The second add-on pack for Fallout 4 has arrived, vastly increasing the options for building up your own personalized settlement.
While Automatron added in the ability to craft robots, the Wasteland Workshop DLC now gives you the option to trap raiders and creatures that roam the wasteland – and then battle them against each other!
With the right materials you can now create just about any building imaginable, populate it with a horde of decorations, and even earn a few extra achievements along the way.
Perk Requirements
While Automatron required you to have high rankings in the Science, Armorer, Blacksmith, and Gun Nut perks to build the best robotic equipment, the perk requirements are much less stringent for the new additions with Wasteland Workshop.
The Beta Wave Emitter and Fusion Generator are the primary additions that have any perk requirements at all. Before capturing any wild animals to use in your arena or assign to defense of a settlement, make sure you have the Animal Friend and Wasteland Whisperer perks at level 1. The Fusion Generator also requires a Science perk at level 4.
A few of the new items (particularly the cages) require power to properly function, so make sure you’ve got the spare materials on hand to build new generators.
Wasteland Workshop Achievements
Although there’s not a quest to complete or new villain to overcome, there are three new Wasteland Workshop achievements to snag and increase your gamer score:
Docile – Have 5 tamed creatures in a settlement at one time by building any cage (or a combination of cages) and using the Beta Wave Emitter to tame whatever you catch. See below for info on building cages.
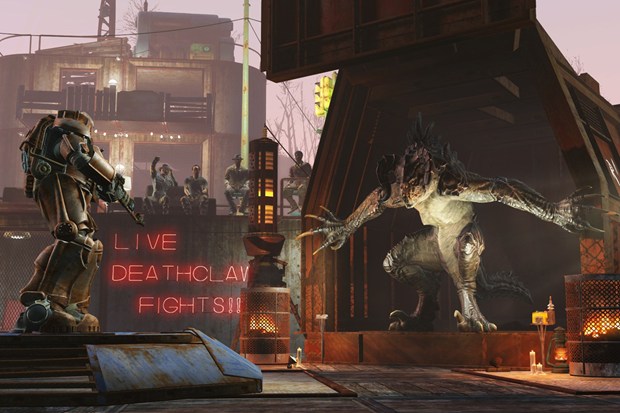
Instigator – This one unlocks when you start a spectated arena fight in a settlement. After building the Arena Contestant Blue Team and Arena Contestant Red Team objects, assign a settler (or companion) to each and have them battle. Keep in mind that your settlement’s happiness will drop if your settlers fight to the death.
Trapper – Simply build one of every cage type. The only hard part about unlocking this achievement is gathering all the various meats you’ll need, as each different cage has a unique material requirement. See the list of settlement objects below for a full break down of the materials needed.
New Settlement Objects
Aside from a load of little knick knacks and slightly upgraded objects, these are all the major additions to Fallout 4’s settlement building (along with their material requirements):
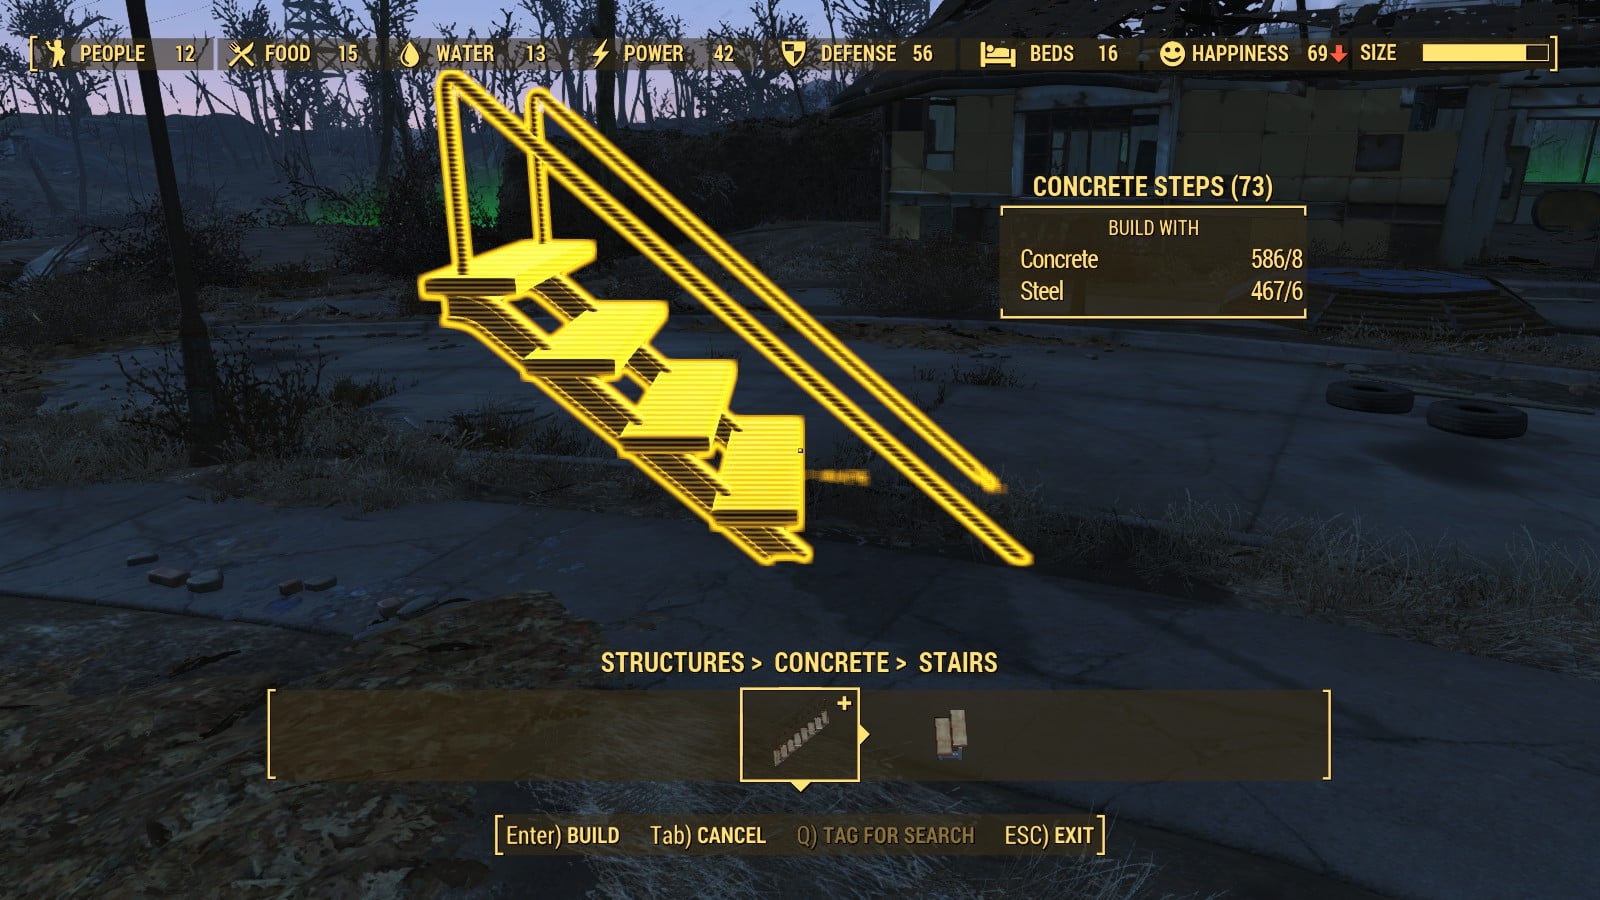
Structures – Concrete
- Floors – Steel 2, Concrete 4 to Steel 4, Concrete 8
- Walls – Concrete 4 to Steel 4, Concrete 8
- Roofs – Steel 4, Concrete 6
- Stairs – Steel 4, Concrete 4 to Steel 6, Concrete 8
- Railing – Steel 4 to Steel 6
Structures – Doors
- Powered Door – Steel 2, Copper 2, Concrete 6 to Wood 8, Steel 4, Copper 2 (requires power 1)
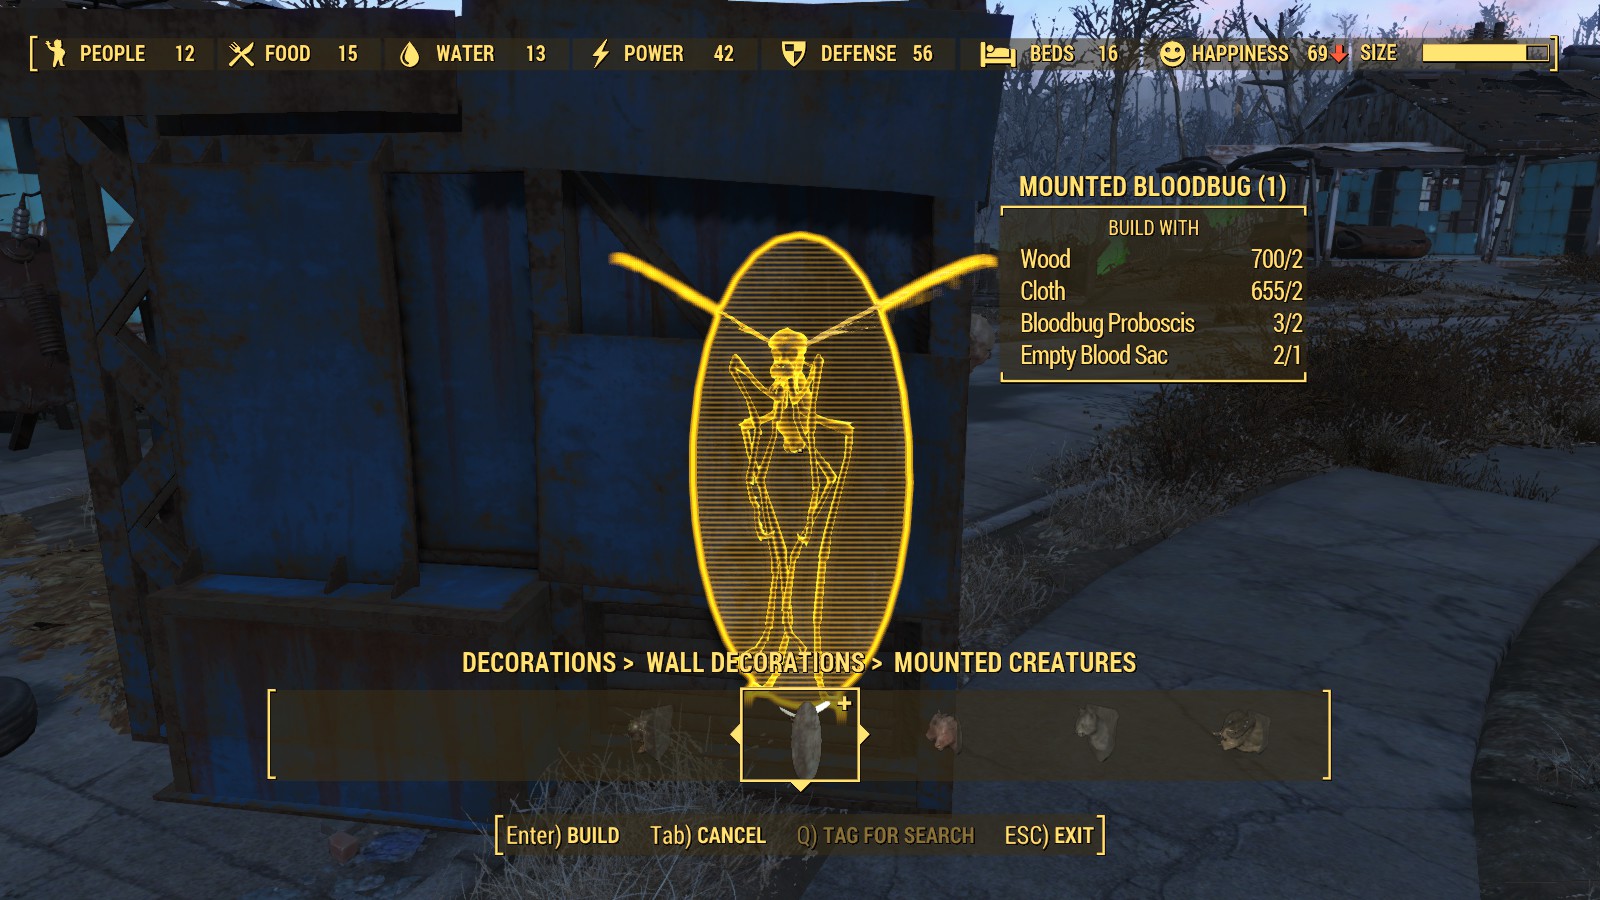
Wall Decorations – Mounted Heads
- Bloatfly Head – Wood 2, Cloth 2, Bloatfly Gland 2, Bloatfly Larva 1
- Mounted Bloodbug – Wood 2, Cloth 2, Bloodbug Probiscis 2, Empty Blood Sac 1
- Cat Head – Wood 2, Cloth 2, Cat Meat 2
- Deathclaw Head – Wood 2, Cloth 2, Deathclaw Hide 2
- Dog Head – Wood 2, Cloth 2, Mongrel Dog Meat 2
- Feral Ghoul Head – Wood 2, Cloth 2, Skull 1
- Glowing One Head – Wood 2, Cloth 2, Skull 1, Glowing Blood Pack 1
- Gorilla Head – Wood 2, Cloth 2, Synthetic Gorilla Meat 1
- Hound Head – Wood 2, Cloth 2, Mutant Hound Meat 2
- Mirelurk Hunter Head – Wood 2, Cloth 2, Mirelurk Meat 2
- Mirelurk King Head – Wood 2, Cloth 2, Morelurk Meat 3
- Mirelurk Queen Claw – Wood 2, Cloth 2, Queen Mirelurk Meat 2
- Mongrel Head – Wood 2, Cloth 2, Mongrel Dog Meat 2
- Radroach – Wood 2, Cloth 2, Radroach Meat 2
- Radscorpion – Wood 2, Cloth 2, Radscorpion Meat 2, Radscorpion Stinger 1
- Stingwing – Wood 2, Cloth 2, Stingwing Meat 2
- Yao Guai Head – Wood 2, Cloth 2, Yao Guai Meat 2, Yao Guai Hide 1
Wall Decorations – Lettering
- Pre-Spelled Signs – Steel 4 to Steel 10
- Letters and Numbers – Steel 2
Power – Generators
- Fusion Generator – Gear 12, Screw 10, Copper 20, Aluminum 25, Nuclear Material 12, Crystal 8, Rubber 2 (requires Science perk rank 4 and grants a whopping 100 power!)
Power – Miscellaneous
- Decontamination Arch – Copper 4, Aluminum 8, Circuitry 4, Fiber Optics 6, Rubber 5 (requires power 1)
Power – Neon
- Signs or Letters and Numbers – Glass 1, Steel 2 (requires power 1)
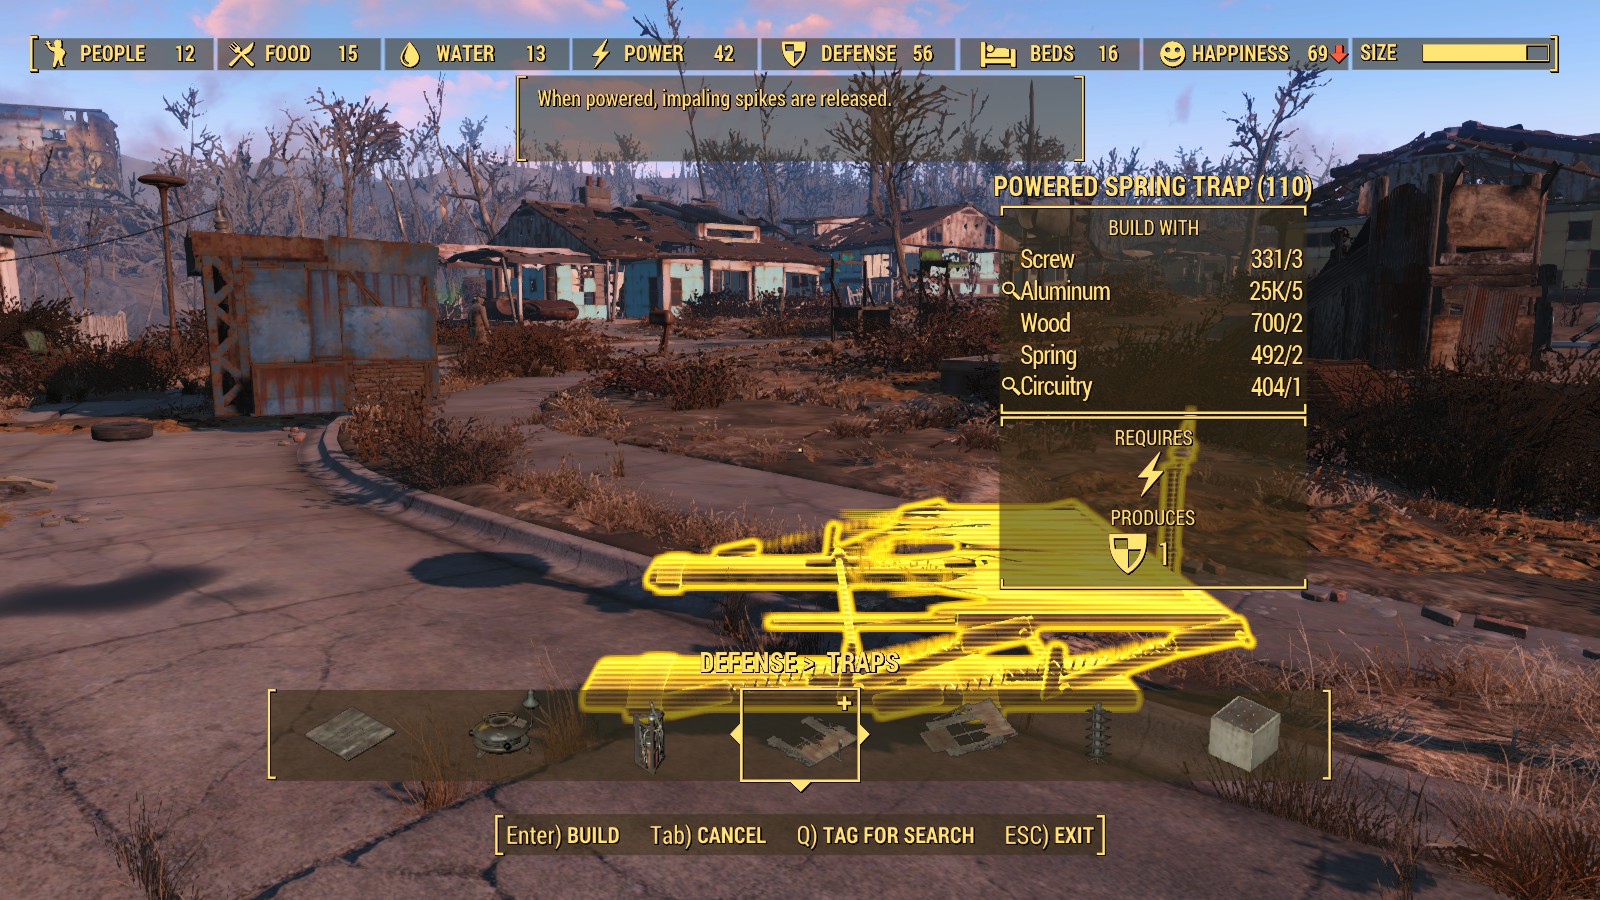
Defense – Traps
- Trapdoor – Wood 6, Steel 2, Screw 4
- Radiation Emitter – Screw 2, Nuclear Material 3, Lead 2, Steel 2
- Flamethrower Trap – Screw 2, Rubber 4, Aluminum 4, Oil 6
- Spring Trap – Screw 3, Aluminum 5, Wood 2, Spring 2
- Powered Spring Trap – Screw 3, Aluminum 5, Wood 2, Spring 2, Circuitry 1 (requires power 1)
- Sawblade Trap – Spring 4, Gear 2, Circuitry 2, Aluminum 10, Wood 2
- Spike Trap – Steel 9, Spring 3, Concrete 6, Gear 3
Cages – Small
- Cat Cage – Steel 6, Copper 1, Softshell Mirelurk Meat 2 (requires power 1)
- Dog Cage – Steel 6, Canned Dog Food 3, Copper 1 (requires power 1)
- Mole Rat Cage – Steel 6, Radroach Meat 4, Copper 1 (requires power 1)
- Mutant Hound Cage – Steel 6, Brahmin Meat 2, Copper 1 (requires power 1)
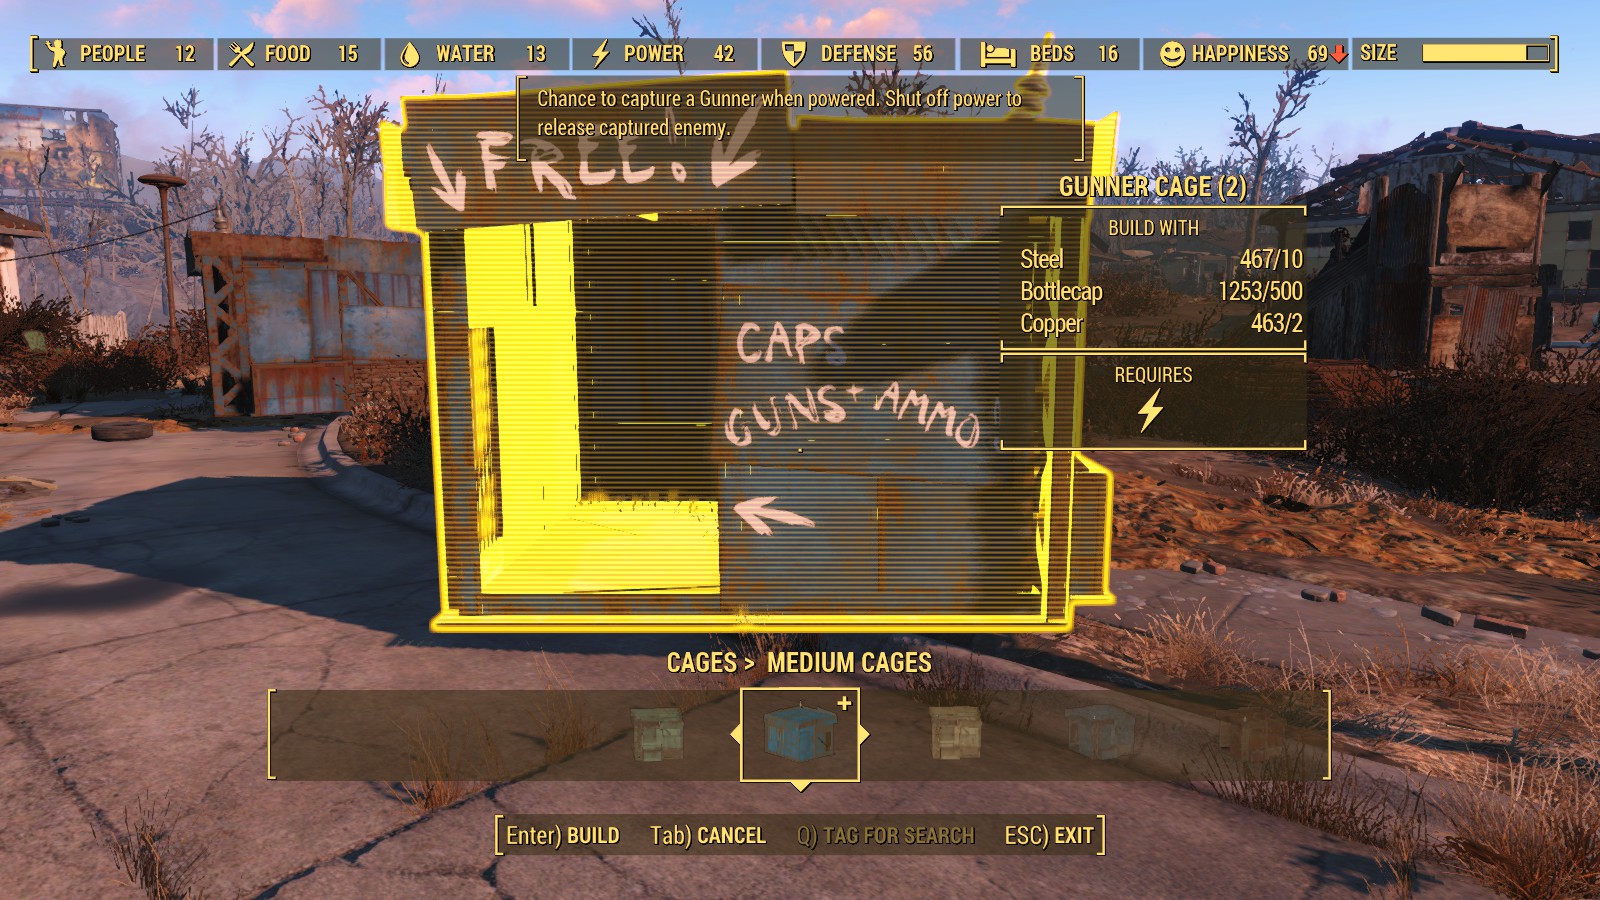
Cages – Medium
- Feral Ghoul Cage – Steel 10, Mongrel Dog Meat 4, Copper 2 (requires power 1)
- Gunner Cage – Steel 10, Bottlecap 500, Copper 2 (requires power 1)
- Insect Cage – Steel 10, Copper 2, Mole Rat Meat 4 (requires power 1)
- Raider Cage – Steel 10, Jet 6, Copper 2 (requires power 1)
- Super Mutant Cage – Steel 10, Brahmin Meat 5, Copper 2 (requires power 1)
Cages – Large
- Brahmin Cage – Steel 16, Razorgrain 4, Copper 4, Gear 4 (requires power 1)
- Deathclaw Cage – Steel 16, Yao Guai Meat 4, Copper 4, Gear 40 (requires power 1)
- Mirelurk Cage – Steel 16, Mirelurk Egg 4, Copper 4, Gear 4 (requires power 1)
- Radstag Cage – Steel 16, Carrot 4, Copper 4, Gear 4 (requires power 1)
- Yao Guai Cage – Steel 16, Radstag Meat 4, Gear 4, Copper 4 (requires power 1)
Cages – Arena
- Arena Contestant Blue Team – Wood 4, Steel 10 (requires settler)
- Arena Contest Red Team – Wood 4, Steel 10 (requires settler)
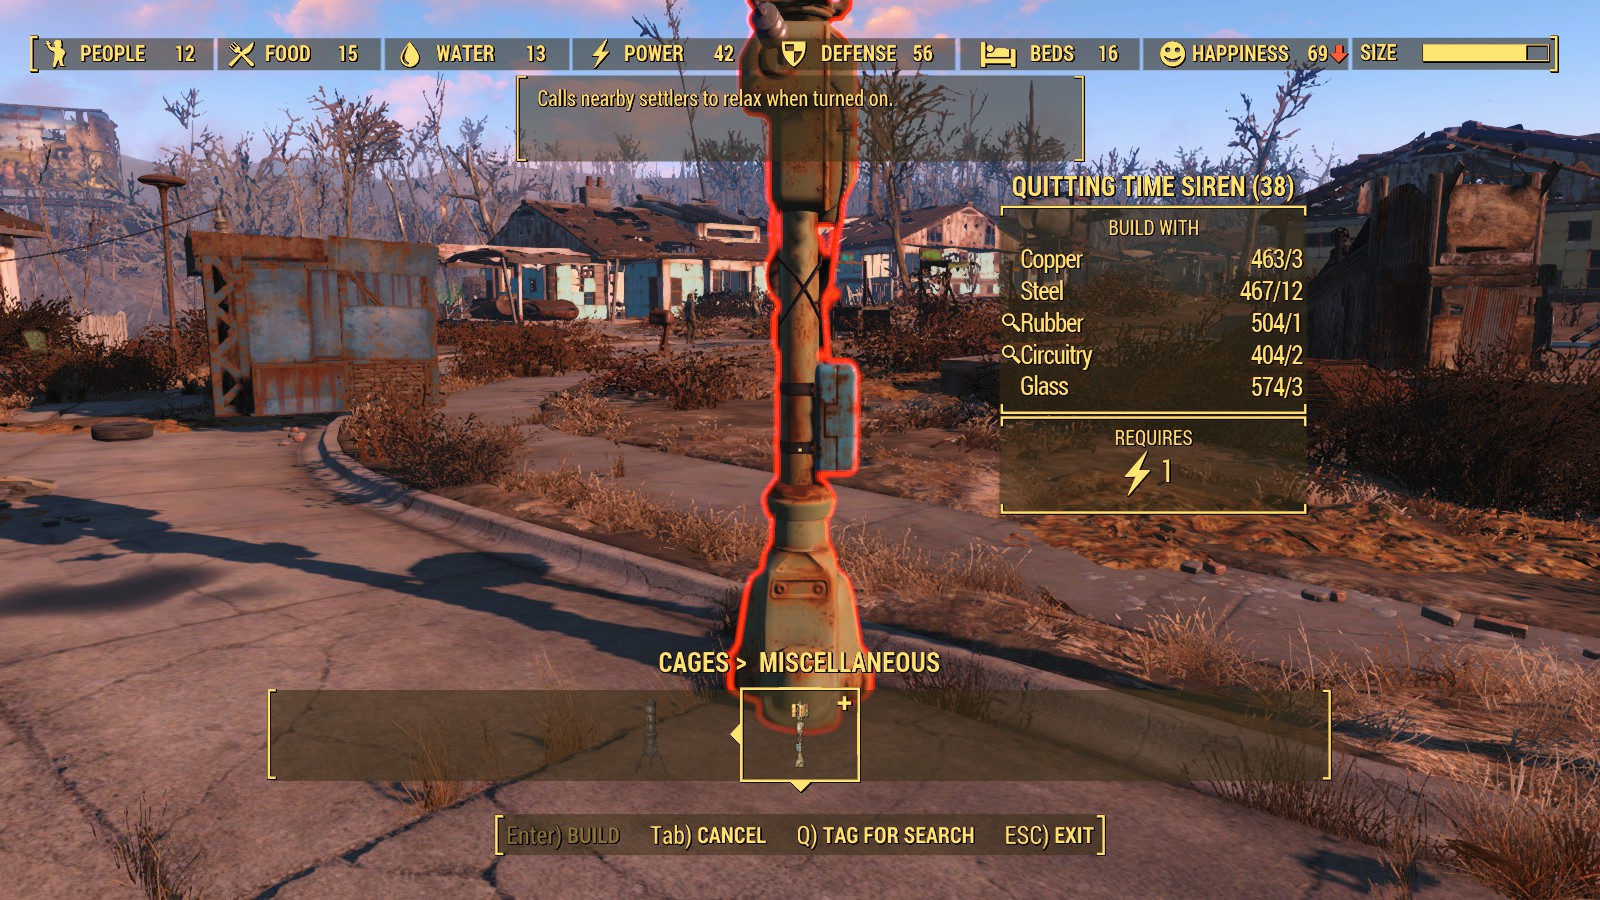
Cages – Miscellaneous
- Beta Wave Emitter — Copper 5, Aluminum 8, Crystal 4, Circuitry 3, Nuclear Material 5, Rubber 2 (requires Animal Friend 1, Wasteland Whisperer 1)
- Quitting Time Siren — Copper 3, Steel 12, Rubber 1, Circuitry 2, Glass 3 (requires power 1)
That’s everything – be sure to share with us how you built your perfect arena or let us know if you find any other interesting additions that we should be putting in our settlements!