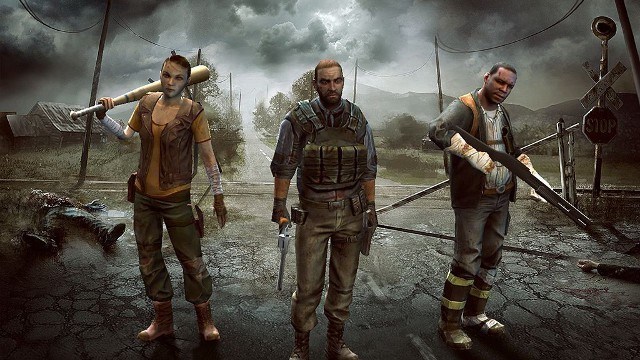
Fans of The Walking Dead have a new way to challenge their knowledge of zombie apocalypse survivor skills with a new mobile game developed by Next Games and published by AMC. The Walking Dead: No Man’s Land is part resource management and base (camp) building, part turn-based combat, and probably the most satisfying zombie-slaying you’ll find in a mobile game.
In order to progress in No Man’s Land, you’ll need to pay equal attention to both areas of gameplay. Combat supplies you with things you need to grow your camp, while the camp functions as the hub from which survivors and equipment will be managed, making them better in combat.
With this in mind, we’ve broken this guide into two main sections: The Camp and The Map. The Camp will cover everything you need to know about managing your survivors, equipment and buildings while The Map will cover everything that takes place outside of The Camp, including combat.
The Camp
The camp is the central hub for all activity in No Man’s Land. It’s where you will go to see your current mission, manage resources/equipment/survivors, recruit new survivors, and check in on your guild and achievements. It’s necessary to manage the camp properly in order to achieve anything in the rest of the game. If you aren’t being diligent about it, you’ll find yourself unable to complete missions or weekly challenges.

Resources
Resources are everything needed to keep the camp going. With the exception of radios, the resources you have available can be seen at the top of the screen when in camp. Resources will come from a variety of activities within and outside of the camp.
- Gas – Required to start new missions, with each mission typically costing at least 3 gas to start. While you can rely on 1 gas refill every 10 minutes, more can be acquired from reward boxes and shooting camp walkers.
- Supplies – Used to build and upgrade building. These are acquired from reward boxes and shooting camp walkers.
- Experience Points (XP) – Used to level survivors and their equipment (weapons and armor). They can be obtained from reward boxes, mission walker kills, and camp walker kills.
- Gold – Can be used to speed up building and equipment upgrades as well as survivor training and healing. Gold is the only resource that can be used to add more slots for survivors in order to increase the size of the group. It can be acquired from reward boxes and camp walkers. Or, if you’ve got cash to blow, it can be bought via the gold store.
- Radios – Needed to recruit new survivors to the camp. Obtained from reward boxes and killing camp walkers.

Structures
Structures encompass all the buildings, plots and other things you’ll build within your camp. Every camp starts out with some base structures, like the council and the campfire, but you’ll need to buy the rest using supplies. Different structures become available and are upgradable under different circumstances, so you’ll need to watch the shop for new buildings and keep an eye on existing buildings for little green arrows pointing up. Those indicate the building can be upgraded.
You’ll want to pay a good deal of attention to the structures in your camp, since you’ll have to keep them upgraded in order to level survivors or upgrade equipment.
- Council – The primary structure in the camp (and already in the camp when you arrive), the council regulates what kind of structures can be had, how high they can be leveled, and how many of each can be had. Different structures will unlock as the Council is leveled up, as will the ability to have more pre-existing structures and higher levels for them.
- Campfire – One of three structures that are in the camp when you arrive, the campfire functions as a sort of mission hub, keeping track of the current primary objective. The campfire is also the only structure that can not be leveled.
- Mission Car – The last structure that’s already built when you arrive at camp. It serves as storage for the gas needed to initiate missions. Like other structures, the Mission Car’s storage capacity increases when leveled up. How quickly you should upgrade this will be determined by how often you log in to play. If you log in a couple times a day, the car will have enough gas for missions when you log in.
- Hospital – Heals injured survivors returning from missions. Upgrading the hospital unlocks healing slots and speeds up the process. If there are more injured survivors than slots, some will have to wait to heal.
- Workshop – Upgrades weapons and armor. Can only upgrade one item at a time. Item upgrade levels are restricted by the current level of the workshop. Items that can be upgraded here will have a little green tab with arrows pointing up above their cards in the management screen. (This screen can also be accessed via the Equipment Tab on the left side of the camp screen.) Upgrading equipment costs XP.
- Training Grounds – Used to level up survivors. Can train one survivor at a time. Survivor levels are restricted by the level of the training grounds. Survivors that can be trained here will have a green “Train” button under their profile card in the Survivor management screen. (This screen can also be accessed via the Survivor tab on the left side of the camp map.) Training Survivors costs XP.
- Farm Plot – Produces the supplies resource. Upgrading increases production and storage. The amount of farm plots allowed increases as the Council structure is leveled up.Farm plots are the first thing you will want to build and to level up as quickly as possible, as supplies are the resource needed to build everything else.
- Supplies Storage – Storage for gathered supplies. Storage increases when the structure level increases. The amount of supplies storage structures allowed increases as the Council structure is leveled up. You will want to keep an eye on supplies storage when leveling your farm plots as you will need to upgrade them to keep up with supplies production.
- Tents – Produces experience points. Upgrading increases production and storage. The amount of tents allow increases as the Council structure is leveled up.
- Radio Tent – Added in the most recent update. Calls for survivors, upgrading improves the quality of survivors recruited.
- Memorial – This is pretty much what it sounds like. When a survivor dies, their name goes up on the memorial. These names can be seen when this structure is tapped on.
Other Management
On the left side of your screen you’ll see five tabs — one each for Radios, Survivors, Equipment, Social and Achievements. The first three of these serve the same function as the Radio Tent, Training Grounds and Workshop, respectively. The Social tab will allow you to check in on your guild and your progress in the the latest weekly challenge. The Achievements tab will notify you whenever you’ve completed a challenge in the game. All challenges are rewarded; often with gold, so keep an eye on that tab.

Camp Walkers
Walkers wander around your camp all the time, and some of them you can shoot to earn more supplies. These will be indicated by green cross-hairs in the areas around your camp. Tap on them to shoot them.
The World Map

You will find three things on the map; the Weekly Challenge, the Theater and the Episodes.
- Episodes – The main storyline of the game. Episodes are set in locations from the show and comic books, starting with Terminus. Each episode consists of 7 primary missions and a few exploration missions that can be repeated. (Primary missions can not be repeated.)
- You will earn XP from walker and enemy kills during a mission and 3 reward boxes to open upon completion. More reward boxes can be earned by watching advertisement videos or spending 25 gold.
- The Weekly Challenge – A changing set of missions that reward both the single player and guilds. This is a series of missions that you can repeat throughout the week. As the missions are repeated, the difficulty level will increase.
- As with episode missions, weekly challenge missions will reward you with XP for kills and a reward boxes upon mission completion.
- You will also earn supplementary rewards by earning mission stars, both for yourself and for your guild.
- The Theater – Once a day, the theater will allow you to watch 3 ads in exchange for the chance to open 3 reward boxes (1 box per ad).

Mission Types
There are two primary types of missions in every episode, story missions and exploration missions. Exploration missions can also be broken into two kinds: Normal and Deadly.
Deadly missions are indicated with a bright red color on the map. If you attempt one of these, be aware that if any of your survivors die, they are permanently dead. You won’t be able to use them any more and their names will go on the memorial.
Deadly missions also appear in the Weekly Challenge.

Combat
Combat takes place in Episodes and The Weekly Challenge. In general, you’ll find yourself fighting off walkers rather than living people. Everything done in these two areas of the game is turn-based, swapping between you and the AI.
Note: During missions you will always be fighting something, but there will be other objectives as well — such as opening chests, moving vehicles, or getting a gate open. How many turns are required to complete one of these tasks varies, so keep in mind you still have to fight off walkers when deciding who does what. Also, be sure you understand what each of your survivors can do. We’ve listed them along with their abilities below.

Survivor Types
You will start out with two survivor classes, the Bruiser and the Scout. The Hunter will be added after completing Road to Terminus tutorial, where they will replace Daryl Dixon when he leaves. Mission groups are made up of a total of three members selected from your roster. Other classes will be acquired in later missions. Different group combinations are ideal for different missions. The mission text will give a general idea of what to expect. However, some missions will take some trial and error to figure out the right grouping.
- Bruiser – Wears heavier armor and is armed with blunt, heavy weapons. If their attack doesn’t kill a walker outright , it will stun it for one turn, making them great for assisting with the harder-to-kill Tank walkers that also have the ability to stun. Bruisers do better in open areas or areas where they can’t be swarmed by walkers.
- Scout – Wears light armor and is armed with a blade or screwdrivers. The scout moves quickly and goes straight for the brain. The scout is ideal for taking out Armored walkers. In general, there should be at least one of these on every mission.
- Hunter – Wears light armor and is armed with long range rifles. These survivors can wound or kill multiple enemies with one shot, making them incredibly useful on missions where walkers can swarm the group easily. Sometimes you’ll even need to take two, but keep them out of grabbing range of the walkers. Also note that if a walker is an Armored type, the Hunter will generally shoot them in the torso rather than the head.
- Shooter – Wears light armor and is armed with pistols and revolvers. These survivors are good backup against already wounded enemies.
- Assault – Wears heavier armor and is armed with semi-automatic rifles. Because they can take out multiple enemies with one burst, these survivors are good in missions with walker herds.
- Warrior – Wears lighter armor and is armed with a sword. These survivors are a stealth class, ideal in situations with fewer enemies that can be snuck up on.
Walkers
You’ll come up against three types of walkers in TWD: No Man’s Land. These are Normal, Armored and Tank. All three types have three varying levels of aggression — Roaming, Hunting and Aggressive.
- Normal Walker – Your garden variety undead. There’s nothing particularly special about these and they’re deceptively easy for almost any survivor to take out in small groups. Do NOT let yourself get surrounded by them.
- Armored Walker – Wears armor, think riot gear. These walkers can be taken out pretty easily by the Scout or the Warrior. Shooting one of these will injure but not kill them.
- Tank – Are the Bruisers of the walkers. If they hit one of your survivors they will be stunned for one turn. So watch out.
Combat Turns
Combat alternates between you and the AI. AI will not move until after you’ve made your move and there’s no time limit. That said, when AI moves, EVERY AI on the field gets the chance before it’s your turn again. If you’re not careful you can find yourself surrounded.
Moving your survivors uses Action Points (AP). Each survivor gets 2 AP each during a move, but can elect to move shorter distances and use 1 AP (or not move at all). Characters that do not use their full AP are put into Overwatch mode for the walkers’ turn. Overwatch allows you to maintain a safe distance from the walkers and will automatically attack the ones that get close. Get used to using this. It will keep you alive!
Miscellaneous Tips
While most everything you need to know is contained in this guide, we do have a few additional tips that will make your life in the apocalypse a bit easier.
- Have a plan: When handling resources, keep in mind what you really need. If something doesn’t need upgraded right away, hold on to those resources for what does. Just because something gets the little green upgrade arrow over it doesn’t mean you need it right now.
- Leveling the car can wait: Unless you’re logged in all the time, you’re not going to need to upgrade the car immediately or often. Even then you won’t have enough survivors starting out to be going on back to back missions.
- Be willing to retire survivors: As you progress, you’re going to recruit survivors of higher quality and with higher max levels. Do NOT be afraid to retire those other survivors you might be slightly attached to in order to make room for them.
- Hold on to that gold: It might be really tempting to spend that gold on speeding up upgrades and healing, but you’re going to need it to buy more survivor slots; and the price of those slots increase every time you buy one.
- Repeat those exploration missions and Weekly Challenges as much as possible: There’s no going wrong with doing this. You get XP and rewards every time you do any of these and that means quicker leveling.
And there you have it — everything you need to know to survive in The Walking Dead: No Man’s Land. Get to work, start building and soon you can have a ‘Ricktatorship’ of your very own.

