Heroes of the Storm is the newest Blizzard title to hit PCs and takes pride in being much more objective-based than its fellow MOBA counterparts.
The game consists of 7 different maps, all containing a different set of missions that competitors will have to team up with other players to take on.
Strategizing with the random map you’ve been assigned to play on is the key to victory in Heroes of the Storm. Here we will explore the Dragon Shire map, including general tips and tricks, then diving further into specific champions, builds, and strategies to wipe the floor with your opponents.
Step 1: A General Understanding of the Map
Map Objective
Dragon Shire is another objective-based, three-laned map that is medium in size. The general objective is a version of “King of the Hill,” with 2 capture points at the top and the bottom.
When your team captures both the top and bottom shrine at the same time, the Shrine in the middle can be right-clicked and at the end of a short channel, that player becomes the Dragon Knight.
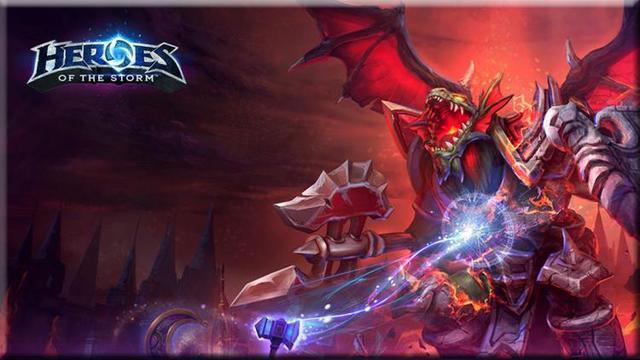
The Dragon Knight can be controlled for a short period and has 2 strong attacks– kicking enemy heroes away and breathing fire in a damaging AOE cone in front of him. Capturing the Dragon Knight is vital to gaining an edge and mowing through structures on the Dragon Shire map. This should ALWAYS be your main focus.
Map Layout
Expanding on the aforementioned lanes, this map gives players a better understanding of the Dragon Shire.
As you can see, the top, middle, and bottom lanes all contain a capture point, as noted by the orange marker. There are 4 minion camps in the center jungle, giving both teams an equal opportunity to defeat them.
However, the last camp is below the bottom capture point, which will take a bit more planning and strategy to overtake than the others.
Current Team Structure Meta
There are two different meta options players can capitalize on while playing the Dragon Shire map.
The first is the standard 2-1-2, which sends 2 players top, 1 player mid, and another 2 players bottom. This ensures balanced map placement and an equal chance at all shrines, but leaves the Knight camp at the bottom open.
The second option is a more aggressive, high-risk high-reward 1-1-3 composition. This places 1 hero in the top lane with strong wave-clear, 1 hero in the mid lane with high roam potential, and 3 heroes in the bottom lane to overrun the bottom shrine, preventing the other team from ever capturing it, and securing the Knight camp underneath the capture point.
I’ll be discussing different team comps and hero choices for these 2 different meta options in Step 4: Choosing Your Hero Effectively.
Step 2: Playing the Map Correctly
During the duration of the game, players will have to focus on the strategy they’ve has chosen to rotate flawlessly. Continuing with the theme of the article, there are 2 ways to play the game out, the balanced version with the focus on controlled team fights, and the aggressive version which avoids team fights.
Staying Balanced and in Control
If your team has chosen the standard method of play for this map, you’ll be running a 2-1-2 composition– 2 in the top lane, 1 in the mid lane, and 2 in the bottom lane.
You should start the game with a focus on gaining and maintaining control, which means vision control and team fights. You’ll read later that the 1-1-3 strategy is going to be focusing on preventing you from using the Dragon Knight and team fights, so your best bet is to counter this by forcing fights.
Throughout the mid game, your team should be countering the bot lane push by using the unguarded top lane to your advantage. Your team can ambush the 1 member of top lane, and capture the two Knight camps towards the top to make sure the enemy bot lane has to stop and defend. When that happens, capitalize on it and capture the bottom shrine, which will allow you to control the Dragon Knight.
The end game should be focusing on team fights, assuming you didn’t allow the other team to gain an experience lead. One of the main focuses of the 1-1-3 comp is to gain an experience lead, but if you keep the balance your team comp will decimate the other in a team fight. This should give you the edge needed to outplay the other team.
Starting Aggressive and Never Slowing Down 
If your team has chosen the 1-1-3 method on this map, you’ll be running 1 tank in the top lane, 1 roamer in the mid lane, and 2 DPS and a healer (3) in the bot lane.
Using this strategy your main objective is going to be to keep the other team from getting the Dragon Knight, not controlling it. It’s also to out-scale your opponents by gaining and maintaining an experience lead.
You’re going to accomplish this by never leaving the 3 lanes, if you can help it, capping as many minion camps as you can, and destroying as many structures as you can. That being said, it’s not worth trying to gain experience from killing enemy heroes, so this should be your lowest priority.
Throughout mid game, your objective is going to be top and mid lane never leaving lane, one of your bot lane DPS never leaving lane, and the other 2 (DPS and healer) rotating to push the lane, and cap the minion camps. With this continuous rotation, your team will steadily gain an experience lead.
While using this method, team fights should be avoided at all costs. Your main focus should be objectives, especially the Knight camp at the bottom, unless the Dragon Knight or enemy kills are free. As the game progresses bottom should be pushing harder and harder, especially with the minion camps pushing other lanes. Your team should be winning lane fights because of the experience lead, and ultimately out push the enemy team.
Step 3: Using the Dragon Knight
The Dragon Knight is an epic tool for the Dragon Shire Map, and can effectively decimate structures with extreme AOE damage, while kicking enemy heroes out of the way.
In order to fully understand how to use the Dragon Knight, another GameSkinny author, Rob, has put together an extensive guide for using him as efficiently as possible:
Read: Rob’s Dragon Knight Guide
Step 4: Choosing Your Hero Effectively
Consistent with the other maps in Heroes of the Storm, teamwork and strategy is incredibly important. It’s important that your team comp matches the strategy that you’ve decided to play.
Team Composition and Powerful Heroes
As I mentioned earlier, there are 2 different ways to play this Dragon Shire map, and with the 2 different strategies comes 2 separate sets of heroes and compositions.
The 2-1-2 composition is the standard for this map, and is going to focus on balance.
In the top lane should be a team of heroes whose only goal is to keep the shrine from going down, since that’s the only reason top lane is relevant. Virtually any two heroes that work well together can go top, but it’s more efficient to have a tank and a DPS so that the tank can stay while the DPS can roam around. Examples of heroes include Valla, Tychus, and Tassadar for the DPS and Uther, Malfurion, or Chen for the tank. 
In the mid lane you should have a high-sustain hero that’s capable of holding their own, like Raynor. This position should be focusing on soaking up XP, since there is only 1 person in this lane, the other team can gain an advantage if they’re in mid lane and you aren’t. It’s also essential that you’re there to stop the Dragon Knight capture. Heroes that will be good here are Illidan, Nova, Zeratul, Muradin, Sonya, etc.
In the bot lane will be more vital heroes since all the minion camps are in that area and it’s generally closer to the mid lane where the Dragon Knight will be pushing if your team captures both shrines. A ranged damage dealer is necessary, which could be Valla, Jaina, Tychus, etc. The other should be a healer to keep the DPS alive, like Lili, Brightwing, Malfurion, etc.
The 1-1-3 composition is going to be played a bit differently.
In the top lane players will have to focus on survivability and wave clear in order to hold the lane. This hero should be able to survive on their own for a while, as you won’t be leaving top lane for a long time. Examples of heroes that are great for this strategy in the top lane are Brightwing, Tassadar, Chen, and Falstad. 
In the mid lane we’ll be focusing on roaming capabilities and control. This hero should be very mobile and be able to escape ganks easily and gank other lanes. Examples of heroes that would be great in the mid lane include Valla, Stitches, Janna, and Tychus.
In the bot lane we’ll have 3 heroes, and the purpose of the lane would be to focus on fending the enemy team off the bottom shrine, ensuring that the other team never controls the Dragon Knight. This lane is also going to focus on the Knight camp, so that your team ensures extra map control. The bottom comp should have 2 heroes that can push extremely hard and 1 to heal them. Heroes that are great in this lane range from Sgt. Hammer, Zagara, Nazeebo, Gazlowe for the pushers. Great healers include Uther, Brightwing, and Reh’gar.
Let the Battle Begin!
Now that you’re a Dragon Shire expert, it’s time to decimate your opponents on the field of battle. If there’s anything this Dragon Shire Map Guide is missing, feel free to let us know and we’ll be happy to expand.
Players looking for further HoTS content can find more guides, tips, news and more in the Heroes of the Storm section of GameSkinny here.

