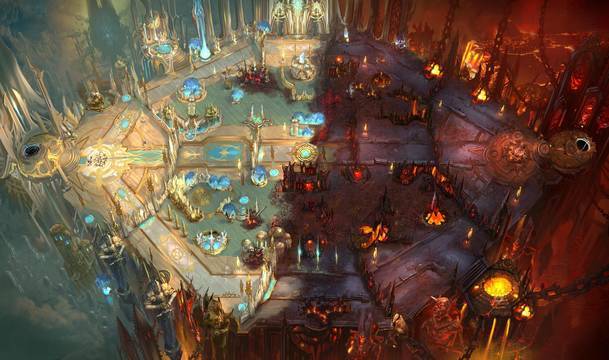
In contrast to other popular MOBAs, Heroes of the Storm has a lot of map variety, which adds a new dimension of strategy to a genre that already has a lot of moving parts. With seven different battlegrounds and an eighth on the way, Heroes of the Storm requires you to be able to adapt your playstyle to fit the objectives of the map in questions – heroes and tactics that work well on The Haunted Mines might not work as well on Sky Temple.
In a some ways, Heroes of the Storm is simpler than other MOBAs, but the changing battlegrounds do demand a certain level of game mastery from HotS players. Here are some tips, tricks, and strategies for each battleground to make sure that you go into your games with the knowledge you need to emerge victorious.
Tomb of the Spider Queen Strategy
Core Mechanics
Minion waves on the Tomb of the Spider Queen include an extra contingent of mechanical spiders that drop gems. Collect these gems and turn them in at one of two collectors to spawn a wave of Webweavers that will push each lane.
TIP: This map has very few mercenaries, so heroes and tactics that revolve around them are not going to work.
General Strategy:
This map is very much about pushing, wave clears, and vision control. Heroes who can wipe a wave of minions without dumping a lot of mana or losing a ton of health are in high demand, especially tanky ones, since they need to be able to gather the gems that drop and survive to turn them in.
The Webweavers themselves are weaker than a lot of other objectives, and are easy to burn down, so you want to make sure you time your turn-ins for when your team can coordinate a push. In order to maximize your spider’s potential, you will need to adjust your push: if the enemy team splits to stop your webweavers, you should group and push as five – if they group to stop you, then you should split.
There are a lot of hiding places on this map, and vision can be a real challenge. Setting up ambushes, especially at the collectors, can be very effective if you’re able to catch the enemy team unaware.
Strong Heroes:
Tychus (with Melting Point), Diablo, Anub’Arak, Tyrande, Sylvanas, Zagara, Asmodan.
Sky Temple Strategy
Core Mechanics:
The Temples on this map will periodically activate, allowing either team to capture them. While controlled, the Temples will fire beams of power at the enemies’ forts. Guardians will spawn and try to kill the players who control the temple.
TIP: There is an order to temple activation – the first ones to activate are Crocodile (Top) and Snake (Middle) at 1:30. The second activation is Bottom (Jackal), and the third is Bottom and one other random temple. All other activations are random. All activations occur exactly 2:00 after the last temple has cleared.
General Strategy:
Unless you are very far ahead, you want to commit to capturing and holding one temple – don’t overcommit and try for two unless a large chunk of the enemy team is dead. Sustain and survivability are essential on this map, since the neutral guardians will spawn on the temples. Heroes with high mobility can also be very useful for controlling the map and contesting temples.
The damage from the temples can’t be mitigated – it will wear your forts down, so there’s not really an option not to go for objectives. Make sure you know which temples are about to be activated and get your team into position to contest them, and make sure not to get into trouble when a temple is about to spawn.
Strong Heroes:
Tyrael, Tassadar, Uther, Rehgar, Anub’Arak, Falstad, Brightwing.
Garden of Terror Strategy
Core Mechanics:
At night, shamblers spawn around the map that drop seeds when killed. When a team gathers 100 seeds, they spawn a Garden Terror in their base which comes with powerful siege abilities and a hefty chunk of health.
TIP: The Garden Terror’s ‘W’ ability does no damage to heroes, but spawns a potted plant that does high damage to buildings and minions – it can also be targeted and killed. The Terror’s ‘Q’ ability polymorphs and slows heroes in an area. Make sure you’re using them correctly!
General Strategy:
The shamblers are distributed evenly across the map, so when night falls make sure that your team is picking up the easy camps that are close to your side. You can try to disrupt the enemy team as they go after the big terror, which has the most seeds, but it’s safer to try to burn down yours with four or five people. If you have a strong warrior with good disruption, you can send them to try to mess with the enemy team as they’re working on their terror.
Once you have a Garden Terror, your team needs to rally to support it. If heroes are dead, try to delay activating the Terror until they’re up. If you absolutely can’t push as a team, then you can use Sprint to dash around the map in your Terror and drop pots to do damage to buildings (this doesn’t work so well late game).
Similarly, if your enemy is pushing with a Terror, make sure you rally to stop them – ignoring a Garden Terror is a bad idea. This map is really big and has lots of shamblers and mercenary camps to pick up, so mobility and clearing ability are key.
Strong Heroes:
Asmodan, Nazeebo, Nova, Zeratul, Falstad, Tychus, Brightwing, E.T.C., Anub’Arak
Blackheart’s Bay Strategy
Core Mechanics:
Coins can be acquired from skeletons and chests, or from killing other heroes. Once you have enough, you can turn them in to Blackheart, and then he will fire unavoidable cannonballs at your enemies’ forts.
TIP: Because coins don’t disappear on death, it can be very risky to hold on to too many – it makes you a very juicy target for the enemy team. Contesting the turn-in can be just as effective as trying for coins in the first place.
General Strategy:
If you can, decide with your team whether or not you are going to try to farm coins or try to contest the turn-in – it’s possible to do both, but better to commit to a single strategy. It is very rarely worth it to hang on to coins, so if you have an advantage, use it to turn them in safely. If you do want to hoard coins, try to get as many as possible on a hard-to-kill hero and bait the enemy into fights.
Heroes with high mobility and heroes with stealth are very useful on this map for contesting objectives and punishing risky turn-ins. Sniping a hero with lots of coins as they’re trying to unload them can turn the game around.
Strong Heroes:
Nova, Zeratul, Tychus, Falstad, Brightwing, E.T.C., Muradin, Sylvanas.
Dragon Shire Strategy
Core Mechanics:
There are two shrines that can be captured at the top and bottom of this map. Controlling both will make the Dragon Knight able to be activated, transforming the hero who controls it into a massive fire-breathing siege monstrosity.
TIP: Use the Dragon Knight wisely! Don’t stand where multiple tower can hit you and don’t be afraid to move to a different area if you’re facing too much resistance. The Dragon Knight is very powerful, so don’t waste it.
General Strategy:
You’ll notice pretty quickly that it’s almost impossible to hold both shrines if your teams are evenly matched, so it’s a good idea to try for a different lane strategy on Dragon Shire. Many teams send three heroes to the bottom lane to secure the shrine there or put only one hero in each lane, with two others roaming. Stealth and high mobility heroes can steal – or ‘ninja’ – shrines out from under your enemy, allowing for a quick Dragon Knight pickup.
As with the Garden Terror, you want to try to support your Dragon Knight as much as possible, though it’s pretty sturdy. You can either push hard with it, or push the other lanes to force the enemy team to make tough choices.
Strong Heroes:
Falstad, Zeratul, Nova, Brightwing. E.T.C., Tyrael, Sylvanas, Zagara, Tyrande.
Haunted Mines Strategy
Core Mechanics:
After a short while, two entrances to a separate area – the mines – will open, with undead enemies to kill who drop skulls. Once 100 skulls are gathered, a golem will spawn for each team based on the number of skulls they have gathered and push down a lane.
TIP: You can’t teleport into the mines from the main map, so heroes with abilities that allow them to move around the map are at a significant disadvantage here.
General Strategy:
The Haunted Mines is a small map with only two lanes, and the strategy is a little different from the other maps. Most teams send four heroes into one lane and one hero with good wave clear into the other, though this depends somewhat on the enemy team ‘s composition.
When the mines open, it is important to go for the big camps – the ones in the middle – and try to get as many skulls as fast as possible. Don’t engage the large grave golem unless at least one hero on the enemy team is dead or you’re certain they won’t get there in time. If you can’t contest the mines, go for mercenaries instead and push the forts hard.
Generally, if your golem is larger, you should push with it. If it’s smaller, you should defend.
Strong Heroes:
Diablo, Sgt. Hammer, Sylvanas, Tyrael, Anub’Arak, Valla, Asmodan, Muradin, Zeratul.
Cursed Hollow Strategy
Core Mechanics:
Tributes will spawn periodically around the map – once your team has gathered three, the Raven Lord will curse your enemies, stopping their forts and towers from firing and reducing their minions to one health.
TIP: It is possible to waste an entire curse if you’re not careful. Don’t delay your push to take mercenary camps if you don’t need to – push hard, and in multiple lanes.
General Strategy:
Cursed Hollow is a big map, and it can be challenging to stay on top of all of the objectives. If you have some strong laning heroes, let them go solo to free up other players to roam. Mobility is incredibly important on this map – if you don’t hustle when a tribute appears, you can easily lose it. Champions with speed boosts, teleports, and dashes are especially important on Cursed Hollow.
Your team doesn’t need to contest every tribute, but you shouldn’t ignore them either. Don’t run blindly across the map to get to one, especially if the other team is missing, but pay attention to where and when tributes spawn and contest the ones you can. Map awareness is key.
Getting cursed and having your enemy be cursed aren’t necessarily game changers – you need to press your advantage, so make sure you are coordinating with your team. Popping a siege camp right before you pick up a third tribute can be huge, making communication and teamwork extra important on this map.
Strong Heroes:
Falstad, Brightwing, E.T.C., Sylvanas, Tyrael, The Lost Vikings, Tyrande, Zeratul.

