The Great Gubal Library is the fourth dungeon you unlock in the Heavensward expansion. You unlock this dungeon at level 59. Keep in mind, every dungeon from Vault to the end will be hard on the tanks as far as incoming damage. Even with mitigation abilities, some of the enemies will put out a lot of damage.
Demon Tome:
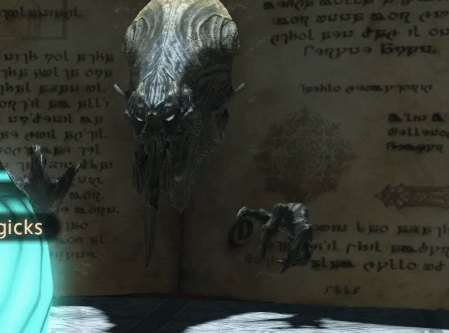
This is practically Demon Wall from Amdapoor Keep, with a twist, literally. Instead of encroaching on the player’s available combat space, players will rotate to the other side of the room.
Attacks:
- Purple Goo Bars: (Not sure what the actual name is.) Just Like Demon Wall, Demon Tome does the alternating columns of purple. Getting caught in one will apply heavy and slow on the player.
- Dark Blizzard III: A ground circle AoE, usually cast during the purple columns.
- Repel: Another return from Demon Wall, it’s a full distance knockback. Luckily in this fight there is no edge for you to fall off.
- Disclosure: Demon Tome closes and after a short time reopens. If you don’t move to the other side of the bridge in time, you will die. After reopening, Demon Tome will spin around to face the other direction. If you’re too close, you’ll be knocked back and take damage.
- Words of Winter: Every time except the first time, Demon Tome will use this after Repel. The first time he’ll use it mid rotation after the first Disclosure. Words of Winter freezes the floor, if you try to move while the floor is frozen, then you’ll slide. While sliding and shortly afterwards you’ll be unable to perform any abilities.
Byblos:

Byblos is the second boss of the dungeon. It’s not overly difficult, but there is a lot of room for error. However, making errors in this fight will make it a lot harder as Byblos will do more damage.
Attacks:
- Page Tear: A frontal cleave doing moderate damage.
- Head Down: A straight line AoE charge. It appears to target a non-tank player at random, no matter how far away they are. You can shorten the distance of the charge by running to Byblos. Upon casting it also knocks the player back.
- Tail Smash: Appears to work the same way as Snakes in Coil turn one, stand behind the boss to trigger a backwards attack.
- Bone Shaker: At certain stages throughout the fight, Byblos will jump to the book. During this time a pair of Page 64 mobs will spawn. Unlike their normal versions, these have telegraphed lasers and no tether. While you fight the Page 64 enemies, Byblos will periodically use Bone Shaker dealing room wide AoE and applying a stack of vulnerability up.
- Tether Orbs: After you kill the Page 64 enemies, two players will receive a tether connected to an orb. The player needs to position themselves on the other side of Byblos so that the orb will connect with him and push him off the book. If you fail to do this, the Bone Shaker phase will repeat.
- Gale Cut: Byblos places wind orbs around the room, just avoid them and continue the battle.
The Everliving Bibliotaph:

This fight is by far the easiest in the dungeon. It’s more time-consuming than anything else because the DPS have to completely stop at points to deal with a summoning mechanic.
Attacks:
- Thrub: A frontal cleave dealing moderate damage.
- Void Call: This is the major mechanic of the fight. During the cast, lights will appear on the plates around the room. The first cast the plates will have one light each. The second cast plates will have two lights. The third cast two plates will light up with three lights. To turn off the lights, you need a number of people equal to the lights to step on the plate until a chain appears. If you fail to make the chain appear on a plate, it will summon an add. The third cast has to be fully prevented, or the adds will perform an AoE cast.
- Orbs: Players will get a mark over their head. If you get this mark, run to the edge of the room and stand between two plates to drop the orb. These orbs pulsate damage in an area around them, and adds a stack vulnerability up.
- Deep Darkness: A room-wide AoE with a safe zone in the center.
- Magic Burst: The exact opposite of Deep Darkness.
That wraps up everything you need to know for The Great Gubal Library. If you have any comments, questions, or concerns leave them down below. Also, be sure to check out my list of Heavensward guides for other new content.