Hellfire Citadel is a five wing instance that allows World of Warcraft players to face bosses in a somewhat non-linear order. Unlike previous guides, we cannot provide the most optimal order raid teams should encounter these 13 bosses. Refer to the in-game raid journal (shift+J) determining which order to face them depending on team composition and skill.
Hell Breach is more of a linear wing that requires the first two bosses to be defeated before venturing deeper into the raid. Kormrok is designed to be the final boss of the wing, but he can be switched out for two other bosses who will be accessible with the Hellfire Door open on Normal, Heroic, and Mythic difficulty.
The other wings for Hellfire Citadel includes: Halls of Blood, Bastion of Shadow, Destructor’s Rise, and The Black Gate. The following ratings are based on a first impression and defeat of each boss.
Hellfire Assault

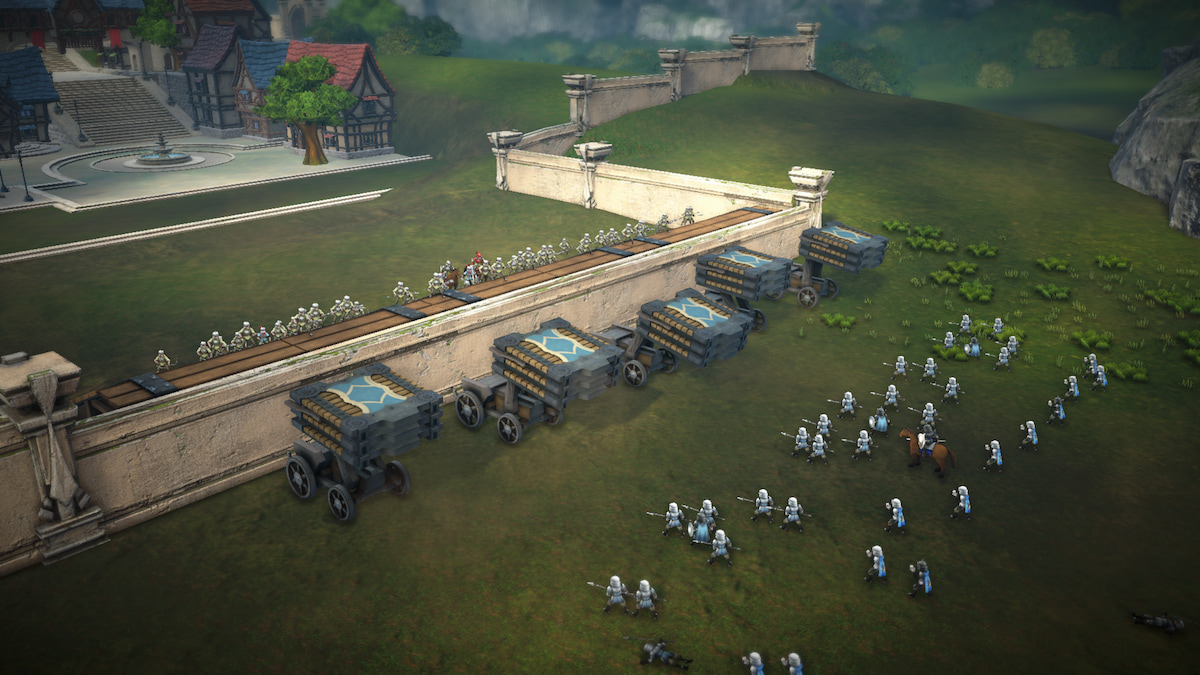
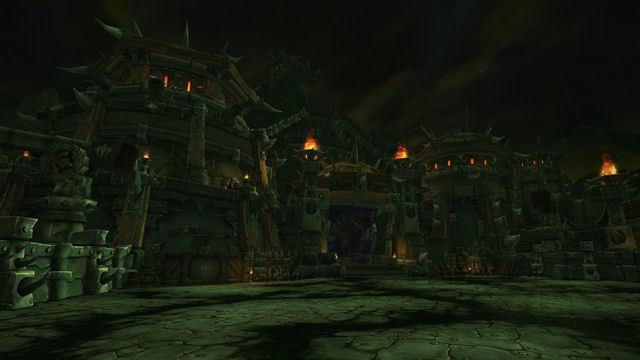
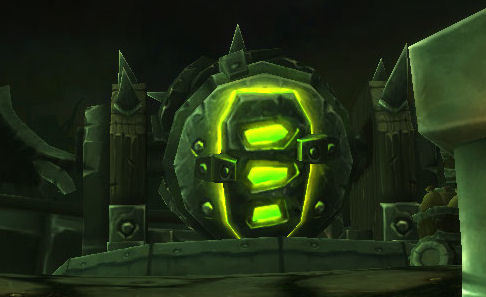
Unlike most raid encounters, the Hellfire Assault doesn’t have a singular boss to defeat. Instead it is more of a scenario with an objective: break down the Reinforced Hellfire Door.
Ready the Cannons
 Once the encounter begins, players will need to commandeer both of the Hellfire Cannons. Based on the availability of Felfire Munition, the Hellfire Cannon will continuously fire towards the Reinforced Hellfire Door. Should a Hellfire Cannon be destroyed, it will explode with Hellfire Destruction. This will instantly kill all players and wipe the raid. So it is important to protect the Cannons from the waves of enemies throughout the encounter.
 Felfire Munitions will appear on the ground when Felfire-Imbued Siege Vehicles are destroyed. This object should be picked up by players before it despawns in 10 minutes. Once the Felfire Munitions have been picked up, the player will gain Haste and increase their movement speed by 100% for 9s. However, carrying the Felfire Munitions will inflict moderate Fire damage every second it is held. If a player dies while carrying the Felfire Munitions, the box can be picked up by another player.
Once the player carrying the Felfire Munitions is close enough, it will automatically be thrown to the Cannon. This will give the Hellfire Cannon enough ammunition to fire Hellfire Rounds at the Reinforced Door.
At least 24 shots, or 6 boxes of Felfire Munitions, will be required to break down the Reinforced Hellfire Door and complete the encounter.
The Siegemaster Mini-Boss

While some raiders work on gaining control of the Hellfire Cannons, one of the tanks will need to pick up Siegemaster Mar’tak plus the Iron Dragoons, Contracted Engineers, and Gorebound Felcasters. These adds will need to be AoEed as quickly as possible. Mar’tak only has three abilities that she will use until she leaves the encounter.

She will face a random player and create a Shockwave. This will send a cone of earthen spikes that will knock any in the path of it and inflict heavy Nature damage. Players should quickly move away from the indicated path of Shockwave to avoid taking unnecessary damage.
 Mar’tak will also hurl a notched axe at 3 targets before it returns to her with Howling Axe. Each of her targets will suffer heavy Nature damage, but this can also splash to any players within 8 yards of those marked. Players marked with the Howling Axe debuff will need to quickly move away from the rest of the raid before it reaches them.
Once Mar’tak reaches 50% health, she will flee from the encounter area. If she is not defeated before the first Siege Weapons appear, the other tank will need to keep all enemies away from her because of her Inspiring Presence. This is a buff that will increase damage done by 10% and will steadily increase the longer she is out during the encounter.
Hellfire Reinforcements
 All throughout the encounter, large mental capsules will be launched into the area. Players will want to quickly move away from the large orange ground effect marked for the capsule’s impact. Any players within a few yards of the impact will take Capsule Impact for moderate Fire damage and be knocked back.
The tank who does not have Siegemaster Mar’tak will need to pick up the reinforcements that will spawn from the capsules if she has not fled the encounter.
These reinforcements includes: Hulking Berserkers, Gorebound Felcasters (Gorebound Terrors), Contracted Engineers, and Iron Dragoons.
If Siegemaster Mar’tak is out of the encounter, one tank will need to pick up the Hulking Berserker while the other aggros any other reinforcements. Tanks will need to swap every 2 stacks of Slam that will inflict heavy Physical damage and increase Physical damage taken by 30% per stack for 12seconds.
The Hulking Berserkers will also roar out, causing nearby players to Cower for 9seconds. This will reduce cowering players to have their movement speed reduced by 20% and inflict moderate Physical damage—damage that bypasses armor.
 Contracted Engineers will shock a player with Conducted Shock Pulse. This will deal moderate Nature damage and stun the target for 6seconds, but can also jump to 3 additional targets. This spell is interruptible and the stun is dispellable. They will also jump to a random target and set explosive charges at their feet with Boom. Players within 5 yards will have heavy Fire damage inflicted if they don’t move away before they explode in 10 seconds.
Players will want to watch out for Contracted Enginners casting Repair on any targeted vehicles. Repair should be interrupted quickly, otherwise they will heal their target for 2% of its total health every .5 seconds.
Gorebound Felcasters will be the adds that need to have damage done maintained to avoid triggering their transformation simultaneously. This caster will hurl a gout of flame at a target inflicting Fire damage with Incinerate. They will also conjure Felfire Volley that will inflict moderate Fire damage to enemies within 50 yards. Both of these abilities can be interrupted before he transforms.

At 40% health, Gorebound Felcasters will transform into demonic entities call Gorebound Terrors. During their Metamorphosis, they will inflict moderate Fire damage and knock back all players within 5yards of them. The Terror will have an increase in damage by 30% and movement speed by 70%. His only ability he will be able to cast will be Felfire Volley which cannot be interrupted.
Finally, the Iron Dragoons do not have any special abilities and will only deal melee damage.
Melee DPS will want to remain on the Hellfire Reinforcement adds and kill Gorebound Terrors>Hulking Berserkers>Contracted Engineers>Gorebound Felcasters>Iron Dragoon is no Siege Vehicles are active.
Release the Siege Vehicles
Similarly to Operator Thogar, the Fel-Imbued Siege Vehicles will roll out at set times throughout the encounter. The Siege Vehicles are not taunt-able and will head towards the Hellfire Cannons with the intent to destroy them. Players will need to content against three types: Felfire Flamebelcher, Felfire Crusher, and Felfire Artillery.

The Felfire Flamebelchers will begin to Belch Flame in the cannons dealing heavy damage to it as well as any players within 3 yards of the impact.
 The Felfire Crushers will Bore any players that stand in its path for heavy Nature damage. But the Crusher Vehicle isn’t alone and brings several untargetable Gorebound Siegeriders that will protect its vulnerable sides and back with Burn. Those who stand in the channel will have moderate Fire damage inflected every .5 seconds for 4 seconds. If a Felfire Crusher reaches the Hellfire Cannon, it will quickly destroy it with Crush.

Finally, Felfire Artillery will being to fire Artillery Blasts at the Cannons that will deal extremely heavy Fire damage to them and any players within 40yards.
On Heroic Difficulty, Felfire Demolishers will appear. These will target a distant, random player with a red reticule and fire Siege Nova. Siege Nova is a series of mortars that will stretch between the target and the Demolisher. Any players within 3 yards of these will take moderate to heavy Fire damage. It will then fire another, larger mortar at the center of the target and deal damage to all players within 100 yards. This damage should be reduced by moving away from the impact point.
Tips
- Bloodlust/Heroism/Time Warp at the beginning of the encounter to force Siegemaster Mar’tak to flee well before the first Fel-Infused Siege Vehicle spawns. That gives players roughly 30s to defeat the adds she starts with as well as herself.
- DPS Legendary ring proc should be used during the start of the encounter, 3rd Siege Vehicle wave, and then 5th and 7th waves.
- Healer Legendary ring proc should be used to help the raid survive Felfire Volley spam with Gorebound Terrors.
- Tank Legendary ring procs can be used to mitigate high stacks of Slam from Hulking Berserkers.
- All DPS will want to peel off of the Hellfire Reinforcements whenever a Fel-Infused Siege Vehicle is present. Felfire Crushers will take precedent as soon as it is present. Major DPS CDs and damage mitigation should be use with the Felfire Crushers.
- The Gorebound Felcasters will need to have damage done to them managed carefully to avoid having more than one of them Metamorph.
- Raid teams should assign the most mobile players to carry the Felfire Munitions to the Hellfire Cannons.
- Healing CDs should be used to counter Gorebound Terrors’ Felfire Volley.
Iron Reaver

Siegemaster Mar’tak hasn’t completely retreated within the Citadel and instead is operating the Iron Reaver. The Iron Reaver is a two-phase repeating fight that will require maximizing encounter area, raid awareness, and heavy movement to dodge her arsenal. The first phase is simply tank and spank while the second phase will have the raid focused on adds.
Ground Operations
She begins the encounter on the ground and will need to face against her enemies to reach full power to engage her second phase. Her Iron Reaver is equipped with AOE damaging technology.
 Iron Reaver will set her sights on the highest threatening tank roughly every 15 seconds. The tank with the Artillery debuff will need to quickly move as far away from the rest of the raid as the artillery shell will deal heavy fire damage to those closest to the impact.
Upon impact, Artillery will leave a sticky patch of fel-green fire of Immolation. Immolation will deal moderate fire damage that can stack if players fail to move out of the ground effect.
Periodically, the Iron Reaver will fire off an Unstable Orb at targets that will deal minor fire damage. Players who are closer than 8 yards to the target will also be caught in the fire and gain a stacking debuff.

She will rotate through three different abilities that will randomly target non-tank players. So long as players are spread out a minimum of 8 yards, they shouldn’t share the damage with their fellow raiders.
She will also randomly target an area and deal major frontal cone fire damage to any within 5 yards of each Barrage impact. Barrage will also leave behind a sticky patch of Immolation.
 Every 3 minutes, she will throw a mechanical temper-tantrum and channel Pounding for 6 seconds. The raid should use damage mitigation abilities for Pounding as it will deal moderate damage. By pounding the ground, she pushes the Immolation effects back around her, so players will want to make sure they put enough space between them and the green fire.
 Twice during the Ground phase, Iron Reaver will Blitz in a targeted direction and back to the tanks. She deals moderate Fire damage to those caught in the charge and drags those who fail to avoid as she rockets across the ground and leaves a debuff that should be dispelled. Her Blitz also moves the Immolation patches in her path.
Air Operations
 Once she has reach Full Charge, the Iron Reaver has fewer abilities as she takes off into the air. During the flight phase, she has a damage reduction shield that decreases all damage taken by 95%. So players will not be focusing on her, but her new set of abilities and adds.
Since she won’t have the tanks to focus on, Iron Reaver will randomly target raid members with Artillery but deal 50% less damage while in the air. Again, those with the Artillery debuff will want to move away from the rest of the raid to designated detonation areas. These artillery impacts will leave patches of Immolation on the ground.

She will fly across the raid encounter in a straight line leaving a Fuel Streak behind her. This sticky fuel will reduce players’ speed by 30% for those caught in it. The raid will want to quickly move out of this before she passes back over with Flash Fire that will ignite the fuel and leave Immolation behind.
 While she is burning the ground from above, Iron Reaver will drop Firebombs in targeted locations and will deal moderate fire damage to those who don’t move out of the impact. These bombs come in a variety of types that should be DPSed down as quickly as possible.
- Volitale Firebombs have a 45s fuse that will inflict moderate damage to all enemies and spread additional Immolation patches.
- Burning Firebombs have a 40s fuse and inflict those who deal damage to it with stacking Fire Vulnerability–increases fire damage taken by 15%. It doesn’t deal any damage upon exploding in Normal and Heroic.

Once she has run out of energy, she will fall out of the sky in a targeted area. Falling Slam will instantly kill any who fail to move out of the way as this massively heavy piece of technology comes crashing out of the sky. Falling Slam will also extinguish Immolation patches in the area she will land.
With the Iron Reaver back on the ground, she will be taunt-able and will no longer have her damage reduction shield. The raid will once again want to spread out around where she lands with enough space for tanks to detonate Artillery safely.
Tips
- Bloodlust/Heroism/Time Warp should be used at the start of the encounter because of Iron Reaver hard enrage timer of 10 minutes.
- DPS Legendary ring should be used during Ground Operations.
- Healer Legendary ring should be used on the second Pounding during Ground Operations.
- Tank Legendary ring can be used to share damage from Artillery during Ground Operations.
- The boss positioning is very loose. Ideally, tanks should stack together while the rest of the raid fans out behind her.
- Ranged and healers should be spread out at least 8 yards away from each other while avoiding all ground effects.
- Healers should rotate CDs for each Pounding cast.
Kormrok

Kormrok is a three-phase alternating encounter that will require heavy raid awareness and movement. Phase change will occur with each leap he makes into three of the outlining pools of the encounter. Each pool will briefly empower one of his abilities until he absorbs the next energy.
This magnaron has five primary abilities he will use throughout the fight: Pound, Fel Outpouring, Explosive Runes, Grasping Hands, and Mutating Hatred. The first four abilities can overlap during empowered phases which will keep the entire raid team on their toes.
 Kormrok will Pound the ground repeatedly, creating shockwaves under all players and can splash on any within 4 yards. When Pound doesn’t align with another ability that would require players to be grouped up, the raid should keep their distance from each other by 4 yards.

Periodically, he will slam the ground that causes the Shadowy Pool to spew forth globules in Fel Outpouring. These globules move in a direct line from the pool but at varying speeds. Players unable to avoid one of the globules will suffer major Shadow damage.
The giant magnaron will create Explosive Runes on the ground. If assigned players don’t trigger these within 15 seconds, they will explode and inflict major fire damage to the entire raid. When the rune is exploded sooner, it will inflict major fire damage to the player who triggered it.
 Finally, Kormrok will summon several stone hands under the feet of his enemies. These Grasping Hands will inflict minor Physical damage to all players gripped an those within 4 yards. These hands will need to be quickly DPSed down before those being held die.
Mutating Hatred is the only ability used against the current tank. He will use different abilities based on whichever pool he has leapt into. Tanks will need to swap with each application of Fel Touch applied after getting hit with any of these abilities as it increases magical damage taken by 50%.
Pool Leaping
 Kormrok will Leap through the air and then splash down into the nearest of the three pool. Be aware that he will not leap into a pool that he has been into recently. The raid will be able to control which pool he leaps into by positioning near the next one he will splash into.
Explosive Energy
When Kormrok jumps into the Fiery Pool, he will become empowered with Explosive Energy. While empowered, he will be able to cast Explosive Runes 3-4 times.
 These Empowered Explosive Runes will not disappear when triggered but instead will reform nearby. It’s important to herd the Explosive Runes together by having players trigger them at the same time while pushing them towards the center. When there is just one Explosive Rune remaining, it will not be able to reform.
 The boss cast Explosive Burst that will ignite the ground beneath the main tank’s feet and stuns them. After 10 seconds, the ground will explode and inflict major Fire damage to all players within 40 yards.
Foul Energy
The magnaron will become empowered with Foul Energy when he jumps into the Fel Pool. While empowered with Foul Energy, he will be able to cast his Grasping Hands 3-4 times.
Instead, Dragging Hands will be cast and players will slowly be dragged towards the closest pool.
He will also cast Foul Crush that will summon a Crushing Hand beneath the main tank. The tank will immediately be grabbed and crushed for minor Physical damage until the hand is destroyed.
Shadow Energy
When he leaps into the Shadow Pool, he will absorb Shadow Energy. While empowered with Shadow Energy, he will be able to cast Empowered Fel Outpouring 3-4 times which causes all three pools to send out globules.
Again, these globules will move in the opposite direction of their originating pool. They will also move at varying speeds and overlap one another. Players will need to be quick on their feet to avoid getting hit with moderate damage.
Tanks will periodically be knocked backwards with a massive Swat. The main tank will suffer major Shadow damage with the initial smack. They will take additional damage upon Impact inversal to the distance they travel.
Tips
- Bloodlust/Heroism/Time Warp should be cast at the beginning of the encounter.
- DPS Legendary ring should be used with Bloodlust/Heroism/Time Warp and then whenever Grasping/Dragging Hands is cast.
- Healer Legendary ring should be used during Pound and Grasping/Dragging Hands overlap.
- Tank Legendary ring should be use to mitigate any of the Mutating Hatred abilities (Swat, Explosive Burst, Foul Crush), especially during Enrage.
- If Kormrok is not defeated in time, he will enrage and gain 30% more haste that will allow him to use all of his abilities faster while enraged.
- Position Kormrok near the next pool for him to leap into. The easiest order will be Fiery > Foul > Shadow.
- Off-tank should taunt Kormrok away from the Explosive Burst tank.
- Assign a team to activate (Empowered) Explosive Runes with quick damage mitigation CDs.
- Group together in small clumps of 4-5 about 5 yards apart during Grasping (Dragging) Hands to quickly AoE.
- Positioning will be important during the Shadow phase for the next phase and maximize travel distance for tanks.
Halls of Blood | Bastion of Shadows | Destructor’s Rise | The Black Gate