Information overload!
Tokyo Mirage Sessions #FE’s HUD can be a bit intimidating at first. With so much information on the screen at once, it’s easy to get lost. As such, let’s study it one piece at a time, starting with the most essential of the HUD elements. We’ll be using this image (below) for reference:
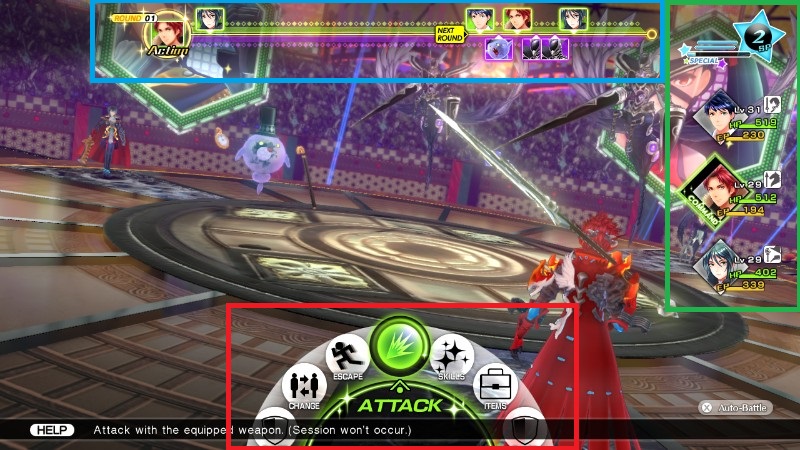
The Command Wheel
The command wheel (highlighted in red) is how you will choose actions for your characters. The options are as follows:
- Attack: Exactly as the name implies: it’s your basic attack. When using this, your character will not spend EP. However, you also cannot trigger Sessions as a result. This is rarely useful, as EP is very difficult to run out of, and should only be used as a last resort or to pick off weak enemies.
- Skills: This is the most important button in the game in Easy or Normal difficulty. This button opens up your Skills menu, allowing you to choose which skill you want to use on your enemies or allies. Your skills use EP to attack with various weapon types, inflict status conditions, or heal your teammates.
- Items: This opens up your inventory. There you will find various healing items, status enhancers, and even some attacking items.
- Guard: Your character will be unable to attack for one turn — or until they show up next on the action queue. They will take less damage, and also recover a small amount of EP as a result of guarding.
- Command (Itsuki Only): Command lets you order your characters how to act on autopilot. The Command order gives you manual control over your cast. Minimal Skills causes them to favor Attack over Skills, Healing Main will focus on healing skills, Defense Main will focus on guarding and defensive buffs, and Offensive Main will spend all their EP on attacking whenever possible.
- Change: This is the button you’ll want to select if you need to swap out cast members. There is no penalty for switching, and you will be able to attack immediately with the new character.
- Escape: Run away from the battle. This may fail, and you’ll lose a turn as a result.
- Auto Battle (X Button): Auto-Battle will cause your party to follow their Command orders until X is pressed again. If no orders are given they will simply use the Attack command. Itsuki can only use the Attack command in Auto-Battle mode.
The Action Queue
The action queue (highlighted in blue) displays the order of action turns characters will have each round. The round is completed once every character and enemy’s actions have been completed. Various elements can change the action queue order, so make sure you pay attention to this every round.
Party Status
The party status HUD (highlighted in green) shows you the current condition of your cast. The green bars mark your health, the yellow ones are your entertainer points, and the blue bars are the number of special points you have. The number within the blue star tells you how many bars you have filled, so don’t worry about counting them yourself.
If your cast members are under the effects of a status condition you will see various squares appear. Green or red swords, shields, and circles determine if you have boosted or lowered offense, defence, or hit rate. A purple diamond with bubbles indicates poison, blue is sleep, and a pink heart is infatuation. The latter of these is particularly dangerous as your ally may randomly attack you or heal the enemy. The same goes for confusion.
Understanding type advantages…
Each enemy in Tokyo Mirage Sessions #FE has a list of weaknesses and resistances, and it’s up to you to discover them! Thankfully, the game doesn’t expect you to memorize the type advantages of every single opponent you face.
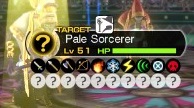
When you fight an enemy for the first time you’ll find that they have a large yellow box with a question mark. This indicates that you do not know what the enemy’s reaction will be to your character’s attack. This can be for a number of reasons including:
- You have never fought this enemy before.
- You have yet to attack this enemy with the weapon type you are using.
- You’re hallucinating this yellow box.
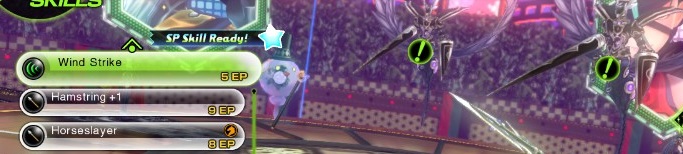
Chances are the third option isn’t the case, so let’s assume you haven’t attacked an enemy with this type of attack before. In this case you will get a box in the top left of the screen indicating what the risk of your attack is.
For example, in this image the little face next to my attack is neutral. This means that there is very little chance the enemy is Nu, Rp, or Dr. Ideally, you want to avoid any and all sad faces when attacking unknown enemies – especially in Chapter 3 onward. The reason for this is that most of these enemies will fall under these three weapon disadvantage types.
But what do these symbols mean exactly?
Type advantage symbols explained…

As seen above, there are four damage types for each weapon type:
- ‘–‘ means that the enemy is neutral to that weapon type. If you attack this enemy with an attack of the symbol above it, the attack will do normal damage to that enemy.
- ‘Wk‘ means that the enemy is weak against that weapon type. If at all possible, use an attack that is related to the symbol above this symbol. These attacks will do twice as much damage.
- ‘Rs‘ means that the enemy is resistant against that weapon type. Try to avoid this whenever possible as your attacks will do less damage than normal. If you can’t avoid it, attack anyway or switch to someone who can do full damage instead.
- ‘Nu‘ means that the enemy nullifies attacks of this weapon type. Do not attempt to fight an enemy that has this symbol with a character that has no other choices. You will do no damage, and you will waste Entertainer Points.
- ‘Rp‘ is the worst case scenario. Never attack an enemy that has this as the symbol for your attack type. This symbol means that the enemy will not only take no damage, they will return the damage to you in full. If you aren’t able to attack this type of enemy, and there is no other choice. Get out of there!
- ‘Dr‘ is another dangerous type disadvantage. If an enemy has Dr labeled under a weapon type, that means that your attacks will heal the opponent instead of damaging them. This is another enemy type you want to avoid hitting with the corresponding weapon type whenever possible.
Keep in mind that if this is your first time fighting an enemy, the symbol will be replaced with a ‘?’ until you hit them with that element type or defeat them.
But how will I know what works and what doesn’t?
There are two types of enemies in Tokyo Mirage Sessions #FE. The first is Persona/Shin Megami Tensei style enemies, and Fire Emblem style ones. While you’re pretty much out of luck when it comes to the former (aside from maybe guessing based on their colors and using the Risk system), Fire Emblem enemies tend to stick close to their origins.
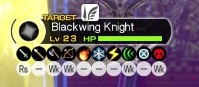
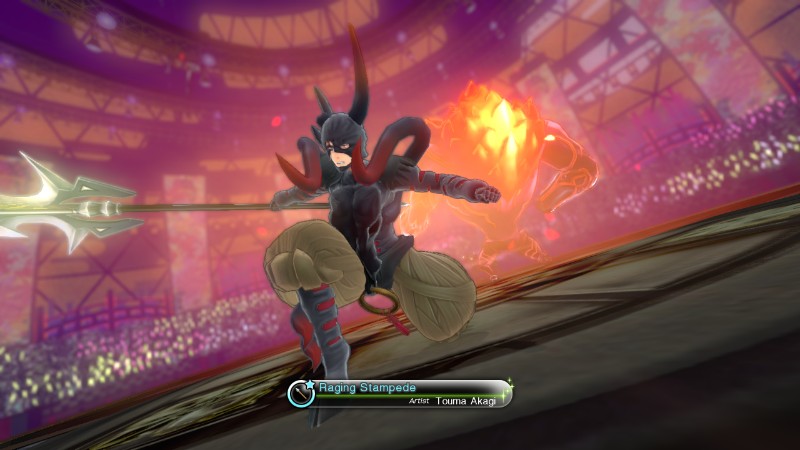
For example, this Blackwing Knight has a nice white square with a lance and a feather. This means that their weapon type is “lance” and they are a “flying” type. If we look to the Fire Emblem attack and magic triangles, we’ll know its weaknesses based on this convenient image below:
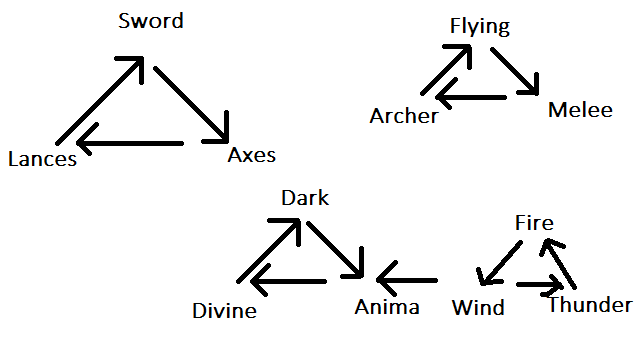
While it’s not the prettiest thing in the world, the premise is essentially that you want to hit the enemy with whatever the weapon points to – while simultaneously avoiding those that point to your weapon. The magic triangle is where things get tricky since Wind, Fire, and Thunder are part of a smaller triangle within the Dark, Anima, and Divine one. That said, once you master this, you’ll ace just about every enemy that comes your way.
In Tokyo Mirage Sessions #FE, an easy way to understand your advantages against Fire Emblem style enemies is to simply look at the convenient white square beside their name. Typically you’ll see symbols such as a lance, sword, or axe. Other Fire Emblem enemies include Flying (wings), Mages (wizard hats), armored (knight helmets), and dragons (dragon head). Knowing the weaknesses and advantages of each class is half the battle.
In the case of the enemy in question, they should be weak to bows and axes at the very least, and so we should start off with those attacks.
The HUD in Tokyo Mirage Sessions #FE has also been streamlined for type advantages you already know. As seen above, if you have already fought an enemy before, the enemy will have a massive green exclamation mark if you are hovering over an attack that they are weak against. This is particularly useful when trying to initiate Session attacks.
Speaking of which…
Session, ikimasu!
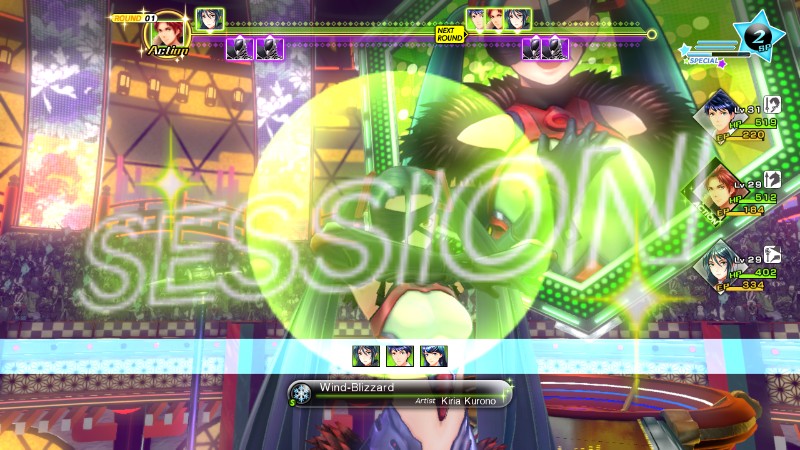
Sessions are an interesting feature in Tokyo Mirage Sessions #FE. If your party members have the necessary session skills they will automatically attack once a character initiates battle with a type advantage. You have virtually no control over which session attacks will be used, so make sure that any followups by your co-stars aren’t going to hurt your performance.
One way to do this is to select an enemy which as a green exclamation mark on it, and then check the list of session attacks your party will make. Each session attack is free of charge, so don’t worry if your session attack leads to a zero-damage hit. However, be wary of Rp symbols, as you will still take damage from these enemies if you hit them.
There are some exceptions to this rule though…
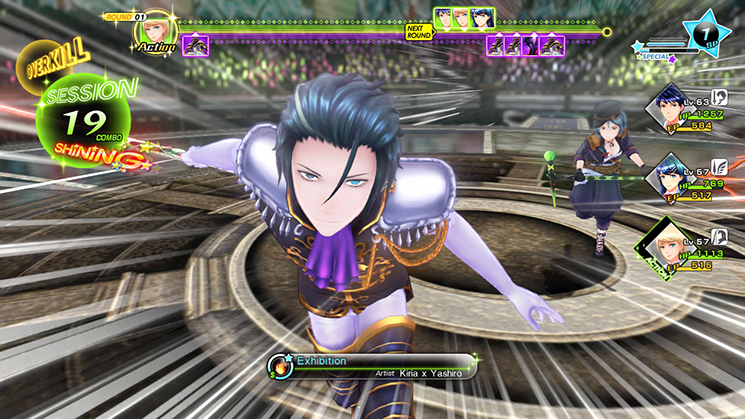
Time for some Overkill!
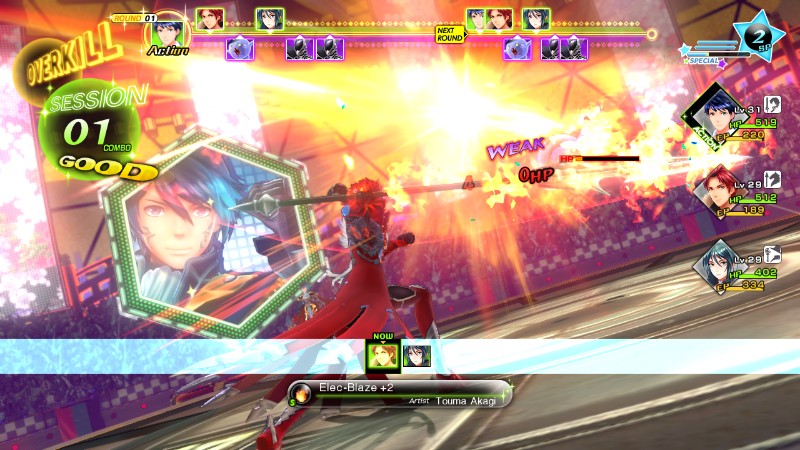
Overkill is a mechanic that doesn’t quite become useful until after you unlock Itsuki’s “Director” Radiant Unity ability. Overkill is activated whenever you defeat an enemy and your session attack chain isn’t over yet. During Overkill your allies will be able to attack any opponent without penalty or type disadvantages being part of the equation – including Nu and Rp.
If you find yourself in a situation where your character can’t attack an Nu or Rp enemy, try to aim for someone else in the meantime so that an ally’s Session attack will be triggered while in Overkill mode. Other practical uses include: defeating numerous enemies with weaknesses, wiping out weak enemies in quick succession, and taking down healers such as clerics while still damaging enemy mirages.
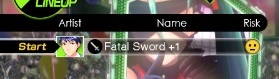
Show them a Special Performance!
Special Performances require Special points to initiate. These abilities are the strongest abilities in the game, and each one almost always guarantees that the effects listed in the bottom status bar will be applied. Most of them also involve the Fire Emblem Mirages transforming back into their physical form to attack or the idols doing some sort of attack based on a side story’s plot point.
I would generally recommend keeping these attacks stored away for later on in a chapter. Most enemies won’t require these attacks to be defeated, and they are best used on end-of-chapter bosses. The main reason I suggest saving them is that special points take a lot of grinding to build up, and unless you have Clap Track items on hand it’s unlikely you’ll build up a single bar during a boss battle.
What is an “Ad Lib Attack” exactly?
Ad Libs are a bit of a tricky subject since they can’t be relied upon – ever. This is primarily due to the fact that they are triggered completely randomly, and if you simply aren’t lucky you may never see them triggered at all.
Each Ad Lib attack is tied to a side-story in the game. To unlock one you simply need to increase the Stage Level of your characters until they are high enough to play their side story. Once their side stories are unlocked — and you have finished the mission — Tiki will be able to perform a Radiant Unity with that character. Once complete, attacks of the weapon type associated with the Ad Lib have a chance to trigger them.
Another type of Ad Lib attack is the Duo Attacks which are triggered during longer Sessions chains by pressing L or R instead of when a character uses an attack. These tend to be even more powerful than either Special Performances or Ad Libs
One problem with this feature is that Ad Libs are partially triggered based on your character’s luck — which in itself is randomly increased or decreased over time and with healing stations (i.e.: vending machines). As such, while these skills are incredibly powerful, they cannot be relied on, and in turn should not be expected to ever be seen.
You should enjoy them to their full when they do though.
And that’s all you need to know!
Hopefully with this knowledge you’ll be able to traverse the idolasphere in one piece. While all of this information seems like a lot, Tokyo Mirage Sessions #FE is truly one of the most hand-holding JRPGs out there as you won’t find yourself in too much trouble without a guide. However, I hopefully shed some light on some of the more confusing aspects of this wonderful game.
Good luck on your way to stardom!