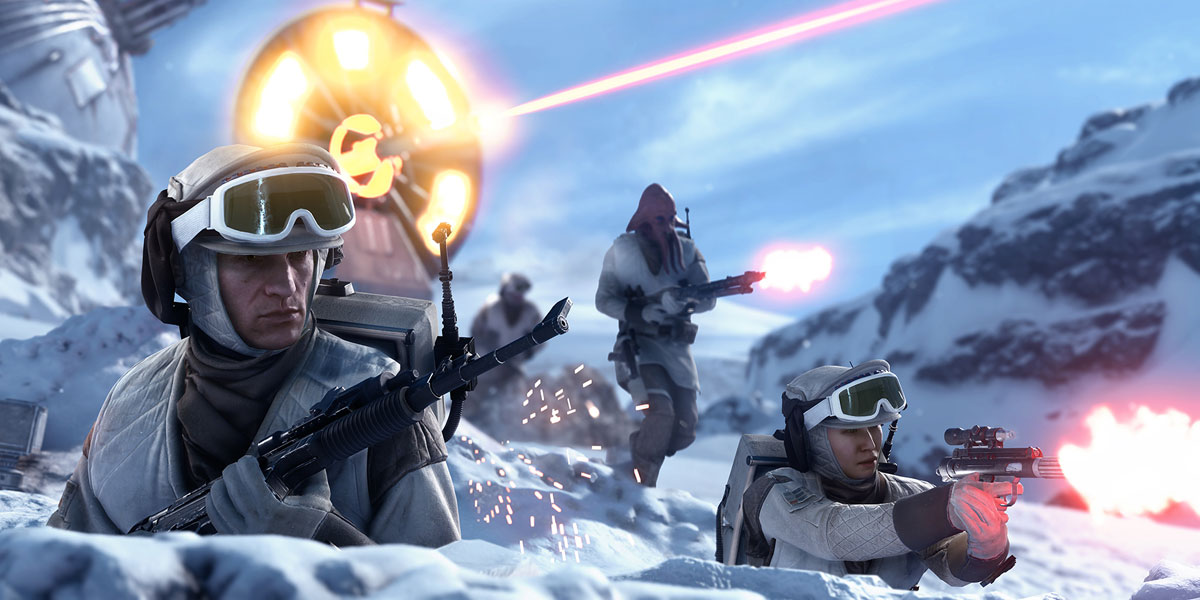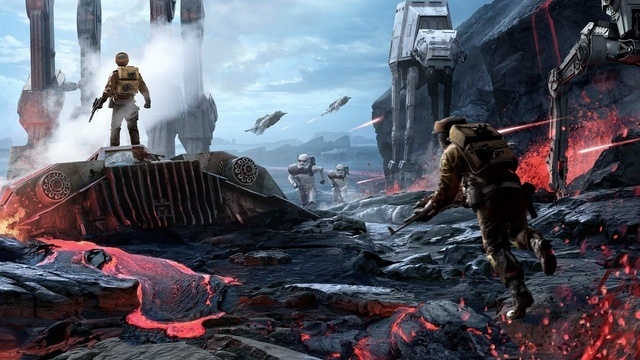
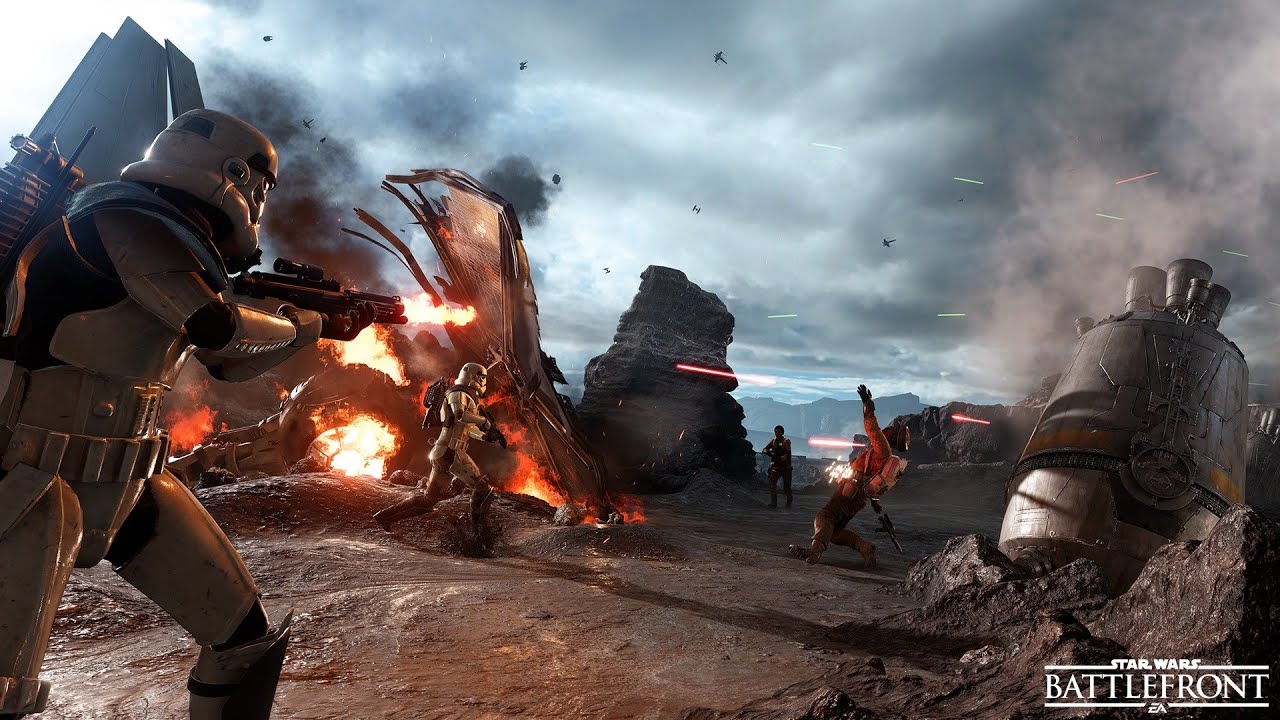
For those who haven’t hopped onto the Star Wars Battlefront beta train and already gotten the hang of things, the extensive Walker Assault map presents hefty challenges. Struggling to figure out basic game mechanics and strategies could throw a nasty bump in the road toward entertaining gameplay. These handy tips will start off your lightsaber game with a bang, whether you’re supporting the Rebels or the Empire.

1. Grab a headset
We’re starting out pretty basic here, but footsteps come loud and clear through headsets. Don’t be the player disadvantaged by a lack of one. Key in on audio cues and up your level of awareness by plugging one in.
2. Crouch!
Press the B button (Xbox One) or the circle button (PS4) to stay low while moving for a hefty increase in your kill rate. You’ll keep out of your enemy’s line of sight and get a jump on attacking. Seriously, this can make an unexpected and huge improvement in your gameplay.
3. Don’t be hasty on Drop Zone departure.
Star Wars Battlefront directly recommends players hang out in the Drop Zone before stampeding on toward the Walker Assault game mode. The details remain in obscurity for players to figure out, leaving you wondering: Exactly what level and which equipment should you aim for before moving forward?
Dedicate roughly 45 minutes to an hour to the Drop Zone. Don’t take on Hoth’s map until you’ve reached at least Rank 3. Leveling up unlocks new Star Cards, a.k.a. your loadout. Try to earn enough credits to unlock the Ion Shot and the Cycler Rifle Cards. Rebels will find the Ion Shot absolutely essential to taking down AT-ATs. The Cycler Rifle provides a one-hit headshot kill from long range with a bonus low cool-down time. HOWEVER, this weapon has a 7-second recharge so don’t use it if and while you’re camping.
Use the A280C, your first weapon, to reach level 3. Switch weapons as soon as you jump into multiplayer. Earn 550 credits for a new weapon and grab either the DLT-19 or the DH-17. The DLT-19 suits long-range attacks better with a drop in firepower. the DH-17 suits medium range best with a serious damage boost.
4. Deny habit! Don’t waste time aiming down the sights.
The mechanics of Star Wars Battlefront actually don’t support aiming down the sights for a boost in accuracy or utter lack of recoil. Instead, you lose a precious second of firing time in addition to significantly slowing down your character without much of a difference in accuracy. Scoping also leaves you completely unprepared to react quickly to the surrounding environment. For the sake of Battlefront, try to shoot enemies immediately. Do it for a much improved K/D ratio, if nothing else.

5. Firing in slow motion.
Note that laser rifles’ ammo doesn’t care for speed. Shots tend to be slower than you might expect or anticipate. (The Empire’s blasters tend to be particularly slow.) This makes ranged attacks trickier. You’ll find it most beneficial to lead your target in order to predict their location and unleash sci-fi inspired hell upon them.
6. Master active Cooldown.
Weapons overheat in Battlefront, necessitating cooldown periods afterward. In the middle of the screen, below your aim, you’ll notice a curved bar. This bar fills up red the more you fire your gun – overheating, right before your eyes. Laying back on gun use prevents overheating, but should your gun reach that point, yellow sections appear on either end of the bar while it clears out (the cooldown period). Hitting X or the square button, depending on your controller, as the bar moves through these yellow sections instantly cools your weapon, thus allowing you to fire away to your heart’s content until the process repeats itself.
Beware: Consecutively using this feature gradually decreases the size of that yellow section. Practice nabbing that instant Cooldown. This saves precious time while providing the chance to nab extra kills.
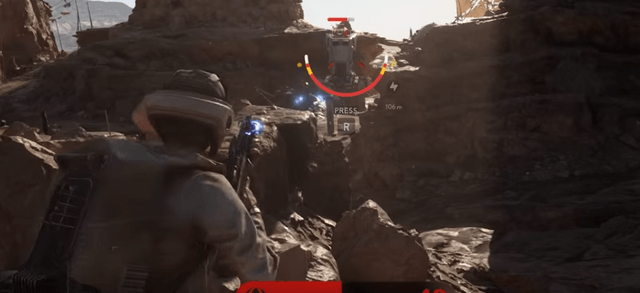
7. Your map is your life now.
All the information you could ever want or need lies in Battlefront‘s handy dandy minimap, complete with HUD. It reveals:
- Enemy location
- Pickups
- Objectives
Some areas of the Drop Zone map straight up obscure your line of sight via rocky terrain, making the map crucial to navigating and locating specific points.
Don’t get caught up in spawn points either! Enemies may randomly pop in for a hasty hello and gun greeting right behind you. They may even appear in a group directly in front of you. Seeing as how enemies get a few seconds of invulnerability upon spawning, you need to be privy to these sudden appearances, making the enemy location on your minimap a potential and literal life saver.
Conclusion? Always, always, always leave some attention for your map.

8. Use that Jump Pack!
Purchasing the Jump Pack Star Card ASAP can make a huge difference to your field traversal. It’s the key to mastering the huge map Walker Assault presents as its burst thrusters allow you to jump over large distances.
This item makes quickly escaping or even launching surprise attacks in trenches a breeze. Use it to reach high ground for ideal firing locations, rush enemies, bolt out of range, or to quickly claim an escape pod for bonus EXP. No matter what strategy you go with, make this baby your bread and butter.
Never sprint over trenches unless fatal enemy fire is your cup of tea. Stick to the Jump Pack.
9. Stick close to escape pods even after they’re captured or lost for rewards.

Each pod drops 3 lovely boosters anyone can grab. This first come, first serve mentality may leave you racing teammates for goodies, but don’t let that discourage you. Pods drop heavy weapons, team shields, Ion Card charges, etc. Get lucky enough to grab a Thermal Imploder and you can take out an entire squad, for example.
These boosters come with an added bonus: They stick around even if you die, so don’t feel pressured to use a solid perk at the wrong time.
10. Stick to third-person perspective.
While first-person tends to be the go-to in shooters, this mode doesn’t actually provide any real advantages in Star Wars Battlefront. A reliance on third-person works best. Shot accuracy remains about equal from first to third-person, plus third-person lacks the heightened recoil consequence of first-person.

Third-person perspective significantly broadens your field of vision so you can be keenly aware of your surroundings and approaching enemies. Being able to spot said enemies more quickly also helps build the habit of shooting on sight, without delay or extra time spent aiming down the sights as mentioned earlier. Hold down D-pad to switch perspective on PS4, or change this preference in the gameplay options.
11. Be wary of vehicles.
Being able to take over a vehicle tempts the best of us with its grand promises of enemy devastation, but don’t take advantage of this option just because its there. Controlling vehicles on either side takes practice. Concentrate on objectives with your nineteen comrades in arms.

That said, AT-ST and AT-ATs have the potential to dominate gameplay in Walker Assault. If you’re Empire, consider practicing your pilot techniques. While you don’t want to be more trouble than your worth on the battlefield, these skills definitely still have a time and a place once honed.
12. Playing Jedi.
Luke Skywalker and Darth Vader control doesn’t come down to optimal player performance. This ability comes as a random drop. The Jedi’s health gradually decreases in addition to your damage exposure and the consistent chance of death. (You don’t escape this simply because you’ve become iconic.)
Aid your team. Don’t just run around blasting your enemies in the face because it’s easier now. Gather allies and obliterate your objectives.

13. Fighting Jedi.
You don’t. Run. After that, find comrades and try to eat away at a Jedi’s health from afar. Close engagement promises only the sweet release of death.
HOWEVER, if the Jedi that shows up features the iconic theme music of your side (Rebel Alliance versus Imperial tunes), seek out the player and aide them as they wreck objectives.
14. Just for Rebels.
Stick to trenches and your mountainside base to stay hidden from aerial assaults while taking out AT-ATs and AT-STs with high-mounted blasters.