Gold Bricks are just one of many collectibles in the LEGO universe, and they can be tricky to find. They’re often hidden behind fun puzzles or in cool locations. If you’re aiming for 100% completion, you’re going to need to track them down, so we’ve put together a guide to all the Gold Brick locations in LEGO Marvel’s Avengers to help you make it happen.
Recommended Videos
S.H.I.E.L.D. Base
- The first brick is hidden behind a door with three lights above it. Each light is connected to an electricity panel – follow the wires from the lights to find the connected panel and turn them all on to open the door.
- Find a small structure with switches on either side and pull both switches when the needle is in the green section of the circle.
- On the roof of the “Joint Dark Energy” mission, there is a cage with a shield switch at the top. Hit it with Cap’s shield to open the cage.
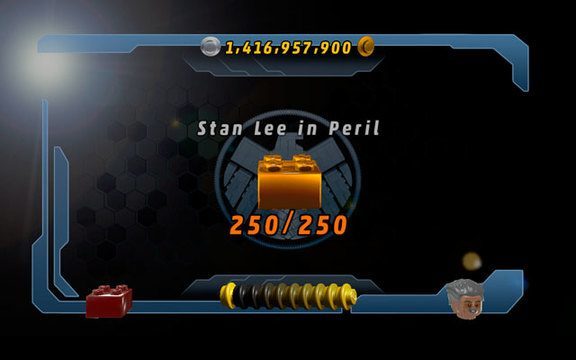
- Up the stairs behind where you find Stan Lee, there is a security camera you need to sneak past that leads to a room with three doors blocked by lasers. Shoot the target near the Gold Brick and pull the switch to shut down the cameras. Hitting the shield switch over the door will open up a special access tunnel that leads to the brick.
- On a roof near the Air start gate, there is a pool of water around generator. Freeze it to interrupt the power flow, then head to street level to find your Gold Brick.
- There is a black LEGO container inside the fenced-in area.
South Africa
- There are seven barrels around the broken hull that you need to break to find this brick. The order doesn’t matter, but breaking one starts a fifteen second timer, so be quick.
- Inside the ship with two large cranes are racks of barrels placed near a set of green lights. Break the barrels and assemble the switches, then pull them in the order that the lights flash green.
- Inside the hold of the intact ship that’s not on the water is a shield switch that can be revealed by scanning. Hitting it reveals a switch on the other side of the wall. Use a stealthy character to pull the switch.
- Look for three empty oil tanks on the road. The tanks have five targets on them that need to be hit with a ranged weapon – shoot all five targets within the time limit to earn your Gold Brick, which is inside a nearby trailer.
- High on the HMS Churchill are four Twirl Poles. Twirl on each one to lower them and light a bulb on the smokestack. After all four bulbs are lit, a chest will open.
- In the broken hull directly across from the start point, clear the wood from a ledge to reveal a blue LEGO safe. Crack it to get your Gold Brick.
Barton’s Farm
- Near the barn there is a shed with a door made of gold LEGO bricks. Heat them up to clear a path, then assemble a shield switch with the bricks inside the shed. Using the switch exposes a Gold Brick on top of the barn.
- Near the entrance to the farm there are two greenhouses. One is blocked by a broken switch, the other has a locked crate. Dig in a pile of dirt behind the crate to reach the inside of one greenhouse, repair the switch, then use it to open the crate.
- Around the exterior of the barn are two grapple handles. Pull the handles and shoot the target that’s left behind – there is a third inside the barn that you need to scan to find. After you hit all three targets a crate will open outside the barn.
- Attack the six spider webs in the barn. They’re mostly easy to find but you might need to do some searching.
- Around the outside of the farmhouse’s second floor are empty sockets – fill them with Twirl Poles, then use the poles to open a small enclosure with a switch inside. Use a stealthy character to pull it, then get the Gold Brick from a crate on the ground.
- There are two switches near each other that need to be connected to work properly. Attack the crate to assemble a Speed Boost Ramp — which, when used, will repair the wires running between the switches. Use the switch near the ramp, then use the second when the arrow is in the green part of the circle.
- Dig up the chest on the hillside.
Sokovia
- Demolish the white car near the start of the level. Assemble a shield deflect pad from the leftover bricks, then use the activated laser to heat up a gold LEGO object in the second floor window, causing a member of the cleaning crew to open a nearby container.
- From the start of the level, follow the intact street up to the crosswalk into a building with metal bars visible behind the window. There are two pressure pads inside – the one on the right moves the bars blocking a locked container. The left pressure pad opens the way to a third pressure panel, which opens the way to a switch, which then reveals a broken technology panel. Repair the panel and tap the large lights in the same order as the smaller lights to open the container.
- On the second floor between apartment buildings off the town square are two targets – shoot them both and assemble the bricks to create a S.H.I.E.L.D. access terminal. Activate it with a HYDRA agent to open the door, then pull a switch to deactivate the lasers. Crack the blue LEGO cylinder with a sonic attack.
- There is a shield switch on the side of a building – hit it, starting a timer, then mind control the S.H.I.E.L.D. agent inside the fire escape. He needs to climb the ladder, pull the switch, and drop down the hole onto the Gold Brick before the timer expires.
- Rebuild the statue in the town square, then follow the power conduit to a wall. Extinguish the flames near a switch, then pull it. You need a character who can wade through toxic goo to pull the next switch, and then one who can destroy a black LEGO brick to access the gold one.
- Drop down into the sinkhole near the start point and break through the cracked wall. The Gold Brick is inside, just behind the wall.
Washington D.C.
- There are five platforms next to the information booth near the Washington Monument. Four have pressure pads, one has a switch. Repair and flip the switch, then jump on each pad without touching the ground to open the door to the booth. You need a character with Telekinetic Powers to actually collect the Gold Brick.
- Mind control the attendant in the information booth, then have him break apart the brochure rack and build it into a switch. Pull the switch to open the door, then have someone break the blue LEGO object to get the brick.
- Charge up the electricity panel behind the Lincoln Monument to open a secret door. Use a stealth character to get past the security camera and stand on a pressure pad to remove the bars protecting a target on the wall. Hit the target to open the locked container outside.
- Use the red grapple handle on the information booth to open the door. Attack the brochure racks to reveal the Gold Brick inside.
- In the secret base under the Washington Monument, break through the cracked brick wall. Use a freeze beam on the water over the weight pad until the ice sculpture weighs enough to complete the connection. Pull the switch inside the cell when the needle is in the green to open the second cell.
- Build a speed boost ramp from the bricks contained in a HYDRA crate, the open a grate with the ramp. The grate leads to a secret space underneath the stairs at the entrance, where a black LEGO container contains the Gold Brick.
Malibu
- On the bluff above the beach there is a fence with a switch set against it. Step on the pressure pads in the order that the lights on the columns blink.
- Go down the steps in the back of the house to reach the Hall of Armor. Straight across the room is a blue LEGO safe behind lasers. Break apart the computer terminal, then rebuild it into a switch. Pull the switch to power down the lasers, the break the safe with a sonic ability.
- Repair the electricity panel near the silver Iron Man statue outside the house. Charge the panel, which will turn one of two red lights over a nearby door green. Scan the grassy area over the wall to reveal a second electricity panel. Once both are charged the garage will open, revealing the Gold Brick.
- There are five Iron Man helmets that are in close proximity to each other, one on the roof and four on the rocks of the beach. You need to destroy them all within eight seconds of the last. Start on the roof – flying characters with ranged attacks are useful here.
- Target the shield switch in the garage to open a door with the Gold Brick behind it.
- In the Hall of Armor, look for the black container near Amadeus Cho. There is a Gold Brick inside.
Asgard
- Melt the golden statue of Odin on the tower, but make sure you’re ready for a fight. Once the guards are taken care of and the statue is gone, switch to Captain America and Thor. Use the shield smash pad to clear the boulders and reveal the brick.
- Make your way to the top of the Library and charge the two electricity panels nearby. Step on the pressure pads inside the boxes (they must both be down at the same time) to complete the circuit. The Gold Brick is in a locked container in the back of the room.
- Enter the building in the Training Grounds behind the target dummies. Activate the shield switch to open the bars and fire up the laser cannons. Get on top of the shield deflect pad and redirect the lasers at the glowing objects on the opposite wall.
- Seize control of one of Asgard’s defense turrets and shoot the targets that appear. If you hit 30, you earn a gold brick.
- On the grassy field behind the Solar is a barrel – attack it to reveal a grate that leads inside the energy field. Scan the Solar to reveal an object which can be destroyed to drop the field. Target the silver LEGO chest to open it, revealing a Gold Brick.
- Open the black LEGO container outside the entry to the Rainbow Bridge.
GameSkinny is supported by our audience. When you purchase through links on our site, we may earn a small affiliate commission. Learn more


