Straddling the line between resource management and action combat, the pixel art ludus simulator Domina puts you in control of a stable of gladiators that will either bring glory to your house… or see you cast down to the dregs of Roman society (check out our full review of the beta here).
For such a simple graphical design, there’s a lot of concepts at play with Domina, and mastering them all takes more than just a strong sword arm. Your lunista needs a shrewd mind for business and an utterly ruthless disposition.
Important notice: this guide info is based on the current state of the game in beta prior to official release — anything below may be subject to change at launch and beyond as updates are applied!
Gladiator Combat / Class Basics
First and most importantly, you can’t actually control any gladiators in combat until unlocking the Mind Control skill through your doctore.
Until that skill is learned, gladiators will auto-battle through AI only, which is typically a bad thing, so pick this skill immediately after learning the base Humility skill.
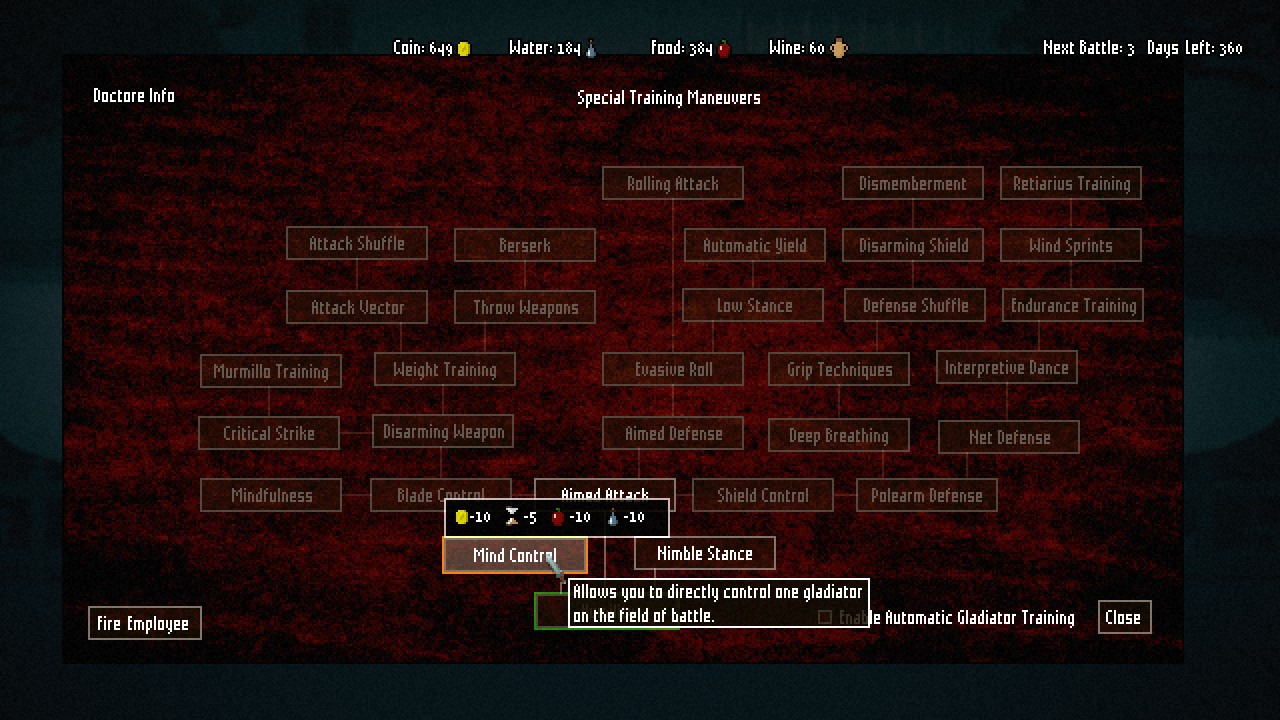 Learning Mind Control
Each battle has an extreme element of luck at play. You could get a 3 vs 1 match with the opponent chained to the ground… or the opposite. Losses will be inevitable, so you need to weigh the possibility of winning versus how losing a well-equipped, expensive gladiator will impact you in future matches.
Keep in mind that for group matches, you don’t have to use the max number of gladiators for the battle. If you are confident in your team’s equipment and abilities, using fewer gladiators earns you more coin and exposes fewer expensive slaves to possible harm.
Group matches of 6 versus 6 or bigger become incredibly chaotic, with the red circle underneath enemies barely visible most of the time. Don’t worry too much though, as there’s no friendly fire, so swing away!
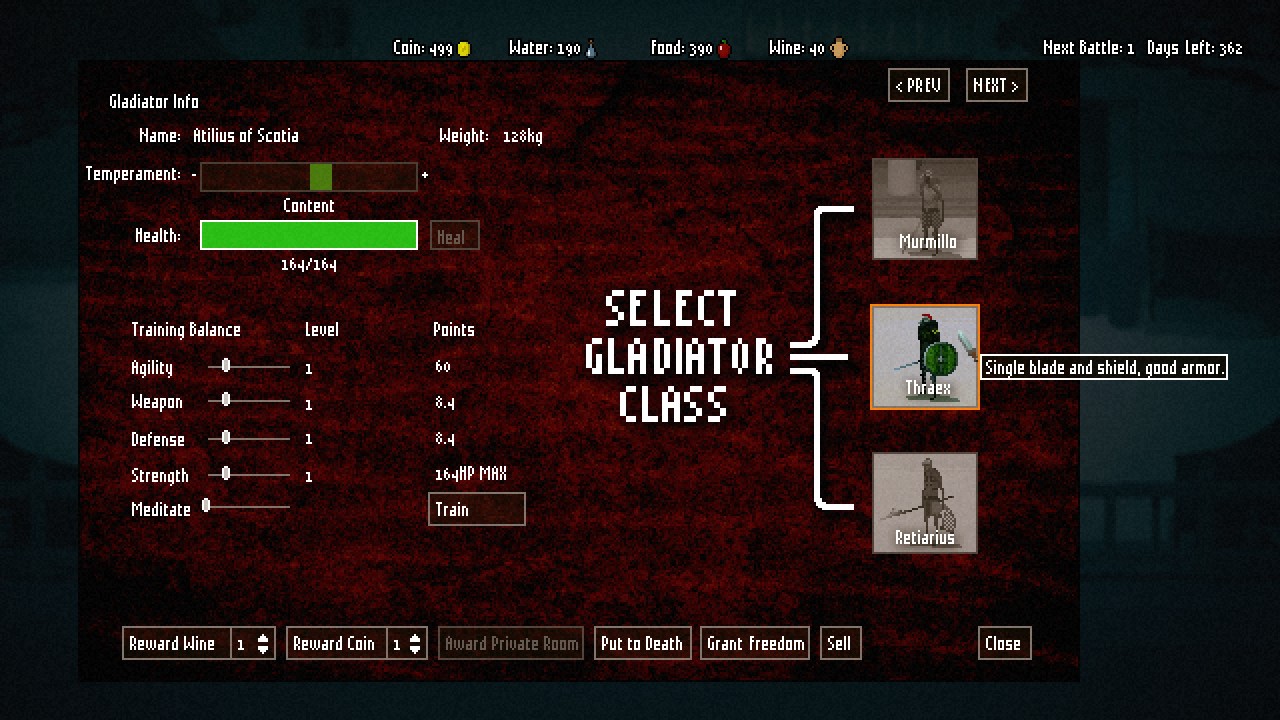
When first acquiring new slaves, they start naked and defenseless and must select from three class options:
- Murmilla – dual wielding specialist that focuses on fast, deadly strikes over defense
- Thraex – well rounded class that uses a sword and shield combo for good attack without losing defensive capabilities
- Retarius – trident and net combo soldier that slows down enemies and attacks at longer range
 Selecting A Slave’s Class
It isn’t immediately clear unless you go into options and turn aim assist on, but where you are pointing the mouse determines where your gladiator strikes at various angles and at different sides, while the keyboard is for moving in specific directions.
In other words, moving left doesn’t turn your sword strike to the left — you still have to shift the mouse left or you will keep swinging to the right.
This may be corrected as tweaks are made in the beta, but it seems at the moment like hitting from below has the biggest chance of a successful strike and does the most damage.
While attacking, keep an eye on your white stamina bar in the top-left corner just under the icon of whatever gladiator you are controlling. It’s not super prominent on the screen, and running, rolling, or attacking reduces stamina, resulting in lower damage and less successful attacks.
Training And Equipping
First and foremost, immediately click on your doctore and then select “Enable Automatic Gladiator Training.” There just simply isn’t enough time between matches to be right-clicking every single gladiator repeatedly to start training and still buy equipment or change an employee’s current task.
With that out of the way, it’s time to start equipping gladiators. New, unequipped slaves only get you a handful of coins, so selling them isn’t useful unless your ludus is full and running out of food.
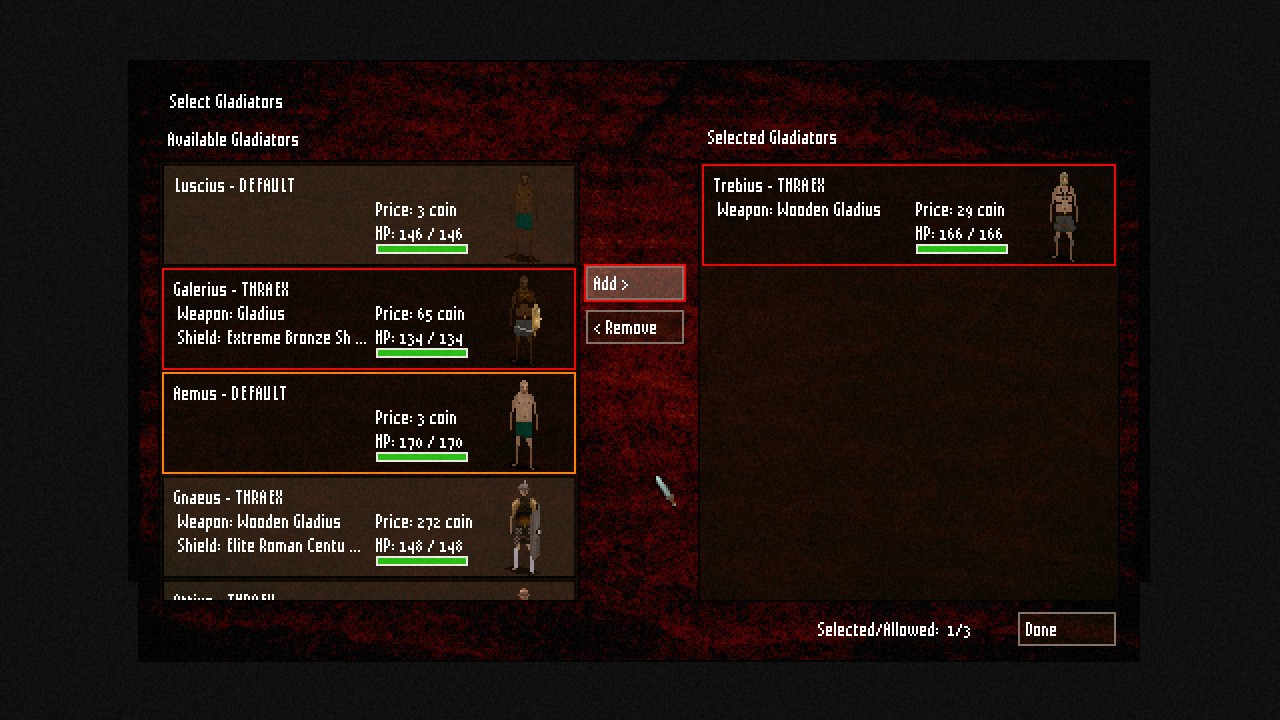
Instead, sending utterly naked guys into battle who have been lightly trained can actually be a viable strategy alongside a few equipped soldiers — it costs next to nothing, and if the match is a large group fight, its a good bet the naked slave will pick up dropped weapons and shields. Those who survive will also get attribute boosts and will be more worth outfitting with your low supply of coins.
 Choosing Unequipped Slaves For A Match
How you choose to upgrade equipment is entirely up to you — focusing on giving the beast gear to one gladiator with high skills is perfectly viable, as is spreading out your coin by upgrading all your gladiators to a lesser degree.
While buying new equipment and training your gladiators, keep in mind which Jupiter’s Blessings cards are equipped. For instance, if you’ve got a card that increases weapon training speed by 500%, you can get an absolute monster of a gladiator by changing his weapon training balance slider all the way to the right. He will then train weapons first over any other attribute.
If you add in hirelings (see below) who increase skill training speed, then that gladiator will be doing ungodly amounts of damage, which is a huge boon in the regional championship games when facing arena bosses with 600+ hit points.
Hiring Employees
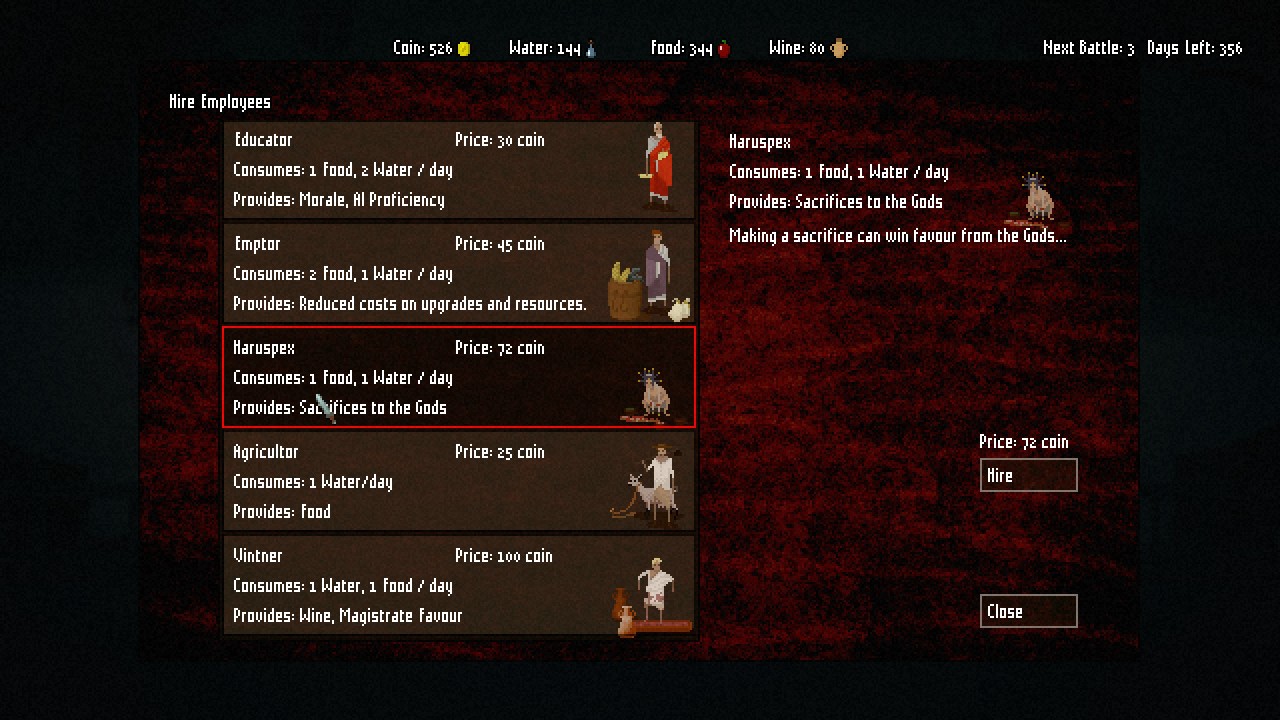
There are more options for employees than you will use, so you need to plan strategically as to which options give the most bang for your coin. Hirelings that make food, wine, and water cheaper aren’t worth it – these resources only cost 1 coin a piece anyway.
The Agent is one of the cheapest employees and can save you a ton of money with his “steal weapon” and “steal armor” abilities. Sometimes they fail — resulting in the Agent being killed so you have to buy a new one — and who the weapon or armor goes to is randomized, but in the long run it can save hundreds of coins.
Faber on the other hand is a big starting investment — 75 coins — but reduces the cost of expensive equipment, and can offer random upgrades in addition to repairing broken equipment. If you want to be sporting the best weapons and armor, hire this guy as soon as you can afford it.
The Bard boosts heal speed, morale, and training speed. If you want effective gladiators who aren’t going into battle half-dead or ready to defect, you want to buy him.
In my playthroughs, I’ve found the best lineup to be Faber, Bard, and Agent, but the Architect or Medicus can be swapped out for the Agent if you prefer to focus on healing or training speed.
 Hiring Employees
Navigating Roman Politics
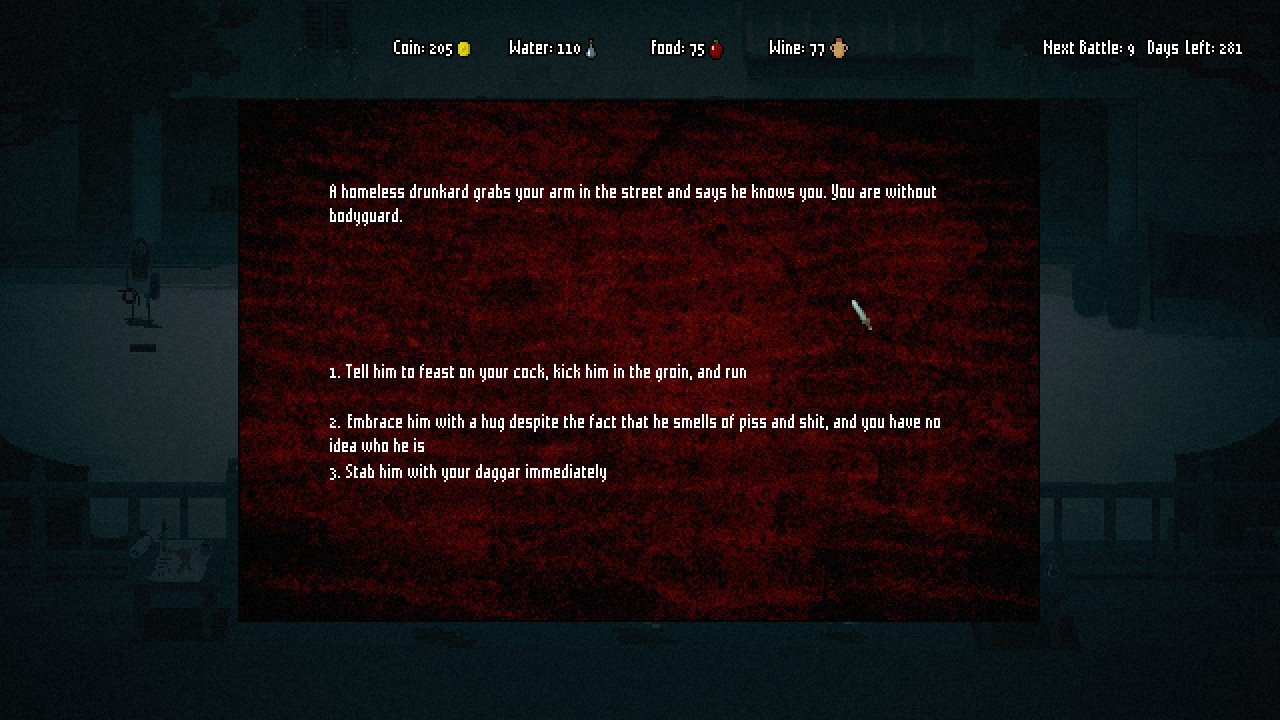
Danger doesn’t only strike in the arena — you have to always be on your toes for random encounters that will frequently reduce your food, wine, water, or coin supplies. To prevent dropping morale, be sure to always have more than 50 of each resource on hand at any given time in case one of these events pops up.
Don’t approach these random encounters thinking “how can I be most helpful,” but instead from the position of “how will this screw me over and who is being more underhanded than me?”
For instance, sending out your slaves to search for the magistrate’s kidnapped wife seems like a grand idea for currying favor… until you realize he staged the kidnapping to get rid of the old hag and didn’t want her found. Woops.
Aiding drunk officials sometimes is helpful, and others will just cost you coins with nothing provided in return. Replacing the stolen wine stores of both the legate and the magistrate just ends up making them both angry, since they didn’t want the wine back, and instead wanted to accuse someone of stealing it for political purposes, and so on.
The only time you can be sure you will get lowered favor is if you outright refuse requests beneficial to the legate and magistrate, like denying the legate’s soldiers a place to rest after battle.
 Making Decisions
Those are all the basics you need to know to run a successful ludus and head towards the championship games with healthy, well-equipped gladiators. Let us know if you have any other Domina tips or strategies we should try out!