Pulling from a completely different era of gaming, Tides Of Numenera (reviewed here) is a much different experience than with either the open world Skyrim-style or the traditional JRPG.
Below we cover all the basics you need to know before diving into Torment’s unusual style. Looking for info on the best class build instead? Check out our Tides Of Numenera character creation guide here.
The Basics
If there’s one single, most useful hint in the whole game, it would be to know that the Tab key highlights everything you can interact with! Always be tapping it everywhere you go. There are myriad objects, creatures, and NPCs in any given map section and most of them are more than window dressing.
An object that seems like a simple visual oddity to add flavor may actually offer a way to level more quickly or provide useful items for an edge in an upcoming combat.
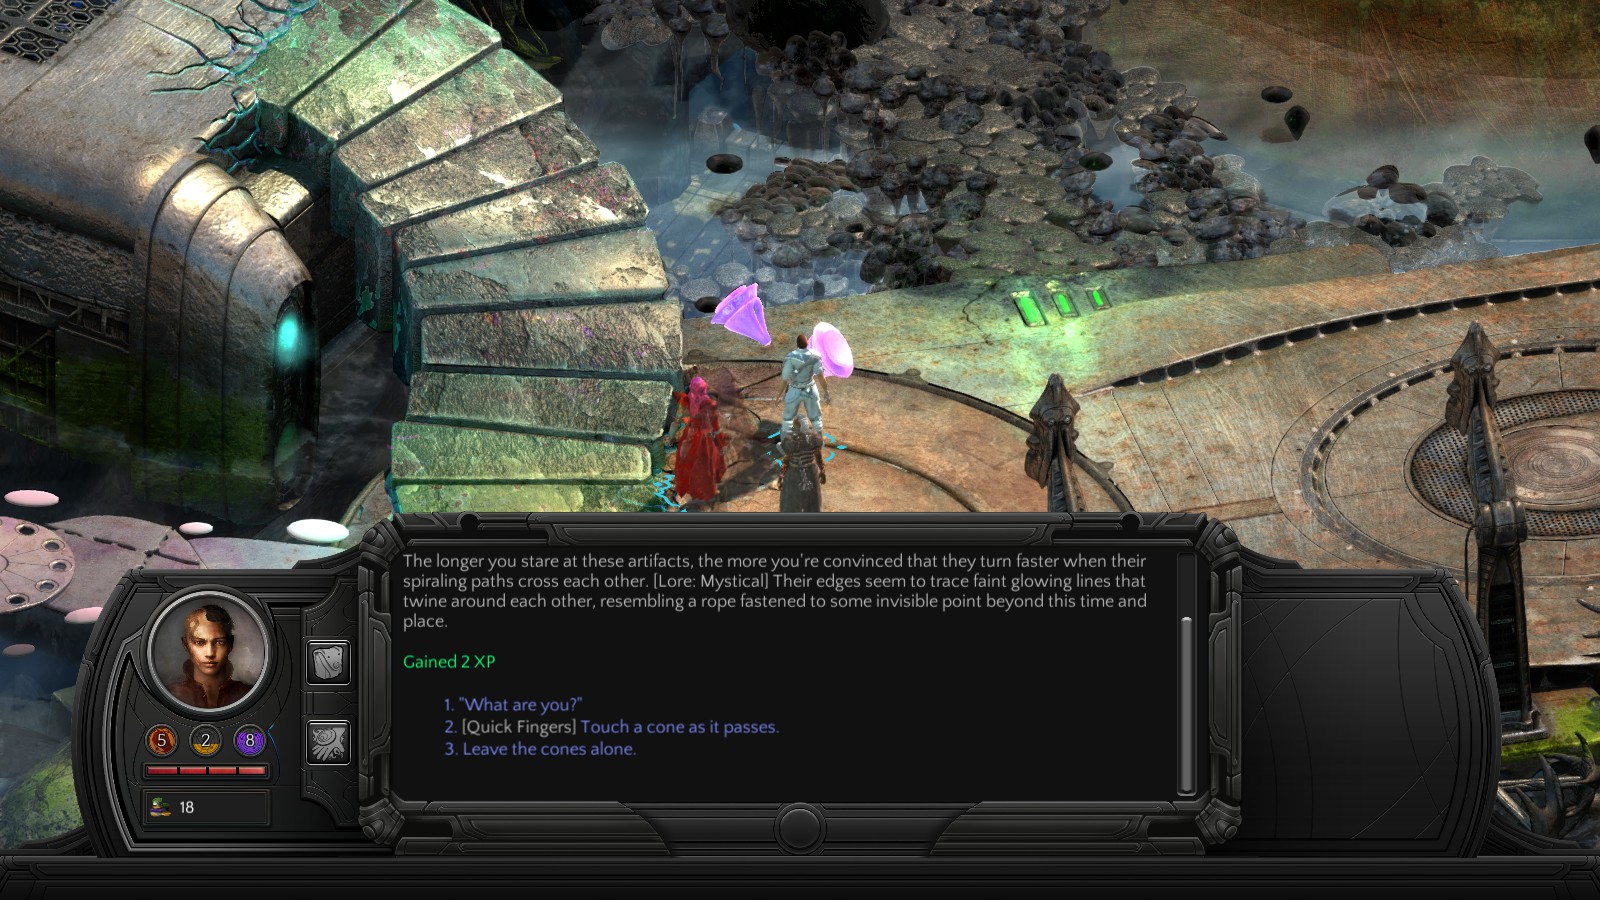 The Lore Mystical Skill provides free XP if you interact with these cones
More so than any other RPG out there, Torment is all about dialog. Reams and reams of dialog, from talking to people you meet to lengthy sequences recalling past memories. Accordingly, be sure to talk to your companions as frequently as possible. You’ll learn new things, gain new items, unlock new quests, and gain experience as you discover their secrets and learn about their history.
While the Last Castoff does gain experience from completing Crisis segments (see below), there are far more options to bump up your XP count by recalling memories of the Changing God while interacting with objects or talking to people. Even something as simple as a pile of rubble or a random passerby on the street can potentially be a source of lore and experience.
Similarly, look for new ways to utilize items you’ve discovered through dialog, and don’t be afraid to backtrack to re-initiate conversation with a previous character or set piece.
For instance, the broken machine near the beginning of the game yields up a jagged crystal shard if you follow the dialog tree to its end. While a free light weapon is useful (especially if you picked the Nano or Jack classes), it doesn’t deal a ton of damage. There’s an easy way to bump up it’s capabilities though.
Take this shard to a floating black and green obelisk at the Reef Of Fallen Worlds – an imposing object that shoots beams of deadly light – and a dialog option appears to charge the shard with light, increasing its damage and utility without having to spend any shins at a merchant.
 Does an object seem useless? Come back to it later!
Navigating Through Crisis
Rather than the expected Real Time With Pause combat style of the previous Torment, this sequel instead has you enter a Crisis – a scripted, turn based segment filled to the brim with options beyond just swinging a sword or casting a spell.
Always be on the lookout during any given Crisis for ways to utilize background objects or engage in conversation with your enemies. Even if you can’t talk them out of fighting, you can frequently use dialog to gain an advantage by weakening their resolve or inflicting combat penalties.
Don’t forget that movement and range come into play during a Crisis much like they do in a tabletop war game. Abilities that allow you to teleport can easily turn the tide of any combat, and keep in mind that effects that push or pull an enemy against walls or platform edges knock them down and deal bonus damage.
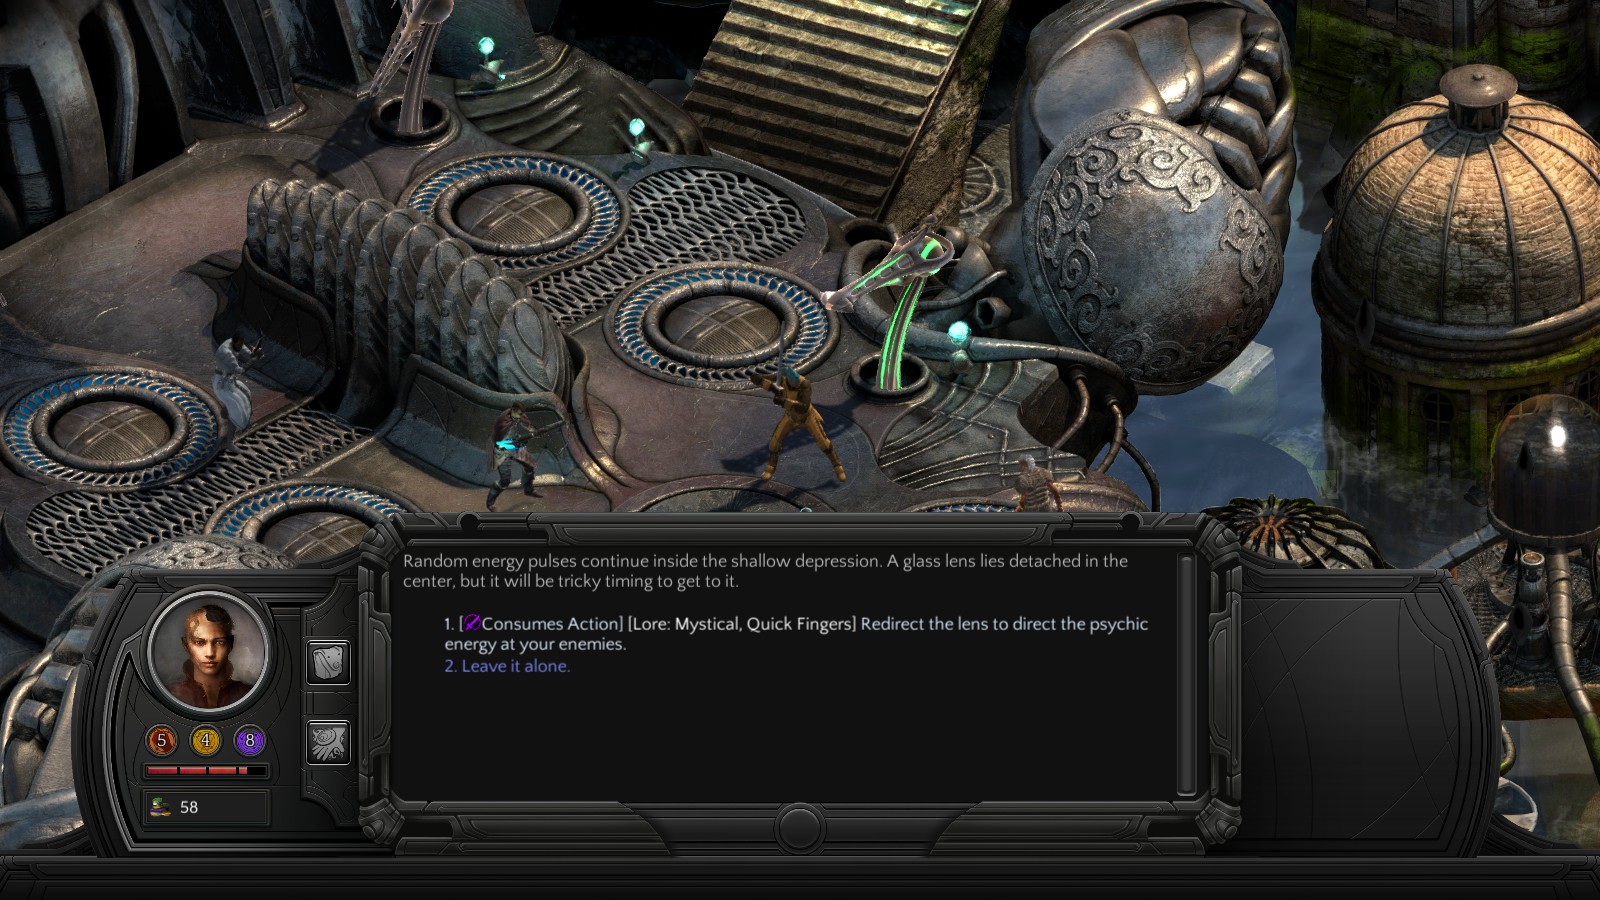 The proper skills turns this background object into a powerful weapon
Numenera Specific Rules
Pulling from the Numenera tabletop RPG rather than the Planescape setting of its predecessor, Torment has some key differences that D&D players may not be expecting.
Each character has three Stat Pools covering Might, Speed, and Intellect. These pools will frequently go down as you complete tasks, with Might falling if you spend points to break an object, Intellect being used up if you outwit someone in conversation, and so on.
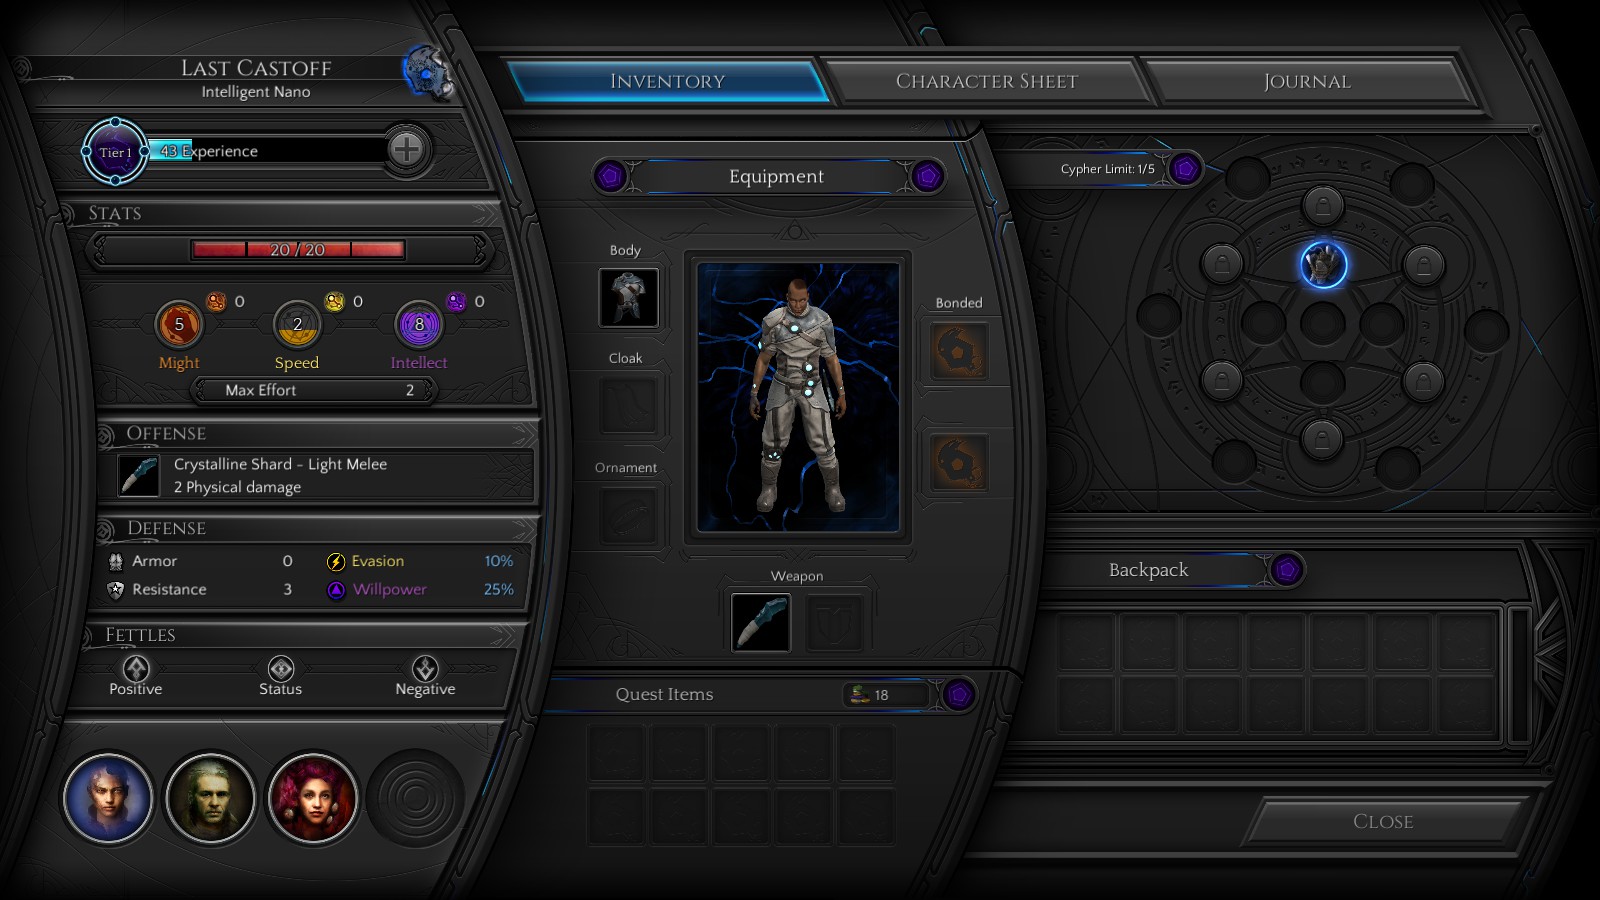 Unlike with other RPGs, your stats will frequently go up and down
Each character also has a maximum Effort, which allows you to spend additional points from a Stat Pool to increase your chances of success. The first point used during a task doesn’t cost anything — in essence you are using the Stat for free for a lower chance at success.
Anything above that first point reduces your overall available pool until either finding a place to rest (few and far between) or using an item that heals that Stat. What this means is that the more often you succeed in combat or dialog, the less useful that character will be in future battles and conversations.
This is why the importance of the Edge Stat can’t be overstated: every point of Edge means you have an extra point of Effort to be applied that doesn’t reduce your Stat Pool, so you can keep succeeding longer.
Here’s where the unique leveling system comes in. Each time you level you choose from one of four options: increasing a Stat Pool outright, increasing Edge, increasing maximum Effort, or learning a new Skill / upgrading an existing Skill.
You can only take each option once pier Tier, and after choosing all four options your Tier bumps up. Essentially, this means you can only boost your Edge, Effort, etc. once every four levels — so choose wisely! A higher Edge is always useful because it means you’ll be spending fewer Stat points, but if you are frequently using one Skill or Stat over all the others, it may be a better choice to increase those instead.
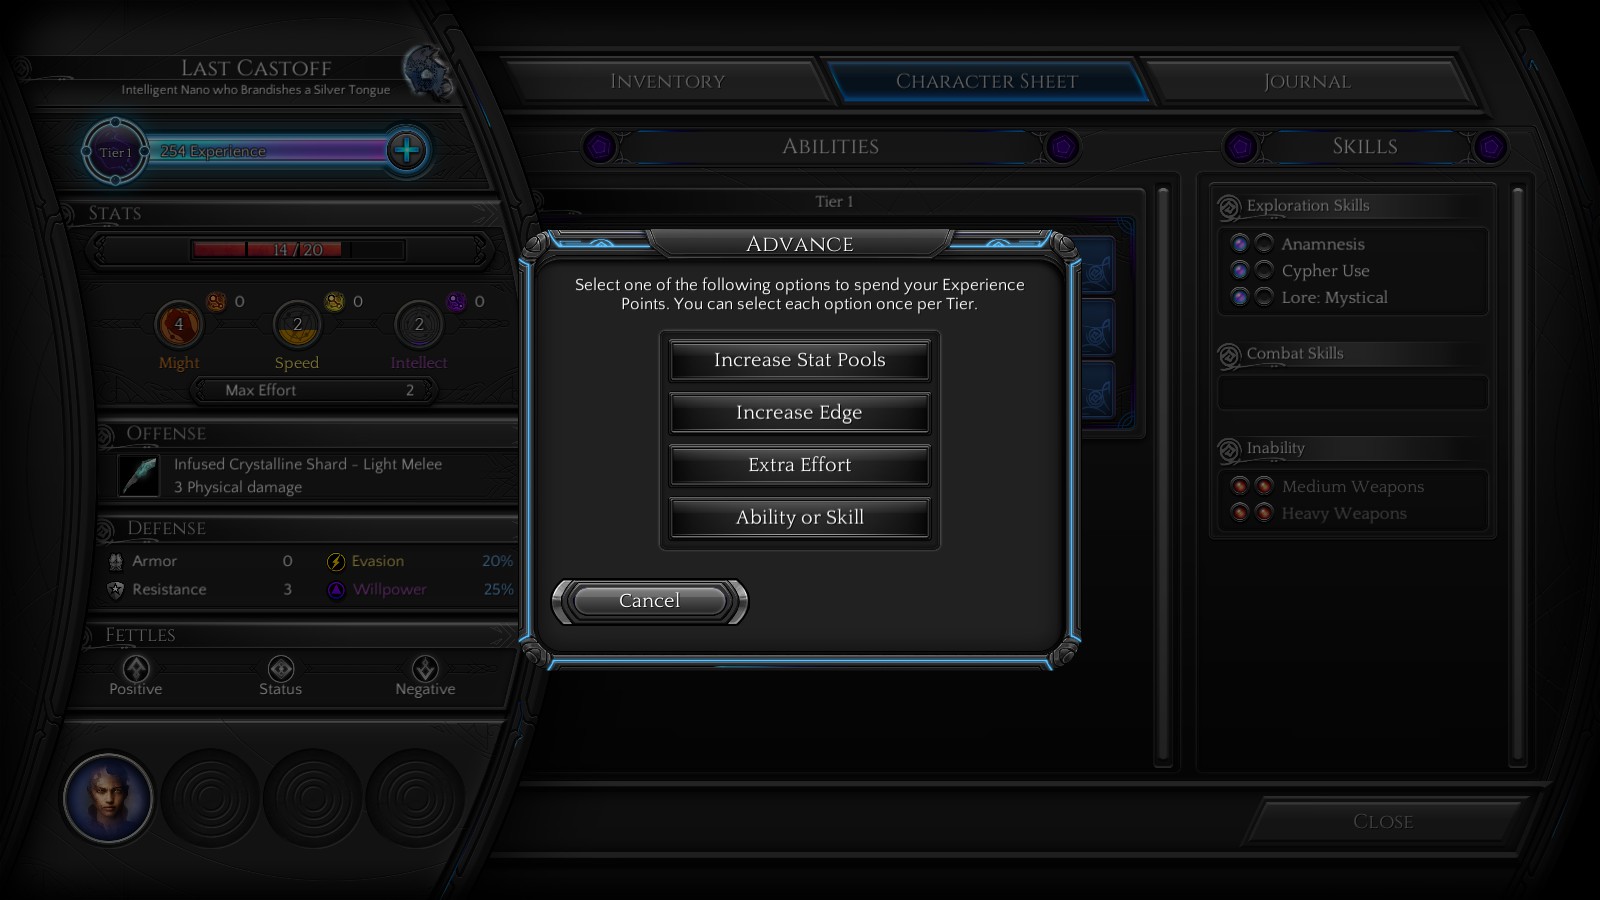 Choosing a leveling option
With these key differences in mind, you are now ready to explore the bizarre Ninth World and help the Last Castoff discover the answer to the question: “what does one life matter?”