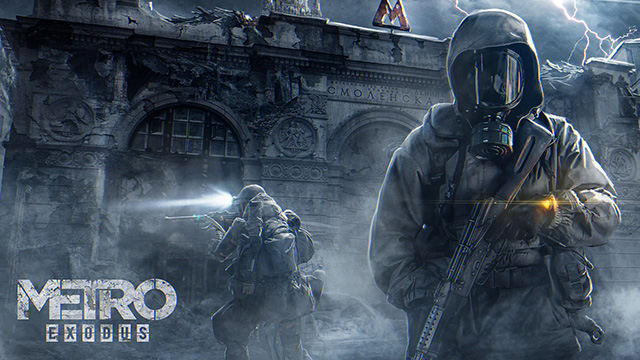
Although weapons are probably the most important pieces of gear in Metro Exodus, it’s your suit that prevents you from dying instantly in post-apocalyptic Russia. Fortunately, there are a number of various suit and armor upgrades in the game strewn throughout the game. Each new upgrade piece will add something unique to your suite, and help you complete missions in a far more effective way.
Below, we’ll show you all 13 possible locations for suit and armor upgrades in Metro Exodus. I also briefly look at the Top 5 upgrades at the end of this guide.
Metro Exodus Suit and Armor Upgrade Locations
Compass Upgrade
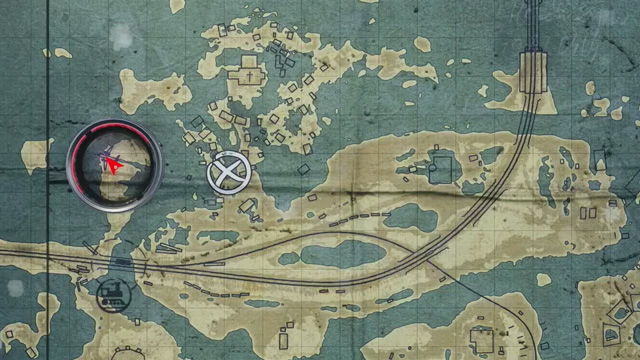
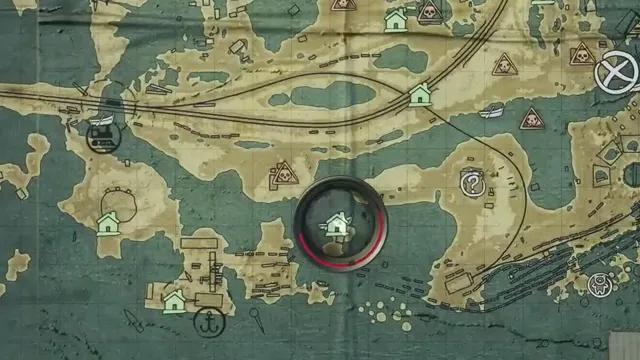
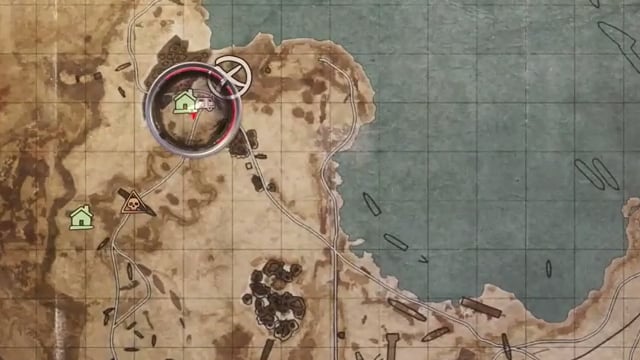
One of the most important pieces of gear you can find in Metro Exodus is a simple compass, which is available in the very first location, Volga. Just head north from the railway and locate a crashed airplane. Get inside and grab it from the cockpit.
Obviously, you will need to install it using a workbench. But as soon as you do, the compass will show you the way to your next objective without constantly opening and closing the map. It’s super convenient and saves you a ton of time.
Extended Filter Upgrade
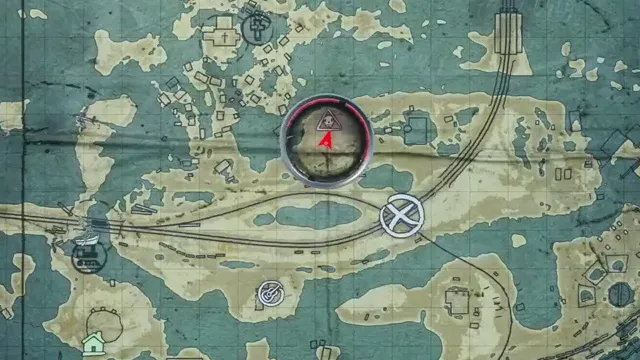
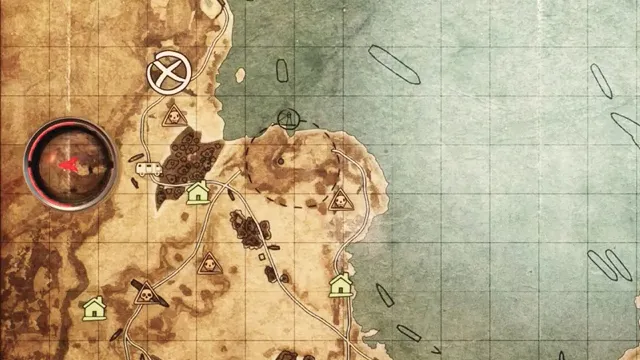
The initial gas mask filter in Metro Exodus isn’t particularly good, as it needs to be replaced every couple of minutes. But you can find an extended filter in the central-northern part of Volga.
It can be seen inside an abandoned bunker on one of the tables. As soon as you equip it, you will notice that this filter holds a lot longer than your typical vanilla gas mask.
Ammo Pouch Upgrade
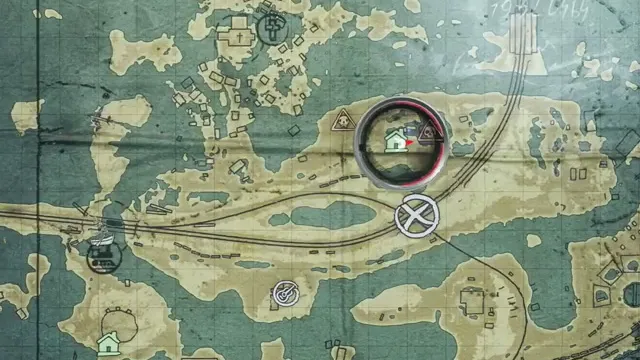
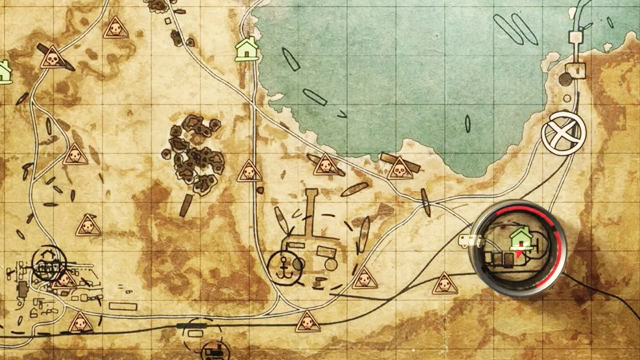
In the same area as before, you will find a prison facility that still holds several people. You can free them and as a reward, you will get a key that will play an important role later in the game.
But what you’re really here for is a large pouch for ammo, which can be found right at the backside entrance into the building. Grab it and you will be able to carry a lot more ammo than before.
Throwing Weapons Harness Upgrade
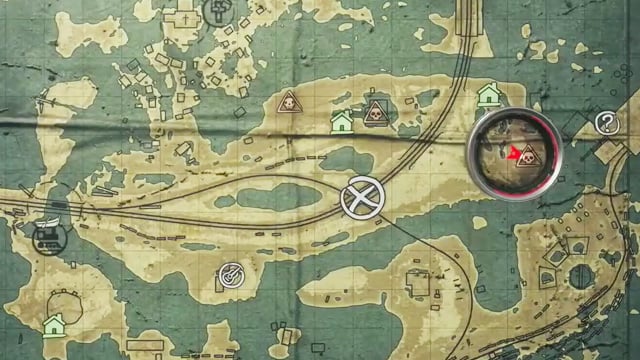
Carrying more ammo is great, but how about being able to carry more knives? If you’re a stealthier player, this upgrade is an important one.
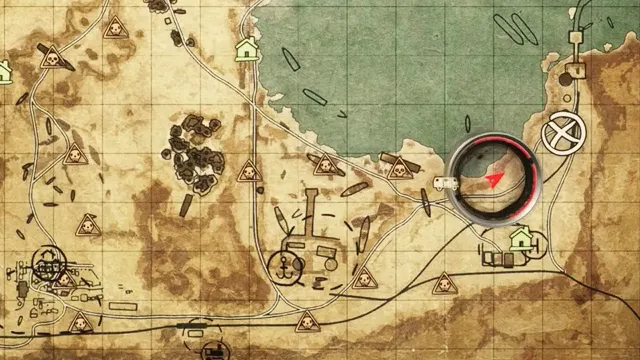
You can find a harness upgrade at the gas station located in the eastern part of Volga. Just enter the building and go inside the storage room behind the locked doors. I didn’t have to worry about keeping throwing weapons on hand after getting the weapons harness.
Battery Charge Controller Upgrade
The flashlight and night vision goggles are essential tools in Exodus, so it is a good idea to get the battery charger since it allows you to preserve a lot more energy. But be ready for one of the hardest puzzles in the game.
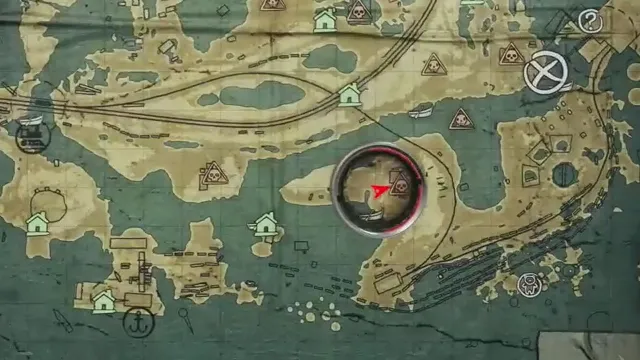
The battery charge controller can be found inside the fisherman’s house on a small island in the southern part of Volga. You can use your boat to get there; you will also need a can of gas to be able to start the generator located in the hut nearby. This will open the door into the house.
As you enter the house, switch on the electricity and follow the ramp to the second floor. Drop down through the hole in the floor and switch on another generator.
Enter the next room and open the metal door. Behind the door, you will find a man on the electrocution table. Unfortunately, you have to kill him by switching on the electricity. Now, you can finally get your battery charge controller.
Reinforced Helmet Upgrade
If you’re playing on a high difficulty setting, then you simply need to get a better helmet, as enemies tend to aim straight at your head. You can find a reinforced helmet in an abandoned building, which can be found to the east of the fisherman’s isle.Just go inside and equip it.
Metal Detector Upgrade
Finding ammo and metals can be really hard at times. Often, you simply don’t see these valuable items nearby because of low light conditions. But with a metal detector, you can’t miss a thing.
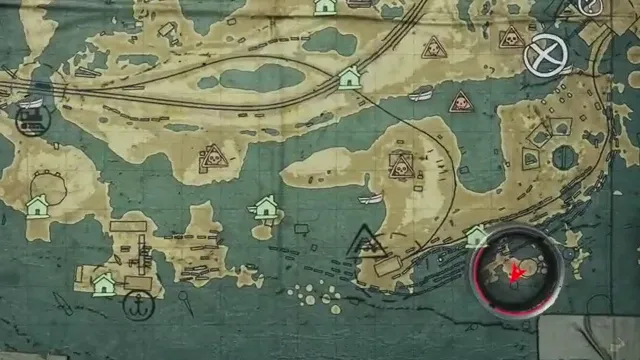
To get this upgrade, take a short trip to the southeastern part of Volga and break the lock on an abandoned bunker. Inside the bunker, you will find the metal detector on the table.
Night Vision Goggles Upgrade
The last suit upgrade in the Volga region is the night vision goggles. It can be found inside a terminal located in the eastern part of the map. If you’ve been kind enough to release the prisoners from the prison before, then you should have received a key that opens this terminal. I found the goggles on the table inside.
Motion Scanner Upgrade

If you enjoy playing in a stealth mode, then having a motion scanner is simply a must. It will allow you to detect the movement of your enemies from cover, keeping you alive longer. You can find this armor upgrade on top of the base at the northern part of the Caspian level. Just take all the ladders to the top floor, and you will find it on the table near a shelf with gas cans.
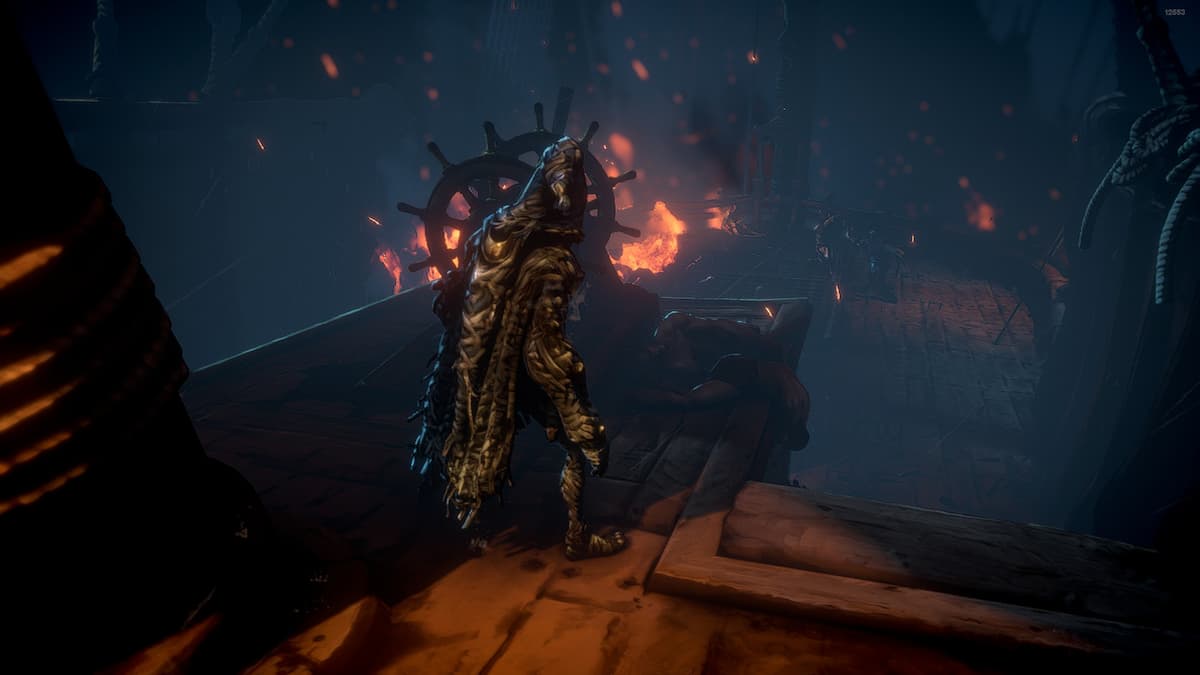
Extra Bright Flashlight Upgrade
Nights can get really dangerous in Metro Exodus. This is when all of the most furious mutants wake up and start hunting for prey. Fortunately, they are terribly scared of light, which you can produce using an extra bright flashlight.
All you need to do is go to the northern shore of the Caspian area, where you will find a shipwreck. Go inside and pick up the flashlight from the chest. Just be sure to get a battery charger before using it.
Armored Glass Upgrade
If you go west of the shipwreck location, you will soon stumble upon an inhabited cave. You will need to use the ladder to get up to it, but when you do, you will find an armored glass in one of the chests. This item is an alternative piece of headgear, which could be used instead of your helmet. But if you have the reinforced helmet from before, then you can skip this one.
NVD Amplifier Upgrade
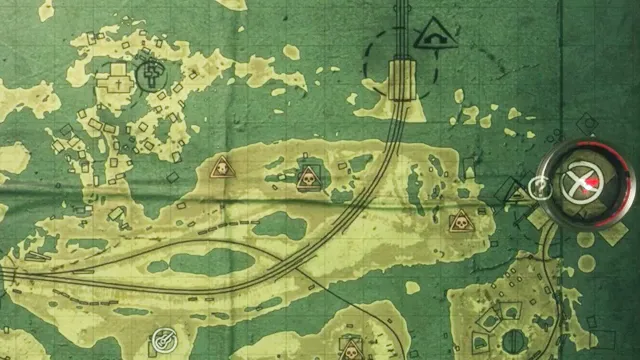
In the southeastern part of the Caspian area, you will find an abandoned air control center. Go inside the building and follow the stairs to the top floor. You will soon arrive at the radio room with an NVD amplifier. You can use it to turn your night vision goggles into a heat vision goggles, which is a far more advanced piece of gear.
Consumables Carrier Upgrade
From the previous location, walk a bit to the north; you will arrive at a fork in the road. Turn left, which will lead you to a small cave. Inside the cave, you will find a consumables pouch, which will allow you to carry even more medkits and other consumables.
Top 5 Upgrades
Remember that you don’t need to find all 13 gear upgrades, as most of them are not essential. However, here are the top five that you should be looking for the most:
- Compass
- Reinforced Helmet
- Night Vision Goggles
- Ammo Pouch
- Consumables Carrier
These suit and armor upgrades will make your time on the surface much more manageable. If you’re just starting out, then be sure to head over to our beginner’s guide. To see why we said Metro Exodus was almost the perfect game, you can read our official review.