I like to think of Sdorica as a gacha game for people burned out on gacha games, but better. I’m just going to assume you know what that means, and chances are you do if you’re a fan of Japanese-style mobile RPGs. Gachas are pretty cancerous.
Sdorica‘s gacha system is beyond fair, but that isn’t the draw of the game. The real draws lie in its wombo combo of great music, beautiful aesthetics (not A E S T H E T I C S, this isn’t vaporwave), surprisingly deep battle system, and team building. It’s a fairly effective combo. I’ve been having a lot of trouble putting it down.
There’s no need for me to gush about the game, this isn’t a review. It’s great, an easy A+ on the mobile market. But you’re here for a guide, and dang it, I’ll give you one.
We’re going to go over a number of pieces of advice for newer Sdorica players. It’s certainly not everything that should be touched on, but it should stand as a good groundwork for your blossoming orb-matching and party building skills.
General Tips and Advice
We’re going to start a little simple here and work our way up!
Keep an eye on your limited missions
Though most limited missions are event-tied and give you ample time to complete them, a handful are only available for a single day and can be completed daily until they are rotated for a different set.
At the time of writing, the daily limited quests can grant a large chunk of Soul Energy, Currens, Bequeather Scrolls, and even a Region Material Chest. These are all worth the short effort it takes to complete these quests.
What is 9 p.m. UTC in your timezone?

Events, missions, and a few other things reset at 9 p.m. UTC each day. It’s helpful to know what time that is in your timezone:
- 9 p.m. UTC = 5 p.m. EST (North America)
- 9 p.m. UTC = 2 p.m. PST (North America)
- 9 p.m. UTC = 9 p.m. GMT (UK)
- 9 p.m. UTC = 10 p.m. CET (Europe)
When should you infuse (pull)?
It’s still weird saying “infuse” instead of “pull,” but a pull is a pull no matter how the developers want to label it.
If you’ve played any other gacha game and have any semblance of self-control, then you saved the currency you used to pull until a special banner (pull event) came up. The same applies here in Sdorica.
There are two big pieces of advice I can give you on pulling:
- Only do full 10 pulls for 500 Crystals to get at least one SR
- Only pull during special banners

Why? Because you need SRs (super rare) and SSRs (super super rare). You are guaranteed one SR with a 10 pull, and special banners have a higher SR/SSR pull rate. There are also characters exclusive to special banners.
It’s hard to hold off, but crystals are hard to come by. It’s better to wait.
Can you be competitive without rerolling?
If you look around the Sdorica community, it’s hard to get an answer out of it on which characters are the best. But if you ask whether you should reroll, a fair number will say yes. Why is that? Wonderland Trials.
The current “endgame” lies in the Wonderland Trials, where players are ranked based on how well they handled the stage. Some characters are definitely better for this than others, and many players will tell you to reroll until you get a Sharice or Lisa or what have you.
Do you have to reroll? No, you certainly do not. If you’re looking to be competitive in Wonderland Trials later on and you know what you’ve gotten so far is sub-par for that task, you may want to consider it.
The fact is, every character is viable in its own way (except Sherlock — who even knows about that guy?). A character’s strength lies in its ability to play well with the others in the party and counter the enemies within the stage you’re on.
It’s not the rank, it’s the character
Being able to pull the same character in different rarities is getting more common in mobile RPGs, and it is one facet of Sdorica that can easily be said to be a double-edged sword.
You can pull a character you’ve been wanting for a long time, but if they pop out as R (rare), you may find yourself wishing you’d gotten something else. It can take a lot of time to get a character from those low ranks up to even SR if you don’t get lucky with further pulls and get their Minerals.
This makes it so there is no actual indication for which characters are actually common and which are rare. You can assume some are common if you get them repeatedly (Hestia, please go), but there is no other way to tell what a character’s true rarity is in-game.
This is why it’s so important to only do 10 pulls, and to only do them on special banners. You want strong characters, but they need to come out at a rarity at which they are actually useful to save you a headache and a whole lot of grind.
Don’t resonate randomly
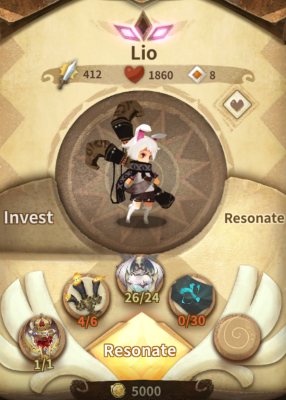 Yes, getting some characters to SR and SSR is important, but not every one of your characters is prime for it. Materials for SR and SSR resonation require luck or once-a-week grinding to get, making them rare and valuable.
You have to think about the synergies of the characters you currently have when they are at SSR — and that may be thinking far ahead.
How your parties do in battle doesn’t have as much to do with their level and rarity as it does their synergy with one another.
As characters get up to SR and SSR, their skills get amped up with additional effects, which ideally will synergize with at least one of the other characters in your party or have significant negative impact (damage reduction, enhance removal, heavy damage) on enemies.
Here are how many materials you need to resonate a character at every tier:
- N to R: 1 Tear of Valiant Warrior, 2 miscellaneous materials of the same tier, 6 Soul Energy of the same tier and color, 4 Minerals
- R to SR: 1 Tear of Dragon Slayer, 6 miscellaneous materials of the same tier, 12 Soul Energy of the same tier and color, 15 Minerals
- SR to SSR: 1 Tear of Ancient Dragon, 6 miscellaneous materials of the same tier, 24 Soul Energy of the same tier and color, and 30 Minerals
“Miscellaneous materials” are those like the tree branches and candelabrums you get from daily material quests.
With this in mind, you should plan your material use carefully. Don’t resonate to SSR willy-nilly, so you don’t find yourself in a position where you can’t resonate someone you actually want to just because you got impatient and wanted any SSR you could get.
One free SSR: Tica
You may want to take the time to finish the Training Venture Quests if you want a strong SSR sooner rather than later.
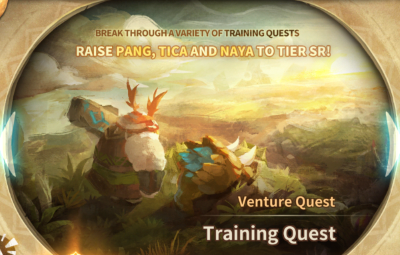
These quests take some time as a whole, but they teach you how to “git gud” and have the added benefit of granting you the materials to get Pang, Tica, and Naya up to SR. But you want an SSR, right?
Hoisting Tica up from SR to SSR is actually very easy, comparative to every other character.
- Complete every Training Venture Quest
- Resonate Tica to SR
- Go to the Progress tab of the Mission menu
- Find the mission that grants you a Tica Mineral for completing stage R3-5
- Complete it and the following missions for the remaining Tica Minerals
As an added note, Pang, Tica, and Naya are all strong characters. Tica herself is quite nice and worth going through the effort of resonating, but Pang is considered one of the best characters in the game at the time of writing. This is due to his durability and extreme damage at SSR.
How to get some characters’ Minerals
You primarily get a character’s Minerals via getting them in infusions, but there is one option some characters have that others don’t. That option? Character Storyline quests.
Not every character has Storyline quests, but those that do can get up to 11 Minerals for that character.

As of right now (May 10, 2018), you can get Minerals for the following characters via following quests. Do keep in mind, though, a number of them do not open until you complete prerequisite Story (not Storyline) quests:
- Dagger: 10 Minerals
- Crushfang: 10 Minerals
- Golemwalt: 11 Minerals
- Naya: 10 Minerals
- Angelia: 10 Minerals
- Theodore: 10 Minerals
- Jahan: 11 Minerals
You probably won’t be able to get all of these at once, but it’s good to know these are available.
In order to access these quests, you must have the character in question and then tap on the “Character Storyline” button at the top of their info screen.
Combat Tips & Advice
Whew, we’re finally out of the “general” section! I don’t have much to say in the way of full-on combat advice because I mostly run Jahan-oriented parties. No one cares about Jahan. Heck, you probably don’t run Jahan, and I don’t know if I’d even recommend it.
The above said, there are a few pieces of new player-oriented advice that may help you if you find yourself having trouble with combat.
Always check enemy parameters when a fight starts
Starting with the simplest here. Enemy parameters, both their HP/armor and their passive abilities, are must-have information to navigate a fight properly.
This is the shortest mini-section in this section, but it is important enough to highlight. Ignoring enemy passives in particular will get you killed, and checking enemy HP and your skill damage will let you use the appropriate skills for the situation.
Buffs/debuffs are absolutely killer
In my first week playing Sdorica, I really didn’t pay as much attention to status effects as much as I should have. But once it all clicked, they may as well have become the name of the game. “Status Effects: The RPG” isn’t a very catchy title, though.
I really cannot stress enough how powerful three stacks of any buff or debuff can be. Enhance, Vulnerability, Exhaust, Tear, Vigilance, Regen, Poison, you name it. Three stacks of any of these statuses is an immense help or detractor to whatever character, friend or foe, they are on.
Typical effects, like Enhance, Vulnerability, Exhaust, Tear, and Vigilance, stack up to 90% with three stacks. That’s right: 90%. That’s crazy.
Effects that deal directly with HP, like Regen and Poison, stack up to 30% of total HP per turn, which is also significant.
Making good use of these effects, in particular those listed as typical, is absolutely critical to both surviving and dealing as much damage as possible. It becomes necessary at a certain point and is a huge part of party building.
Usually health > armor, but …
… not always.
As you well know, true damage pierces armor and goes straight for your health. Some stages have enemies that do true damage, some don’t. There’s no shame in entering a stage, seeing what types of enemies you’re up against, and then leaving to come back in with more suitable characters.
There are some characters that have passives or skills that rely on armor rather than health, there are some stages where you need AoE protection, and there are other stages where enemies will attack more often if their target isn’t armored. These are examples of instances where armor is preferable over health.
Of course, it really boils down to the way you want to play. There is no harm in running an armor support over a health support most of the time, and the poster child for armor-granting supports, Angelia, is absolutely crucial to certain compositions.
The importance of target selection
The game tries to teach you how important target selection is via the Training Venture Quests, but it’s easy to forget. Choosing targets manually is heckin’ important.
There are a lot of situations where there are simply enemies you don’t want to attack or enemies you want to target over the others. If you’re struggling with a lot of stages, it’s either because your party composition isn’t up to par or you’re not making the right targeting selections.
Each character can only use skills on enemies in certain positions — though some can hit the selected target. It’s imperative that you pay attention to which enemies a character can hit when building your party.
Most gold-slot characters have at least one skill that can only hit the front enemy and that’s it, but black-slot characters tend to have more variety in that regard.
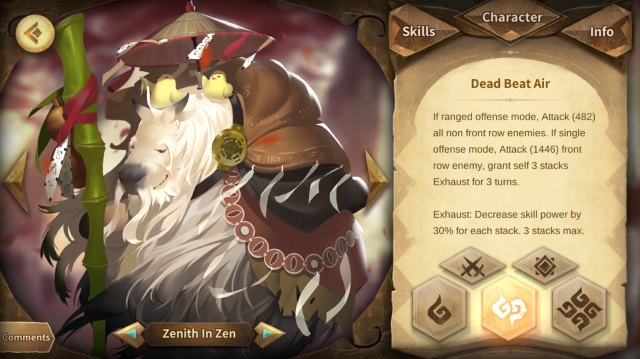
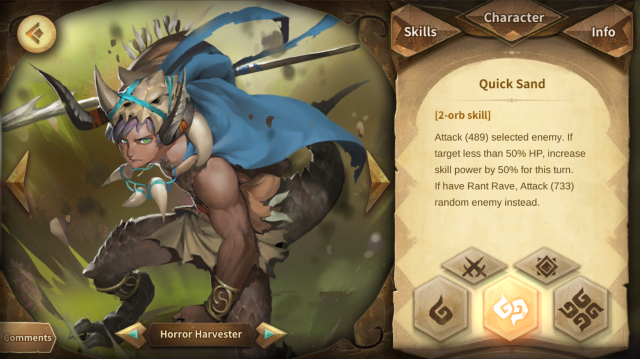
For instance, Fatima has skills to attack enemies in the front, back, at the lowest health, or even the selected target. For comparison, Ned’s damage is highest when he’s under Rant Rave and attacks a random target; and Yan-Bo’s 2 orb is tied to either attacking the front enemy or all non-front enemies, depending on his stance.
It’s not hard to figure out why targeting is so important. Figuring it all out is simple, even. Building a team to cope with it — not so much.
Past all of the above, choosing a target enemy has one other function:
Tank characters who counterattack will attack the enemy you have selected, rather than the one in the frontline.
This can be a little tricky at times, but if you’re running a gold-slot who retaliates, like Karnulla or Jahan, you can make optimal use of their counterattacks by choosing who they whomp on.
You must choose your target before you make your turn and the enemies attack to make this work, but you can change your target between counterattacks if you’re quick about it. That’s right: You can make multiple counterattacks hit different enemies in a single turn. There are definitely some stages where this is warranted.
Enemy turn order and you
This is one thing that seems important, but newer players don’t seem to put as much emphasis on it as necessary.
Enemy turn order will dictate when you use pretty much any skill past the first couple of turns. You have to balance mitigating, healing, and dealing damage throughout a fight, and your opportunities to do so are tied to enemy turns.
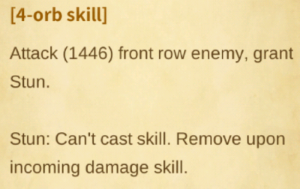
There are also a number of skills where it’s best to use them right before an enemy attacks. These can be taunts, damage reduction, dodge chance, or what have you. Stuns, such as Yan-Bo’s 4 orb skill, are also best done on the turn an enemy is set to attack so their turn counter is reset.
Much of Sdorica‘s combat boils down to proper targeting and using skills at appropriate times, which makes watching enemy turn timers tick down a key component to doing well in harder stages and characters like Puggi (who increases enemy CDs) actually viable.
A large portion of the advice given in this guide is geared towards newer players and doesn’t touch on many of the game’s intricacies, of which there are more than you may think. Currently I am working on a character synergies and party composition guide to help those struggling with building reliable teams.
My last bit of advice here is to make sure you are flexible. The game is developed with players using multiple parties in mind, and you have to do it. You have no choice but to work up multiple parties for different situations, and that’s a good thing. We’ll get into all that in the next guide. For now, thank you for reading. I hope this has been helpful to some degree and that you are having fun plowing through the challenges Sdorica has to offer!