So, you hit level 60 in Final Fantasy XIV and suddenly it matters how you play! Or perhaps it did all along, but you’re an immovable object masquerading as a player with the motto “I pay my subscription, I’ll play how I want!” And so the words of advice and suggestions that came your way as you climbed to level 60 were drowned out by entitled pride.
Min/maxing
I don’t want this heading to mislead — we are not talking of the pursuit to optimize your play, but to minimize effort to the max. Once you’ve reached the maximum level, there’s quite a backlog of abilities to consider. The constant truth in FFXIV is that there’s only two ways to play your job; good or bad, with very little in the way of middle ground.
Cooldowns and buffs for yourself or allies can often be used at opportune moments to breeze through enemy packs like teeth through fudge, whilst others might as well be used whenever they’re up — DPS classes often have a lot of these.
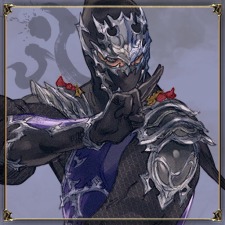
Like me, I’m a Ninja. Now shh and listen.
However, I’m about to remove the Smoke Screen and point out that players that take the time to effectively use their job’s entire arsenal are missing the crucial point — you can finish dungeon runs with just one or two abilities on your hotbar! You can ignore the other stuff with joyful abandon, unless you’re in one of those painfully elitist raid groups, obviously.
For those who happen to be curious, I have included a description of elitist playstyles at the start of each section, to give some comparison and scope of the energy they waste on convoluted strategies. And here they are, role by role. Just look at the difference in effort with min/maxing.
Tanks
 After grabbing a group (or two, if you’re geared and confident) with AOE (area of effect) attacks, cycle through heavy damage-reducing cooldowns. Rampart, Vengeance, and Shadowskin are staples for their respective jobs, while also taking strain off the healer. But start with the most potent ones to minimize damage on big groups.
The main point to keep in mind is that a large pack of monsters will do much more damage than the dungeon bosses — cooldowns are rarely needed for them, and in many cases you can switch to your DPS stance to help things along.
Min/max method
Grab as many enemies as you can, and ignore the cooldowns as the healer’s job is heal constantly, so don’t worry. They’d be bored otherwise, and might start dealing damage instead, which is just ridiculous. Focus single targets, or whatever you feel like! The healer can heal anyone else who takes aggro.
Healers
 Throw the tank an eye for an eye to further reduce their incoming damage, cast a Regen (Divine Seal it as a White Mage) or rely on your fairy to heal as SCH.
With all this and the tank’s self-buffs in tandem, the tank should be in a safe place for a good 20 seconds, where you can activate Cleric Stance and throw out some respectable AOE damage of your own, with the likes of Holy, Gravity, or Bane DoTs (Damage over Time).
If a pull drags out, Save those insta-heal buttons to top up the tank quickly (Swiftcast, Tetragrammaton, Lustrate, Essential Dignity), followed up with some regular heals/shielding. As a White Mage you can sometimes heal an entire pull just by popping Benediction when the tank gets low! This lets you continue the Holy death-spree, MP allowing. Shroud of Saints can be used whenever you anticipate a mass usage of your MP directly preceding its use.
Min/max method
Cure/Physick/Benefic your tank repeatedly, never stop during pulls, even if they’re at max HP. Feel free to Medica II, but definitely do so every 10 seconds at least during bosses. It’s a 30 second buff, but surely Medica is pointless now you have Version 2. Only use Shroud of Saints when you’re already at the brink of 0 MP. Vote to kick the tank as soon it’s convenient if he fails to hold aggro from your rabidly unnecessary group heal spam.
Golden Rule: Healers are for healing, that’s why they’re labelled healers. No matter how huge the opportunities, do not help kill enemies with any of your several damaging spells. You’re a Healer and there is no arguing with that. This is why the whole party needs to be at 100% HP at all times. Cleric Stance is just a leftover relic from FFXIV 1.0.
DPS
Individual DPS jobs and their rotations would be a whole bunch of guides on their own. A good half of the battle in dungeons, however, is simply popping your best damage-boosting cooldowns and blasting anything that’s 3 or more targets with your AOE attacks.
As your TP runs dry (if applicable) and Invigorate isn’t ready, you can revert to single target attacks, but hopefully by this time the pack is nearly dead, and numbers have dwindled. Besides that, bosses are great practice for your core single-target rotation–Just take a few minutes to read and understand your long-earned abilities, and with time you’ll gain proficiency and be the respected damage-dealer that gets commendations.
Min/max method
Prepare for the easiest ride of your life! Use your abilities and damage-boosting cooldowns whenever you please, in whatever order. The best thing about DPS is that no matter what you do, other players in the party will eventually make up for whatever damage you should supposedly be dealing.

The satisfying sound of Dragoon’s Full Thrust is addicting, you’d be a fool not to use it repeatedly. Black Mages ice spells are so much weightier in my opinion that it’s beyond me why anyone would choose Fire IV or the so-called “Triple Flare”.
AOE attacks just take too much TP, so it’s safe to keep those off the hotbar too. Just stick to single-target attacks and work your way through the 6 or 7 enemies when the tank makes a big pull. It can take some time, but you won’t notice when you’re watching the backlog of Dexter on Netflix. Can you believe those episodes are an hour? It flies by.
An important point for Bards in particular, is to always save all of your MP for Mage’s Ballad, no matter how much any mages in your party would benefit from Foe Requiem. It’s the safe option to simply wait until your healer types some variant of “Ballad please” in the chat log, a minimum of five times.
Go take your min to the max!
As you leave this article, you will now have a clear and carefree sense of how to take your minimum effort to the max. Go show everyone how to tank, DPS, or heal the lazy, but super effective way.
That dungeon took an hour!’ *victory fanfare*

