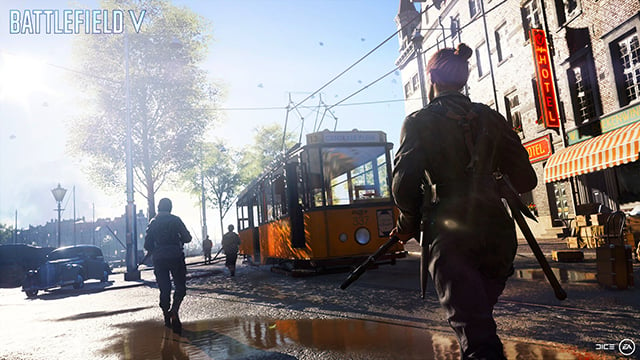
Battlefield 5‘s game modes are all fairly straightforward, with few wrinkles to muck up veteran players or confuse newcomers. Putting the small number of maps aside (even by a Battlefield title’s standards), this you can see this best in its infantry focused modes: Domination and Team Deathmatch.
The two modes are two sides of the same coin. One speeds up as you capture objectives while the other stays at a relative pace but rotates around a central, undefined point. The goal of both is to reduce enemy tickets to zero, and you cause ticket bleed in both by getting kills.
Simple. Classic. Fun.
Getting the most out of “instant action” modes is a tale as old as the FPS, but because of the Class system and level design, it takes a little finesse.

The Road Less Traveled
Conventional wisdom for playing close-quarters, kill-based game modes is to stick to the outskirts, play the spawns, and always have a quick escape route.
In Battlefield 5, having an escape route is your best course of action. Here’s why:
- The outskirts of domination maps are dead zones: While they make a great place for Recon players to post up and cover a sight line, most class abilities favor a more in-your-face approach, Medics and Support, especially.
- The center lane has many ways out: Running down the middle lane of a map still puts you in a kill box, but only if you do it for extended periods. With full destruction enabled, and easy access to every building on the map, there is always a way to move perpendicular to the center lane without actually being on it.
- It’s hard to predict a squad spawn: In Call of Duty, it’s easy to predict where your enemies will spawn based on where your teammates are. Battlefield hasn’t had that feature in a long time. Just because you have full control of one end of the map doesn’t guarantee your safety. One second you’re safe, the next an entire squad runs up behind you, guns blazing.
The best advice, then, is to move in the middle spaces between the outermost and center lanes. Cut from house to house, and be sure to check a window as you move through. Be aware than mantling is significantly slower over large obstacles now, so use doors whenever possible.
Or make your own. You can do that.
Funnel as You Fight
If you can get more than one or two kills per life, you can make a more concentrated impact on enemy troop movement by funneling them in a direction. You might want to just plow through your foes with as much prejudice as possible, but take a step back and consider each gunfight before it happens.
- Does killing this enemy help my team, or will it just get me and my squad seen?
- Where is this enemy in relation to the objective?
- How many of his friends might be around?
- Am I otherwise in a position to capitalize on his death?
If you’re uncomfortable with the answers to any of these questions, you should probably let the guy or gal pass. Your stats will thank you later.
Why? Because if you can get into a position to take out whole squads and keep them off of you for a little while, you create a funnel. In other words, you force your opponents to move in a direction of your choosing, either to remove you from your position or go around you altogether.
In either case, you’ve put them out of position, which creates an opening for your teammates. Whether they take it or not is entirely on their shoulders, and I needn’t tell teammate stories. There are simply too many of them
Funnels take many forms, but there are three primary ones to go for
First is traditional: You make your enemies move down a different line like they’re moving down a funnel. To accomplish this strategy, you need to move along their flank, taking out one or two enemies at a time to make yourself seem like you’re more than one man. If you can stay alive long enough, most foes will choose not to go down your lane, taking a safer path. And that’s exactly what you want.
Second is what I’ll term the “aggro-funnel.” It’s basically the same principle, but instead of misdirection, you want the enemy to know you’re just a person who doesn’t think they can be stopped, “So come and get me, you morons.”
Make enough enemies mad and you can draw them away from whatever objective they had before. Keep it up and you might even call down the wrath of a tank or plane, denying important assets your opponents could use for other purposes.
Your biggest challenge with the “aggro-funnel” is your ammo supply, and therefore is probably best left to a Support.
The third funnel is, for all intents and purposes, a suicide mission. You are the funnel. Your goal here is to punch through enemy lines with enough force to create a space behind you for your teammates to fill. You’ll be running into and through hostile fire from every direction, but take out enough of them and if nothing else give yourself the satisfaction of a rampage well run.
Any class is capable of this last method, but Recon is challenge mode unless you’re something of an FPS savant.

Class Composition
Let it never be said you can have too many Medics. Because you can’t. Revive is as strong an ability as it ever was, and even though healing takes longer now, the fact you can dole it out and never run dry makes a single Medic the kind of force multiplier no squad should be without.
It helps that they can heal on the go no matter how much or little health they might have. And with guns built for close-range combat, you can be a constant thorn in your enemy’s side until you run out of ammo. Add in some smoke grenades and you’ve got soft area denial.
Don’t neglect the sheer power of the Assault class. What they lack in teamplay utility they make for in sheer force. They have the most versatile weapons in the game and enough explosives to make mincemeat out of buildings and the people camping inside them.
They need a squad to reach their full potential, but because they’re not burdened by needing to heal, resupply, or cycle a bolt, they can get to power positions quicker than anyone else. And once they’re there, the Assault can open up entire objectives, Domination or not.
Supports are a nice to have, but I don’t think they’re vital to squad success. That doesn’t mean they don’t have a place on the team, because keeping everyone stocked up and denying important lanes is an important trait. The problem is, much of what they do is better done by an Assault player.
The main reason to choose Support is the overall power of their weapons. While they’re not as one-size-fits-all as assault rifles, their consistency across obscene ranges is something to be feared.
Recons are situational, but they can make all the difference. One properly place flare or spawn beacon can and has turned the tide of a match. The ability to decide when and where your squad deploys opens up too many possibilities to name, and even teammates have a better shot at taking out enemies if they know where they are at all times.
Sniping can be fun too, I guess.
TDM and Domination might not be the most tactically complex modes in Battlefield V, but they can be some of the most fun. Use the tips and strategies presented here as guides, but feel free to invent your own crazy plays. That’s what the “Battlefield Moment” is all about.

