Phoenix Wright: Ace Attorney – Spirit of Justice isn’t just a mouthful of a title, it’s the game fans have been clamoring for since 2007’s Trials and Tribulations. True to form, not only are the cases more challenging then ever, it’s just as difficult as ever to know what to do next, who to talk to, or what pixel needs to be hunted down before the game lets you continue.
Episode 2, The Magical Turnabout, sees players puzzling out the secret of a magician murdered mid-performance, but the real puzzle is working through the game’s ‘Investigation’ mode, and the lengthy ‘Trial’ segment that follows. This guide attempts to be as spoiler free as possible: when the introduction of a character constitutes a spoiler, pronouns are used for their first appearance, but their name, as shown in-game will be used in all subsequent instructions.
Suggested Navigation: In Investigation Mode, use your browser’s find function to look for your current in-game location; in Trial Mode, search for the name of the current witness to find a guide to their testimony. In Investigation Mode, it is possible to progress in a slightly different order than listed below: if the options presented do not appear as described, double-check that all proceeding actions have been completed, and try again.
The Magical Turnabout: Investigation
Playing in Investigation Mode involves two different activities: talking to characters to advance the plot, or examining different locations to find evidence for the trial section. For Talk, every topic must be read at least once to proceed, while Presenting evidence during Investigations is only occasionally required. The only exception for Talk is with each chapter’s assistant character: the dialogue options “Any ideas?” and “What to do” are entirely optional.
Experimentation is highly recommended, and may lead to unexpected dialogue or scenarios. Certain items can elicit unique responses as well: Present the Attorney’s Badge to any other character, and they’re guaranteed to react. Examining thoroughly is also recommended, although only the items required to proceed will be listed below.
Investigation – Day 1
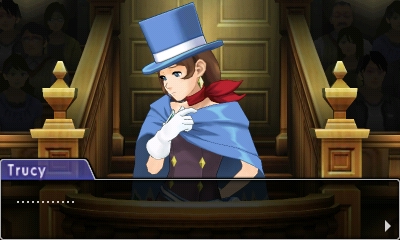
- Talk to Trucy Wright
- Move to Stage
- Move to Wright Anything Agency
- Move to Detention Center
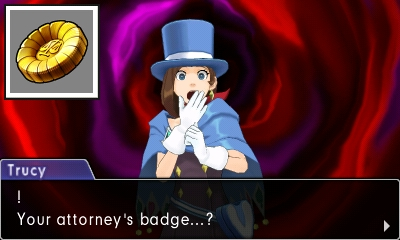
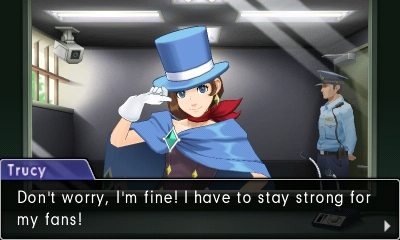
- Talk to Trucy Wright
- Perceive Trucy’s Eyes while ‘I’m fine!’ is being spoken.
- Present Attorney’s Badge
- Talk to Trucy Wright again, select the new option
The Leg Work Begins

- Move to Penrose Theater
- Talk to the Police Officer who appears.
- Move to Dressing Room
- Examine the bag and blue notebook (on the table), green and purple luggage (on left table) and poster (left wall).
- Move to Stage
- Examine the boxes, curtains, camera and crashed dragon prop.
- Rotate to the back of the stage by pressing left and right on the D-Pad during Examination mode.
- Examine the sword, and then the entire coffin: the white outline on the front, back, sides and bottom
- Dust the area: thoroughness is key. Apply powder to any areas that seem incomplete, and blow off the excess powder until you are prompted to compare the fingerprints.
- Compare to Mr. Reus
- Dust again, but this time, manually select the most distinct fingerprint, and present it for examination.
- Dust to the left of the emblem, on the left edge of the coffin.
- Compare to Bonny de Fame
- Dust the top of the coffin and examine any of the fingerprints.
When you finish, Ema will raise the curtain, revealing the backstage. To move there:
- Examine the backstage area
- Examine the sign reading Understage, the smaller coffin, guillotine, bucket, and winch.
- Examine the ladder last, which will move you to the catwalk above the stage. On the catwalk:
- Examine both winches, both the unoccupied green cushions, the caped dummy laying across the closest one, and the rabbit and moon props.
- When you’ve finished, the characters will conclude their business and move off the stage to the auditorium. Examine the new figure on-stage.
- Talk to the big man himself, Roger Retinz.
Questions for Bonny
- Move to the Dressing Room
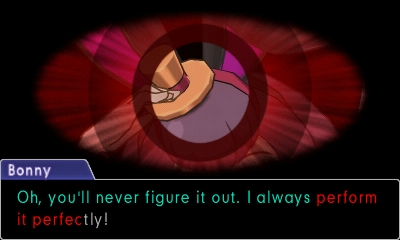
- Talk to Bonny de Famme
- Percieve her hat while she says ‘perform it perfectly!’
- Talk to Bonny again, picking the new option.
- Move to the Detention Center, and Present Trucy with her own notebook.
- Talk to Trucy again.
- Move back to the dressing room, this time, Examine the green board on the table (see above).
- In order, Examine the front of the board, screw in the bottom right corner, backside of the board, and the black sheet of paper.
Beneath the Stage
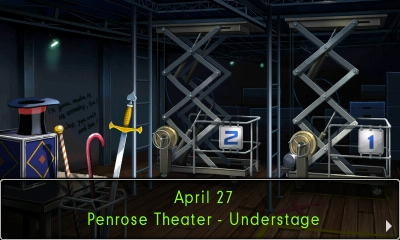
- Move to the Stage area again, Examine the back of the stage, and Examine the Understage sign.
- Examine Stage Lifts #1 and #2, the sword and stand, the red tape in an X on the ground, the hat, the two ladders, and the writing on the wall.
- Move to the final area of investigation, the Take-2 TV Studio
- Examine the standing crewman, the big screen, and the coffee adorned workstation.
- Move back to the Wright Anything Agency
- Have another lovely Talk with Roger Retinz to end the Investigation.
The Magical Turnabout: Trial
Pressing statements and Presenting contradictory evidence is the game here. Sometimes, you’ll also be asked to choose from a list of options, often to give theories about the case or to justify an argument. While presenting the wrong piece of evidence results in a penalty, pressing certain statements, and picking incorrect answers can result in some fantastic moments. Again, only the most necessary steps are listed below.
Witness: Ema Skye

- Press Ema’s 5th Statement. When new testimony is added:
- Present Fingerprinting Results against the new 6th Statement.
- Choose option 2 first.
- Choose option 3, and wait for the next witness to be called.
Witness: Bonny de Famme

- Press all of Bonny’s statements to proceed.
- Choose either option.
- Select Happy(the smiling green face) at the 6th statement.
- Choose the 3rd option.
- Present Trucy’s Statement to the new 6th statement.
- Choose the 2nd option.
- Present Fingerprint Results when challenged for proof.
Witness: Bonny de Famme and Suprise Guest-Witness 

- Press the witness to your content. While it won’t change a thing, the real take away from this testimony is the plot.
- Present Fire Bucket at the 3rd statement, then Choose the second option.
- Next Present the Sword Stand.
Witness: Trucy Wright
- Present Show Footage at the 5th statement.
- Watch the following videos, and pause when cards come flying towards the camera. Present any of these cards to end this cross-examination.
Witness: Roger Retinz

- First, Press the 5th statement, and when challenged, Present the Clipboard.
- Retinz will update his testimony: at the new 5th statement, Present Trucy’s Note, and Select the 3rd option.
- Respond to the following challenges: first Present the Thirteen-Year-Old Poster, then Present the profile of Roger Retinz.
- On the poster, highlight and Present the scars on Mr. Reus’s right arm.
- Retinz will give a new piece of testimony: Press every statement.
- Select the second option, and review the show footage one more time.
- Pause the video right after Mr. Hat (The caped dummy) disappears in a puff of smoke. Go frame by frame, until a shadow appears on the curtain next to Bonny. Select this shadow, and Present it to the court.
- Present the Crime Photo.
- Select Option 2, then during the next segment, select Options 2, 3, 1, and then 2 as they are presented.
- Present the Fingerprint Results, and watch the result play out.
- Some time later, remember the last peice of unused evidence, the Gramaraye Notebook. Present it to finish the episode.
Phoenix Wright, and this Guide will Return In