Getting To The Lost Sinner:
From the Sinners Rise bonfire, you will notice that there are three royal guardsmen in front of you, all with giant crossbows. Running up to one will cause him to switch to his sword and chase you, use this along with the small ledge (the one with the ladder) to pick them off one at a time.
After dealing with the three stooges, head down the ladder and continue down the stairs. Another royal guard, and three more in the room to your left. If you go around the corner you will see that the stairs quickly drop off to your doom, although there is an item at the edge. You can range them or cause them to switch to their sword. Fighting one at a time is a lot easier than fighting three.
Take the elevator down to the flooded cells, when you notice the elevator begin to slow down, you can jump off to a secret ledge which houses another item for you. From there you can simply drop off, you should take very little, or no fall damage from this. You will notice that there is only one way out of the room and it’s filled with waist-deep water.
On your immediate left is the first water giant, grab his attention and then run back into the elevator room. Fighting these guys in water is unwise. They are slow, but they hit like trucks. You can either spam arrows into their faces until they die (usually takes about 20 arrows with a +10 Magic Bow for me) or fight them head on.

If you want to fight them head on, then you want to yo-yo in front of them. So move in to allow them to attack, quickly move back to avoid the attack, and finally move back in to hit them. Use the yo-yo technique if they are swinging at you, if they start doing their tail spin, or dive attack then back off. Those attacks will take at least 60 – 80% of your health away; keep your shield up.
There are two more water giants waiting for you, one is to the right and another is to the left. Do not run up the middle, this will grab both of them and you will die. There is a hole in the wall before the right water giant, simply walk up to him and then run back to the elevator room. Wait for him to show up and kill him, do the same thing with the last water giant.
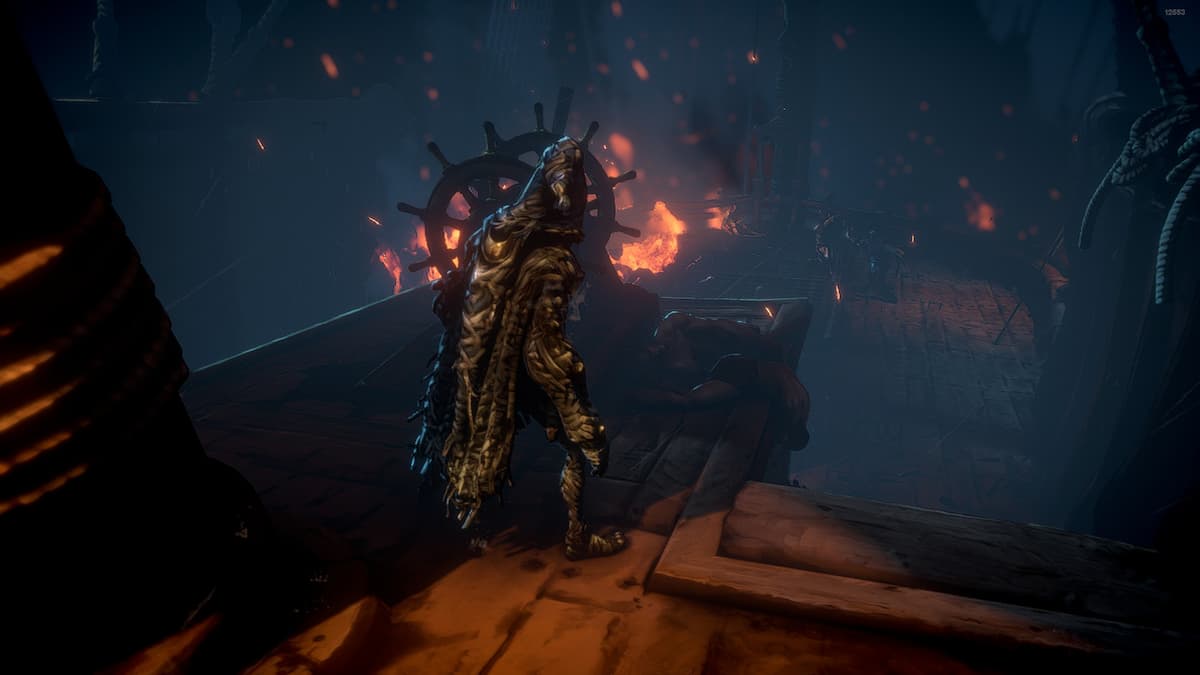
Heading deeper into the flooded hallway, you will notice on your right is a mummy and a small staircase. (NG+ has a red spirit mummy on the left as well) Kill the mummy and head up the stairs, then kill the next mummy on the right side. Dont worry about the mummy on the left walkway, he will not engage you unless you are practically standing on top of him. From the walkway you want to head to the door leading out (NG+ you can unlock this and the door on the left with the Bastille Key) For your first play through, you need to jump down directly in front of the door between the two cells. Make sure you are really close to the door too, so you do not wake up the mummy’s in the flooded cells.
After opening the middle door you will notice a narrow path that leads directly to the mist door. There are two staircases on the left and right leading to small rooms (These rooms have two red spirit spear mummy’s in NG+) Use the Bastille key to unlock these rooms, you will notice that there is a funnel with some oil leaking off of it. Use a fire bug to light your torch (or head back to the bonfire and light it from there) and light the funnels on each side. This will light up the room, allowing you to target The Lost Sinner and making the fight a bit easier.

The Lost Sinner:
Having a shield with 100% damage reduction makes this fight all the easier. Make sure you have one and keep it up, only lower your shield if the Lost Sinner backs off from you. You will notice that she takes a good chunk of your stamina away with each hit, so replenishing it between assaults is a wise choice.
Right off the bat, the Lost Sinner will charge towards you with a thrusting attack. You can block it or dodge to the left, I suggest blocking it. You will notice that she is quick and nimble, and has few openings for a decent hit. Keep circling clockwise around her with your shield up. She has a two-hit combo that can turn into a three-hit combo, so be careful when you think she’s open. Her third hit in the combo is a down strike that can obliterate you, so it is best to take your time on this boss.
Most of the time after she does her two-hit combo, she will jump away when you try to attack her. If you attack quickly enough you can hit her before she jumps. But if you are late you can leave yourself open for one of her slash or thrust attacks.

Stay close to her and keep circling around her, if you gain distance between her you will notice that she will do her running thrust attack. Although if you are low on health and need to heal, start backtracking away from her. There will be a couple of times where she will lull in her aggression, it is hard to tell exactly when, but it is usually right after the two hit combo. You can avoid both attacks by gaining enough distance between you and her, and give you enough time to pop an Estus Flask.
Don’t bother trying to parry her attacks, she recovers far too quickly and makes parrying worthless. She is also strong against fire attacks (I learned this the hard way with a +10 Fire Morning Star) so switching to a non-fire weapon would be in your best interest.
Stay vigilant and this fight is yours!