Space keeps expanding and so does Starbound. The game’s developer, Chucklefish Games, recently released Starbound 1.3 which has re-implemented mechs – which were present in the beta as techs – as both space and ground vehicles.
How does one build or assemble a mech? Well, sit down and grab a pen and paper to make notes on your blueprints. Here’s a guide to help you get started.
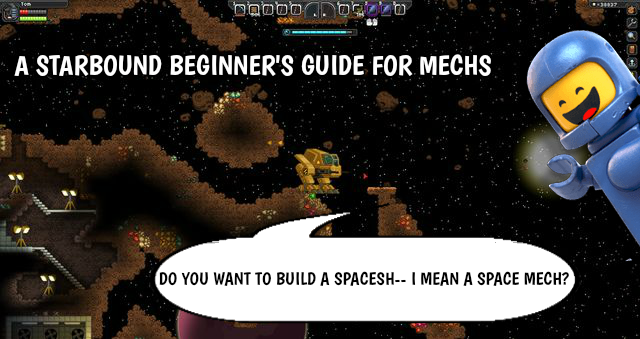
Getting Started: Your First Steps to Building Mechs in Starbound

Maybe he’ll like building space mechs too?
Before you get overzealous building mechs like Benny from Lego Movie, you can’t build a mech right off the bat. First, you need to meet with penguin scientist, Dr. Akaggy, who will give you a quest. He is located at the outpost in the mech station. If you don’t complete his quest, you will be denied access to Starbound 1.3‘s Mech Assembly Station.
I know most gamers don’t enjoy mandatory quests, but don’t be discouraged. His quest puts you behind the wheel of a mech, where you must complete a fun test course. Dr. Akaggy teaches players how to move around, raise a shield, and more – all the skills you need to be a mech pro. Upon completion, you get your own mech as a reward for your patience and flight training.
Time to Fly High — Controlling Your Starbound Mech

Just believe you can!
During your flight training with Dr. Akaggy, you’ll learn how to use a mech. Let’s go through it in a step-like fashion:
- Deploy your mech while on your ship using the Deploy Mech button, which is located on the right side of the screen. It only appears if your ship is parked during a space encounter, in an asteroid field, or while orbiting a potential planet to visit.
- Upon deployment, you’ll be sent to a planet or area in a capsule-like pod, which breaks open upon arrival.
- With gravity: Your mech’s movement is similar to player controls. Hitting left means you go left, right goes right, etc.
- Without gravity: Your mech’s movement is completely different. When moving, the mech accelerates in the direction you choose while using jump will make it stop.
- Arms are activated using your mouse. Left click activates your left arm, and right click activates your right arm.
- Other actions: F toots your mech’s horn and the Interact command makes you exit and enter the mech.
Some Assembly Required — Building Your First Mech
Once you make your way back to Dr. Akaggy following the mech training mission, he’ll allow you access to the Assembly Station where you’ll unlock several starter mech components that can be crafted with salvaged materials. Just make sure you have the right materials before crafting some of the basic components.
Mainly, these early mech components require a lot of titanium. Future mech parts and mech blueprints will require different resources.
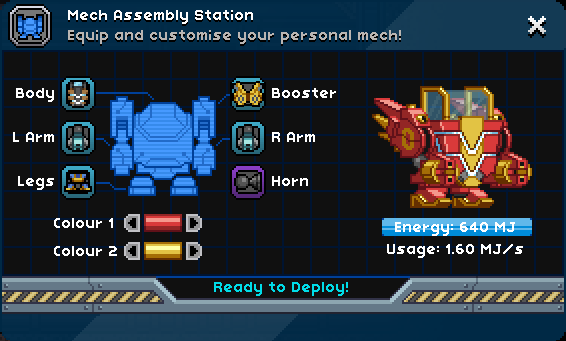
That mech looks really stylish.
There are several components you can customize for your mech: body, left arm, right arm, booster, legs, and horn. Each component has varying defense stats and shows how much energy it has and its usage (except for the horn). There are also special crafting recipes you can unlock later on through various means, like finding a blueprint or speaking to a particular NPC. But if you talk to Dr. Akaggy again, he’ll give you more quests that will unlock more blueprints.
Starting Mech Components
Here’s a list of the most basic starting assembly components in Starbound 1.3 and what you’ll need to craft them:
- Basic Mech Legs
- Requires 10 Titanium Bars
- Basic legs for basic mobility
- Automatically learned after first acquiring a mech
- Drill Mech Arm

- Requires 20 Titanium Bars
- Automatically placed into the Right Arm slot after completing the Test Drive quest
- Serves as a basic mining drill
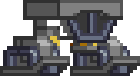
- Mech Bodies

- There are different basic bodies that vary depending on a player’s race. The body to the right is available to Apex players
- All mech bodies require 40 Titanium Bars
- Automatically learned after first acquiring a mech
- Basic Mech Boosters

- Requires 15 Titanium Bars
- Automatically learned after the Dr. Akaggy Test Drive quest
Things to Keep in Mind After Assembling a Mech
Mechs have their own energy reserves, which are shown as a blue bar above the vehicle. Using the mech depletes that energy reserve, but so does receiving damage and attempting to pilot a mech on a planet without a body resistant to that particular planet’s hazards; these will deplete energy at a more alarming rate. While weapon usage does not deplete energy due to it being accounted for by a mech’s arms, you need to be careful that your energy bar doesn’t reach 0.
Otherwise, you’ll be ejected from your mech where one of two things can happen. If the mech was brought to 0 energy through damage, the mech explodes. If not, the mech vanishes without an explosion. But either way, being trapped in space is not a good time for someone who needs oxygen.
Unless you’re a robot space core, don’t get stranded
in the vacuum that is spaaacceee!
Mixing and Matching Mech Types in Starbound
Fortunately for space explorers, mechs provide a safe escape and an armored shell to help you in airless environments. Plus, different mech bodies give different resistances like:
- Violium-tier Mech Bodies
- Resist Deadly Radiation
- Dursteel-tier Mech Bodies
- Resist Deadly Chill
- Solarium-tier Mech Bodies
- Resist Deadly Heat
If you don’t have these bodies while navigating those types of planets, your mech’s energy will drain at a higher rate.
Get Building!
Congratulations! You have completed the Mechs 101 Curriculum. I hope you were taking notes for your final exam!
Just kidding. Instead, let us know how your first flight and building experience went with your first mech in the comments below! And be sure to check out our other Starbound guides for even more tips.
- Starbound: Some Helpful Tips for Beginners
- Starbound 1.0+: How to Craft Your First Set of Armor
- Quick n’ Dirty Starbound 1.0 Weapon Overview Guide
- Upgrade Your Starbound Ship Faster With These Tips
- How to Build a Space Station in Starbound Version 1.3


Published: Jun 28, 2017 12:02 am