Are you really bad at Fortnite and can’t ever seem to beat those ultra skilled players? The free-to-play Creative Destruction may be just the game to keep you in the Battle Royale action while honing your skills against a less entrenched player base.
Much like the game it takes its inspiration from, regular limited time events show up in Creative Destruction. The 25 vs 25 Defend The Captain mode arrives this week and it requires a completely different strategy than the typical solo game.
Want to help your team get a win? Let’s dive into how you should be playing!
Defend The Captain Mode Landing Strategy
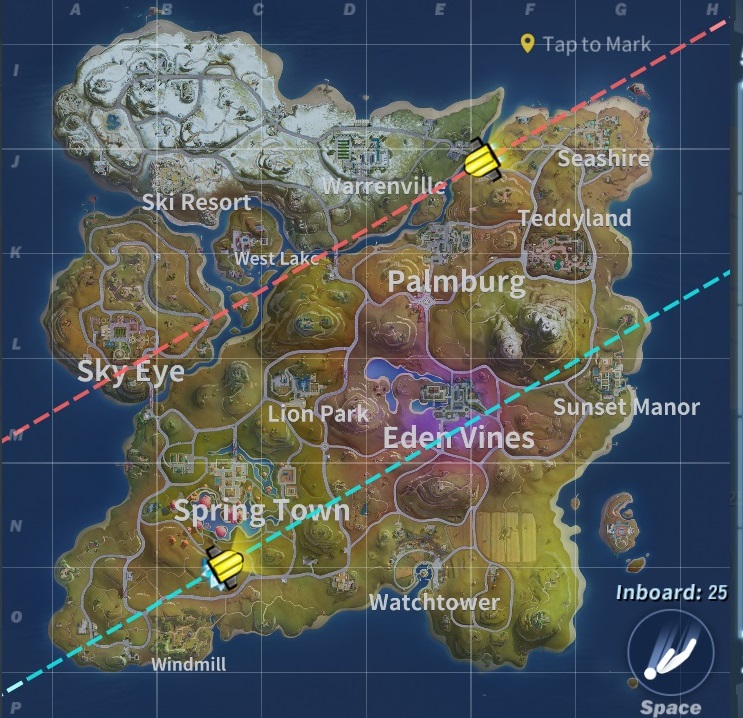
This is one instance where landing at the major locations on the map is actually better than finding something out of the way that won’t be swarming with players.
Make sure to pull up the map while on the battle bus, because you get to see the direction of the enemy team’s movement. Where they land should play a huge role in where you land so you can set up a defense and prepare to attack their captains.
You want to land and move as a team, setting up defenses and then either falling back or pushing forward as a mass.
The storm still shrinks the play area in Defend The Captain, so think of your team as a swarm of locusts in the early game. Completely clear out a major area like Spring Town or Teddy Land, stripping out all the walls for materials and taking all the loot.
When the location is stripped, fall back to the next major area that is closer to the center where you can set up your real defenses.
For instance, you could fall back from Spring Town to Lion Park, and then be in an excellent defensive position to strike out at Eden Vines, Palmurg, or wherever the enemy happens to be entrenched.
Defend The Captain Mode Defense Strategy
To be successful in this mode, you need to think less like you are playing a Battle Royale game and instead think more like a squad-based shooter where you are defending a particular area.
You are going to be fighting against your own team as much as the other side because you need to wrangle your teammates into working as a cohesive whole.
Lone wolf run and gun isn’t as helpful here except for very specific instances (covered in attacking strategy below).
No matter where you pick your defensive outpost, you absolutely want high ground for a clear line of sight. Whether that’s on top of buildings or at the tip of a mountain will depend on where you landed. Either way, force the enemy players to build staircases up to you in areas without cover.
Building two sniper nests in the air for coverage on either side of an area can be a big help in staying alerted to enemy movements, while the rest of the team patrols around on the ground.
If you happen to have been picked as a Captain, your goal is to stay alive over getting kills. Staying bunched up with other teammates in a well-defended area with pre-made buildings for cover is a much better move than going out and attacking.
Defend The Captain Attacking Strategy
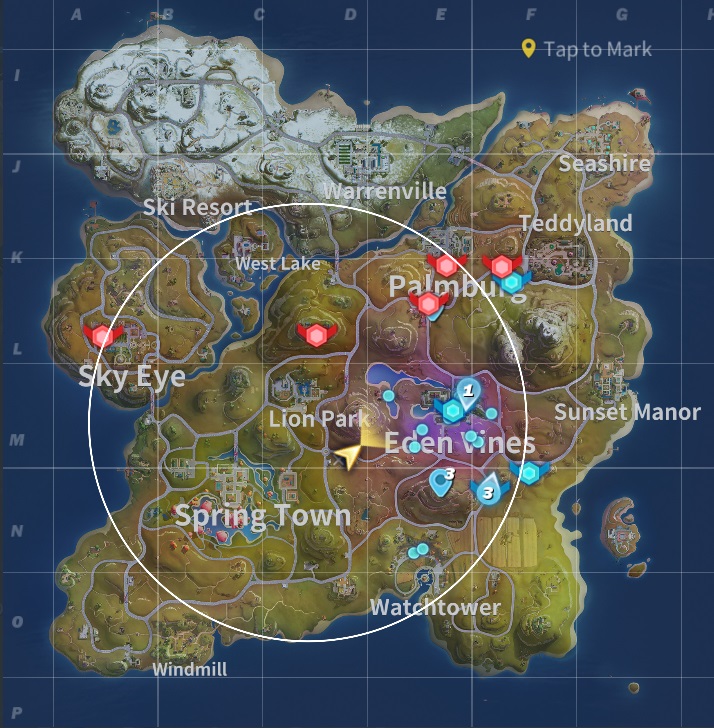
From the start, you can see the position of all your teammates and the position of the enemy captains on the map, but not the position of their 20 regular, non-Captain players. This radically changes how you should go about attacking enemies.
Pull up the map frequently and be on the lookout for one enemy captain clearly out farther away from the rest. That’s almost certainly a player who isn’t focused on helping their team and can be taken out without facing stiff resistance.
An early advantage is key here. If they have fewer players to defend their Captains, it becomes much easier in the late game. For the more daring players with higher skill, it’s not a terrible idea to land close to the enemy position, get a quick kill on a straggler, then high tail it back to your squad’s base.
During the mid-to-late game when both sides are fortified, long-range weapons that don’t require a ton of accuracy should be your go-to choice if possible. Otherwise, think in terms of sniping from afar.
Weapons like the grenade launcher can be absolutely devastating here since you can see the Captain’s position on the map even if they aren’t in your actual line of sight.
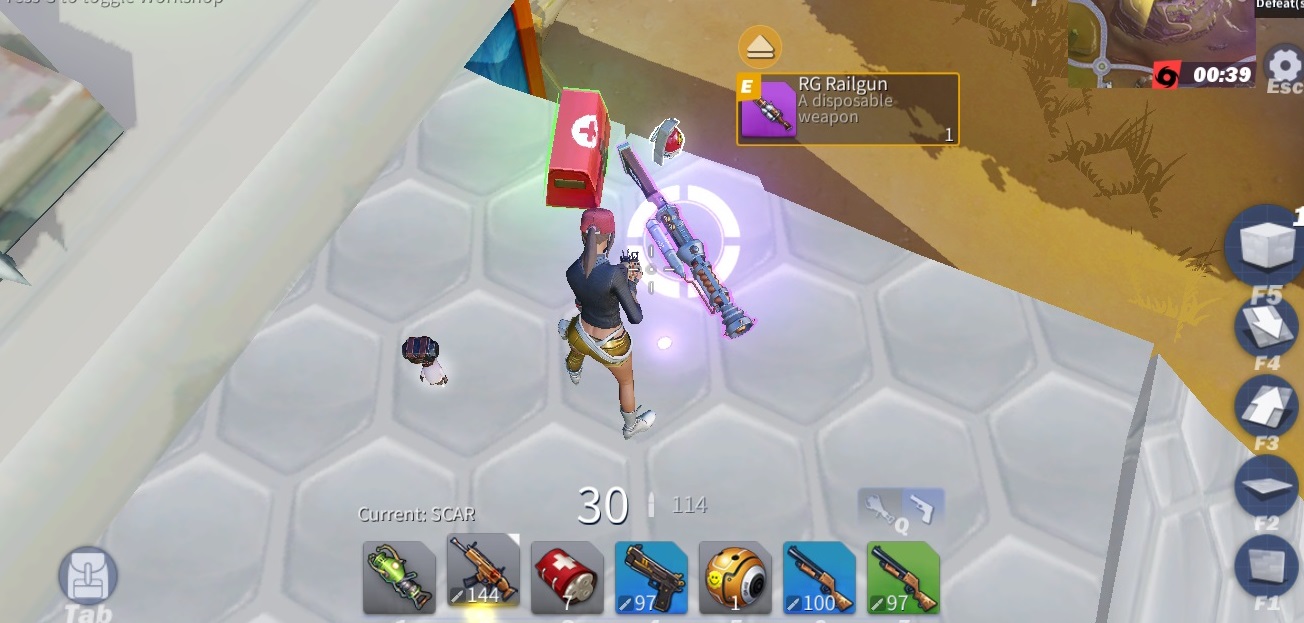
Creative Destruction Railgun Tips
The newly-added railgun shows up in Creative Destruction with the Captain Defense mode, and it works quite a bit differently from the rest of the gun lineup.
You can tap to fire a single blast quickly for small damage or hold and charge for larger damage. There’s also a brief cool down time after firing before you can fire again, so this isn’t a rapid-fire weapon by any stretch of the imagination.
Charged shots take down walls quickly, so the railgun can be useful for destroying defenses if you don’t have an RPG, grenade, etc.
Unfortunately, there’s no ability to zoom in and it doesn’t aim well. So, the railgun is best for hitting someone who is stationary. If the enemy is moving, try coming from behind and following them as they move, keeping the reticle just a half second ahead of where they are running at the moment.
Got any other Creative Destruction Captain Defense tips and tricks we should try out with our team? Let us know your strategy in the comments below!


Published: Aug 17, 2018 02:11 pm