Days Gone has a whole lot of objects, audio files, radio broadcasts, and other assorted items to collect and save, as you explore post-zombie-apocalypse backwoods Oregon.
Sadly, however, you do not get to pet an alpaca.
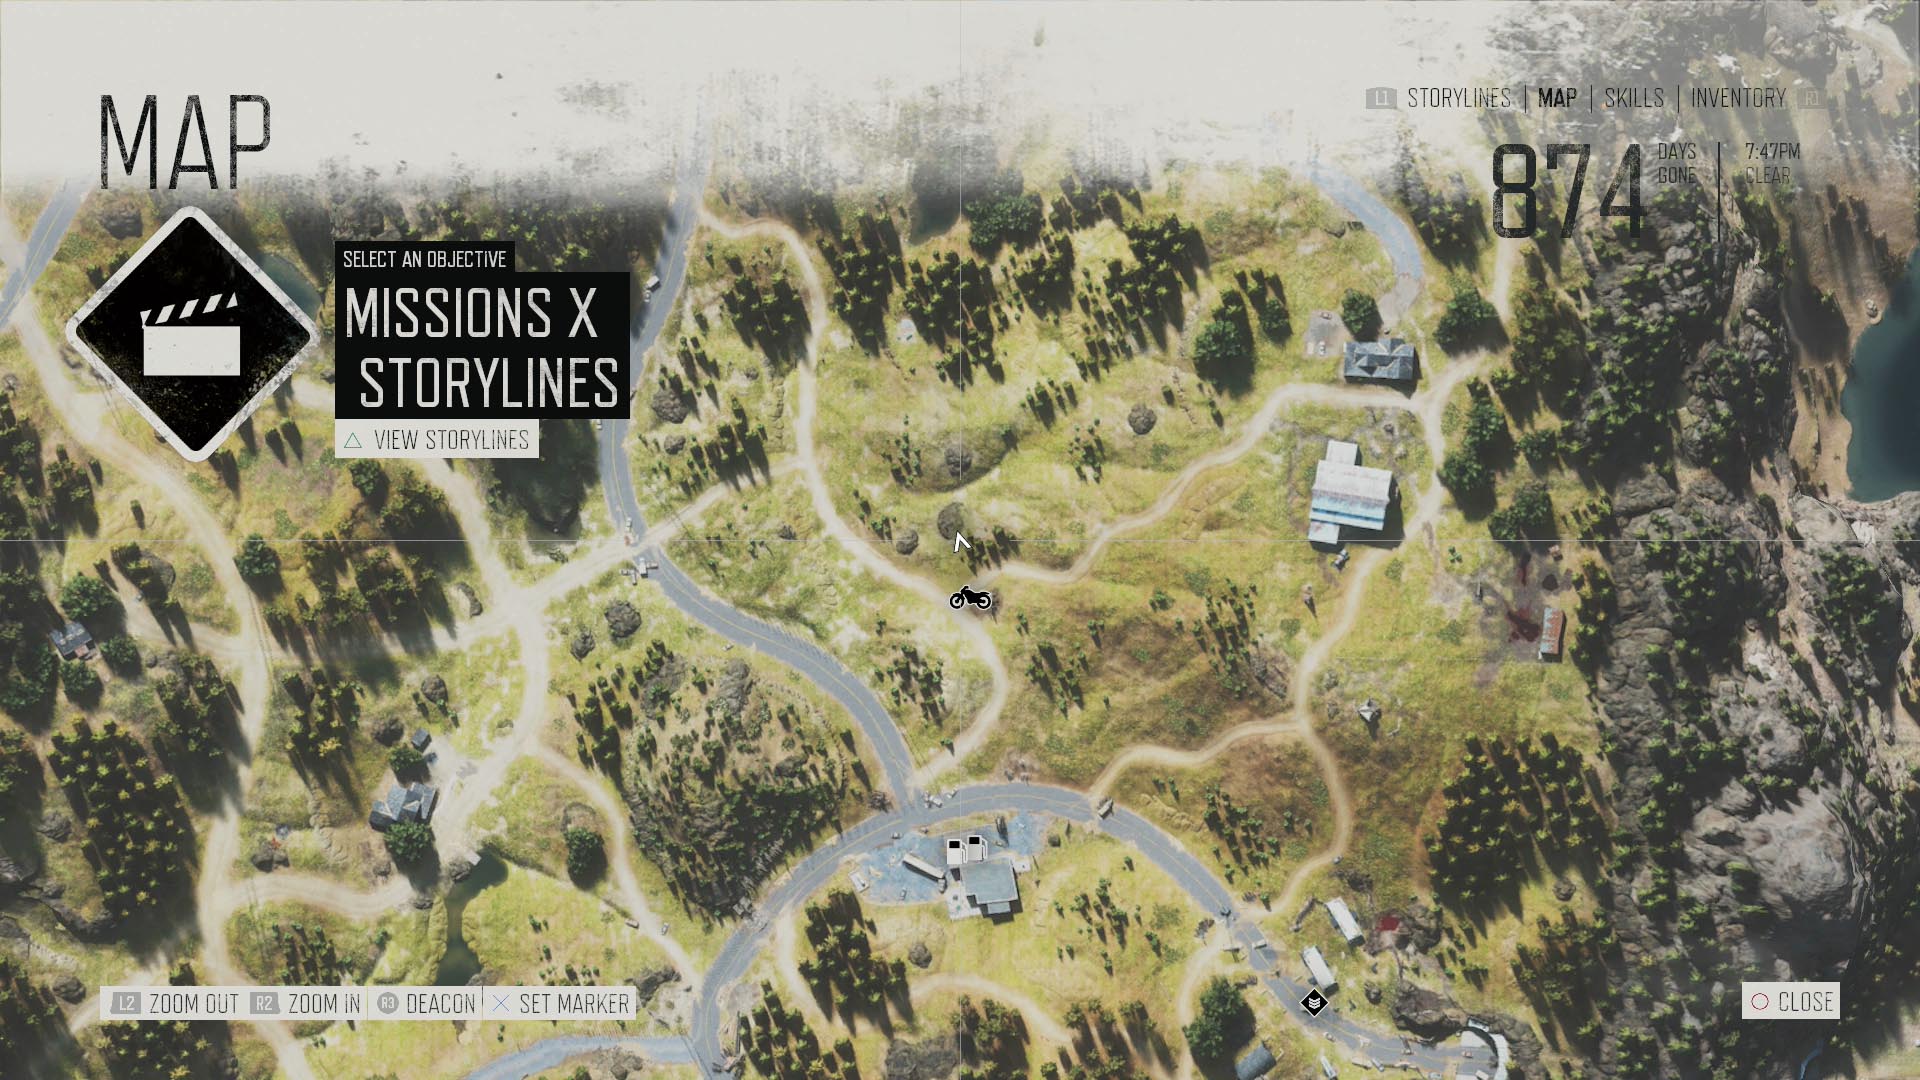
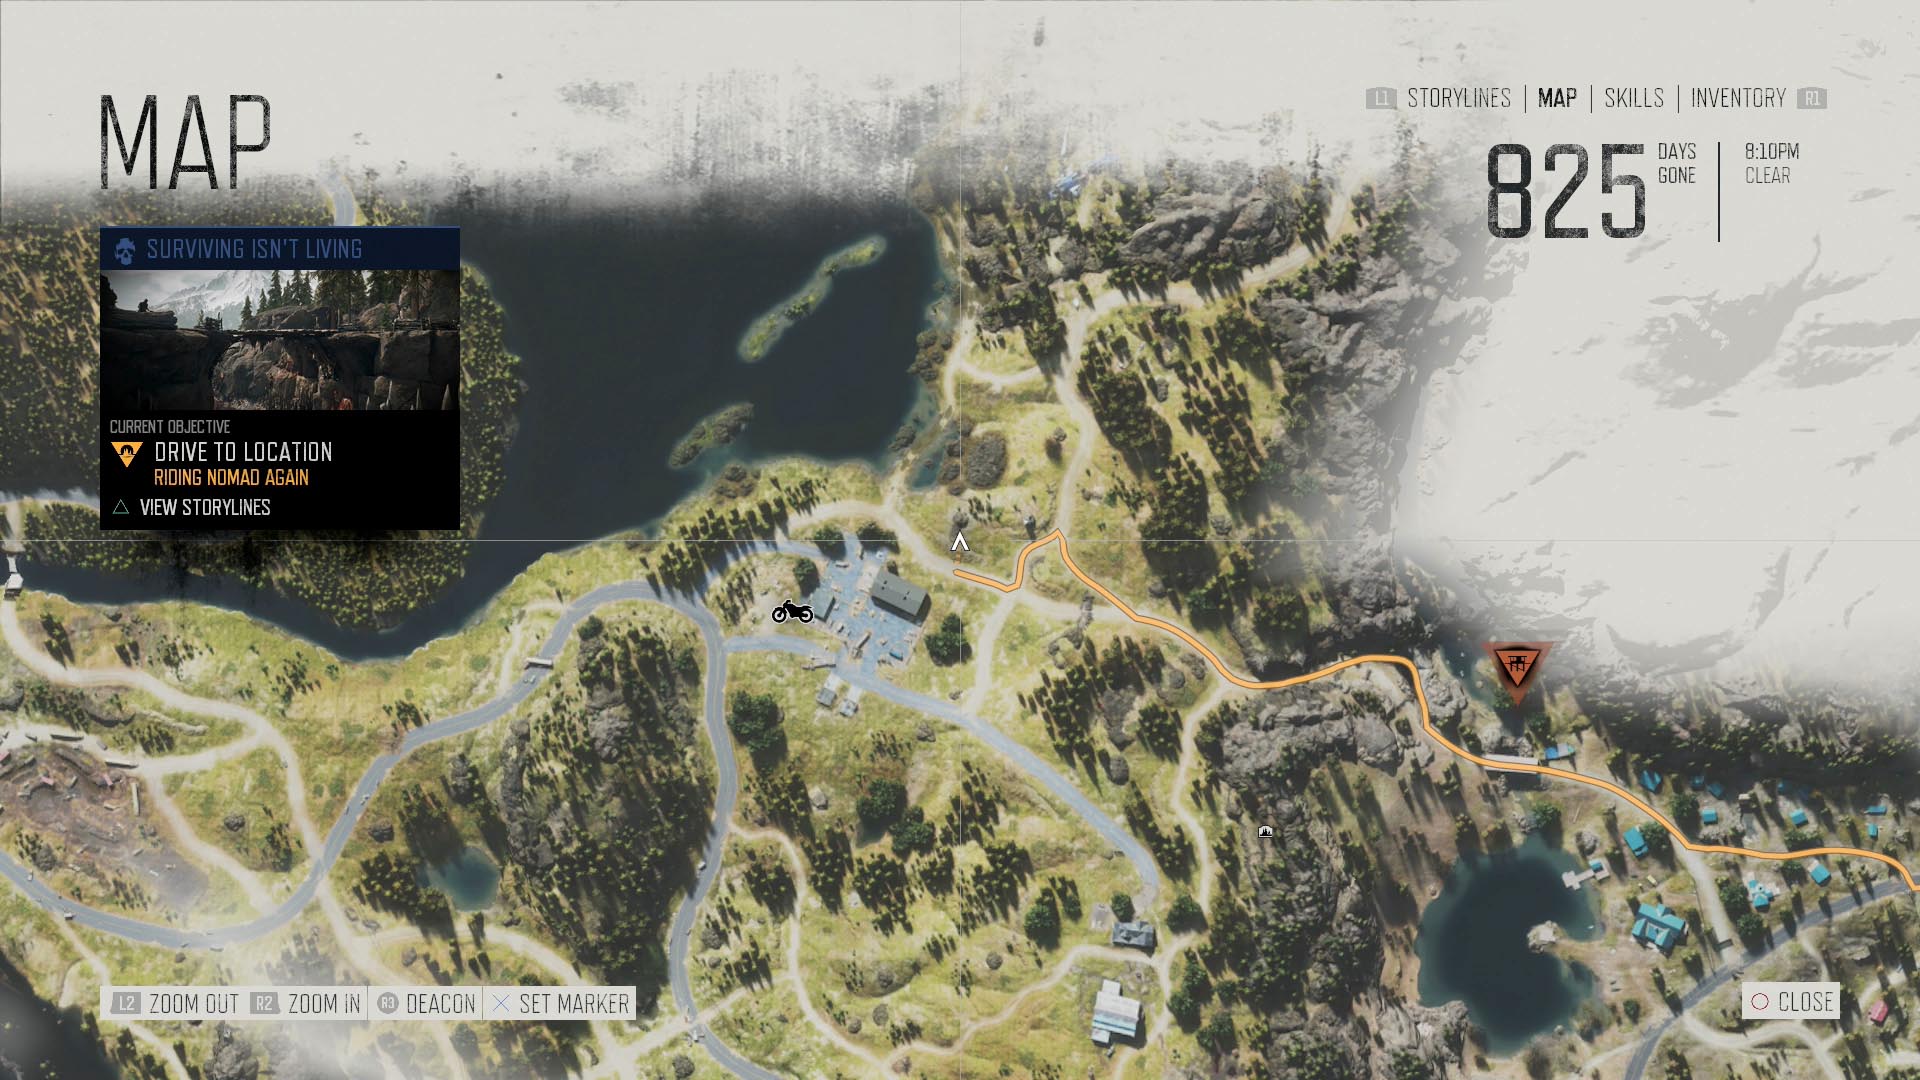
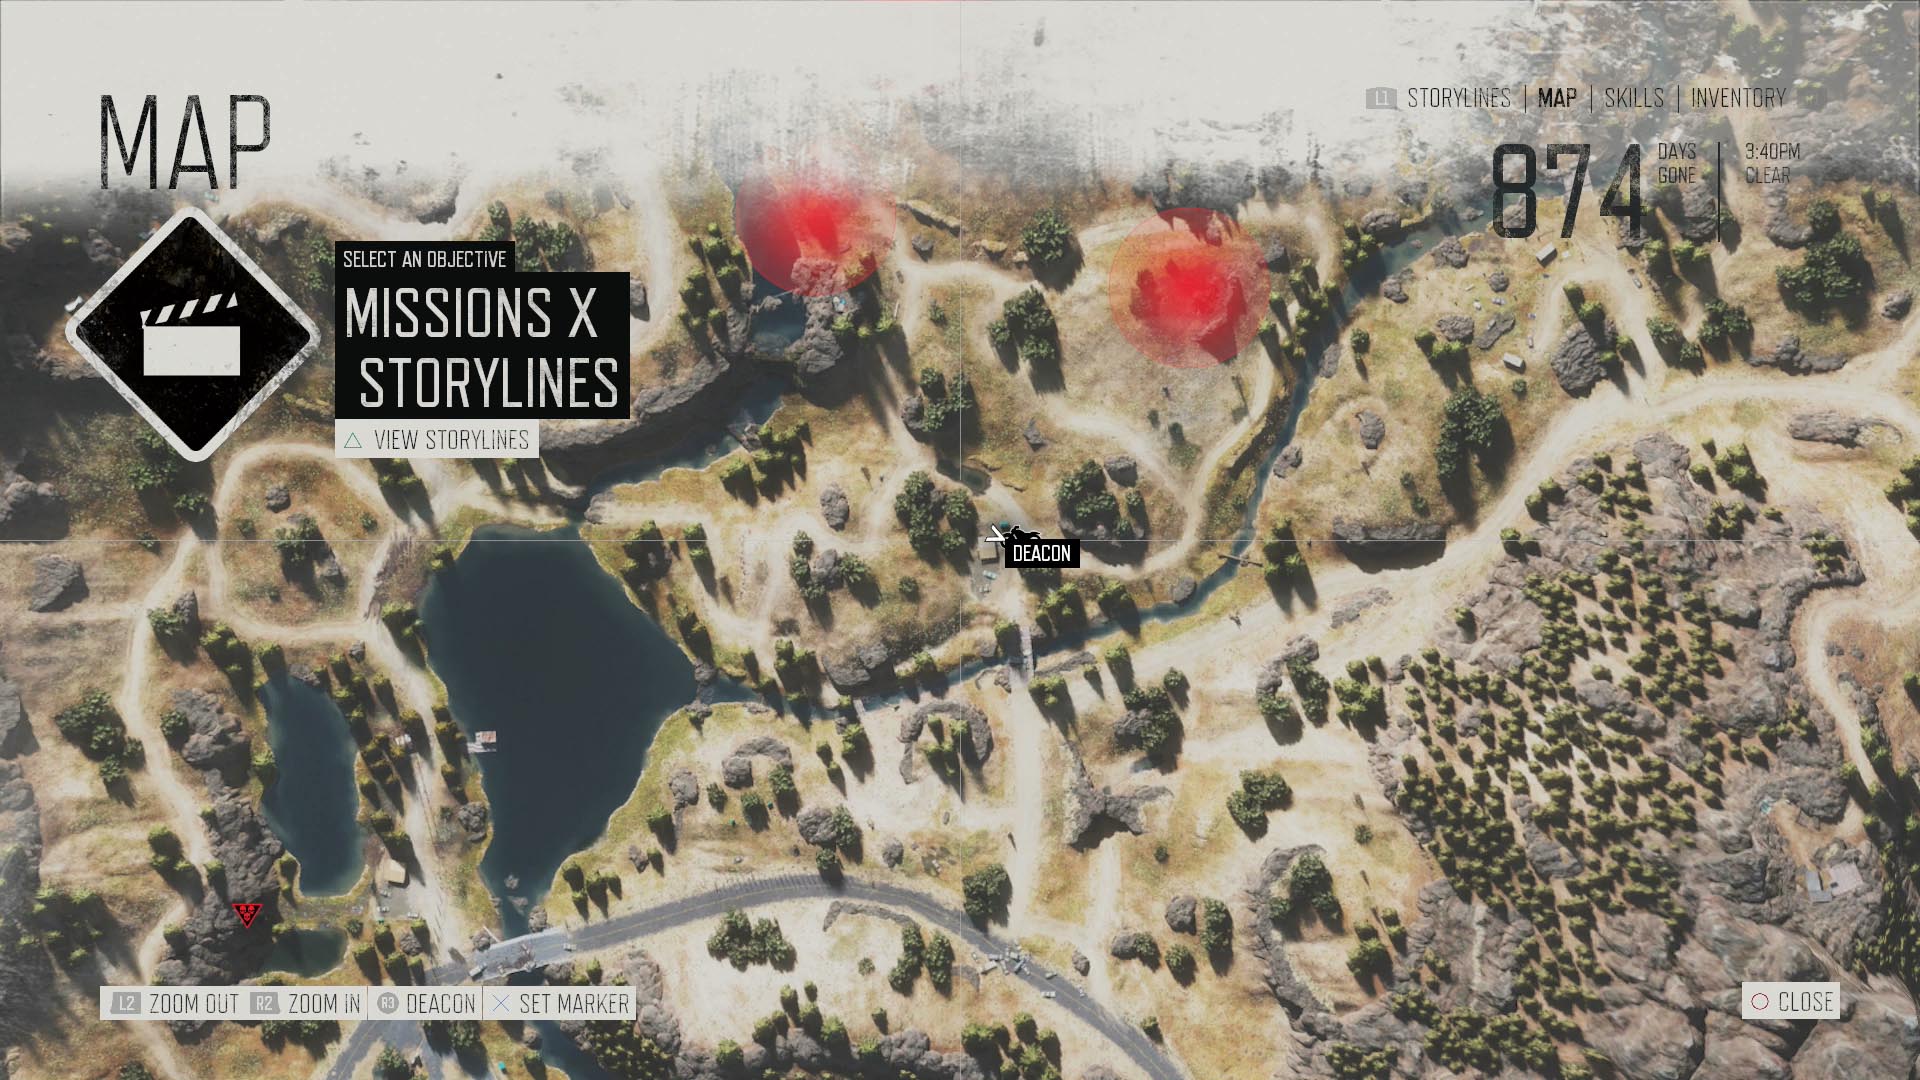
As every collectible counts as an interactive object in the world, they appear on Survival Vision if they’re in range. There’s also a handy in-game checklist that tells you how many of the various collectibles remain to be found in a zone, which can be accessed by pointing your cursor at a blank space on the zone map.
Your first collectible, which will likely be the first herb you pick up, unlocks the Finders Keepers trophy. For further trophies, you have to do some more searching:
- Getting 121 out of 240 collectibles unlocks the Wannabe Fortune Hunter trophy.
- For finding 161 collectibles (or just over 75% of the total count), you get The Broken Roadshow trophy.
This guide will help you find all the collectibles in Days Gone. They’re organized here in the order in which they appear in Deacon’s collection menu. You can check out the first three categories here.
Many of the collectibles are locked behind specific missions, have to do with characters who aren’t introduced until later in the game, or are otherwise riddled with major spoilers.
There do not appear to be any collectibles that become permanently unobtainable. It’s safe to wait until you’ve cleared the game’s story, then go back and use these guides to fill out your collection in free roam.
This guide is still in progress and will be updated with the locations of the handful of collectibles we’ve yet to find.
Radio Free Oregon: 20
![]() After you repair Mark Copeland’s radio uplink early in the game in “No Starving Patriots,” Copeland will use it to put Radio Free Oregon back on the air. After all, every apocalypse needs a ranting, paranoid lunatic with broadcast capability, and Copeland is ours.
After you repair Mark Copeland’s radio uplink early in the game in “No Starving Patriots,” Copeland will use it to put Radio Free Oregon back on the air. After all, every apocalypse needs a ranting, paranoid lunatic with broadcast capability, and Copeland is ours.
Much like JJJ’s radio show in Spider-Man, you’ll pick up an occasional broadcast from Copeland in the open world as you play further into the game. Copeland will usually comment obliquely on recent events, but due to how Days Gone handles things like radio calls, it can seem awfully random whether or not an episode of Radio Free Oregon airs or not. The following contains my best guesses as to what gets a specific radio broadcast to play.
Be sure to listen to a new Radio Free Oregon all the way through if you can. As with NERO Intel recorders, Deacon will have a reaction at the end of each broadcast, and his angry responses aren’t saved in your collectibles menu.
1: NERO Death Camps
This seems to be triggered by completing “What Did You Do?” and leaving the refugee camp.
2: It’s All A Lie
This played for me after completing “They Will Never Stop” in Lost Lake.
3: My Cold, Dead Hands
This aired right after I completed the Lucky Lad mine missions with Skizzo, beginning with “Some Kinda Freak Expert.”
4: Numb the People
Copeland’s rant about drugs seems to coincide with the start of Boozer’s mission “Drinking Himself to Death” in Lost Lake.
5: Home of the Free
This is the first broadcast you hear after “No Starving Patriots.”
6: The Dead Can’t Speak
This seems to be triggered by completing the first step of the “Finding NERO” mission, which in turn is triggered by going to the cemetery during “Finding Leon” to get Leon’s drugs, then completing “They’re Not Sleeping.”
7: The Just Shall Not Starve
This fired for me after “I Got Work To Do” during Boozer’s “Surviving Isn’t Living” mission in Lost Lake.
8: Bunker Down
This might be linked to the first time you clear an ambush camp.
9: Animals Don’t Watch the Sky
Cope will broadcast this soon after you complete “It’s A Rifle, Not A Gun.”
10: Global Conspiracy
Once you get back from Cloverdale after “We Couldn’t Take the Risk,” Copeland will get his Art Bell on.
11: The Federal Ark
This airs once you’re out in the open world again after making the Colonel’s acquaintance in Crater Lake.
12: The Black Helicopters
Start the “Finding NERO” mission series. This also causes NERO helicopters to be a common, random sight in the world, which is presumably what sets Copeland off.
13: They’re Coming For Us
Complete “I Need Your Help” in the “I Remember” chain, where you infiltrate the NERO LZ at Berley Lake.
14: The Advanced Guard
Complete O’Brian’s last eavesdropping mission for NERO, “You Twisted My Arm.” Copeland should broadcast this the next time you’re in the open world.
15: Built to Last
Copeland’s rant about inferior foreign products might be triggered by buying your first motorcycle upgrades from a mechanic, but that’s just a guess.
16: Traitors Will Hang
It seems like Copeland will go on the air with this one almost immediately after your meeting with O’Brian in Cascade during “Why Am I Here?”
17: Cleanse Our Minds
Copeland will uncork this soon after the completion of “I’m Good With That” in the “Ripped Apart” chain.
18: ???
(Current working theory: because I can’t 100% the Cascade region due to historical marker #1 being bugged, I can’t unlock this episode of Radio Free Oregon.)
19: Property Rights
This played for me immediately upon clearing the Bear Creek Hot Springs ambush camp.
20: We Are Watching
When you finish every other major story mission in the game, which you can’t do until after the credits, you receive a final mission on the “Finding NERO” chain called “There’s Nothing You Can Do.” Complete that to get Copeland’s final broadcast.
Speeches: 6
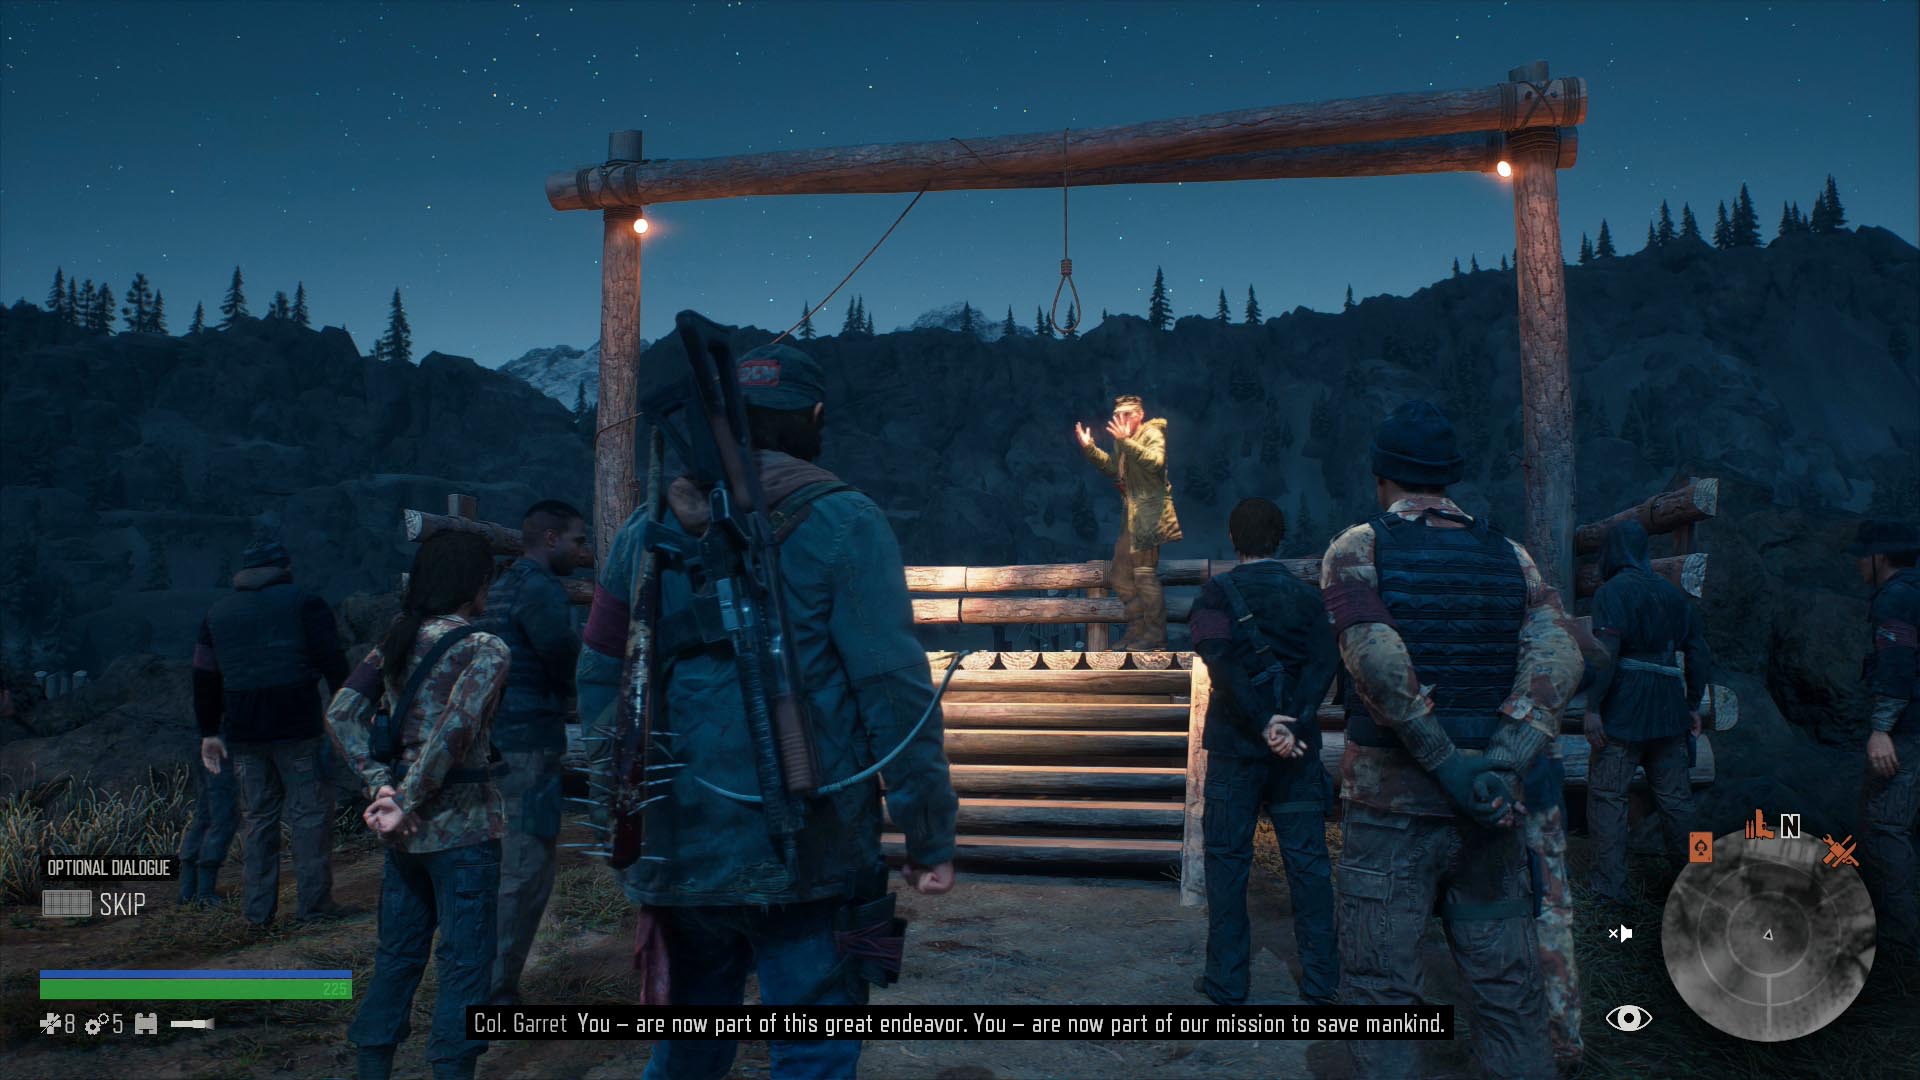
![]() Once you’ve reached Wizard Island in Crater Lake, you occasionally receive a story mission to listen to the camp leader’s speeches, beginning with “We Do Not Discriminate.” As such, all six cannot be missed.
Once you’ve reached Wizard Island in Crater Lake, you occasionally receive a story mission to listen to the camp leader’s speeches, beginning with “We Do Not Discriminate.” As such, all six cannot be missed.
1: Welcome
Complete “We Do Not Discriminate.”
2: The Ark
Complete “We Must Fill the Ark.”
3: The War Against the Freaks
Complete “Throw Them Into the Furnace.”
4: Mourning
Complete “My Eyes Have Been Opened.” (The title has been slightly edited to leave out a spoiler.)
5: Sealing the Ark
Complete “Evil Surrounds Us.”
6: Holy War
Begin “Shadow of Death.”
R.I.P. Sermons: 13
![]() Around the same time you unlock the Lost Lake region, which involves progressing along the “He’s My Brother” mission, you also hear about the Rippers’ leader Carlos for the first time.
Around the same time you unlock the Lost Lake region, which involves progressing along the “He’s My Brother” mission, you also hear about the Rippers’ leader Carlos for the first time.
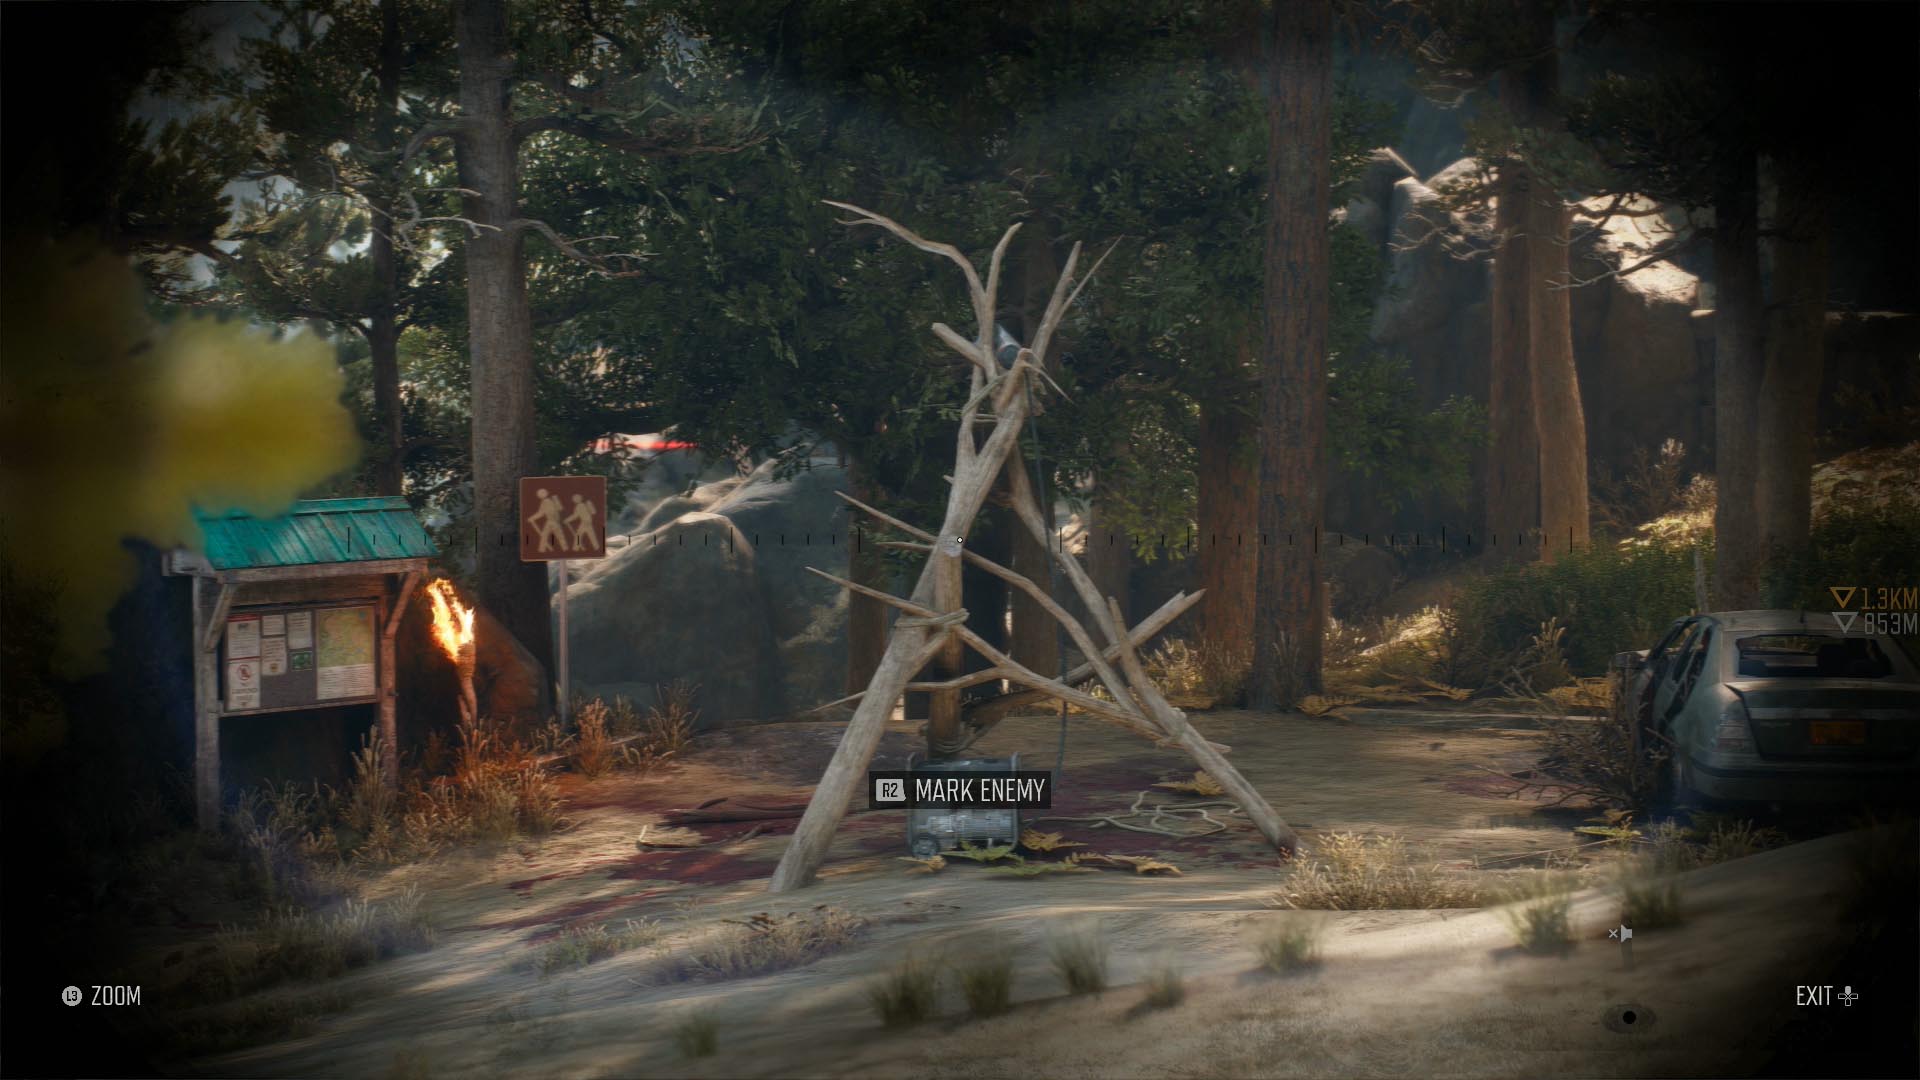
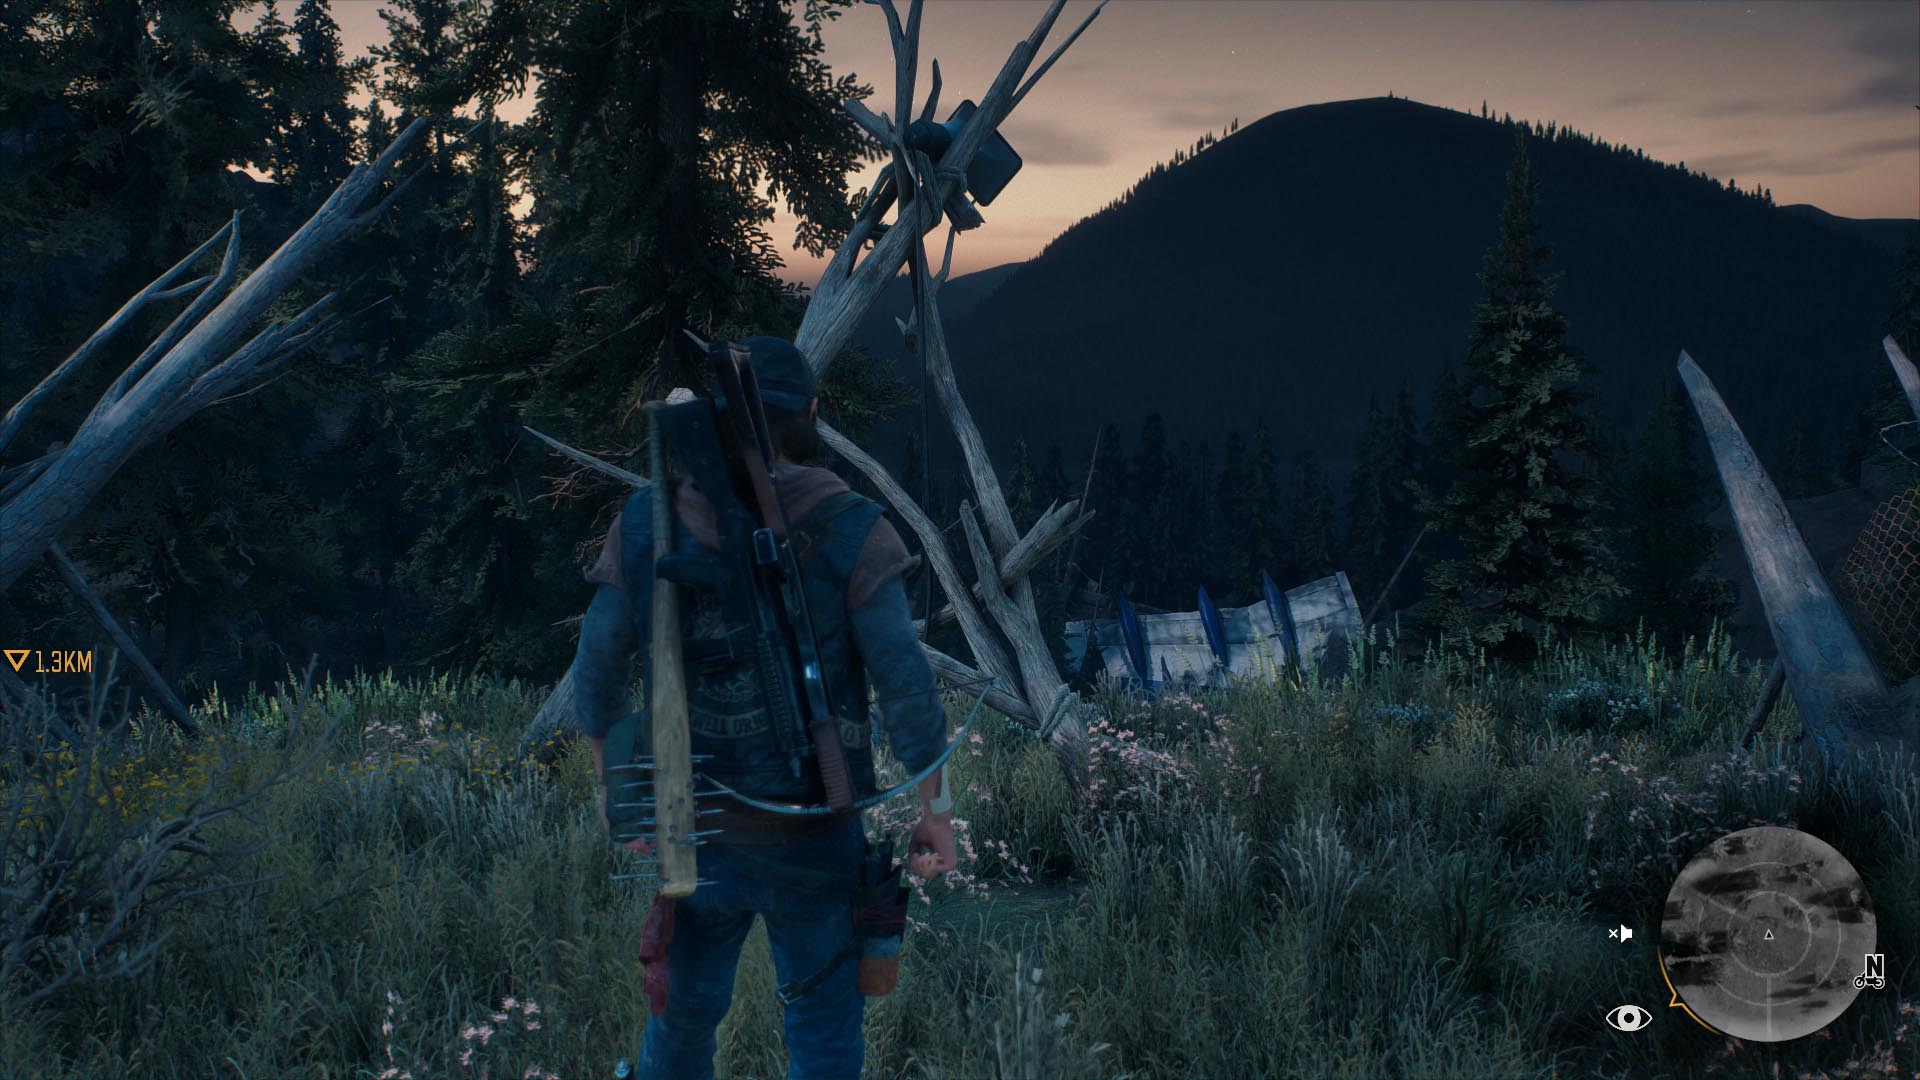
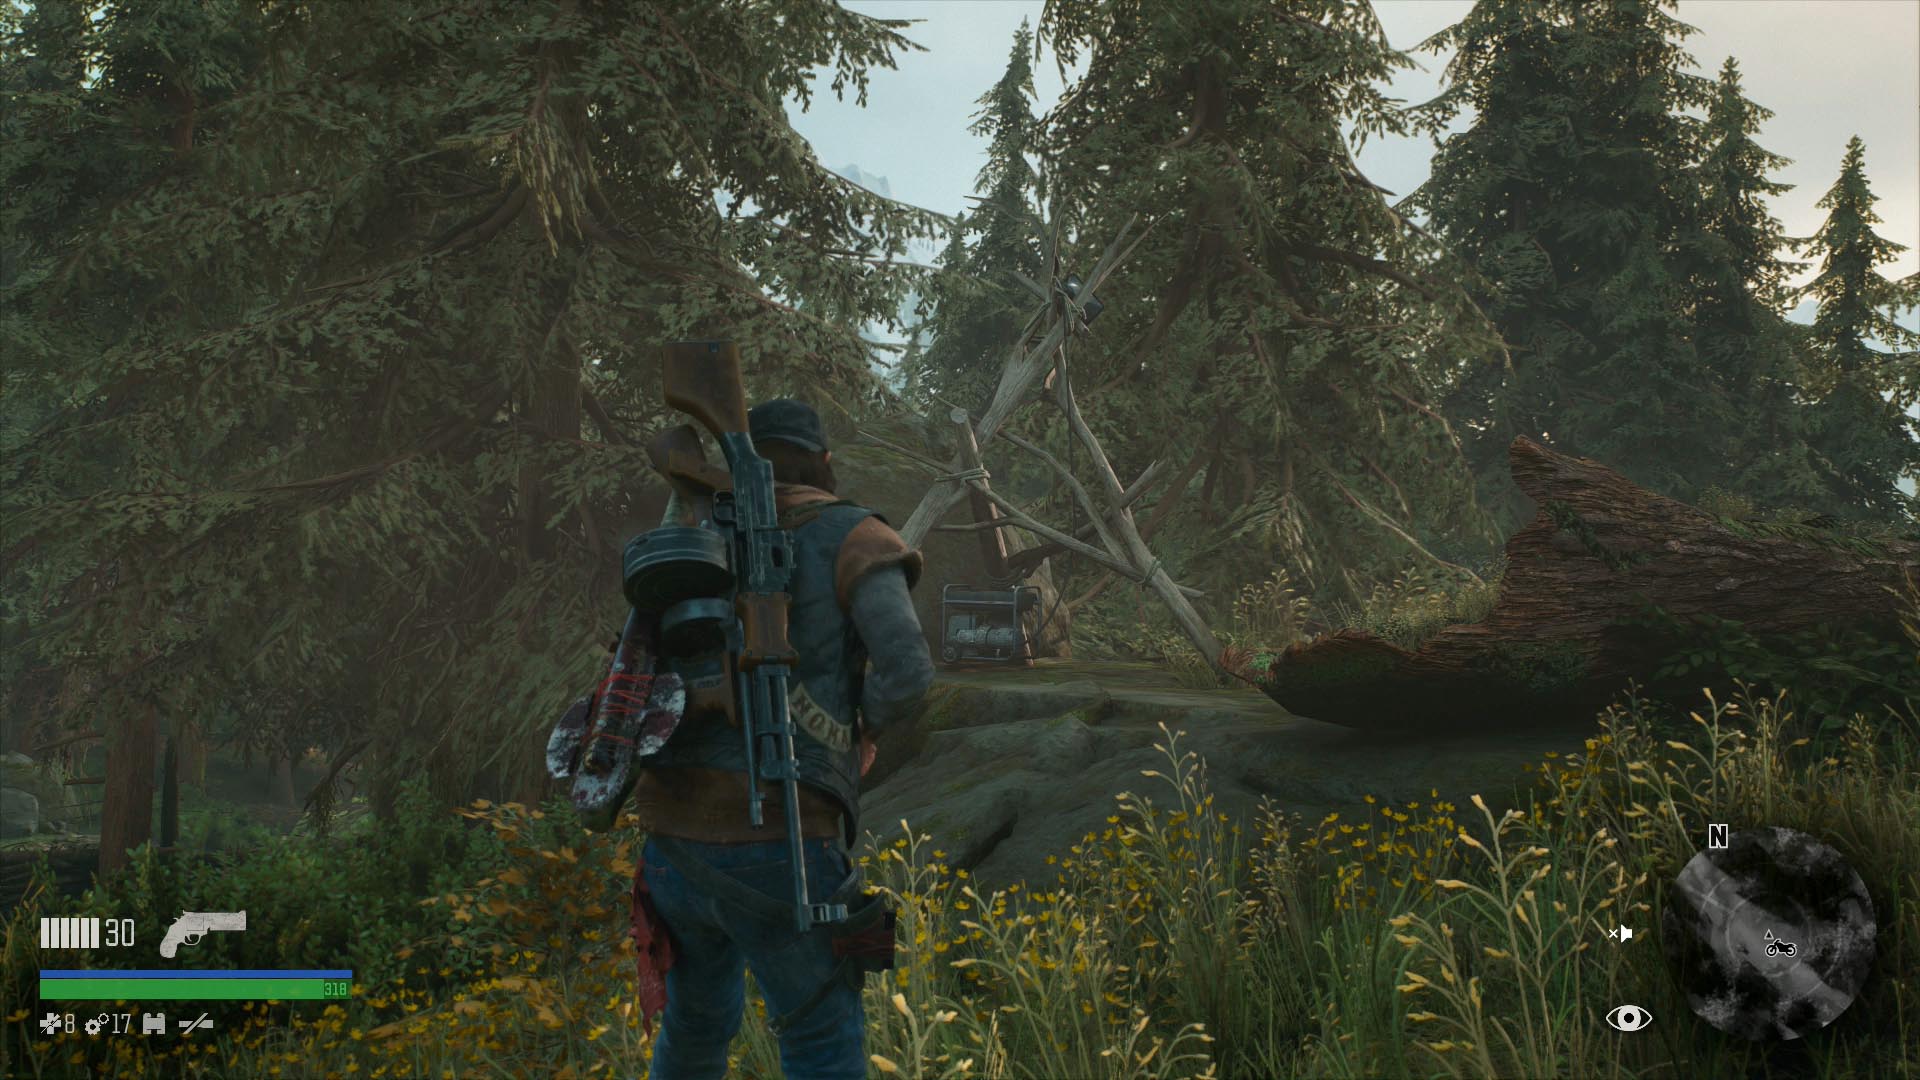
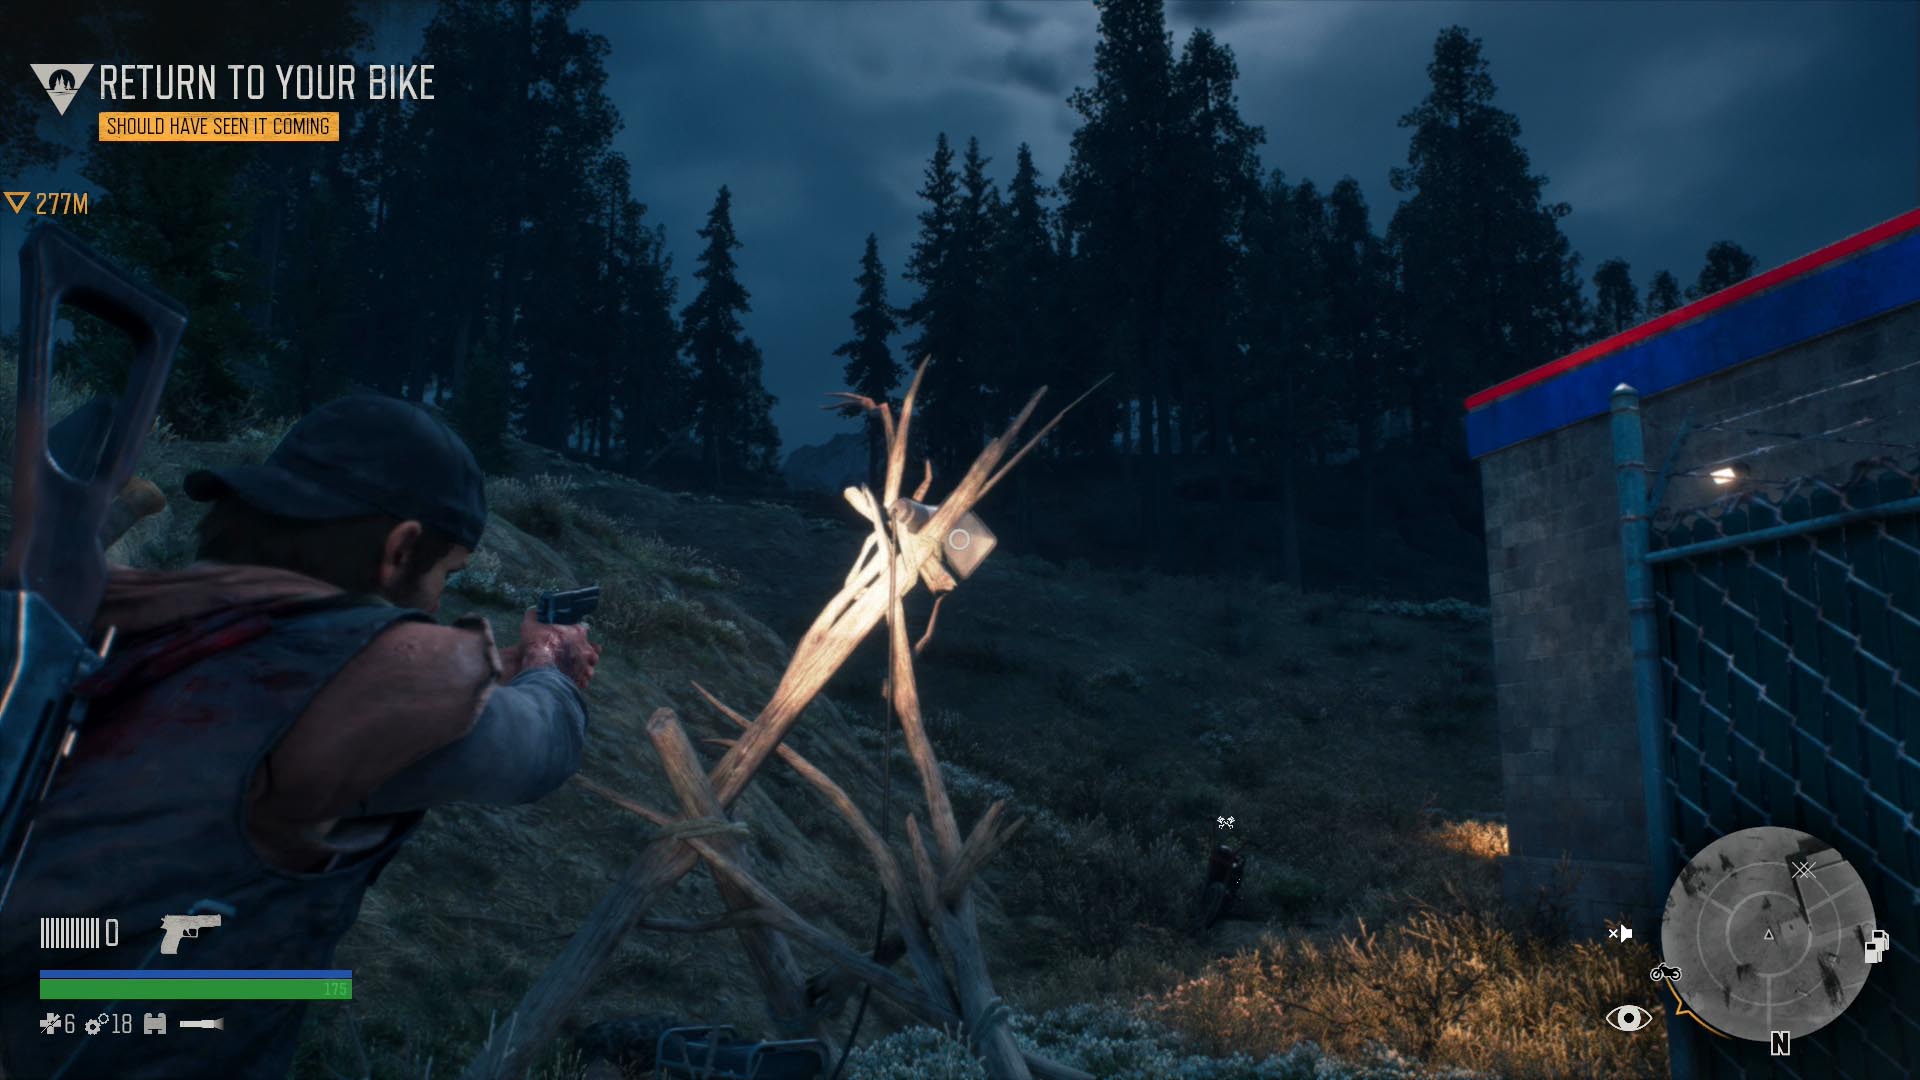
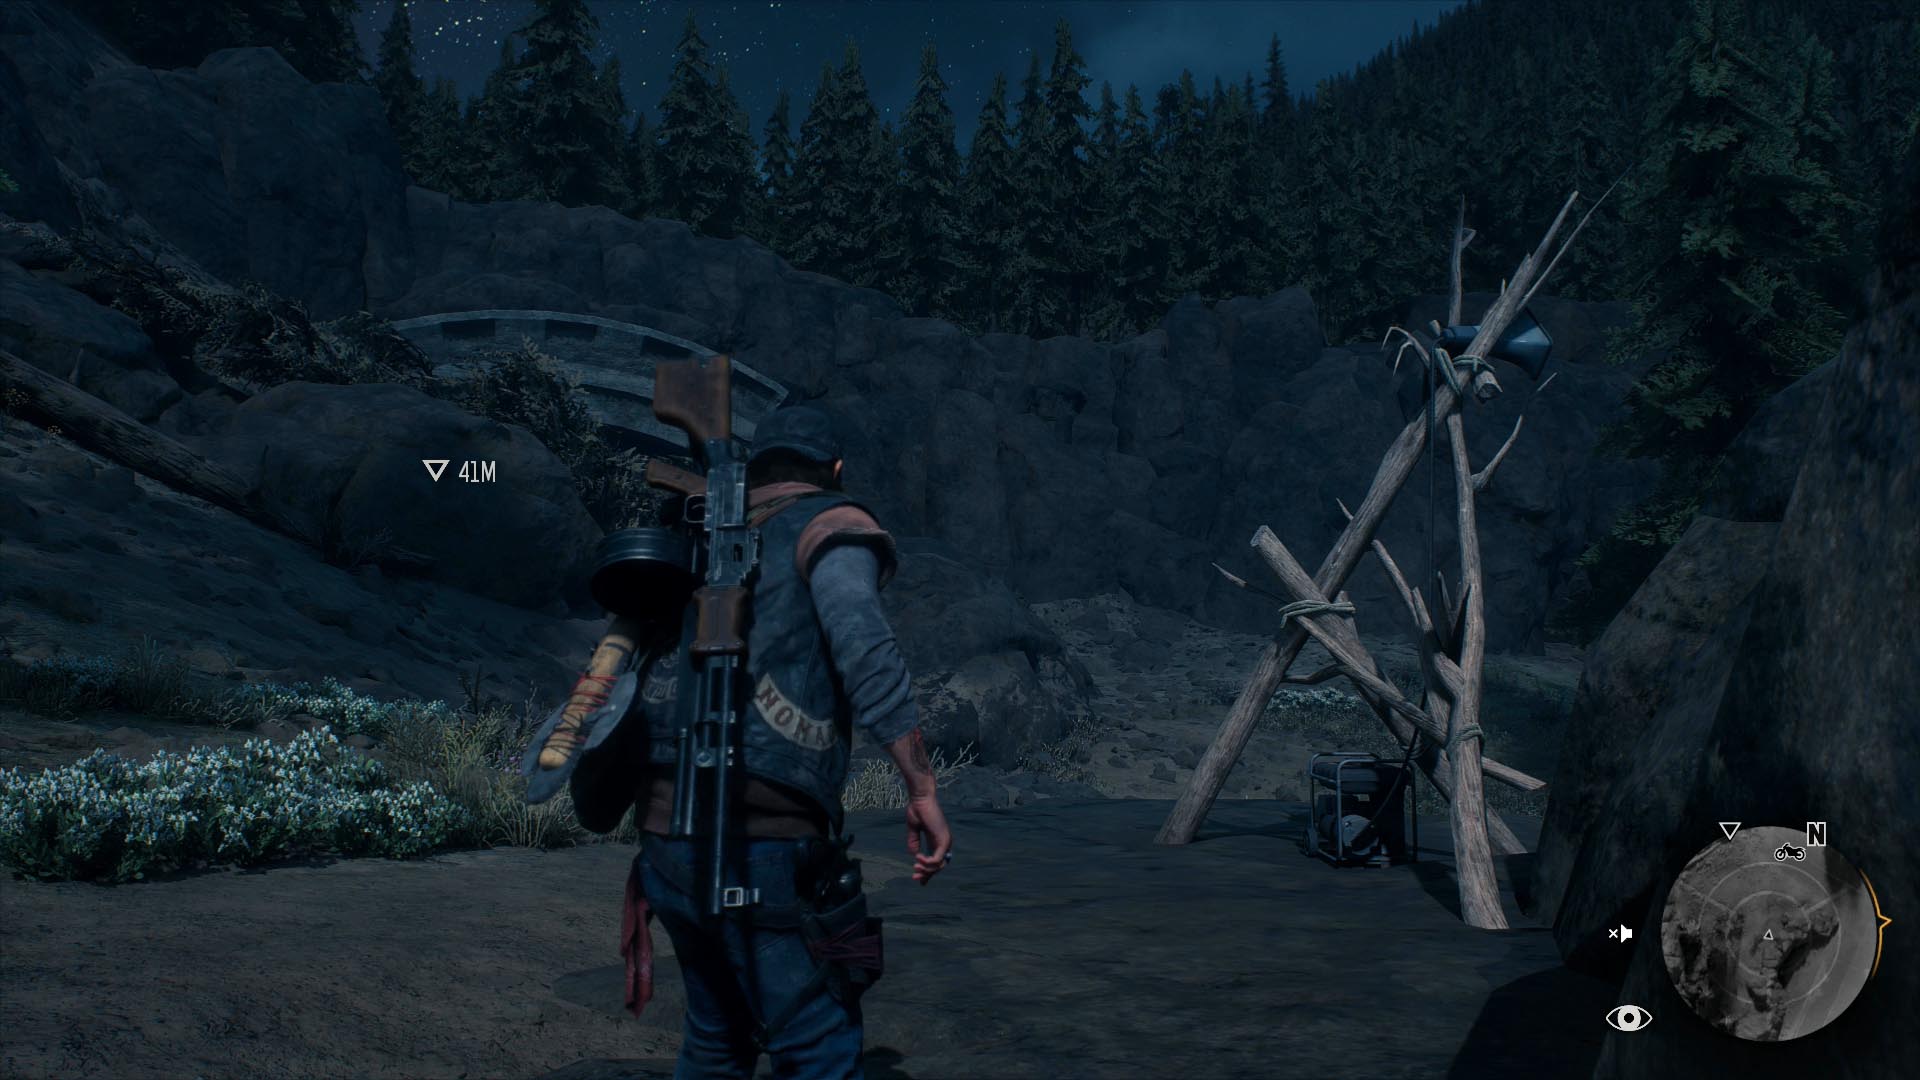
This triggers the appearance of R.I.P. Sermons, where Carlos has set up jury-rigged PA systems to broadcast his cult’s message to anyone in the area. These systems, made from gnarled branches, can be heard from a long way out, are easily recognizable, and appear in or near Ripper camps. Unsurprisingly, 11 out of the 13 Sermons are found in the Ripper-held territory of Iron Butte, which doesn’t fully unlock until relatively late in the game.
In order to collect a Sermon, you can either shoot the megaphone or walk up and hold Square to disconnect the generator that powers it. Notably, you get a very different reaction from Deacon for destroying a Sermon tower before and after “I’m Good With That,” the mission that unlocks Iron Butte for free roam.
1: Fear the Rising
This is set up east of the plane crash in northern Iron Butte. You won’t be able to take the time to collect this until you have the run of the zone, as the plane’s wing blocks access to it from the wrecked passenger compartment.
2: Don’t Run
A Ripper camp appears in Belknap during “A Score to Settle,” a side job for Tucker at the Hot Springs encampment that becomes available once you’ve been to Lost Lake at least once. One of the Sermons is being broadcast from the camp, and is likely to be the first one you find.
3: Pain is a Gift
Once RIP Sermons become available, you can find this about twenty meters north of the Cascade Radio Tower. On the one hand, it’s right next to a mandatory fast travel point; on the other, you never have any reason to come back to this part of the map after you’ve reactivated the tower for Copeland.
4: Set You Free
In Iron Butte, head south past the Cloverdale campus on the main road. This sermon is set up in a clearing to the east, close to the tunnel to Crater Lake.
5: Destroy Your Ego
Check the bluff to the south of the Rogue Tunnel NERO Checkpoint in Iron Butte.
6: Sacrifice for Freedom
Go north from the gas station in central Iron Butte to find this Sermon, broadcasting to no one from the side of an otherwise-unremarkable dirt road.
7: One Mind
You’ll be able to hear this sermon well before you can do anything about it. It’s on the south side of the checkpoint that separates Belknap and Iron Butte, but you can’t ride through the pass until after you permanently unlock Iron Butte in “I’m Good With That.”
8: Founder’s Tale
Look just outside the Wagon Road Ambush Camp in northern Iron Butte, right on the street.
9: The Ultimate Goal
West from the checkpoint between Iron Butte and Lost Lake, southwest from the Rippers’ sniper tower, you’ll find this Sermon broadcast from a short hill.
10: Rest in Peace
Check the ridge to the north of the Ripper checkpoint that separates western Lost Lake from eastern Iron Butte.
You can hear the sermon as you punch through the Rippers’ lines in “Riding All Night,” and circle around from the Iron Butte side to destroy the PA system. If you don’t do it then, however, you’ll have to wait until you get full access to the zone.
11: The Free
Along the west edge of the Redwood RV Park in southwestern Iron Butte.
12: The Rising is Coming
Check next to the gas station due west from the Lost Lake checkpoint in Iron Butte. (The same gas station contains a Tourism collectible; see below.) If you don’t hear and destroy this on your first visit, you’ll practically trip over it while you’re fighting your way back out of Iron Butte in “Should Have Seen It Coming.”
13: Join or Die
This is harder to find than it ought to be. The Sermon is found outside the blocked transit tunnel in western Iron Butte, north from the old golf course’s storage yard. However, the Sermon’s broadcast doesn’t reach as far as you’d think it would, so it’s easy to miss, since if you’re going to the storage yard at all you’re probably entering via its eastern gate.
Tourism: 28
![]() The world of Days Gone is primarily built out of old roadside attractions and tourist traps in backwoods Oregon. Whenever you’re exploring the ruins, you may occasionally find something to remind you of how the world used to be.
The world of Days Gone is primarily built out of old roadside attractions and tourist traps in backwoods Oregon. Whenever you’re exploring the ruins, you may occasionally find something to remind you of how the world used to be.
The tourism collectibles are some of the hardest-to-find in Days Gone. As a rule, you can usually find them lying around areas that used to be of local interest before the Freakers showed up, but beyond that, there’s little to tell you where they are.
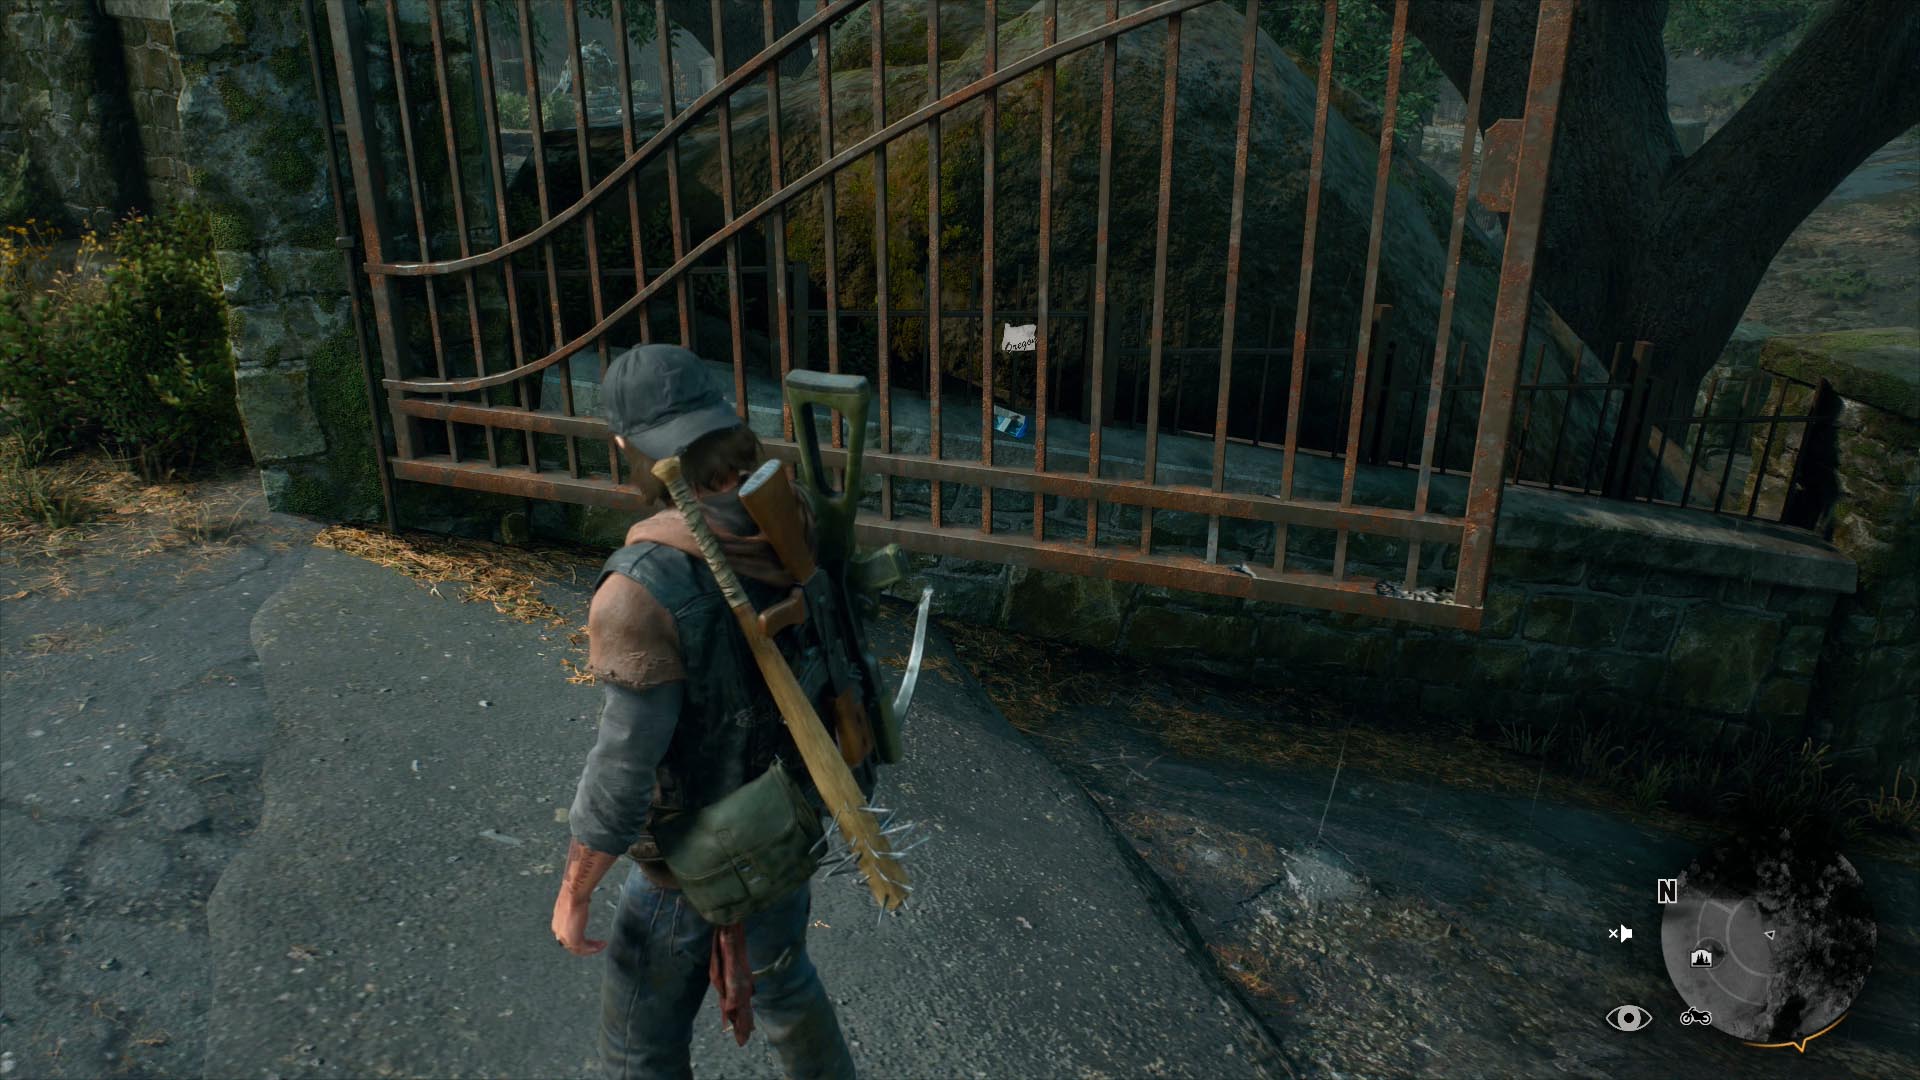
1: Old Pioneer Cemetery Brochure
This is well-hidden. As you walk through the front gate of the Old Pioneer Cemetery in northeastern Cascade, likely because you’re here on the “Finding Leon” quest chain, look to your left. The brochure is on the edge of the garden arrangement, behind one of the broken gates.
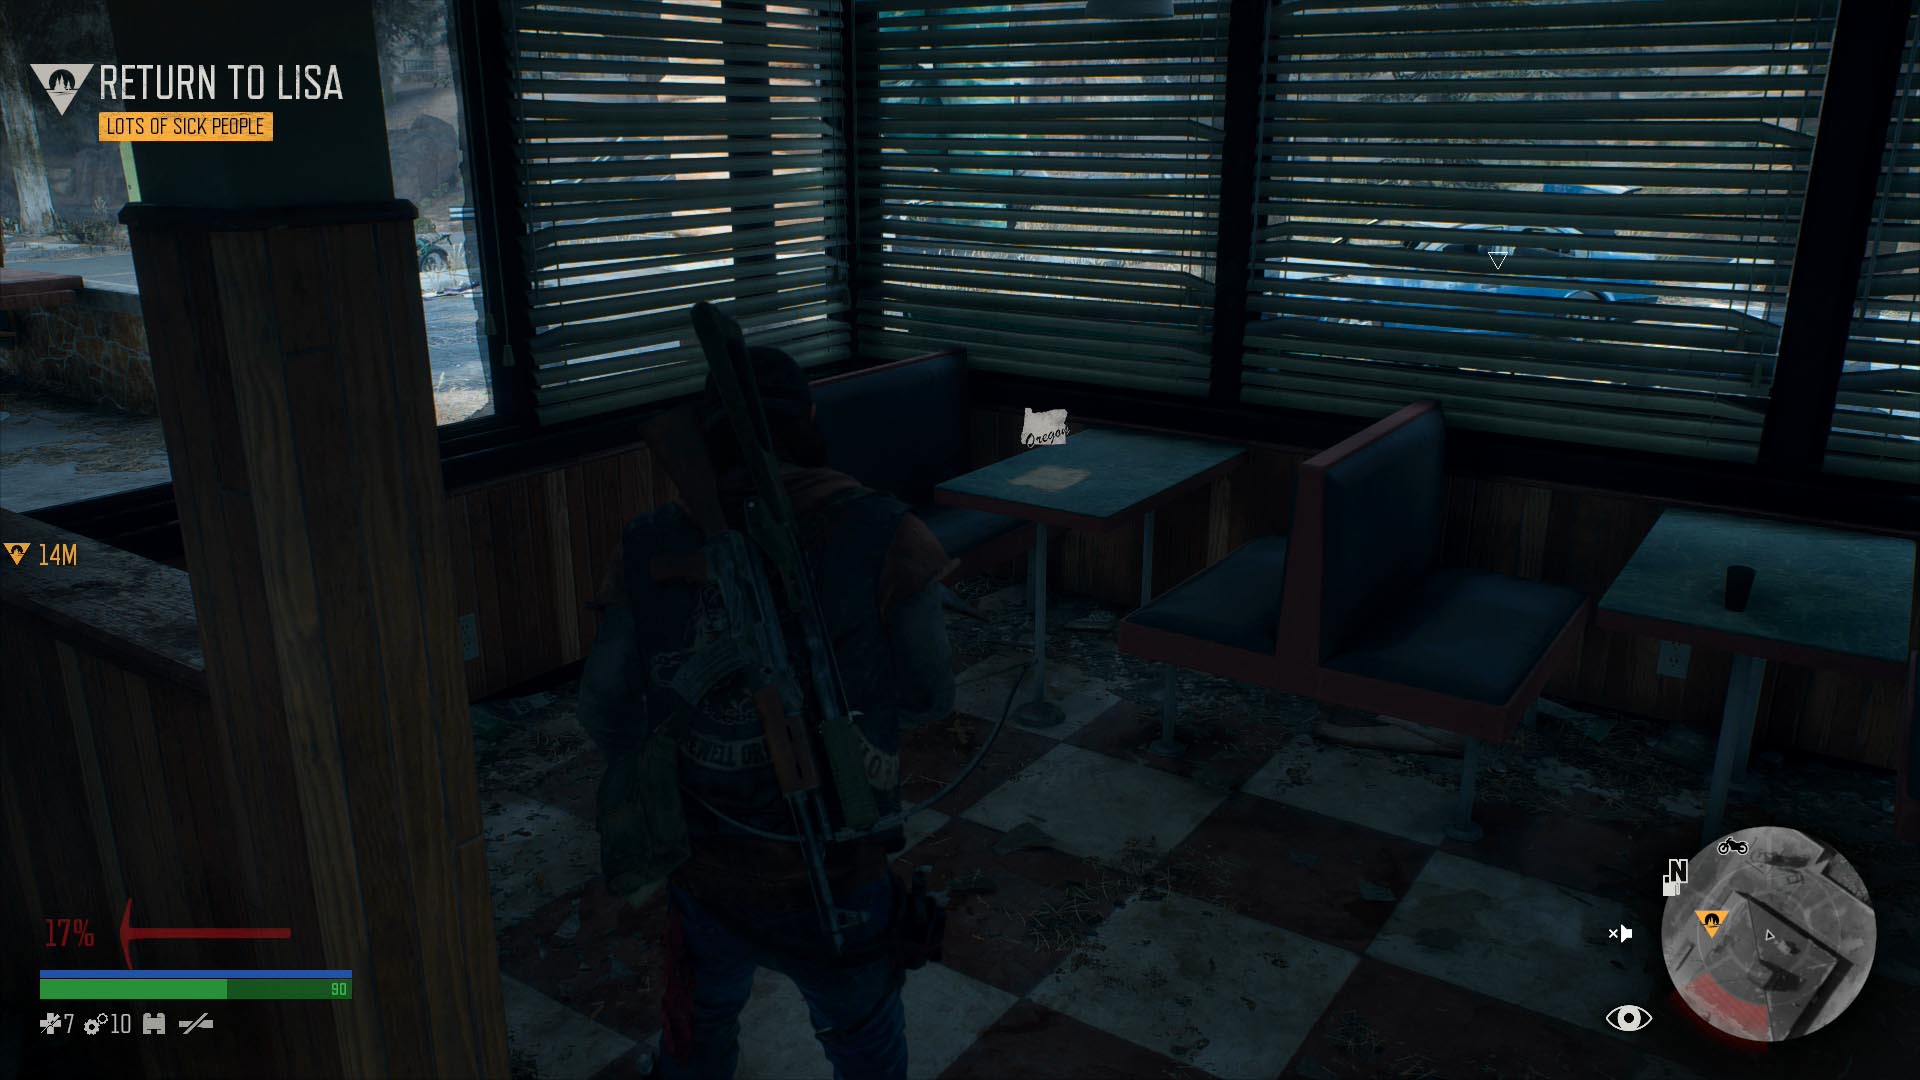
2: Hungry Jim’s Menu
The town of Marion Forks is northeast from the Hot Springs encampment in Belknap, along the main road. While it’s easy to randomly stumble across the town on your own, it ends up being home to a lot of story and side missions over the course of the game.
You can find a few different collectibles here, including this menu, which is on a corner booth in Hungry Jim’s Pancake House.
3: Marion Forks Bumper Stickers
In the back office of the bookstore in Marion Forks. There’s a Freaker nest in the building, which makes it hard to miss.
4: Marion Forks Postcards
On a table in the main area of the same bookstore where you found #3.
5: The Benefits of Bear Creek Hot Springs
If you sneak into or clear the Bear Creek Hot Springs ambush camp in Belknap, near Marion Forks, you can find this brochure sitting on the counter in its gift shop.
6: Salome Hot Springs Guestbook
The largest building near the Hot Springs encampment in Belknap is a ruined hotel directly northwest of its gate. Look under the stairs on the first floor, in its office, to find the guestbook on the desk.
7: Bears? Where?! Black Bear Awareness Poster
North of the Hot Springs in Belknap, in the middle of nowhere, you can find this poster glued to the wall of an unremarkable rest area.
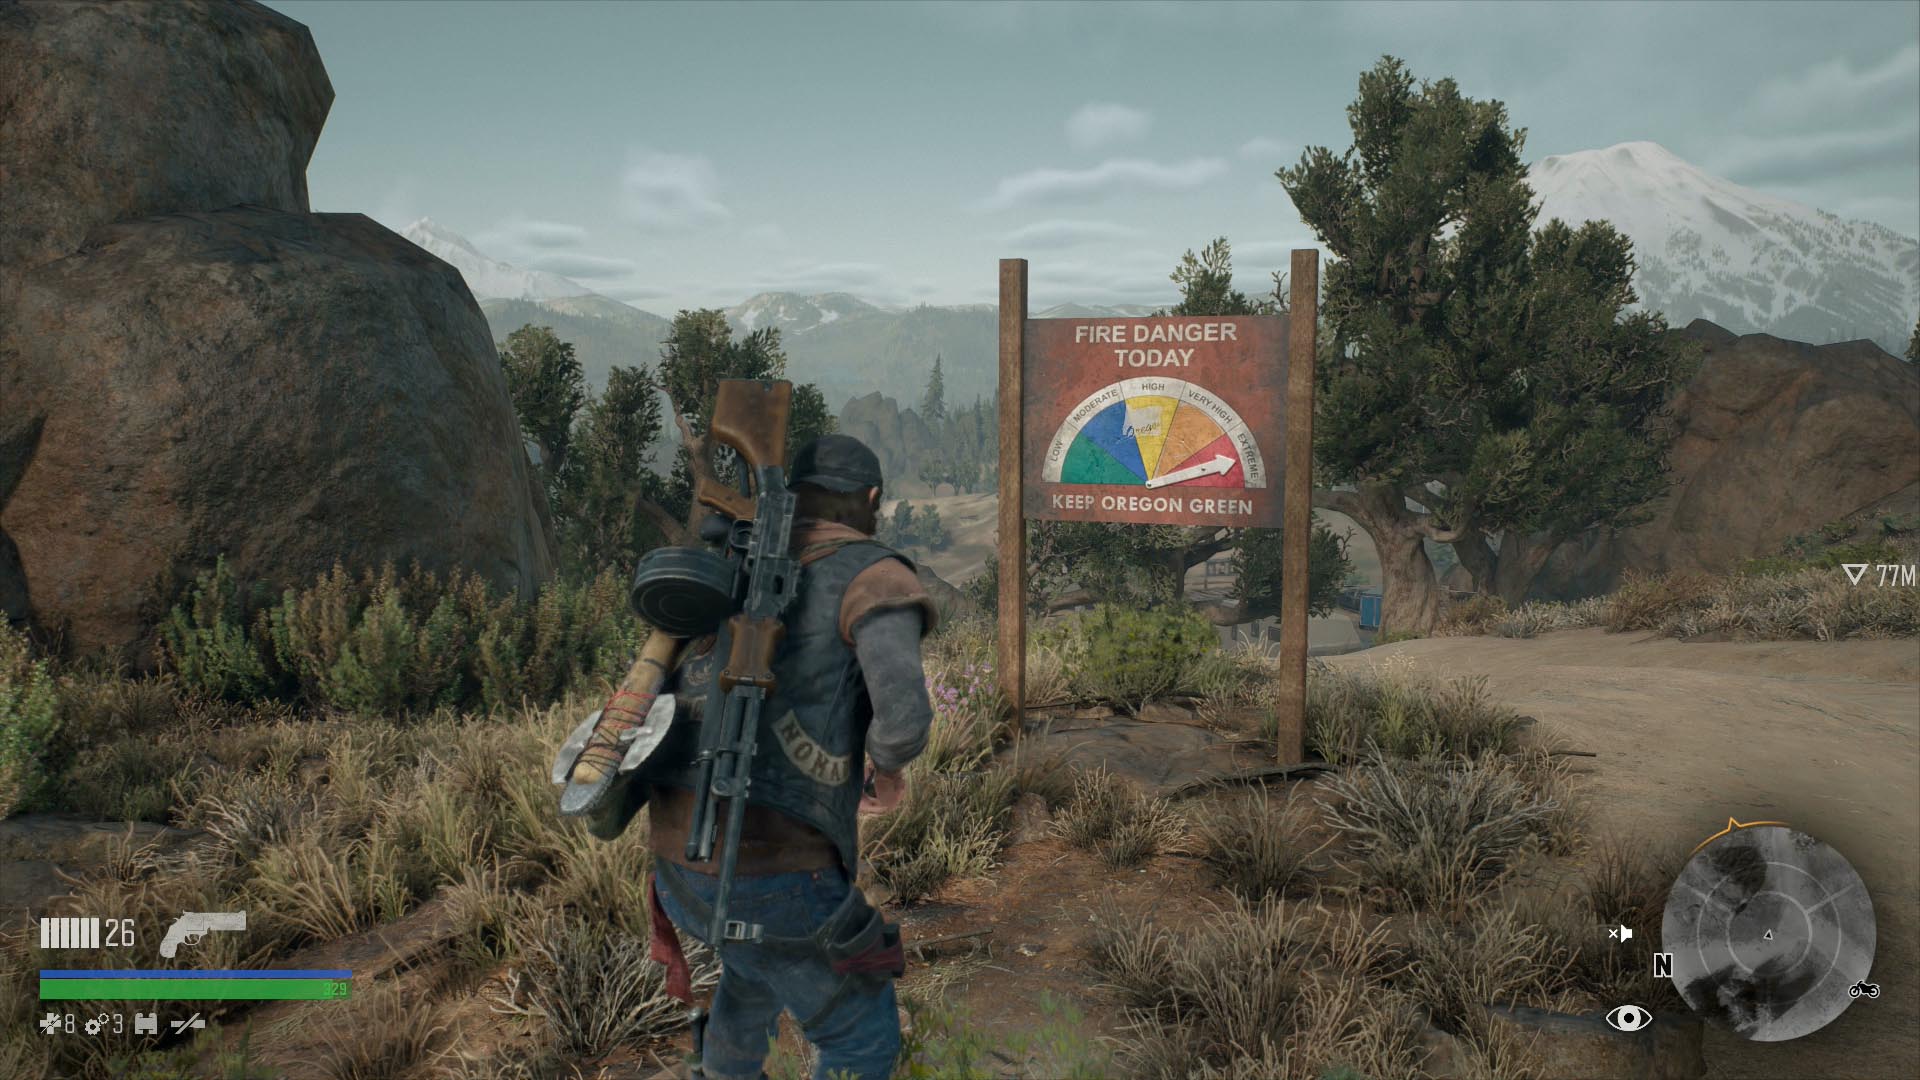
8: Belknap Fire Season Warning Sign
This colorful sign can be found on the hillside southeast from the Bear Creek Hot Springs ambush camp in northern Belknap. The same hill, the Three Fingered Jack Viewpoint, is also home to a historical marker, found a bit further up to the south.
9: Seeking Gorgeous Man
In Crazy Willie’s near the Frontier Motel in Belknap. You’ll probably find this by accident during one of the first missions in the game.
10: Frontier Motel Brochures
In the front office of the Frontier Motel in Belknap. You can pick this up very early in the game while you’re looking for Deke’s bike pump, although it’s easier to miss than #9.
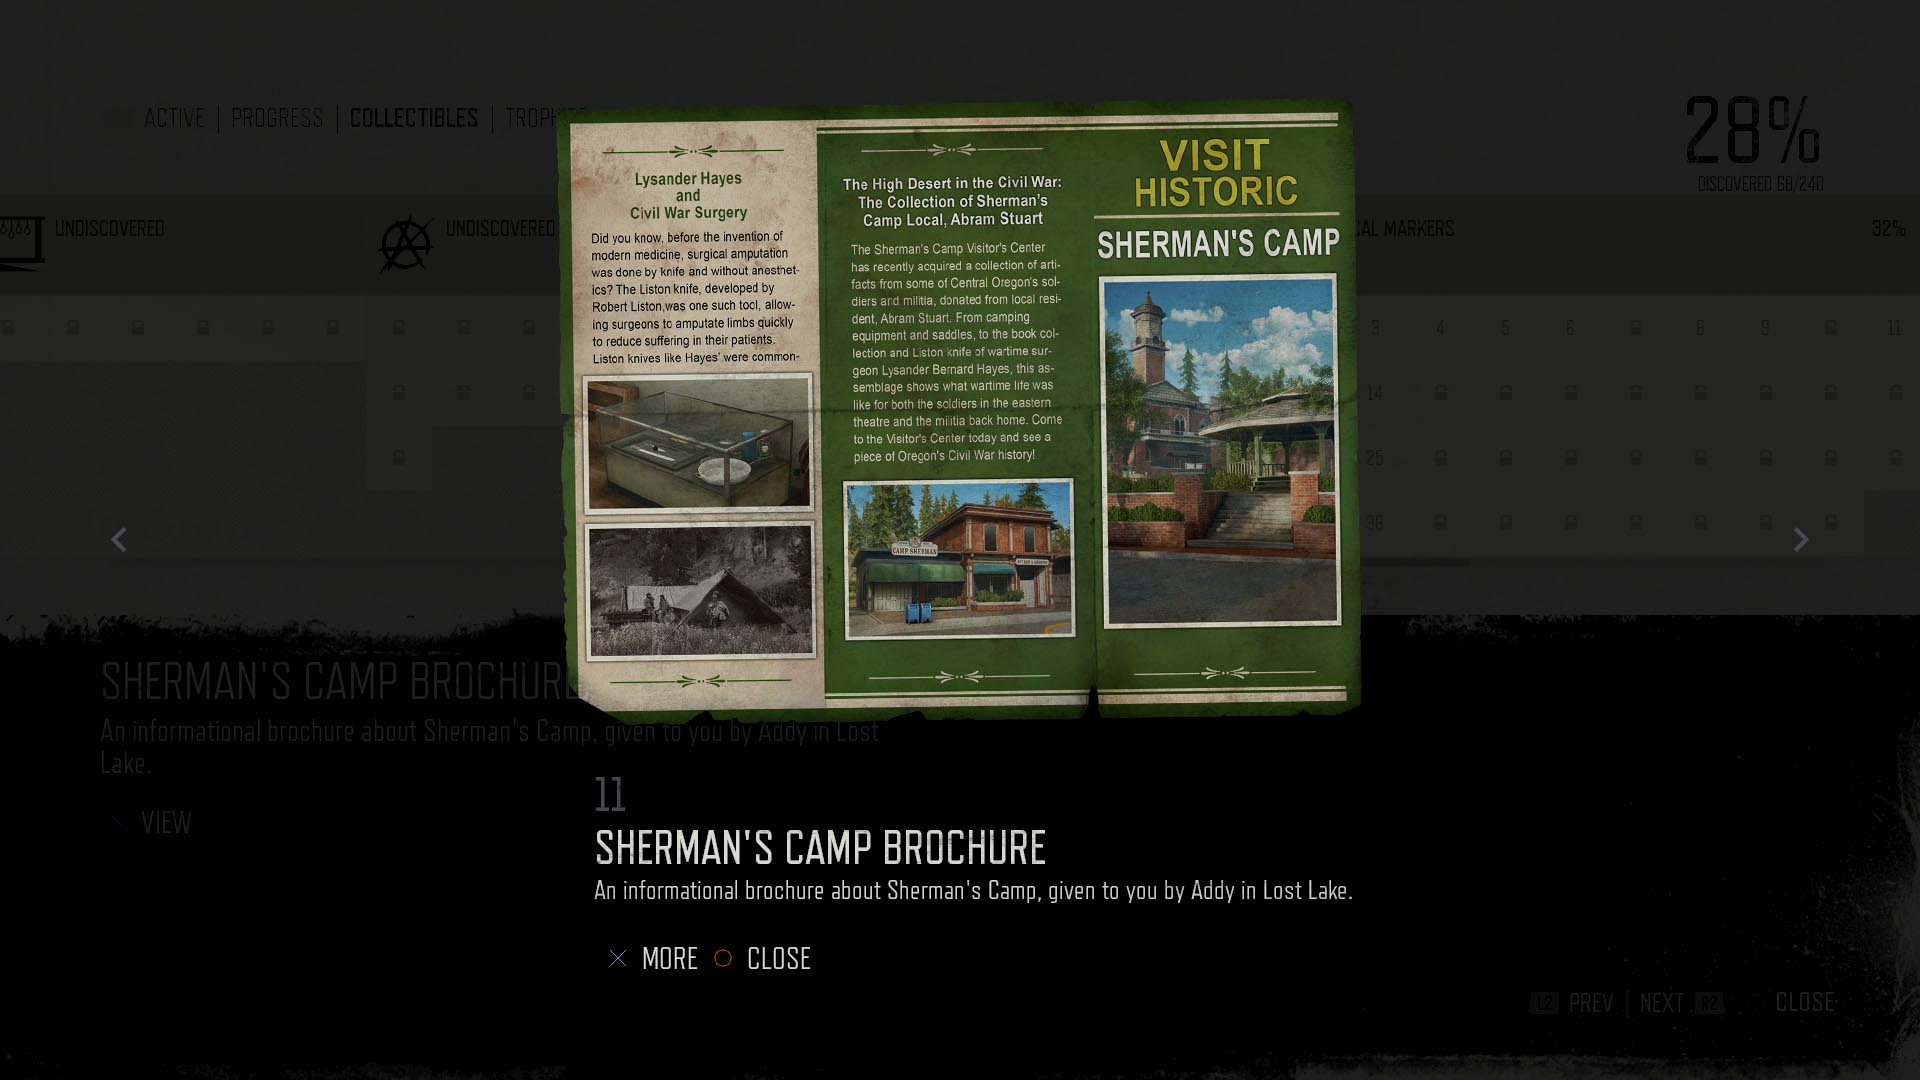
11: Sherman’s Camp Brochure
Unmissable. You receive this automatically from Addy when you pick up “Sherman’s Camp is Crawling” in Lost Lake, which is required for several different mission sequences.
12: Meet the Campfire Cadets
Camp Pioneer in Lost Lake is found north of the Rogue Camp, and northwest-ish from Iron Mike’s encampment. If you don’t find it on your own, you’re eventually sent here as part of the “He’s My Brother” chain, and it’s right near the Ripper checkpoint that guards entrance into Iron Butte.
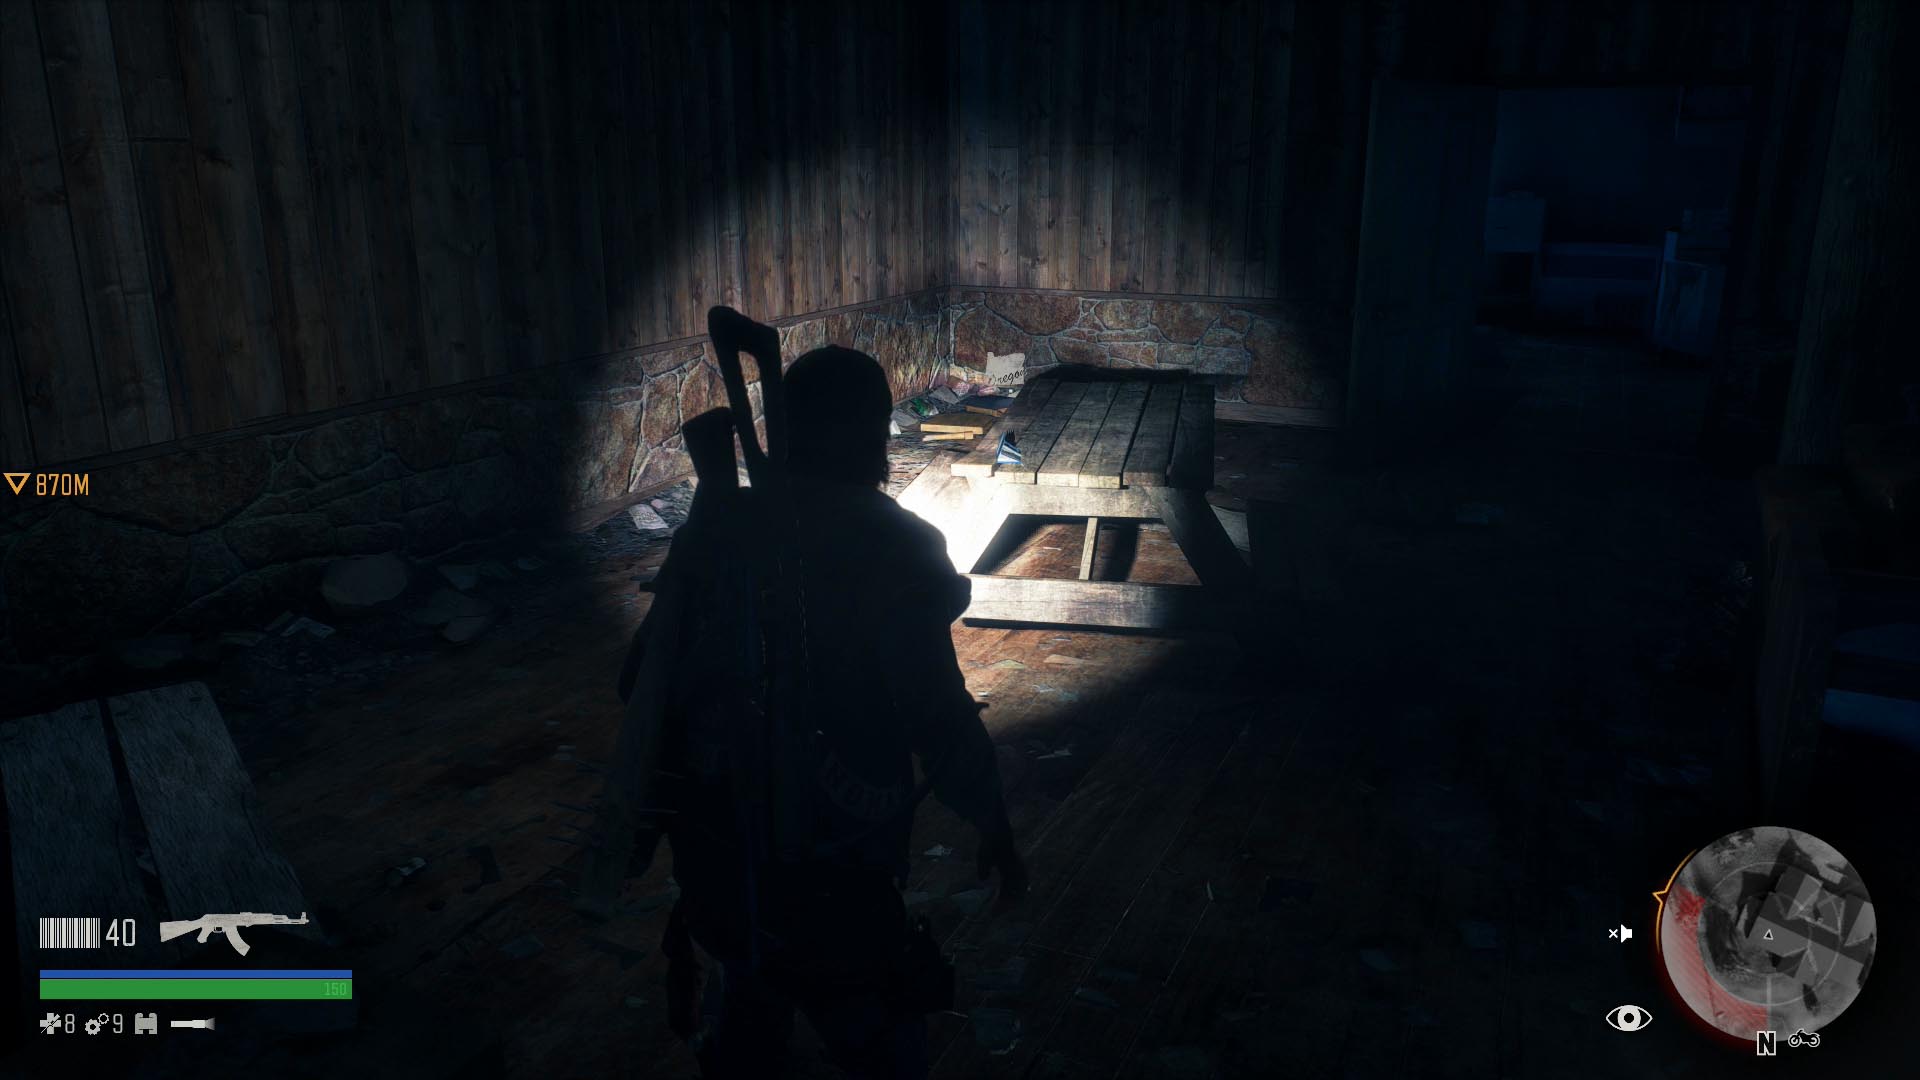
However you get here, you can find this brochure inside Camp Pioneer’s clubhouse, on a picnic table on the first floor.
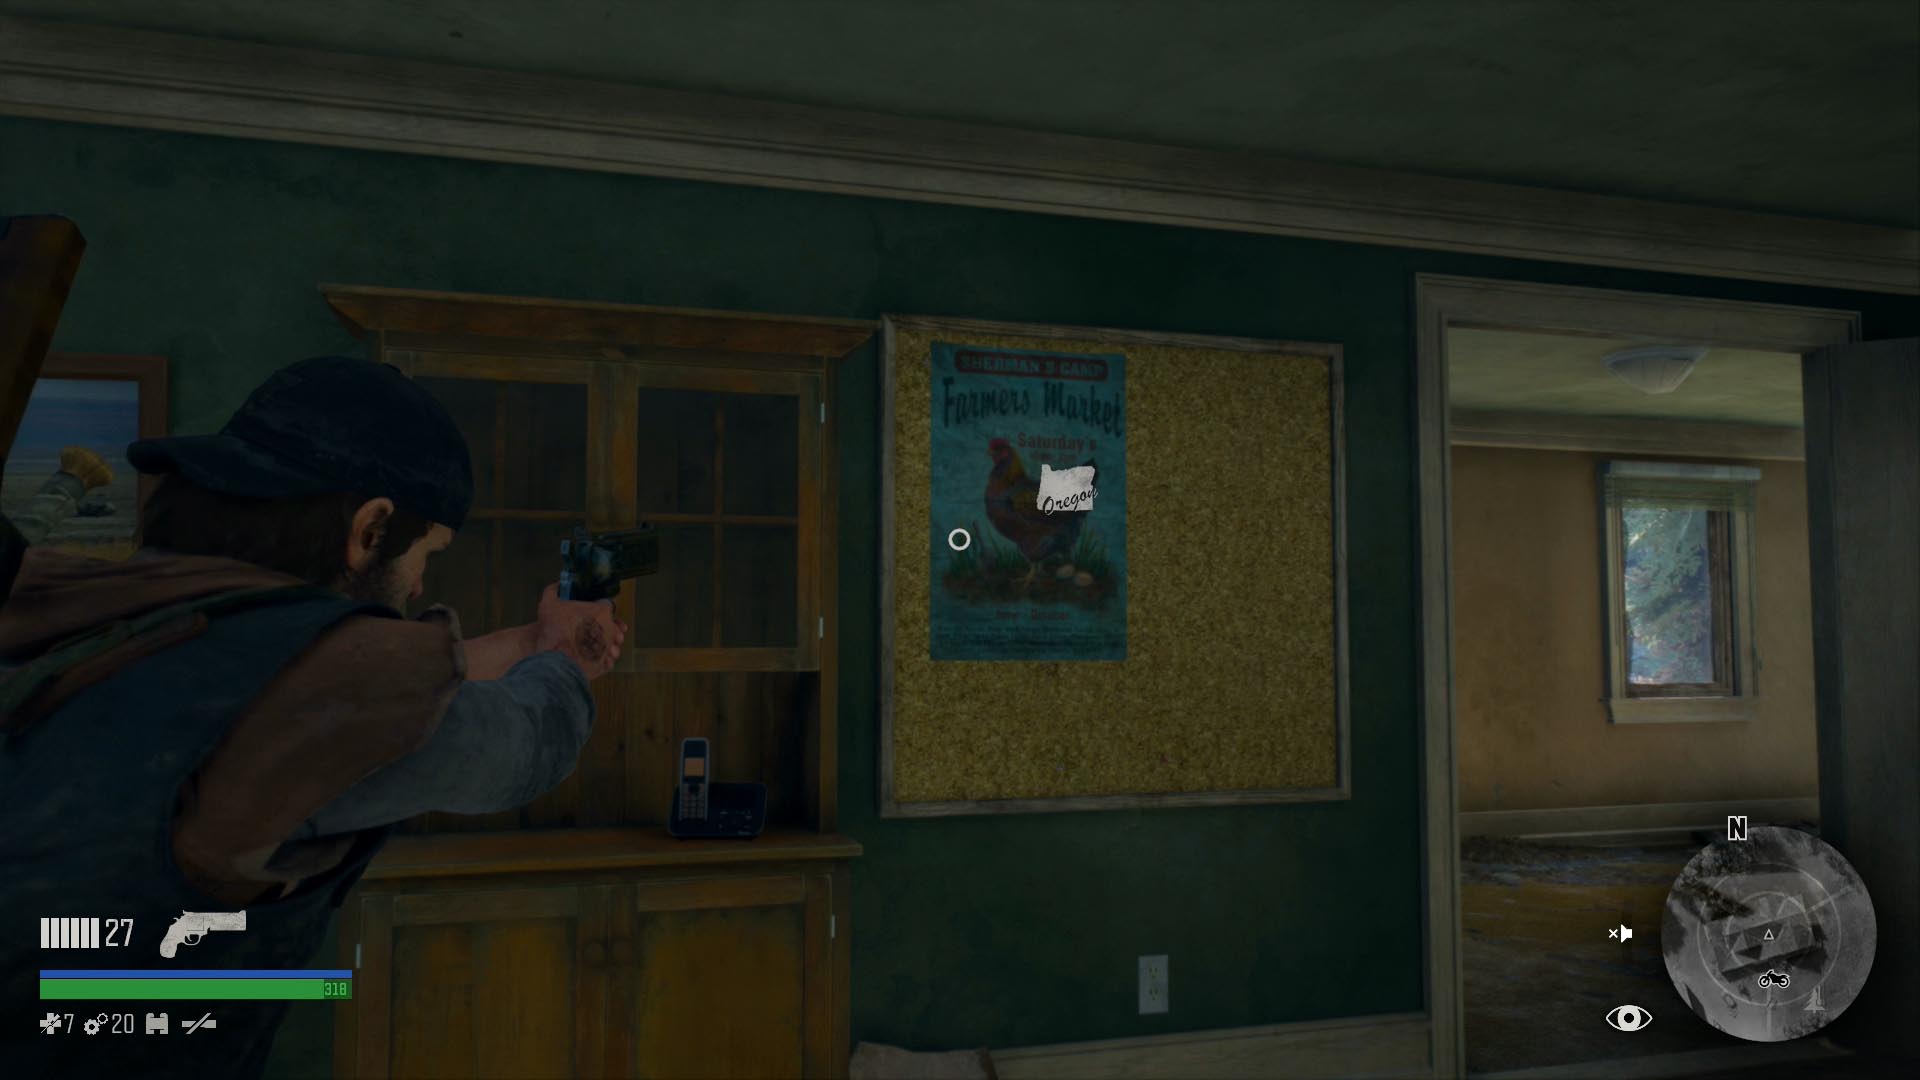
13: Sherman’s Camp Farmer’s Market Poster
This one’s obnoxious. In northeastern Lost Lake, visit the abandoned farm just west of the blocked transit tunnel. This poster is tacked up on a bulletin board inside the farmhouse, near its front door.
14: Rogue Camp Whiskey Menu
Go to the Bucking Elk Lounge in the Rogue Camp in Lost Lake to find this menu on a table inside. You’ll come by during a mission on Lisa’s chain, “You’re Safe Now.”
15: Preserving the Beauty of Crater Lake Poster
Look on the counter in the gift shop at the Crater Lake Visitor Center. You’ll eventually be sent here on a mission from Wizard Island (and be sure to be prepared for a hell of a fight when you are), so it’s not as far out of the way as you might think.
16: Crater Lake Postcards
Break into the restaurant at the Crater Lake Visitor Center to find these on a table. There’s a scenario item in the same room, so this is as close to a “gimme” as tourism collectibles get.
17: Fishing at Diamond Lake Village
Once you reach the Diamond Lake encampment in Crater Lake, you can find this on the pier, pinned up next to the woman cutting fish.
18: Chemult Suds-Fest
Go into the Big Mountain Travel Center in Chemult, in the central part of Highway 97, and look on the bulletin board next to the checkout counter. (It’s directly north of the Fuel icon on your map.)
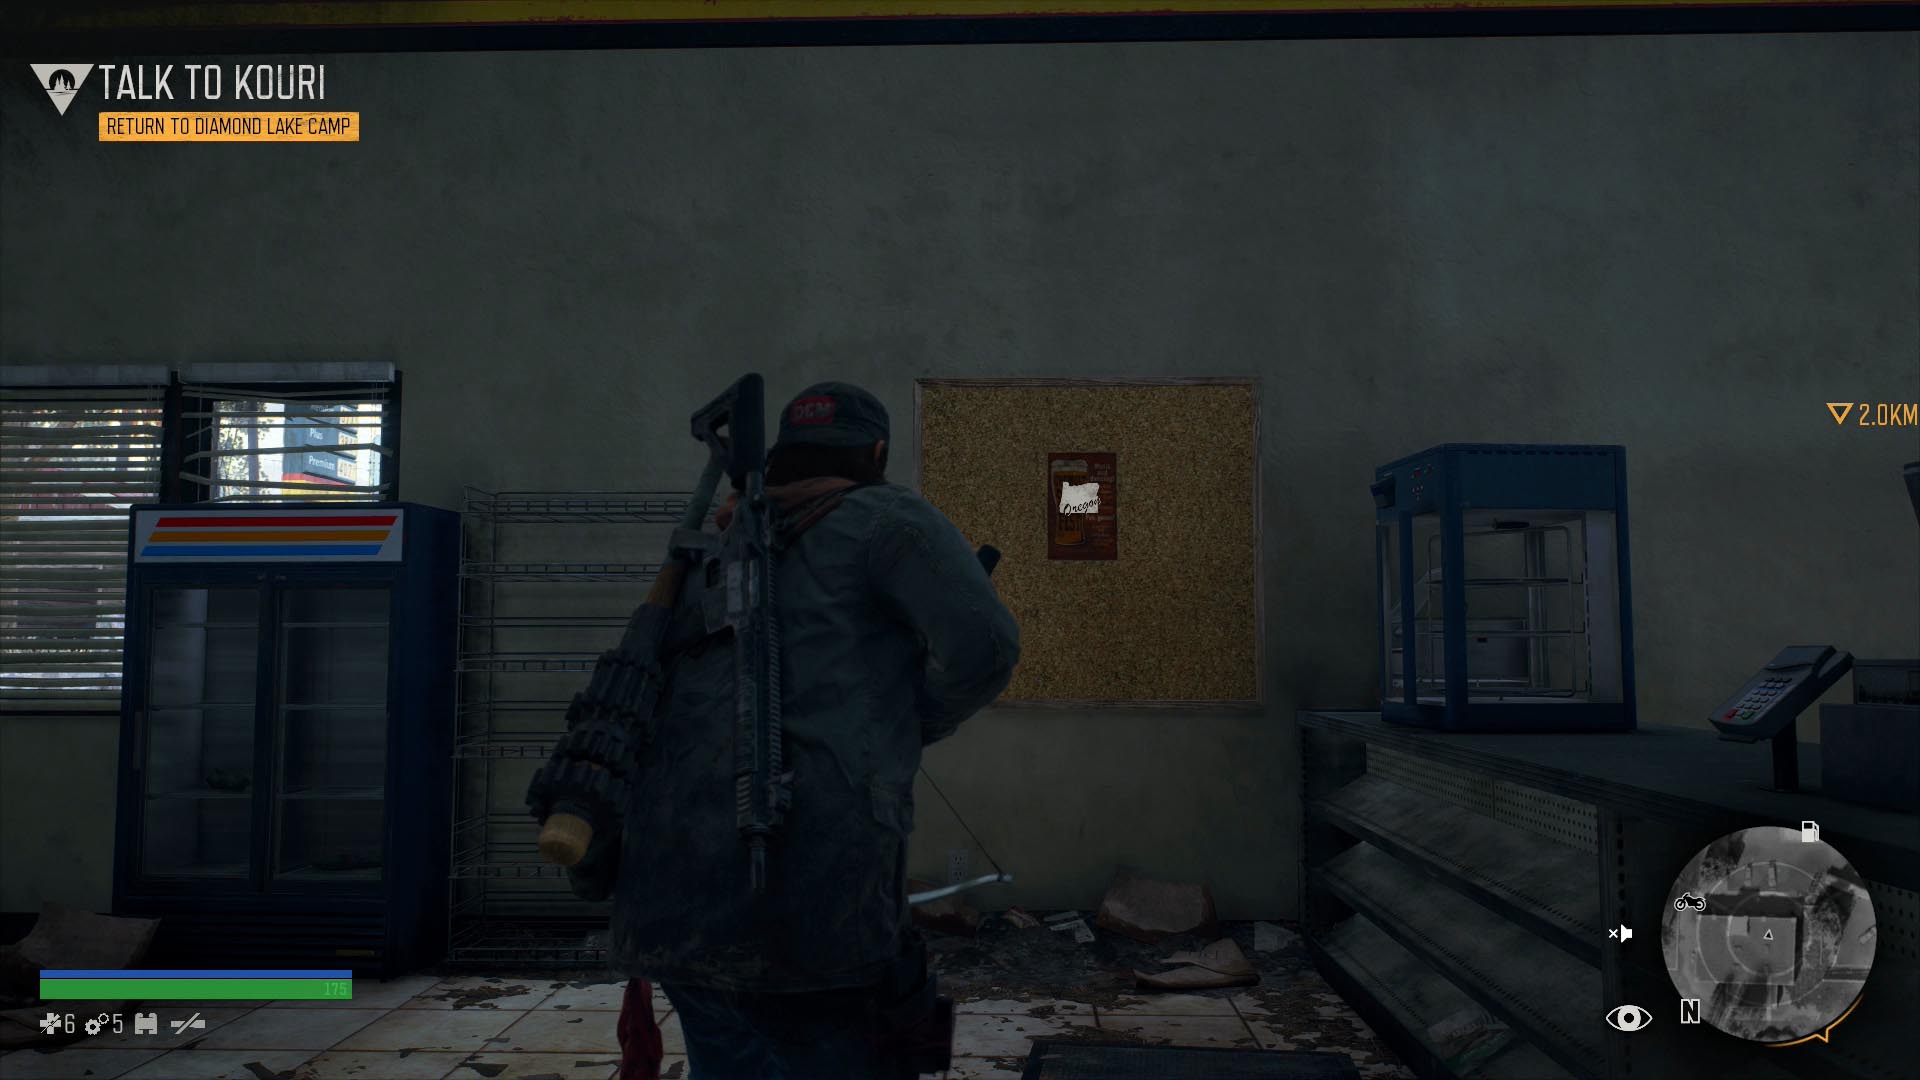
If you found tourism #21, below, this one is right next door.
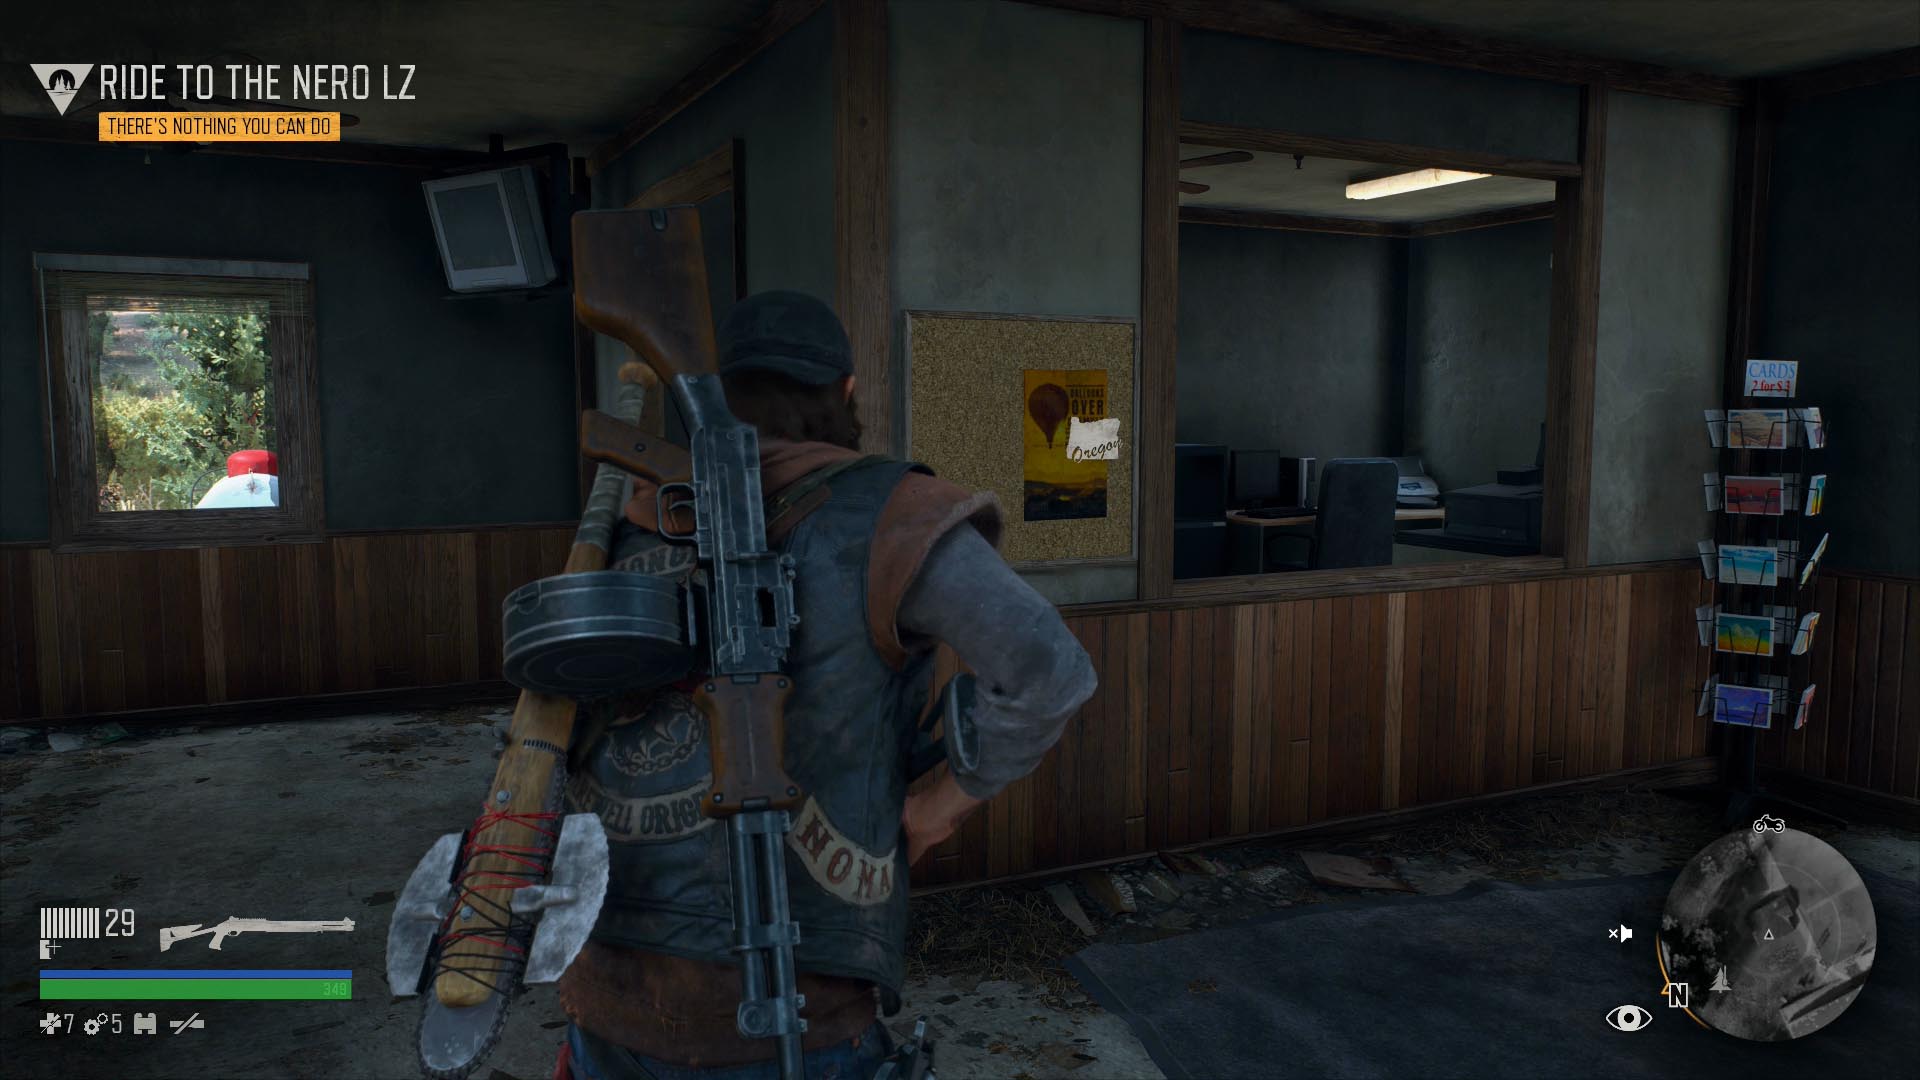
19: Balloons Over Chemult
The Chemult Train Station is in central Highway 97. It’s difficult to miss, due to the train cars full of corpses and the Horde there to munch on them. The poster you’re looking for is in the small office on the north side of the lot.
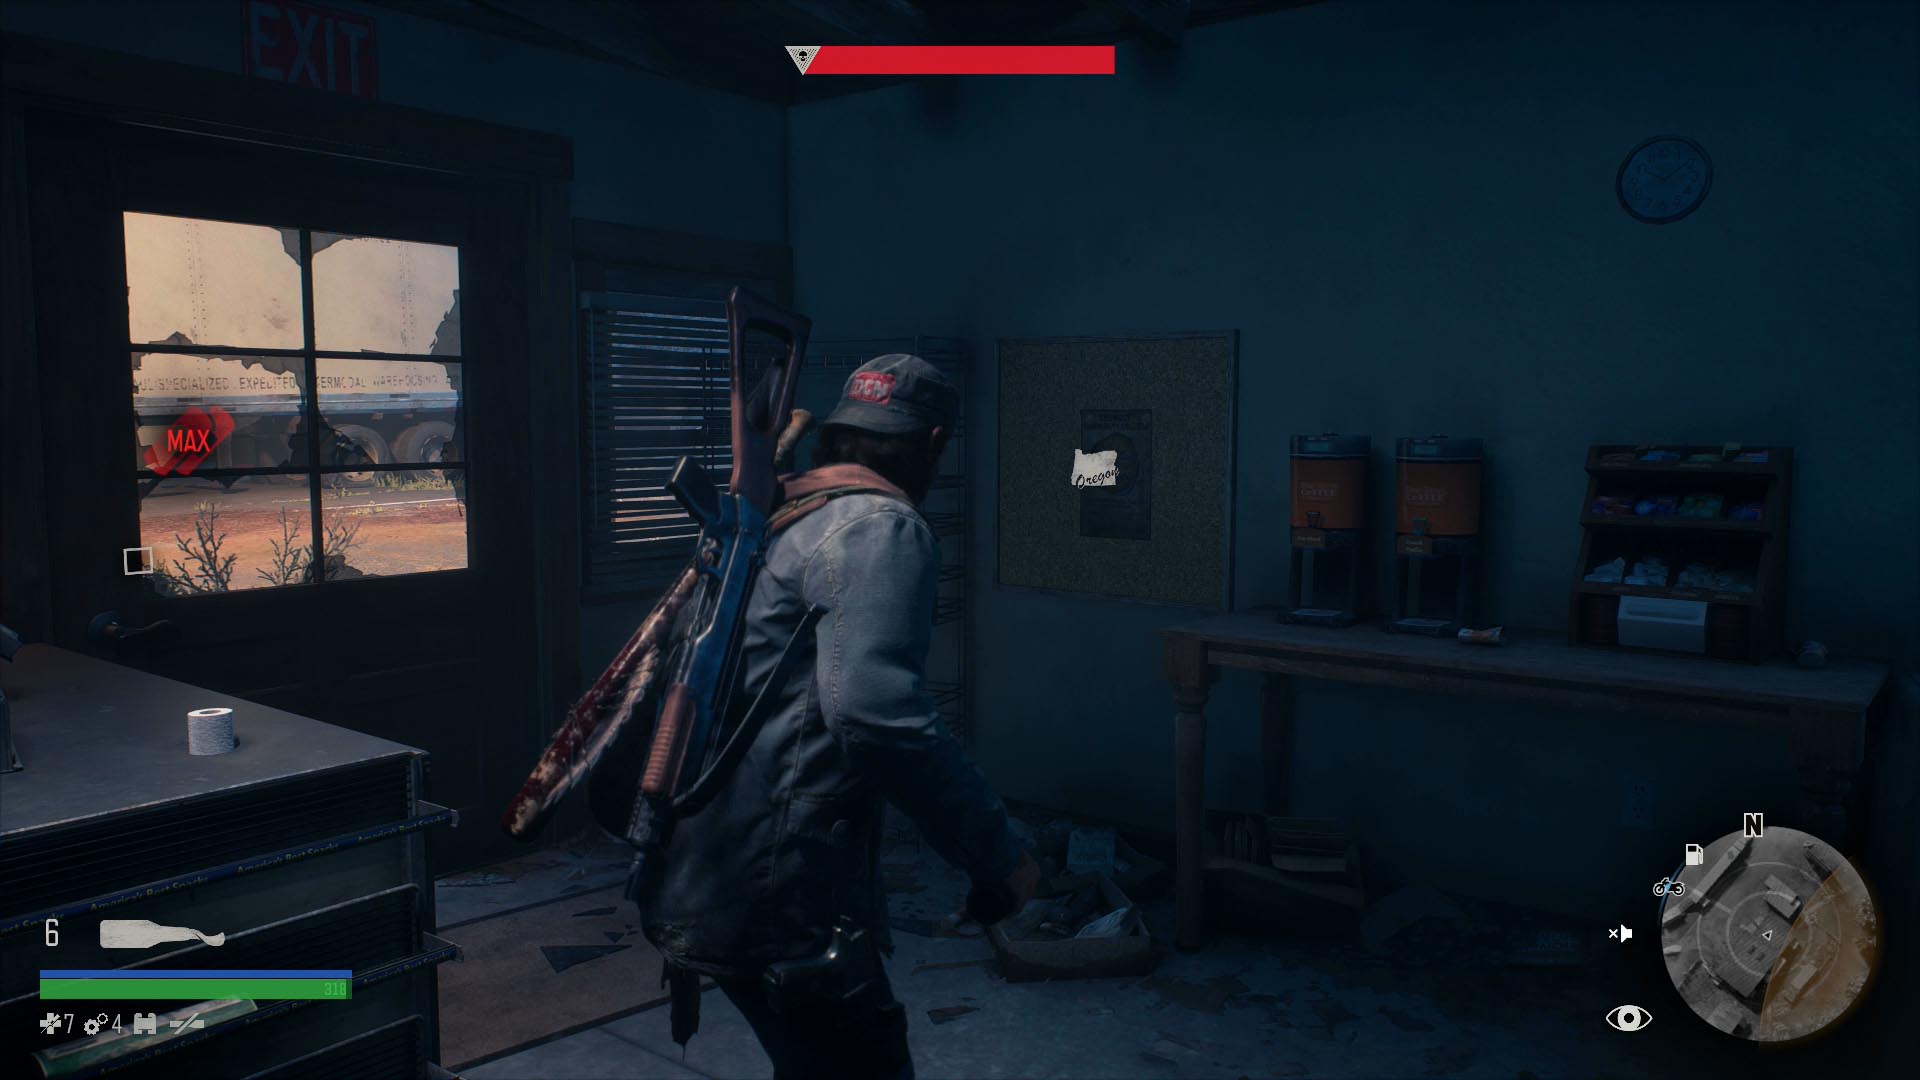
20: Take Out & Tunes
Go into Timber Auto Parts on the southern end of Chemult in Highway 97, and look on the bulletin board near the counter in its office.
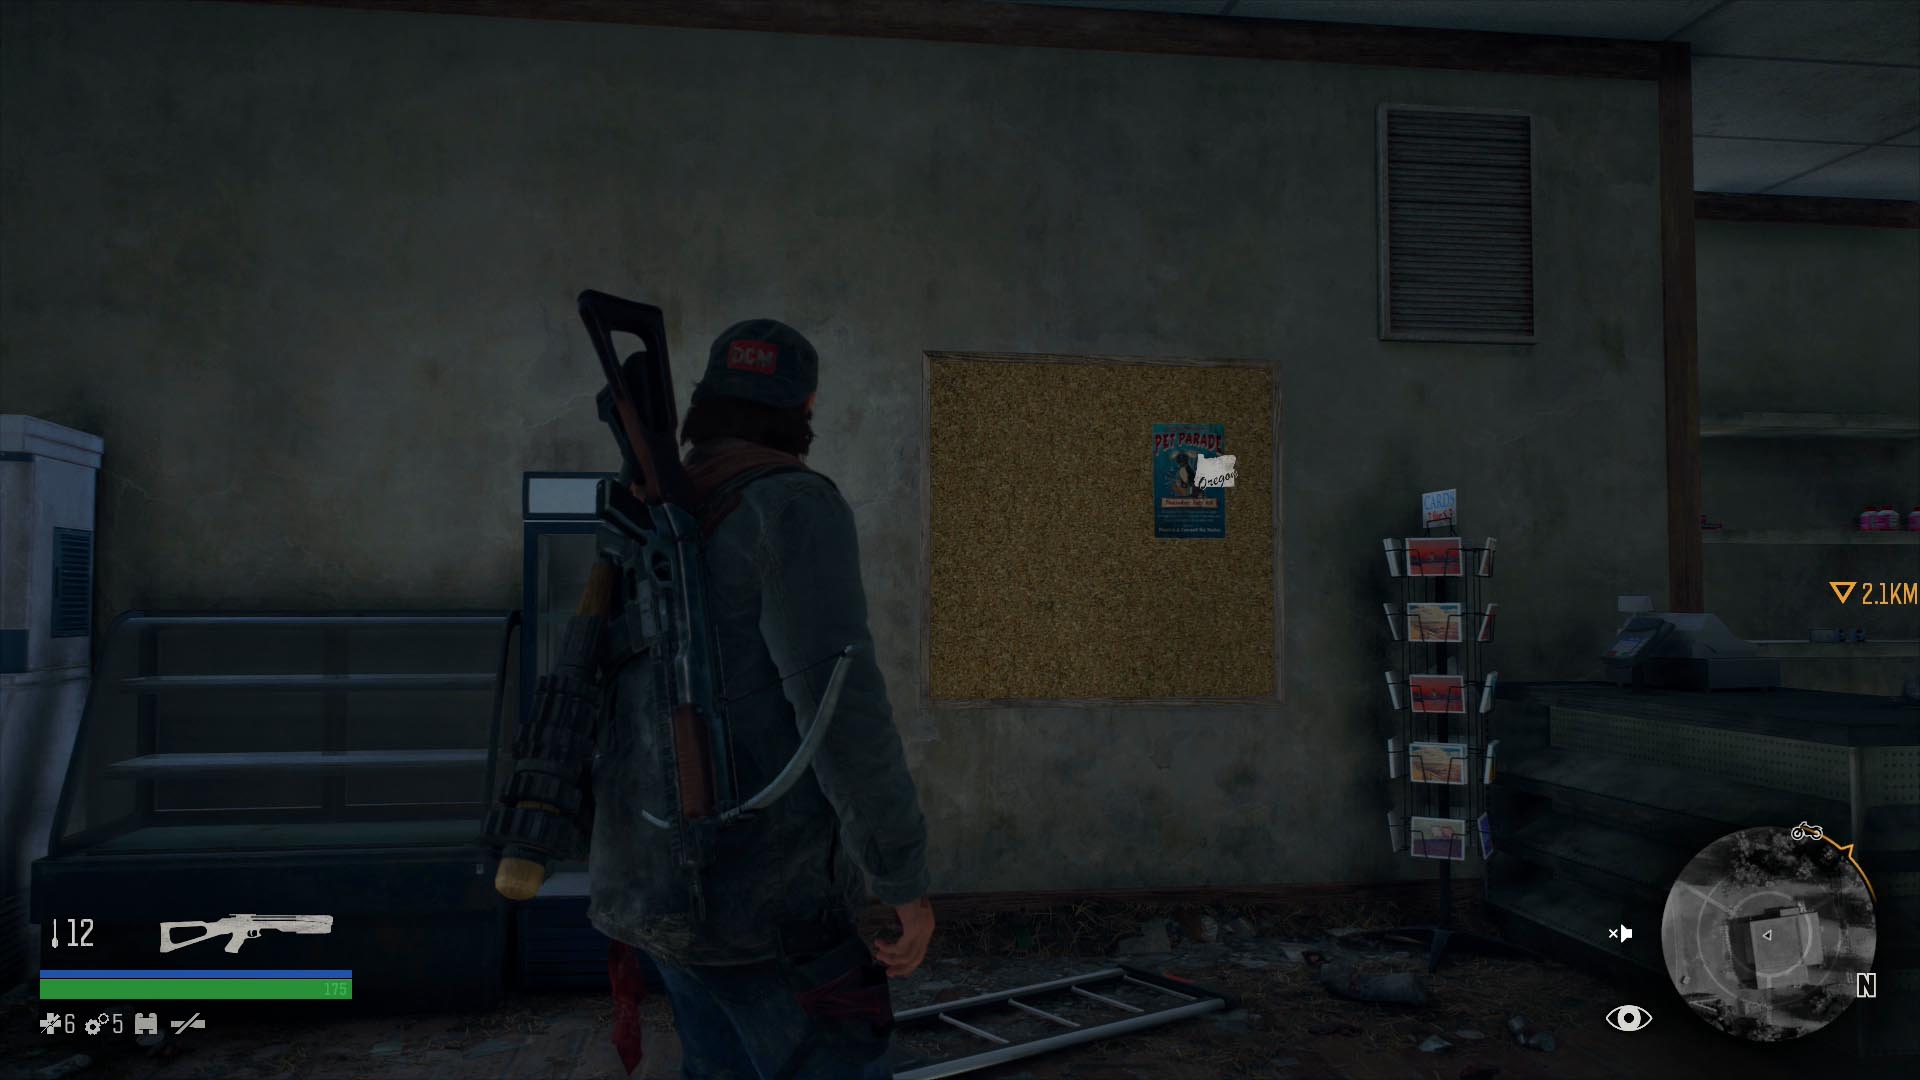
21: Pet Parade
Go inside the Chemult County Feed and Ranch building in Chemult, in central Highway 97, to find this tacked up on a bulletin board next to the spinner rack of postcards. (If you found Tourism collectible #18, above, it’s right next door.)
22: Chemult Community College Green Week Poster
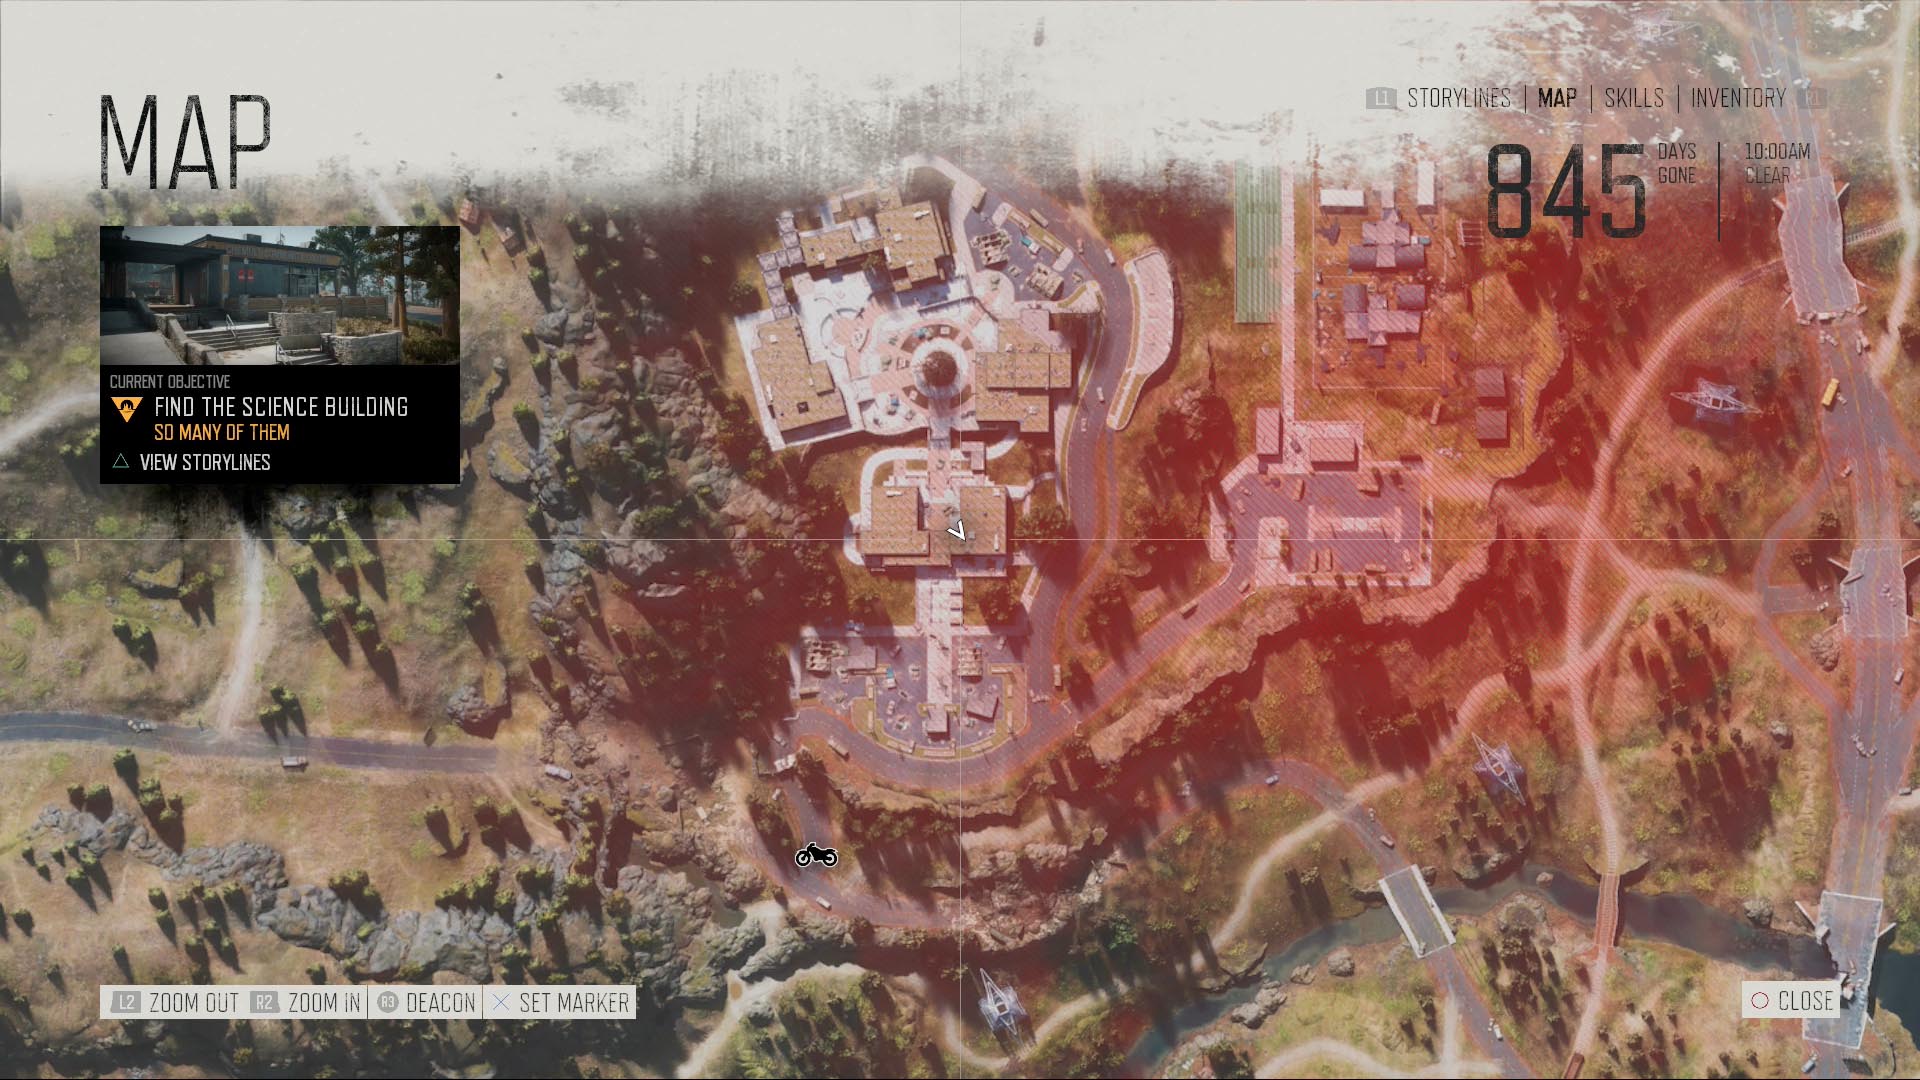
There’s a lot going on with Chemult Community College on Highway 97. You can pick up a bunch of missions for it almost as soon as you’ve found it, as there’s a NERO checkpoint and a Freaker infestation right on campus. However, you can’t get through the gate until a specific point in the “I’m Never Giving Up” storyline.
Once you do, you can find this poster on the wall inside the southeastern office on campus, while you’re initially exploring the place during “So Many of Them.”
23: Chemult Ski Resort Brochure
After you complete the Wade Taylor mission “I Don’t Wanna Hang,” return to the ski resort in northeastern Highway 97. You can get back into the lodge via the main doors on its northern side. There are a lot of useful supplies in here, as well as this brochure, found on the counter in the ski shop on the first floor. (It also appears to have a bug with its lighting, as of patch 1.07.)
24: Klamath Marsh Wetlands Preservation Flyer
Frankly, this one’s just rude. It’s in southeastern Highway 97, tacked up on a display board in a totally unremarkable part of the map. It’s a little ways southwest from the Bare Bay Ambush Camp, but otherwise, you could search for a good long while without ever finding it.
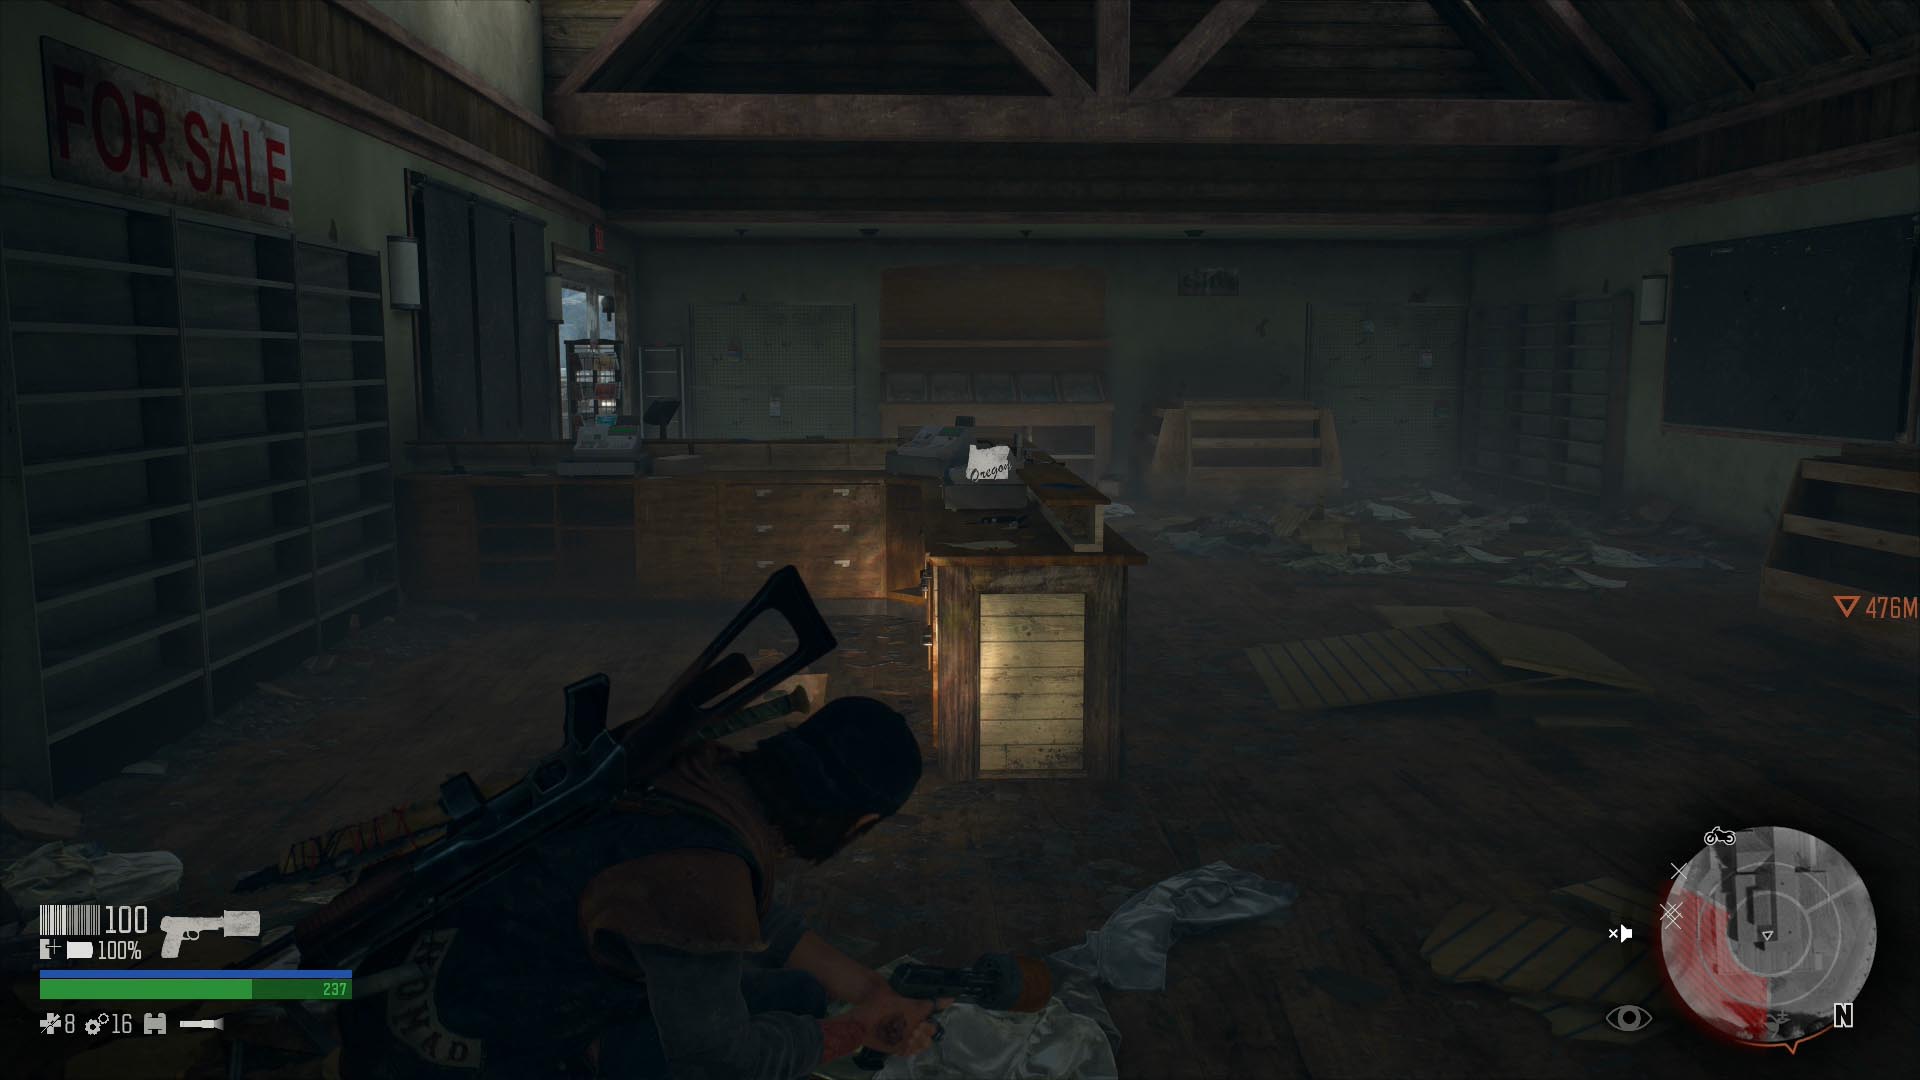
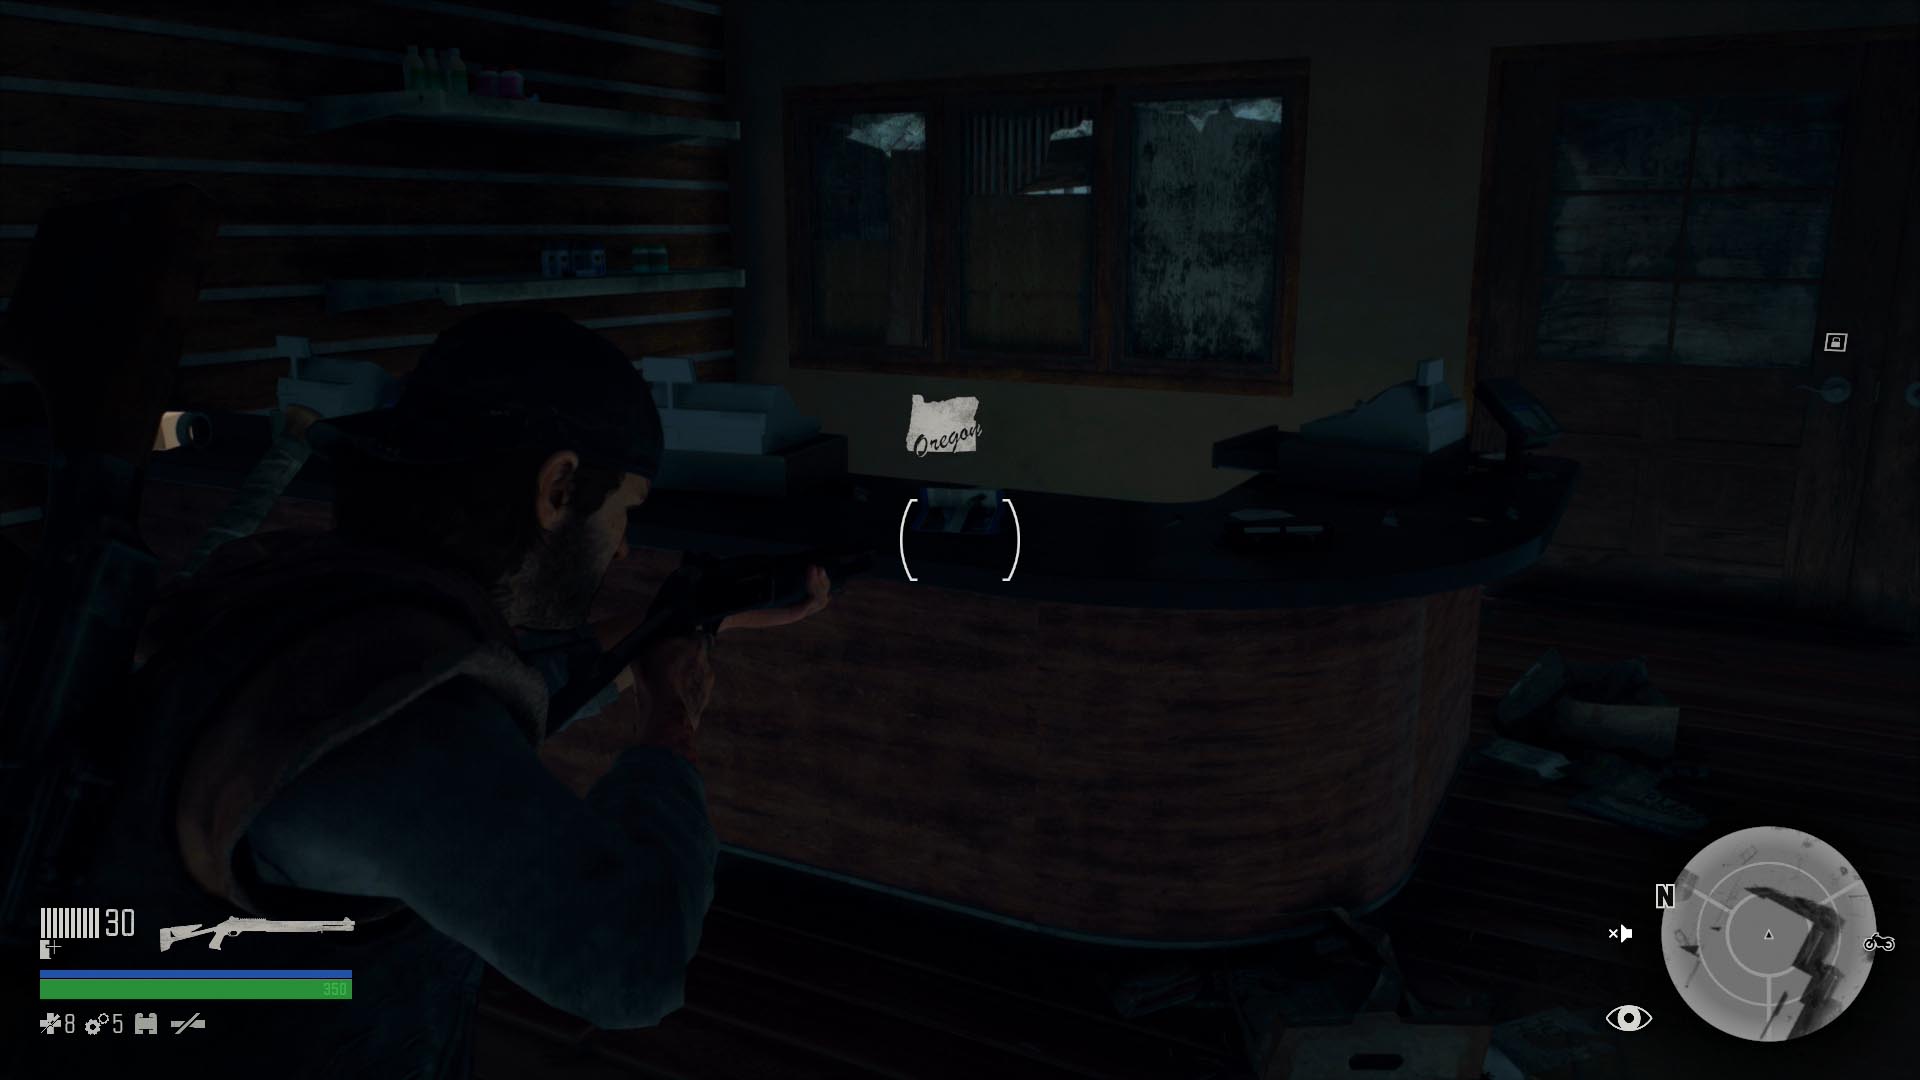
25: Iron Butte Ranch Masters Tournament
Go into the gas station west from the Rogue Tunnel NERO Checkpoint in Iron Butte and look on the checkout counter.

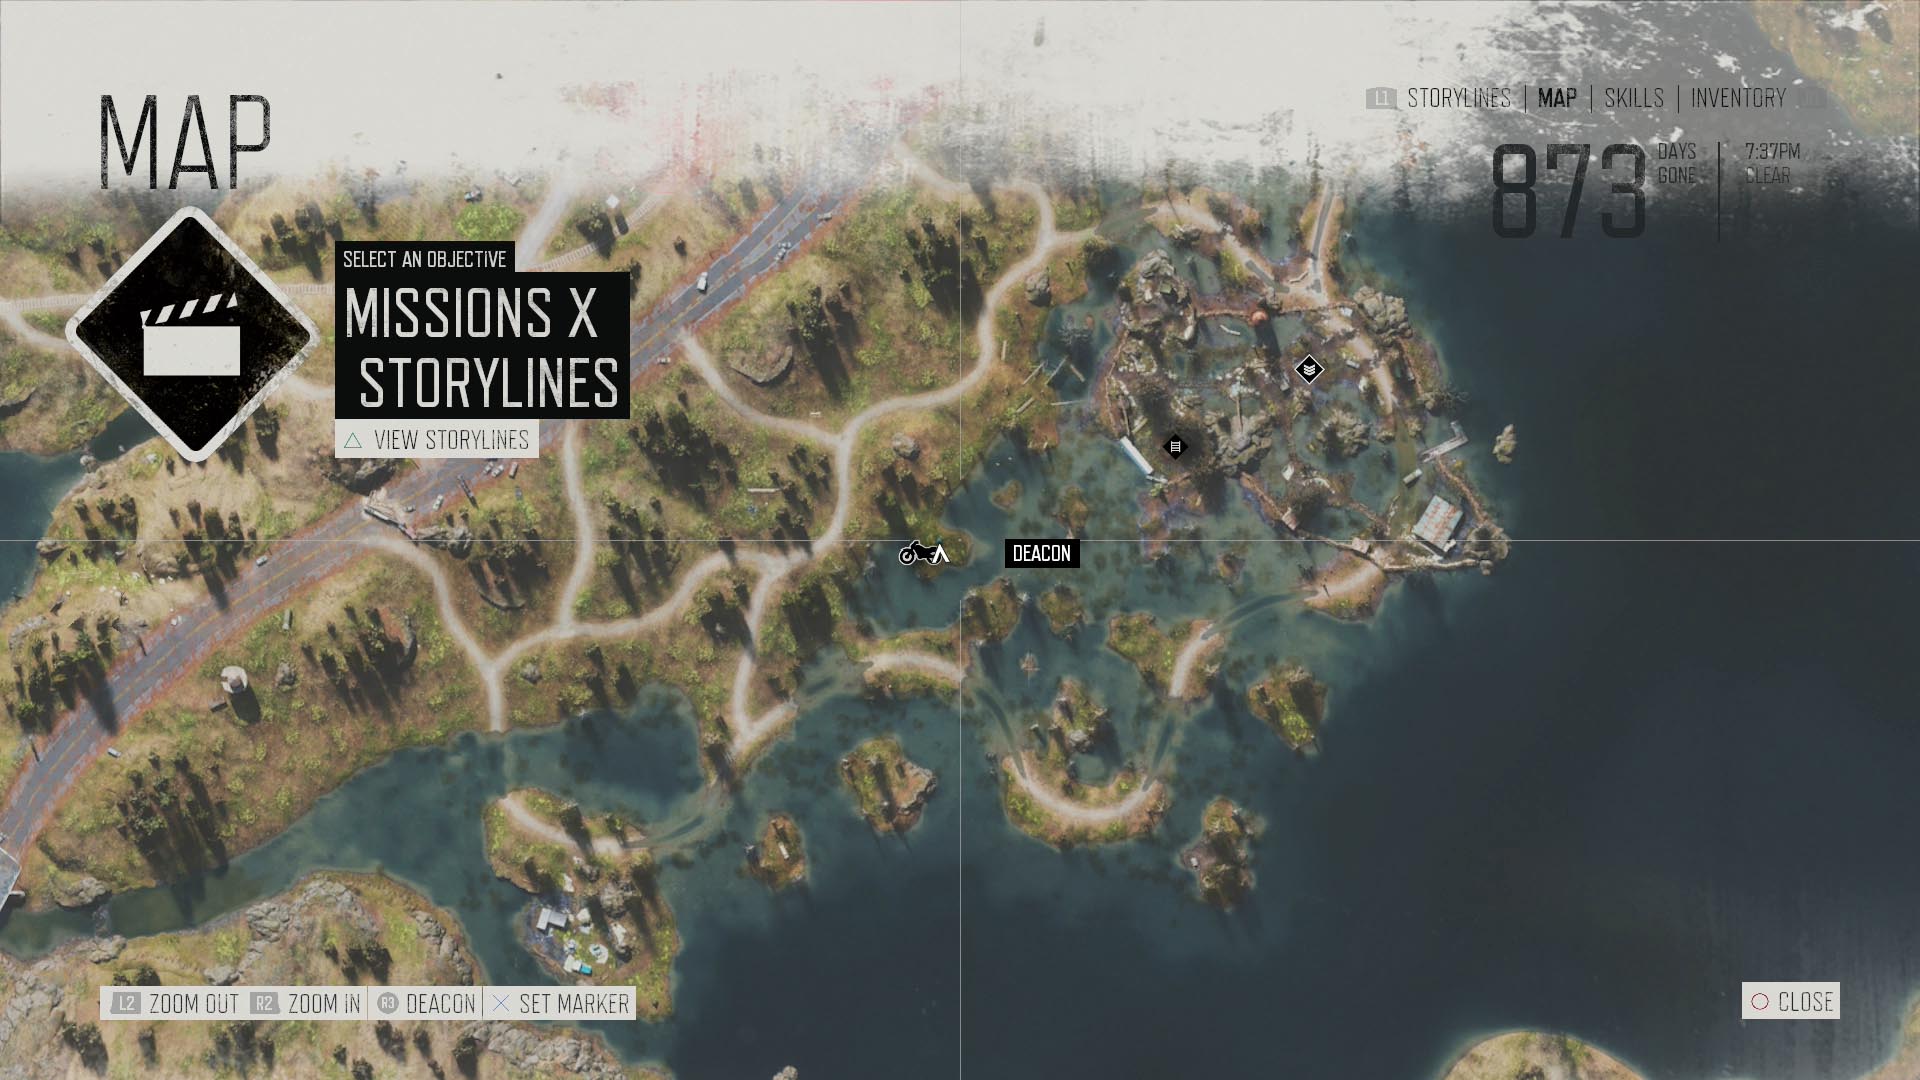
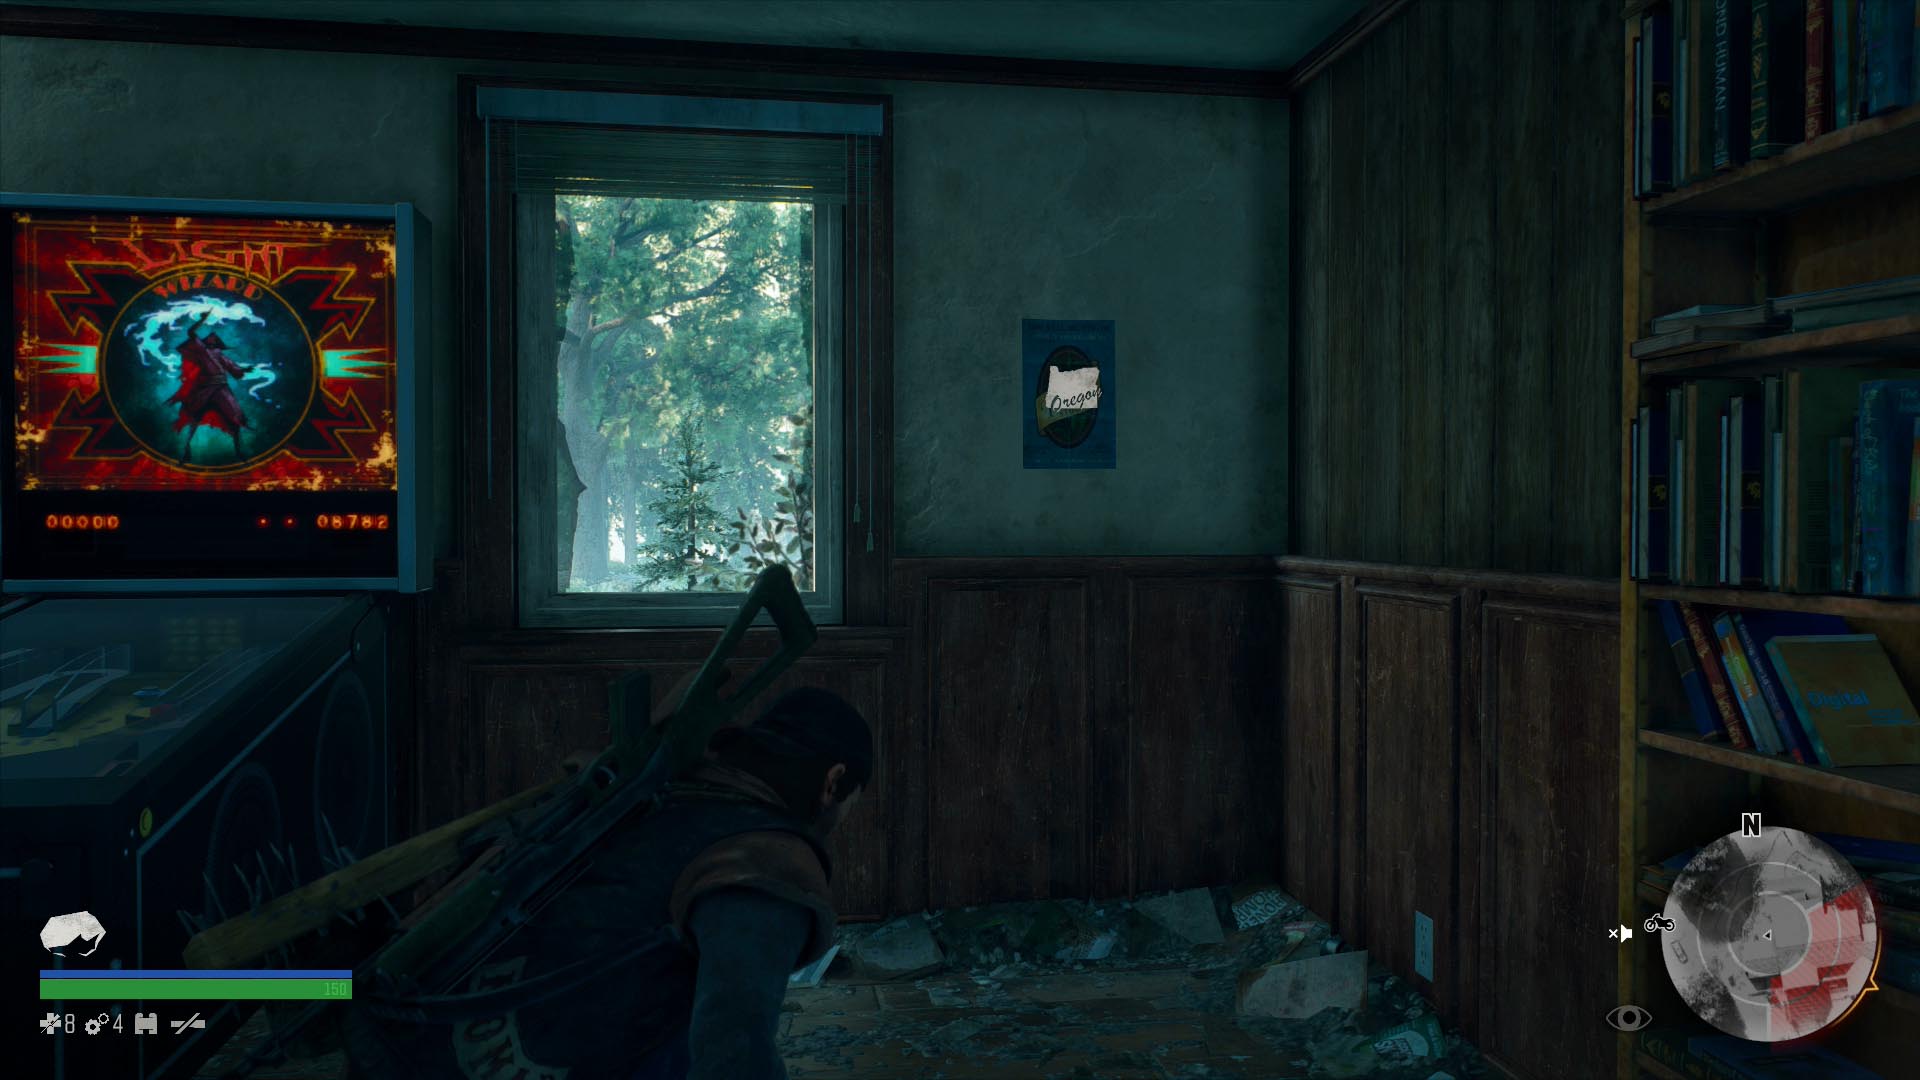
26: Adam Finch Stout Label
At Berley Lake in the Lost Lake region, go inside the biggest house and look on the wall by the pinball machine. You’re sent to the general area during “I Need Your Help,” one of the Lost Lake missions on the “I Remember” chain.
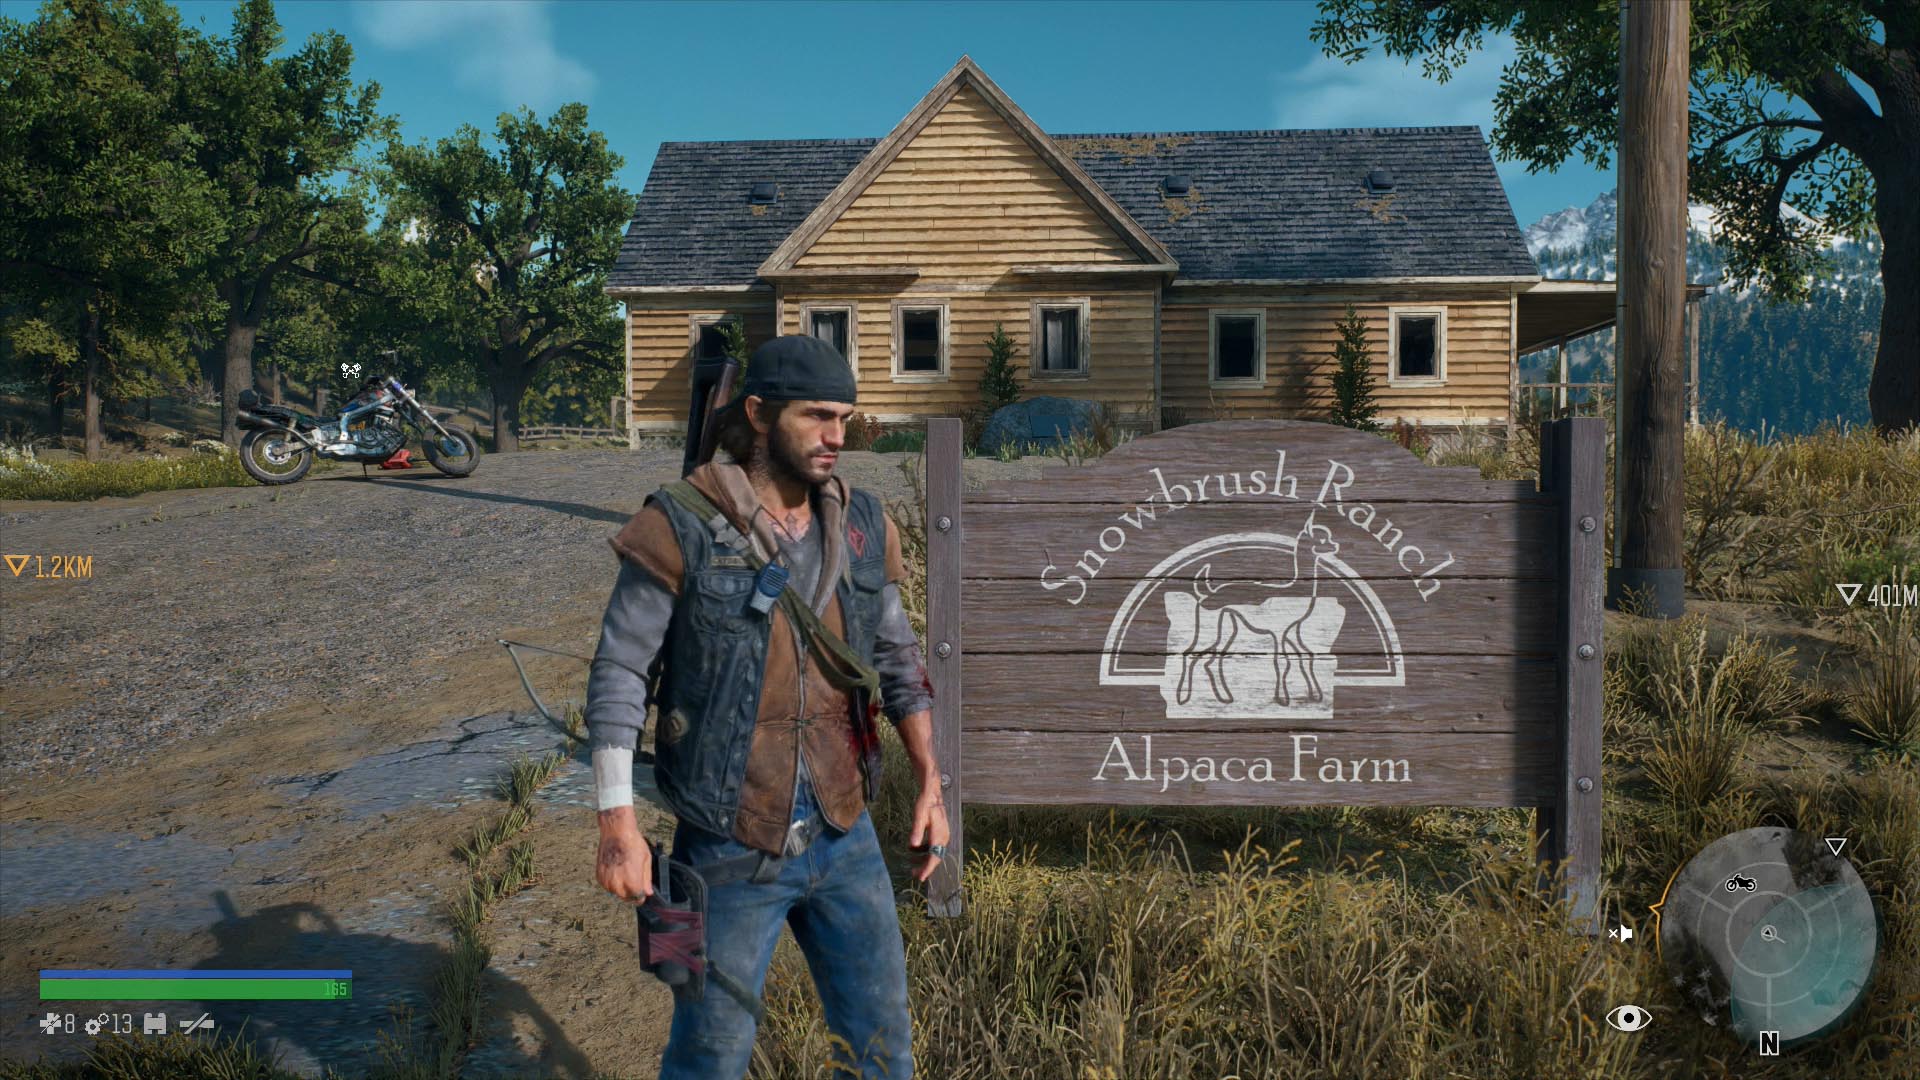
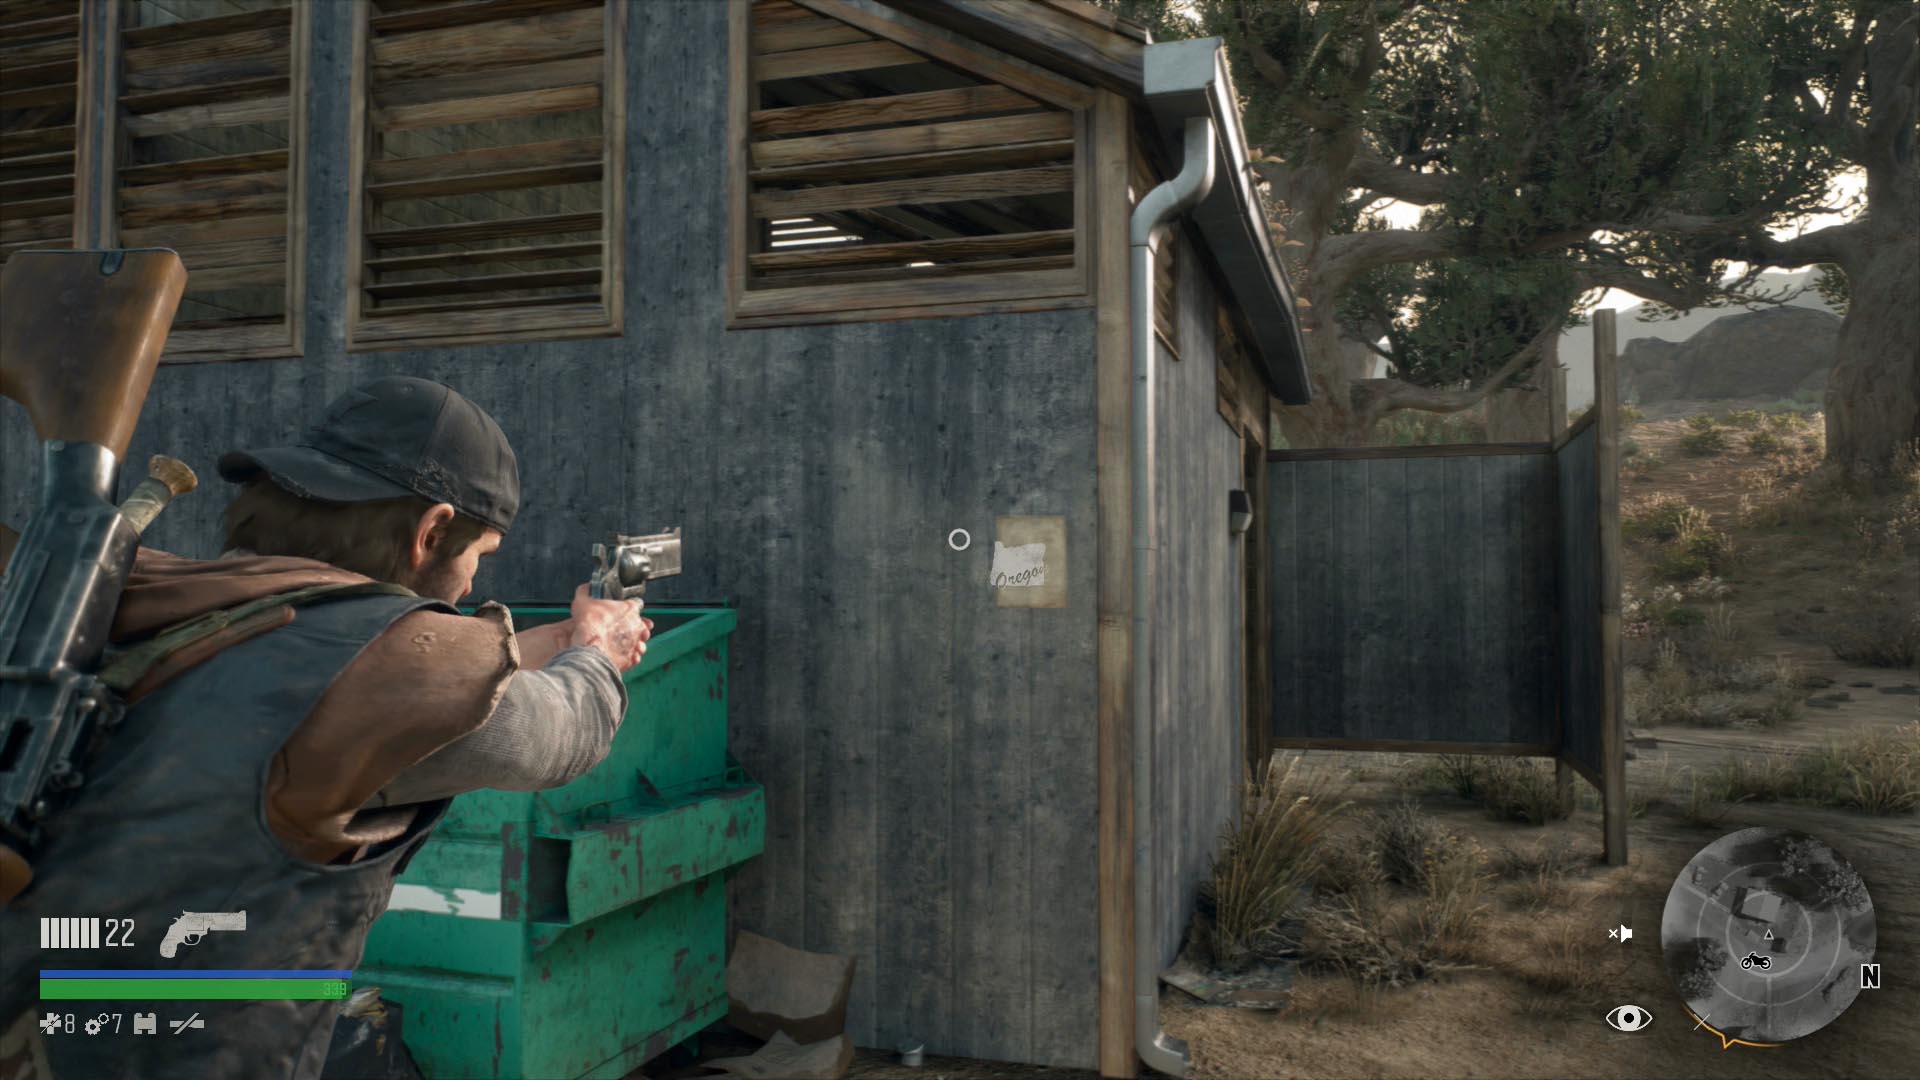
27: Snowbrush Ranch Alpaca Farm
The farm in question is in Iron Butte, south of the Rippers’ checkpoint between it and Lost Lake. It’s a flat yellow building that’s easy to spot by day, with a historical marker outside and this brochure in its foyer.
28: Classified Virus Research
This really stretches the limits of what can be considered “tourism,” but you can find this on the second floor of the Cloverdale building in Iron Butte. It’s only accessible once you visit it during “Expect the Worst,” late in Crater Lake’s story mission sequence. Be sure to read the text in the “more” screen for a Bend Studios Easter egg.
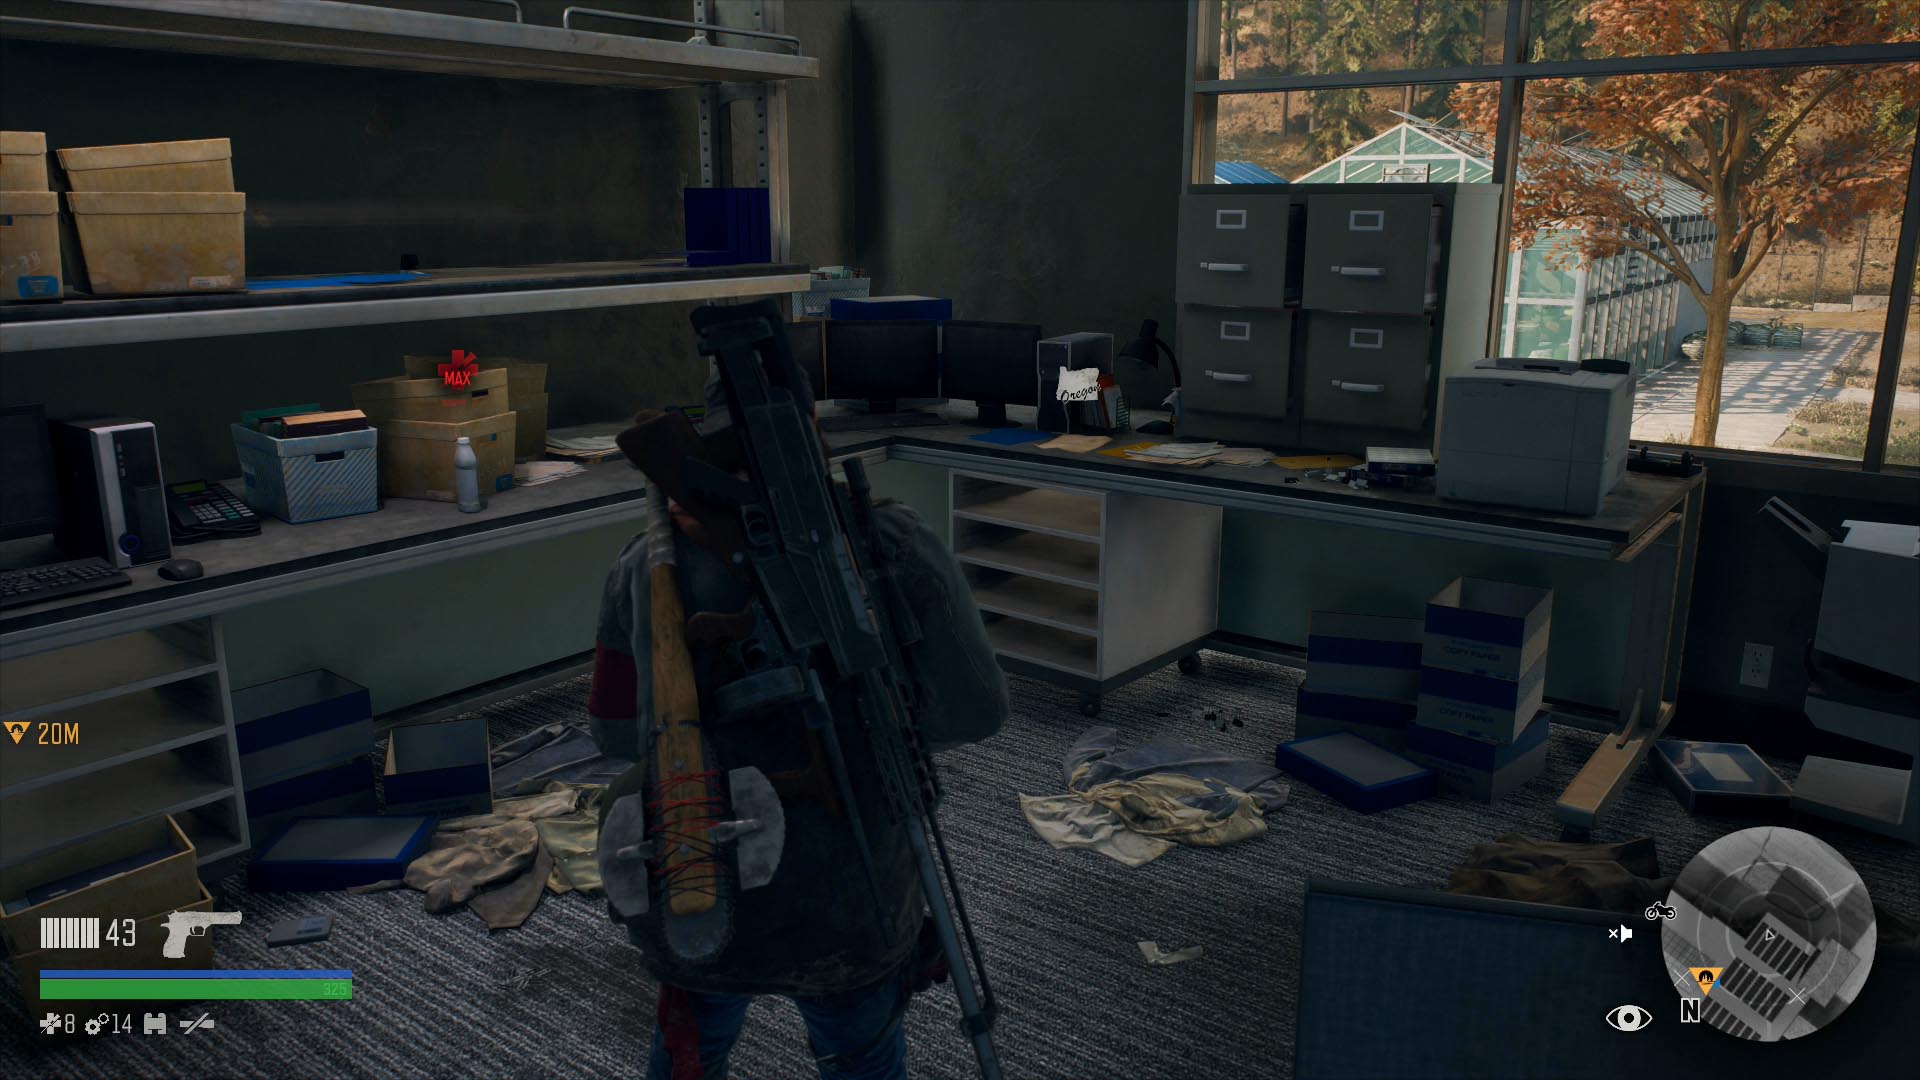
The Cloverdale campus is accessible after you leave, although it’ll be a while and it isn’t obvious. You can get back into the office by slipping through a hole in the fence near the front entrance, although the only reason to come back is if you missed one of the two collectibles in the lab.
—–
We’re still rolling along with Days Gone collectibles.
Move on to the next step of our massive guide to Days Gone‘s collectibles where we delve into seeking out herbs, historical markers, and the camp guitarist, or take a loot at our guide going over where to find NERO intel, characters, and lab note collectibles. That’s not all, though — we have a few guides for Days Gone you may be interested in as well.


Published: Apr 29, 2019 10:32 pm