Throughout The Final Shape campaign in Destiny 2, and in the Overthrow game mode following it, as well as side and post-story quests, you’ll need to solve mini-Vow of the Disciple Raid glyph symbol puzzles. Don’t worry; these aren’t nearly as involved as any Raid mechanic, but they are fairly particular about accuracy. Here’s How to complete them.
How to Solve Glyph Puzzles in Destiny 2: The Final Shape

You’ll encounter your first glyph puzzle during the Requiem mission in The Final Shape campaign, and as the tutorial on the mechanic, it’s the easiest of them all. As with most of the puzzles of this type you’ll encounter, you start a glyph section needing to pass a barrier of some kind, but in later segments, you’ll use them in combat to break enemy shields, as well.
As for actually solving glyph puzzles, it’s simple:
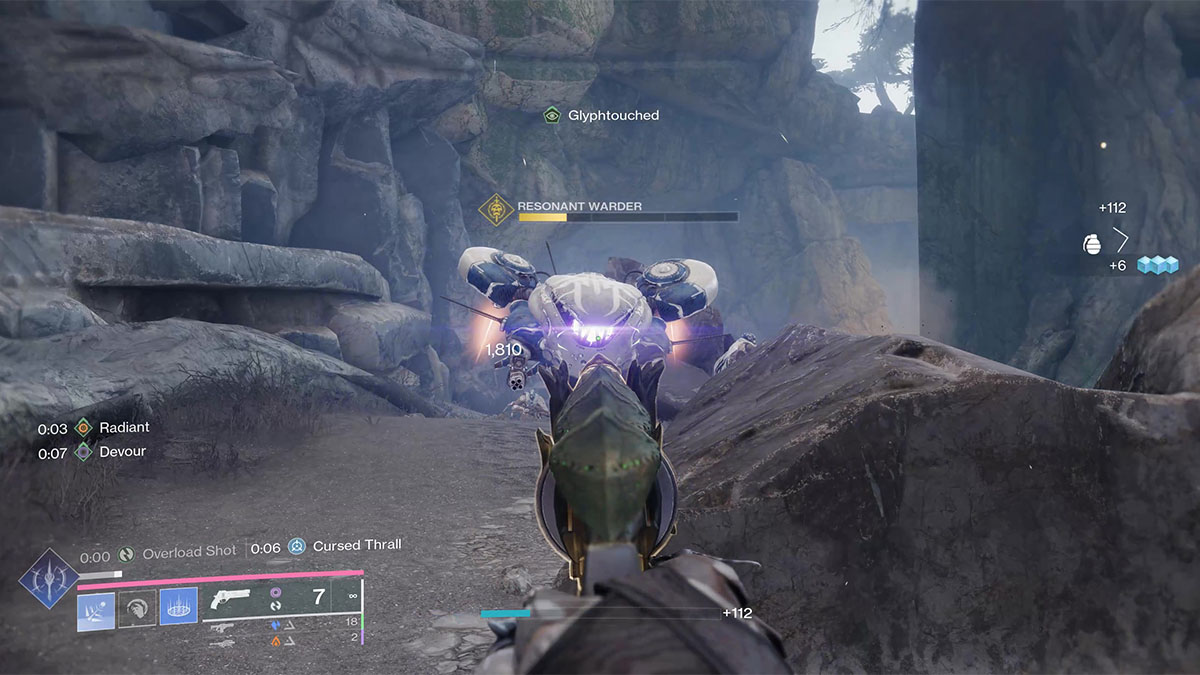
- To spawn glyphs, you need the Glyphtouched buff, which you can get by destroying the Pyramid fragments that hang in the air.
- With Glyphtouched, find a Resonant Warder enemy, defeat them, and then make a note of the glyph symbol they leave behind. Note that the in-game glyph does not move from where it appears, and in later missions and activities, you’ll need to remember two or three of them at a time.
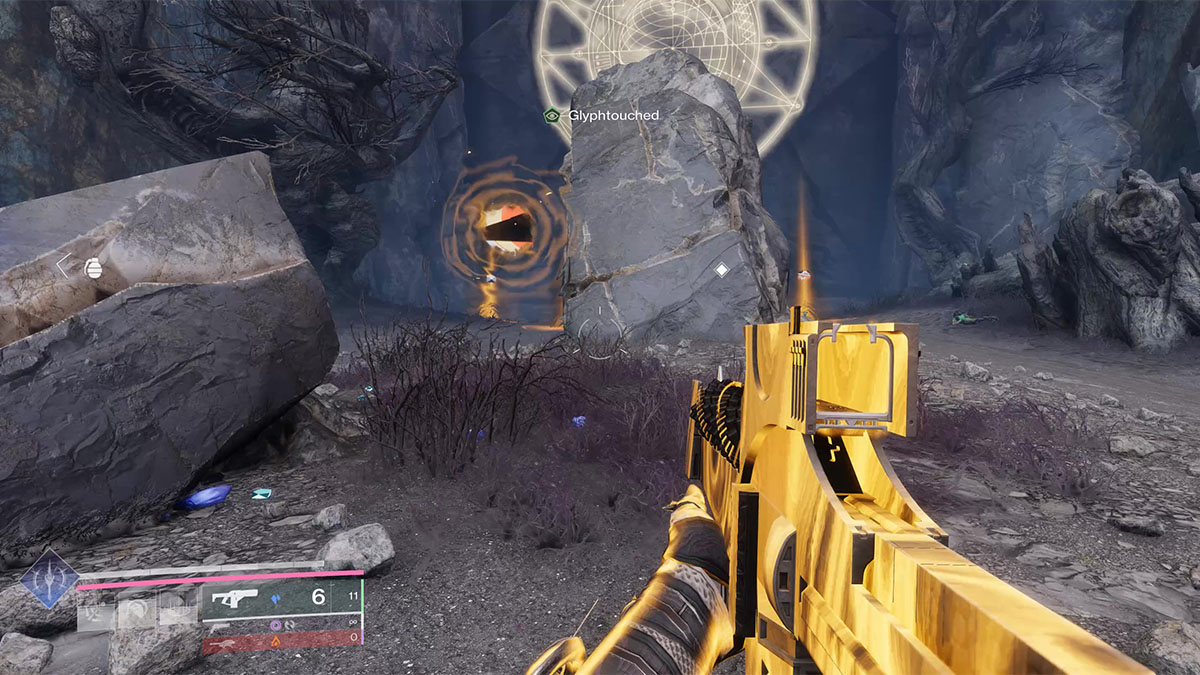
- Once you’ve located all the glyphs you need, separate markers will appear near the barrier or in the arena. You’ll need to step inside the yellow energy radius to activate the glyph. Do that with all the correct symbols, and you solve the puzzle.
If you step into an incorrect glyph aura, the whole sequence resets, and you’ll not only need to defeat more Resonant Warder enemies, but the glyph auras will randomize their order, meaning you can’t simply memorize which one to activate first. You’ll need to take your time, even in the heat of battle, to ensure you get the puzzles right.
How to Remember All Resonant Warder Glyphs
Another thing: Resonant Warders will always be mini-boss enemies and will always be surrounded by other elite enemies and trash mobs. They’ll also spawn different glyphs each time they’re defeated, adding to the complexity of the fight. My best advice for remembering glyphs under stress is to say their symbol out loud. You can come up with your own names, but here are the ones I use:
- No Ghost for the Ghost with a line through it.
- Black Pyramid for the…black pyramid.
- Triangle for the Traveler with the portal cut into its surface.
- Mad face for the weird-looking blue, black, and white symbol. I truly don’t know what it is, and it looks like an angry face to me.
If you have access to it on PC, you can also press the Enter key to open up text chat and type the name of the glyphs into Fireteam Chat. This strategy works whether you’re playing solo or in a fireteam, and it’s a quick and easy way to always have the information on hand. When you’re done with a particular glyph puzzle, simply write a string of dashes to separate one set of glyphs from the next.
And that’s how you solve glyph puzzles in Destiny 2: The Final Shape. Remember, you’ll need to learn to solve them while being attacked, so be careful about where you stop to type or take the time you need to remember which is which. For more on The Final Shape, see our guides on creating Motes of Light, the best weapons for Prismatic, and more in our Destiny 2 guides hub.


Published: Jun 7, 2024 02:04 am