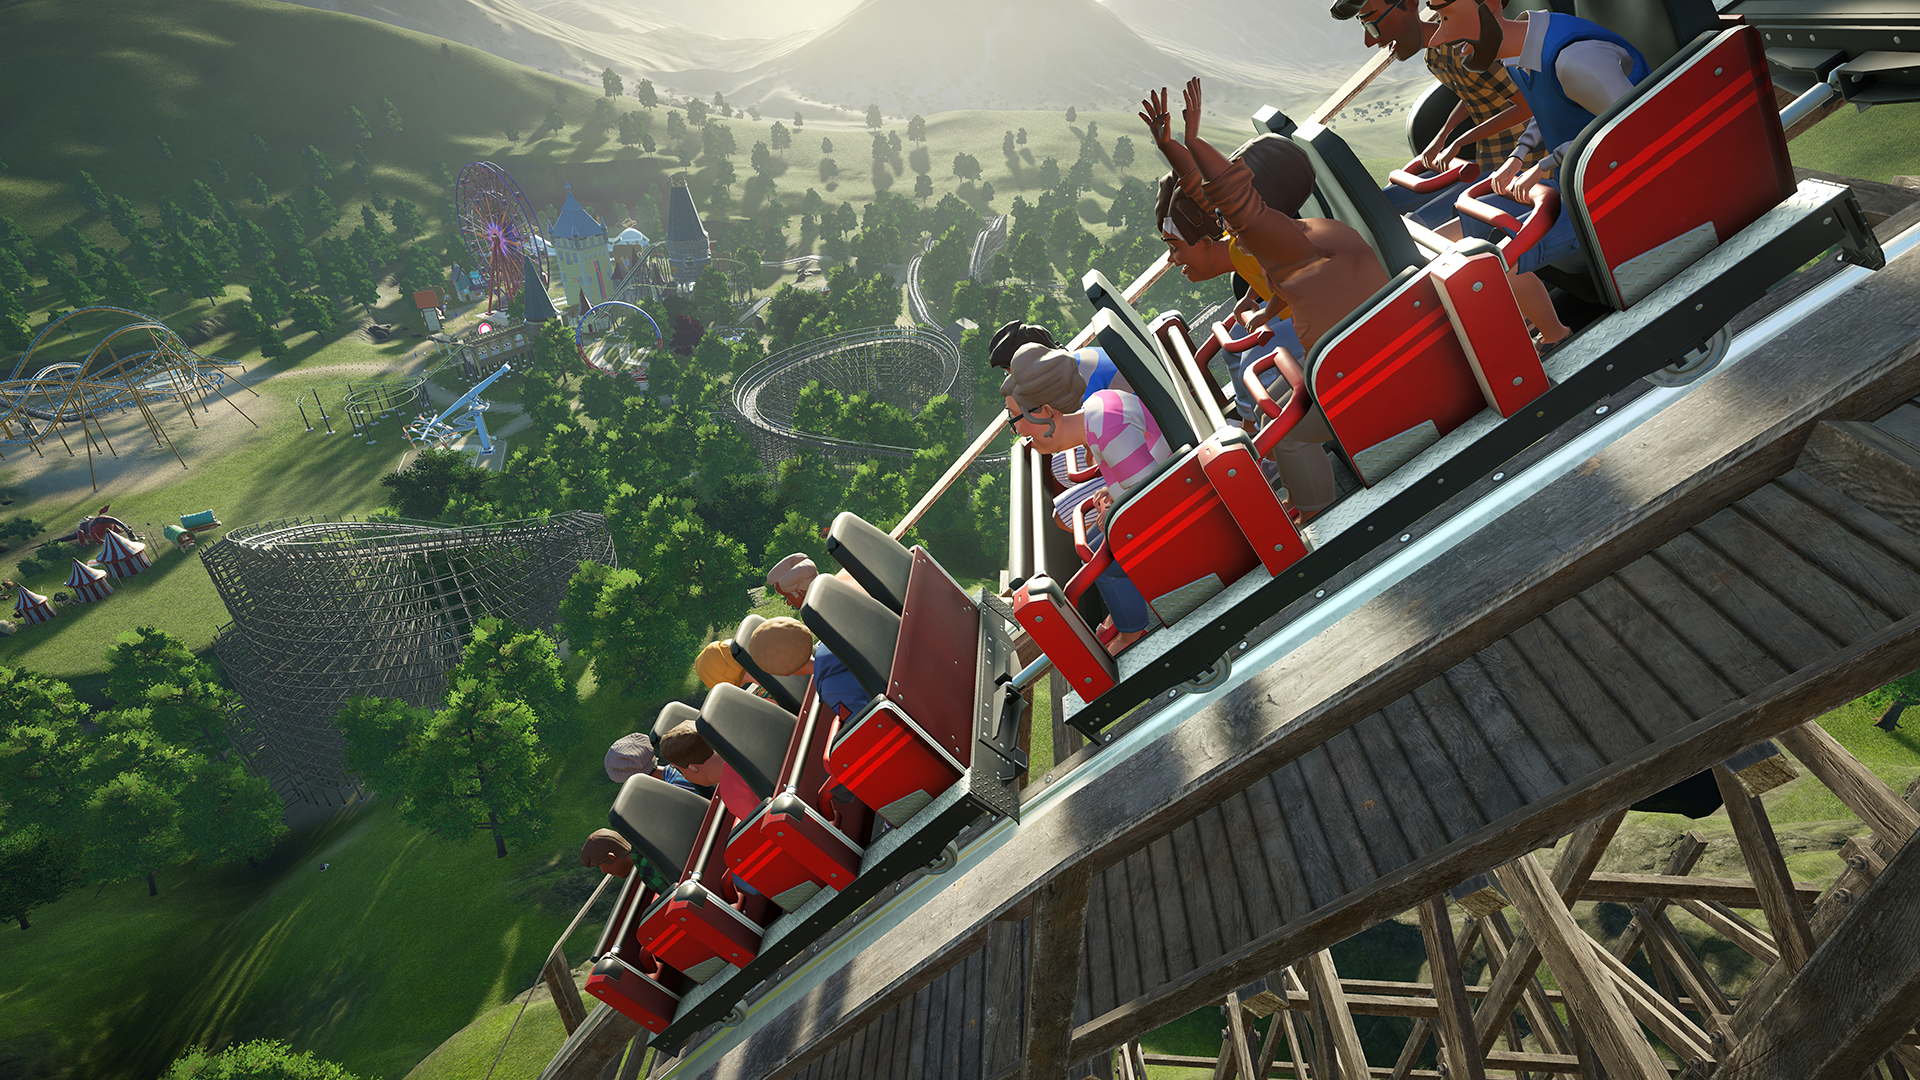
Whether you’re a sim newbie or a RollerCoaster Tycoon wizard, new simulation games take time to get the hang of. Luckily, once you familiarize yourself with Planet Coaster‘s simplistic user interface (UI) and control scheme, it’s a smooth road to creating the amusement park of your wildest dreams.
Don’t be ashamed if you launched Planet Coaster, took one look at it, and turned around to consult Google. (I did, too.) Everyone’s a newbie at some point.
Rest assured that you’ve clicked on the right page. We’ve compiled this handy reference on everything you need to know about the UI and controls to get started in Planet Coaster.
If you’re looking for information on turning a profit, by chance, then check out our park management guide.
Planet Coaster UI Guide
The user interface (UI) sent me running to Google faster than the controls could have. In retrospect, I’m not even sure why — Planet Coaster‘s UI design is so simple a monkey could navigate it.
Problem is, as soon as you start diving into menus, you find screens filled with all sorts of customization options that you might feel like you need a manual to understand. Luckily, Frontier has been giving Planet Coaster‘s UI a nice tooltip makeover the past few updates, so I expect all these spiffy-looking options to be explained more clearly soon. Be sure to hover your mouse cursor over UI elements if you’re looking for more information.
Now, let’s take a closer look at the UI you see upon loading up a park in Planet Coaster.
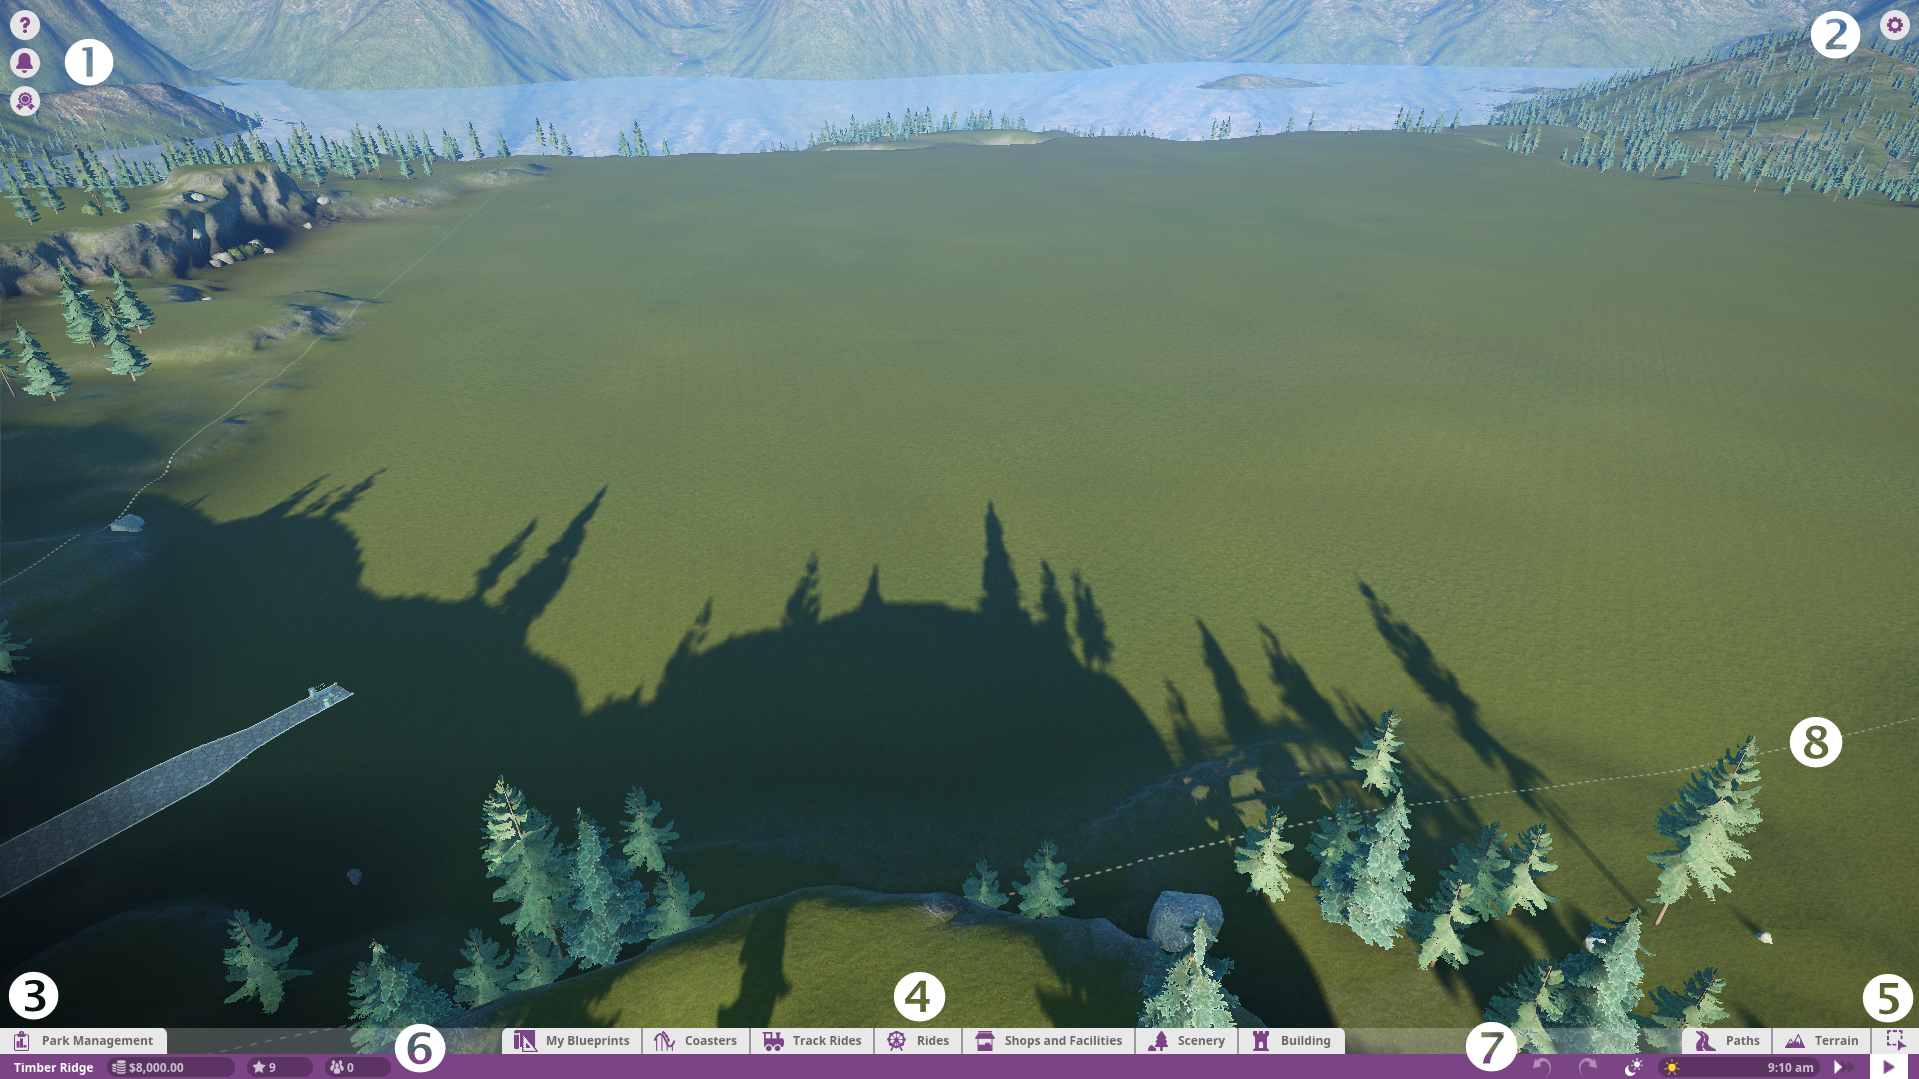
Click the image to view in a higher resolution.
- Notification Center (from top to bottom)
- Help [F1] – Displays a small selection of Planet Coaster‘s basic controls.
- Notifications – Displays park notifications. Allows you to keep track of things like ride breakdowns and guest needs.
- Objectives / Challenges – Objectives are your goals in Career mode, while Challenges are simply optional achievements to work towards while you’re building a park. Challenges generate after spending a certain amount of time playing with your Challenge Mode park, while Objectives are static throughout each Career Mode scenario.
- Options [Esc] – Pulls up the options menu where you can save or load your game, adjust in-game settings, and exit back to the main menu.
- Park Management – Click this button to pull up the Park Management menu. Everything you need to know about managing your park is found here. You can check on your finances, research new rides and shops, set up marketing campaigns, hire new staff, check on your guests, and keep tabs on your attractions.
- Building Toolbar (from left to right)
- My Blueprints – This is where you can find your custom blueprints — including blueprints downloaded from the Steam Workshop. If you’re a newbie, don’t worry about this.
- Coasters – This is where all the roller coaster magic starts. Once you choose and place a coaster, you may edit it however you like within its capacity.
- Track Rides – A similar concept to Coasters. You can build and place them much like any other roller coaster, but they often have key differences which make them unique. Things like monorails and and log fumes are found here.
- Rides – Every other ride under the moon is found here. They don’t have the same kind of customization as Track Rides or Coasters, but they serve the all important role of giving your park that bit of extra definition. Teacups, carousels, and other, more thrilling rides are found here.
- Shops and Facilities – Your guests will get hungry and thirsty while visiting the park. Some of them may even need to use the bathroom. Some may have forgotten their all mighty wad of cash, and some may have even scraped their knee. No matter what your guests need, you can provide for them through Shops and Facilities.
- Scenery – Having a park full of scenery is an important part of Planet Coaster. Your guests will get bored standing in long lines with nothing to look at. Hell, they’ll get bored walking through your park if there’s nothing to look at. Make it pretty for their sake. (And for the love of all things sanitary, please remember to include the trash cans and park benches found in this section.)
- Building – Think of this section as a natural extension to Scenery. It’s all about combining a series of items together into a unit called a “building”. The tools and props included in this section allow you to crank creativity up to 11 and make a park that’s truly your own.
- Terraforming Tools (from left to right)
- Paths – You’ll find paved paths, natural paths, and ride queues here. Your guests cannot get anywhere if you don’t have paths. They’re like the perfect civilians that never step on your lawn.
- Terrain – That’s right, you can edit the terrain any time on the fly. Make mountains, valleys, lakes, rivers, islands in the sky — whatever you can imagine.
- Multi Selection – This tool lets you select multiple items for blueprinting or deletion. Unfortunately there aren’t any keyboard shortcuts for this like you’d expect on other simulation games.
- Park Info (from left to right)
- Park Name – The name of your park. You can edit this in Park Management.
- Finances – How much money you currently have to spend. Hover over it for more information on your monthly profits.
- Park Rating – Shows the total rating of your park. Hover over it for more in-depth reviews.
- Total Number of Guests – How many guests are currently in your park. Hover over it for details on guest happiness and demographics.
- Time Manipulation Tools (from left to right)
- Undo [Ctrl + Z] – Undo last action. You can undo a good number of actions, but there is a cap.
- Redo [Ctrl +Y] – Redo last action. Only works after undoing an action. This tool could easily be utilized to gather a before an after perspective.
- Set Lighting – A wonderful tool that lets you set the daylight lighting of your park without pausing time entirely. Entirely useful when building.
- Time – The in-game time of day. Hover over it for the date.
- Change Simulation Speed [O] – Use this to increase or decrease the speed of simulation. You may wish to pass the time quicker when you’re lacking on construction funds or waiting on new research to come in.
- Toggle Pause [P] – Pause or unpause the simulation.
- Park Border – The edge of your park. You cannot build beyond this border.
Whew, that’s a lot of information just sitting on the main screen. Of course, that’s not everything.
Clicking on a person or object opens up the Selection Panel on the upper right side of the screen. This lets you tweak different settings on objects such as color, ticket prices for rides, salary for employees, and plenty more.
That’s it for UI elements in Planet Coaster. Like I said, it’s pretty simple. They ingeniously found a way to fit all of the information you’ll ever need in nothing more than a handful of boxes. Thank King Coaster for modernization.
Planet Coaster Controls Guide
There are many keyboard shortcuts that make building and maneuvering around Planet Coaster a breeze. They can easily be divided into three categories: Camera Controls, Building Controls, and Path Controls.
Camera Controls
- W, A, S, D, Arrow Keys, or Right-Click and Drag – Pan the camera.
- Q, E – Rotate the camera left or right. In Freelook Camera, pans up and down.
- Middle-Mouse-Button and Drag – Rotate the camera.
- Scroll Wheel or Page In, Page Out – Zoom in or zoom out.
- T – Switch Freelook Camera on or off.
- Shift – Accelerate Freelook Camera
Building Controls
- Z – Tap to rotate object 90 degrees. Hold Z and drag the mouse around for finer precision.
- Space – Toggle Angle Snap on or off.
- Shift – Hold to raise or lower object elevation. Tap to return to ground level.
- Ctrl – Hold and drag the mouse to place objects at the same elevation as the ground level you began holding Ctrl at.
- V – Toggle surface lock for objects.
- X – Toggle advanced move and rotate. This allows for precision positioning on the object’s XYZ axis.
- M – Returns to regular movement from advanced. Also enables movement of selected objects.
- Ctrl + D – Duplicates selected object.
- L – Auto-flatten terrain on or off.
- F – Snap decoration to center of wall (in building mode only).
- Right-Click or Esc – Cancel placement.
Path Controls
Path and Terrain controls differ a bit from the regular building controls. Think of this as a subsection to building.
- U, J or Left-Click and Drag – Raise or lower path.
- Z – Hold and drag mouse to adjust junction angle. Tap for auto acute adjust.
- Ctrl – Disable path joins and junctions.
- Right-Click or Delete – Delete paths.
- -, + – Shorten or lengthen paths. Decreases and increases brush intensity in Terrain edit mode.
- [, ] – Decrease and increase path width. Decrease and increase brush size in Terrain edit mode.
With this reference by your side, you’re armed with everything you need to know to get started in Planet Coaster. Now go forth with confidence and build yourself a park to be proud of!
How’re you enjoying Planet Coaster, so far? Are you stuck or confused on anything? Leave your questions and comments down below!
Struggling with earning a profit every month? Check out our guide to park management.


Published: Nov 17, 2016 06:10 am