There are 72 collectibles to find in The Quarry. These include clues, evidence, and tarot cards. Some are easy to find, lying right in your path, but others are harder to uncover, requiring you to take one path or another. There are seven trophies/achievements associated with these hidden items, and you must get all collectibles of a type in a single playthrough for them to pop.
- Decked Out: Found all tarot cards.
- Forewarned if Forearmed: Got a tarot reading.
- Meddling Kids!: Collected all clues.
- It’s All Coming Together: Found a matching clue.
- What’s This?: Collected first clue.
- Conspiracy Theorist: Collected all evidence.
- The Truth is Out There: Collected first piece of evidence.
The rub is that you can’t get all of the collectibles in a single playthrough. You must make a choice in Chapter 2 that gives you either two clues or a tarot card. You’ll need to finish two playthroughs (the second starting from Chapter 2 at least), and essentially save everyone for most of the game. Certain deaths can lock some collectibles.
This guide is written to avoid as many spoilers as possible, though some will be necessary to properly explain locations. You’ll only need to search for collectibles in the prologue and subsequent 10 chapters; there aren’t any to find in the epilogue.
Prologue
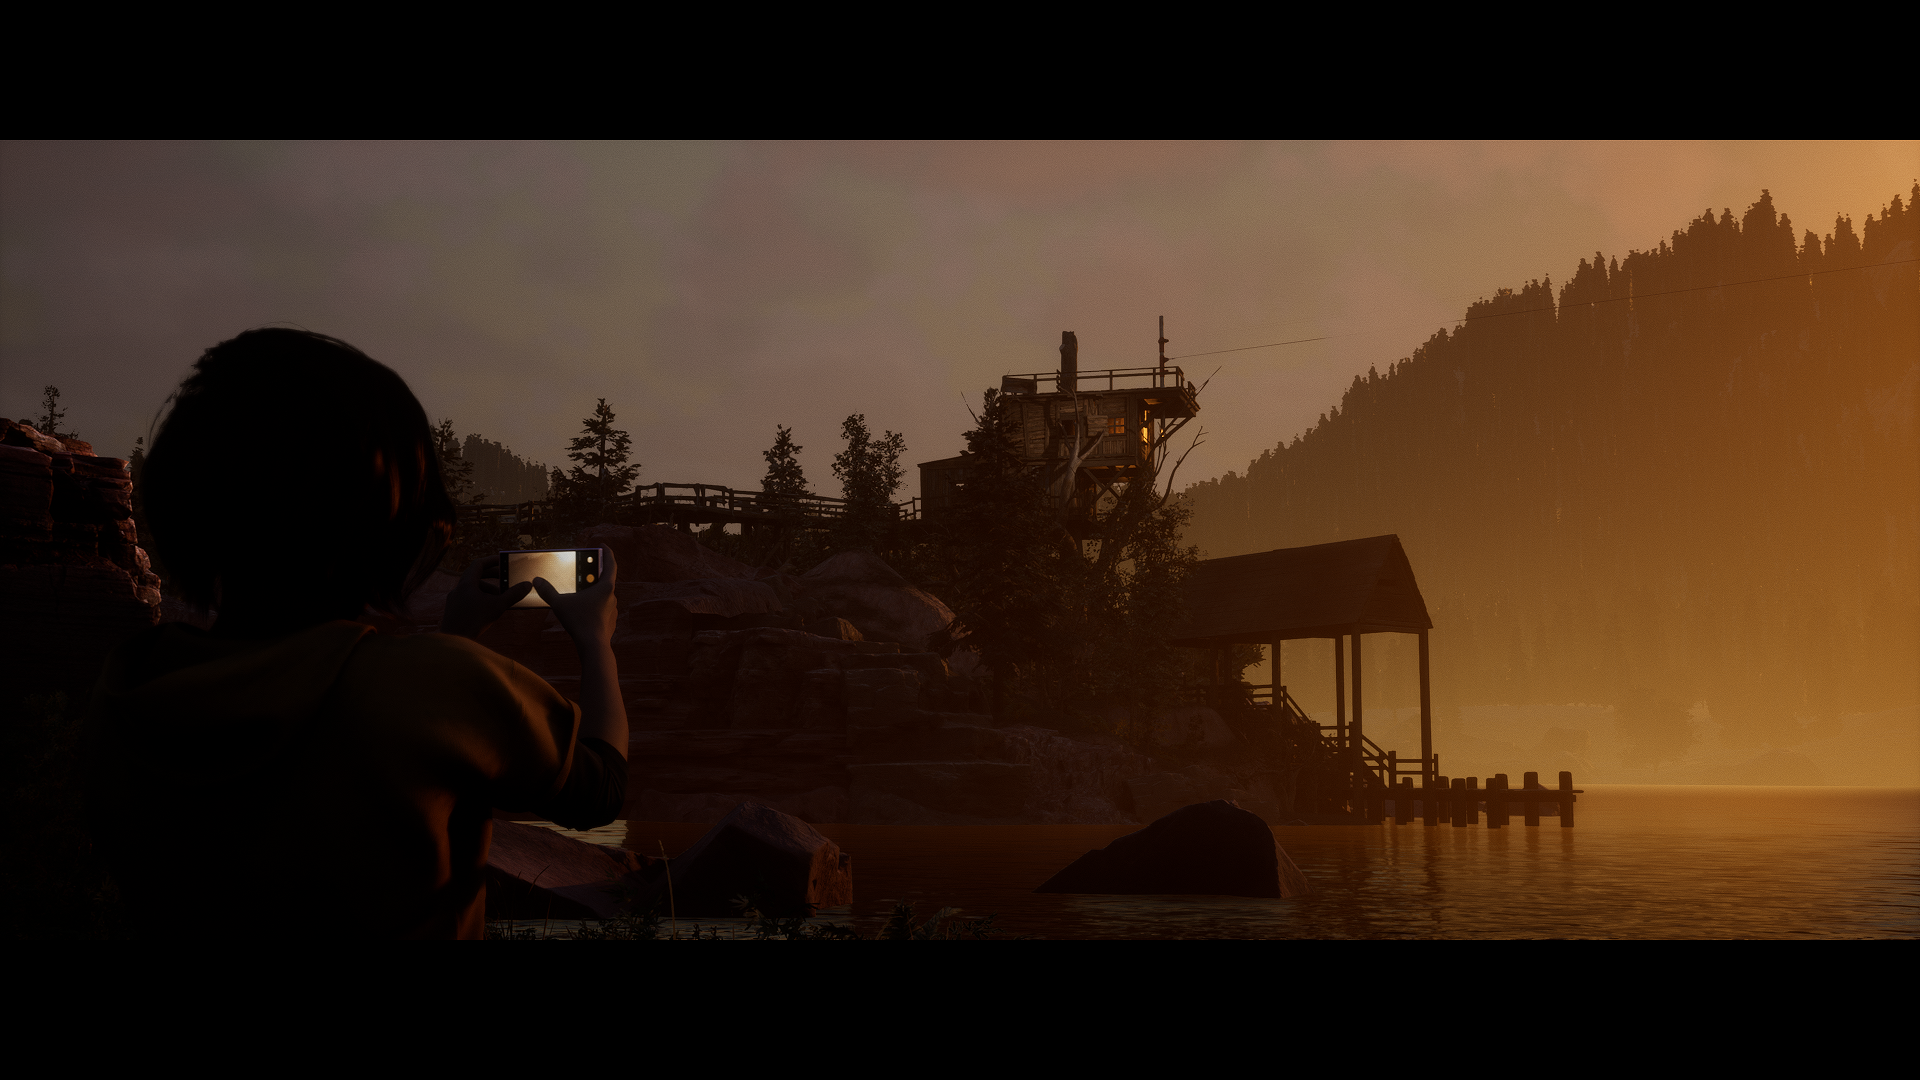
Laura
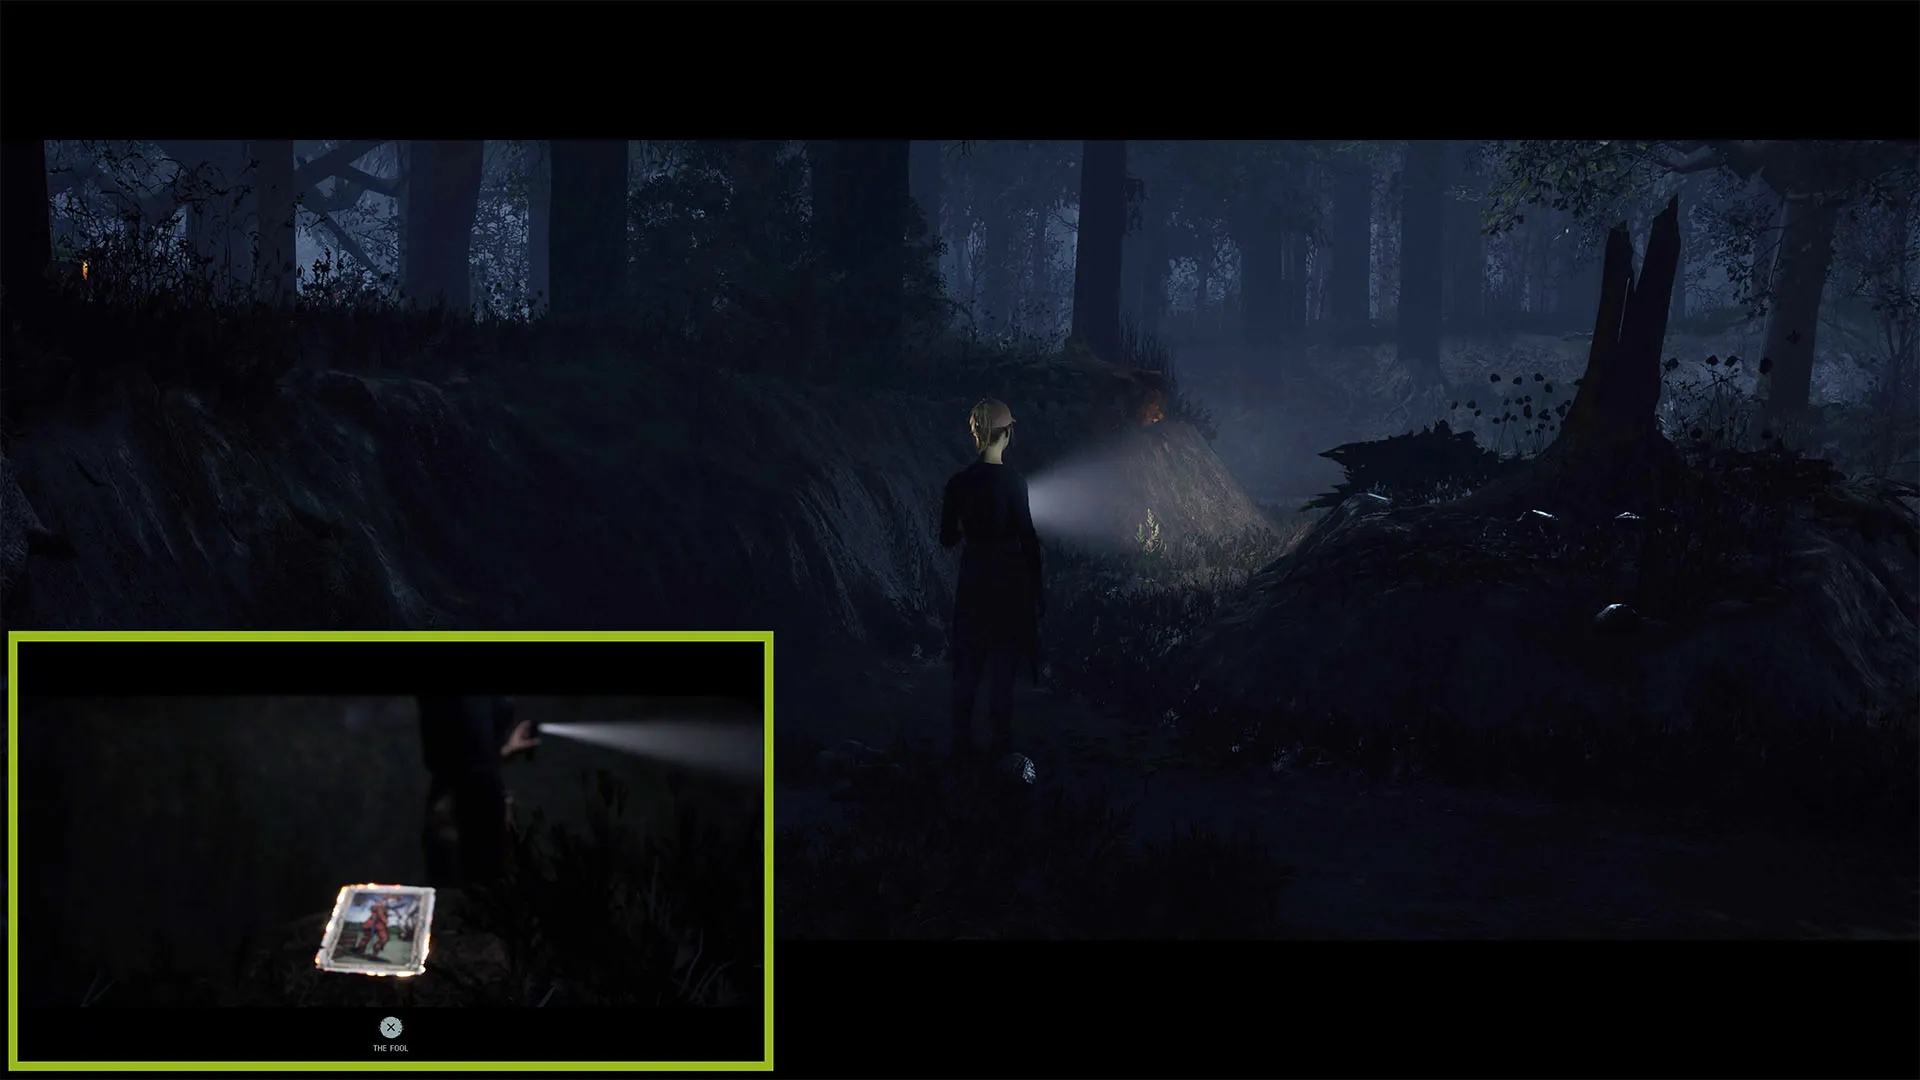
The Fool Tarot Card: Eventually, Laura will want to investigate something in the woods while Max does something else. Choose either dialog option as Laura, and enter a small ravine. Turn left immediately to go between the embankment and a small hill in the ravine with a broken tree stump. As you walk through, the camera will shift.
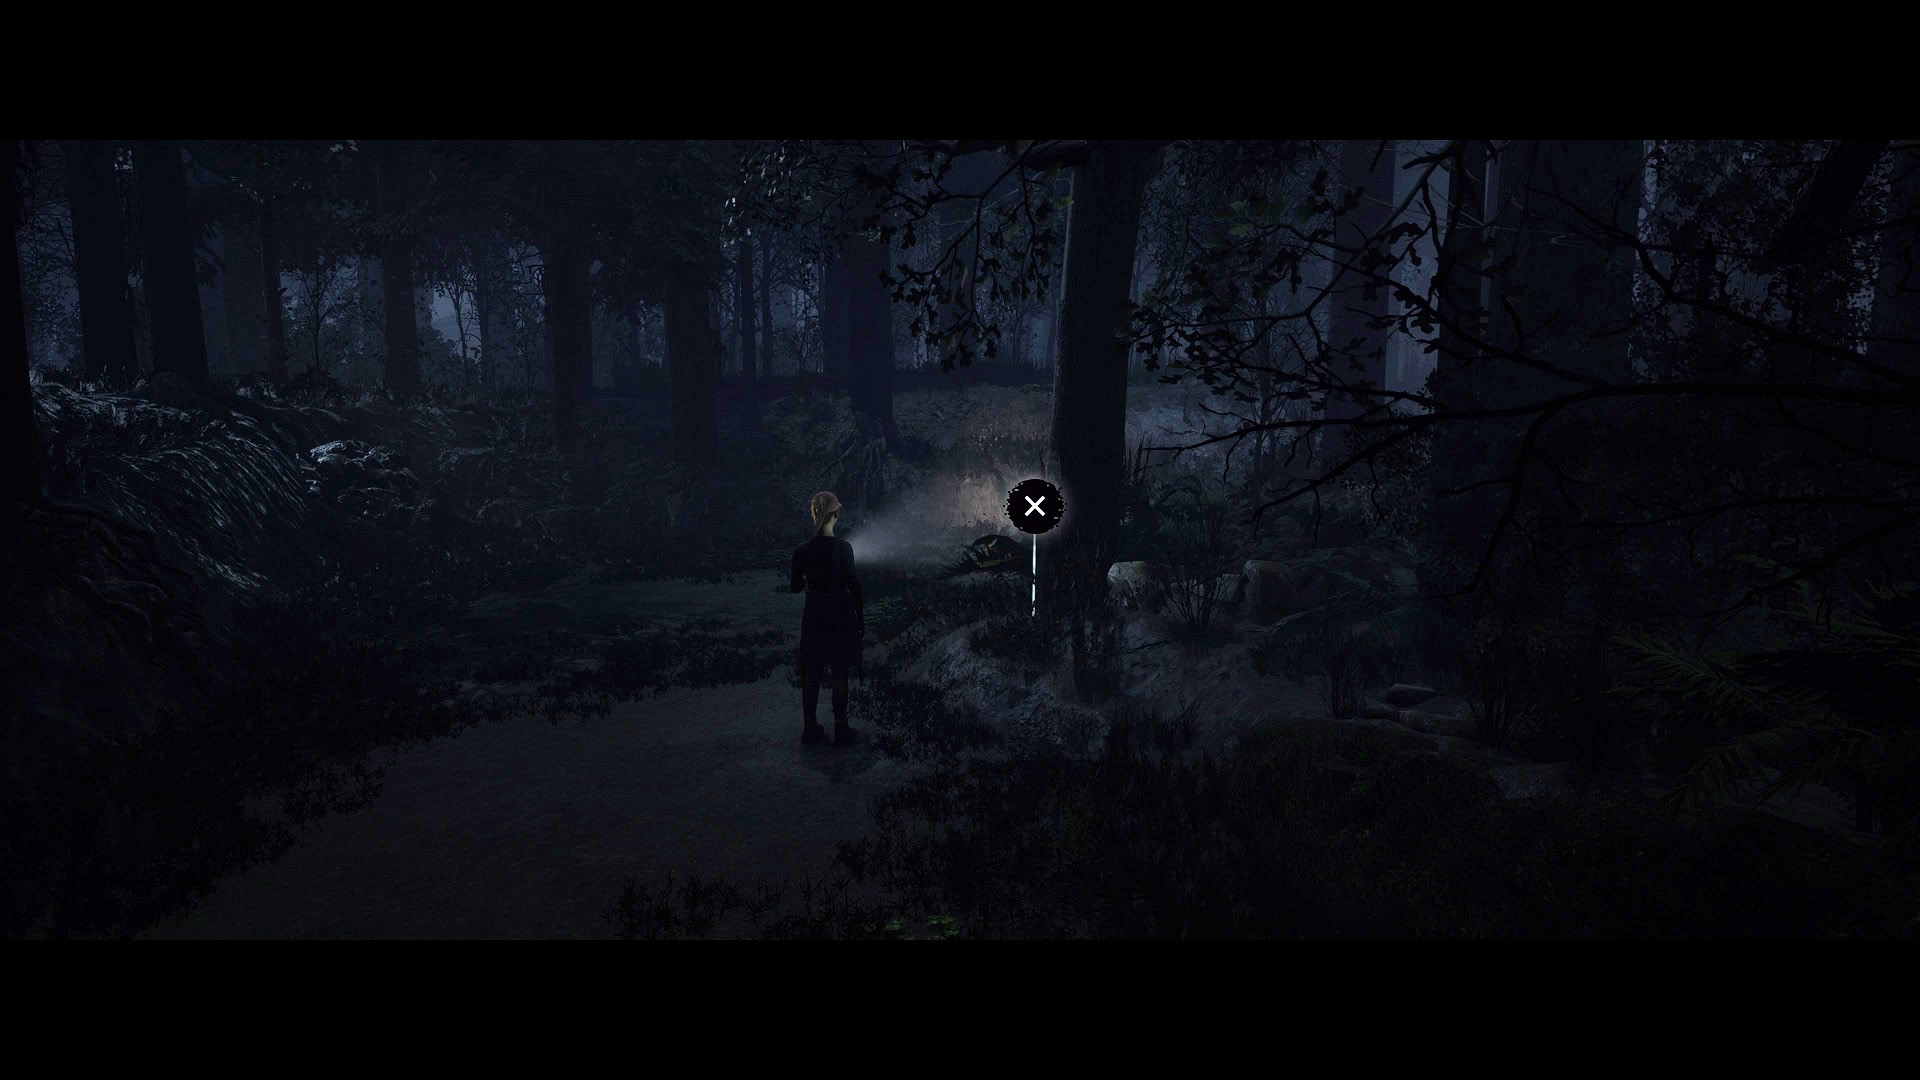
Harum Scarum Poster: This is on a tree on the right side of the ravine in the woods, just after the Tarot Card. Go diagonally right toward where the path turns right, and the button prompt should appear near the embankment.
Escapology Trunk: From there, continue along the path, and you’ll come to a fork shortly. Go left into a dead end, and open the trunk there.
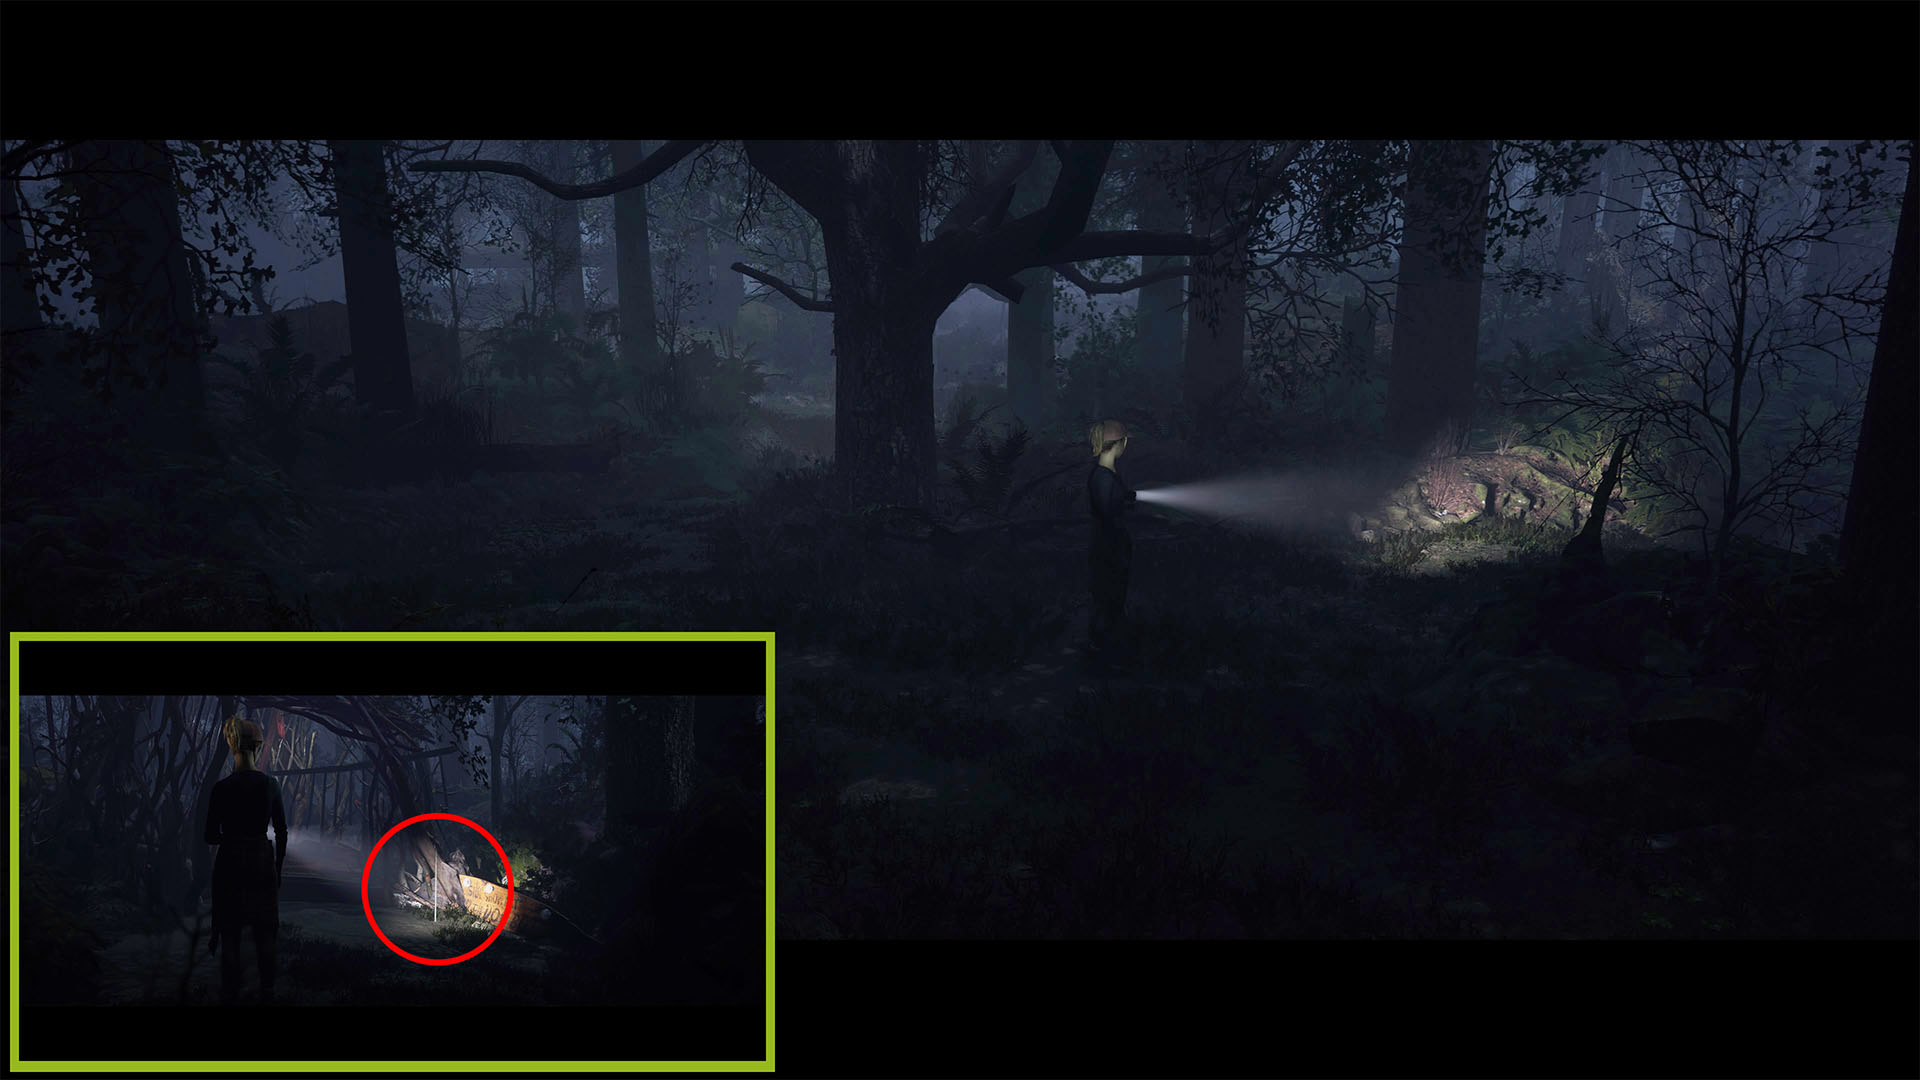
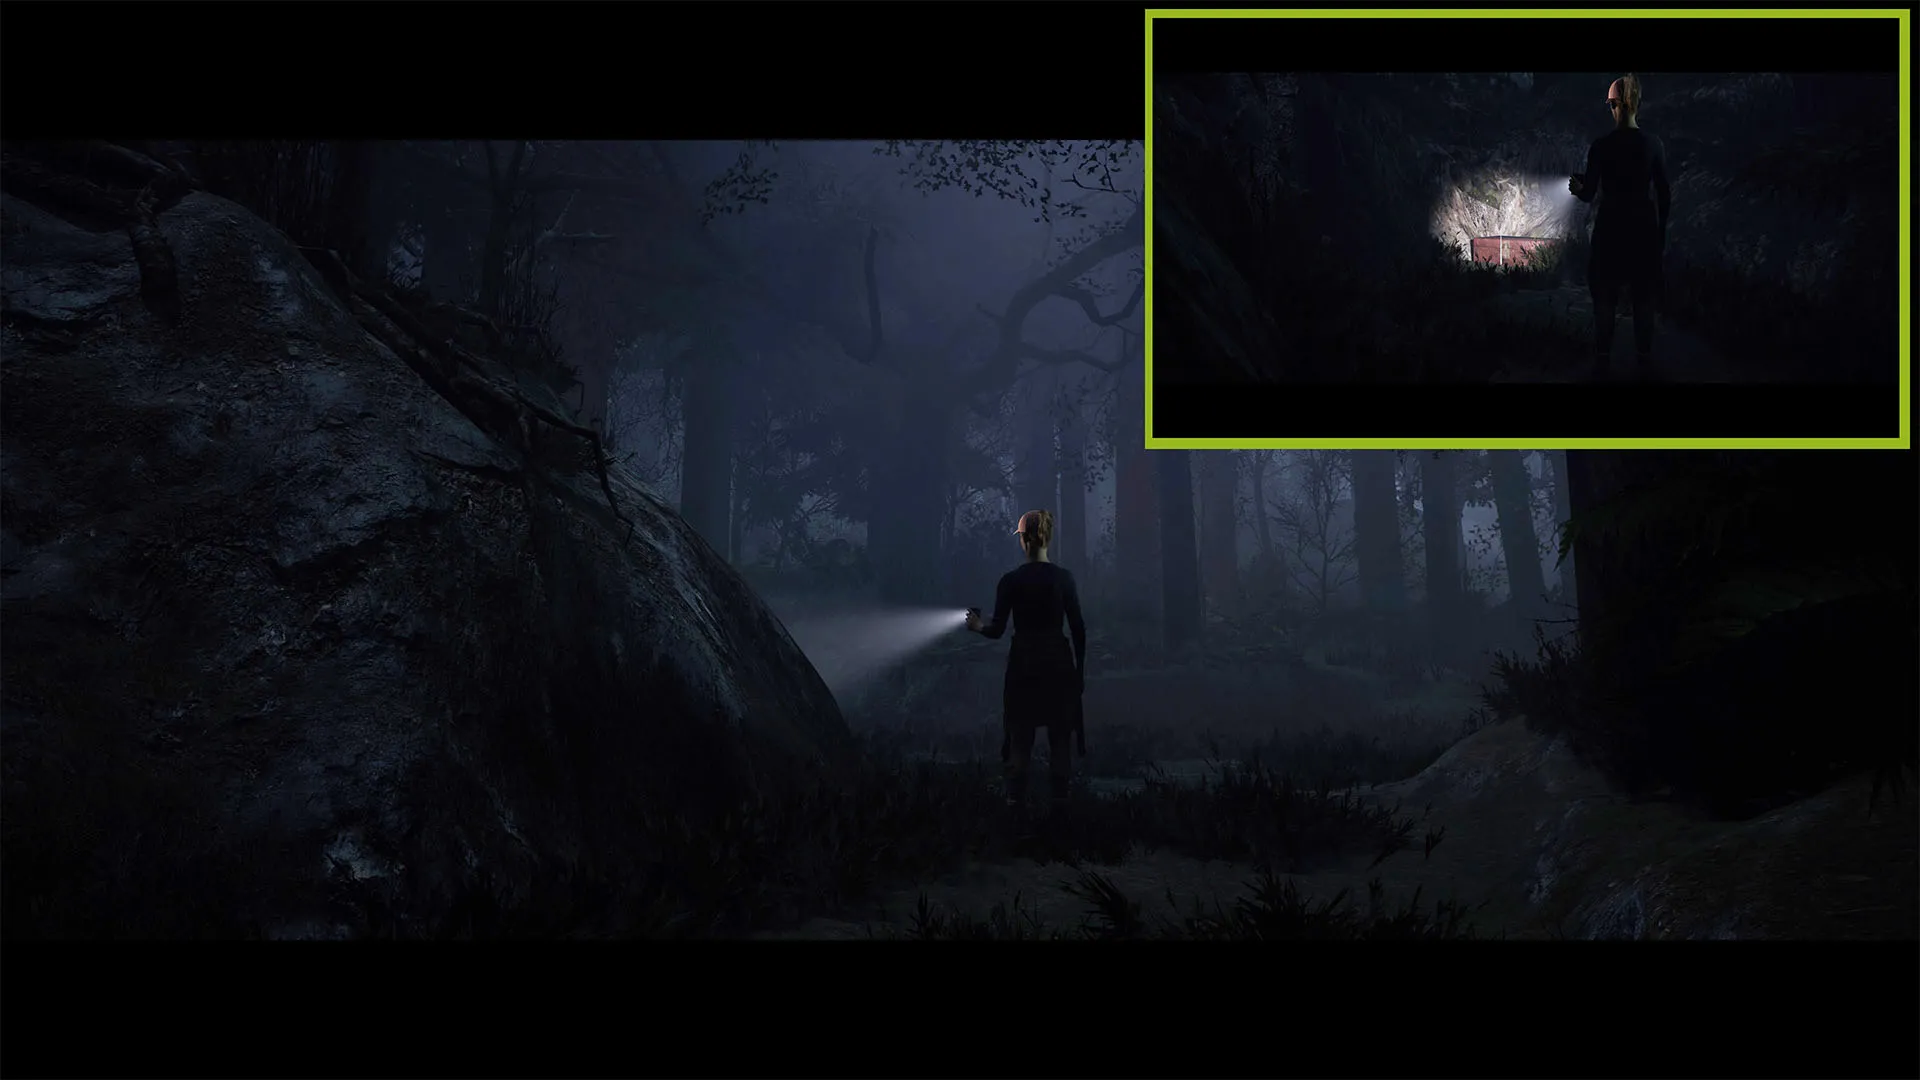
Broken Cage: Now turn around and continue to follow the path. Go right when the scene changes, down a path to the right of the tree in front of you. You’ll see a cage and a prompt to the right, next to a sign on the ground.
Bloodied Collar: After you go downstairs in the bunker, like no one in their right mind would, pick up the collar on the ground.
Chapter 1: Hackett’s Quarry Forever
Jacob

Hunting Notice: After taking control of Jacob by the car, go to the right of the lodge. You’ll see a wooden fence beyond the blue SUV and a sign behind it.
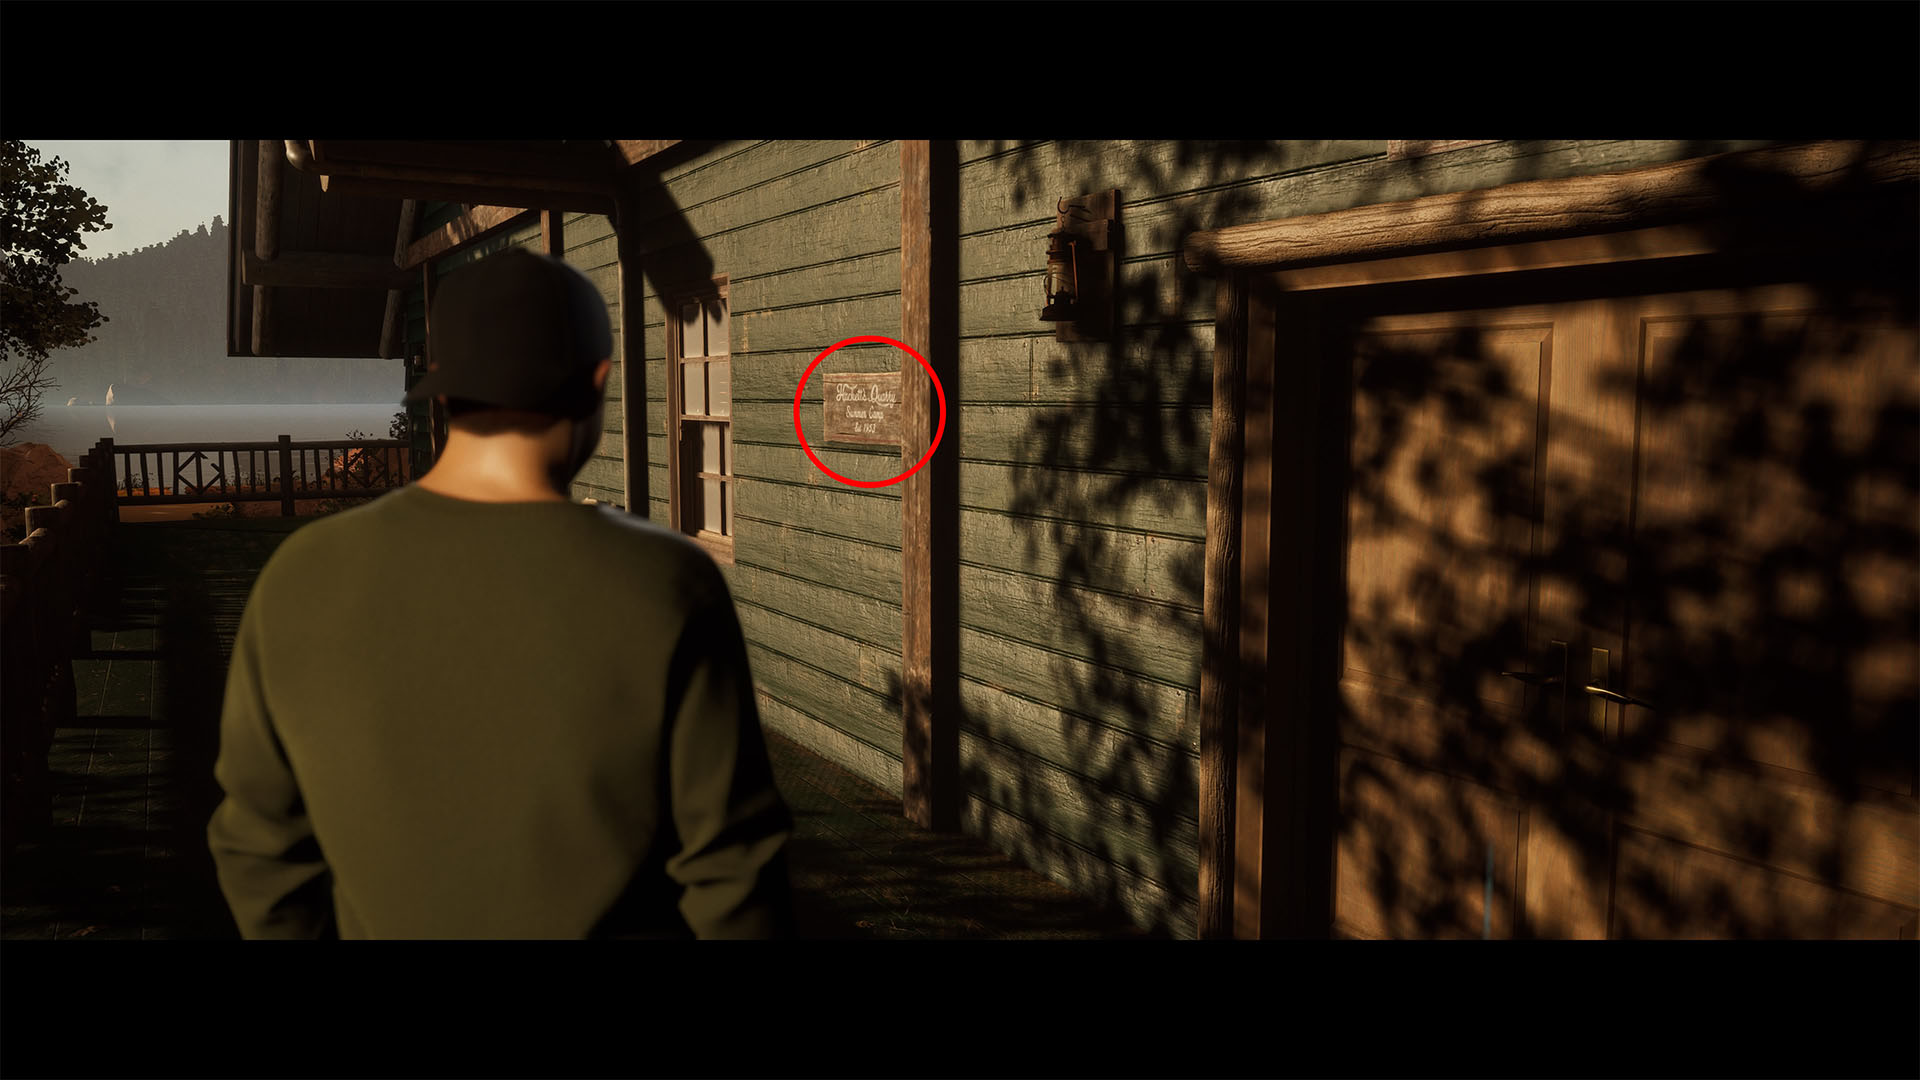
Camp Plaque: Go up to the lodge’s balcony. There is a sign left of the door.
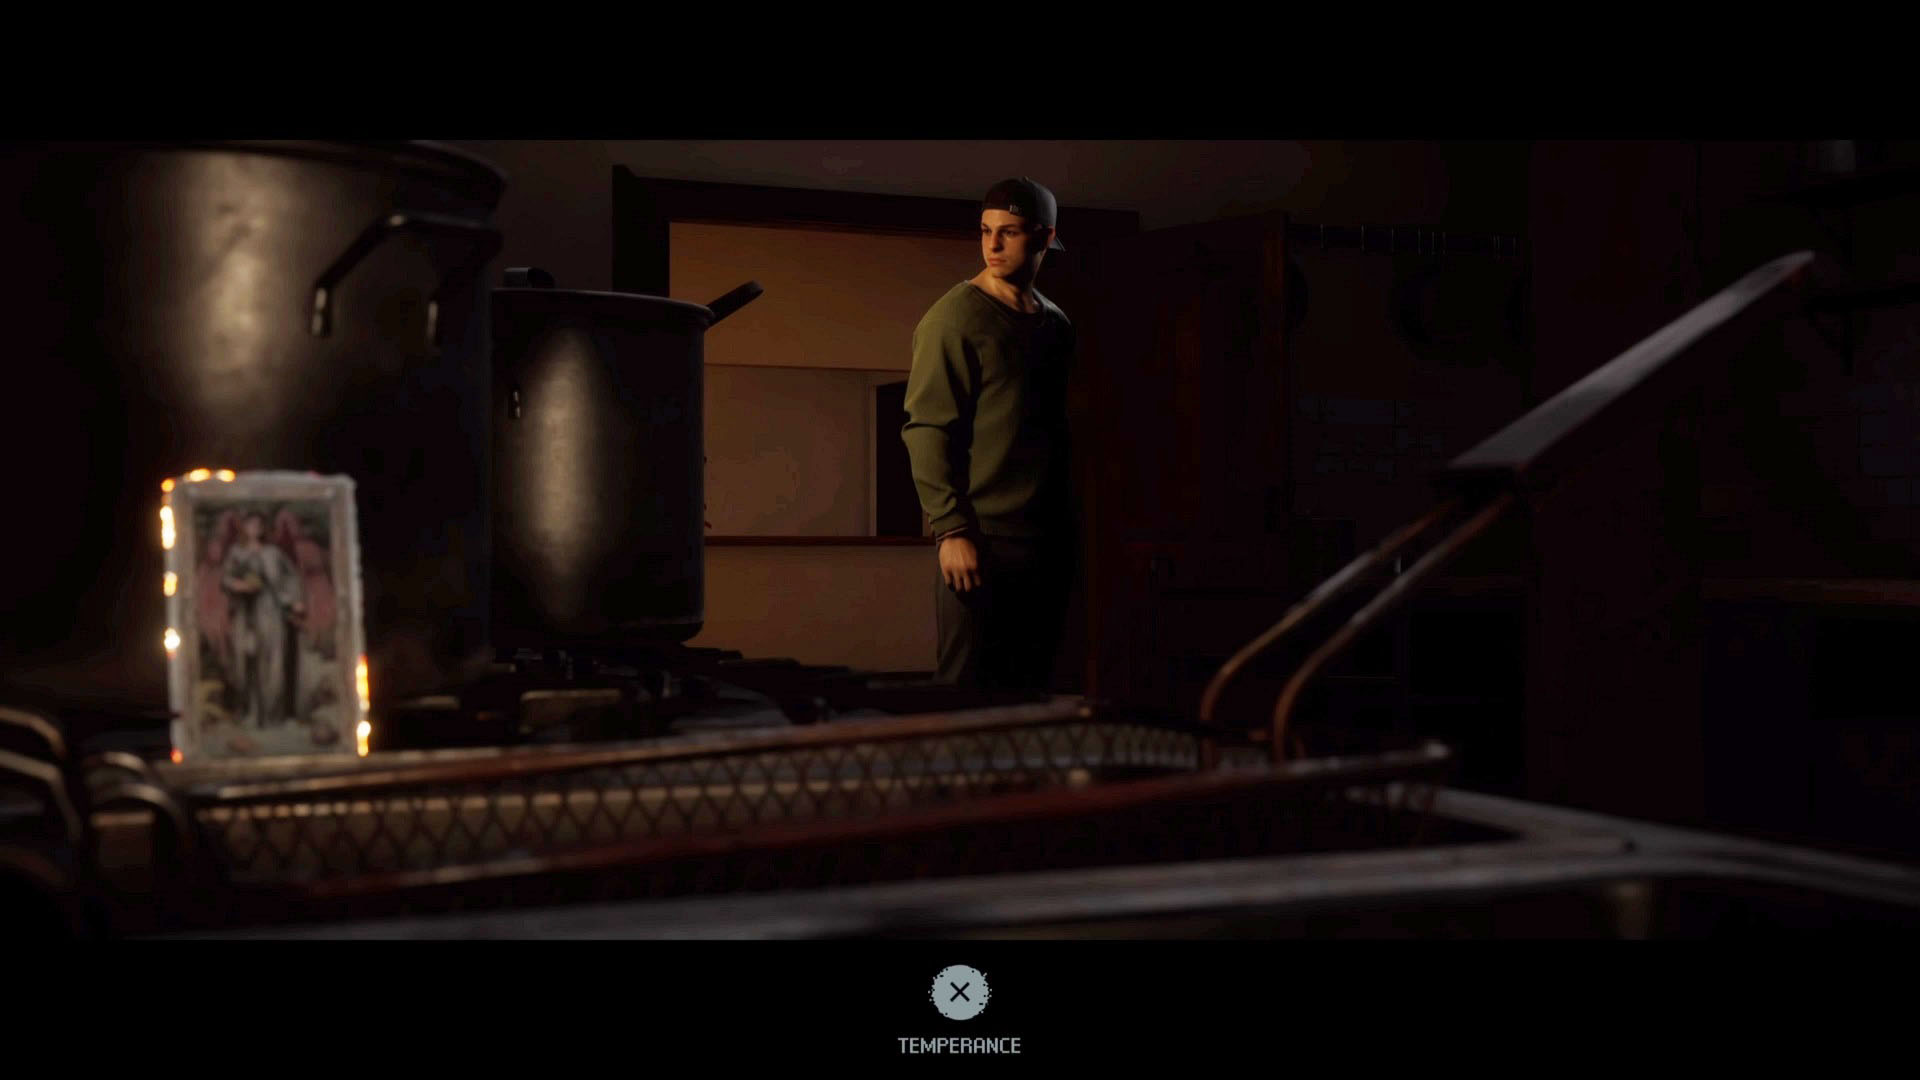
Temperance Tarot Card: Continue around the porch, and go inside the lodge. Go through the library and doubleback to the right through the doorway. The kitchen is on the left, with this tarot card inside.
Abi and Emma
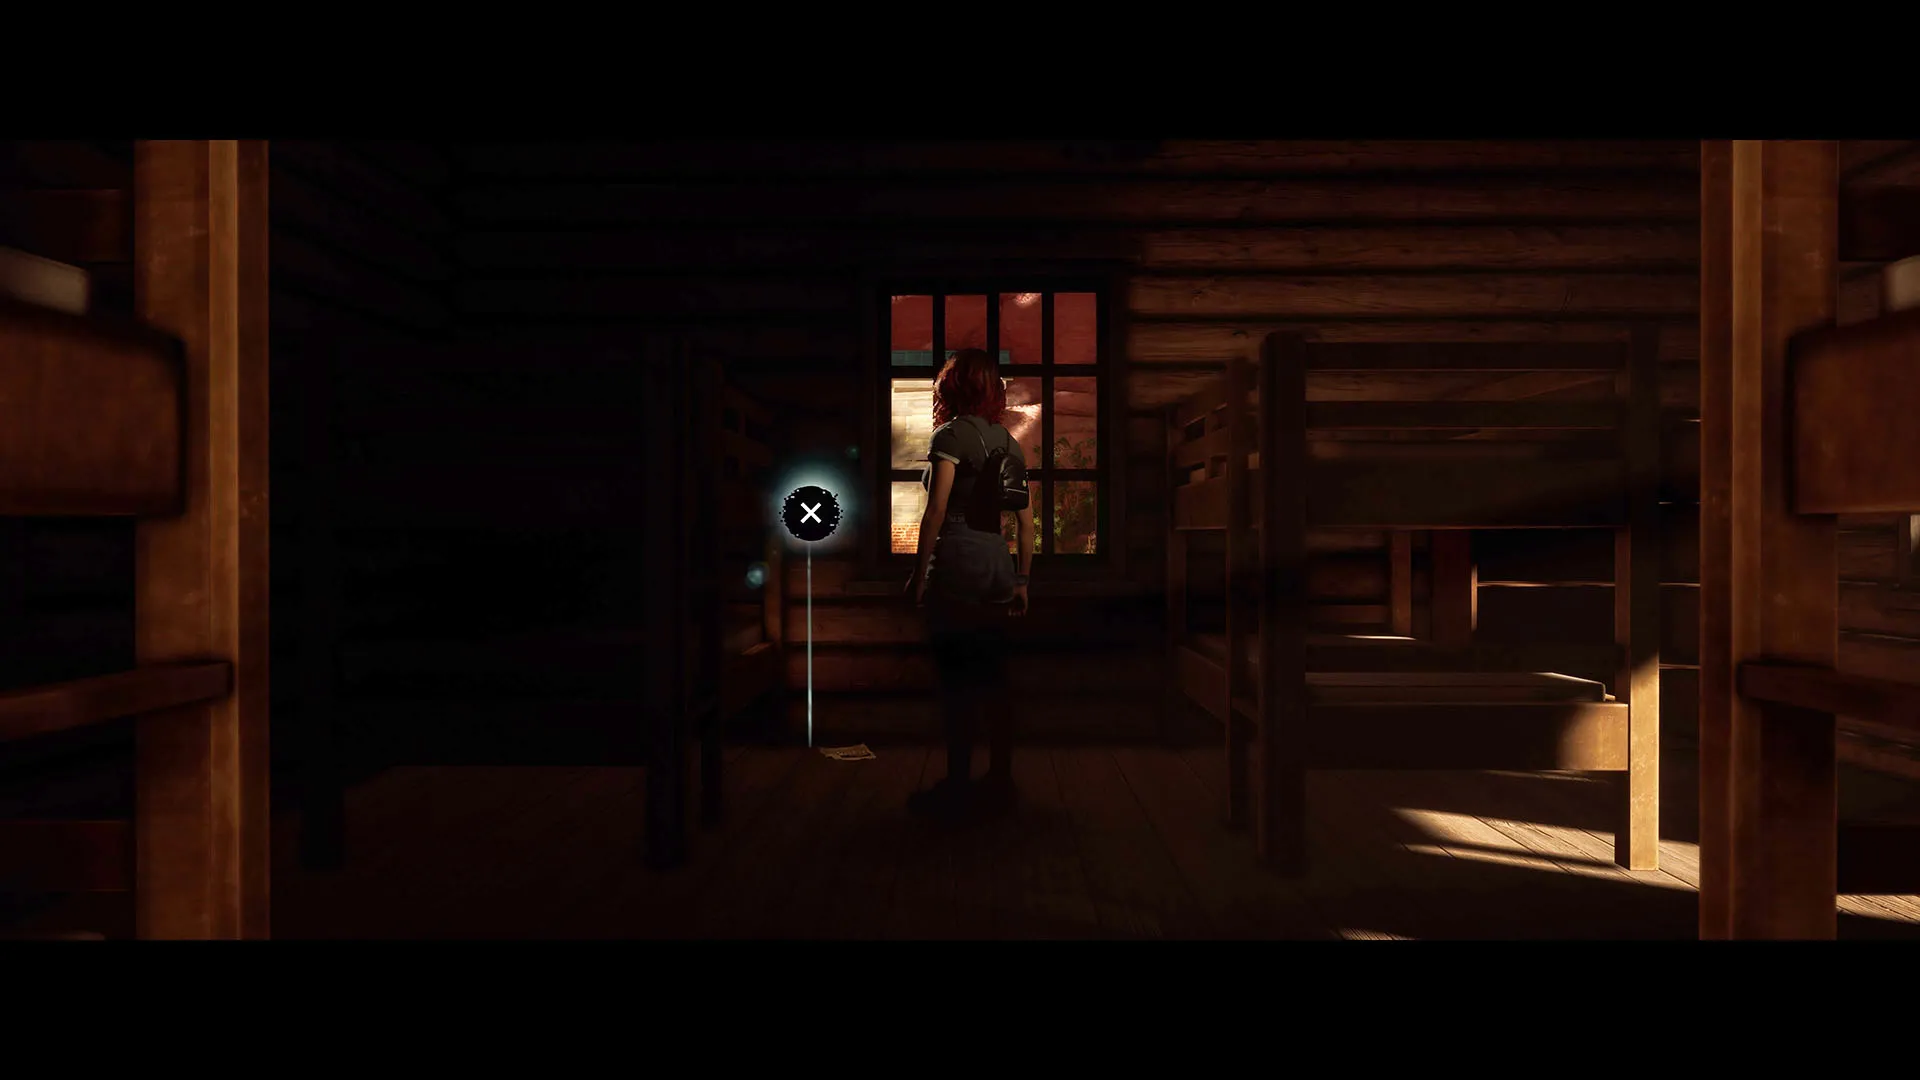
Newspaper Headline Scrap: After Abi and Emma break into the cabin. Grab the Teddy here or not, then walk down (toward the screen). Go between the bunk beds on the left (Abi’s right) and pick this up off of the floor.
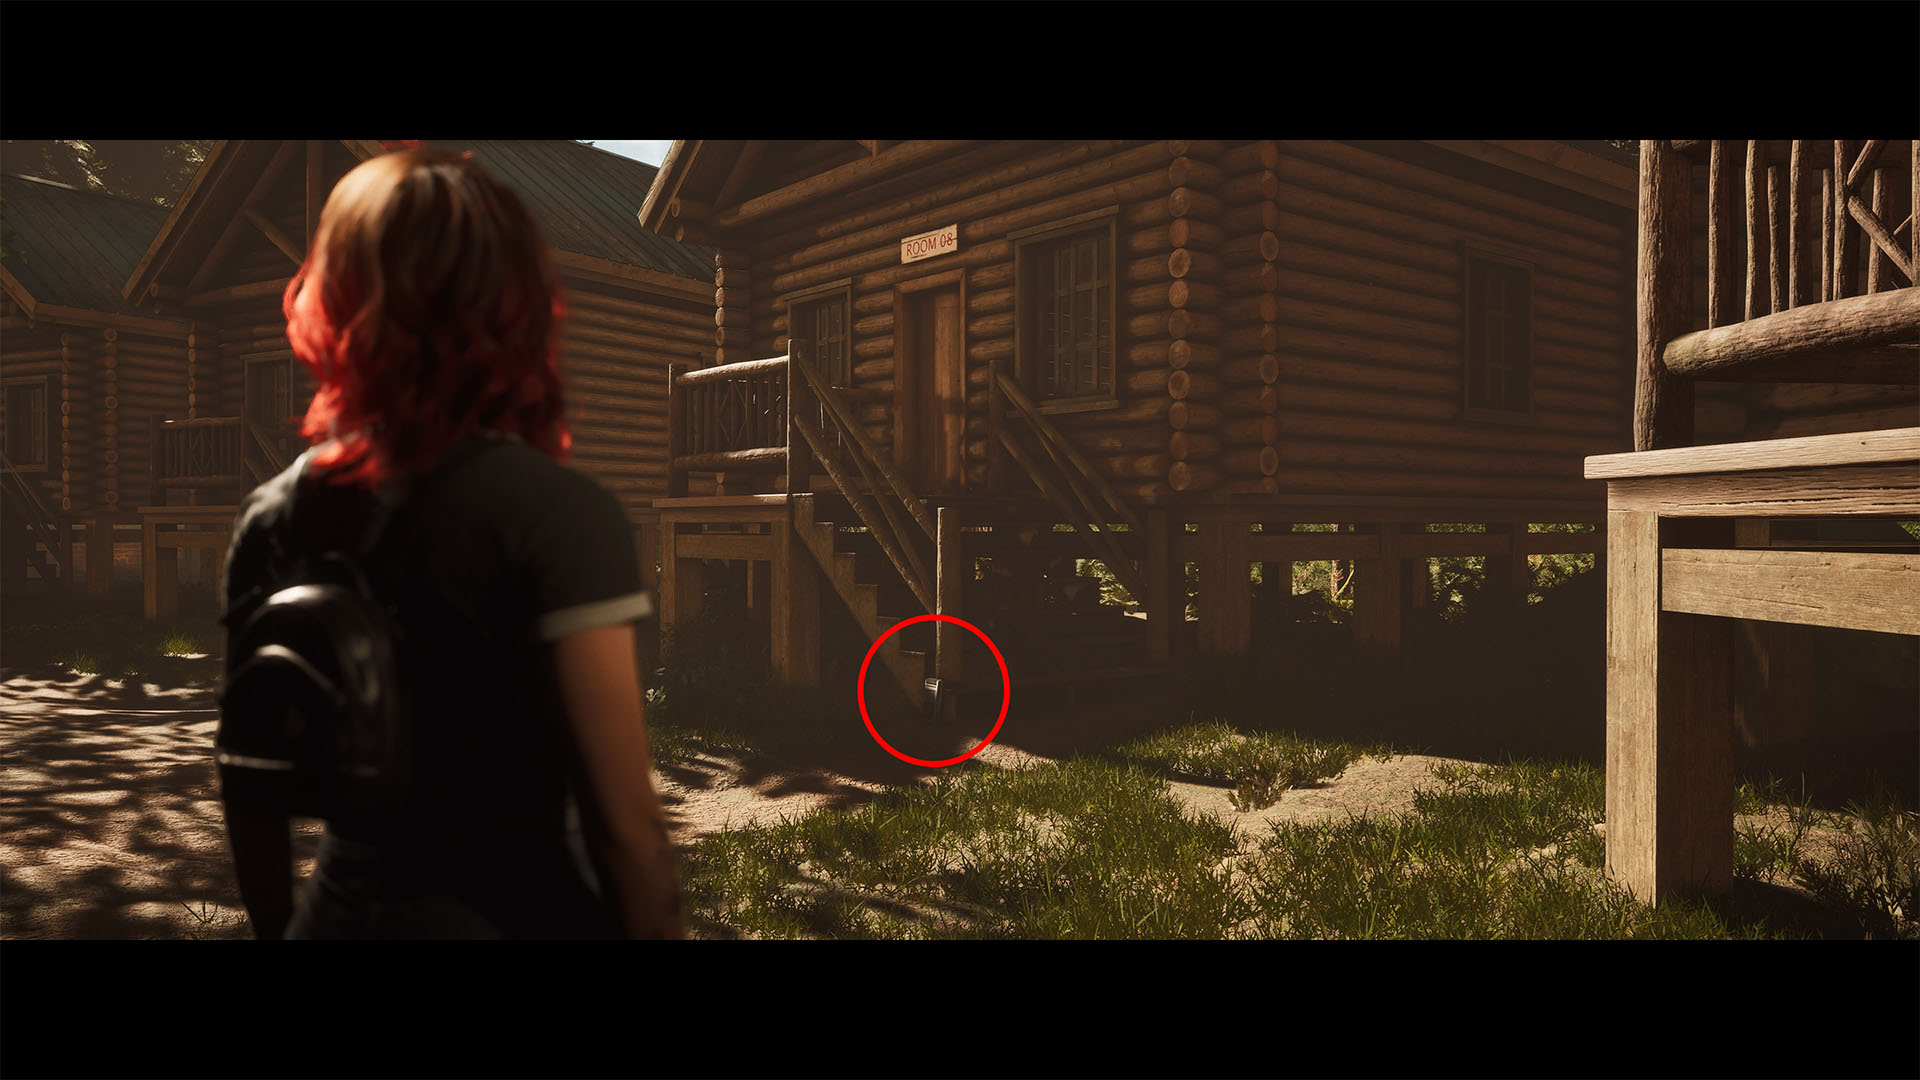
Camp Song Recording: Leave the cabin, and go down the stairs. Turn right at the bottom and go two cabins down on the right. Pick up the tape deck at the bottom of the stairs.
![]()
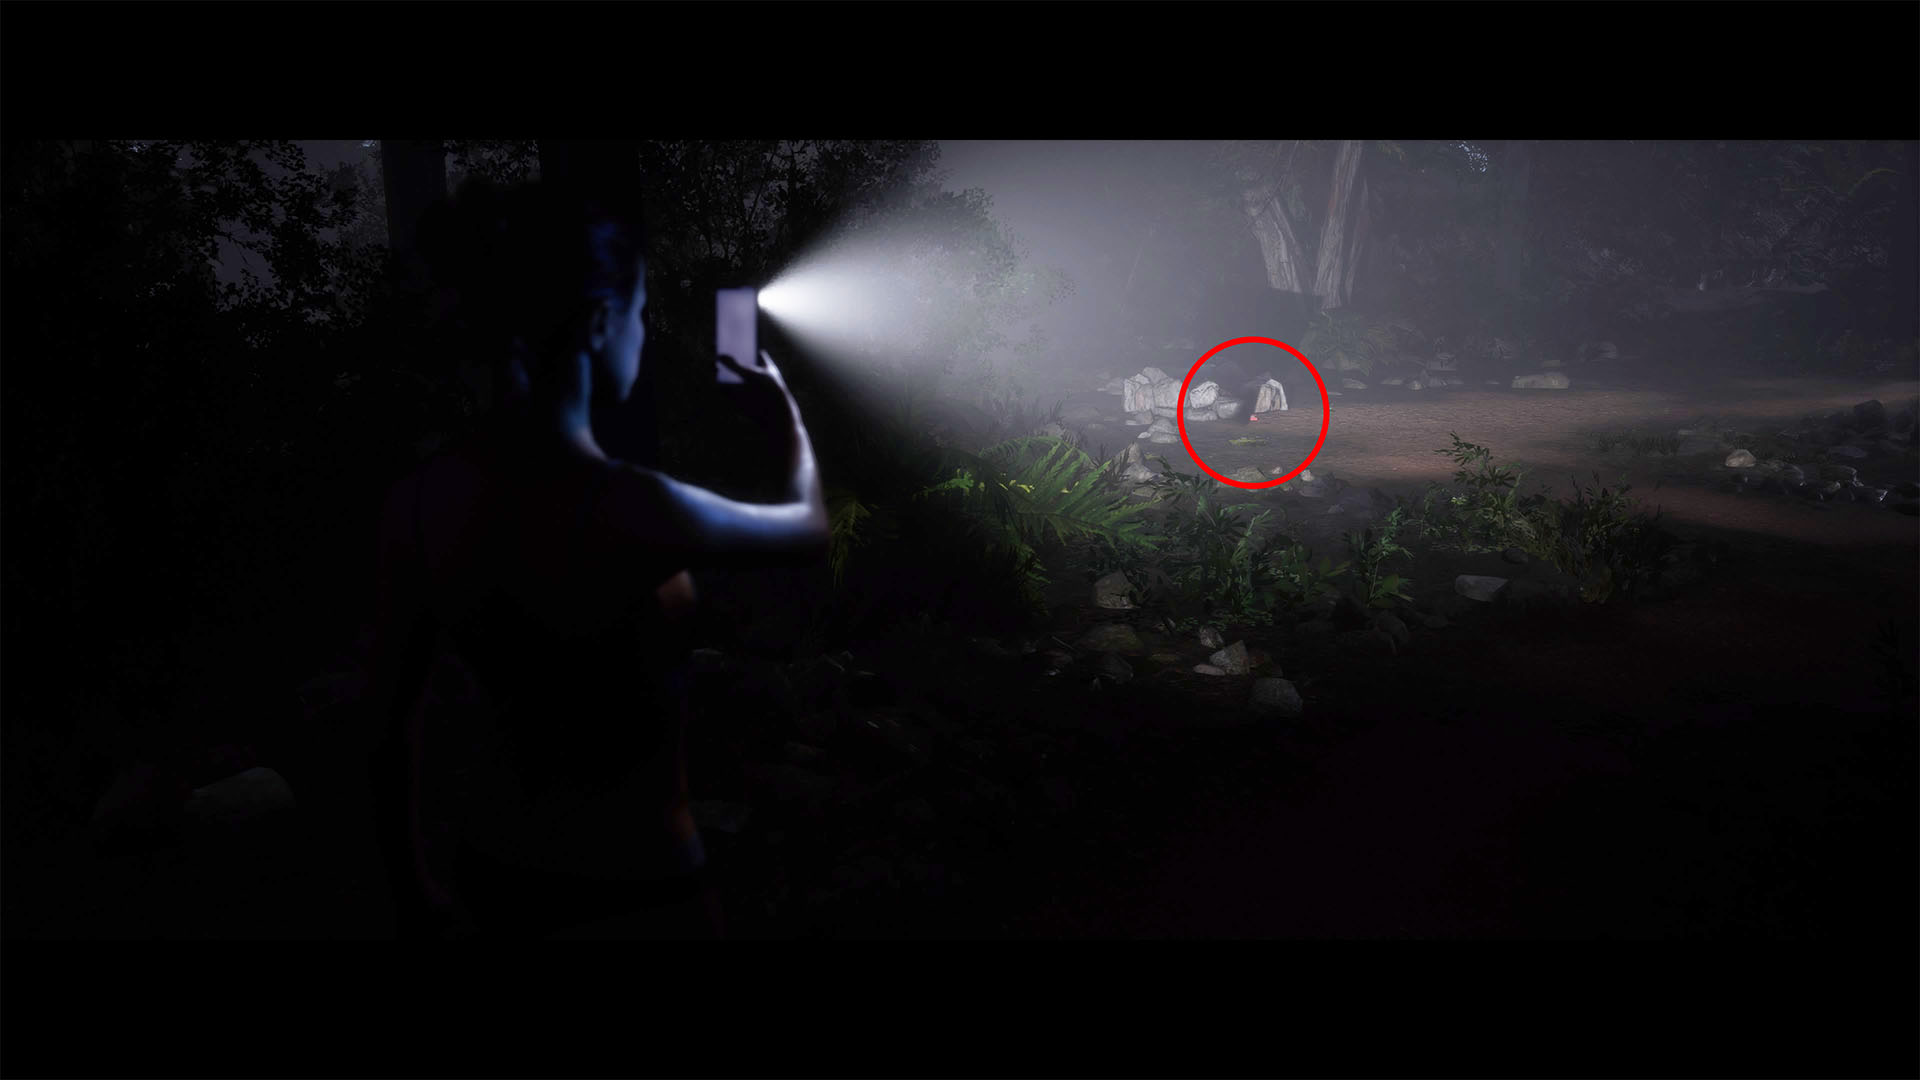
Empty Vial Evidence: Now turn left, and go to the big tree. Check the tires on the right side of the tree.
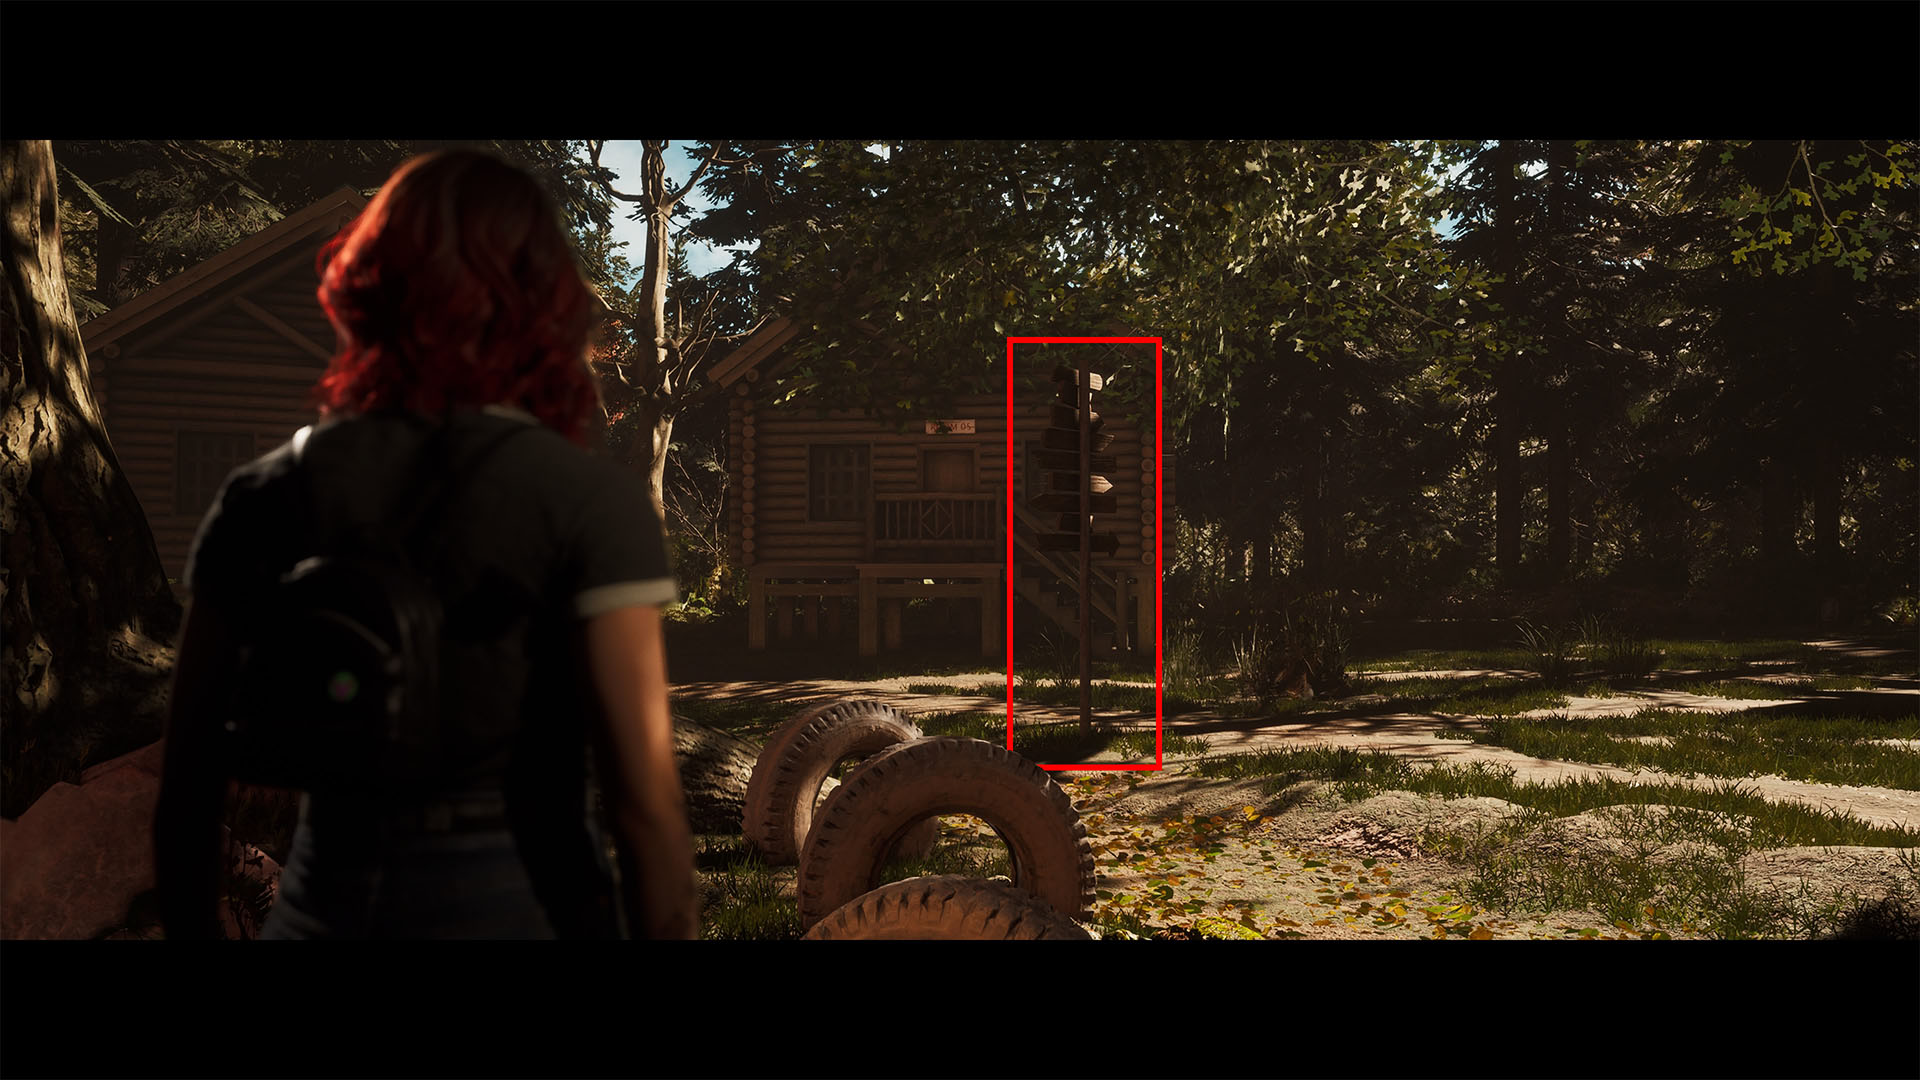
Information Signpost: After picking up the evidence, stay right and interact with the sign just behind the tires, to the right of the tree and in front of Cabin 05.
Chapter 2: Truth or Dare
Emma and Jacob
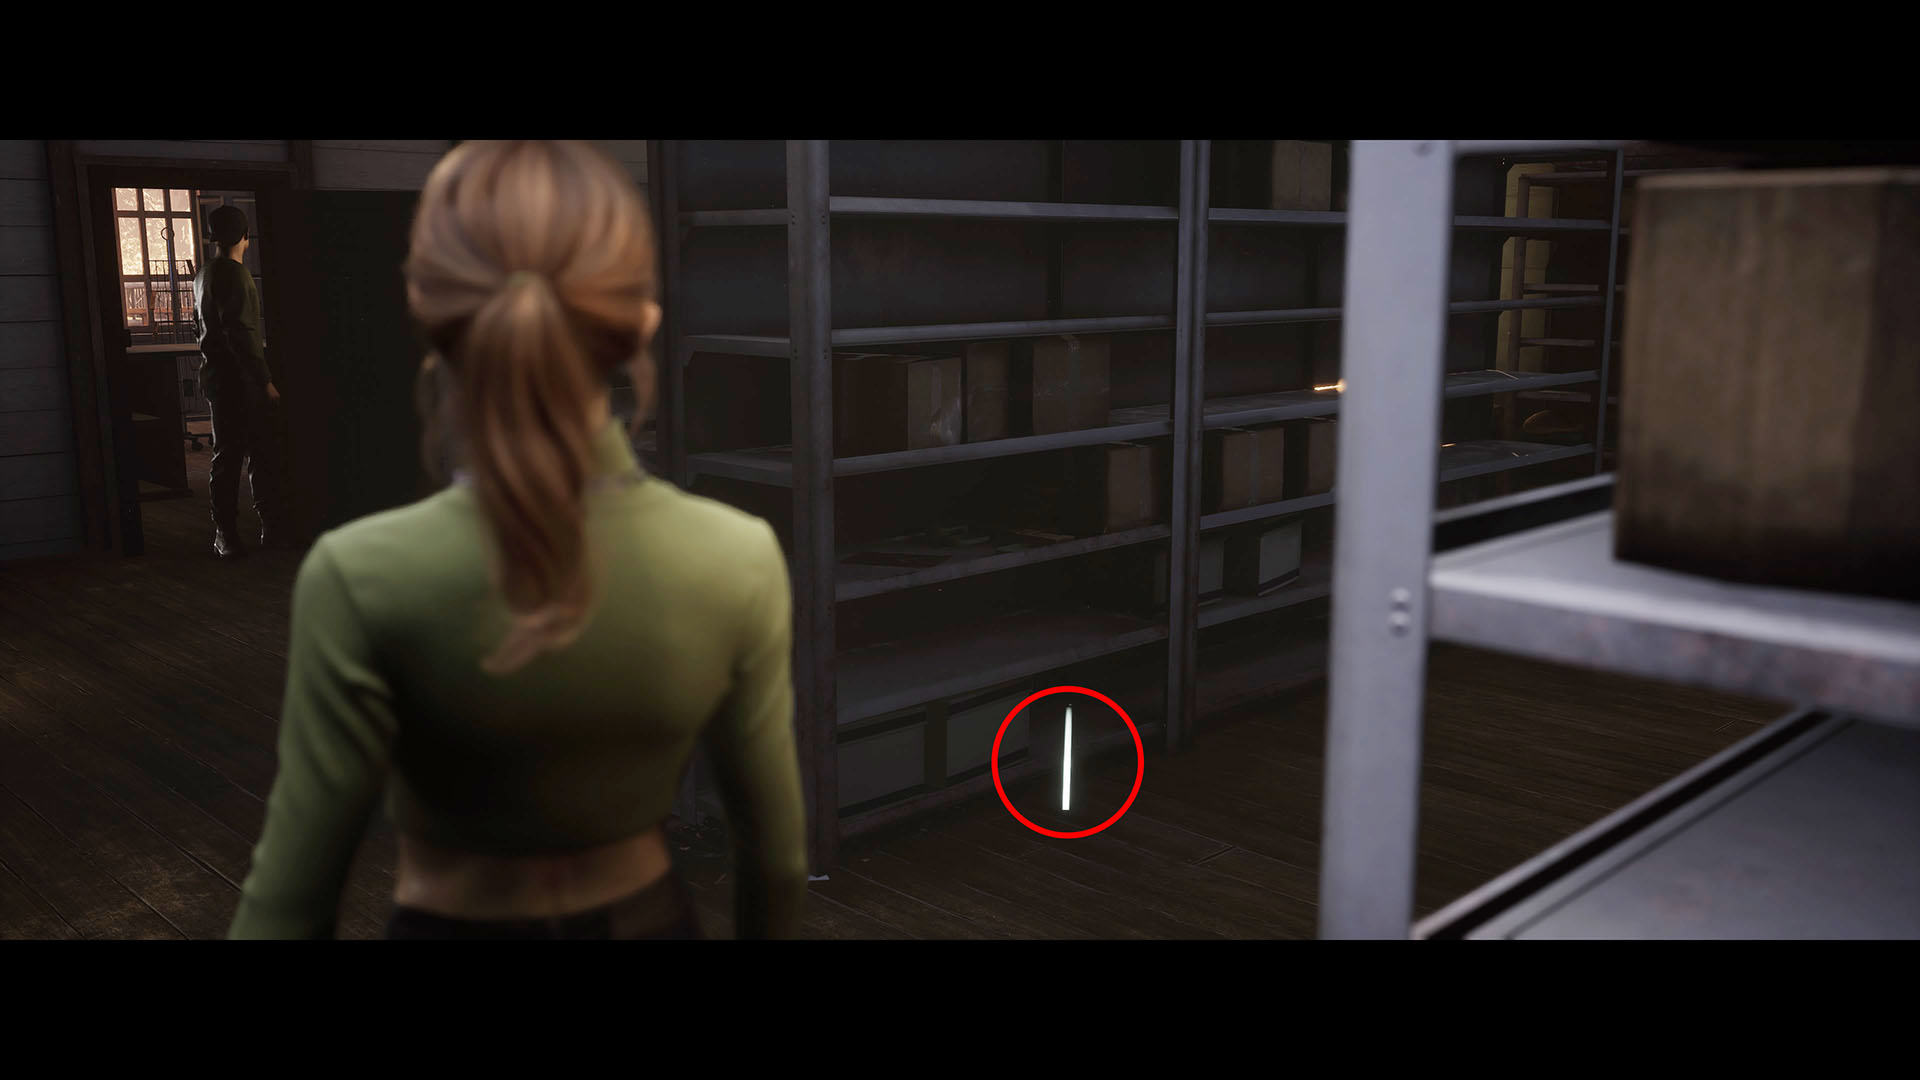
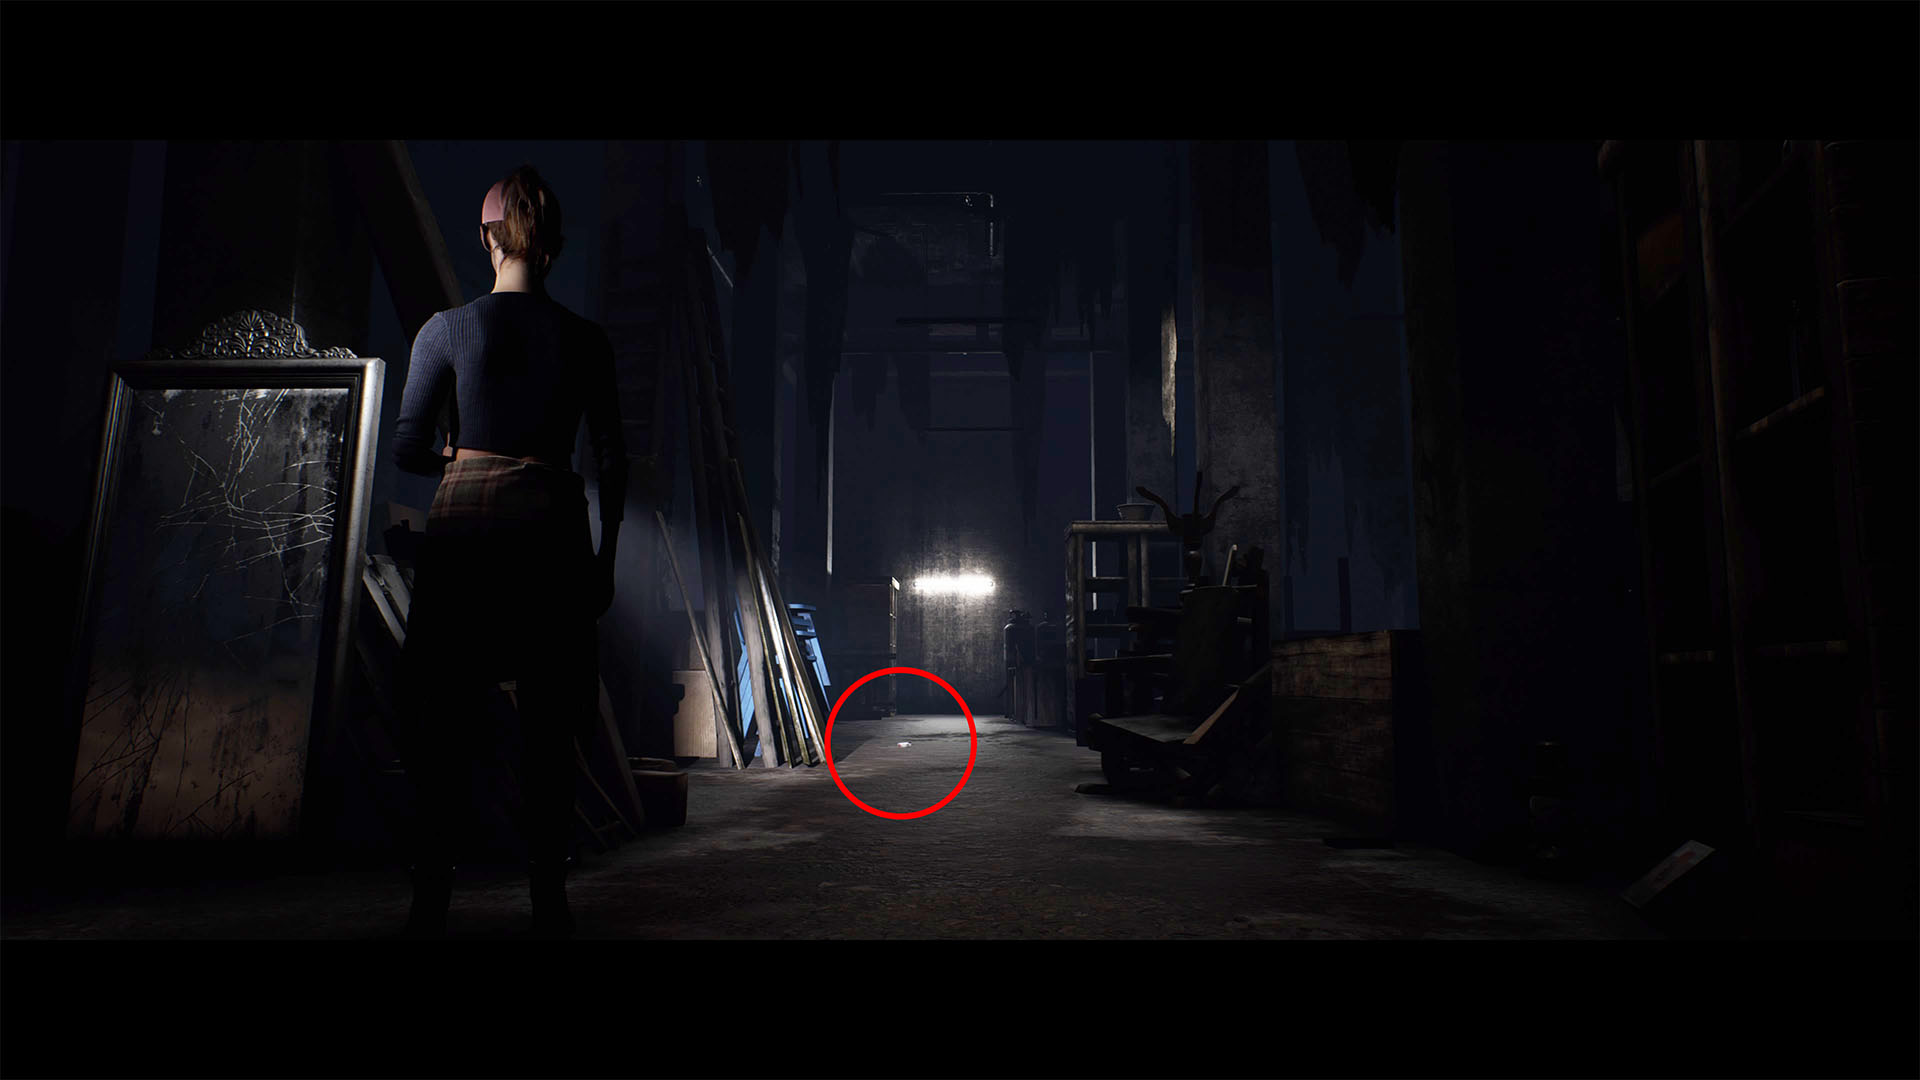
Damaged Memorabilia: In the store, go behind the shelving rack in front of you. The prompt is on the ground, though the collectible is on the third shelf from the bottom. You can get this on your way out, as well.
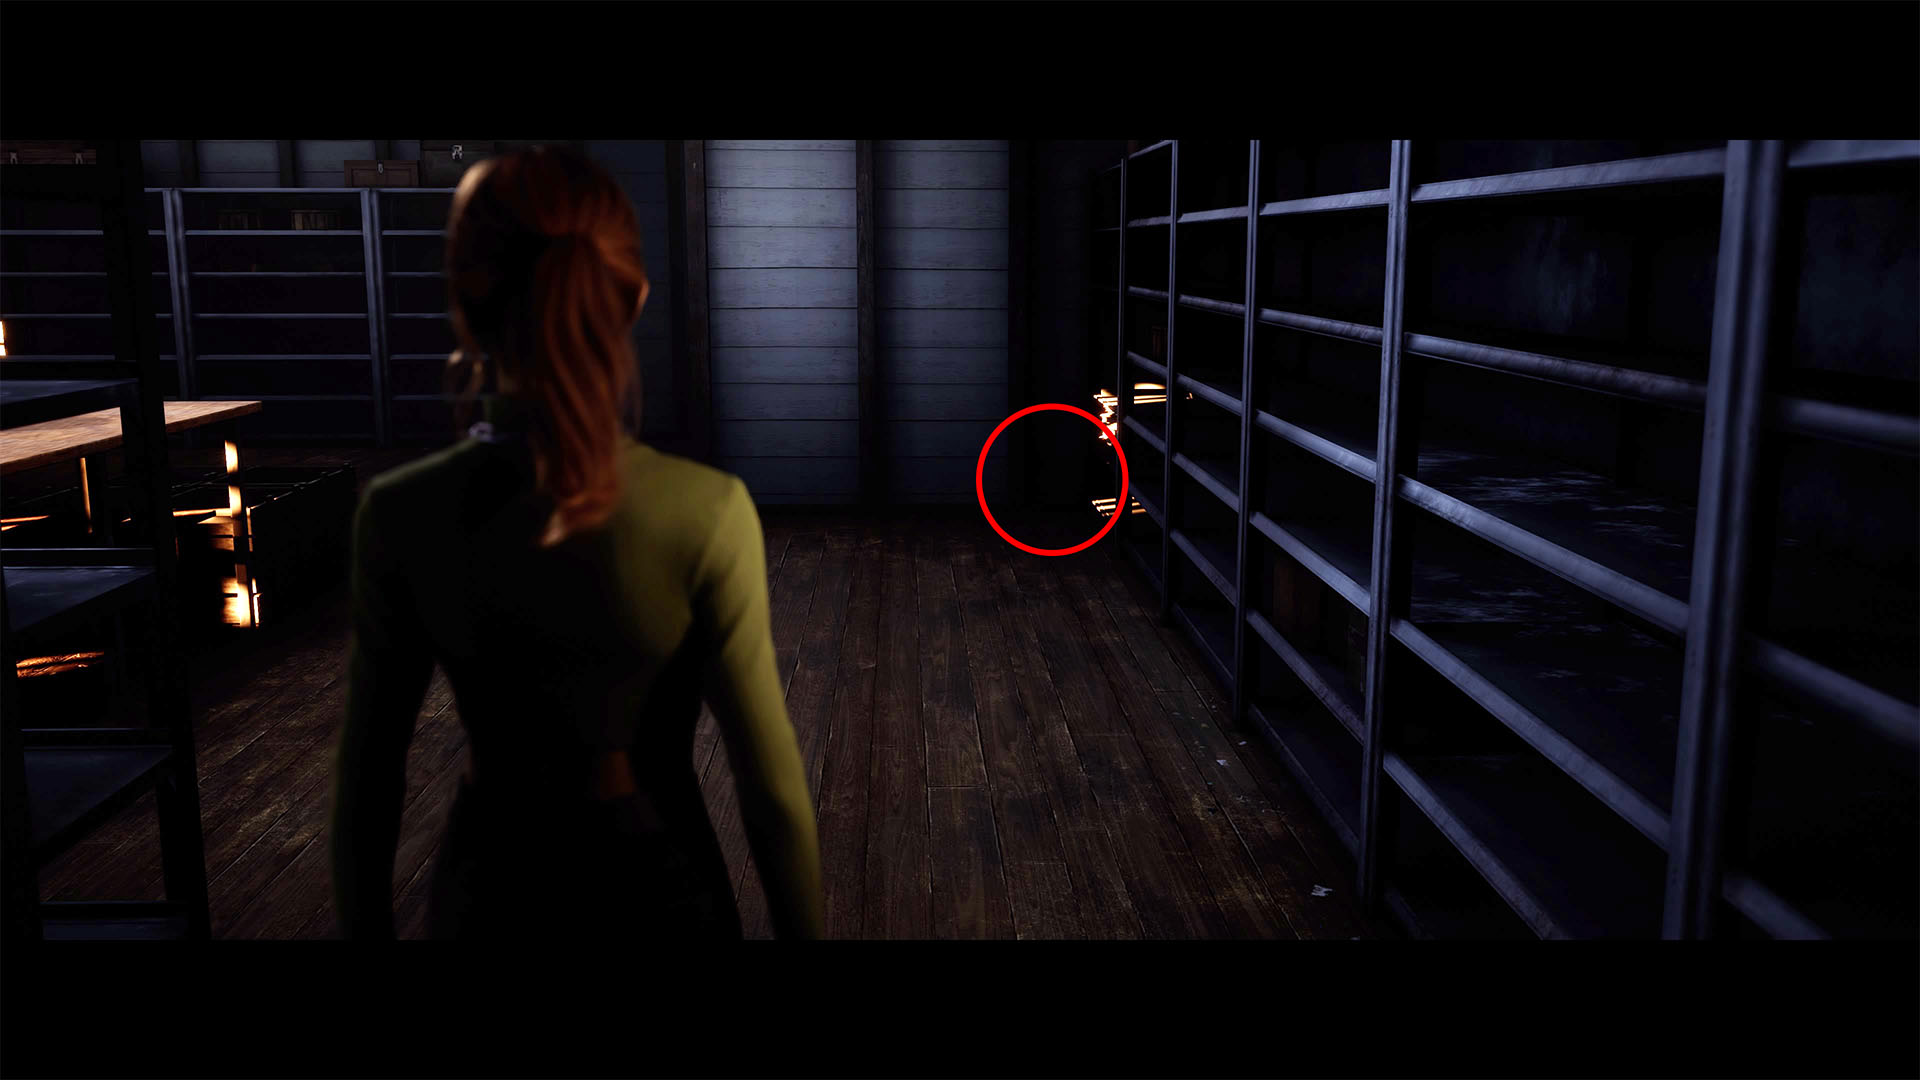
Lodge Renovation Plans: From there, continue through the maze of shelves. There will be a small cutscene that shows a view from the outside. After that, you’ll turn right by a trunk, then left near the cage. Stay on the right side and go all the way back, staying along the shelves. Go to where the sun is shining on the shelves, across from the wooden table. You can get this on your way out, as well.
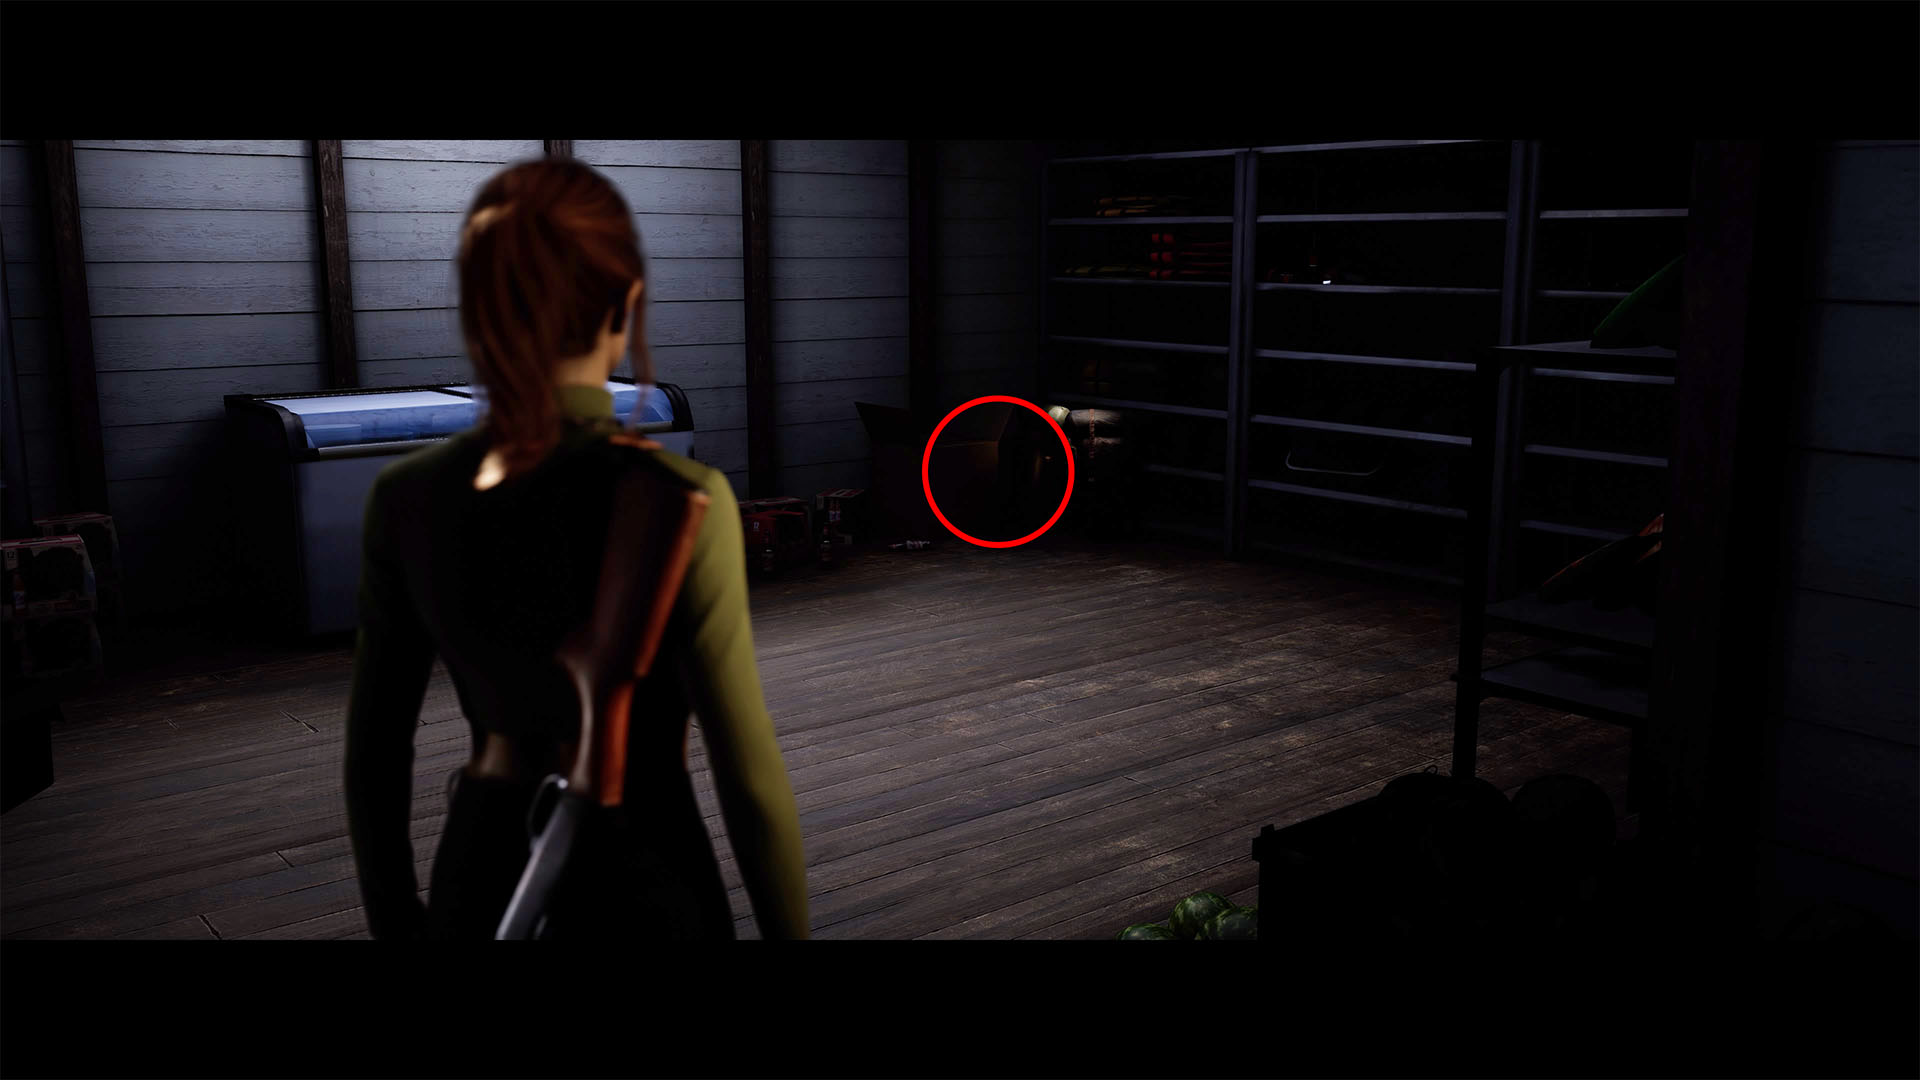
Torn Bags Evidence: Search the locked storage room, and interact with the camping supplies by the shelves lateral to the chest freezer.
Dylan and Ryan
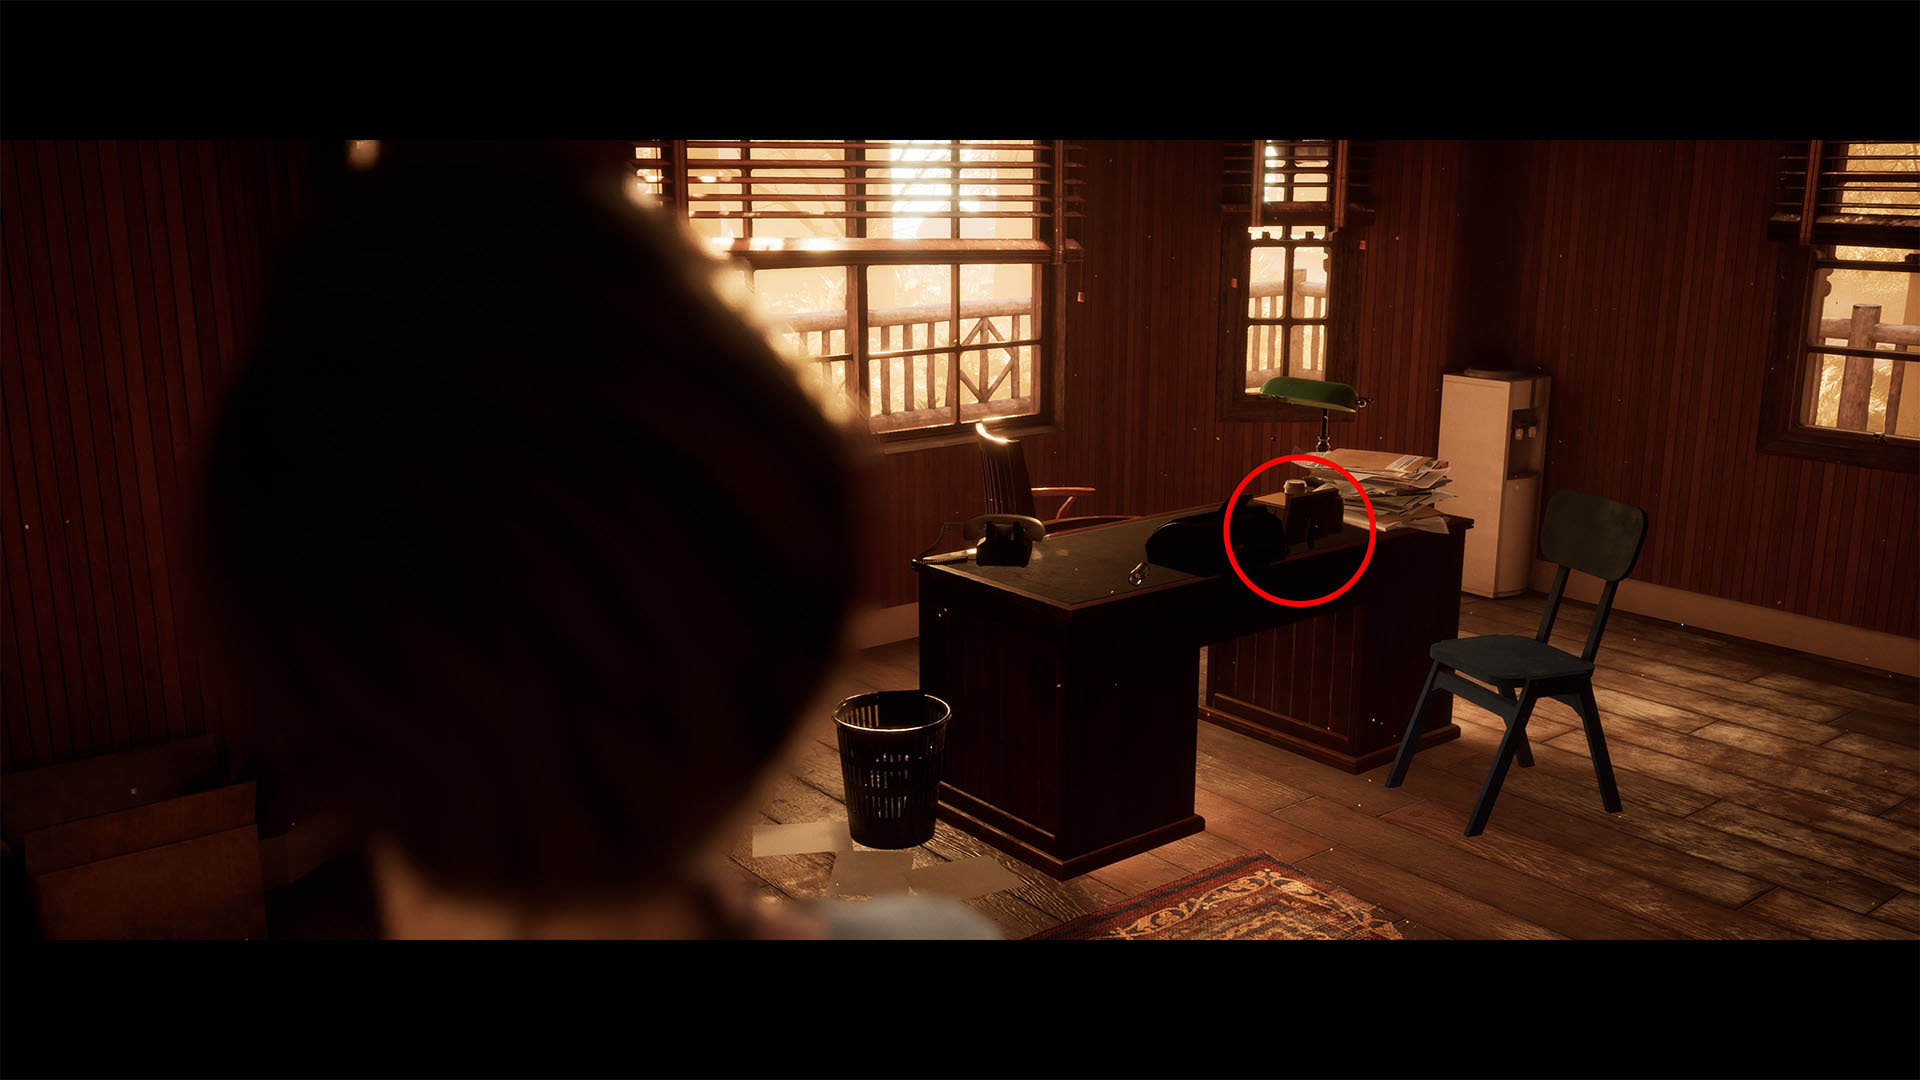
Family Photo: With Dylan in Hackett’s Office, check the front side of Hackett’s desk and inspect the frame.
Counselor’s Ledger: Go behind Chris’ desk and interact with the prompt.
Abi and Nick
This is where you’ll need to choose which path to take: Rocky Road or Shady Glade. You cannot choose both.
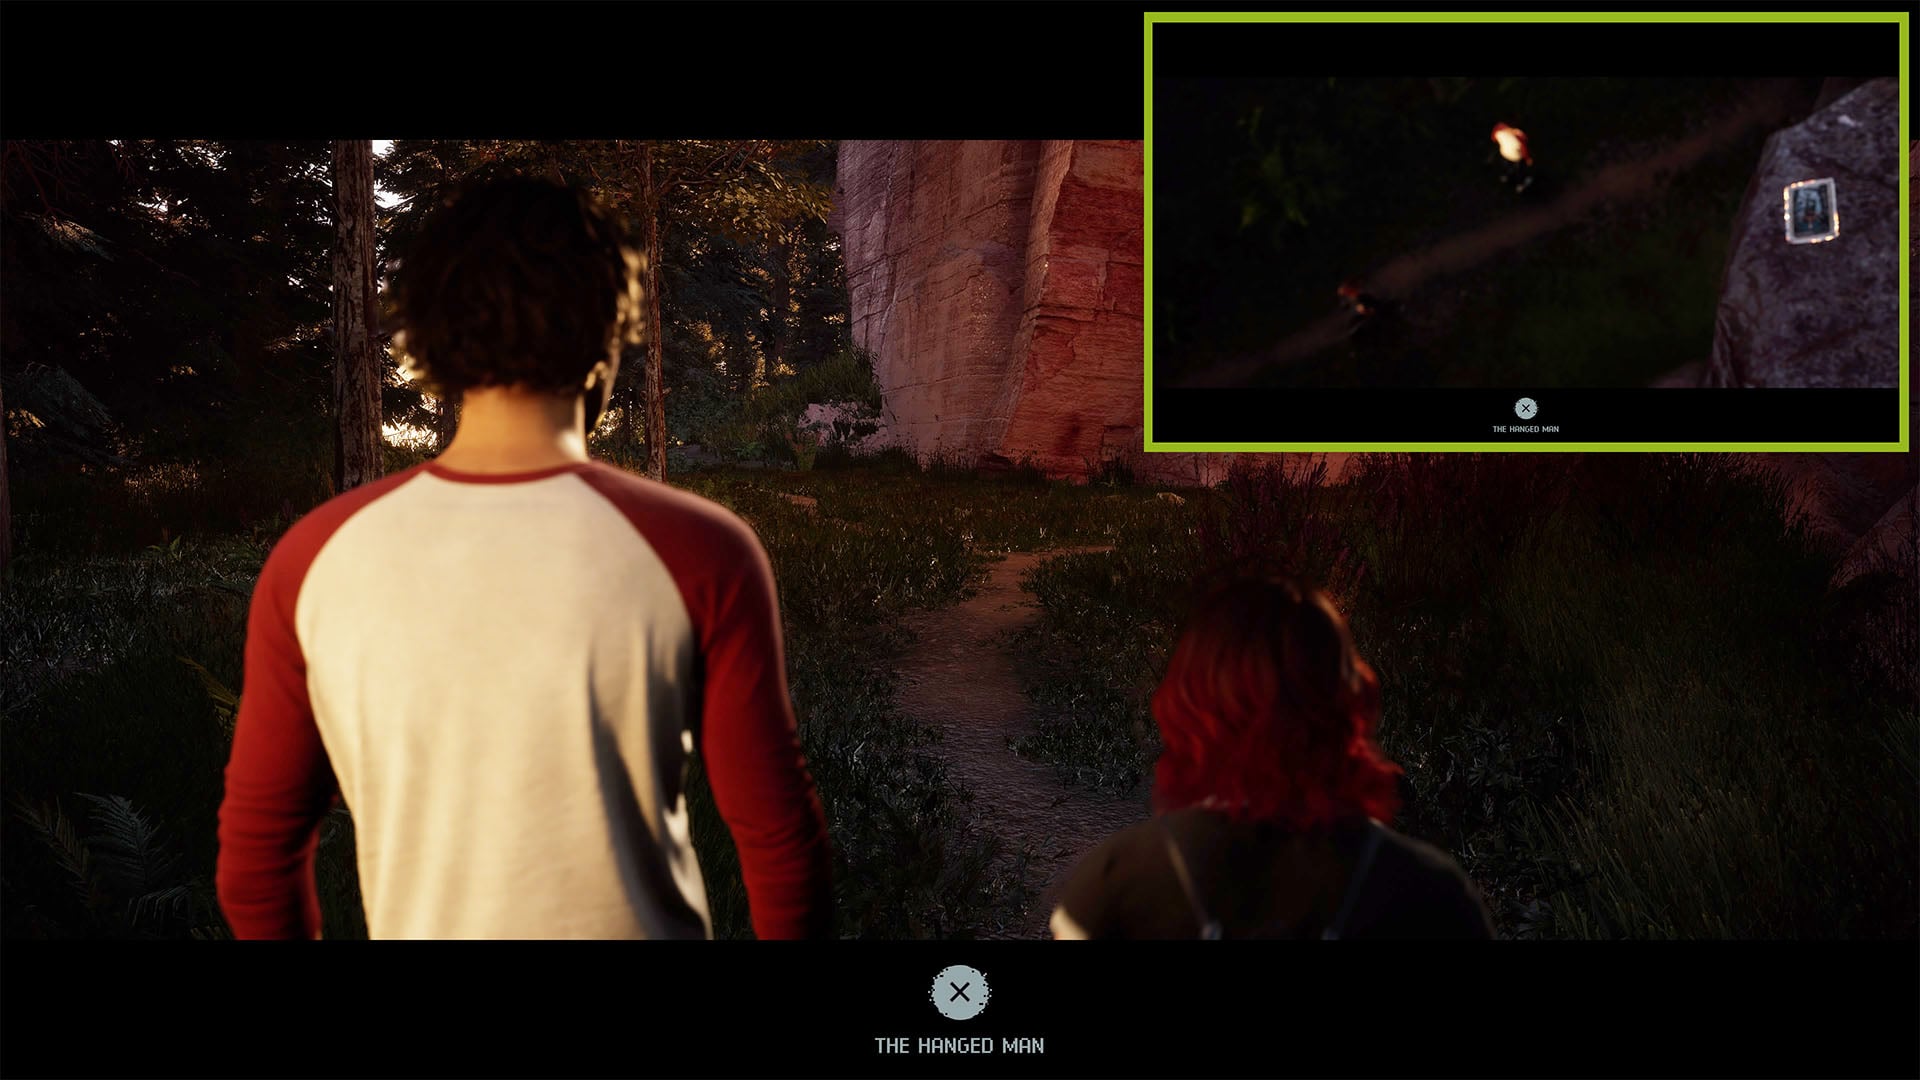
Hanged Man Tarot Card: Take Rocky Road while in the woods. Go left when the path forks, and you’ll cross it along the path.
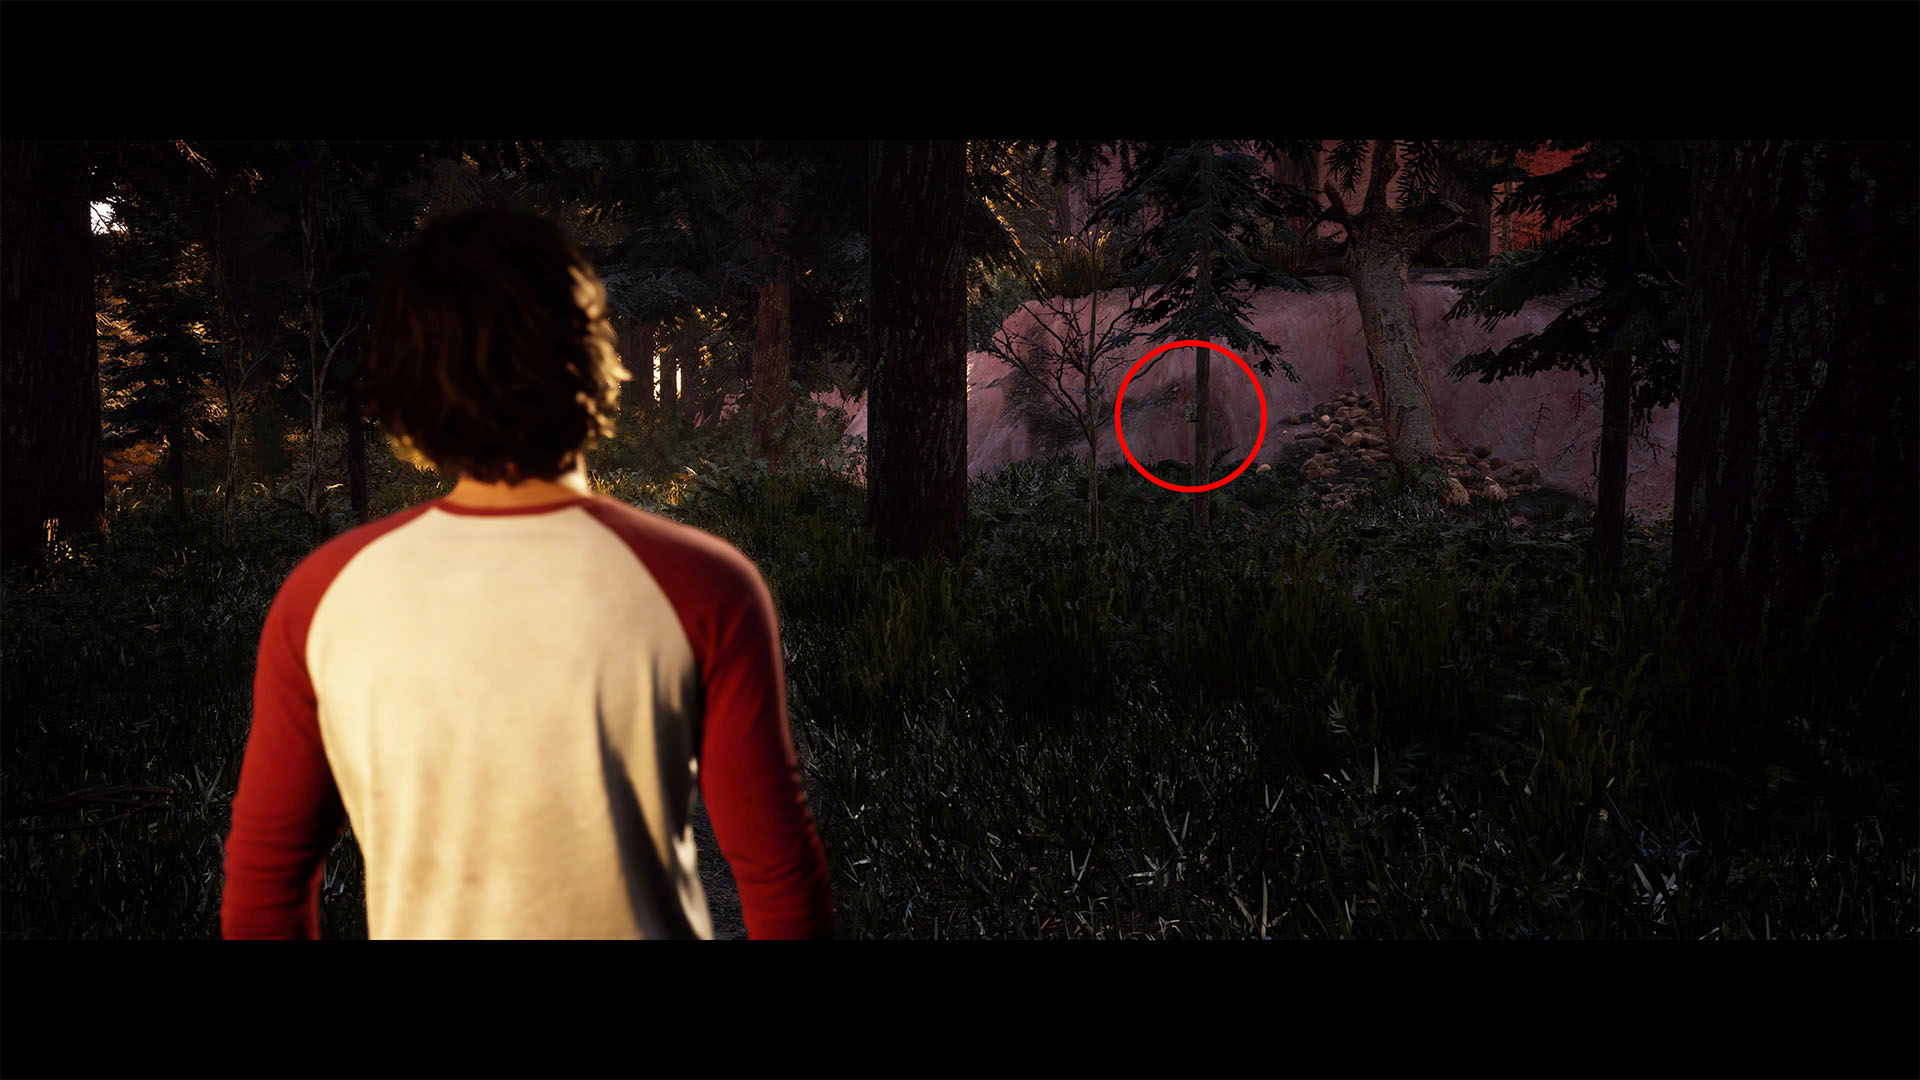
Trail Cam: Take Shady Glade. Follow the path right. As it curves left and up, look into the trees ahead of you and to the right. You’ll see a fallen tree against the cliff and a thin tree in front of it with the camera strapped on it.
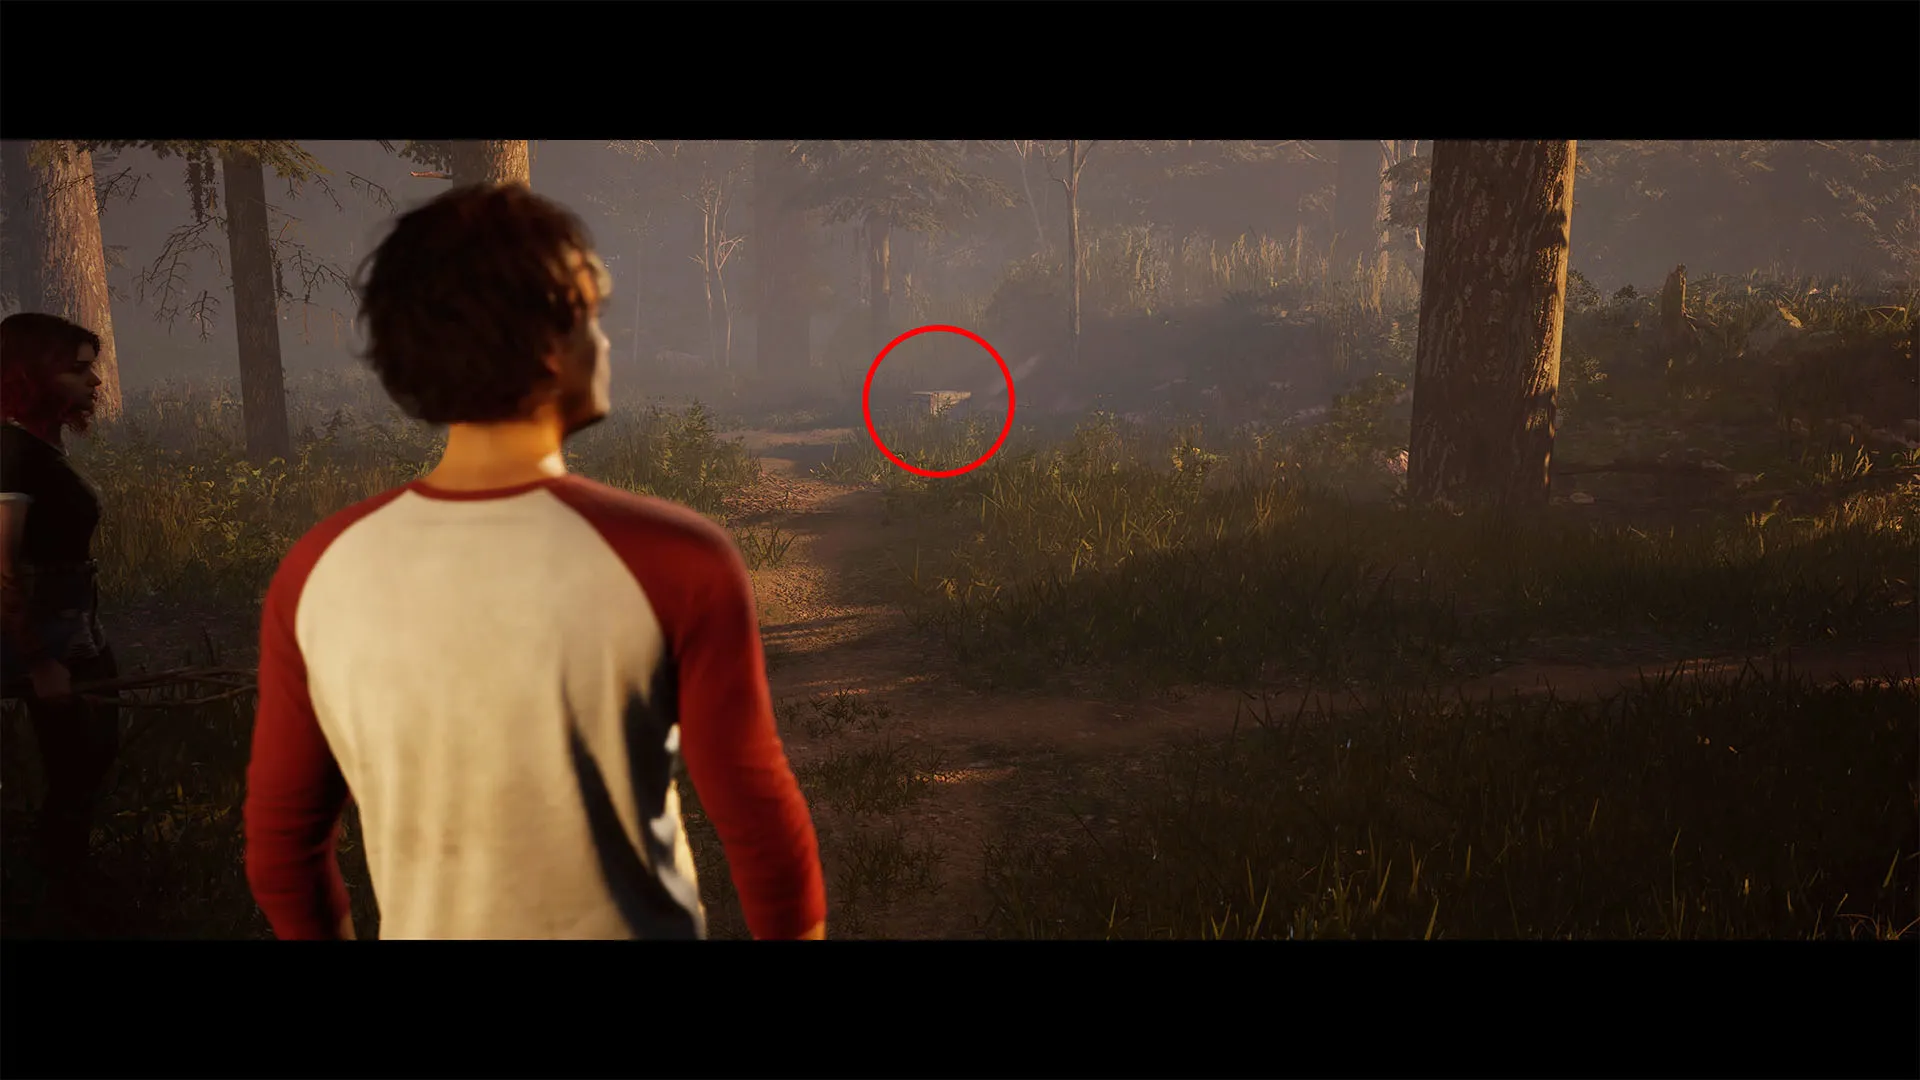
Ranger Box: From there, continue to follow the path up and to the left. Don’t take the path to the right when it branches; this will start a cutscene and you can’t go back. Pass the path that branches to the right, then look to the right just beyond to find a crate.
Chapter 3: Trouble in Paradise
Abi
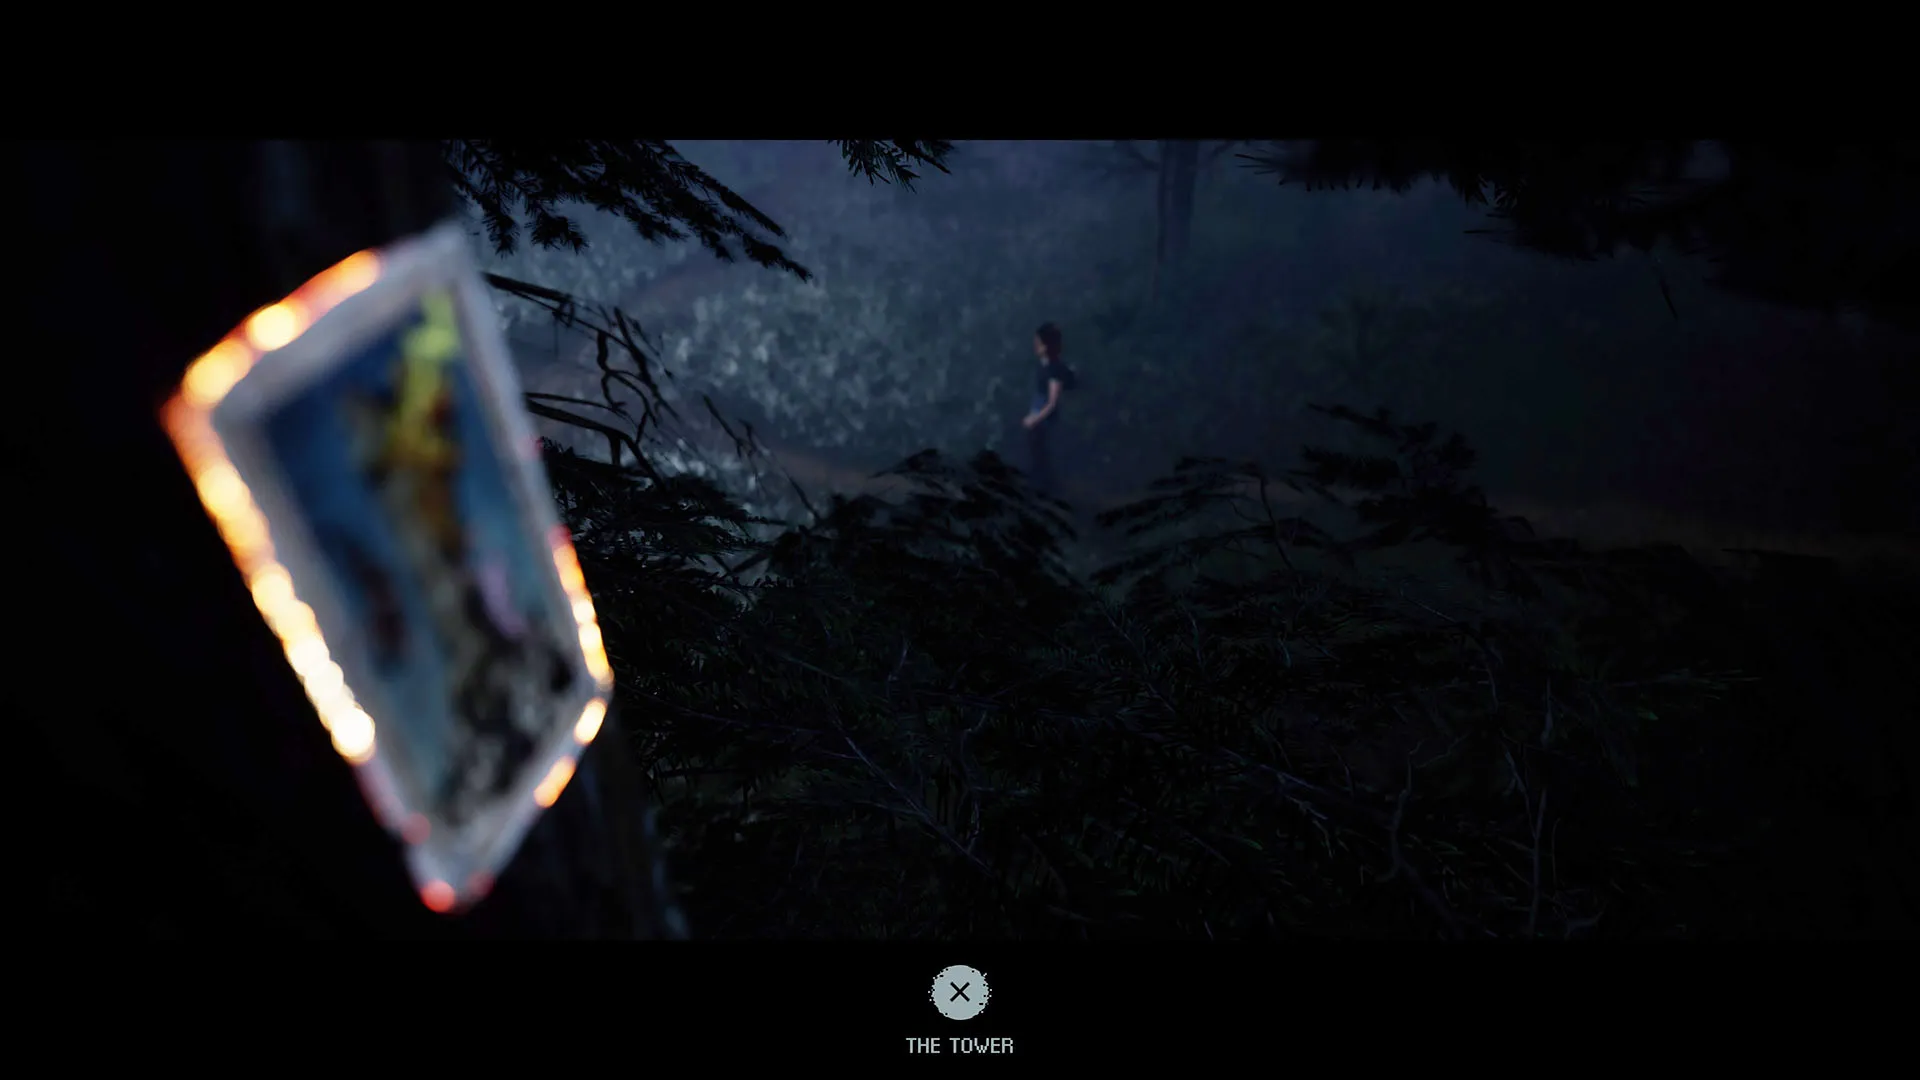
Tower Tarot Card: As soon as you gain control of Abi, turn left and follow the path. Follow the path left again at the next fork, then left one more time when it branches. The camera will shift about halfway down, revealing the card.
Jacob
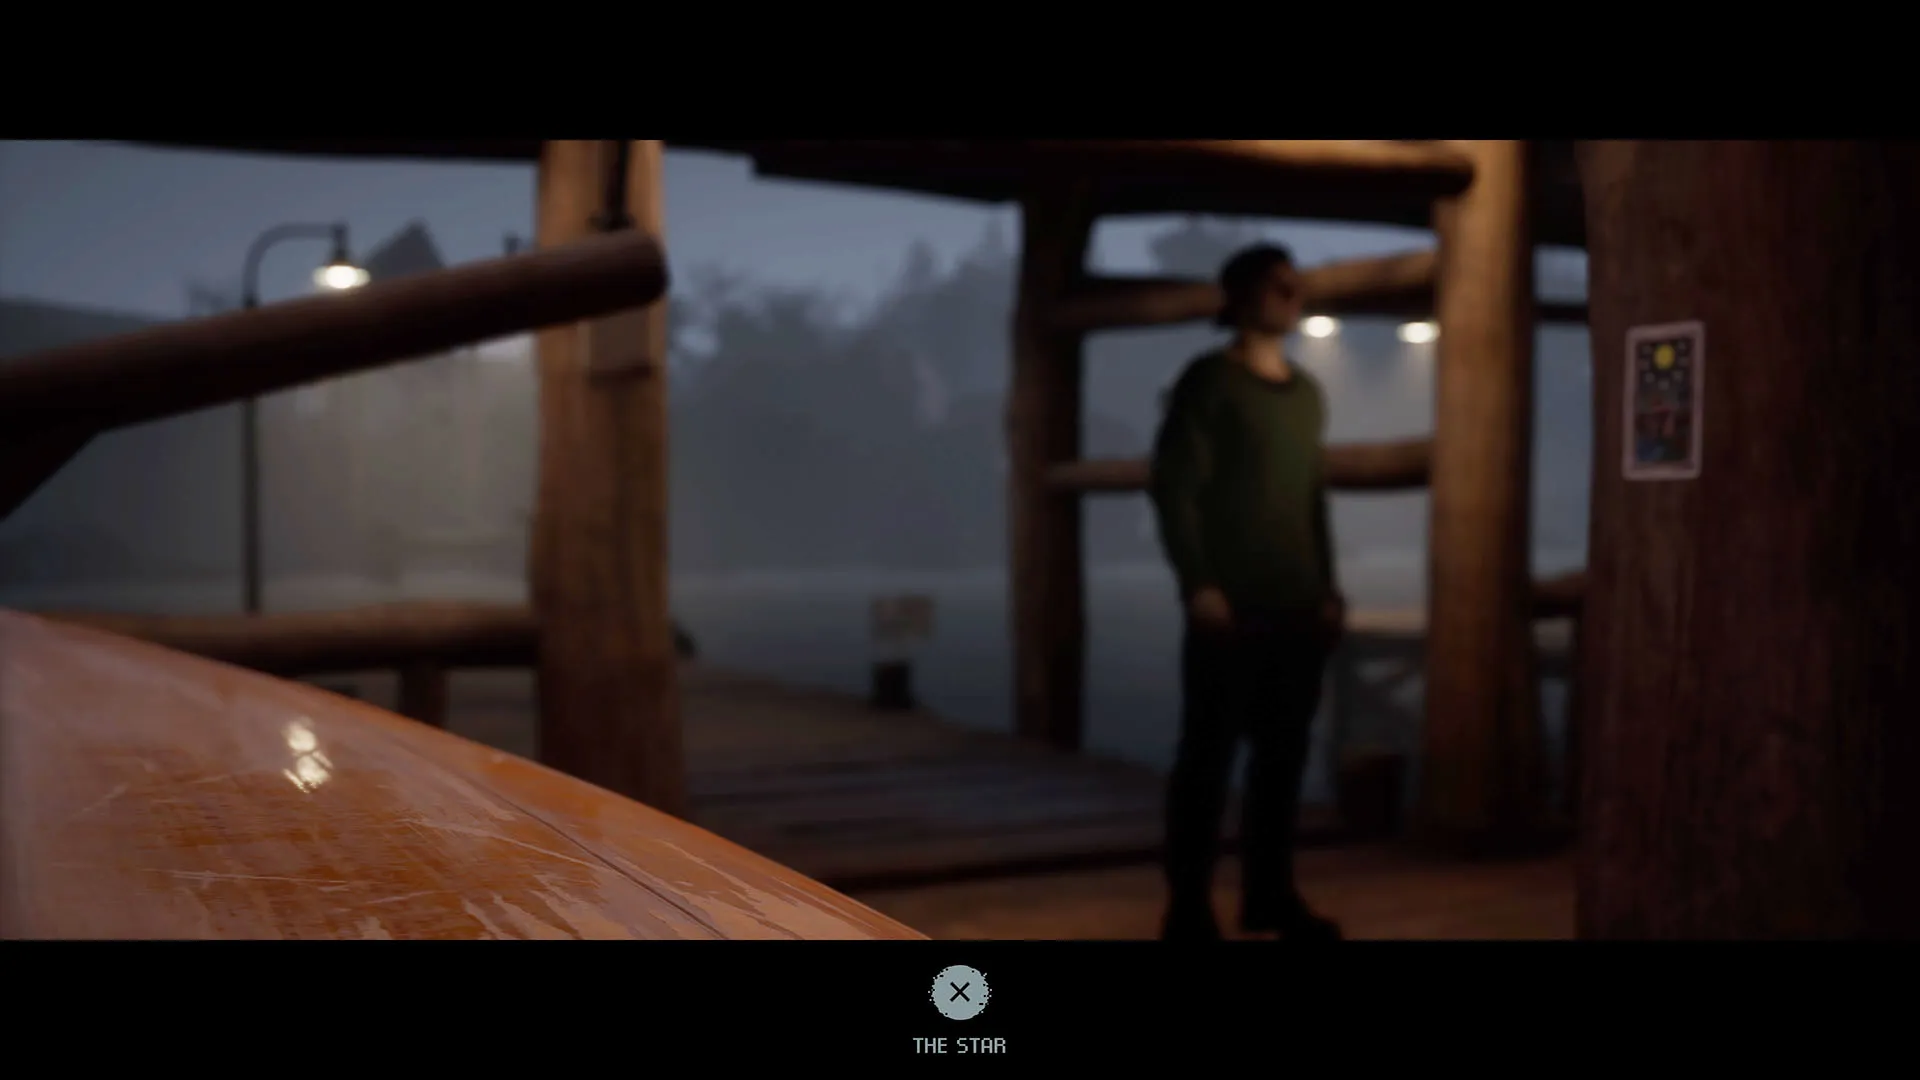
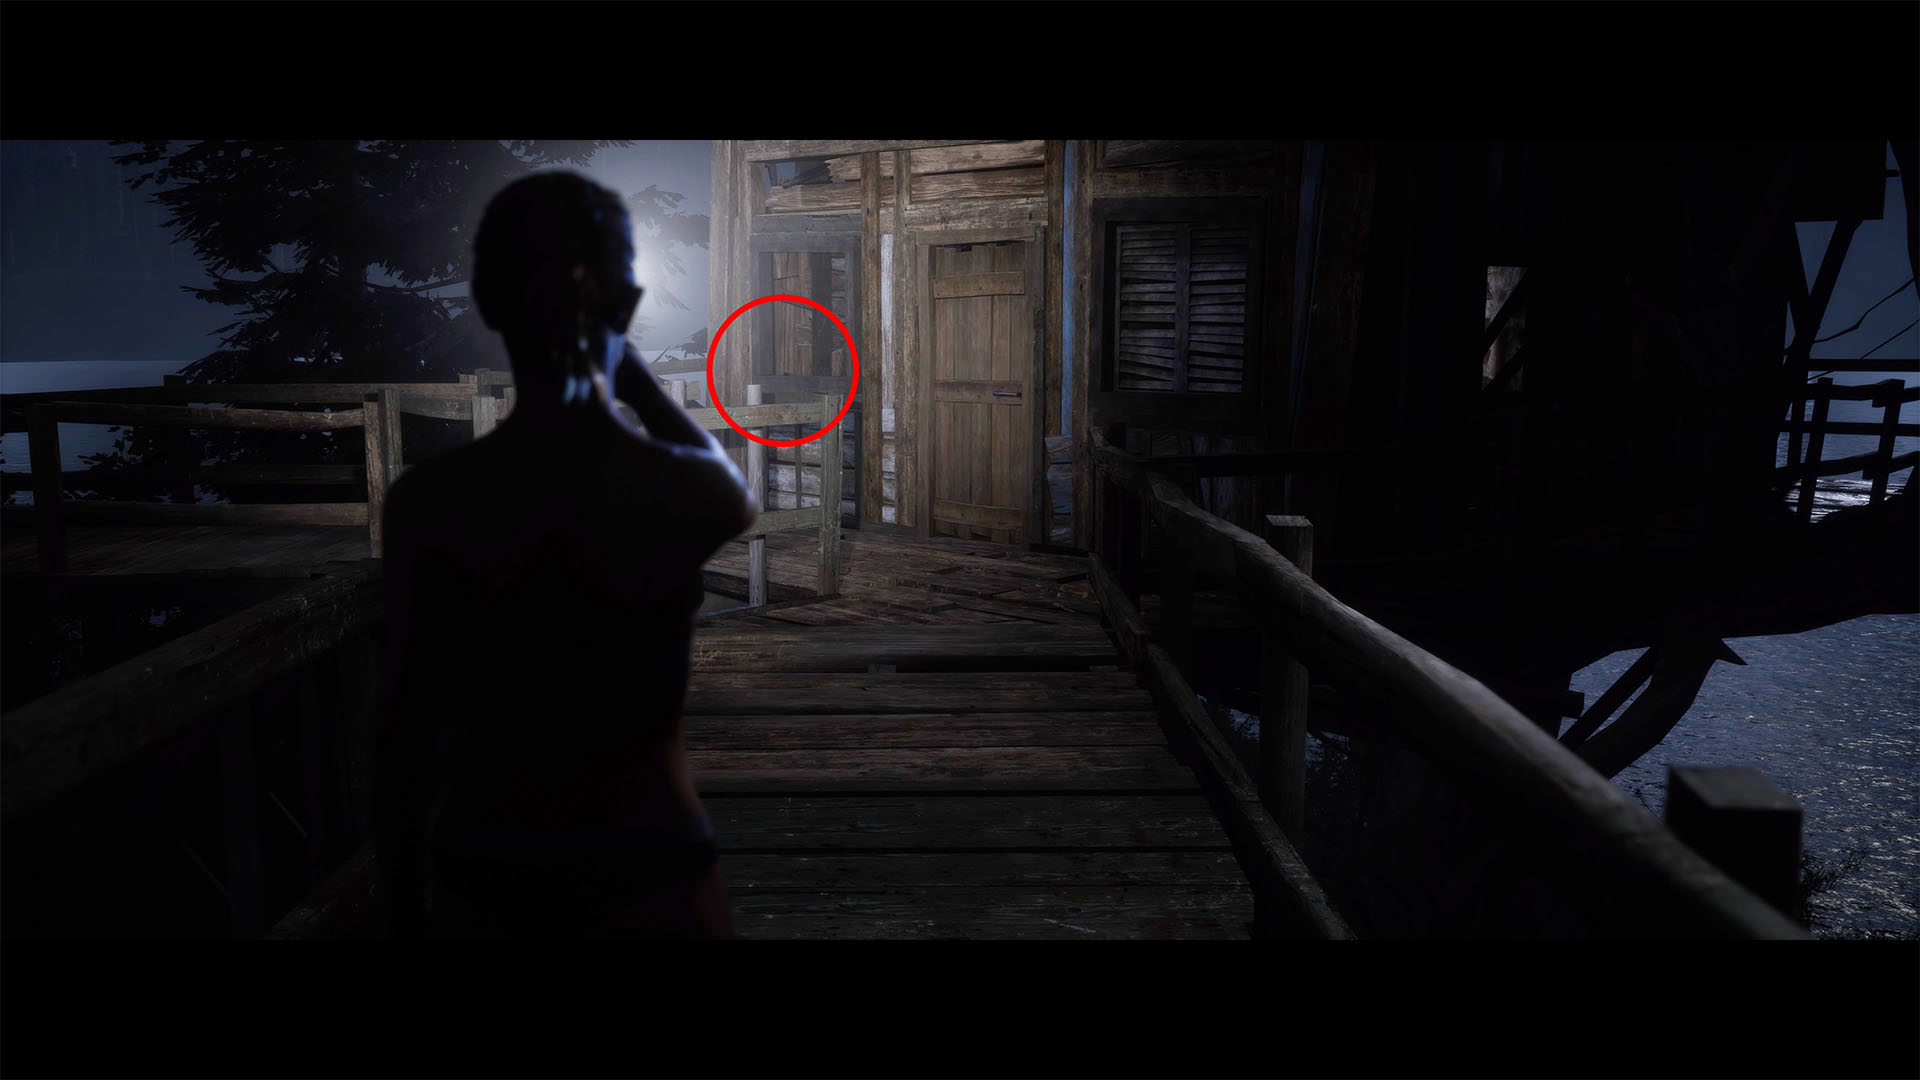
The Star Tarot Card: At the boathouse; unmissable at the beginning.
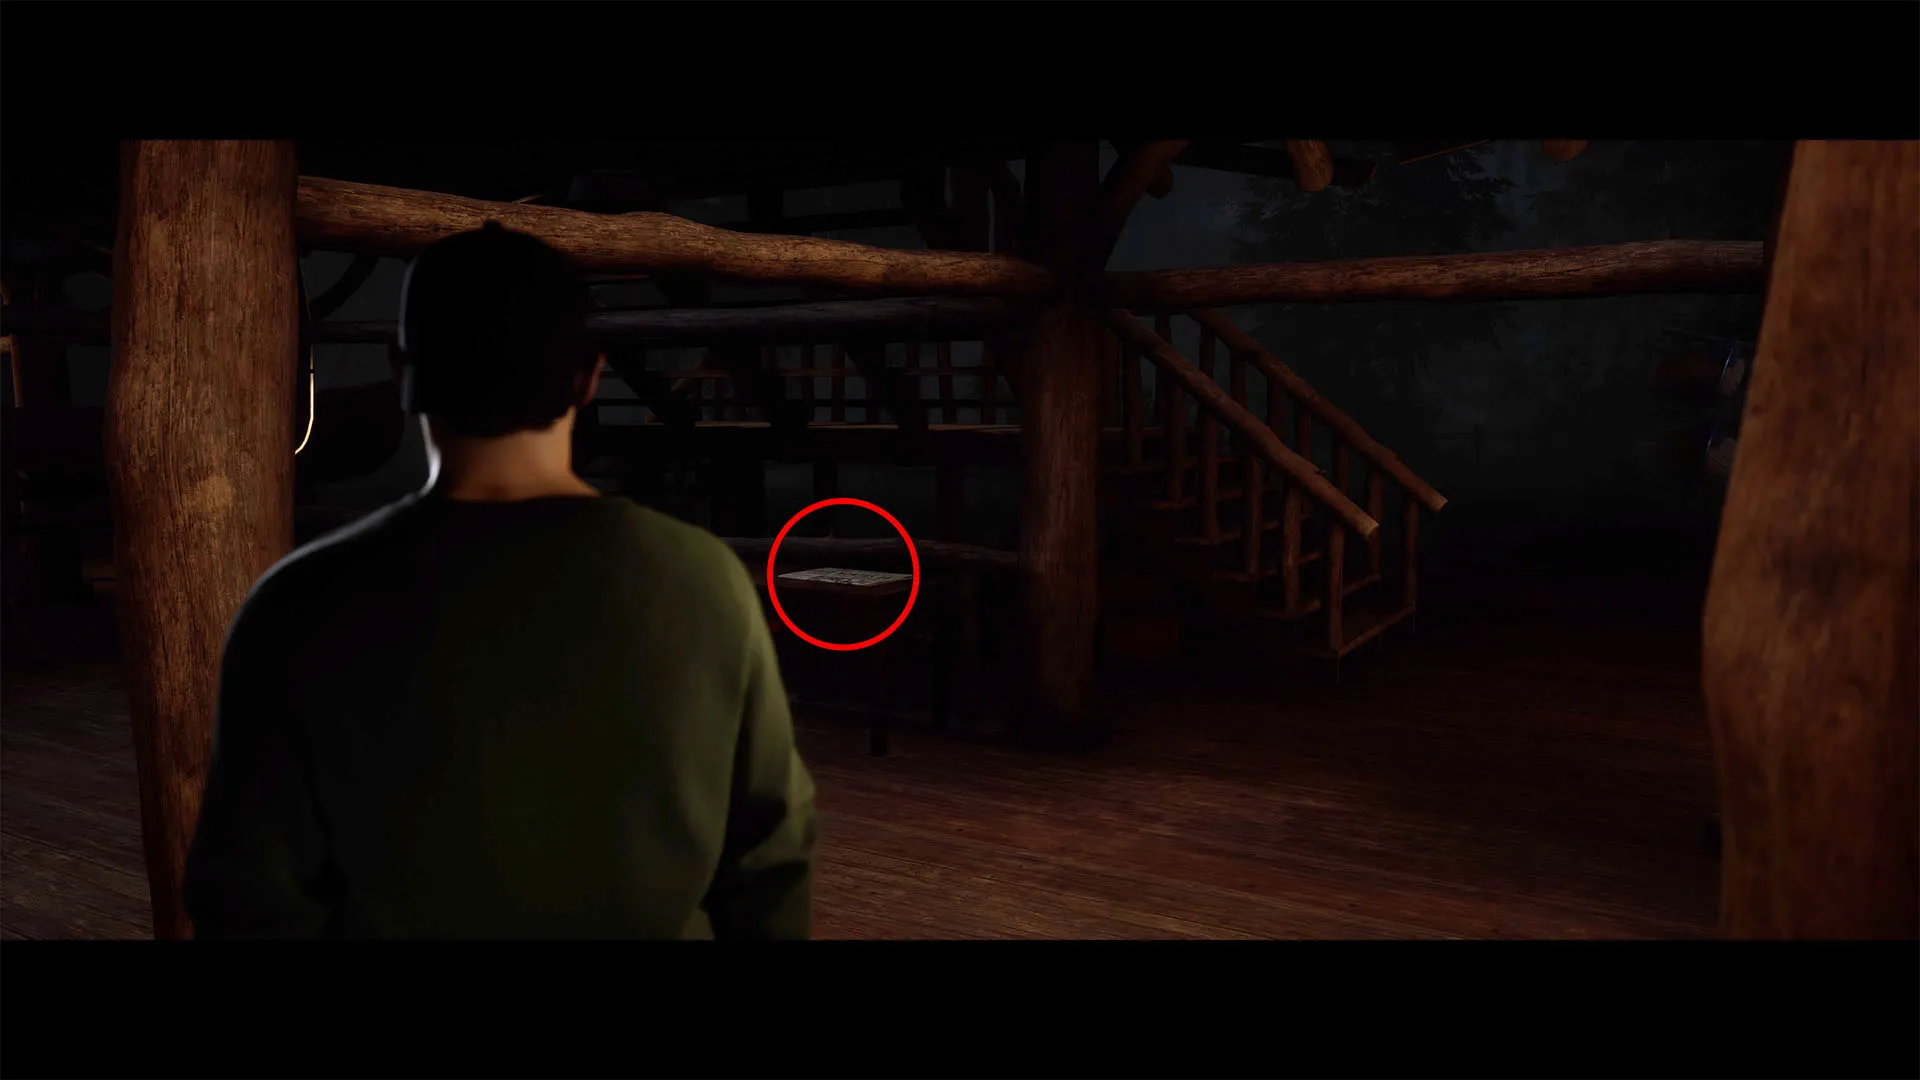
North Kill Gazette: Continue forward after the Tarot Card and interact with the newspaper on the small table by the stairs.
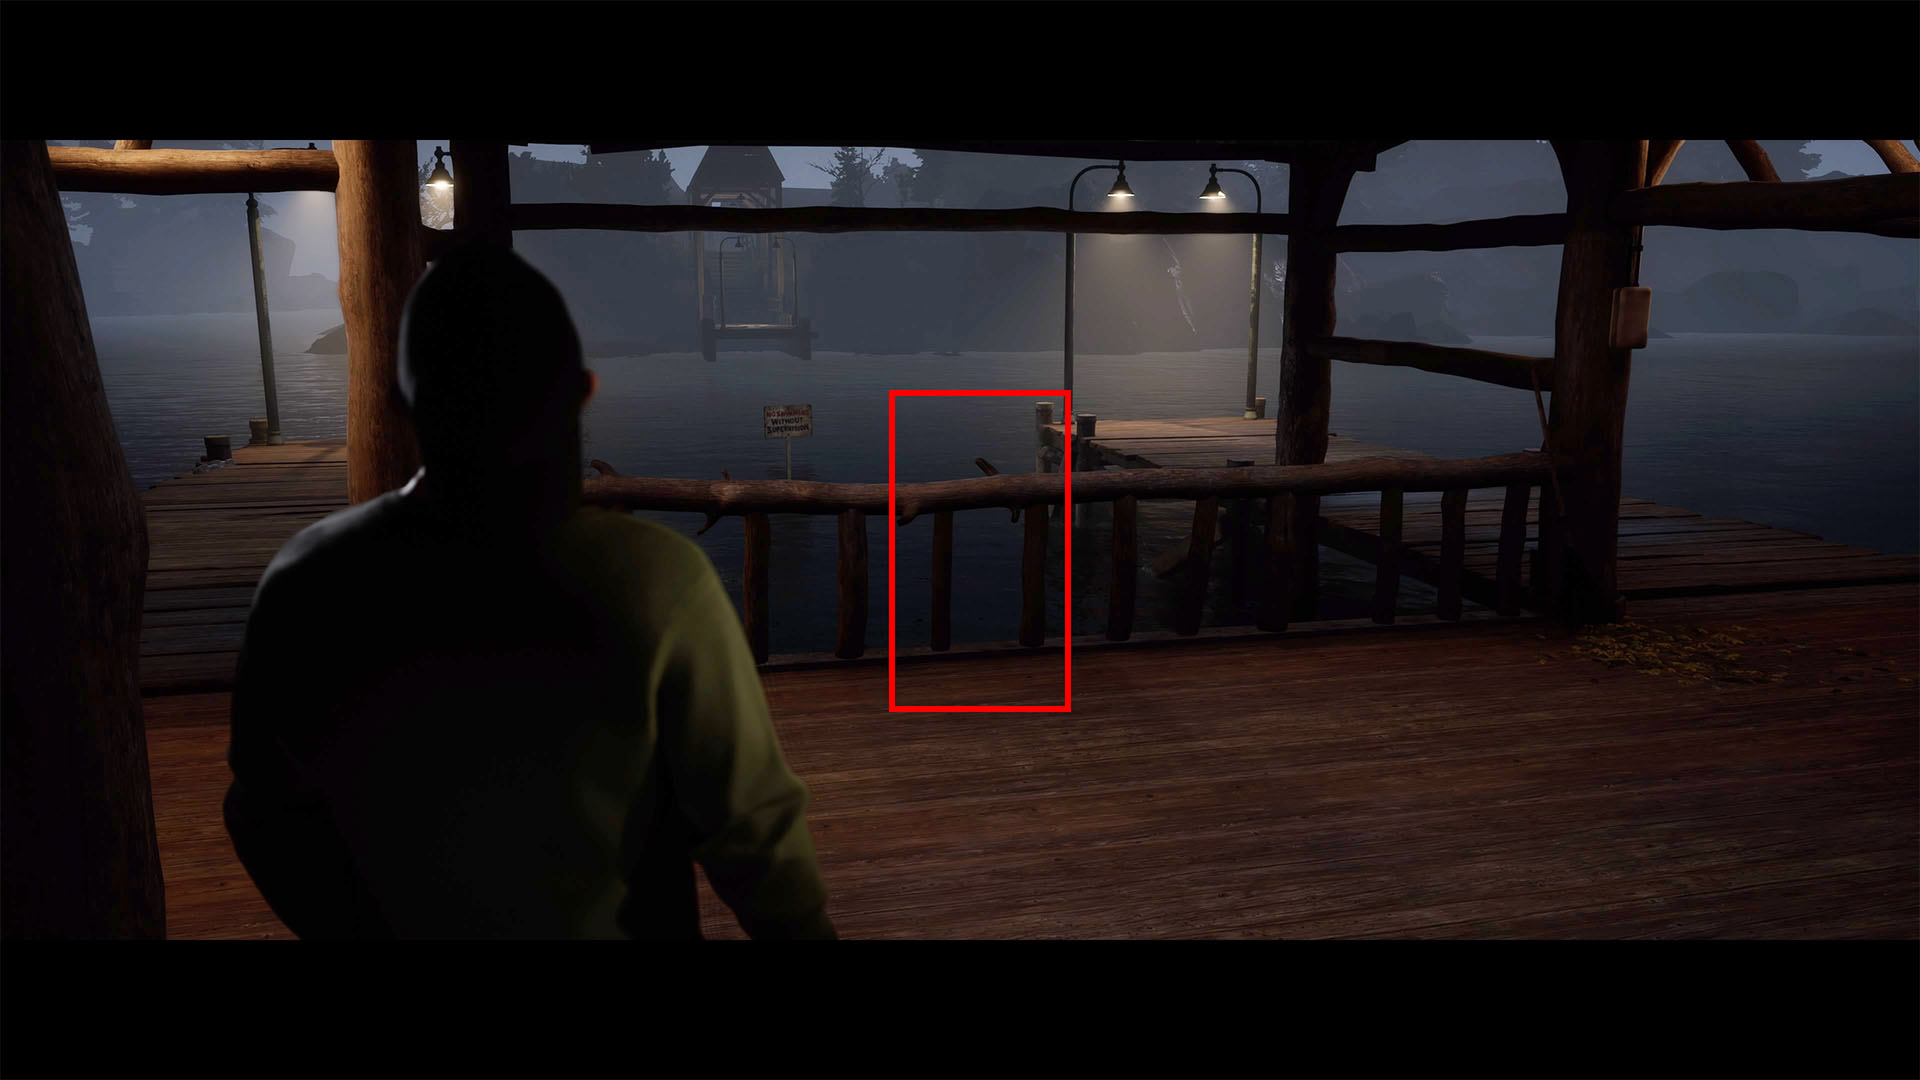
No Swimming Sign: Turn around from the newspaper and interact with the opposite railing.
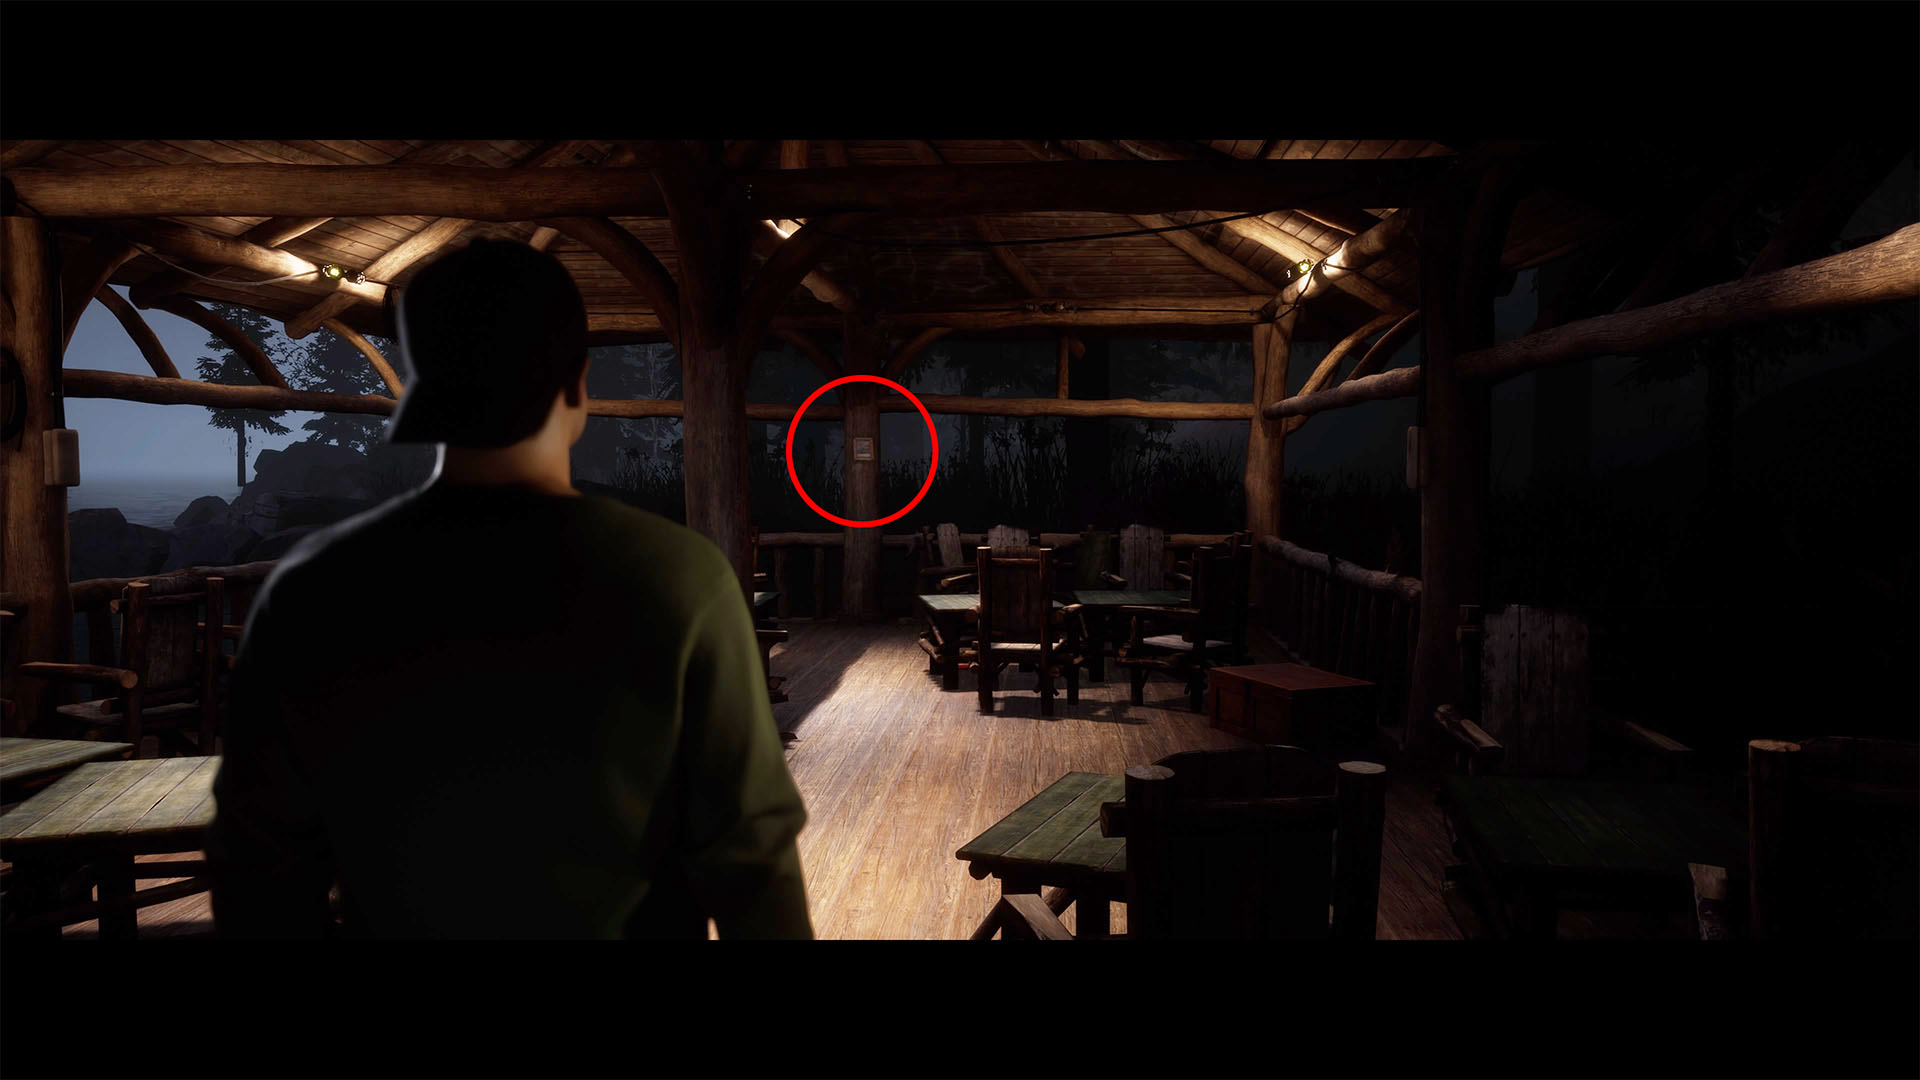
Old Camp Photo: Turn right, and go all of the way to the end of the boathouse, where all of the tables and chairs are, and interact with the picture on the pole.
Bloated Corpse Evidence: If you chose to take to rotor arm from the van in Chapter 1, dive in when given the chance, complete the QTE and choose detangle.
Chapter 4: Don’t Panic
Emma
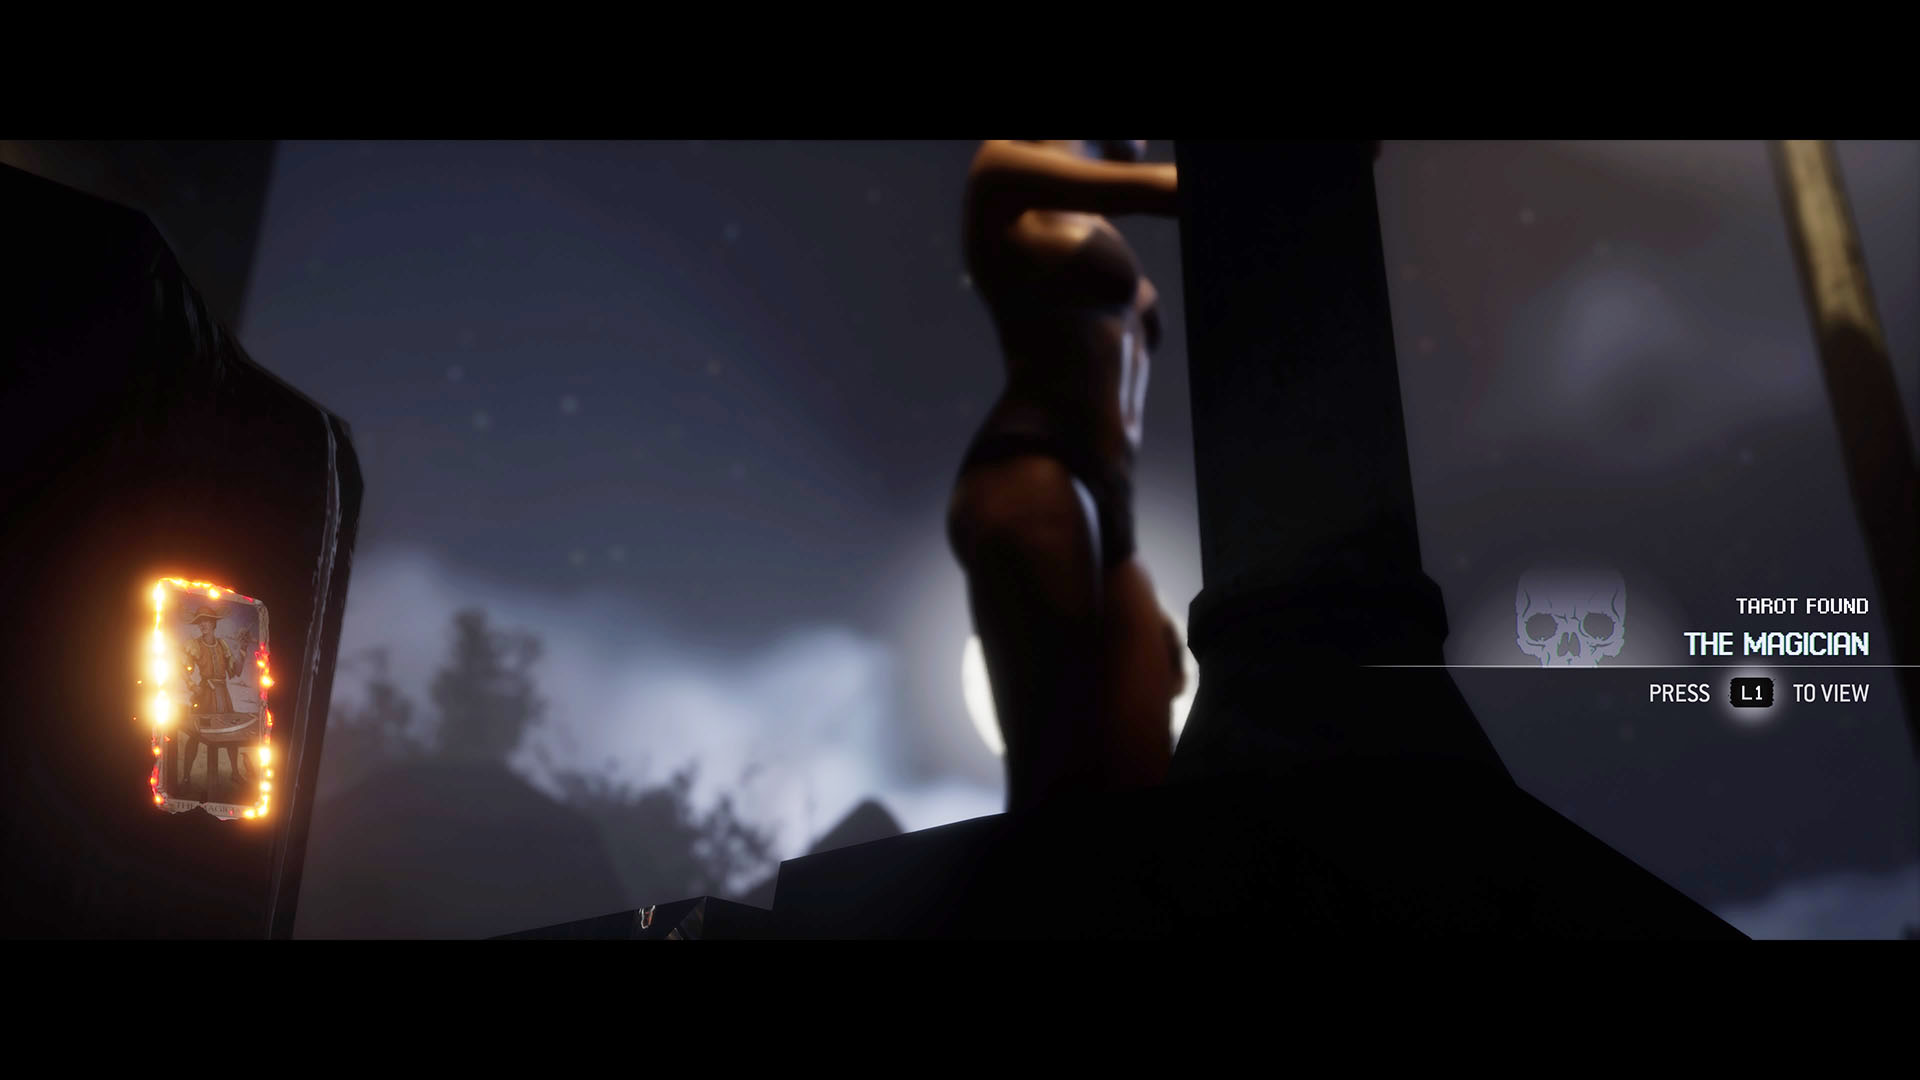
The Magician Tarot Card: On the island, turn around when you gain control and down the stairs back toward the boathouse across the water. There will be a small cutscene, then move forward.
Box of Matches: Turn around and go back up the stairs. Follow the dirt path toward another set of stairs leading up. A cutscene will play, then stay to the right. Two more scenes will play. After, continue toward the ladder and look for an unlit campfire on the left side. The matches are on the ground.
Police Car Keys: Now return to the stairs you passed when you made the choose to go right or left, and take them up. Continue all the way down the wooden pathway to the treehouse. Interact with the window to the left of the door.
Attack Photo Evidence: Go inside the treehouse, and choose to search the bag. Then open the trap door. Do not use the bear mace; it will not trigger the correct sequence. Instead, choose to use the taser. You’ll then need to choose to take the photo manually. It is not automatic.
Dylan
Strength Tarot Card: You’ll return to the lodge as part of a cutscene. When the scene shifts to show the inside of the lodge, it’s in the extreme foreground, on the left side of the screen.
Chapter 5: White Noise
Kaitlyn
- Ticket Stub: This isn’t technically a collectible here. You must make Bobby see you when Kaitlyn is searching the lodge. Succeed at the first QTE, then fail the next two. Bobby will raise a table. Shoot it. You can get the collectible in Chapter 10.
Dylan and Ryan
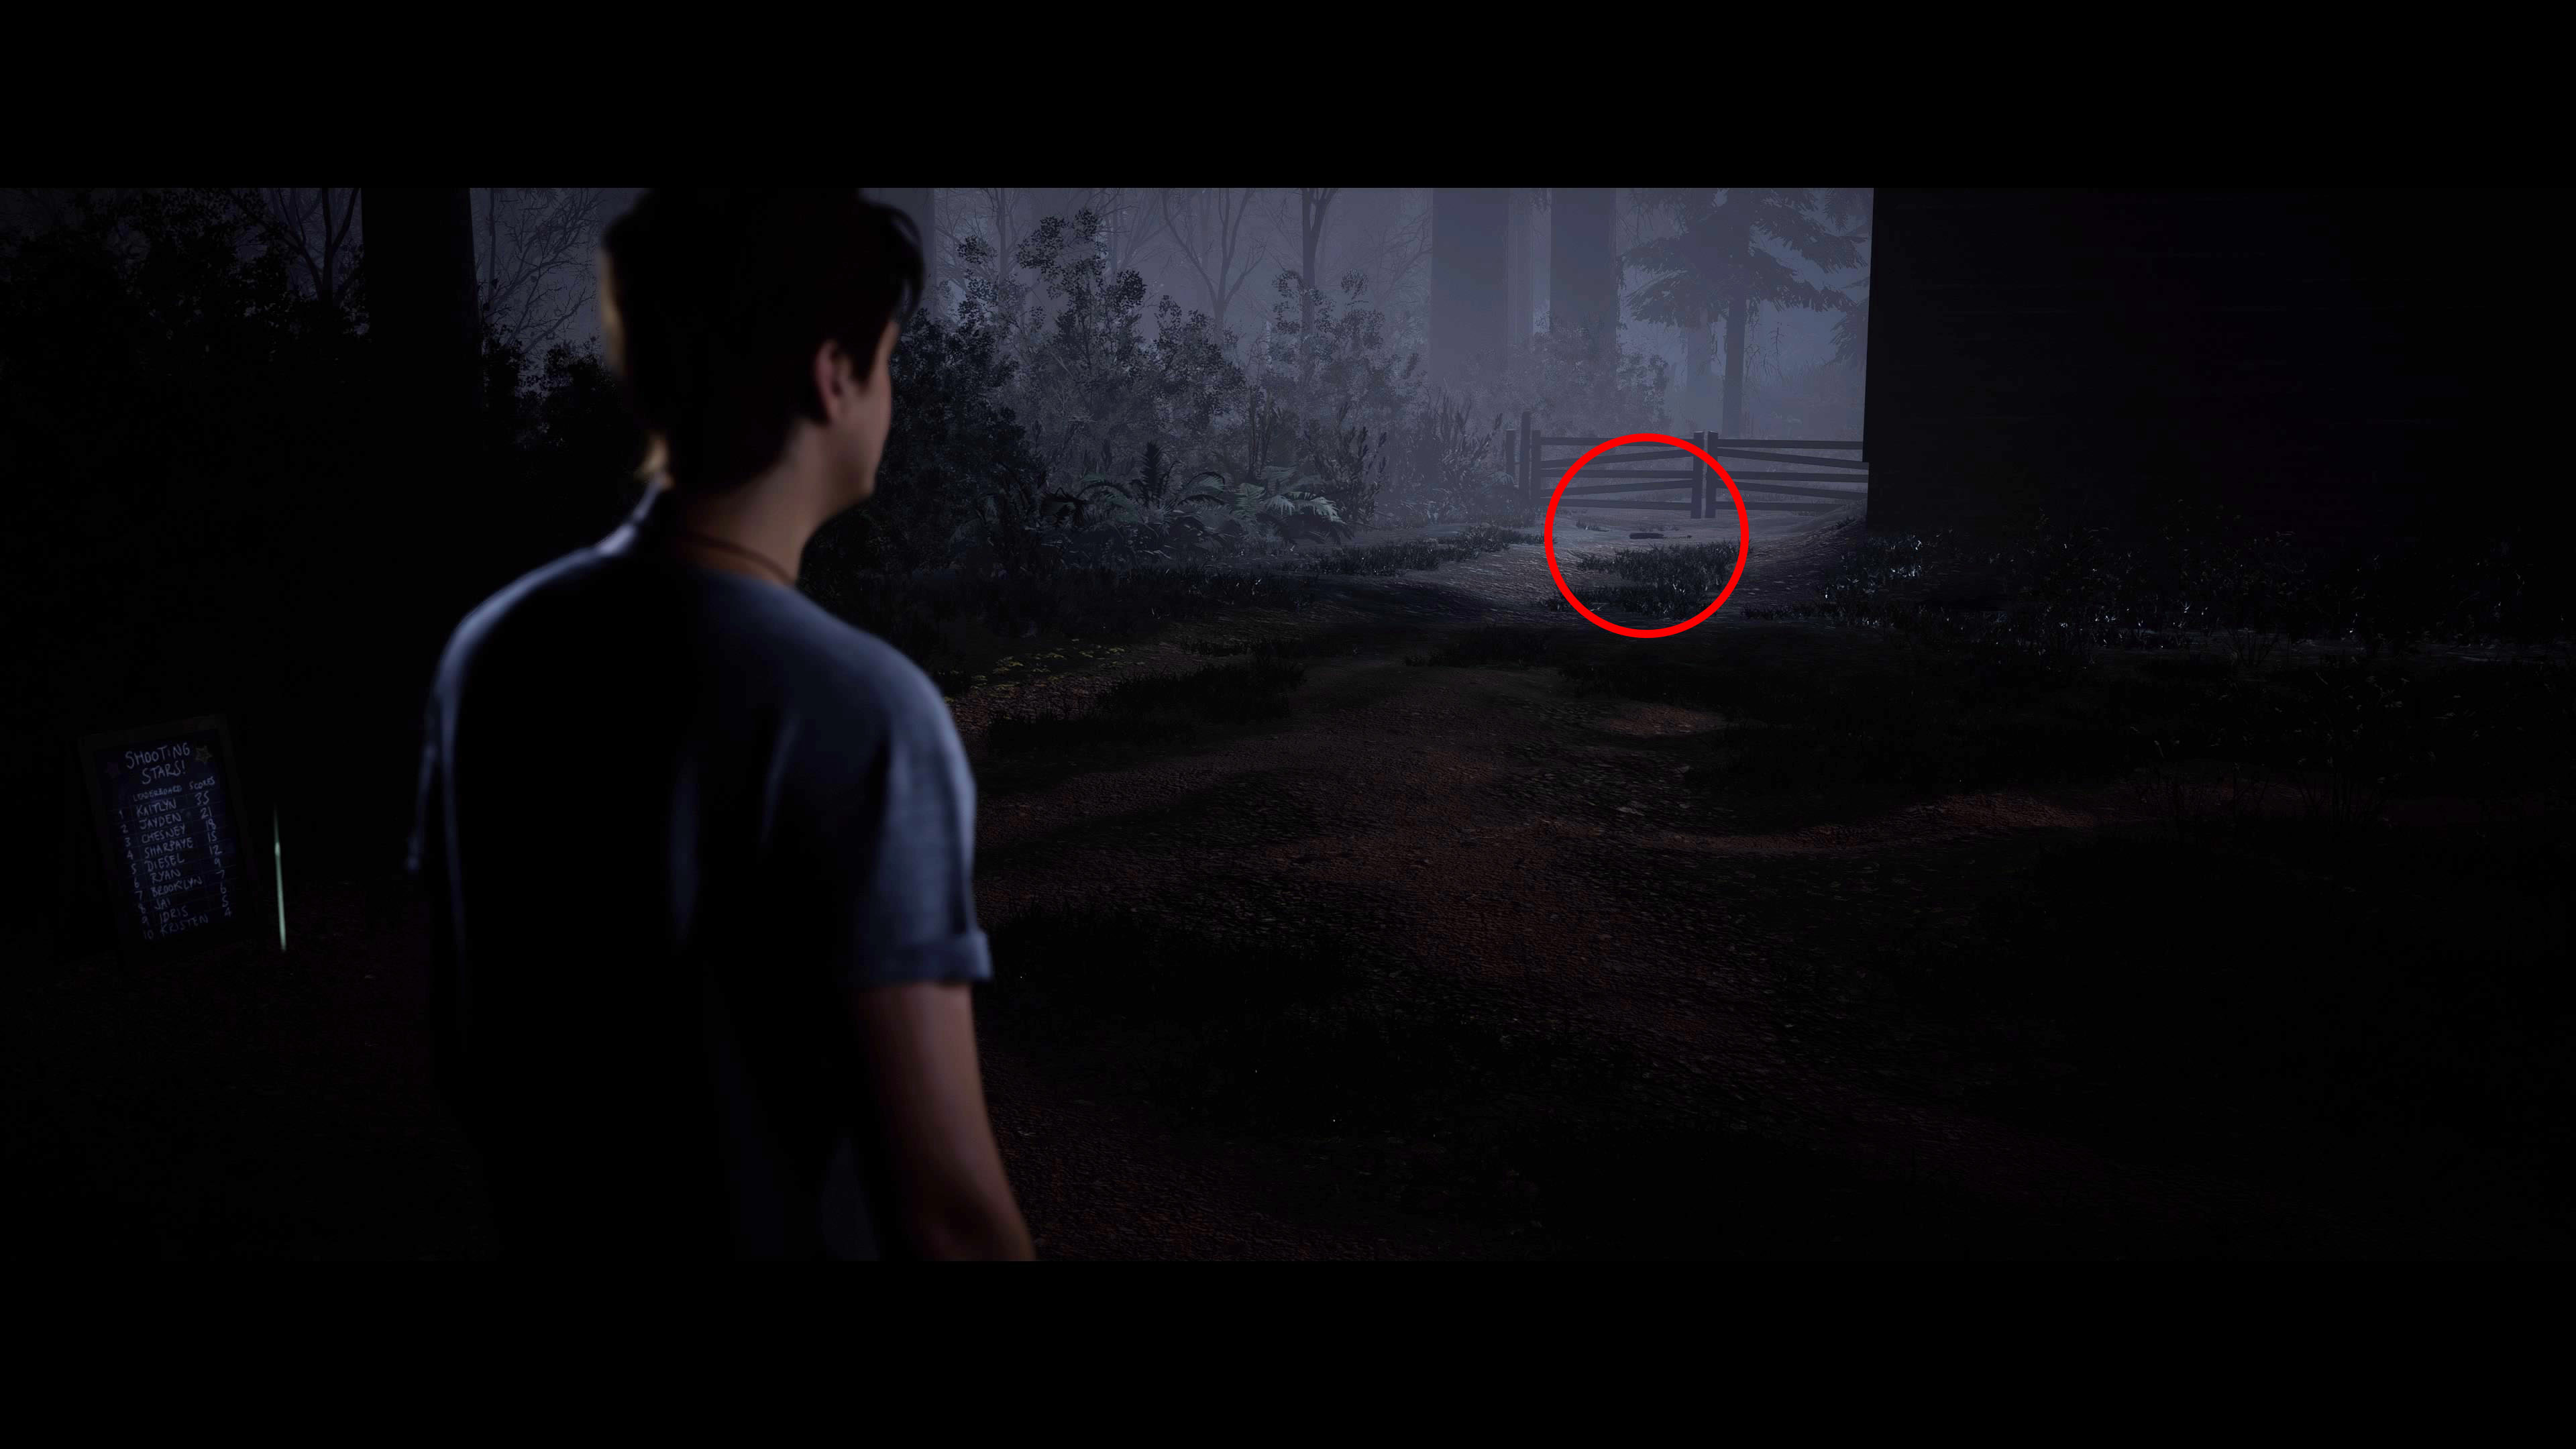
Triggered Bear Trap: On the Cabin Trail to the Radio Hut, cross the small wooden bridge and stay left. Go past the Shooting Stars leaderboard on the left and to the gate at the back of the area.
Letter to Camp Nurse: Now go toward the red light of the radio tower, staying to the right of the tree in the center of the area.
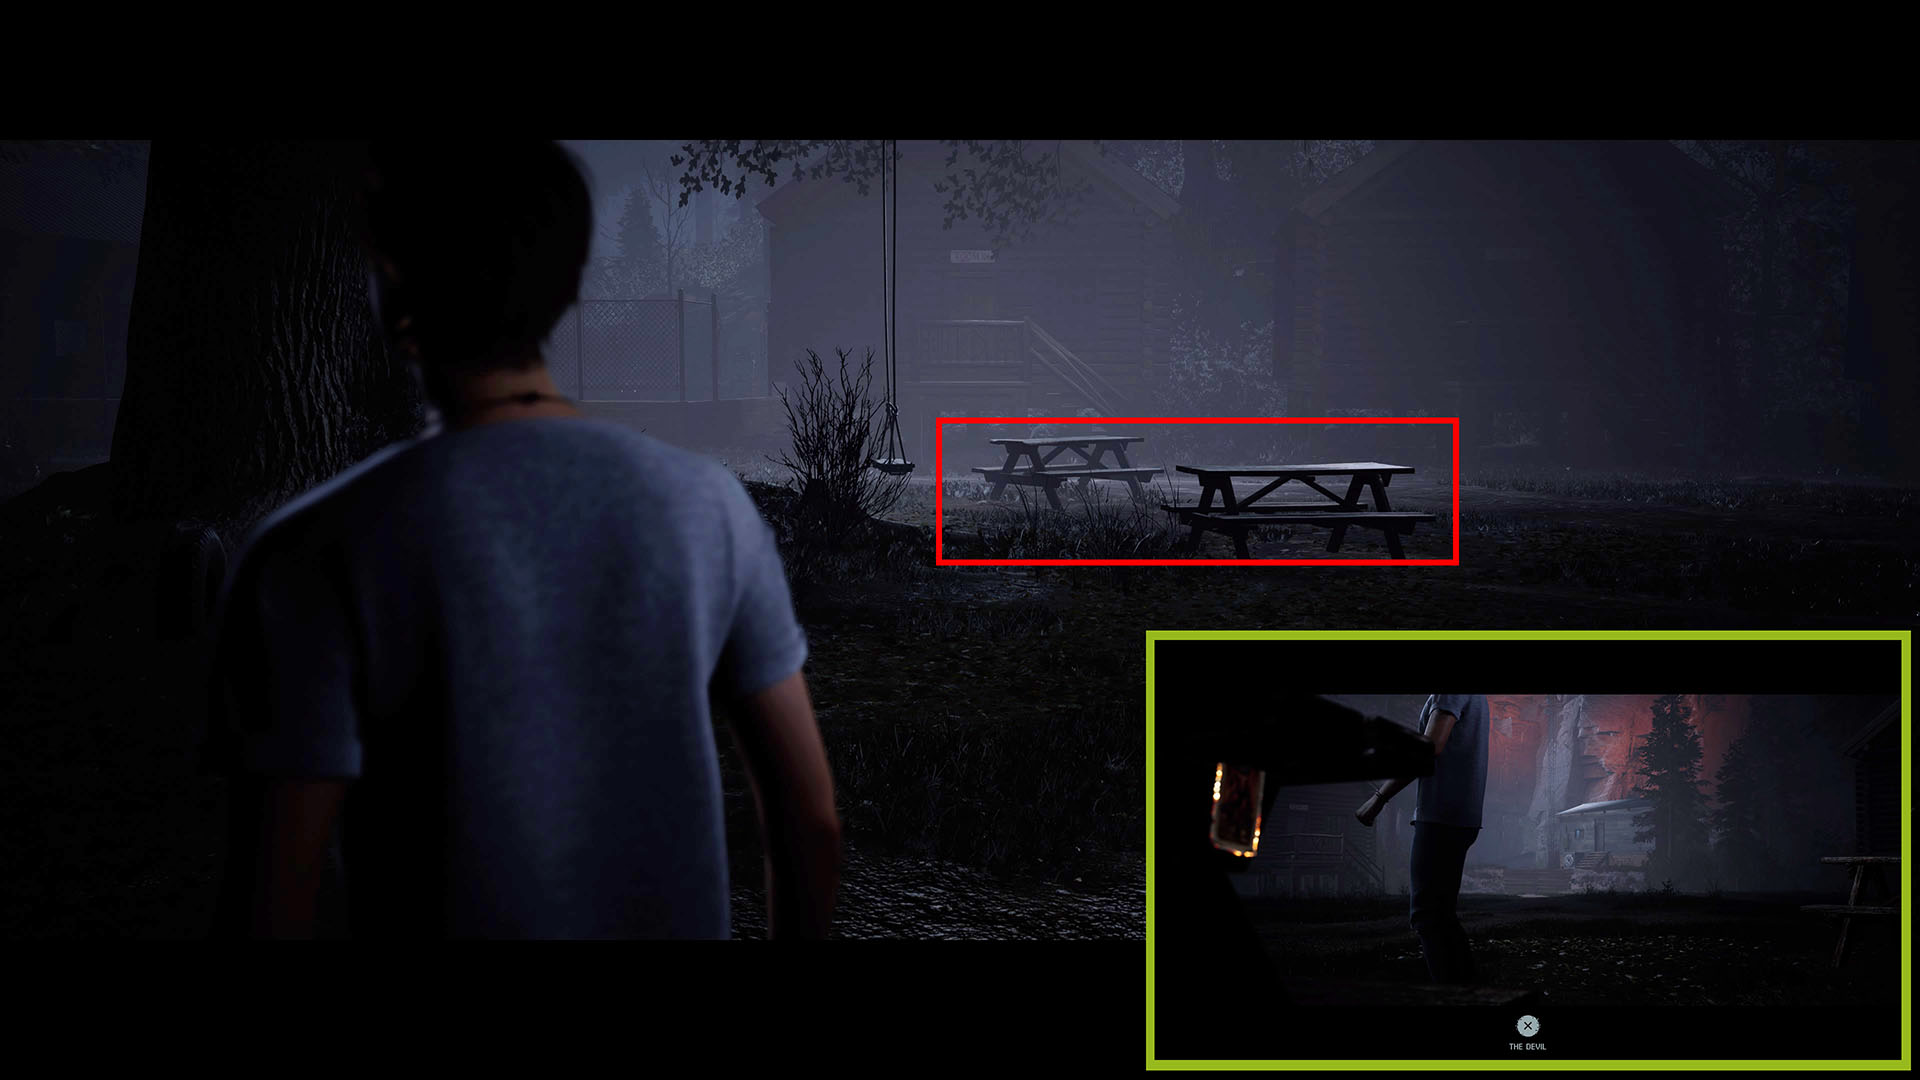
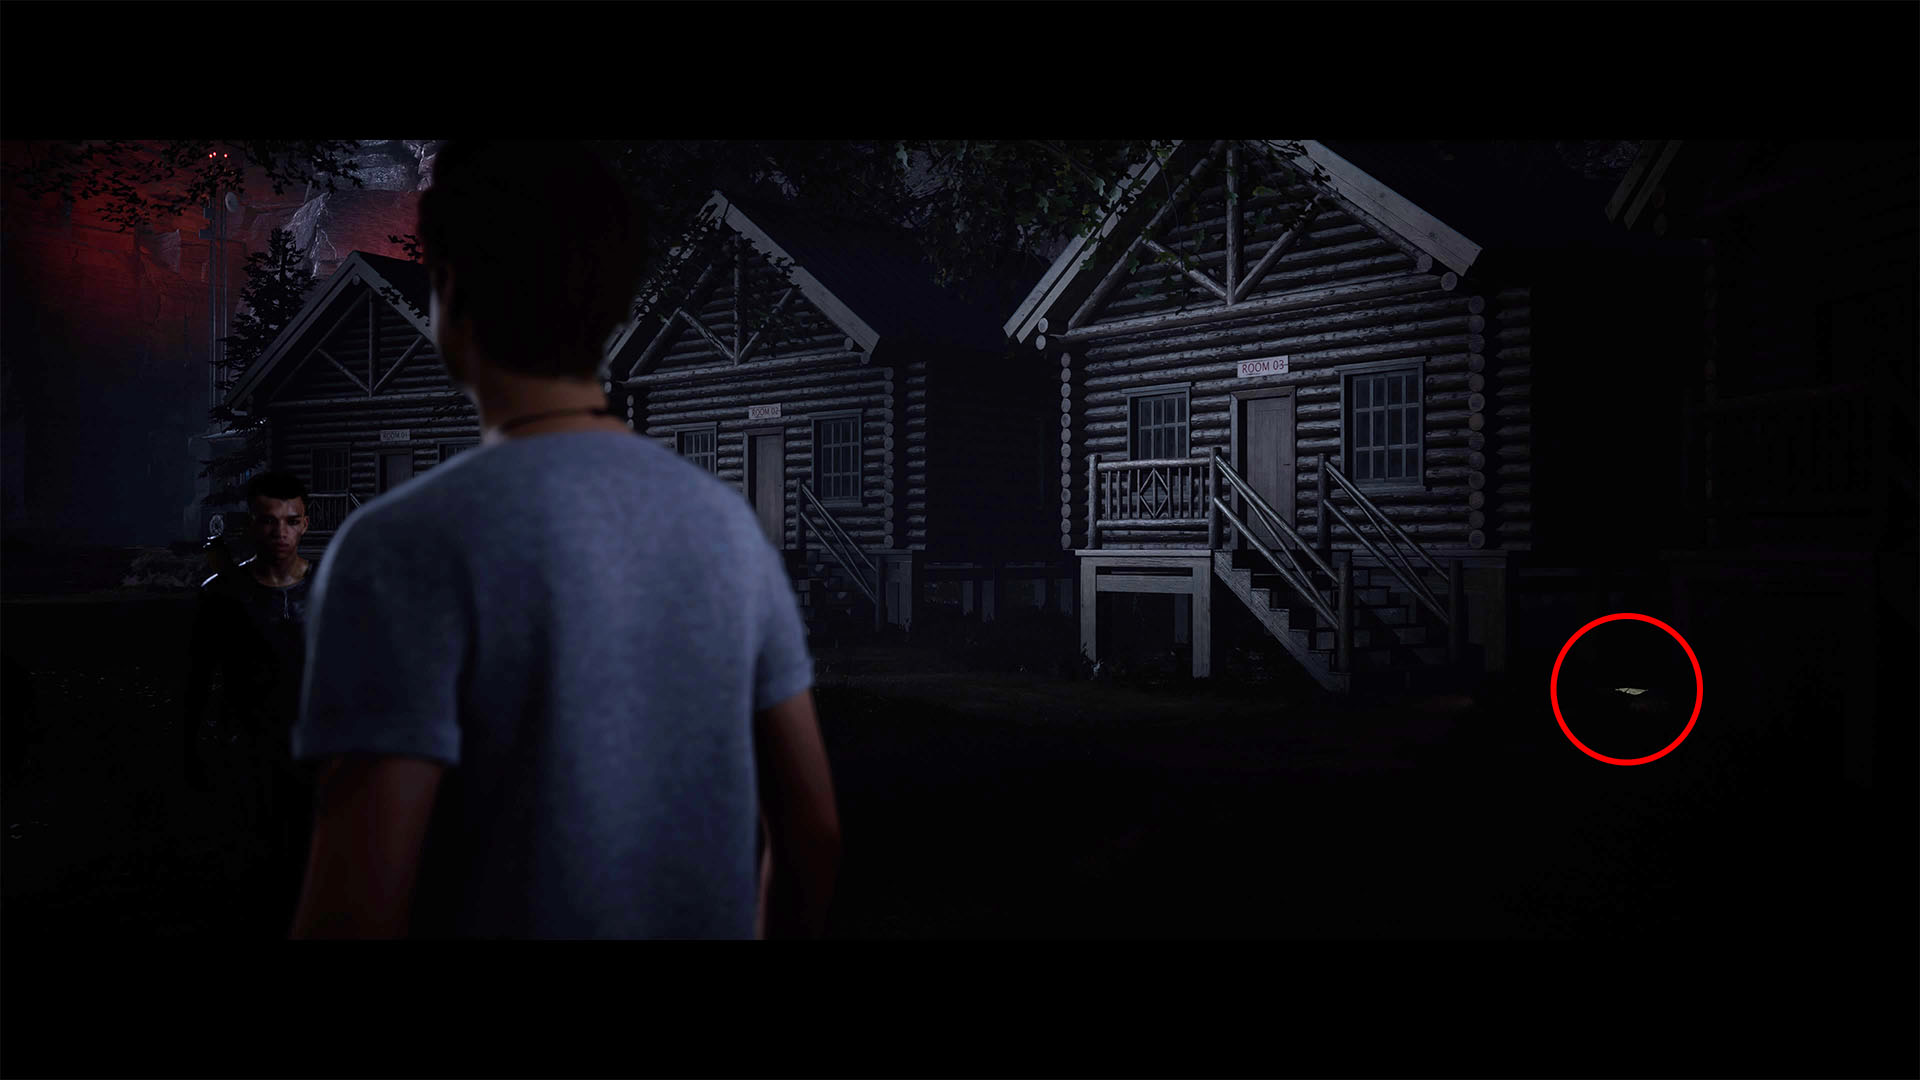
The Devil Tarot Card: The next collectible is by the sign from Chapter 1, in the middle of the area.
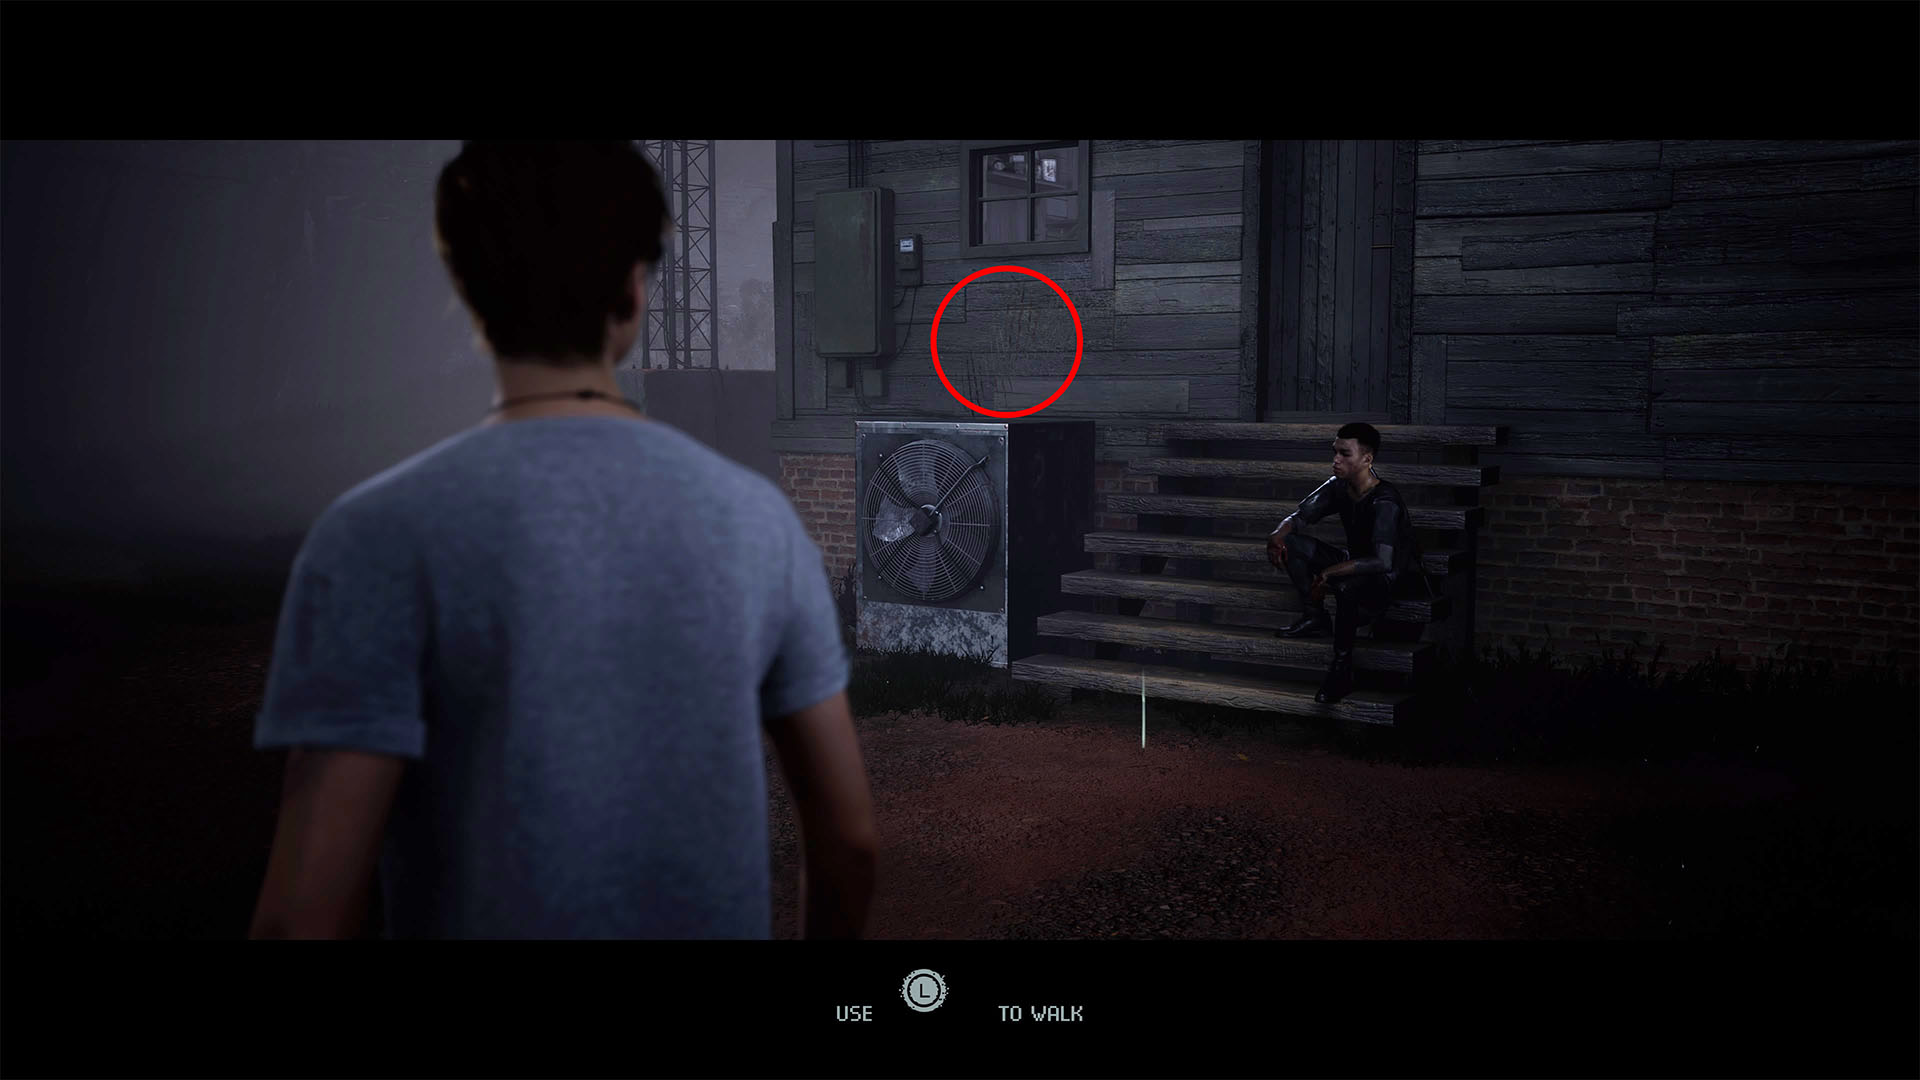
Claw Marks Evidence: Go to the radio hut. Inspect the wall by the hut’s door by standing in front of the fan.
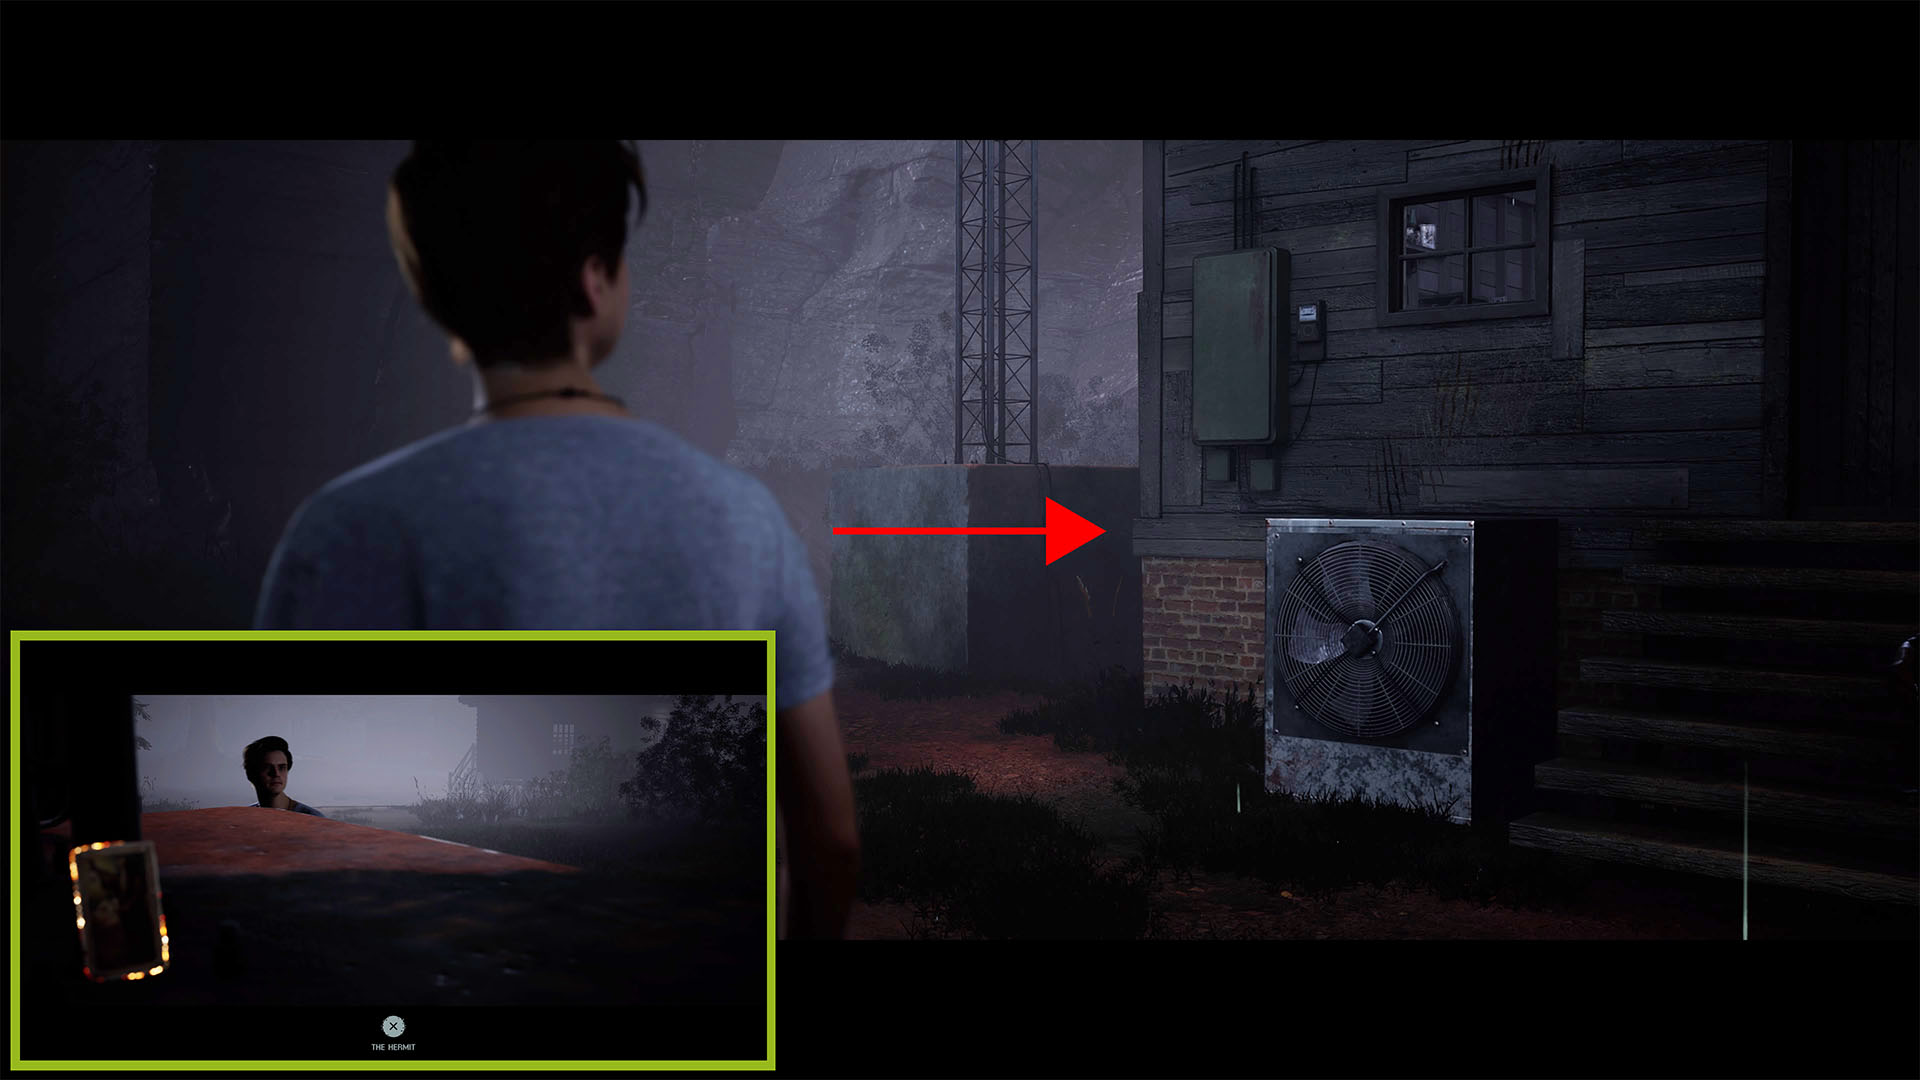
The Hermit Tarot Card: Go between the hut and the radio antenna left of the hut.
Chapter 6: Prayers by Night
Jacob
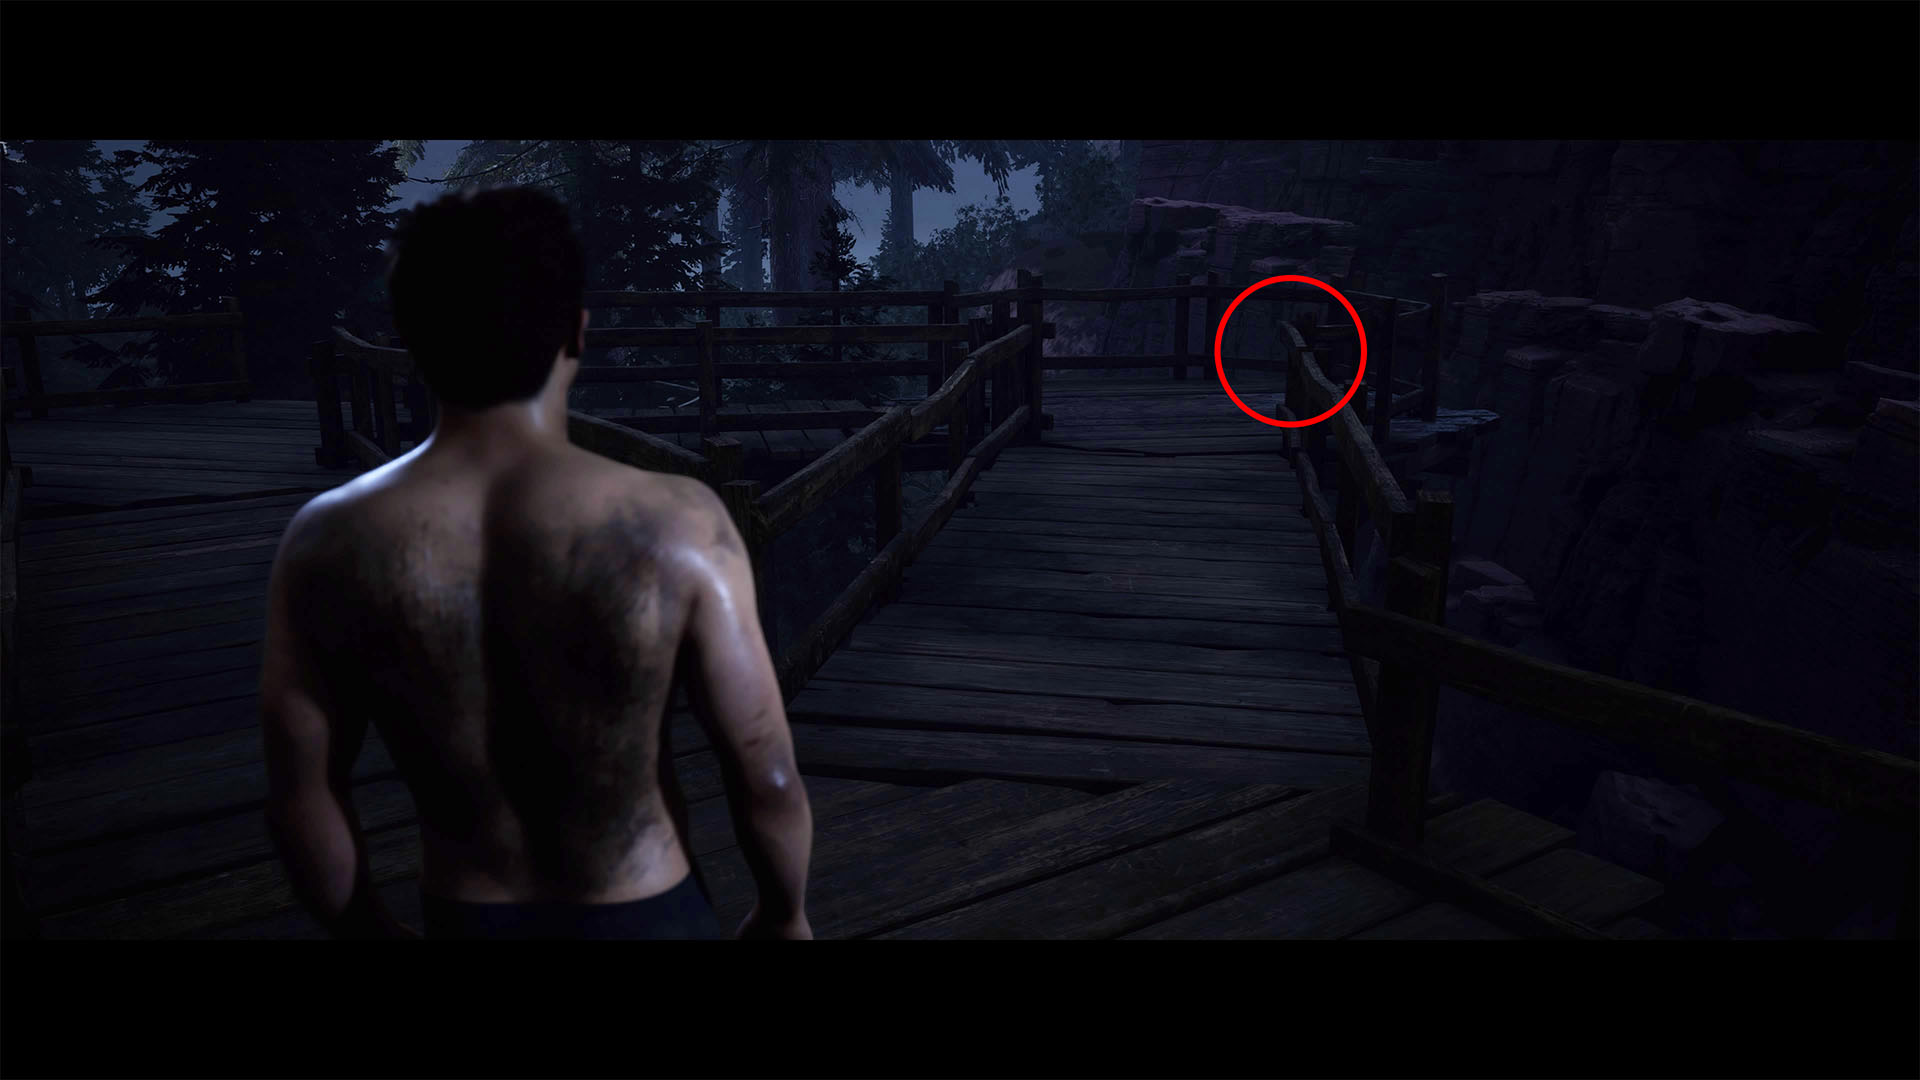
Memory Card Evidence: Follow the path along the wooden walkway almost to the end. There will be a triangular section that forces the path to fork. The camera with the memory card is on the ground in a rounded section that juts out right.
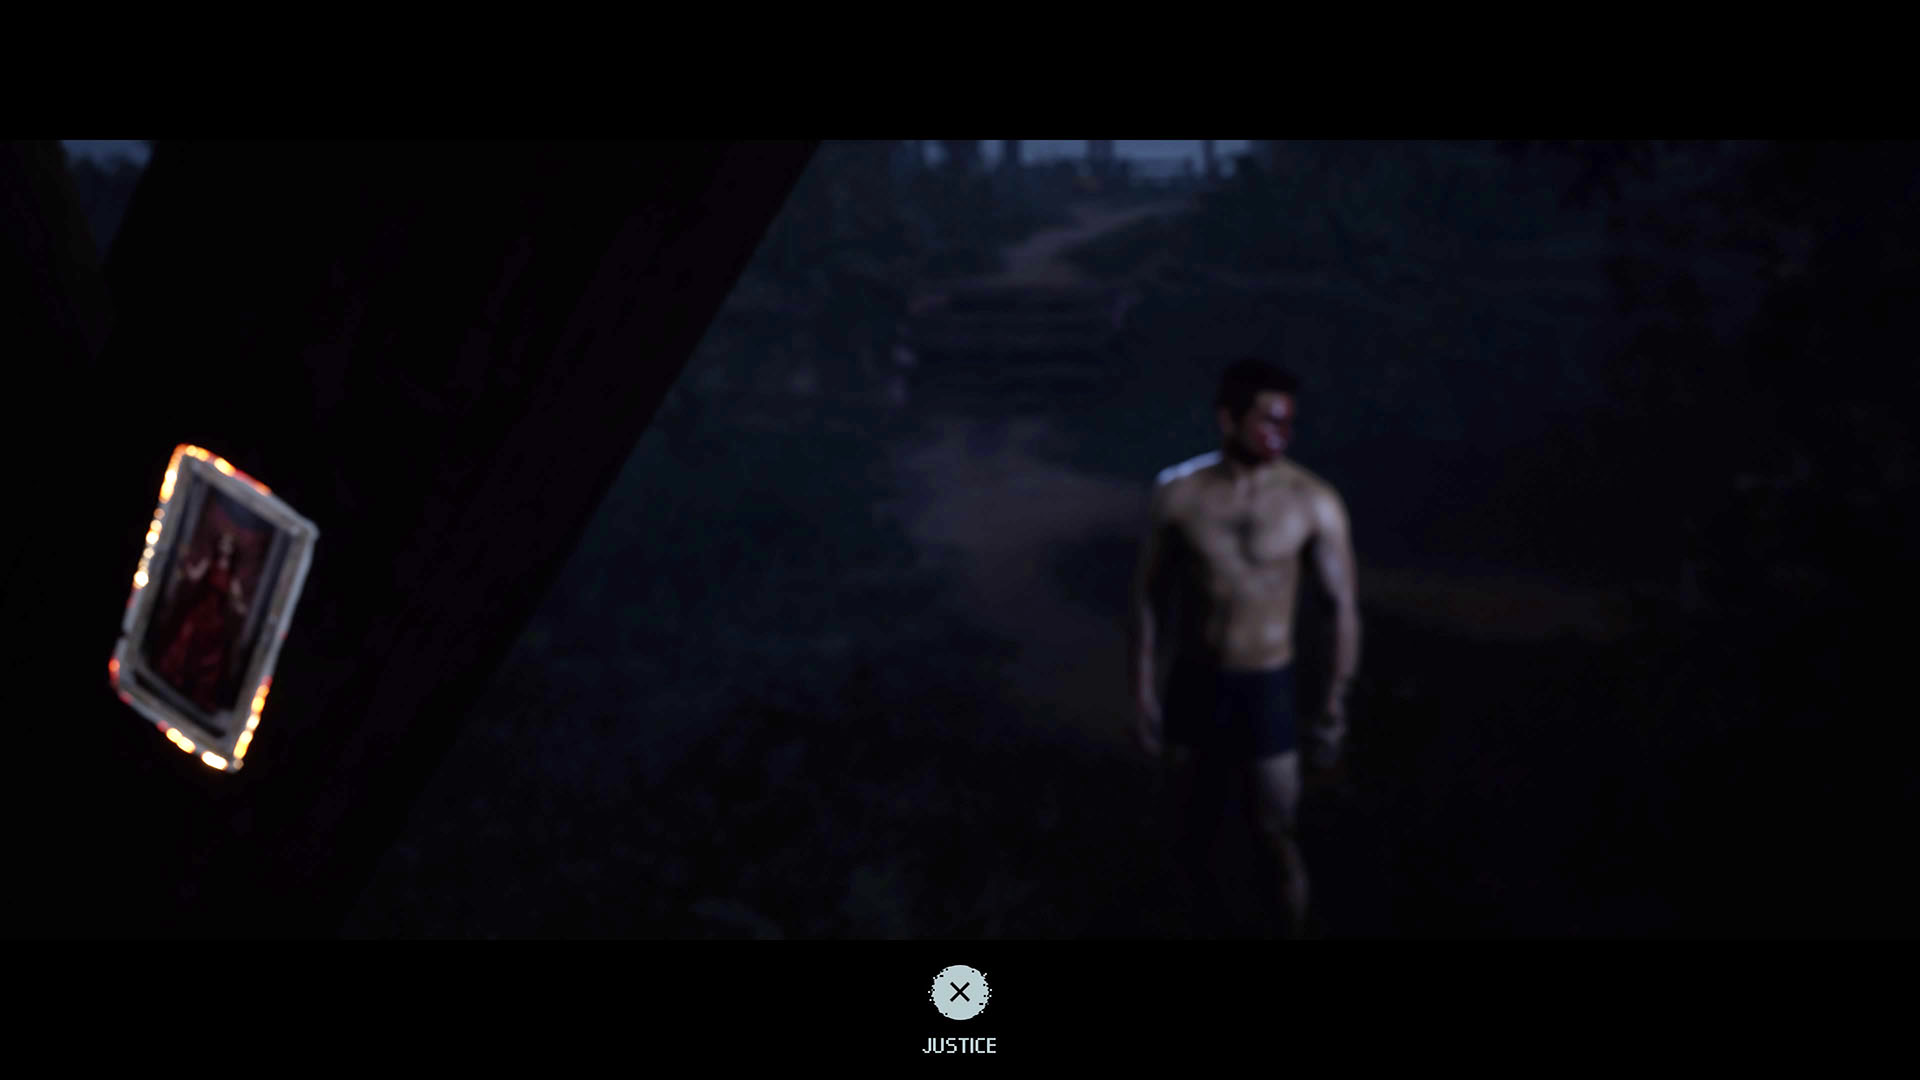
Justice Tarot Card: Go down the stairs to the left of the triangular section, then go left at the bottom. The card is on a tree.
Abi
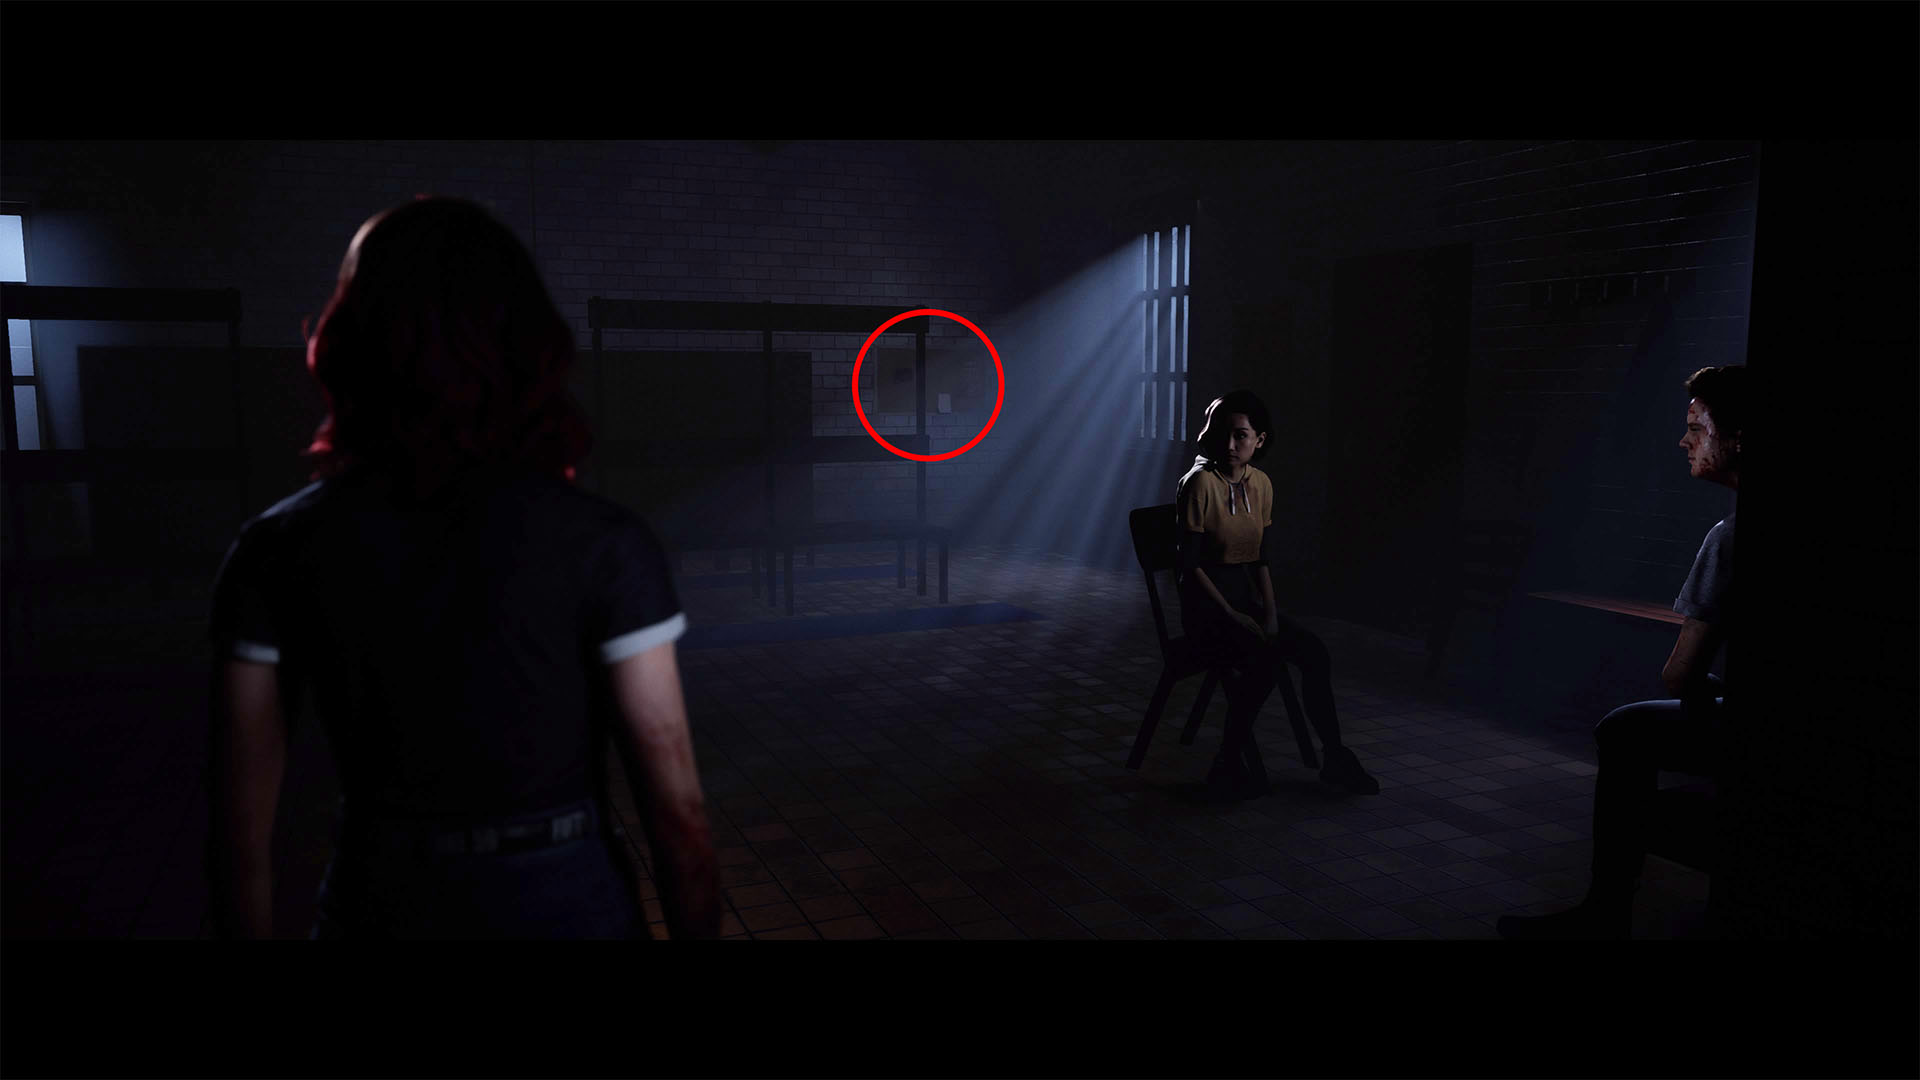
Campers Photo: In the pool house, check the corkboard on the wall behind Kaitlyn.
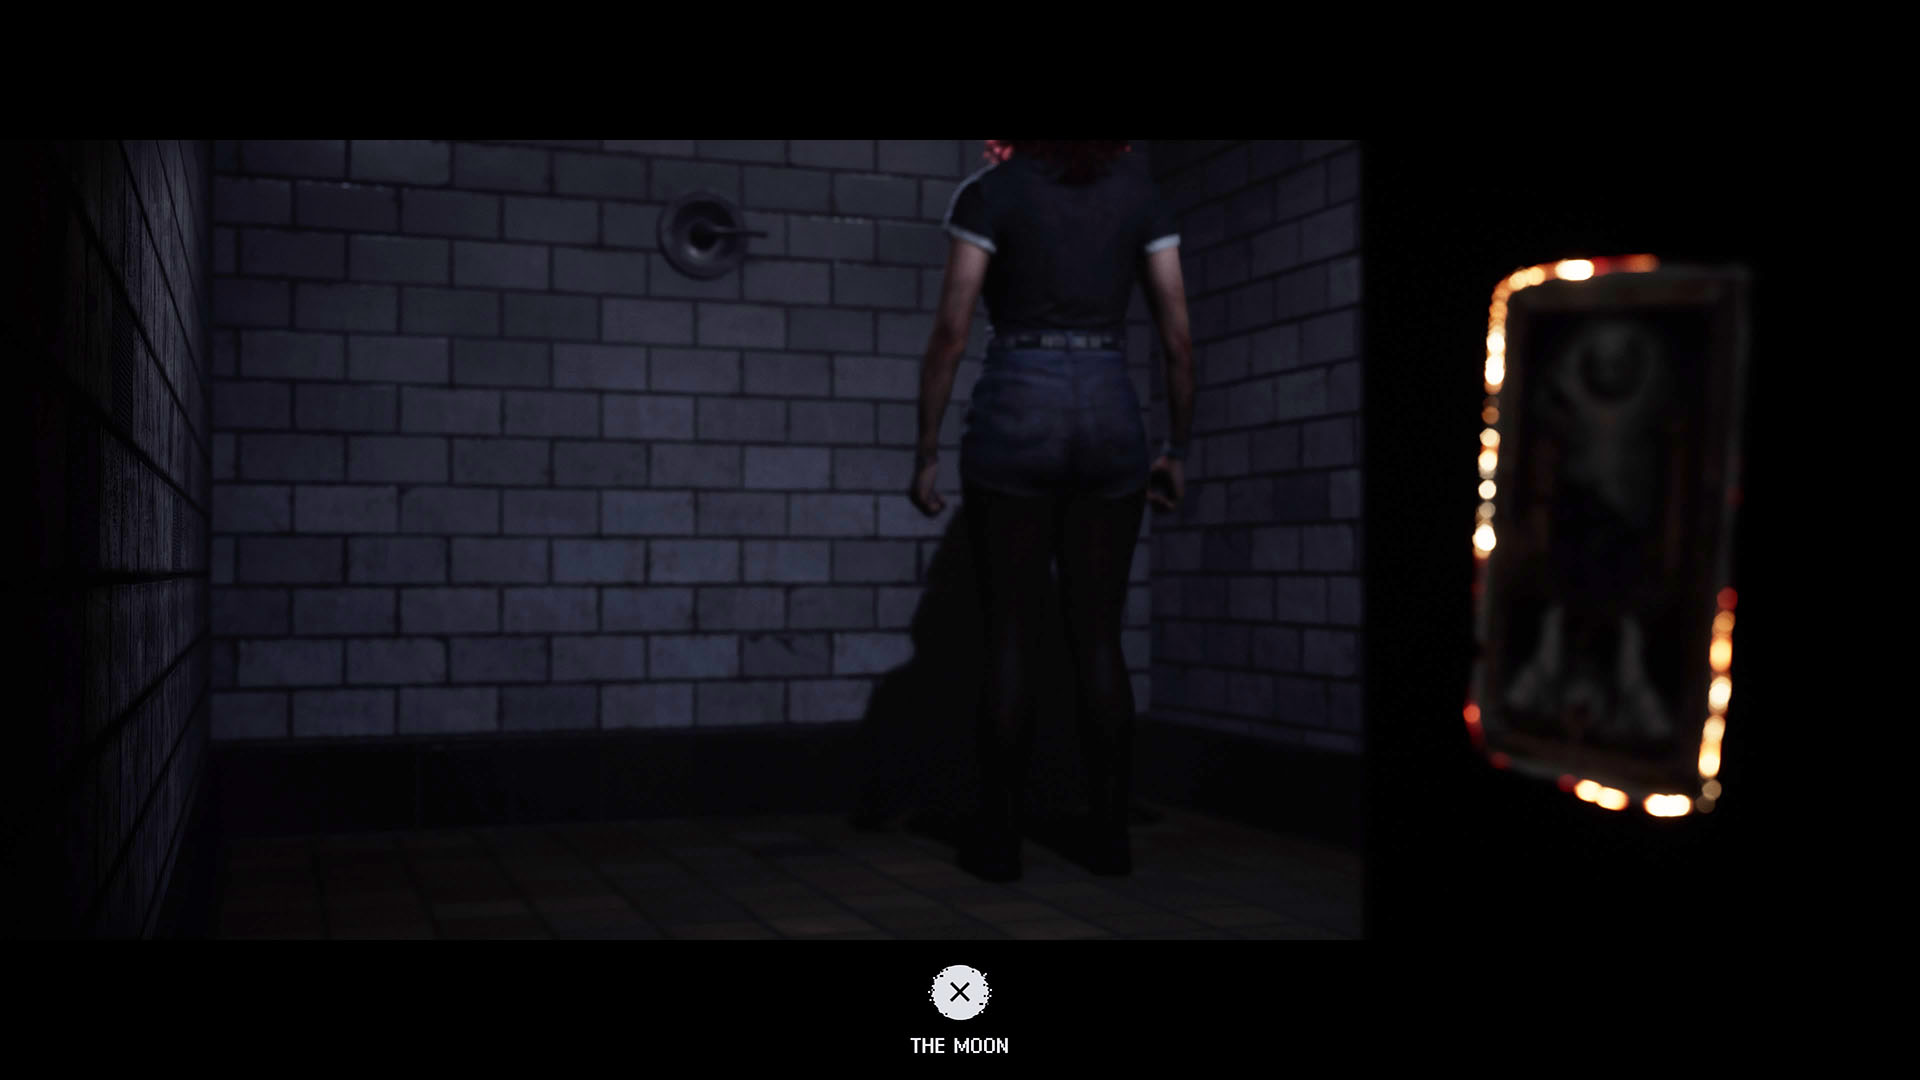
Moon Tarot Card: Go to the showers on the opposite side of the pool house from the bathrooms. Go into the third door/shower and walk to the very back.
Spooky Drawing: Look for the locker at the end of the area by the showers.
Emma
Kid’s Letter Home: At the camp fire pit, check the tent with the open flap behind the log where Dylan and Kaitlyn were sitting in Chapter 2.
Chapter 7: The Past Behind Us
Laura
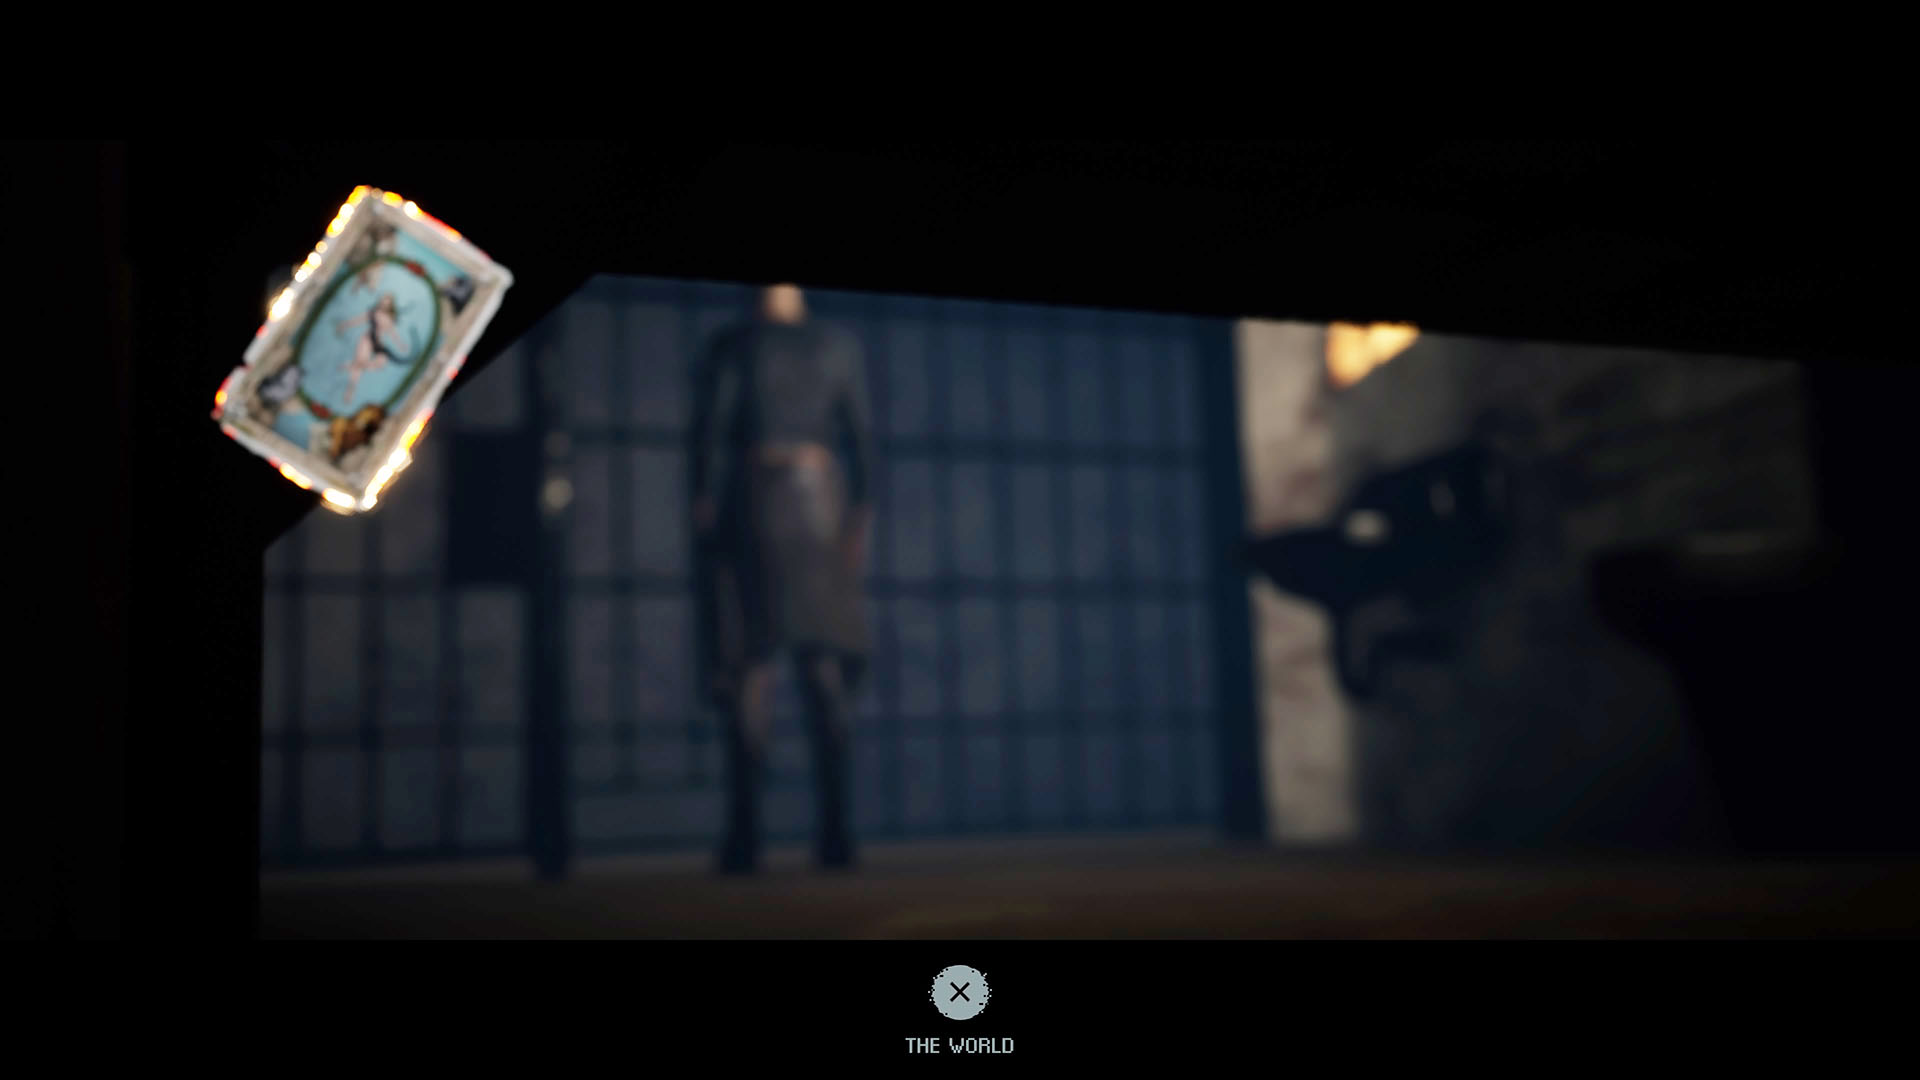
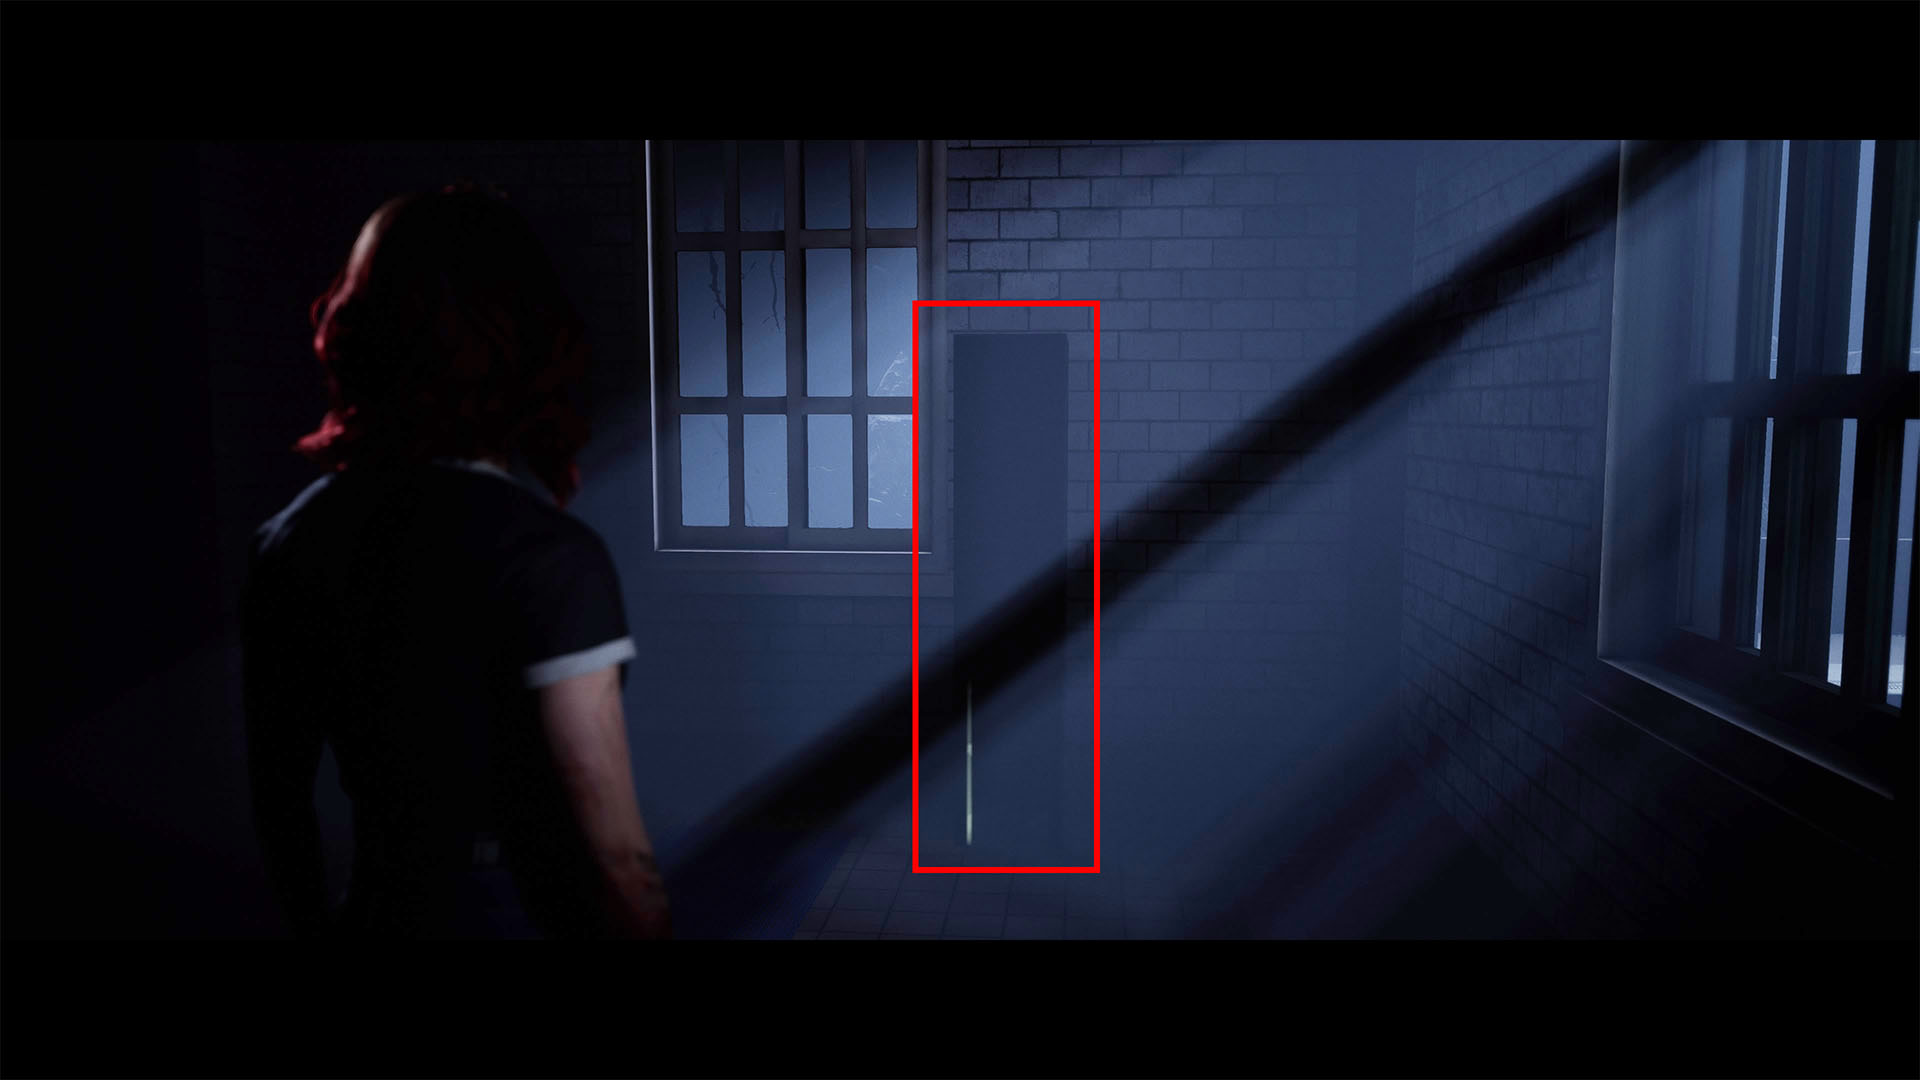
The World Tarot Card: In the cell, walk back and forth (toward and away from the screen).

Scrawled Limerick: Facing the bed, it’s scrawled on the wall opposite the toilet.
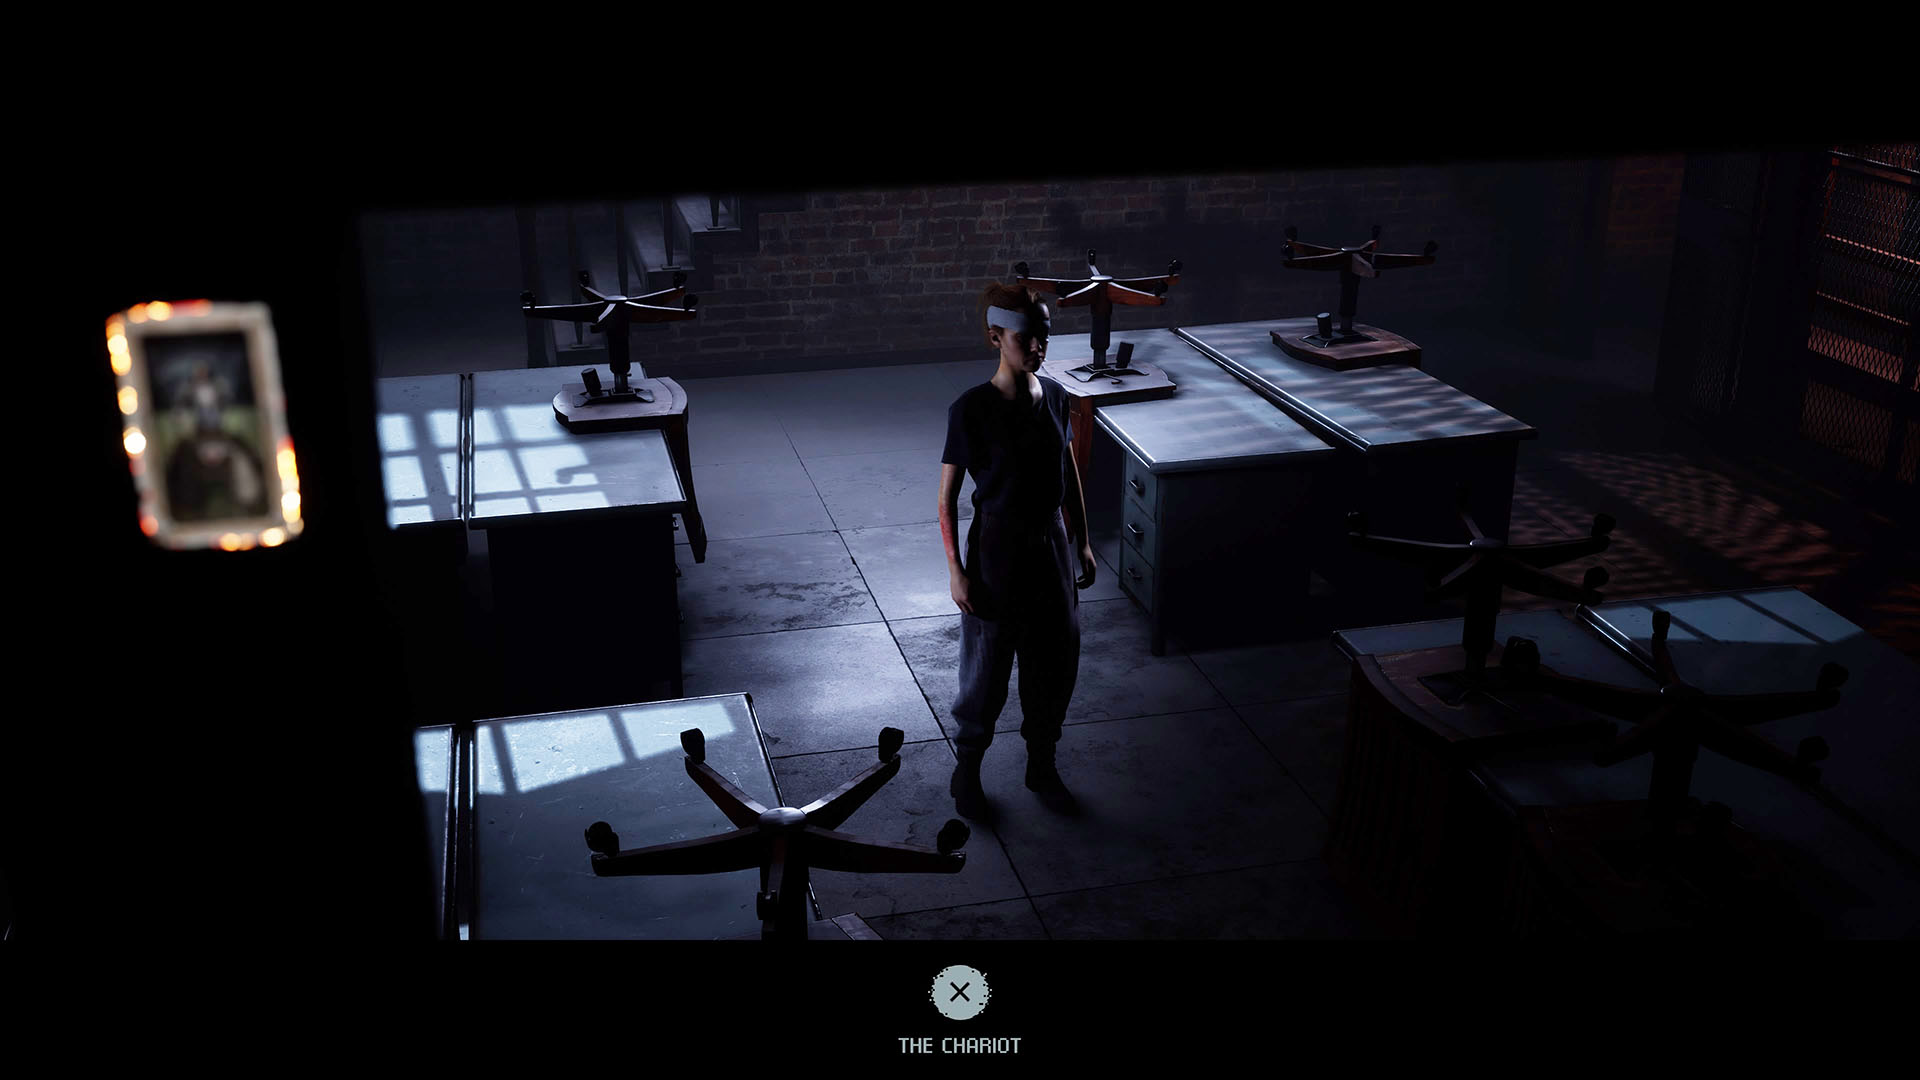
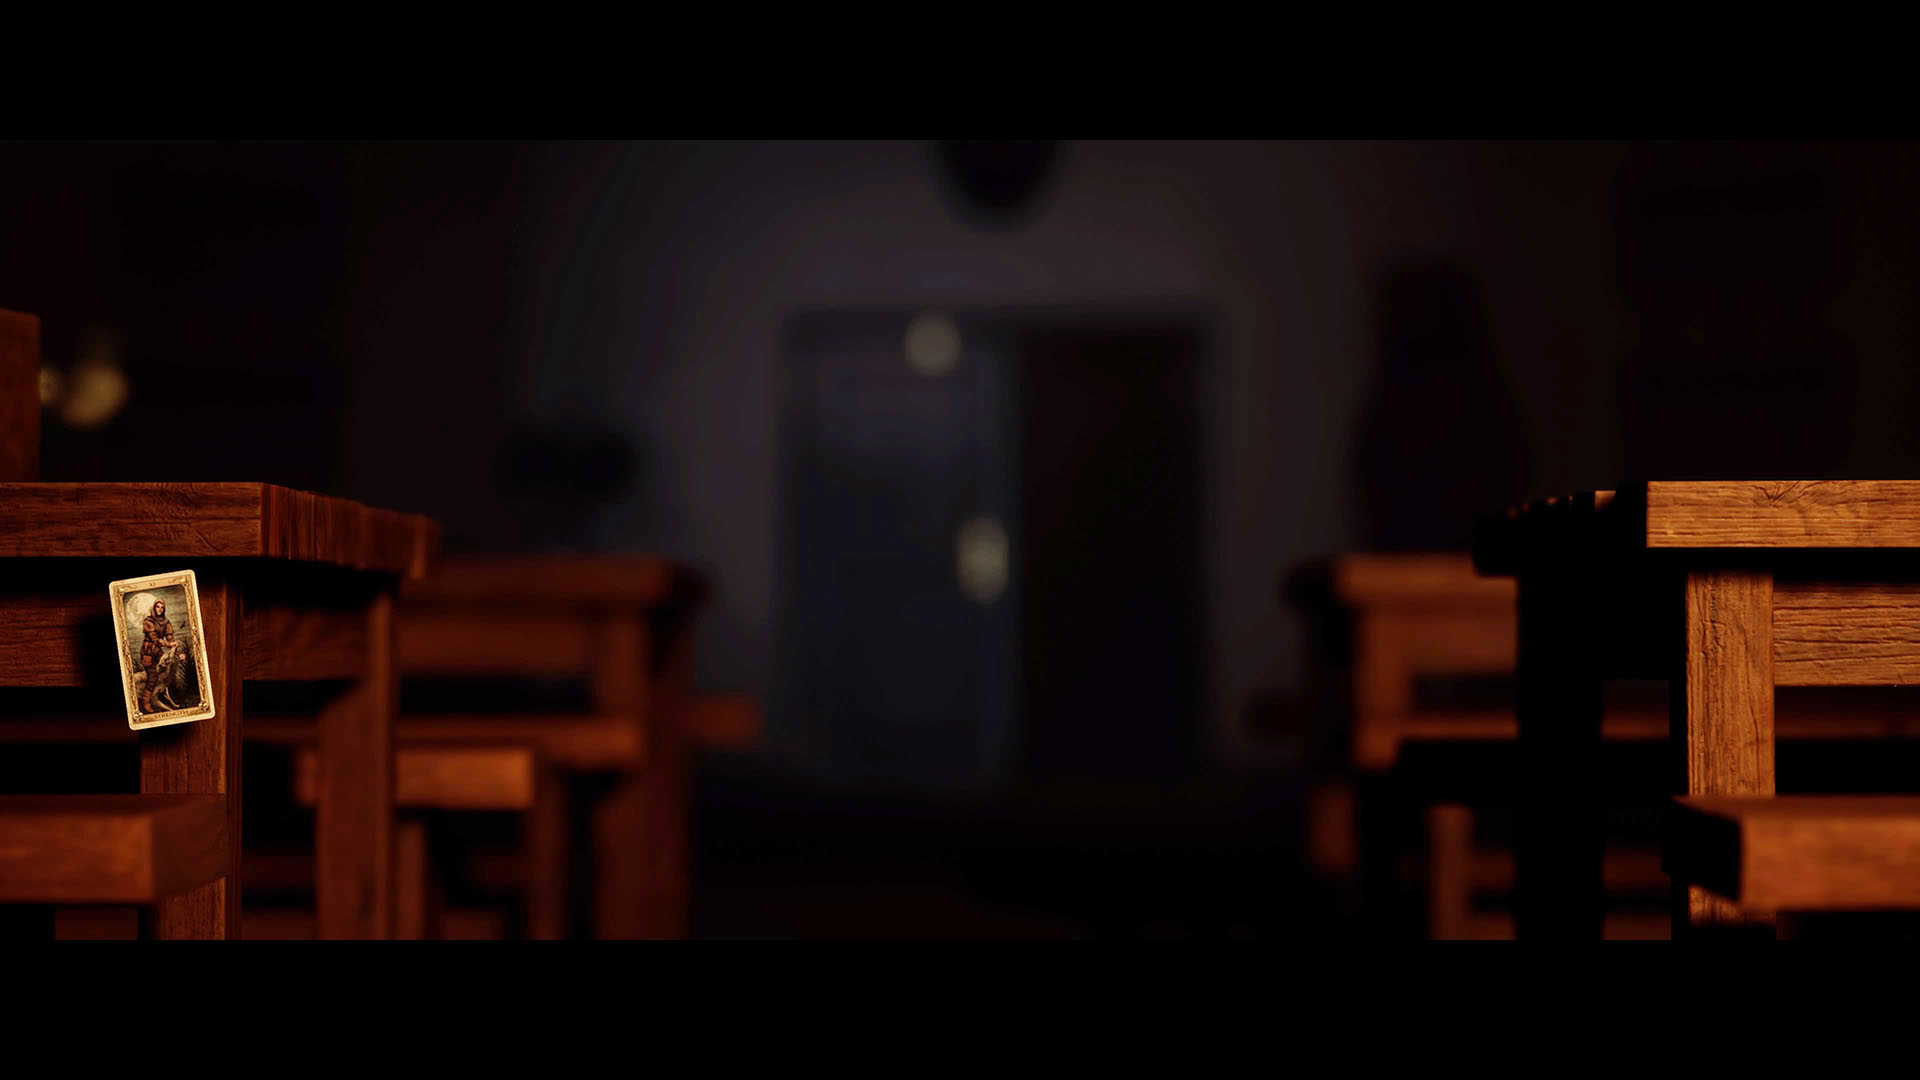
The Chariot Tarot Card: After the second long cutscene sequence in the jail, when you regain control, walk toward the screen (down), then turn left (Laura’s right) to exit through the door. Walk between the desks with chairs stacked upside down on them, through the middle.
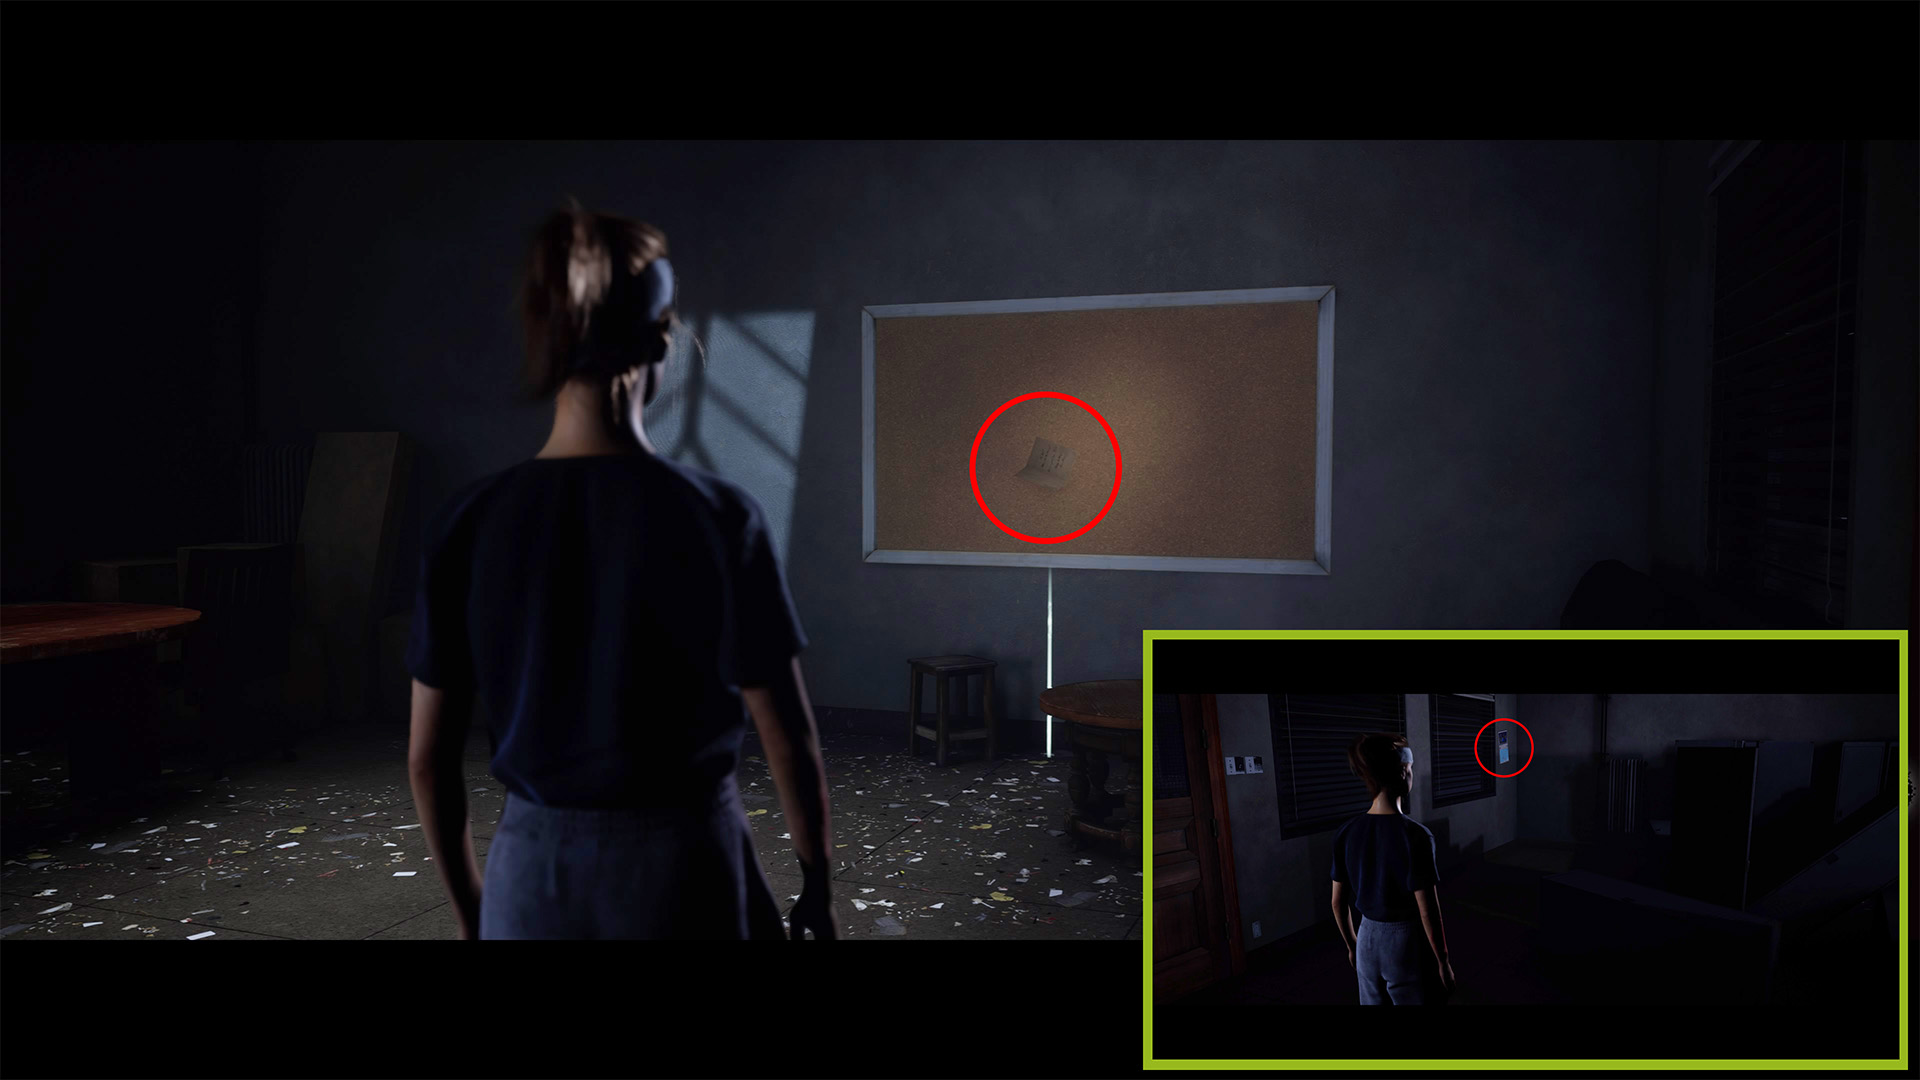
Bizarre Yet Bonafide Podcast: This one is a little laborious, and you’ll pass the next two other collectibles, as well. Go upstairs and inspect the corkboard in the first set of doors to the left. Then exit and get the next collectible below (Charred Sheriff’s Badge) in the second set of doors on the left.
After that, go into the third set of doors upstairs (at the end of the path). Turn left when you enter and inspect the calendar on the wall in the corner. Now go back downstairs, then left at the bottom of the stairs. Go up the next small set of stairs to the right. Grab the Cease and Desist Letter off of the fax machine in the corner straight ahead. Then go into the office on the left. Interact with the computer.
![]()
Charred Sheriff’s Badge: Go into the second set of doors on the left when upstairs. Inspect the first set of cardboard boxes along the right wall with the coffee cup on them.
Cease and Desist Letter: Go up the stairs in the back left corner of the lobby, and grab this off of the fax machine at the top, in the back right corner.
Chapter 8: The Belly of the Beast
Laura and Ryan
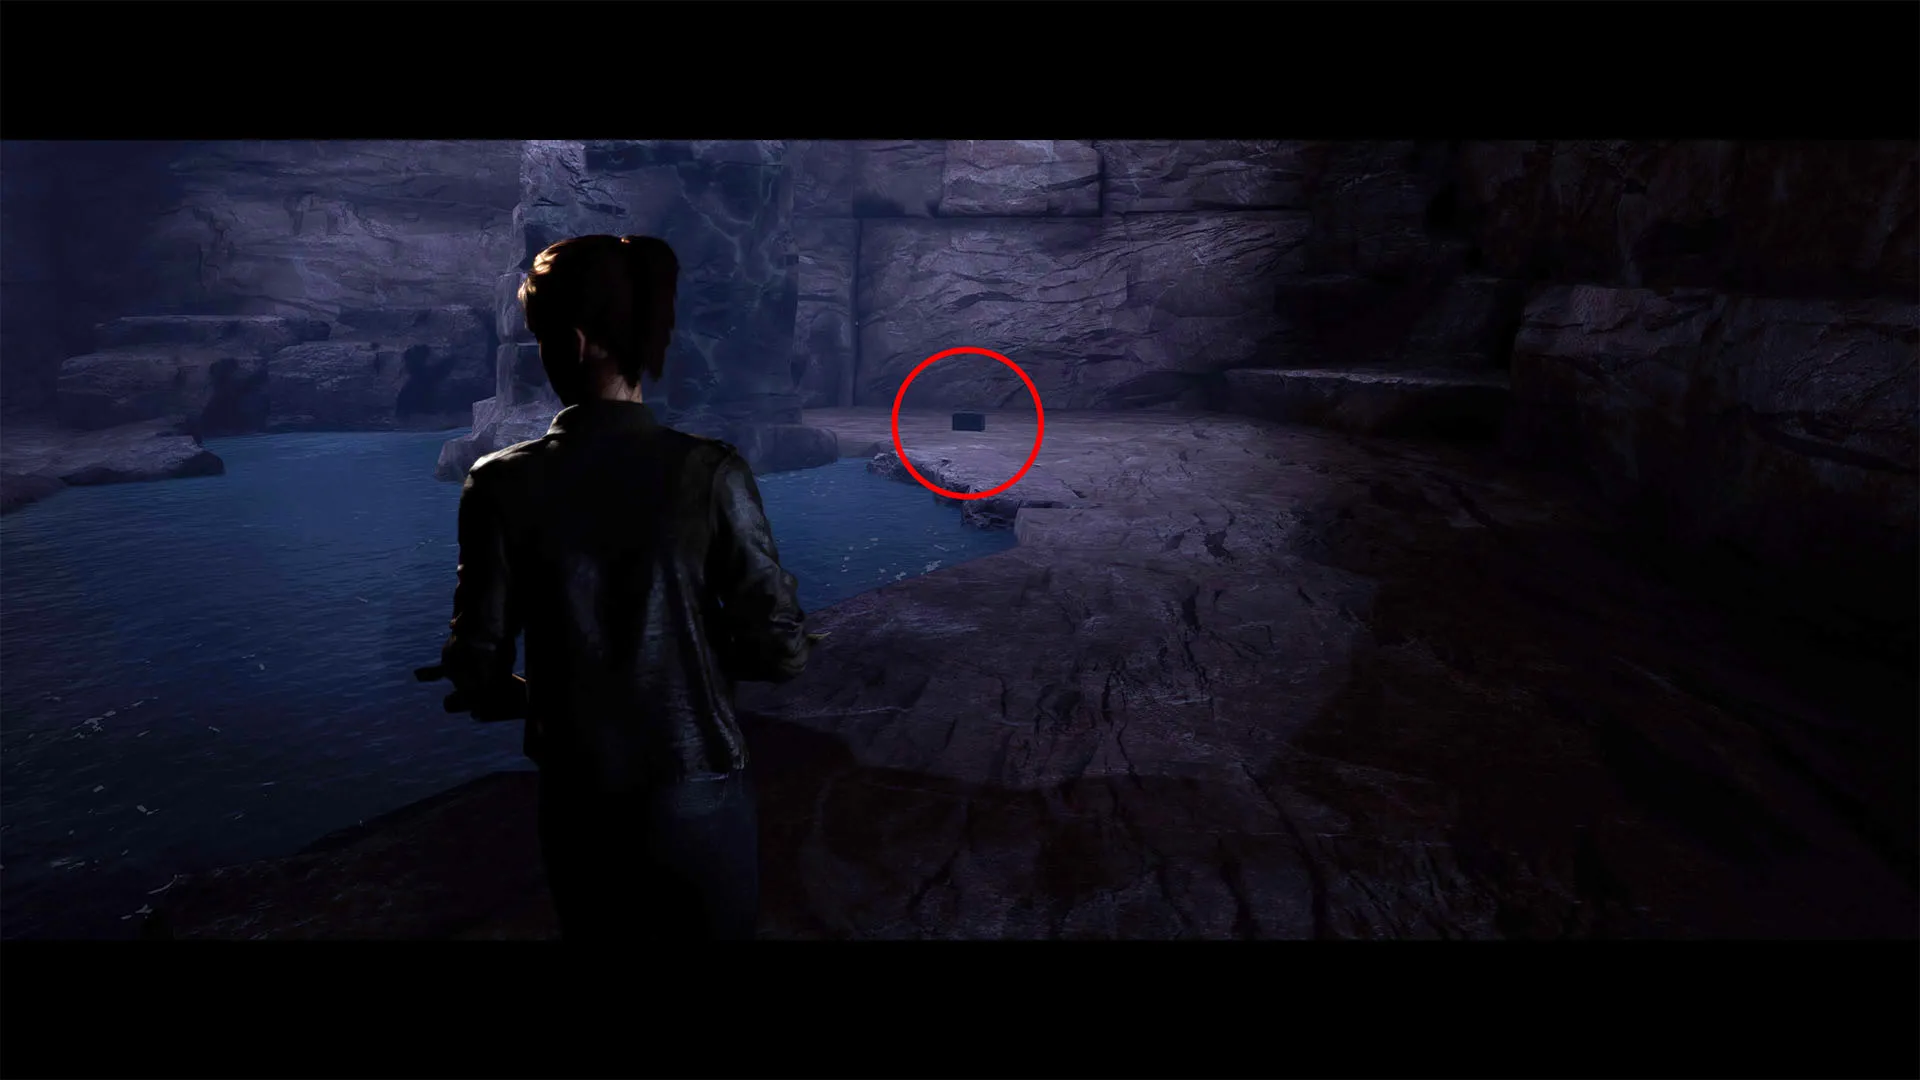
Miner’s Lunchbox: After entering the cave and the cutscene ends, go to the back of the cave, opposite the stairs, to find this collectible on the ground.
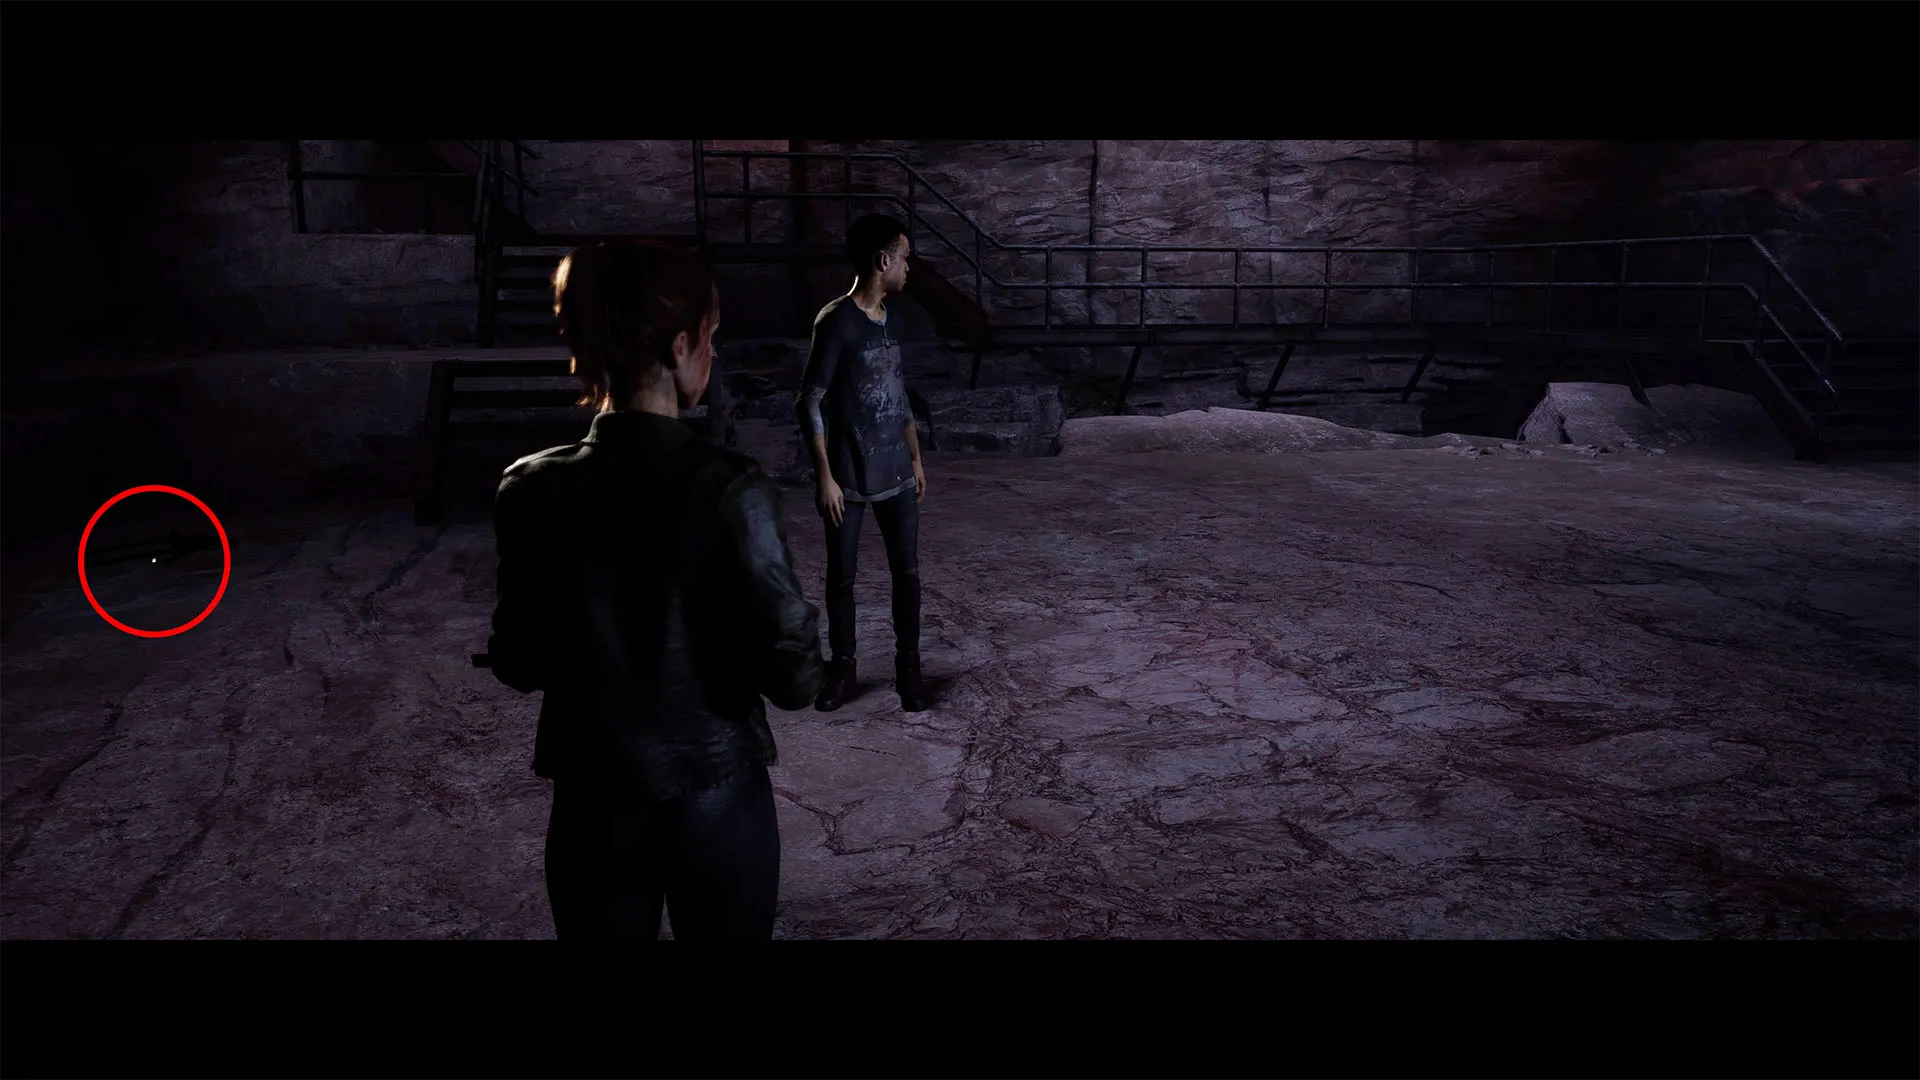
Old Quarry Tools: Now go the stairs, and inspect the ground to the left of the stairs on the left.

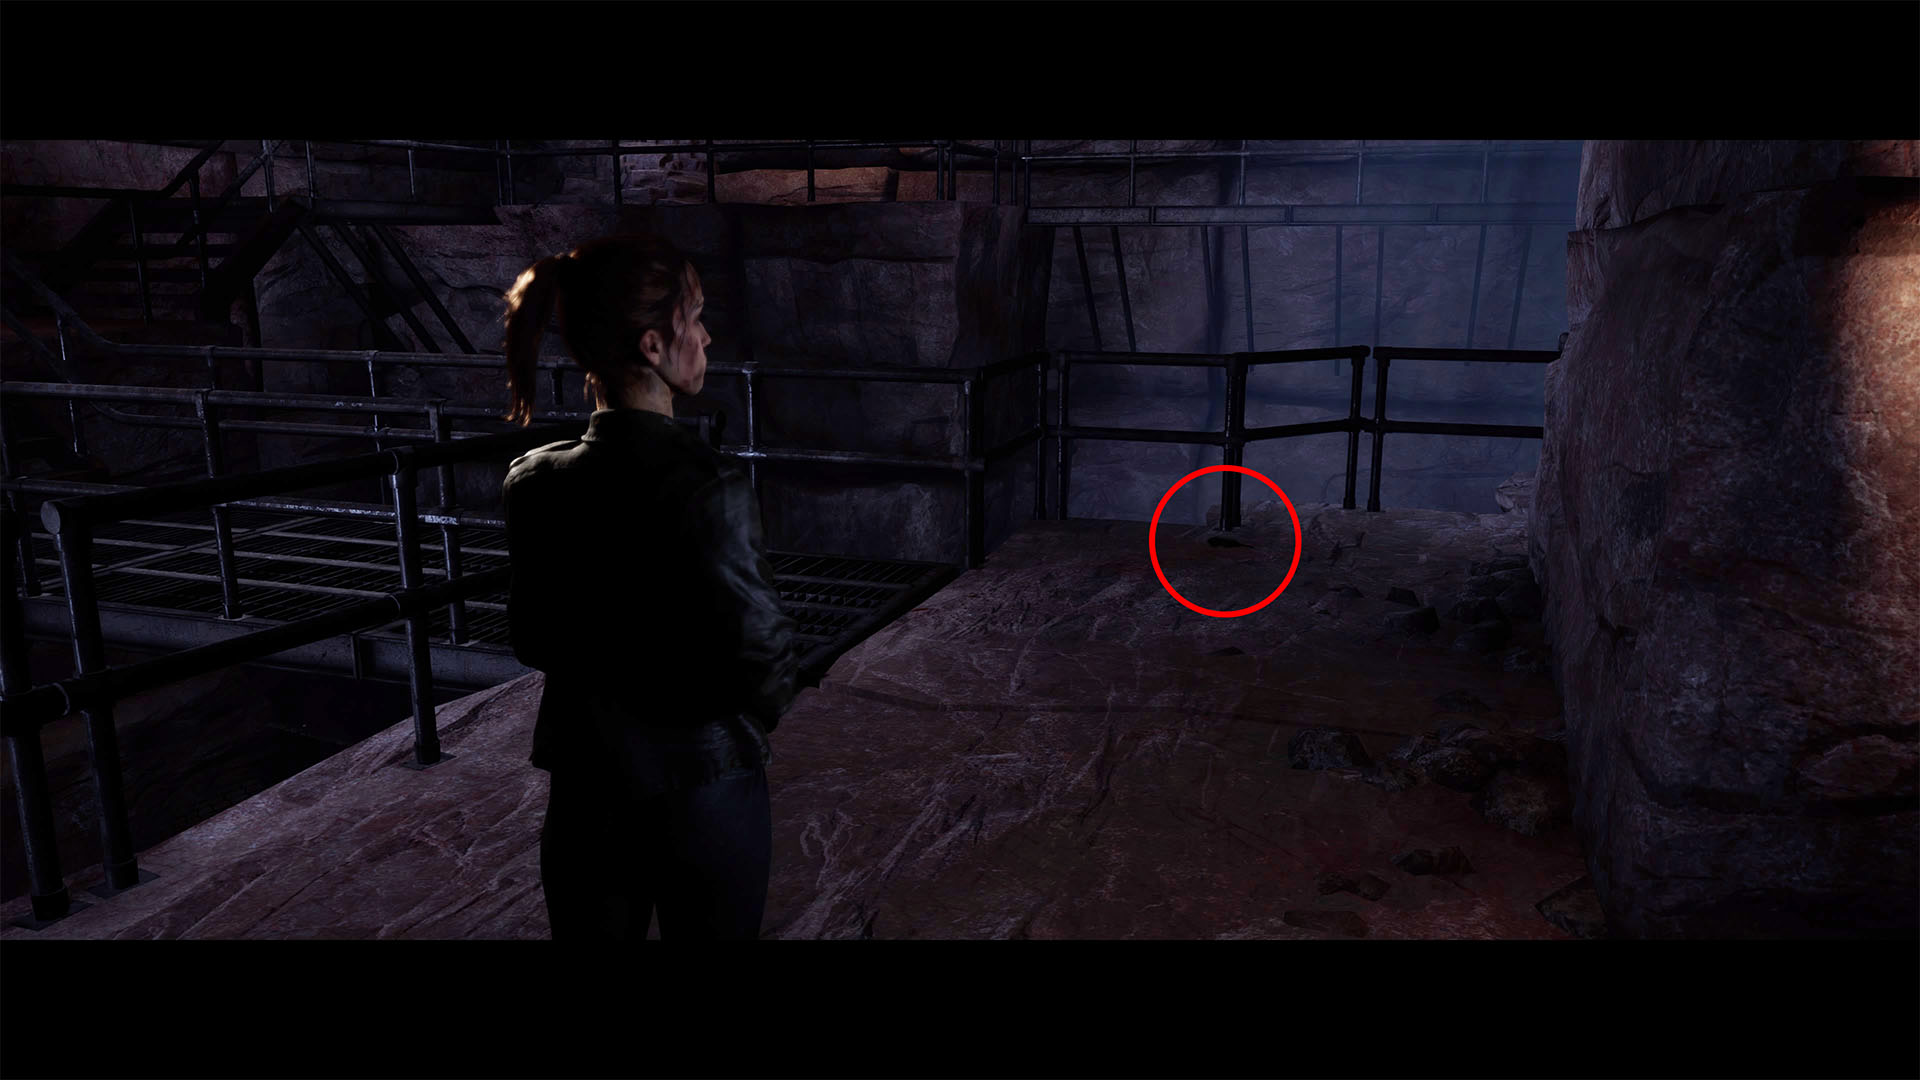
The Lovers Tarot Card: Continue to follow the path along the metal catwalk. There will be two cutscenes, then turn left off of the catwalk to go through the rock. Cross over another small piece of metal walkway, then look left to see part of the walkway goes further out to the left.
Scarred Flesh Evidence: Go to the top of the stairwell nearby, and turn left at the top. Follow the rock path around to find this one on the ground by the next, left-leading metal walkway section.

Wheel of Fortune Tarot Card: You’ll come across this one automatically in the tunnel in the cave.
Ryan

Empress Tarot Card: After completing Kaitlyn’s section, you’ll control Ryan in the cave. Facing the rum barrels, turn left through a doorway, and walk straight to the back.

Rum Still: Now turn right and interact with the rusty stills along the wall on your left.

Emperor Tarot Card: Turn around and exit the room the way you entered, and turn left to go between the racks of rum barrels. You’ll run into this one automatically.
Chapter 9: The Matriarch
Ryan
Kaylee’s Letter: After riding the dumbwaiter up, walk to the far right of the room and interact with the box on the table, by the standing mirror.
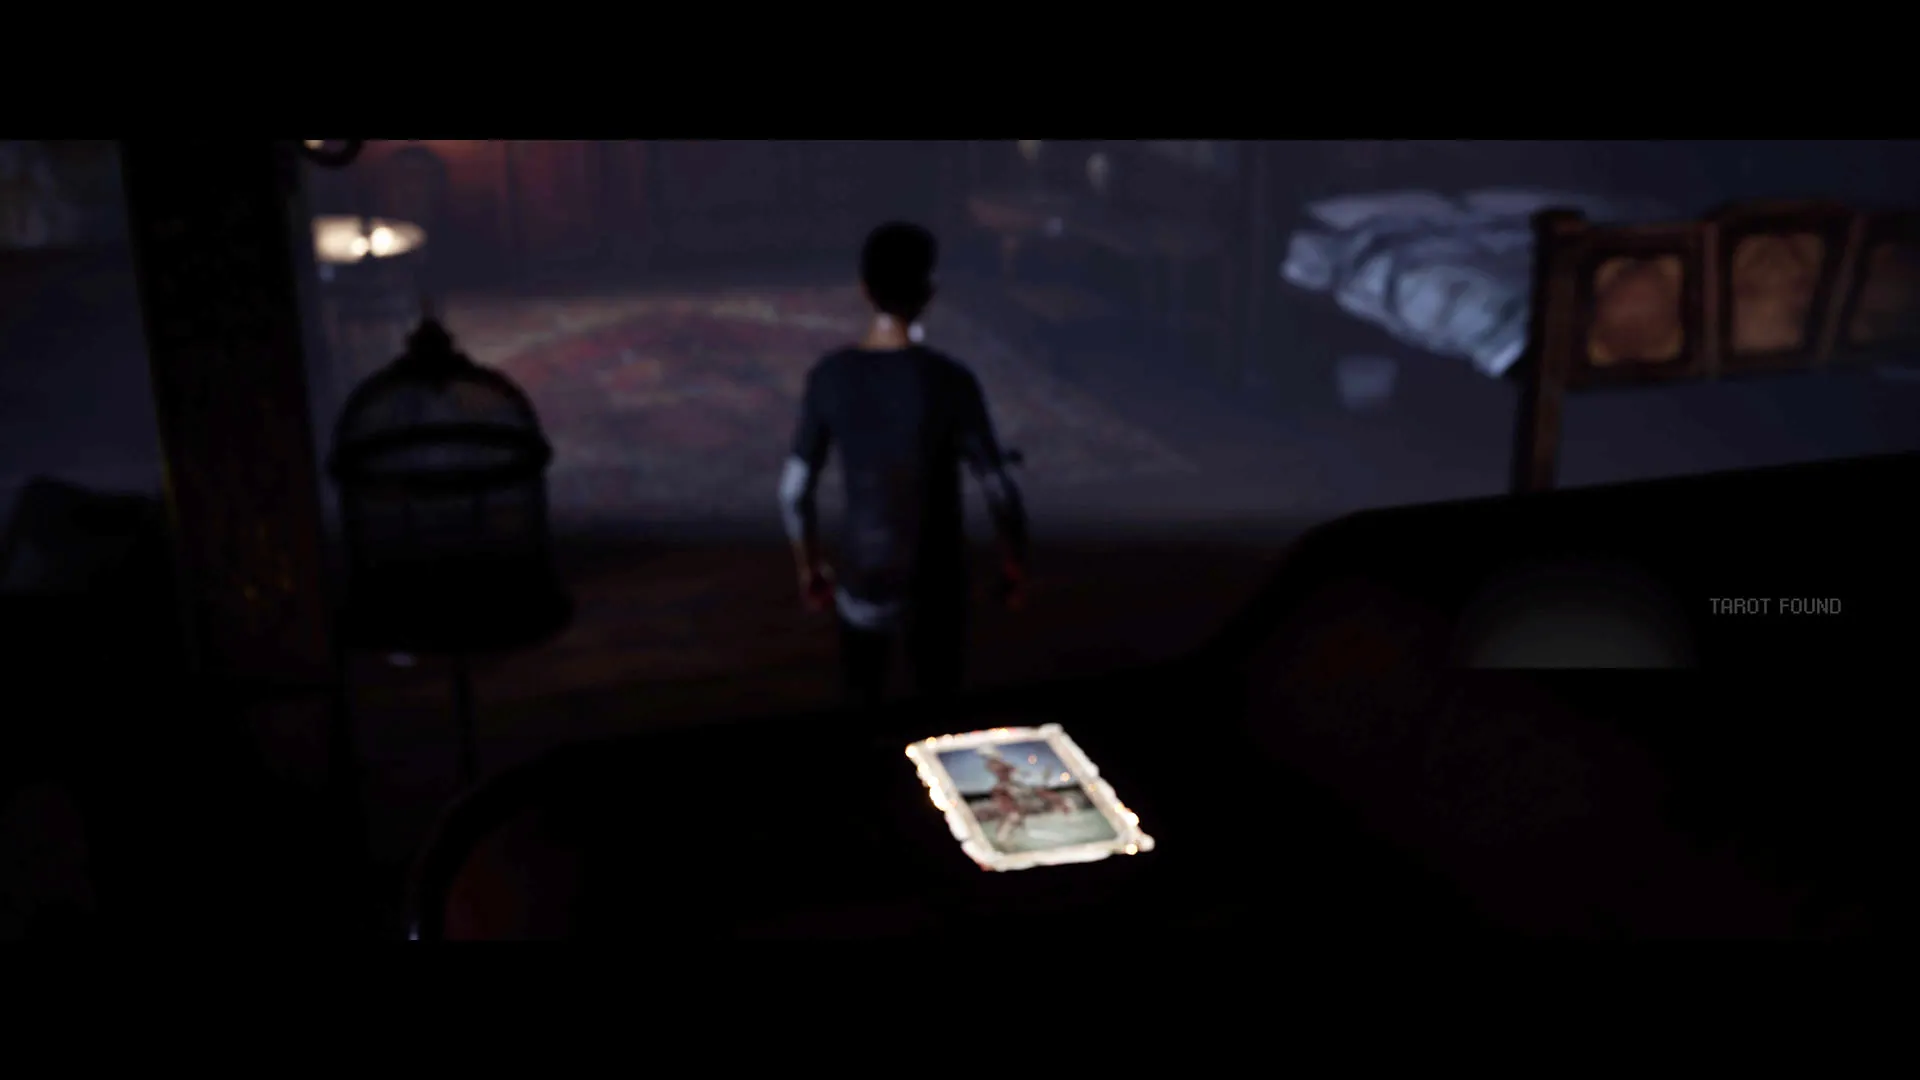
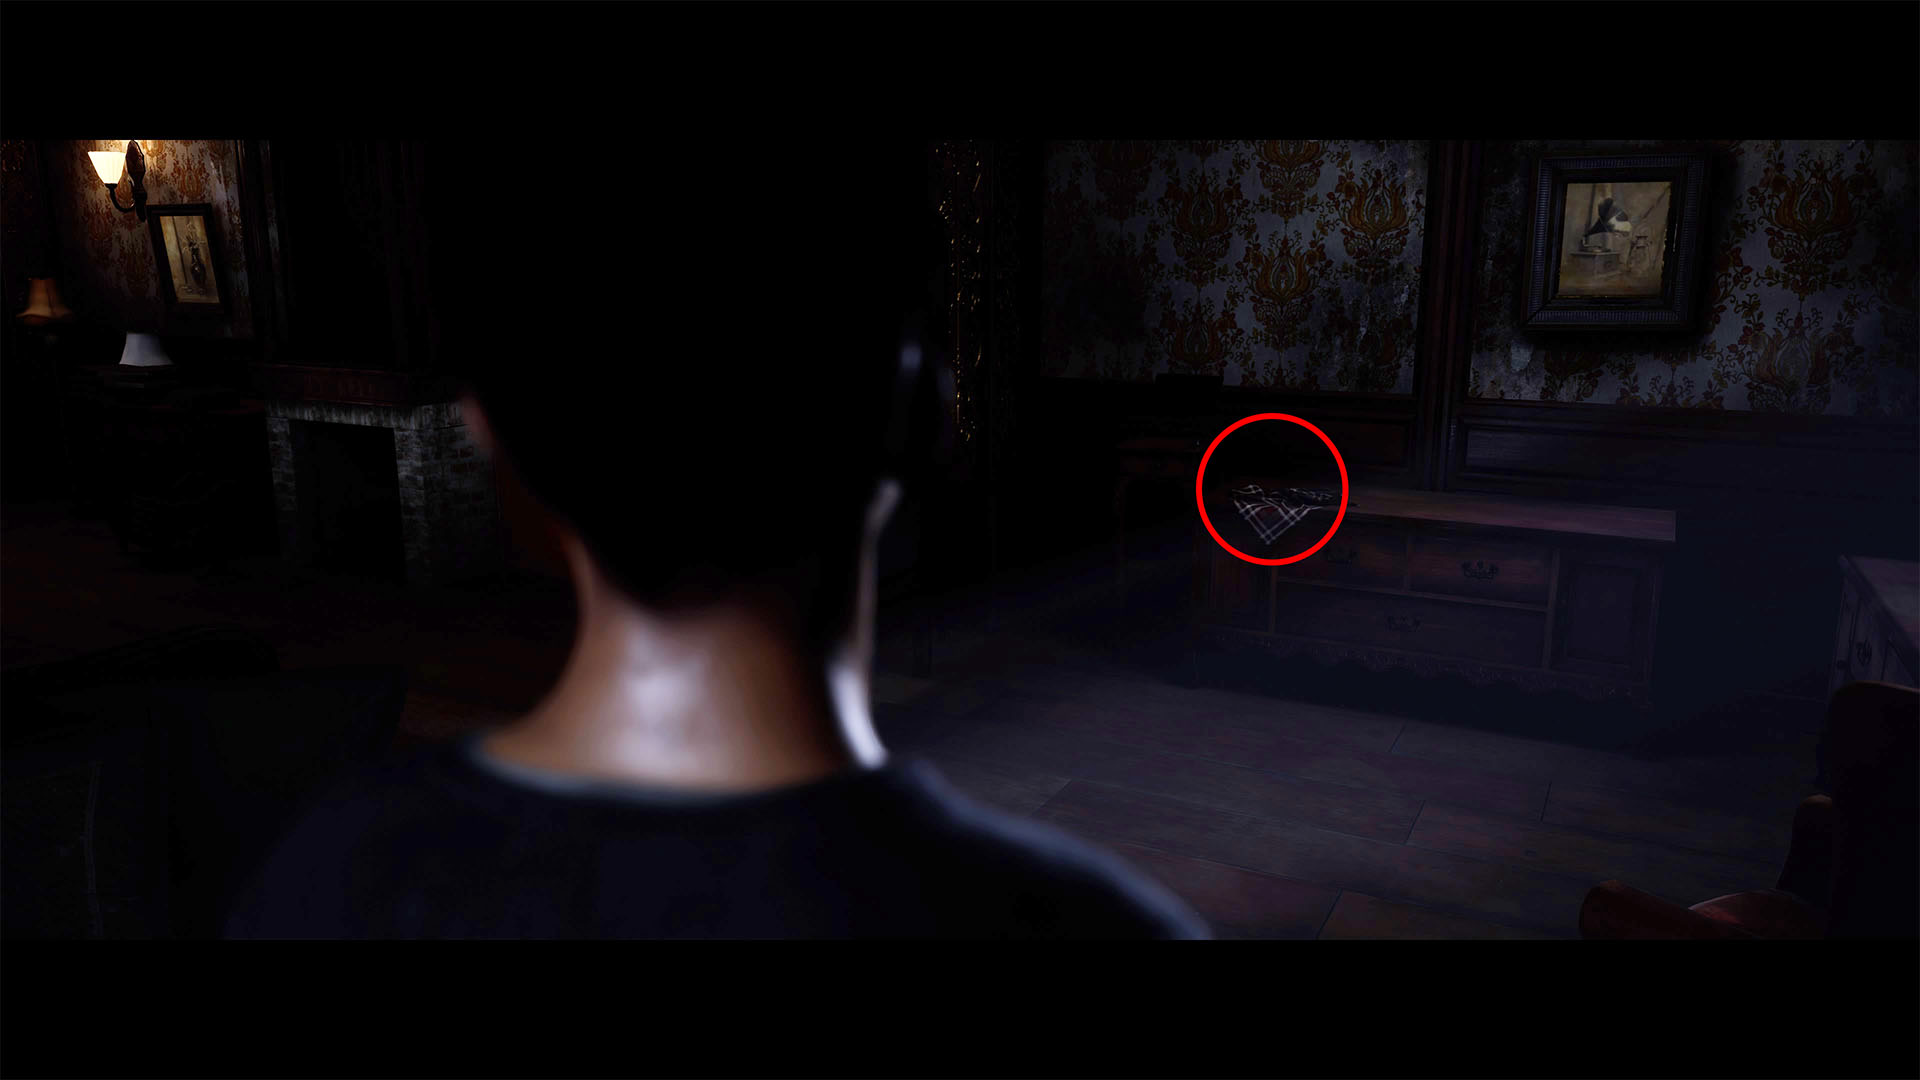
Death Tarot Card: Turn left, and pass behind the couch, and the camera will shift to reveal this one.
Laura
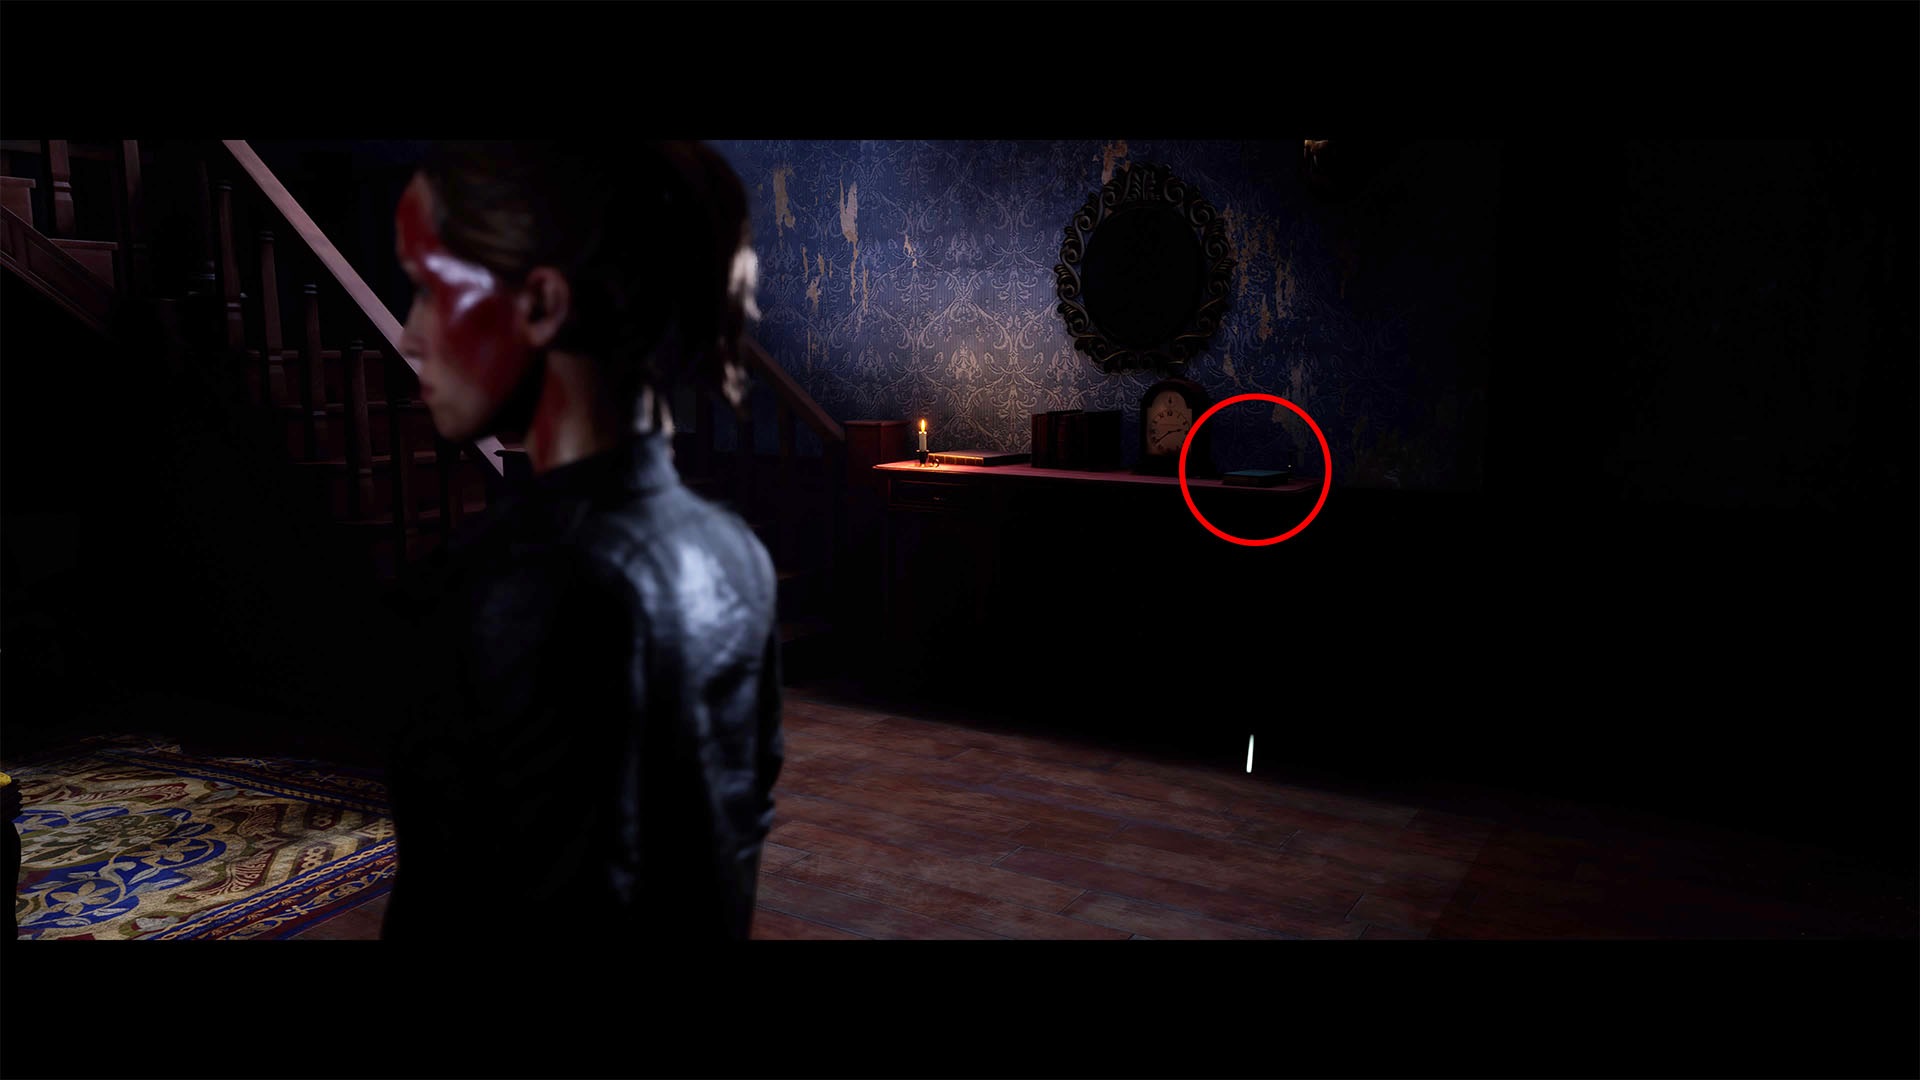
Hunting Trophy Wall: After the bathtub section cutscene ends, interact with the prompt by the chest of drawers with the candle on it by the wall, at the base of the stairs.
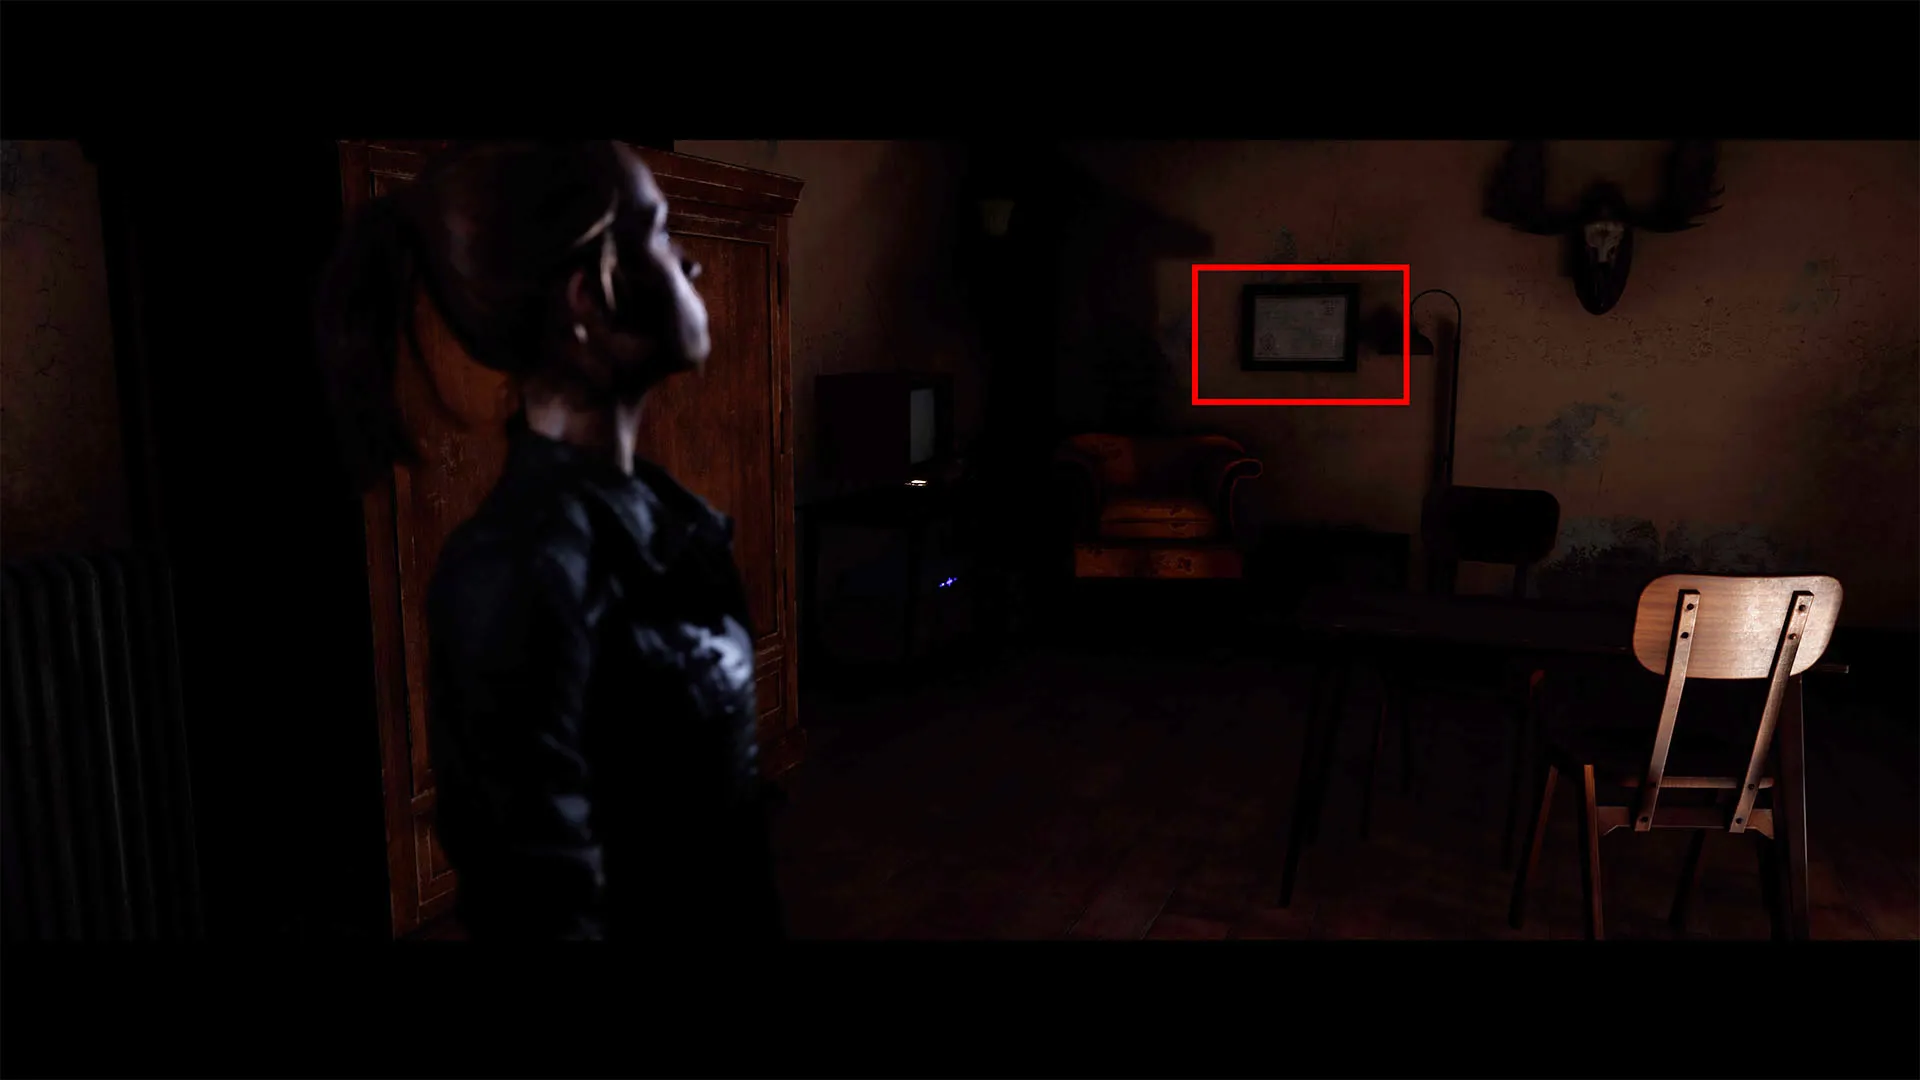
Hackett Family Tree: Use the stairs, and go into the room straight across from you at the top. Turn left when you enter, and interact with the framed family tree paper on the wall by the television and the moose skull.
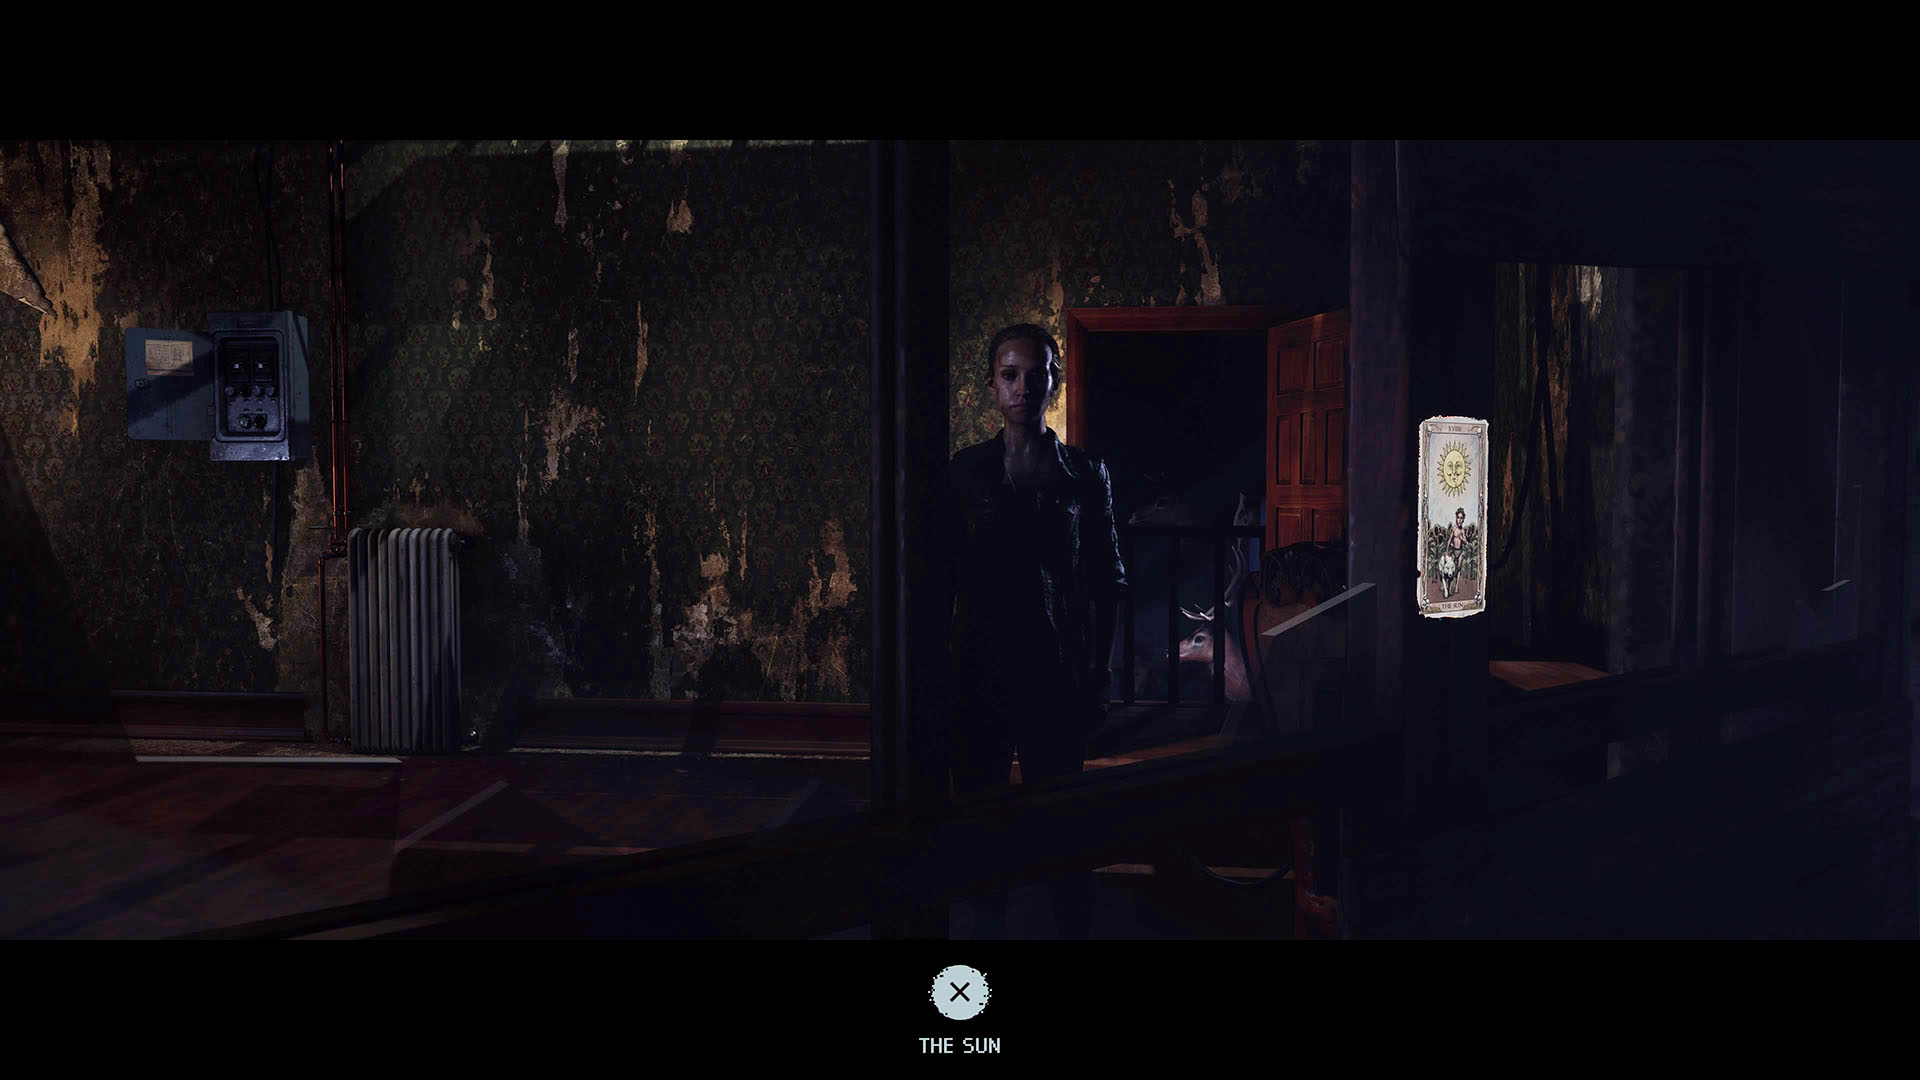
The Sun Tarot Card: Exit and turn right. Continue down the hall into the next room. Walk straight ahead until the camera shifts.
Dylan and Kaitlyn
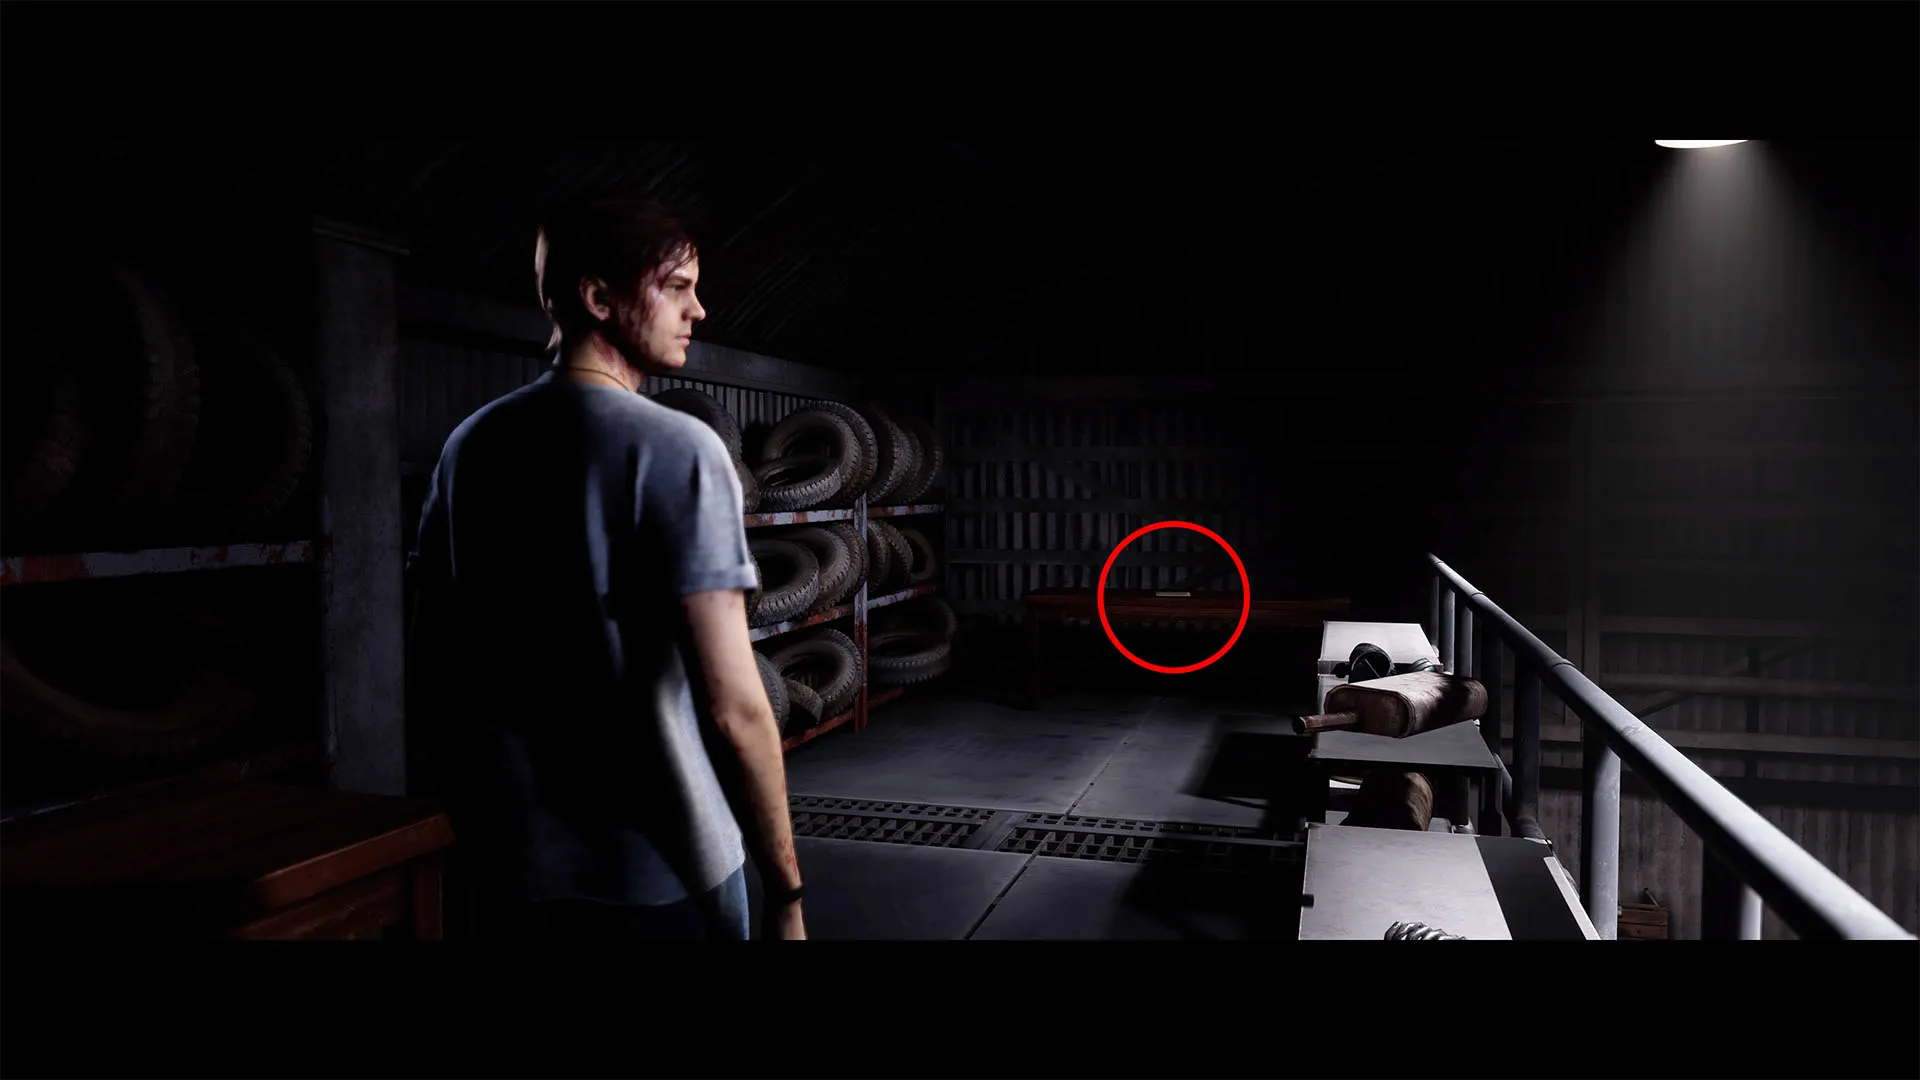
Scrapyard Note: You’ll return to the scrapyard. Stay on the right side, and pass the fenced-off area and red dumpster. Go into the garage on the same side (the entrance is after the light comes on to the left). Go upstairs, right, and all the way to the end of the catwalk. Interact with the note on the table.
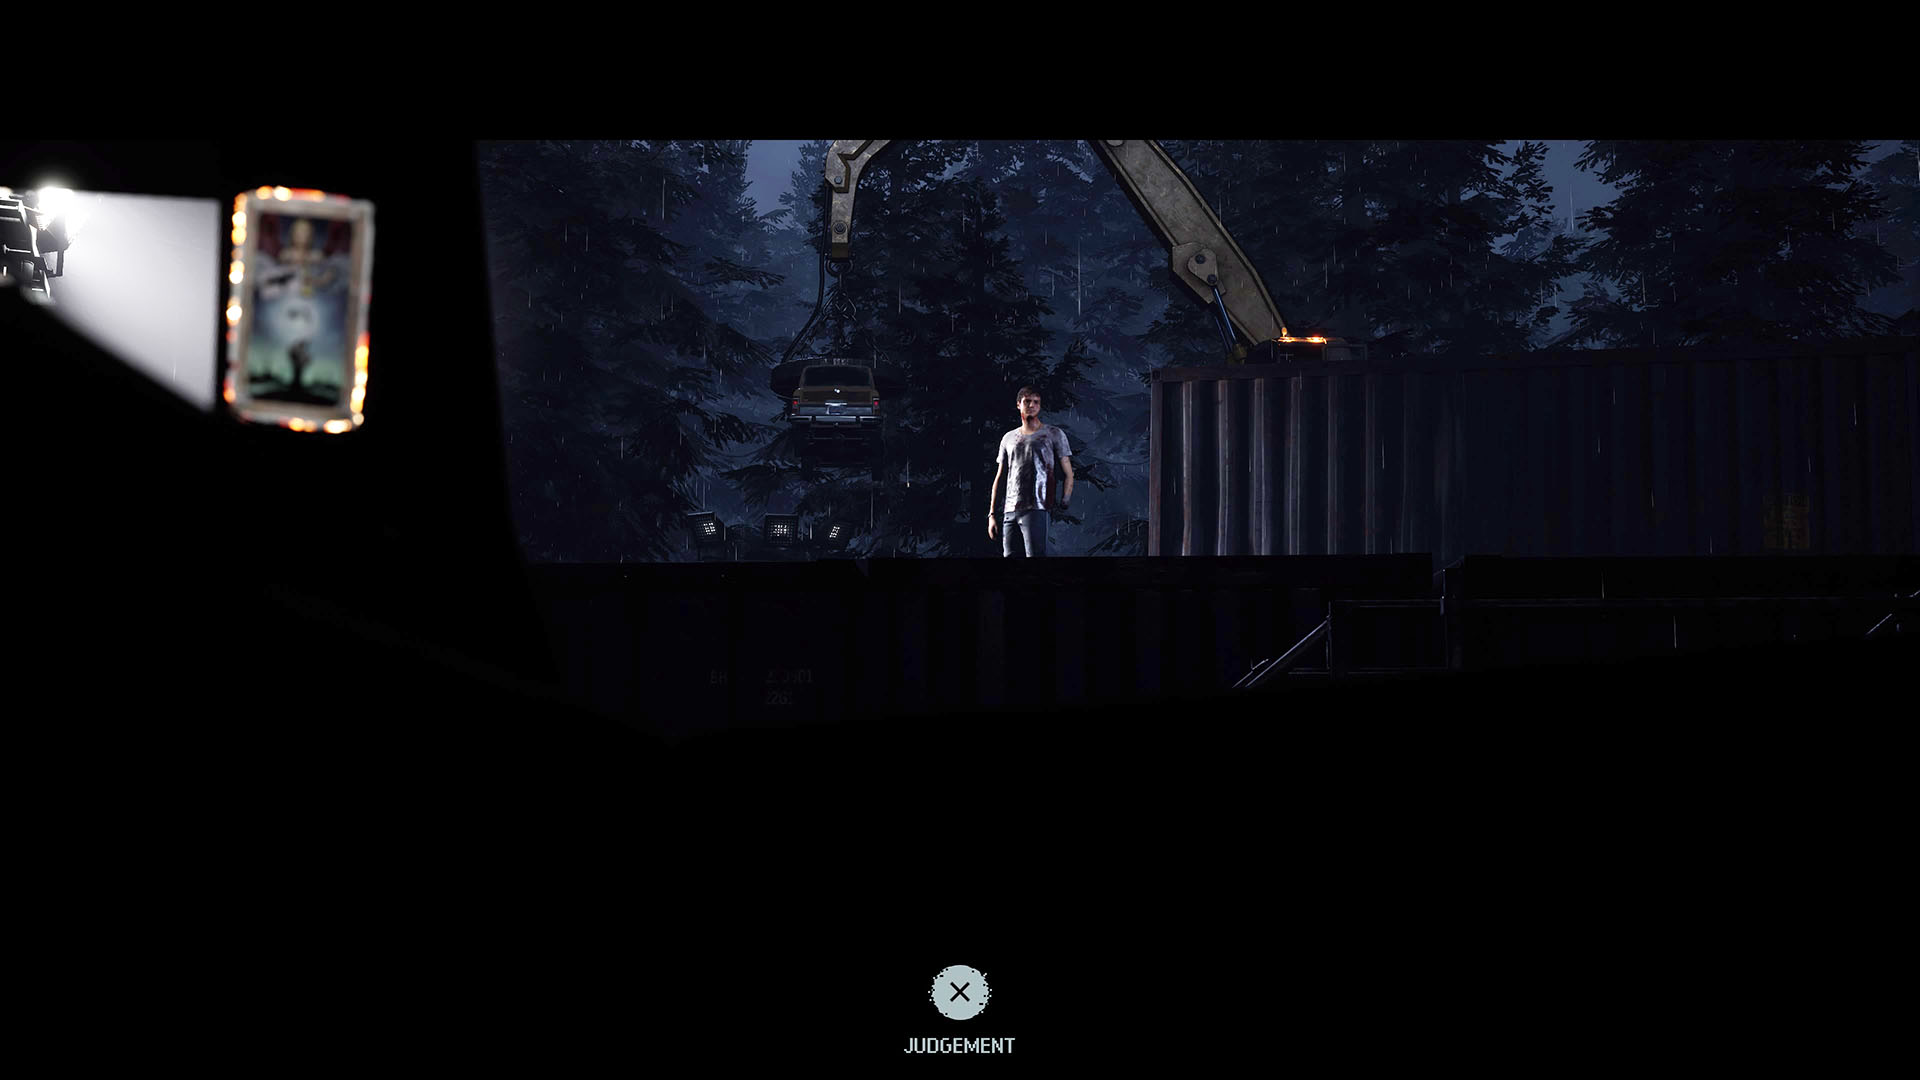
Judgment Tarot Card: Continue through the gate. Go straight through the “tunnel” of cars (there will be a small cutscene with a light on the other side). Then go up the stairs to the left of the container in front of you. Turn left at the top, then left again. Walk a short distance.

Discarded Signage: Continue across the containers and take the stairwell down. Turn right at the bottom, and you’ll see a wooden sign with a psychic and crystal ball. It’s by a container hanging off the side of the other containers.
Abi and Emma
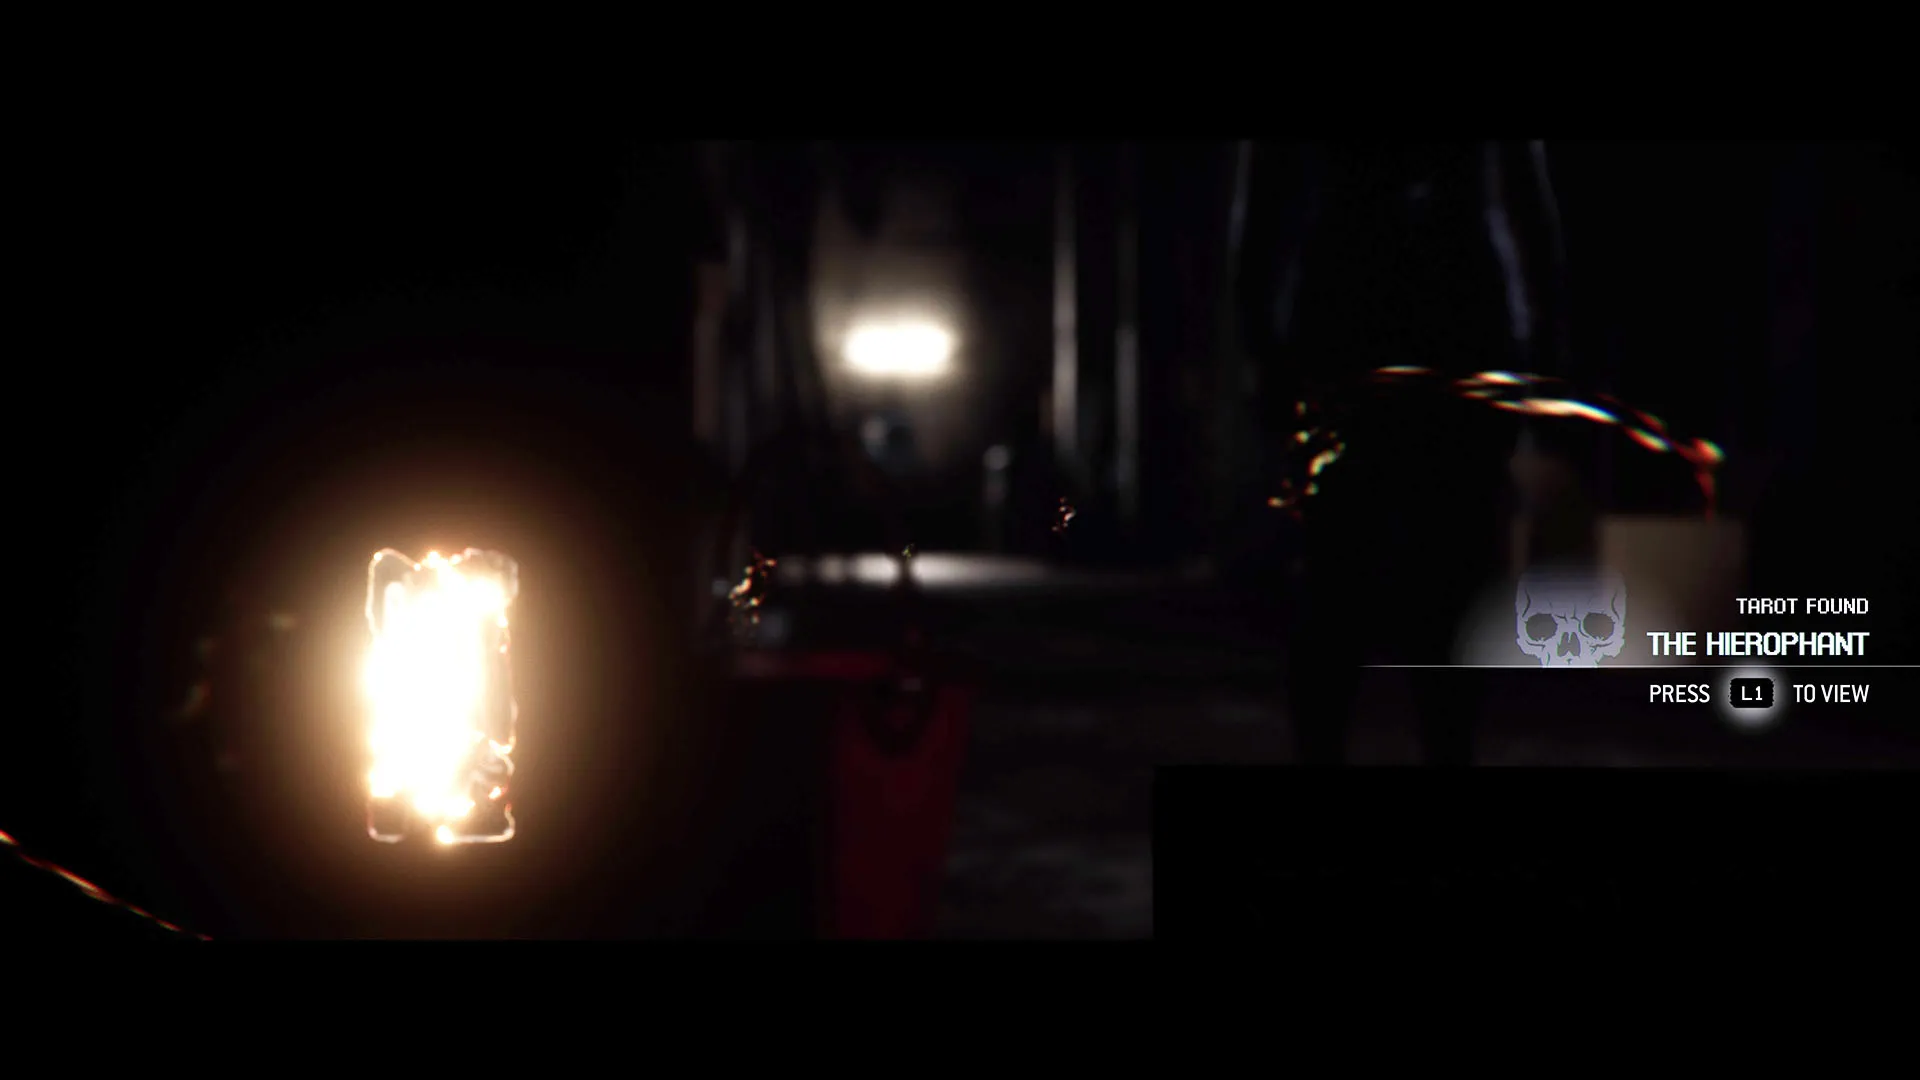
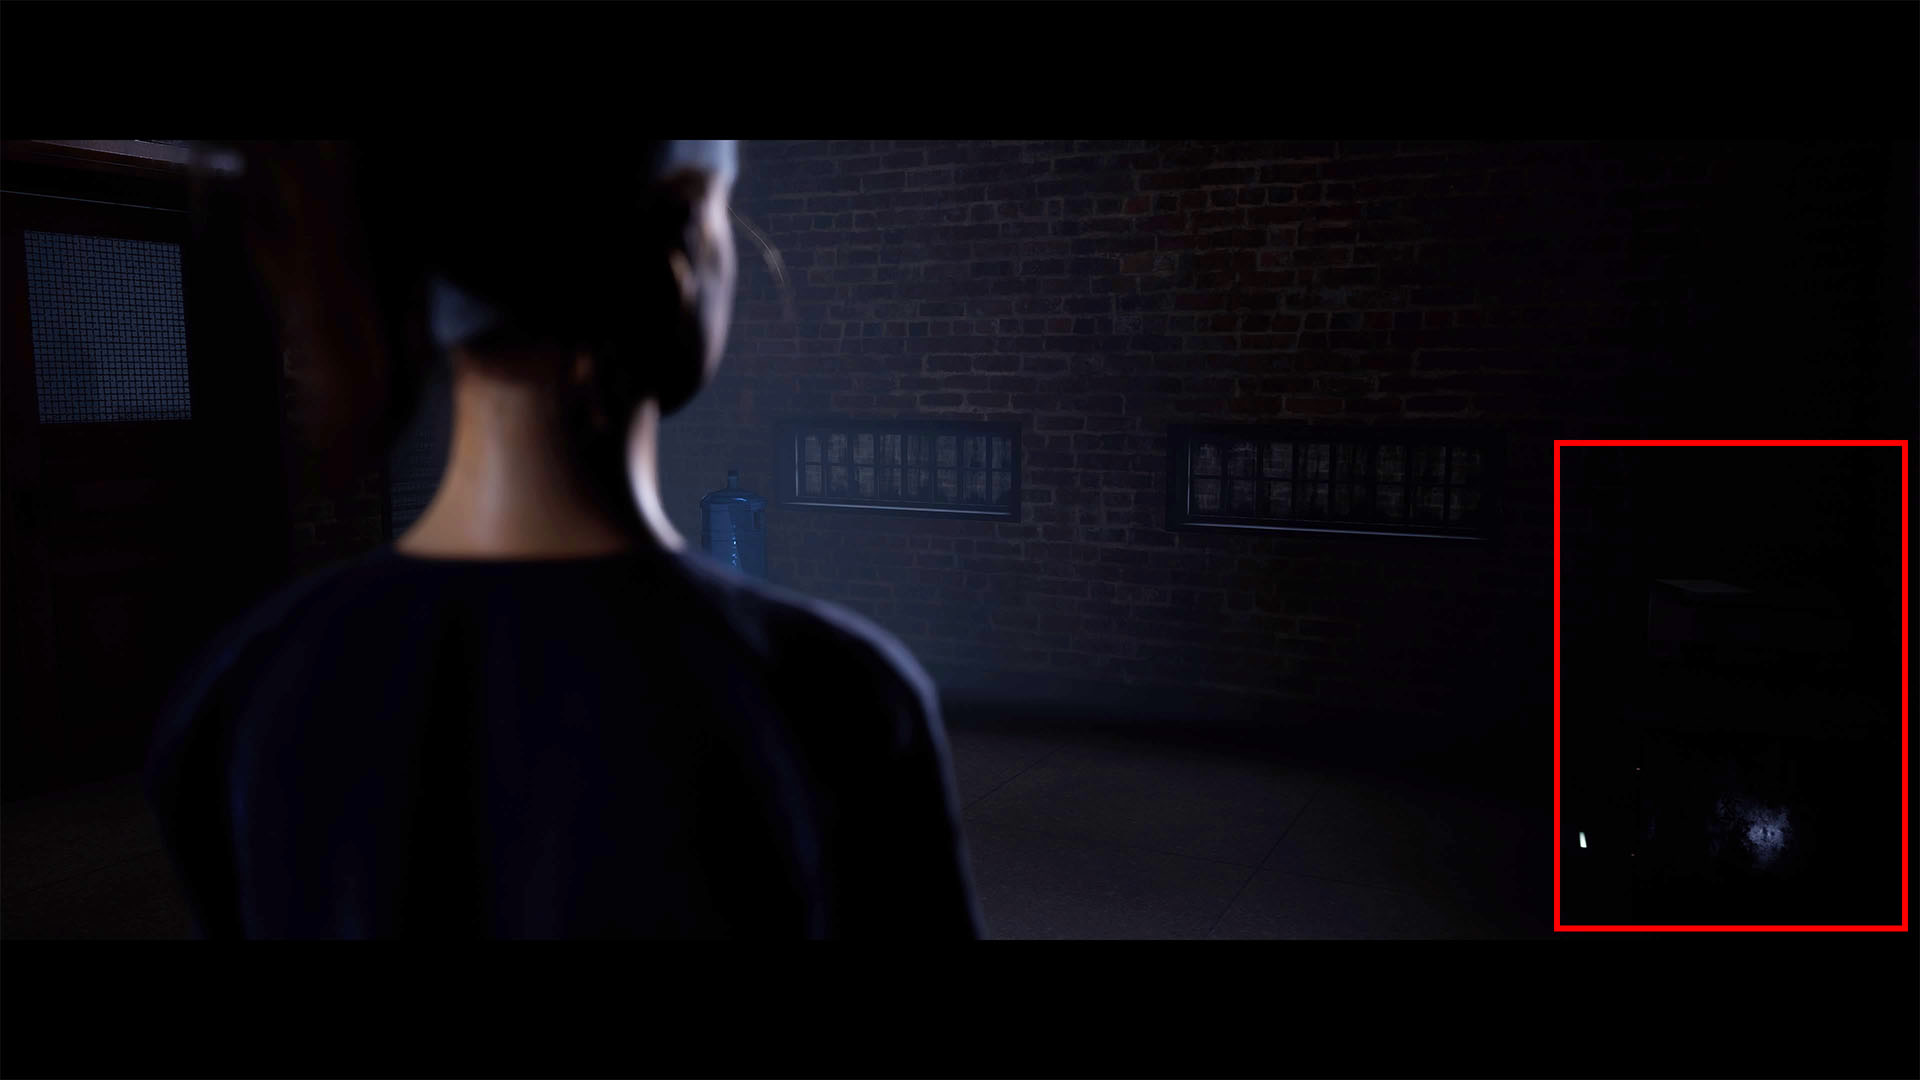
The Hierophant Tarot Card: In the bunker, investigate the stairs where Max was attacked in the prologue.
Chapter 10: Bricks and Mortar
Kaitlyn
Camp Letter: After the island segment, you’ll return to Kaitlyn and Dylan barricading the lodge. Go upstairs. You’ll see a walkway with windows on the right side and a chimney on the left. Turn left into an open den area with shelves and furniture on the right wall.
Turn left again to see another set of stairs going up on the left and a wall with paddles on the right of the staircase. Go through the doorway and interact with the paper on the floor in the back right portion of the room.
The High Priestess Tarot Card: Go all the way upstairs on this side. Go left at the top and all the way to the end, toward the windows and the lamp.
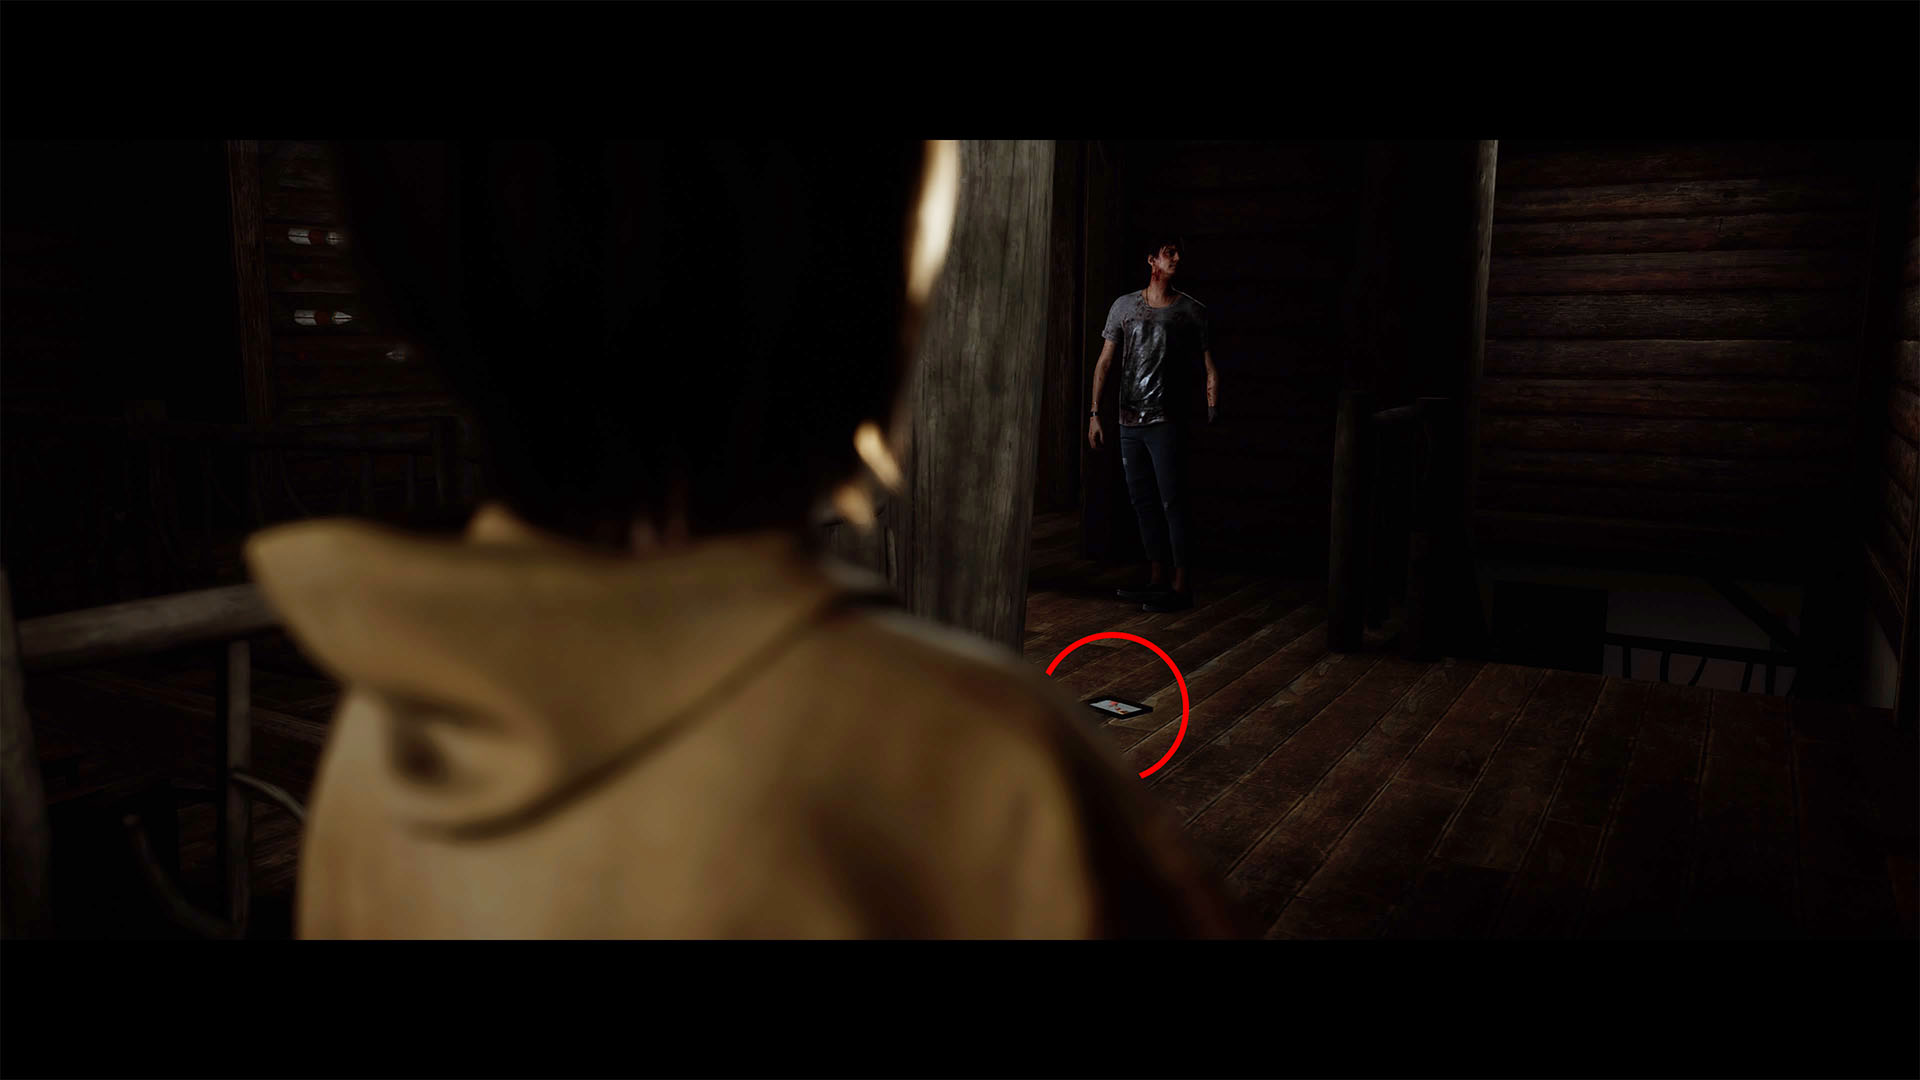
Ticket Stub: Go back to the den area, then follow the path back to the first stairwell, then left onto the walkway with the windows on the right. Go all the way down (you’ll pass a prompt near the railing on the left side by the wall of windows, but leave that for now). Just past that prompt, to the left of the stairs leading down, you’ll see a picture frame on the ground. Interact with it.
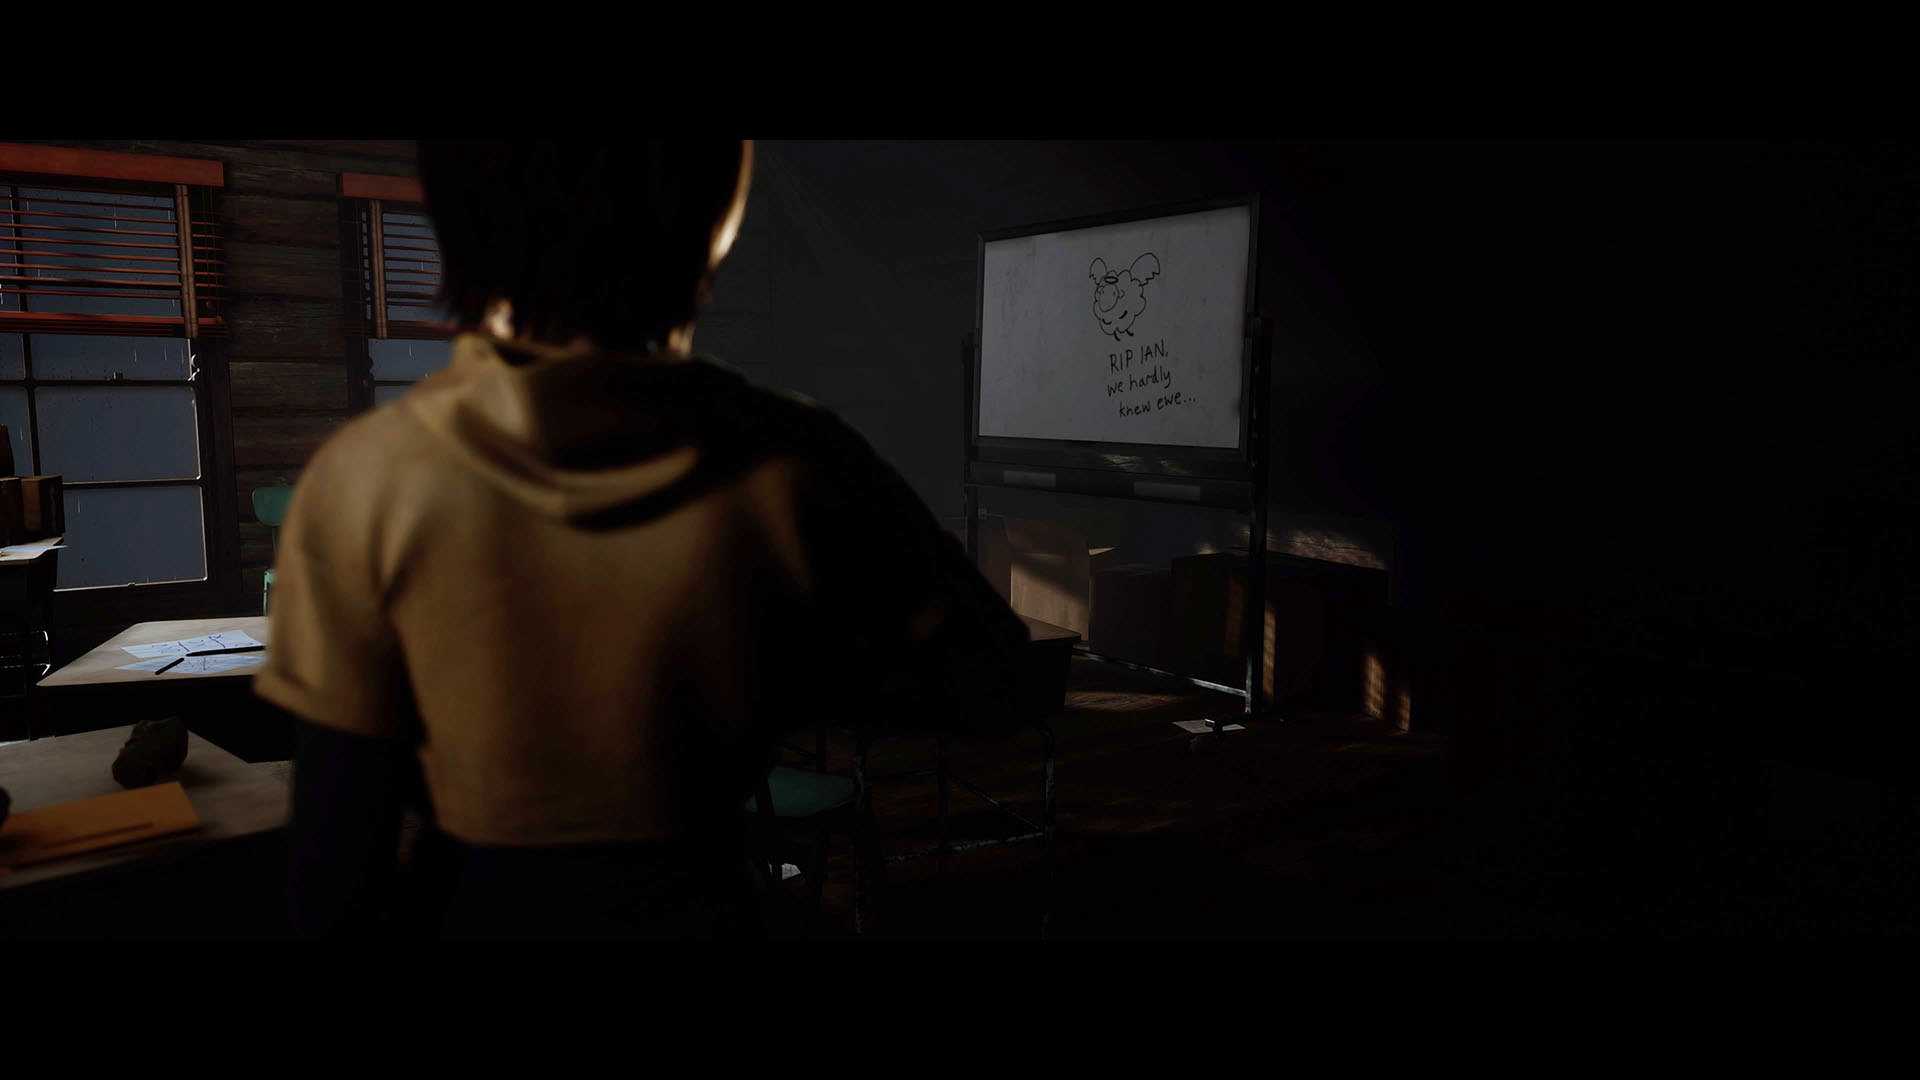
Chalkboard Doodle: Go straight ahead, and into the room in front of you. Go right and into the next room with desks. Interact with the chalkboard on the right side of the room.
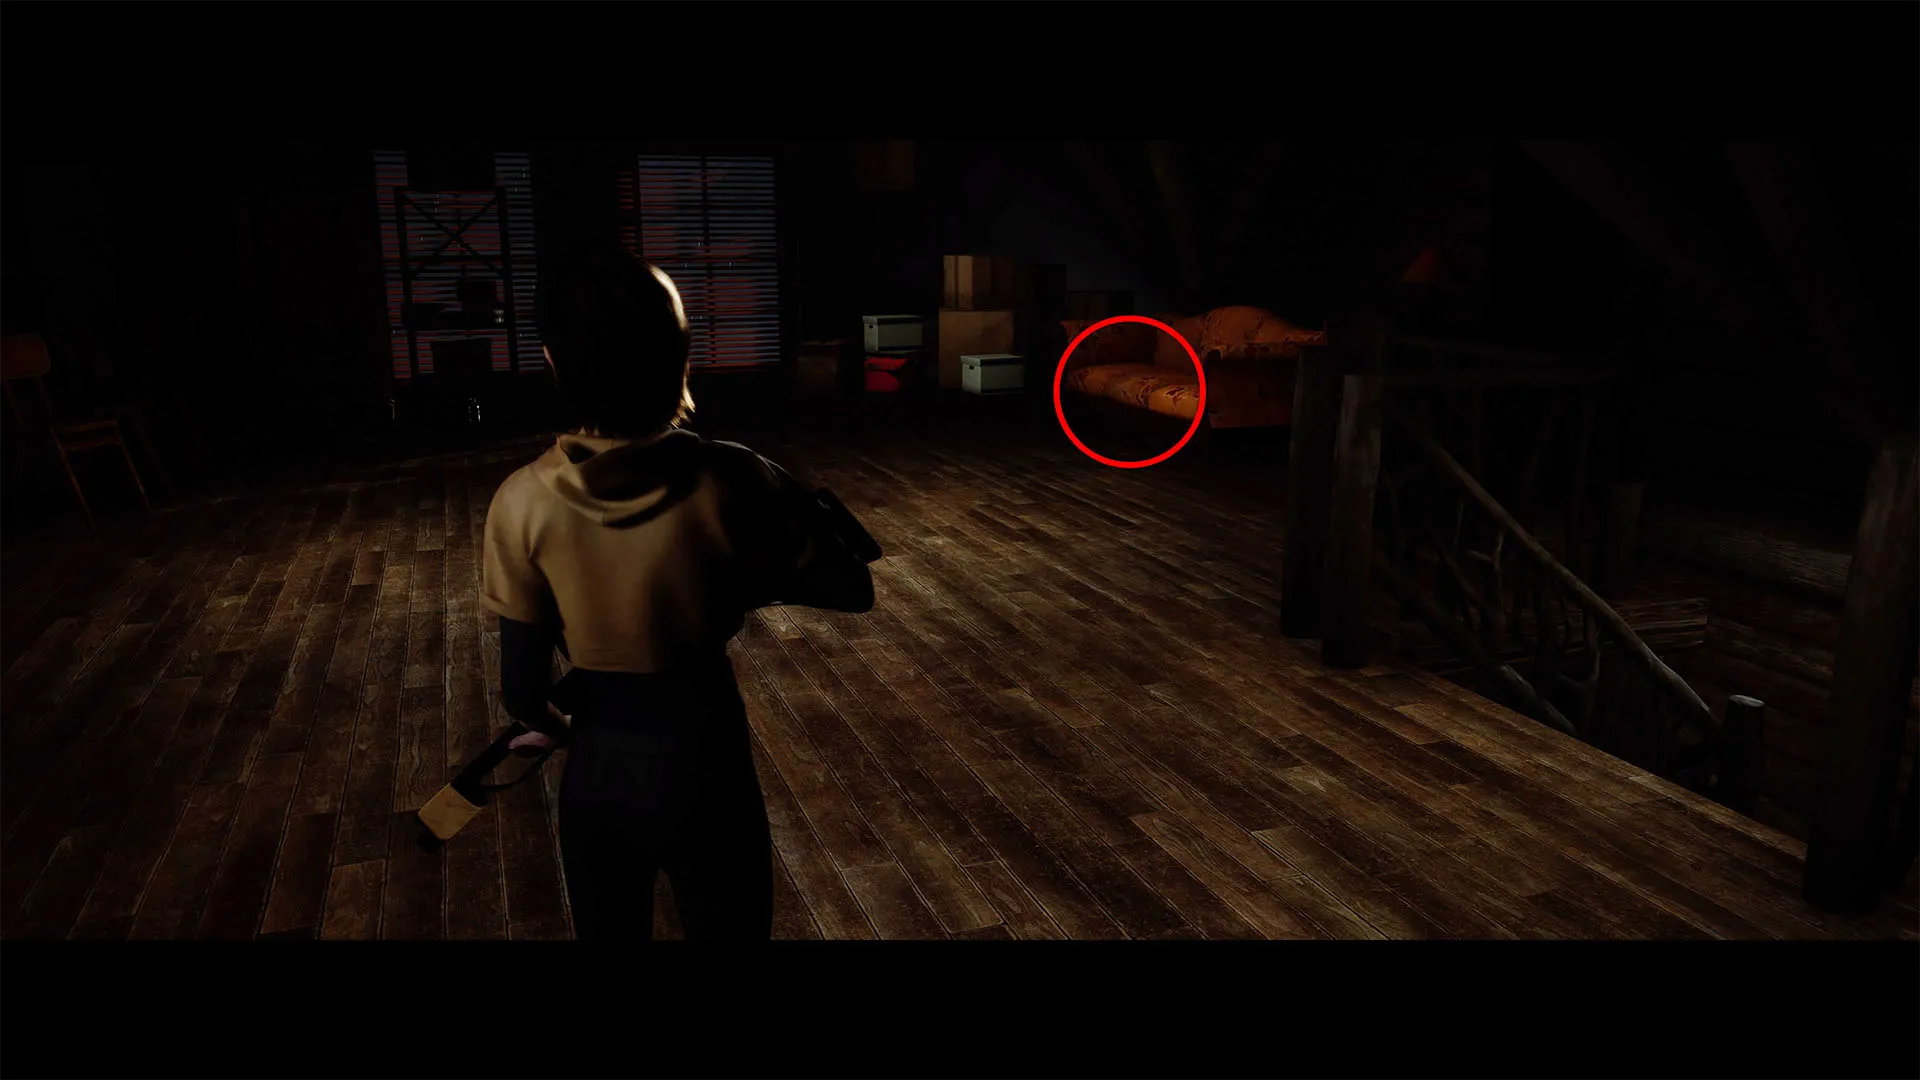
Inscribed Jewelry: Go upstairs using the stairwell nearby. Turn right at the top, and inspect the orange couch by the two windows and stack of boxes.
Evidence Trail Cam Footage: Turn around and go to the opposite side of the room, toward the railing and the clock on the table, and inspect the pile of blue crates and boxes.
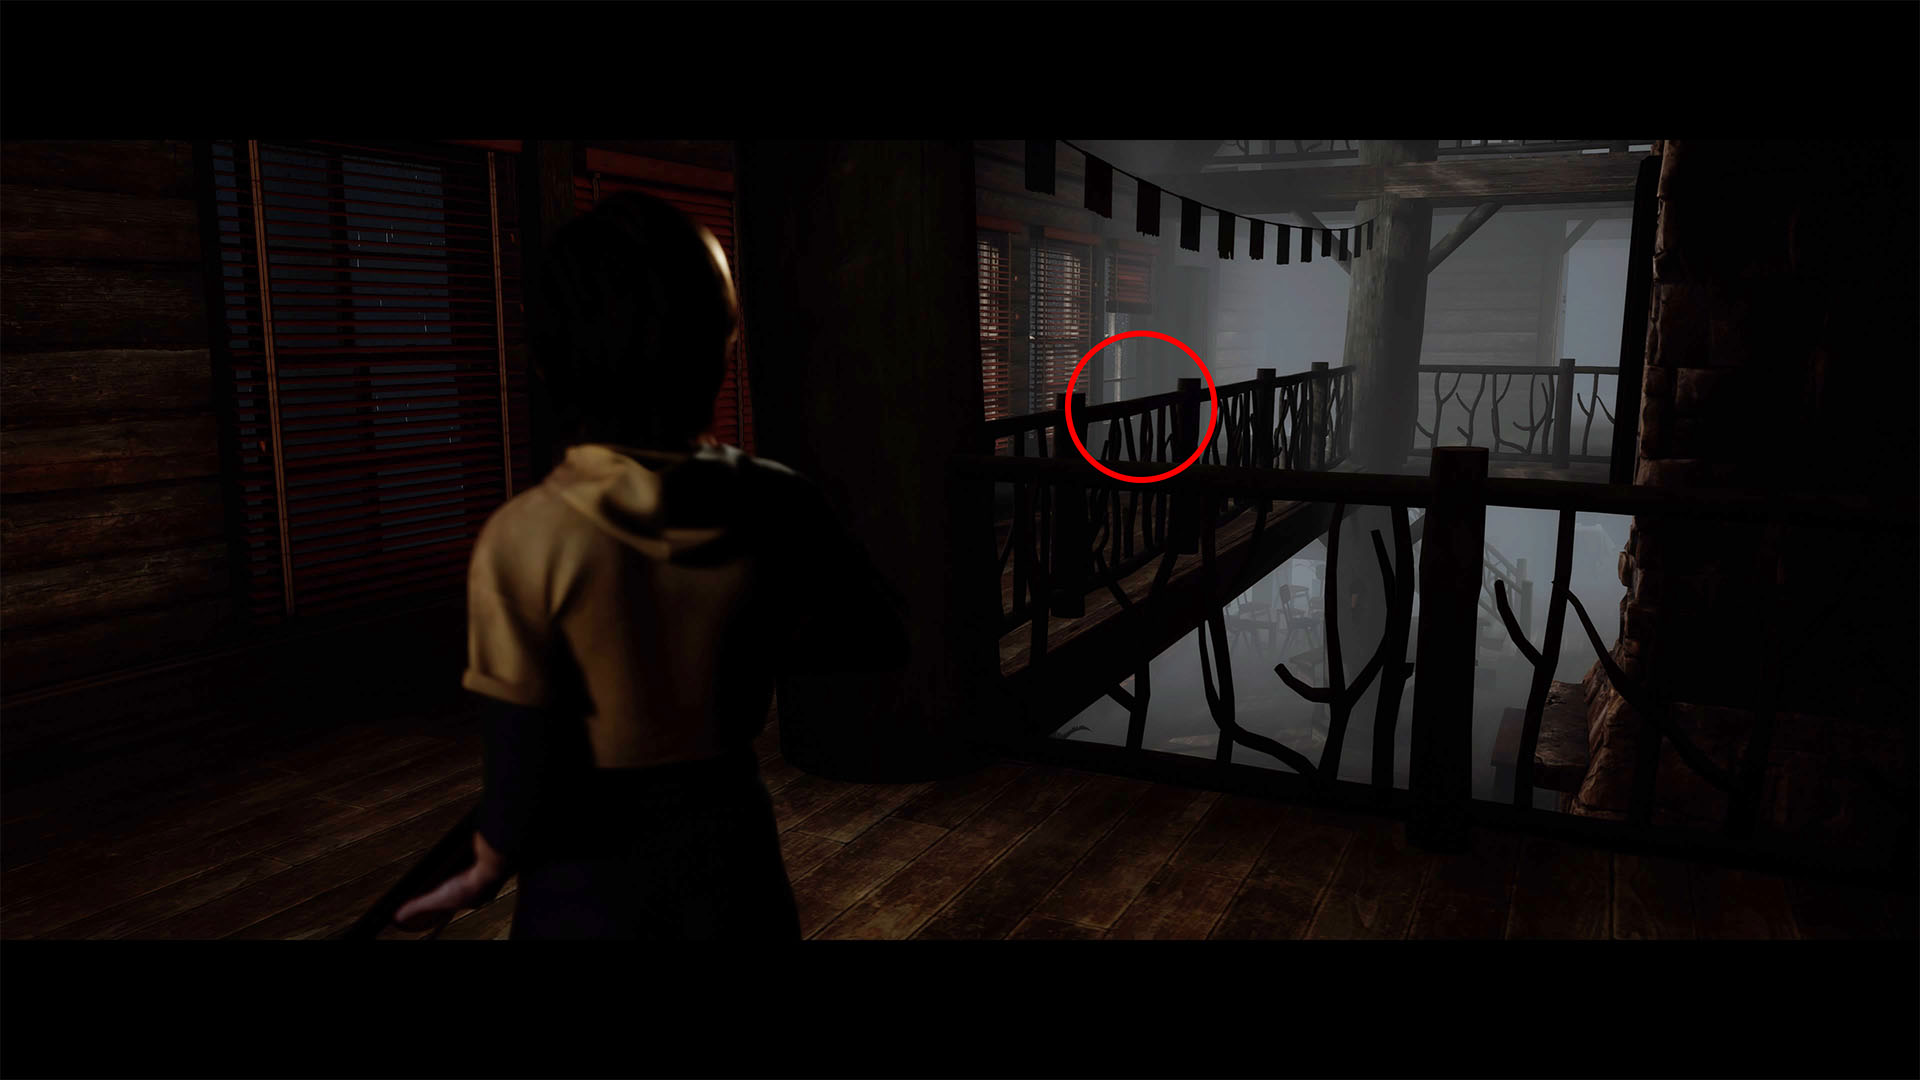
Ancestral Portrait: Now go back downstairs and to the walkway with the wall of windows. Interact with the prompt at the railing for this one (you can start the next segment at this portrait by choosing prepare for attack).
Those are all of the collectibles, tarot cards, clues, and pieces of evidence in The Quarry. Though you can start a playthrough to kill everyone for the Hackett’s Quarry Massacre trophy/achievement, you won’t be able to get all of the hidden items you missed. Luckily, playing through The Quarry again is a pretty good time.


Published: Jun 17, 2022 05:36 pm