
Club Deaf Panther is the third out of five missions in Wanted: Dead, taking Hannah Stone to a fancy club owned by a gang member. While it’s not any longer than prior levels, there’s a few more collectibles here than the last mission. This guide will help you find them all.
Wanted: Dead Club Deaf Panther Collectibles Locations
Club Deaf Panther Map Location
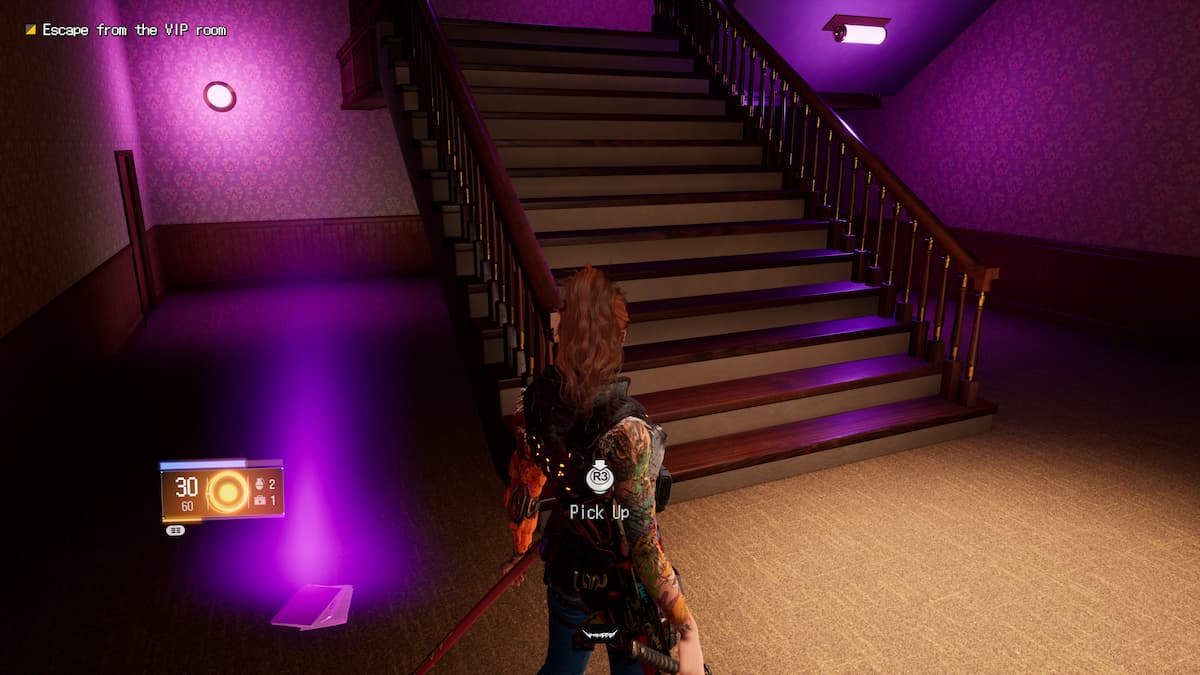 Screenshot by GameSkinny
Club Deaf Panther spawns you into a dining hall, bombarding you with more enemies than you’ve had to face up to this point. After defeating all the enemies in the room, head through the only open doorway on this floor. The Club Deaf Panther Map is sitting on the ground beside the staircase you need to take.
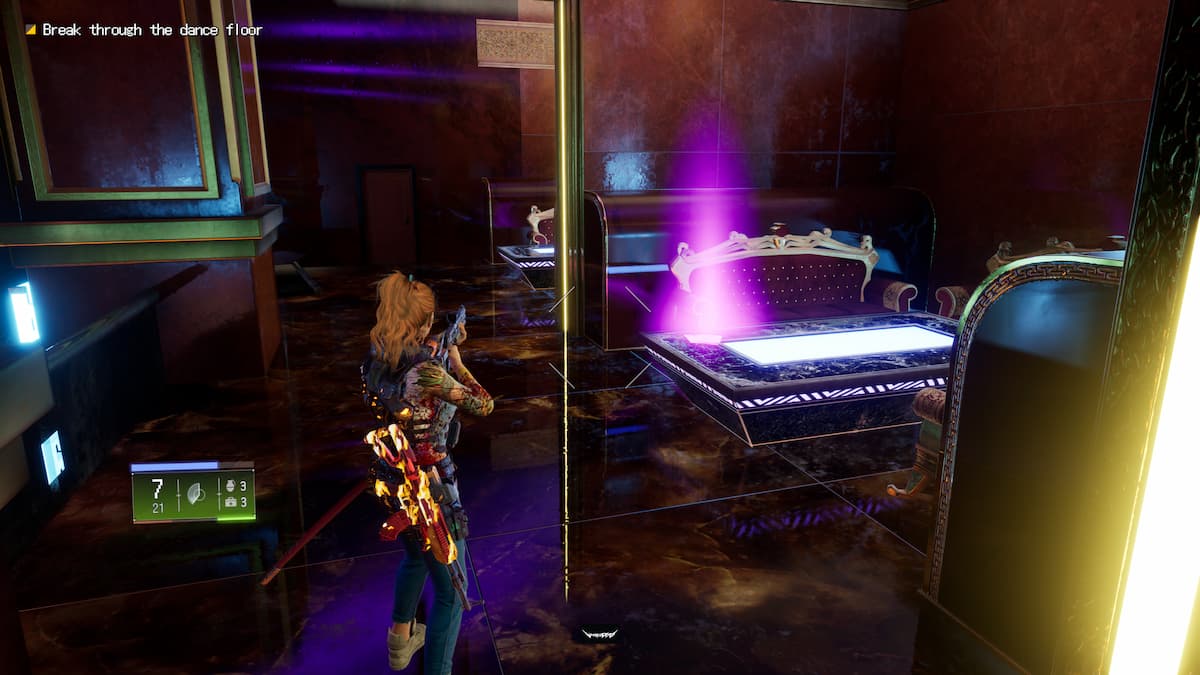
Club Member’s Card Location
 Screenshot by GameSkinny
Keep moving along the stage until you have to travel down a flight of stairs on the opposite end of the club. You’ll end up passing through a red-carpeted hallway on the first floor. Just past this hallway, an enemy ambush takes place in a dance room with eight support pillars and some light fixtures hanging off the wall directed toward the dance center of the room. After killing everyone, you can find the Club Member’s Card on the podium with the DJ equipment.
Paper Napkin Location
 Screenshot by GameSkinny
Shortly after the dance floor, you’ll enter a much larger room with dining arrangements, a performance stage, and eight chandeliers hanging from the ceiling. This room hosts another few waves of enemies. Once the coast is clear, take the stairs on the opposite end from the stairs you entered the room through. The Paper Napkin is found in the middle booth upstairs.
Mustafa’s Gang Report 1 Location
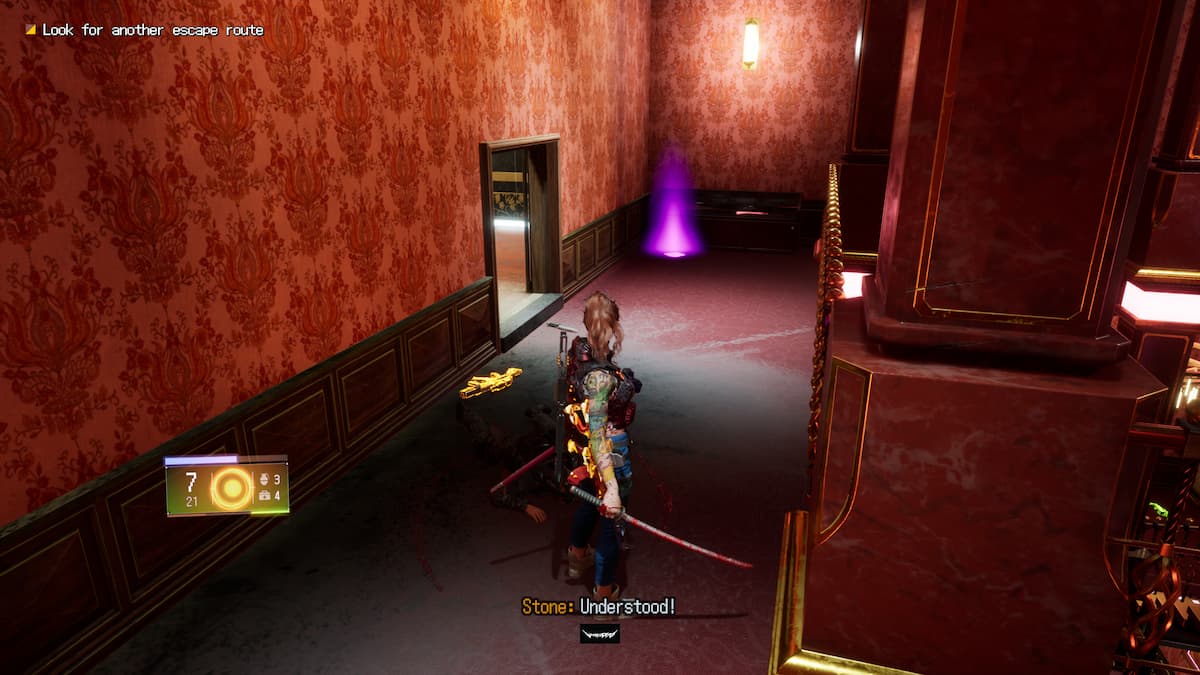 Screenshot by GameSkinny
There’s a checkpoint immediately after the last room. With only one way forward, fight your way up the flights of stairs until you reach the top. At the very end, there’s only path to take through an open doorway. Mustafa’s Gang Report 1 is at the end of the hall just past the doorway.
Mustafa’s Gang Report 2 Location
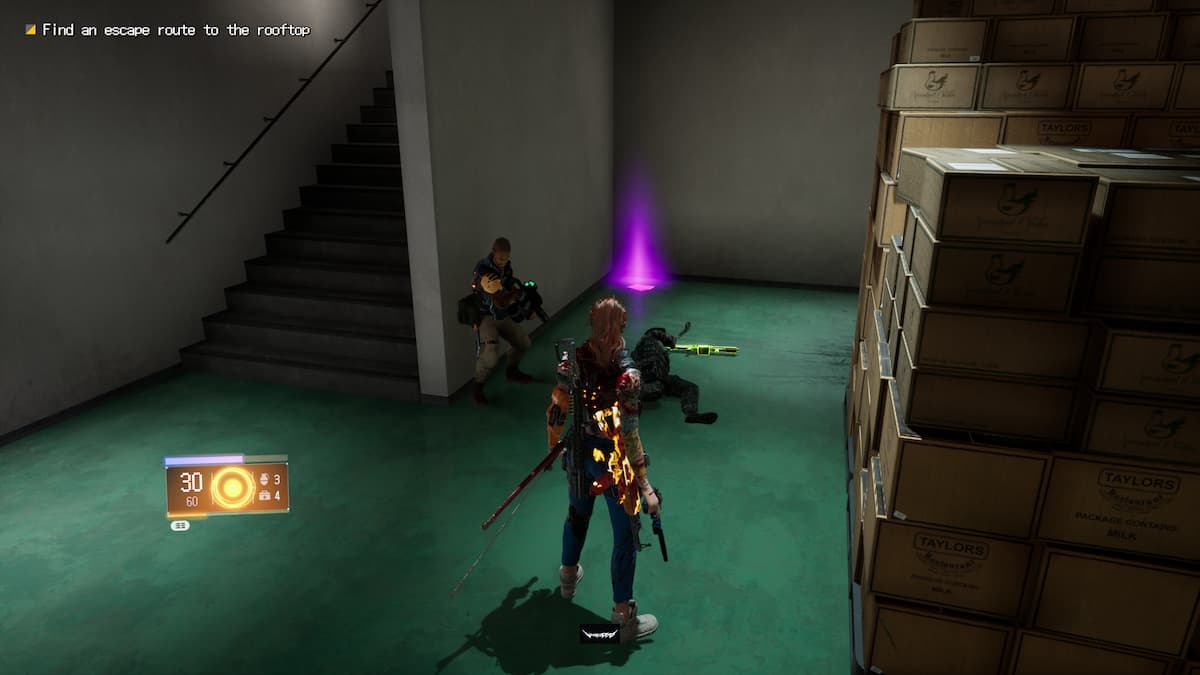 Screenshot by GameSkinny
After the next checkpoint, you’ll be funneled through an encounter with two sword-wielding foes in a kitchen followed by multiple gun-toting enemies in the room past the kitchen. This next area looks like some sort of storage room, filled with stacked boxes and a forklift. Before heading upstairs, check out the ground in the corner of the room closest to the staircase. This is where you’ll find Mustafa’s Gang Report 2.
Those are all the collectibles in Club Deaf Panther, Wanted: Dead‘s third mission. To keep the collecting going, head over to our extensive Police HQ guide, which you hopefully have been keeping track of between missions before reaching this next point in the story. We’ve got many other walkthroughs for collectables among our Wanted: Dead guides collection.


Published: Feb 2, 2023 11:55 am