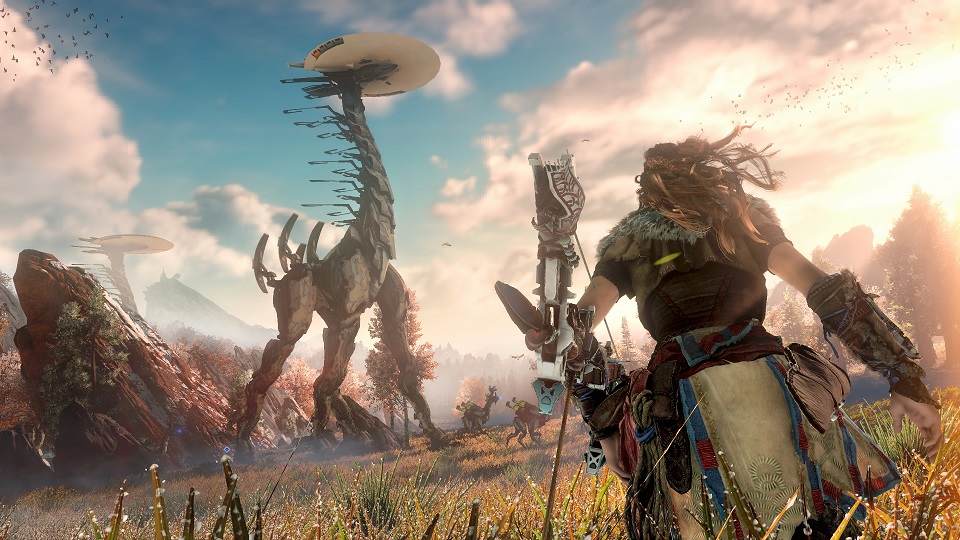
So you’ve made it beyond the Sacred Lands and are now trekking around the world of Horizon comfortably. Packs of Tramplers are nothing to you, Snapmaws flee when they hear you coming, and Glinthawks… well, they’re still annoying as hell. You’re starting to feel pretty good about your hunting abilities, I’m sure.
And that’s when you see them: the biggest, baddest of the machines stomping around the landscape or flying overhead, bristling with enough weapons to level a town. Think you’re ready to take them on?
Whether you’re suddenly having second thoughts or preparing to throw yourself into the fray immediately, this guide will help you ready yourself and give you pointers on how best to bring down the toughest foes the lands beyond the Embrace can offer.
 (Sadly, we never get to fight a Tallneck. Maybe in a sequel!)
Equipping Yourself
While there are only a handful of weapon types in Horizon, every one of them has their uses and strengths and can make a fine addition to your arsenal. Keeping yourself well stocked with a variety of useful weapons and armour can make your life so much easier and give you a number of different options. When hunting the larger machines, let’s talk about what you’ll want to take with you.
- Hunter Bow: Aloy’s default bow is a reliable and fast firing weapon to fall back on, but it’s the upgraded Carja and Shadow Hunter Bows that you’ll really want, as they have access to Hardpoint Arrows. These are relatively inexpensive and have the best balance of damage and tear in the game, so they’re perfect for targeting components and ultimately downing the machine.
- Sharpshot Bow: The low handling on this bow makes it slow to aim and fire, but the Precision Arrows of later upgrades do a whole chunk of damage, so they can be useful for dealing killing blows on exposed weak points. Most importantly, this weapon gives you access to the ridiculously powerful Tearblast Arrows, which will shred important components like paper and can easily turn the odds in your favour.
- Slings: While slightly trickier than bows to aim and fire, Slings do an absurd amount of either regular or elemental damage. Whatever your playstyle, having one of these can make your life so much easier for dishing out huge hits or triggering those all-important elemental effects.
- Ropecaster: Don’t let the lack of damage fool you — the Shadow Ropecaster is an immensely useful item. Hitting a machine with enough shots will tie them down and keep them immobilised and out of the fight, which is immensely useful against multiple opponents. It also makes them easy to exploit, allowing you to position yourself to best strike at weak points or elemental canisters. Just remember that each bit of damage on a tied up enemy reduces the immobilisation time!
- Armour: Having a variety of good armour is helpful for dealing with many situations. Be sure to equip yourself with what will mitigate the most damage for each enemy; I usually fall back on the Nora Protector Heavy for when machines charge at me, but the elemental and ranged armours are also beneficial. And if you’ve got the Ancient Armour, well… you don’t really need this guide, do you?
- Healing Items: When you’re about to tackle a larger machine, you’ll want to keep your medicine pouch as full as possible and carry a stock of healing potions. Enough said. As for other consumables, I find the resistance potions to be largely unnecessary, though health boost potions can work in a pinch. Antidotes are also helpful, simply because they eliminate any Corruption damage over time you might currently be taking, which saves a lot of health in the long run.

Combat Tips
Each machine we’ll be covering has specific approaches to dealing with it that I’ll go into, but for now, here are some handy tips that will help you in dealing with any situation that you might encounter.
- Focus! Using your Focus to study a machine can make all the difference. It’ll fill your notebook with all the specifics components and weak points you can utilise in the coming battle, as well make them glow briefly once the Focus is deactivated for easier targeting. This knowledge will give you an edge in the fight if you utilise it, and leads into the next point:
- Be Prepared! When hunting the bigger machines, you want to take your time and prepare as best as possible. Look around for other machines that it might call on to help, and consider destroying or overriding them to make life easier. Know your environment so that you can retreat, take cover, or hide in tall grass as needed. Learn what elemental types are the most effective and utilise them in the fight. Be ready for as many situations as possible before you pull your bowstring!
- Make the first strike count! Using all the above, you can plan out your first strike to maximise effectiveness and tip the scales in your favour from the outset. Whether it’s sneaking or luring your target in for a Silent Strike, exploding a canister, or eliminating a heavy weapon immediately, that first shot can be the difference between a slugfest or a short scrap.
- Hit the Components! This is established early in the game and should be something you do as second nature, but for the larger machines it’s absolutely crucial: hit the components. Knocking these off will instantly do a chunk of damage to the machine, and it will often disable systems or attacks that it might otherwise use against you. In the same vein, be sure to hit any elemental canisters with their respective types to trigger an explosion and seriously cripple any machine in the area.
- Traps are your friend! While not necessary to succeeding, laying down traps and Tripcaster wires before the engagement can allow you to soften up an enemy considerably or buy you opportunities to pick off key components.
- Dodge! Learn to use Aloy’s dodge roll, then learn to abuse it. Rolling out of an attack will almost always negate the damage and leave you invincible for the duration of it. When you see the warning of an impending attack, hit the roll button and get away from it. If you do it right, it’s almost effortless to take on even the bigger enemies without taking a bit of damage. Roll, roll, roll. I can’t stress enough how important it is to get good at this!
- Go for the eyes, Boo! In addition to damaging components and causing elemental effects, every machine has points on their body that will naturally take more damage and may not necessarily be marked on the Focus. Learning where these are is helpful if you can’t find a good shot on a component you know is still there. If in doubt, aim for the eyes — they almost always take more damage than most spots!
- Damage is damage however it’s done! Remember that no matter what components may or may not still be active on a machine, its health is a flat numerical figure. Just because you can’t hit a specific weak point or only deal a glancing shot, every hit will still whittle this down. Hitting armour may do little initial damage, but it’ll open up more of the machine to target with harder hits or even reveal new weak points. Stay in there and chip away, and it’ll eventually be defeated.
Getting in the Zone: A note about Corrupted machines
By the time you’re looking at hunting the big machines, you’re probably well acquainted with the Corrupted zones that dot the map. As you progress, the types of machines you’ll find in some of these zones will continue to escalate — some of the higher level zones will also contain Corrupted equivalents of the larger machines for you to fight. Aside from the Stormbird, every other machine in this guide will be present in at least one of these zones.
Rather than go into full specifics for the Corrupted equivalents, this is a general note to dealing with them, as the fights themselves don’t change overly much and the strategies outlined for individual machines still apply.
Corrupted machines are higher level than their regular equivalents, and therefore hit harder and have more health. In addition, they will leave patches of corrosive corruption on the ground that will hurt Aloy if you walk over it, as well as apply it if they hit you physically. This corruption will leave a damage over time effect on you with duration dependent on the severity of the contact.
Using an Antidote will clear this completely and provide some resistance to future applications, however.
As a tradeoff for this, all Corrupted machines have a weakness to fire damage in addition to any other weaknesses they might possess. Setting up the battlefield with Blast Wires from the Tripcaster or using firebombs from a Sling is therefore a fantastic way to deal with them and whittle down their increased health pools.
Beyond this, Corrupted machines are just the same as their regular versions. They still have the same attacks and weapons, and still have the same components to break or exploit. So with that, let’s get into the real meat of the guide.
Fighting the Big Stuff
So by now you should hopefully be feeling more comfortable in your equipment and general strategies for hunting these machines. Without further ado, it’s time to cover each large machine and what you should expect from them.
Behemoth
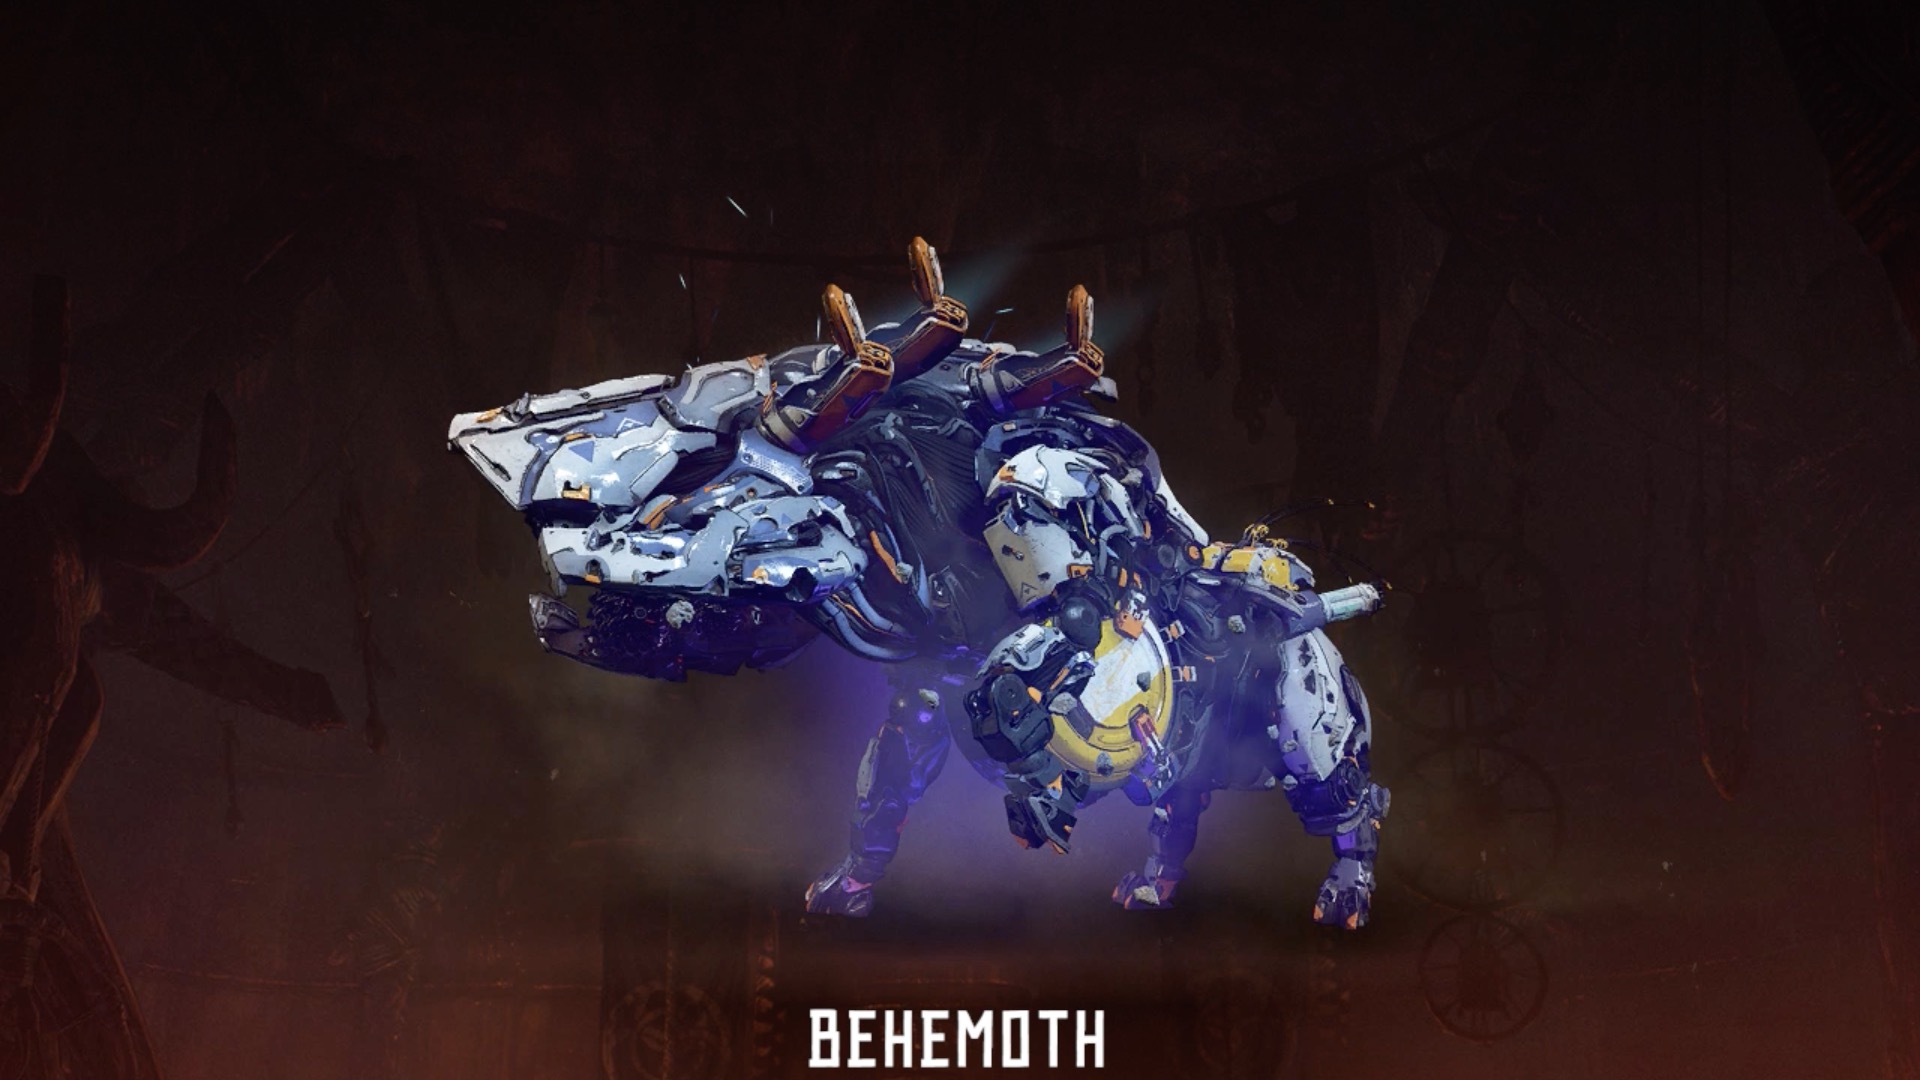
Of all the large machines, I find the Behemoths the easiest to fight due to their easily exposed weaknesses and multitude of large components to target. But make no mistake; they will still flatten you if you’re not careful and don’t treat them with the respect their size deserves. Most importantly, these are the least likely large machines to be encountered on their own, so be ready for backup from smaller machines and other Behemoths!
Attacks: The Behemoth will attack you either by charging at you and slamming its front legs and head against the ground, or else it will resort to spitting a stream of rocks at you from range. Fighting them with some cover handy is advised, but otherwise it’s fairly easy to roll out of the heavily telegraphed attacks.
Elemental Attributes: Behemoths sport a resistance to Thunder attacks, and otherwise have no base elemental weaknesses.
Components: The most instantly recognisable components on a Behemoth are the three Force Loaders on each side of its head, for a total of six. These are large, easy to hit, and removing them all disables the Behemoth’s rock throwing attacks. In addition, it also sports a container on its underside like the Shell-Walker, and destroying the clasps will knock this loose. Finally, there are two Freeze Canisters on the rear of the machine, as well as a Power Cell on top of its head that is hard to spot due to the Force Loaders and additional armour plating.
Strategies: There’s not a great deal of complexity to a Behemoth fight — your primary goal is always going to be disabling the Force Loaders on its head as best as you can. Tearblast and Hardpoint Arrows are my preferred method for doing so. If you’re able to start the fight with a Frost Arrow to the Freeze Canisters, then that’ll amplify the damage it takes and make things much smoother.
Once that’s done, hitting the Power Cell with lightning weapons or breaking off the container clasps should be enough to get the Behemoth into a weak position, whereupon you can finish it off by pumping it full of arrows. The eyes take double damage and are a good place to aim your shots!
Rockbreaker
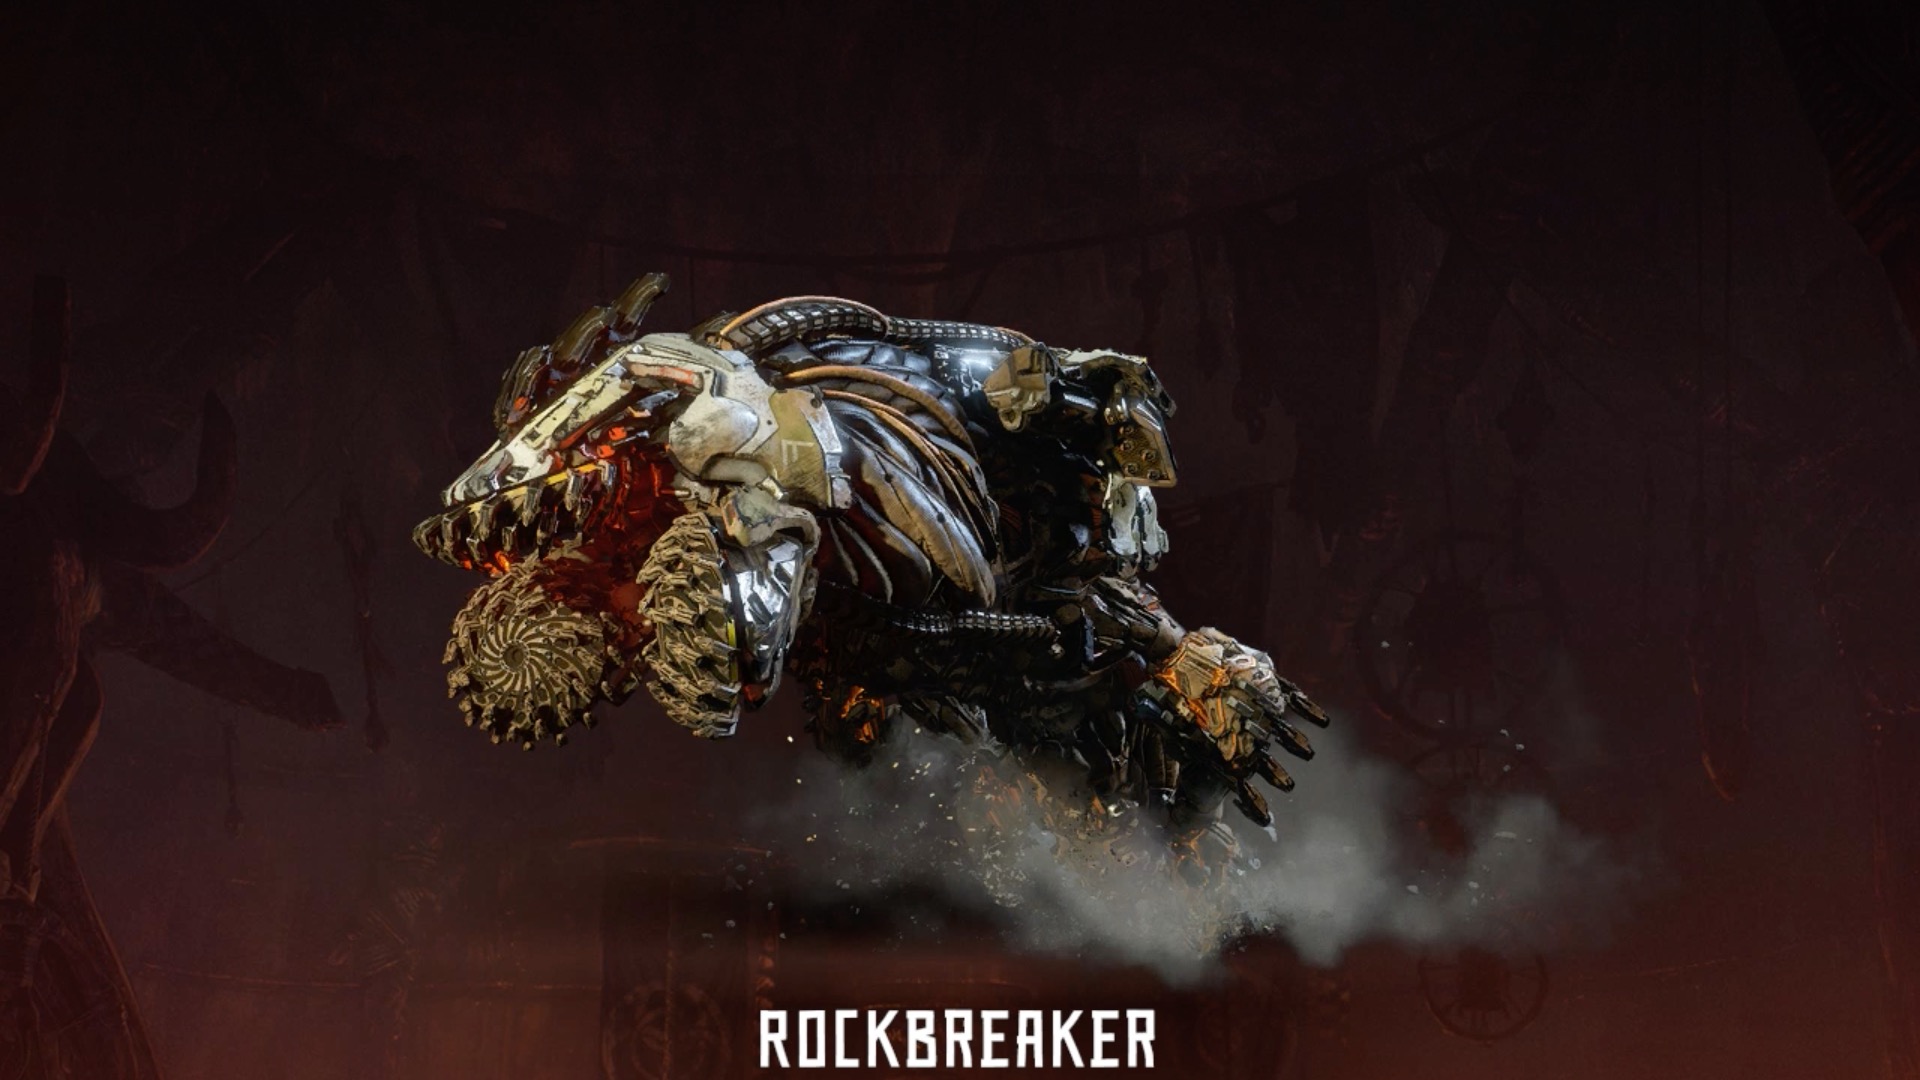
First encountered in an optional sidequest as a surprising and quite tough boss fight, Rockbreaker encounters are scattered throughout the game and are usually pretty damn rough. Much of their difficulty can be circumvented once you realise that they’re completely blind, relying entirely on sound and tremors to detect you. As such, try to move quietly and slowly whenever you can rather than running around, and you’ll find a much easier time of things.
Attacks: The primary means of the Rockbreaker dealing damage is burrowing under the ground and emerging from beneath you. This can be dodged, but the timing needs to be saved for the last second or you’ll still take some damage; you’ll probably get hit a few times before you pick up the rhythm.
Otherwise, it’ll resort to half-submerging and spitting a stream of rocks into the air or at you, so get some distance or cover between you to mitigate this. Finally, even on ground the Rockbreaker will launch itself at you, so be sure to roll away if you see it lunging for you.
Elemental Attributes: Rockbreakers are resistant to fire damage, but they’re weak to freezing. Not only does this have the usual double damage effect, but the freeze icon remains on the machine even when underground, so it can help you track its movements.
Components: The largest and most obvious parts of the Rockbreakers are their four digging claws attached to each limb. Taking all four out keeps the Rockbreaker above ground and makes it much easier to deal with, so this should be your first priority.
Otherwise, the only notable features are the green fuel sac on its belly and the blocky exhaust port on its back. If not aiming for the claws, both of these should be your targets, as they take double damage. Sinking enough damage into the fuel sac will also trigger an elemental explosion, but by that point you’ve probably just about killed it already.
Strategies: Fighting a Rockbreaker is very much a war of attrition and survival. There’s nothing too fancy to it: aim for the digging claws to eliminate its underground forays, and then stick it with as much damage as you can while avoiding the rest. Freeze bombs from the sling are your best friend and will dramatically speed up the fight, so be ready when it emerges!
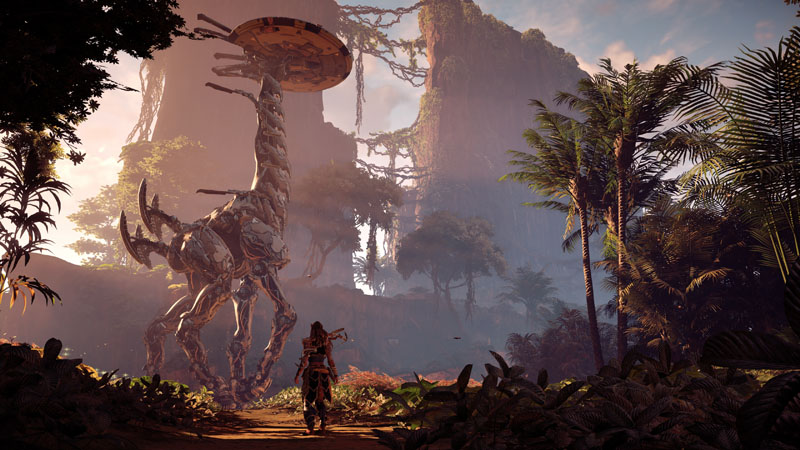
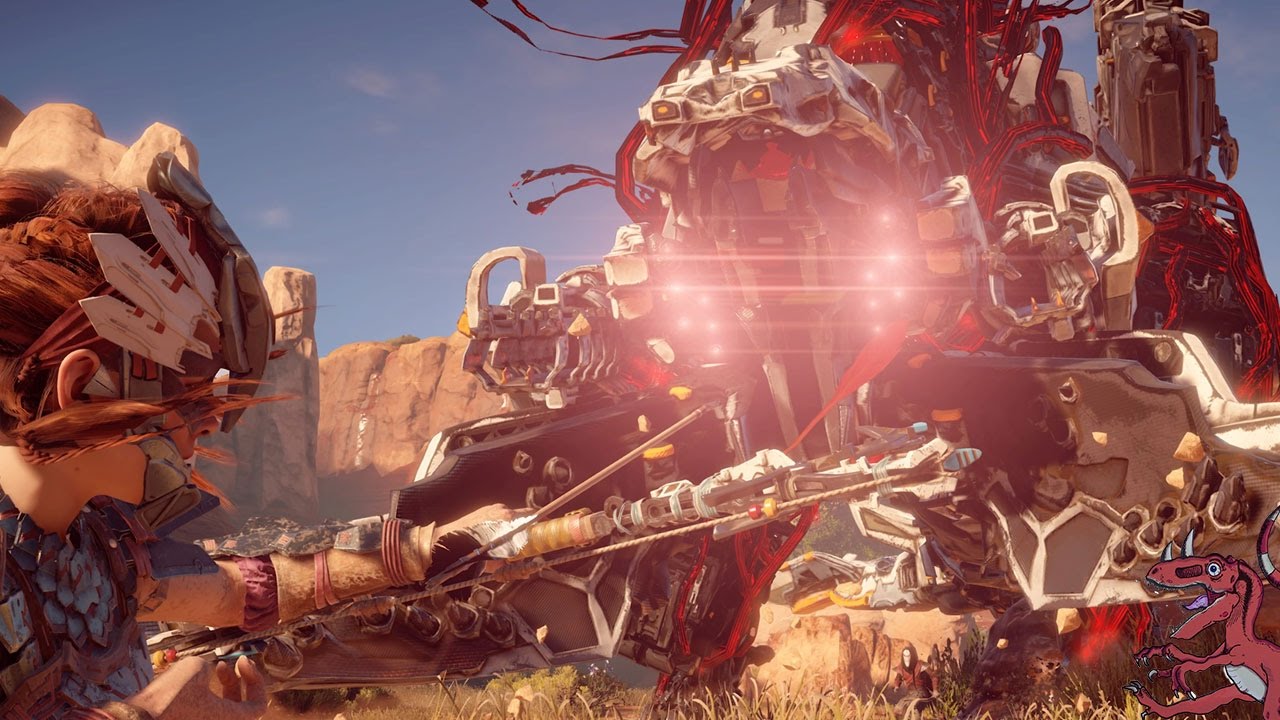
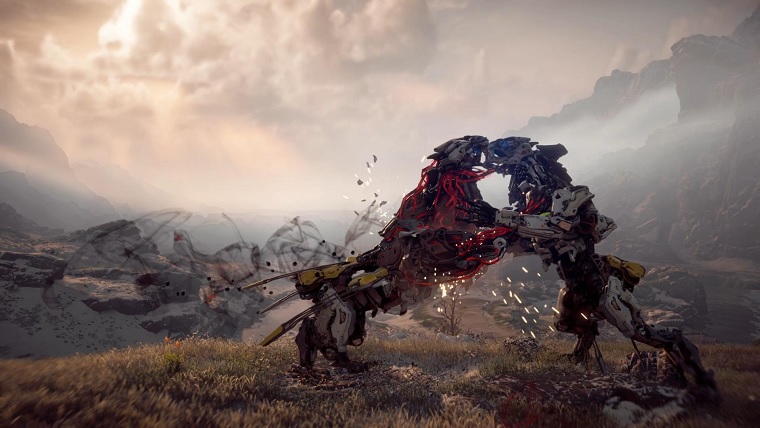
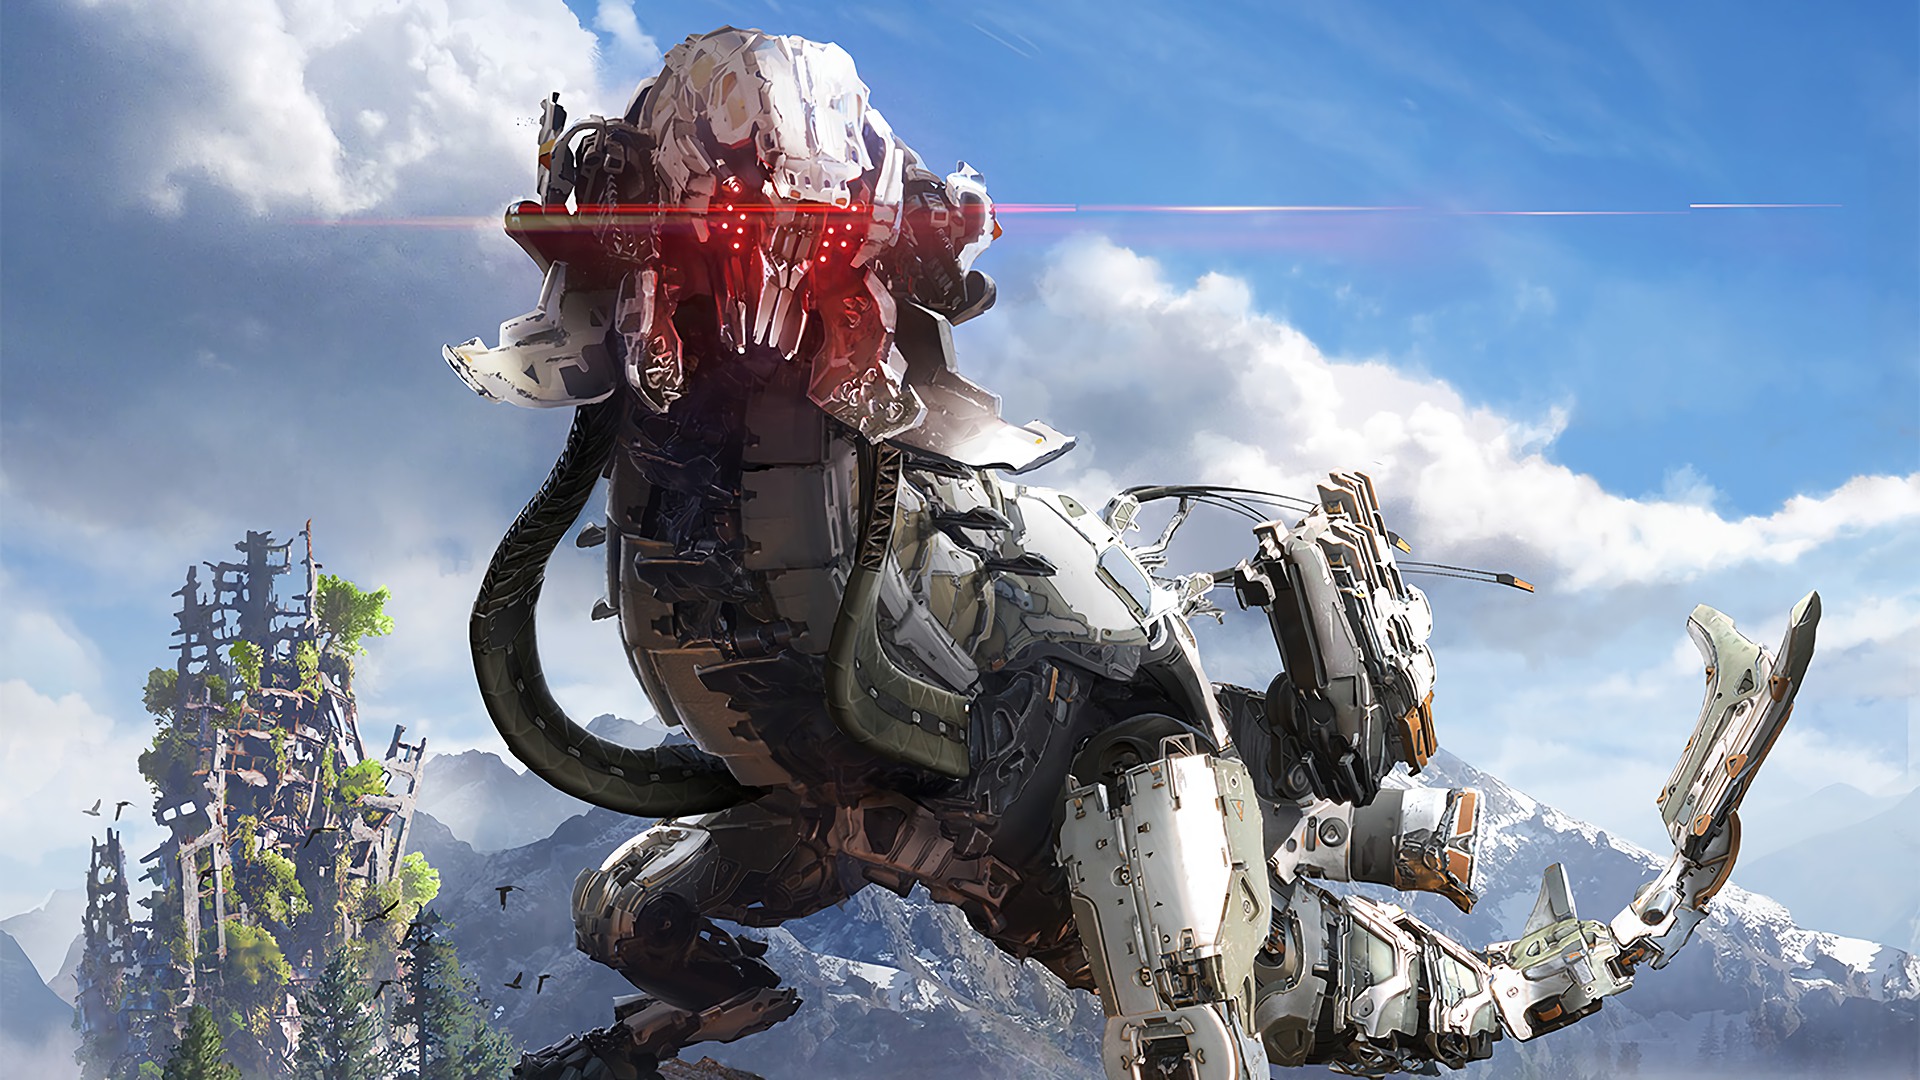
Thunderjaw
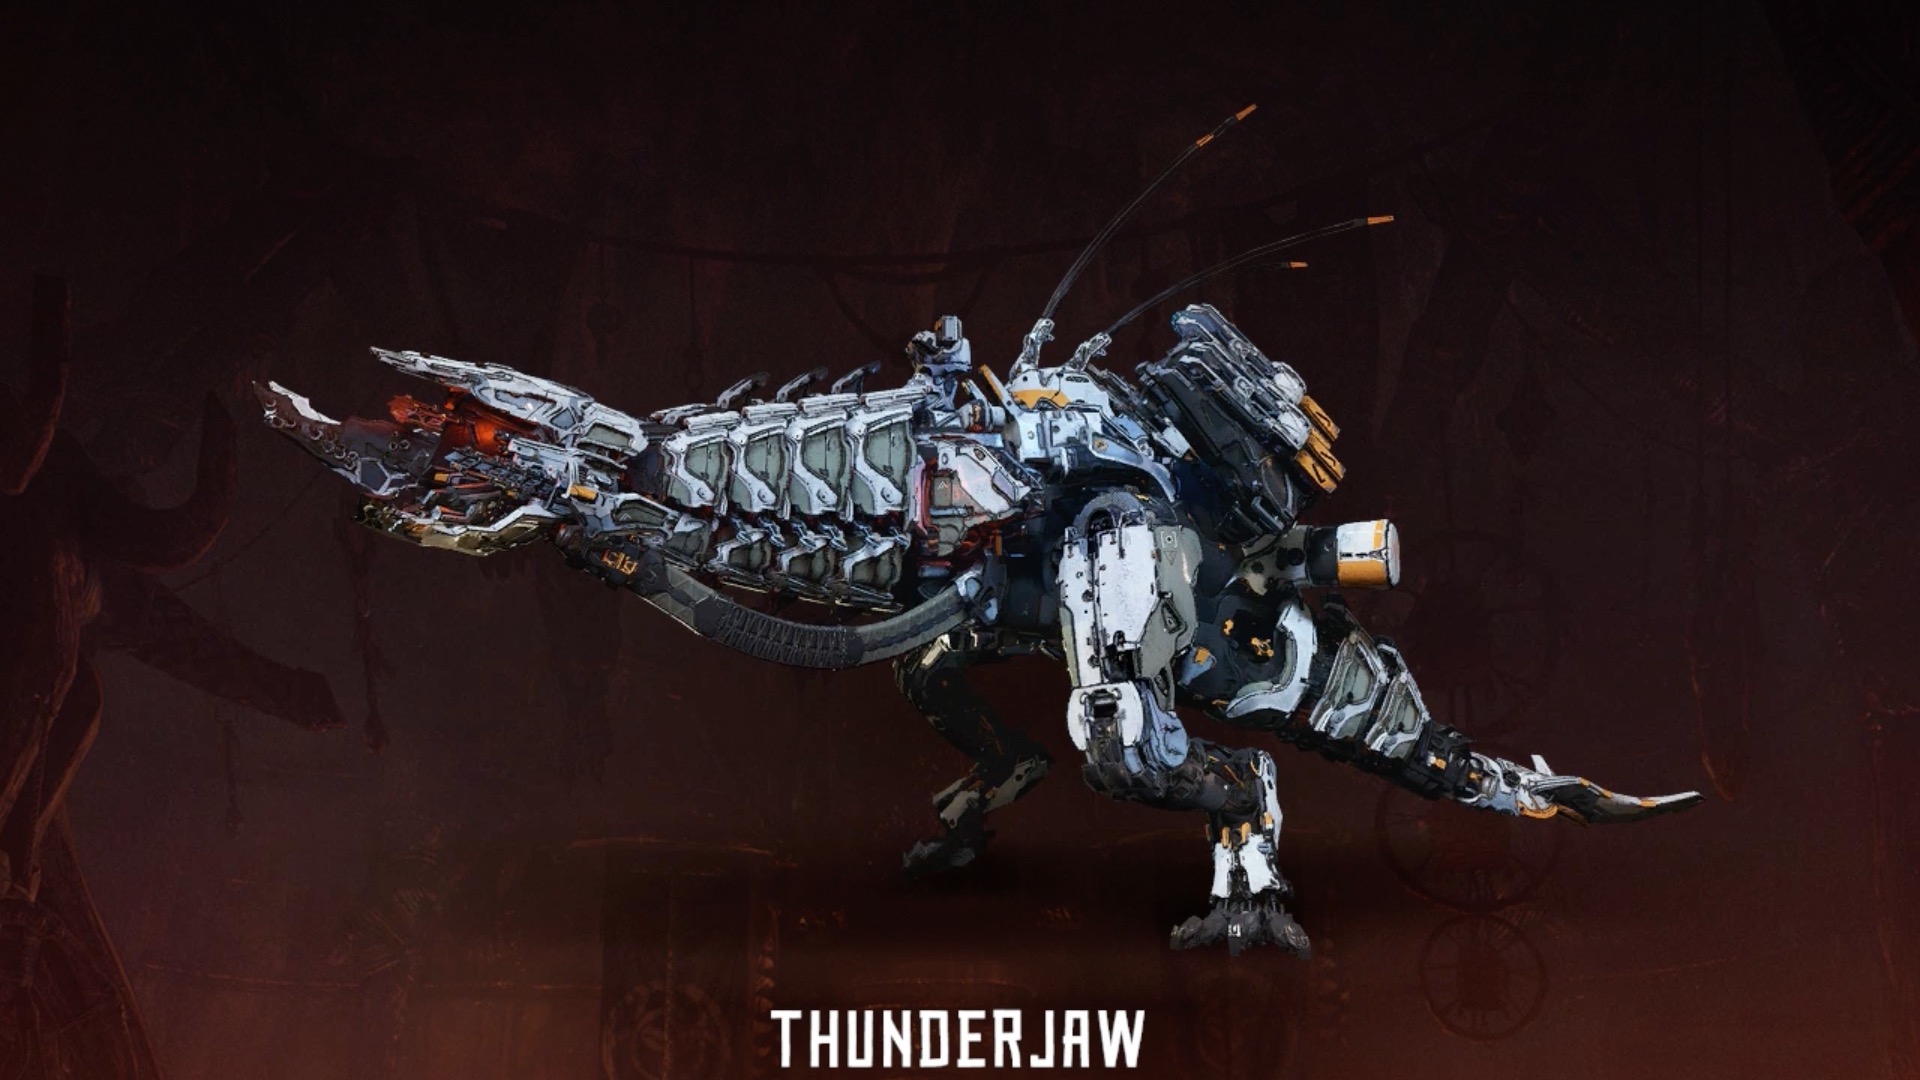
Perhaps the most iconic of all the machines in Horizon, the T-rex-esque Thunderjaw is easily recognisable and at once intimidating. Bristling with a ridiculous amount of weapons and heavy armour, only the brave or the foolish dare take these on without lots of preparation, and even then you’re in for a real fight.
Attacks: The Thunderjaw is as much a weapon as anything it’s armed with, and you’ll need to always keep an eye on it charging at or otherwise lashing out and striking you. Once you deal with its other weapons, this will be happening a lot, so it’s best to learn early in the fight.
As for the actual weapons, these consist primarily of two large disc launchers on its shoulders that fire floating laser-spitting discs. It can also rapid fire laser shots from the side of its head, as well as charging up larger shots from its mouth. Finally, it has a very large melee sweeping attack from its tail that you’ll definitely want to watch out for.
Elemental Attributes: Despite sporting the full variety of canisters beneath its armour, the Thunderjaw has no real elemental weaknesses and sports a resistance to shock damage. Don’t expect to paralyse one easily.
Components: There are a huge amount of components on a Thunderjaw, though most of them are concealed under a ridiculous layer of armour plating. The most obvious are the pair of large disc launchers on its sides, which do the bulk of its damage and make for effective heavy weapons if removed and wielded. The Thunderjaw also has a pair of lasers mounted on the side of its head that can be disabled by breaking them off. Its tail has a large component on the tip that can also be broken off to disable its sweep attack. In addition, there’s a radar sensor on its back that will detect Aloy even if you’re crouching in tall grass, so it needs to be removed before a stealth attack can be considered.
Next, all three types of elemental canisters are concealed within its frame, usually on the underside of its belly and tail, but these are all hidden under armour plating and extremely difficult to get to — it’s worth noting, but you’ll probably not need to consider them at all. Finally and most importantly are two weak points: the data nexus on its head, and the heart area within its chest. These take extra damage on hit and are also covered in armour, but I’ll address them in the strategies!

Strategies: Getting a good first strike in against a Thunderjaw is tricky, as its radar means any attempts to lure or distract it will have it finding you quickly. Your best bet is to get straight into the thick of things. Aim to tear off the disc launchers ASAP, then focus on either the head cannons or the tail component in order to weaken the force it can bring to bear. You might even leave the head cannons on, as while they can be a nuisance, they’re also not extremely hard hitting and you can chain roll out of their fire.
Once the major weapons are off, the tough part of the fight begins: getting through the large health pool of the machine. Attempting to use freeze or damage bombs is a good means of whittling it down, and if you’re able to get to one of the fallen disc launchers, spamming its attacks can do a huge amount of damage to the Thunderjaw… it just runs the risk of leaving you exposed.
Instead, my personal strategy once the weapons are removed is aiming for the head and the heart weak spots. Pumping damage into its eyes works nicely, but striking at the heart can offer triple damage! The best way to get at it is to use Tearblast or Hardpoint Arrows on one of the large cylindrical armour pieces on the Thunderjaw’s hips to eventually remove it. Once exposed, the machinery beneath those cylinders is connecting to the heart — landing a Precision Arrow or Blast Bomb in that opening will deal massive damage and help you bring down your foe much quicker. Whatever part you aim for, be careful! Even a disarmed Thunderjaw is a threatening opponent.
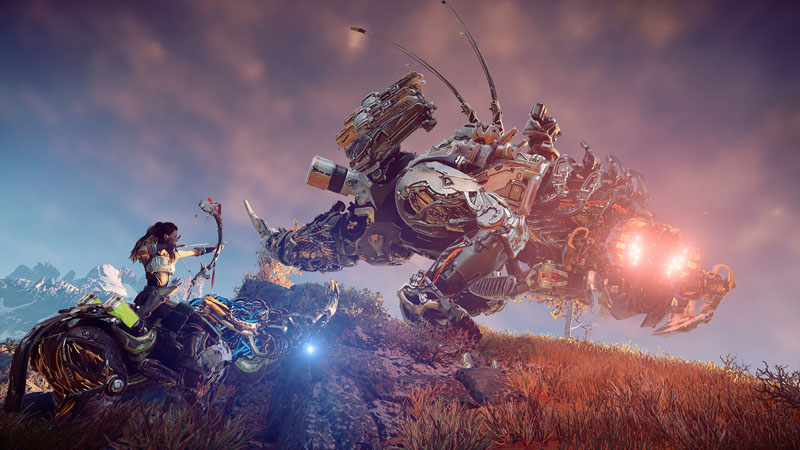
Stormbird

Just when you think you’re about to get spotted by another pack of Glinthawks, you realise that there’s only one up there… and it’s a lot bigger than usual. Meet the Stormbird! While not as deadly as a Rockbreaker or Thunderjaw in my opinion, the high mobility and flight of the Stormbird can make it a real nuisance. But like all things, it is beatable! Thankfully you’ll only ever have to fight these one at a time.
Attacks: The primary attack of a Stormbird is the lightning cannon on its chest, which it will use to fire shock blasts at you while it’s above the ground. Once it’s on the ground, it can utilise a large tail sweep like a Thunderjaw, or it will smash its beak into the ground multiple times in quick succession. Occasionally, it will screech at you, which doesn’t do damage but will temporarily stun you and is more of a nuisance than anything. The biggest threat comes when it launches high up into the air, usually out of view, only to come diving back down onto Aloy and zapping the area around its landing point. Watch out for this and be ready to dodge!
Elemental Attributes: Like the Thunderjaw, a Stormbird has no primary weaknesses and is otherwise resistant to shock damage.
Components: The most obvious and important component is the large yellow lightning cannon in the centre of its chest. This is responsible for all its storm attacks. Each wing will also sport a number of Engines that will disable its dive attack if destroyed, but they can be hard to accurately hit while the machine is in motion. Speaking of hard to hit, a Stormbird also sports a pair of Freeze canisters on its neck that you will likely need to remove the lightning cannon to access. It also has a pair of Blaze canisters on the back of its hips.

Strategies: There’s little use for cover and tall grass against the flying view of the Stormbird, so once it sees you expect to stay in for the long haul. All attempts at downing a Stormbird practically necessitate removing the lightning cannon first, so get your Tearblast and Hardpoint Arrows ready to go. Once eliminated, taking shots at the Engines are your best targets.
This is a battle where the Shadow Ropecaster absolutely shines, however! A few ropes will tie the Stormbird down and give you the opportunity to target the normally very tricky to hit canisters. Doing this will take off a chunk of health and possibly allow you to more easily land high damaging bombs, so this is probably the most effective strategy for dealing with them. If you don’t have access to this method, it’ll boil down to a slugfest of attrition, so keep on shooting and you’ll drown them eventually. As ever, aiming for the eyes once the other components are taken out is the way to go.
Claim Your Reward
And that’s about all the knowledge you need to be well armed and ready to tackle the biggest game in Horizon: Zero Dawn!
Aside from the bragging rights, what does actually downing some of these bigger machines net you? Well, there’s a couple of trophies to be had by scanning and defeating all machine types in the game, so there’s that. Most importantly, every large machine you bring down is guaranteed to have at least two purple modifications amongst their loot! If you can farm up the larger machines, you’ll be able to stock up on powerful modifications and get your gear to the best state you can in no time at all, which should make the later story fights and Corrupted machines much less challenging.
So what are you waiting for? Take your newfound knowledge and go out to assert dominance over the machines of Horizon! And should you have any alternate tips or strategies, be sure to bring them up in the comments!