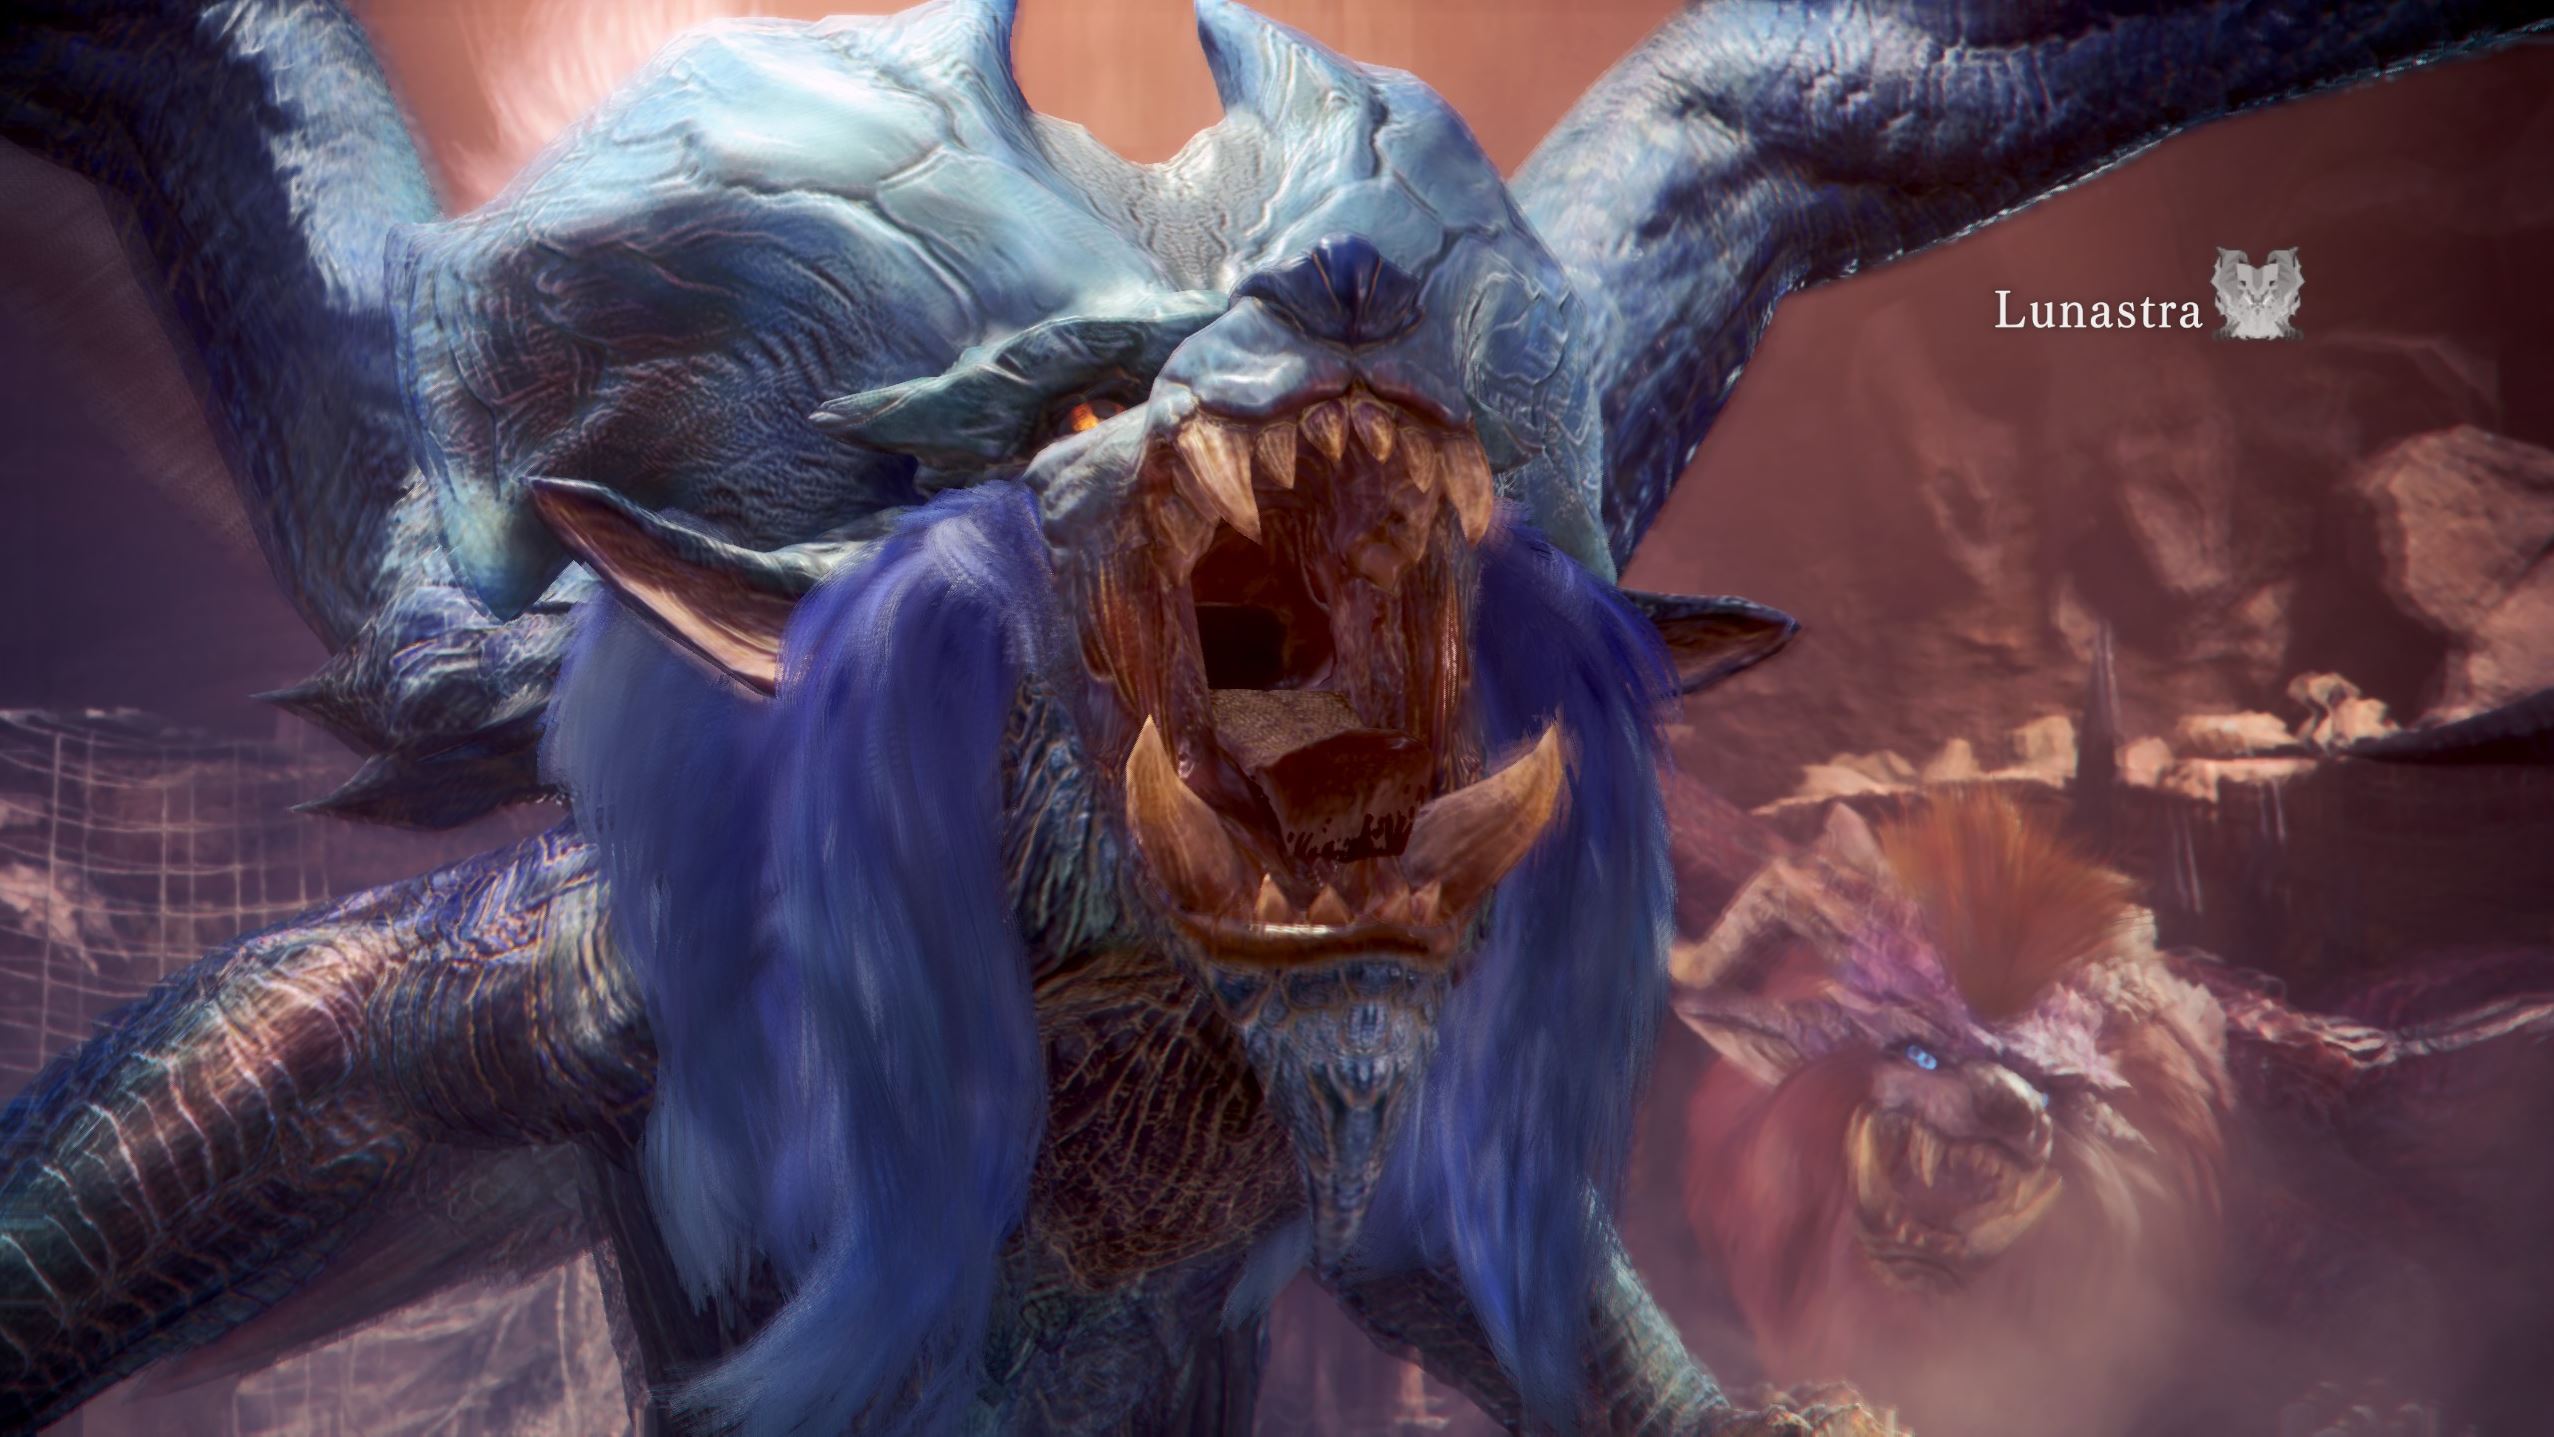
The Lunastra in Monster Hunter: World is the female version of Teostra, and she’s even worse than he is.
Unprepared hunters will find themselves carted in short order—but you won’t be unprepared, right?
Follow the tips in this guide to get geared up and ready.
Getting Lunastra to Show Herself
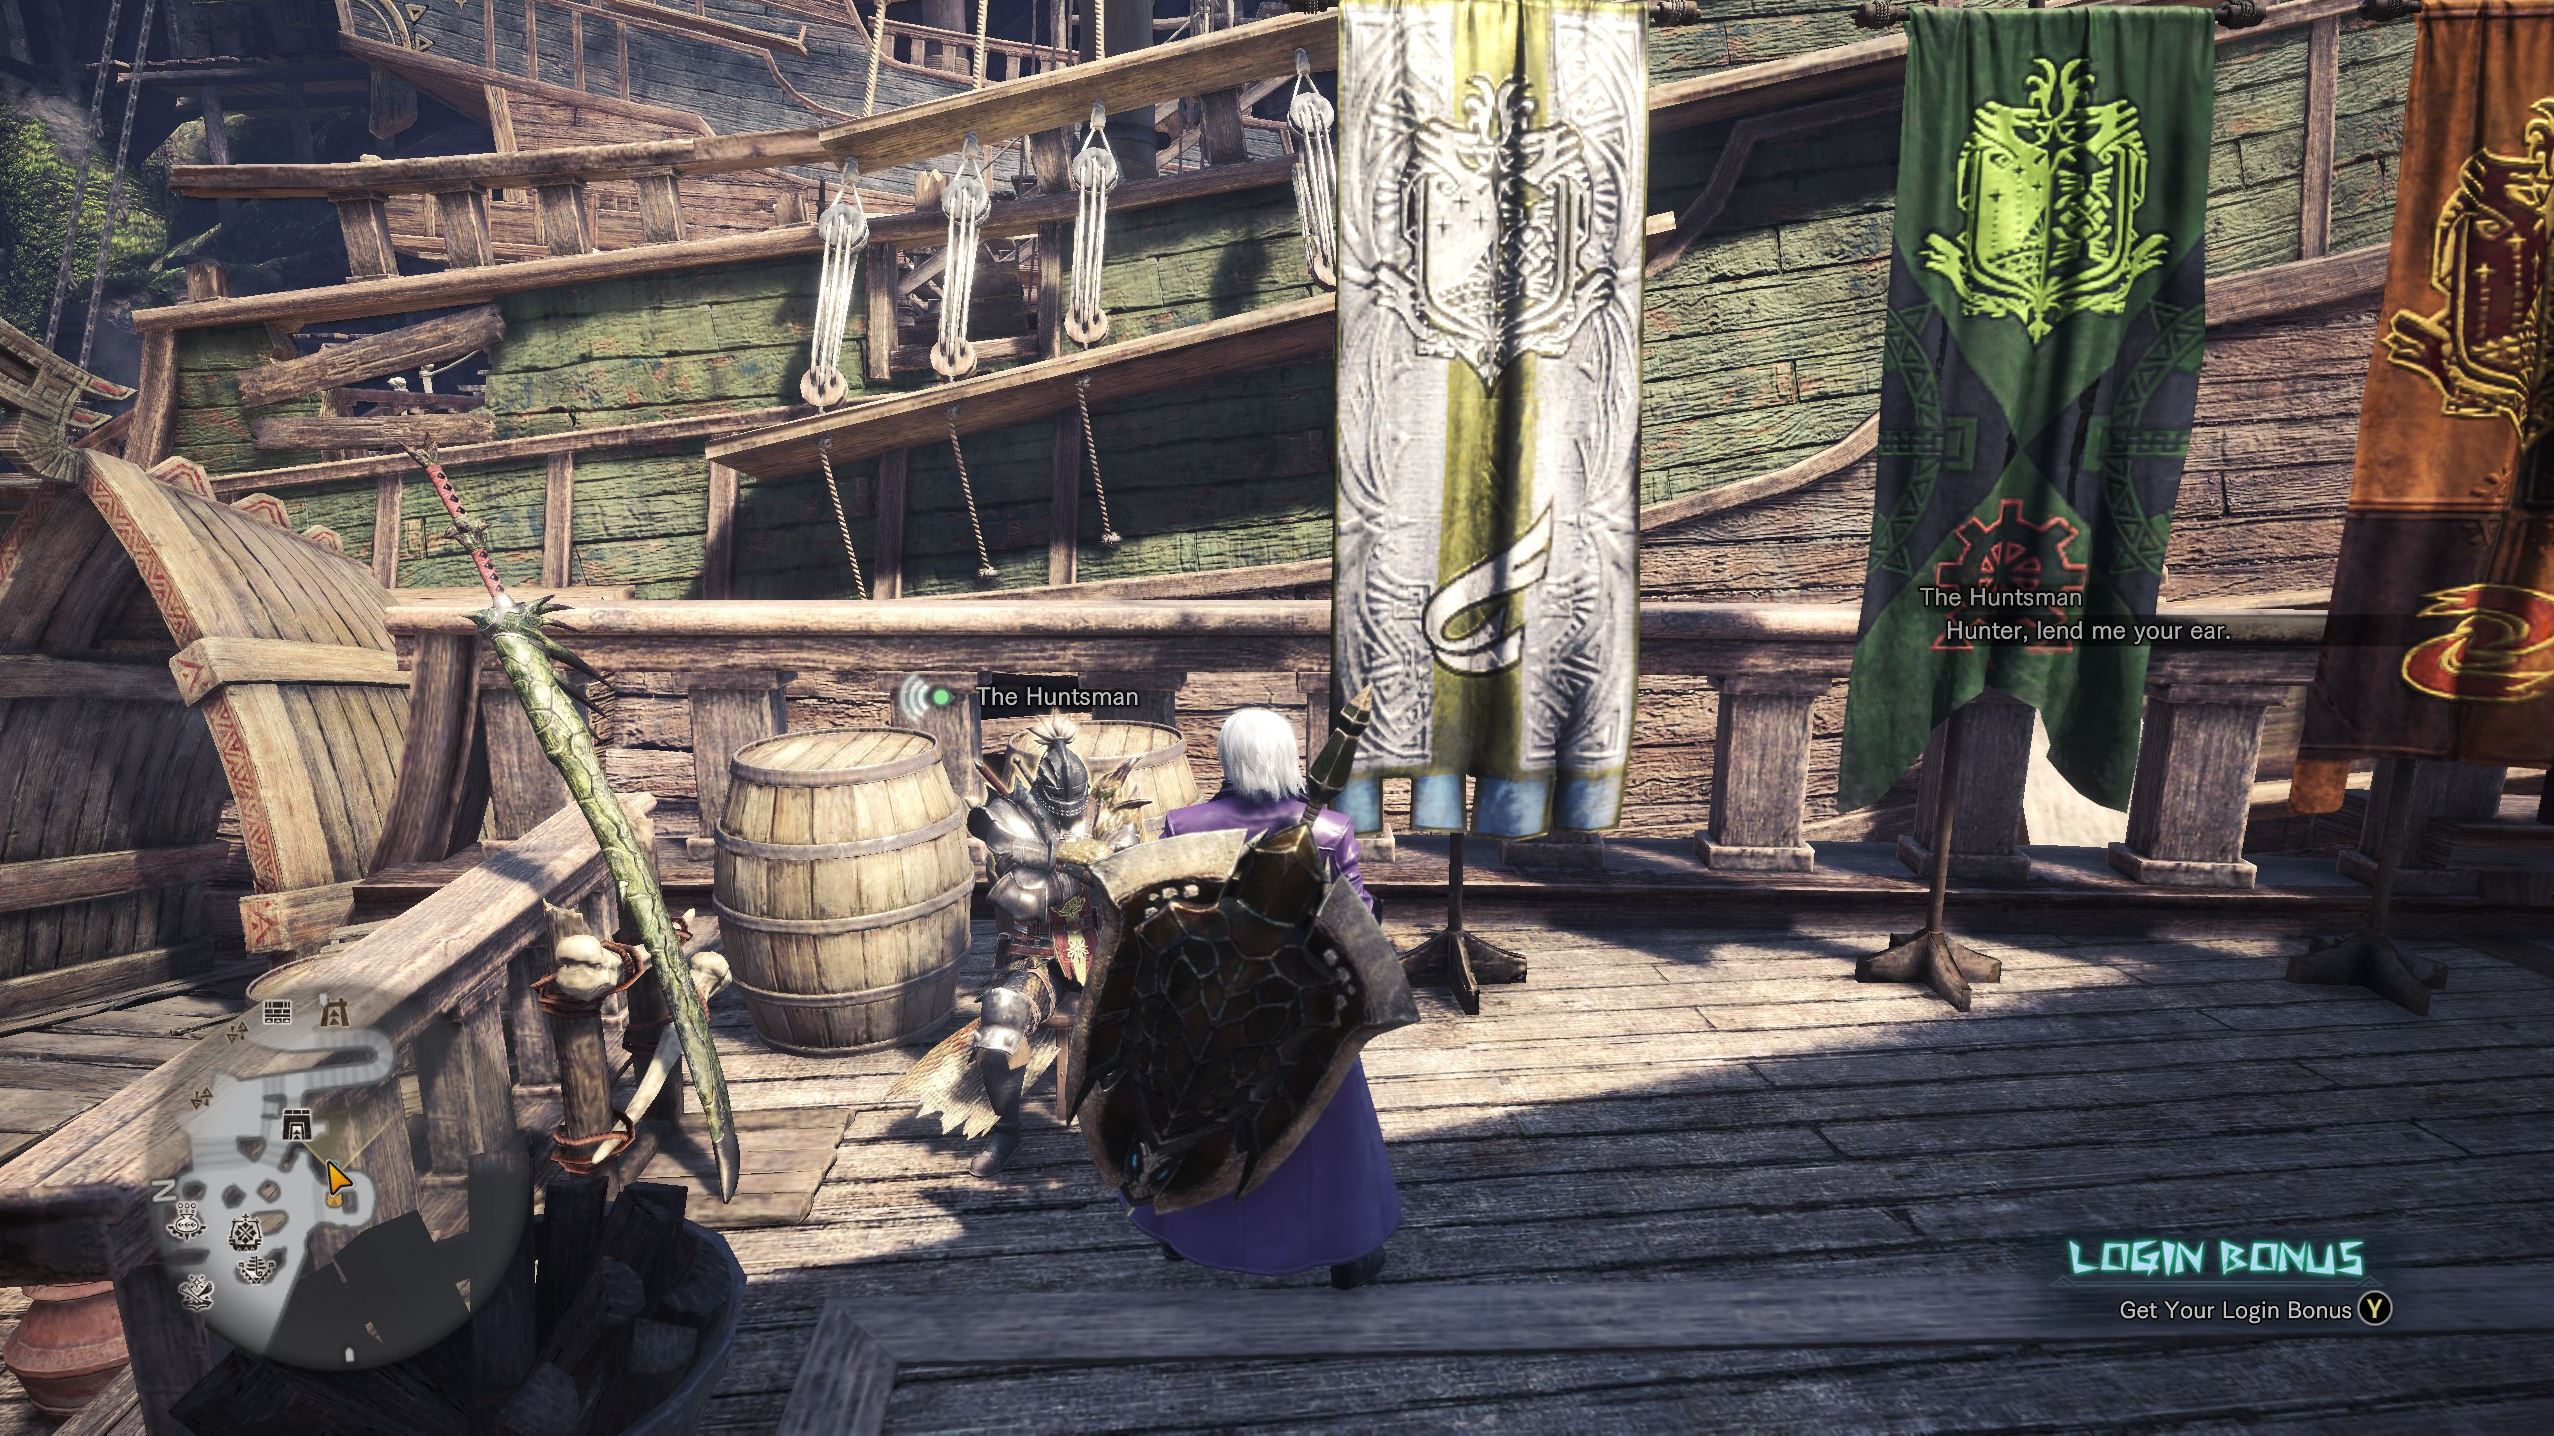
The Lunastra hunt isn’t as convoluted as Kulve Taroth, but it’s not quite as straightforward as most other hunts, either. Once you’re at least Hunter Rank 16 and able to take on 8-star quests, the Hunstman in the Tradeyard should have a quest called The Blazing Sun for you.
You need to take down a regular Teostra to lure out his female counterpart. No big deal, right?
Definitely bring a weapon with high elderseal to keep his constant DoT fire aura in check. If you don’t have a good elderseal weapon, ice would be an acceptable second choice.
Once you’ve put Teostra down, check in with the Hunstman again. This time, he’ll send you to the arena for a quest called Pandora’s Arena, but don’t head out just yet.
Lunastra General Stats & Pointers
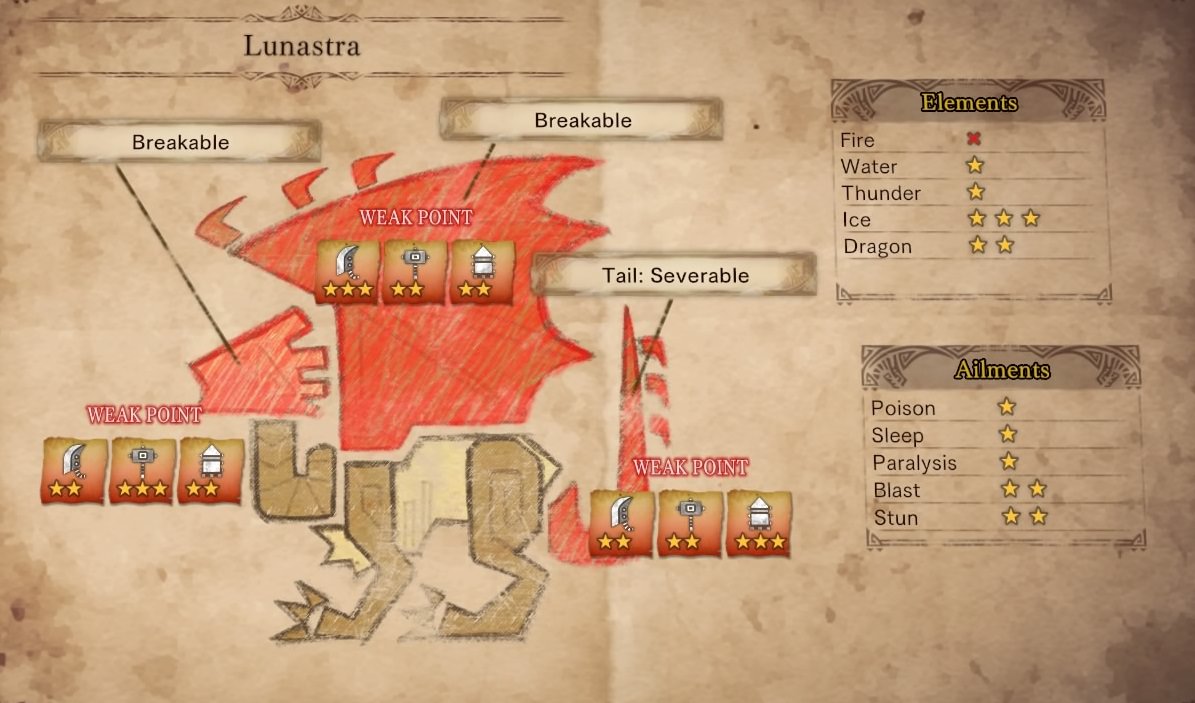
You really, really want a high elderseal weapon this time around. If you thought Teostra’s ultimate attack was bad, it pales in comparison to Lunastra’s. Keeping her constantly inundated with elderseal will ensure that she almost never uses her worst move, and it dramatically limits how often she’ll use the weaker version of it.
She’s also weak to ice, but elemental damage is a secondary priority—elderseal takes precedence.
When you stop by the canteen for your pre-hunt meal, consider ordering something that gives a large elemental resistance boost. If you get tagged by either of her two ultimate attacks, having lots of fire resistance may help you survive it (so prioritize armor with fire resistance as well). If you can get your fire defense up to 20 or higher, you’ll be immune to fireblight, which will also make your life much easier.
Bring a Fireproof Mantle for sure, and maybe a Vitality Mantle too. Both will help you withstand the incredible damage she’s capable of putting out. Finally, pick up a full stack of cool potions.

When you’re ready, launch the Pandora’s Arena quest. Consider running it solo at first; monsters in Monster Hunter: World receive huge buffs as soon as a second hunter joins your party, and Lunastra, in particular, may prove unmanageable for novices if she’s 150% stronger during your first attempt.
Fighting Lunastra — Round 1
Buff yourself like crazy (and drink your cool potion) before taking the rope lift to the arena entrance, as you’ll be dropped directly into combat after the cutscene if it’s your first time attempting this mission.
Simply being near Lunastra causes constant fire damage, which cool potions or the Fireproof Mantle will nullify.
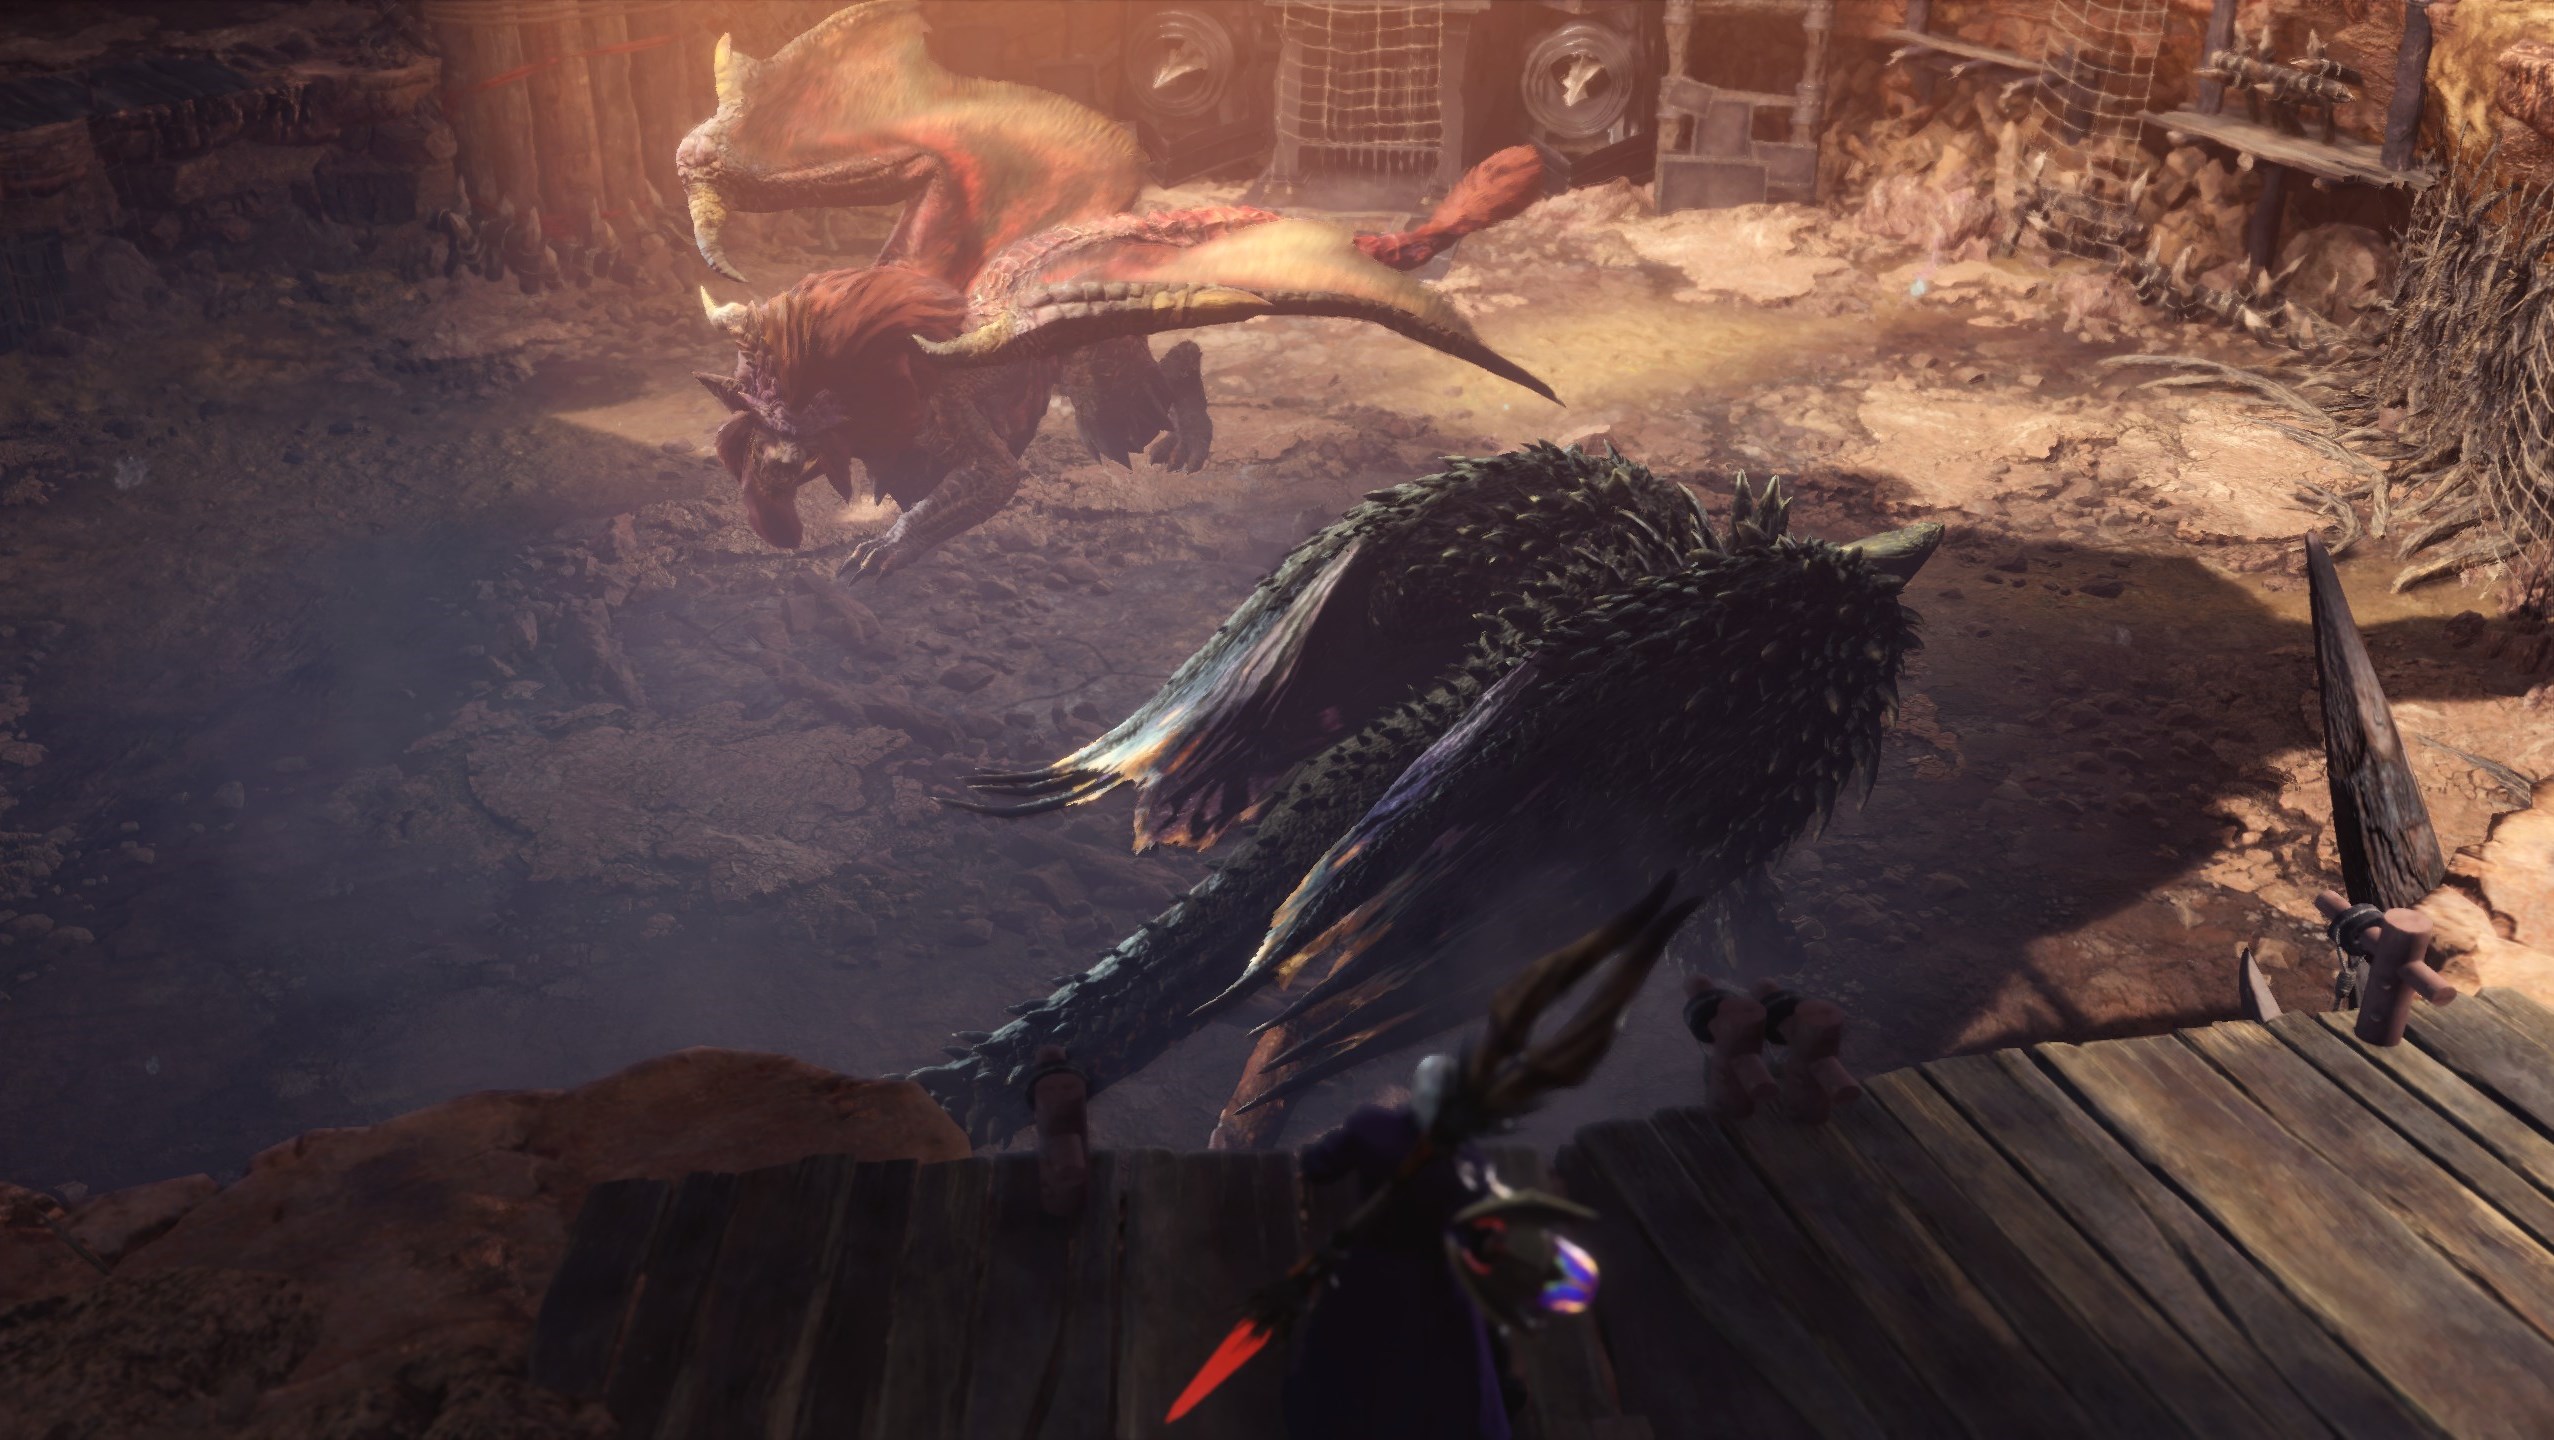
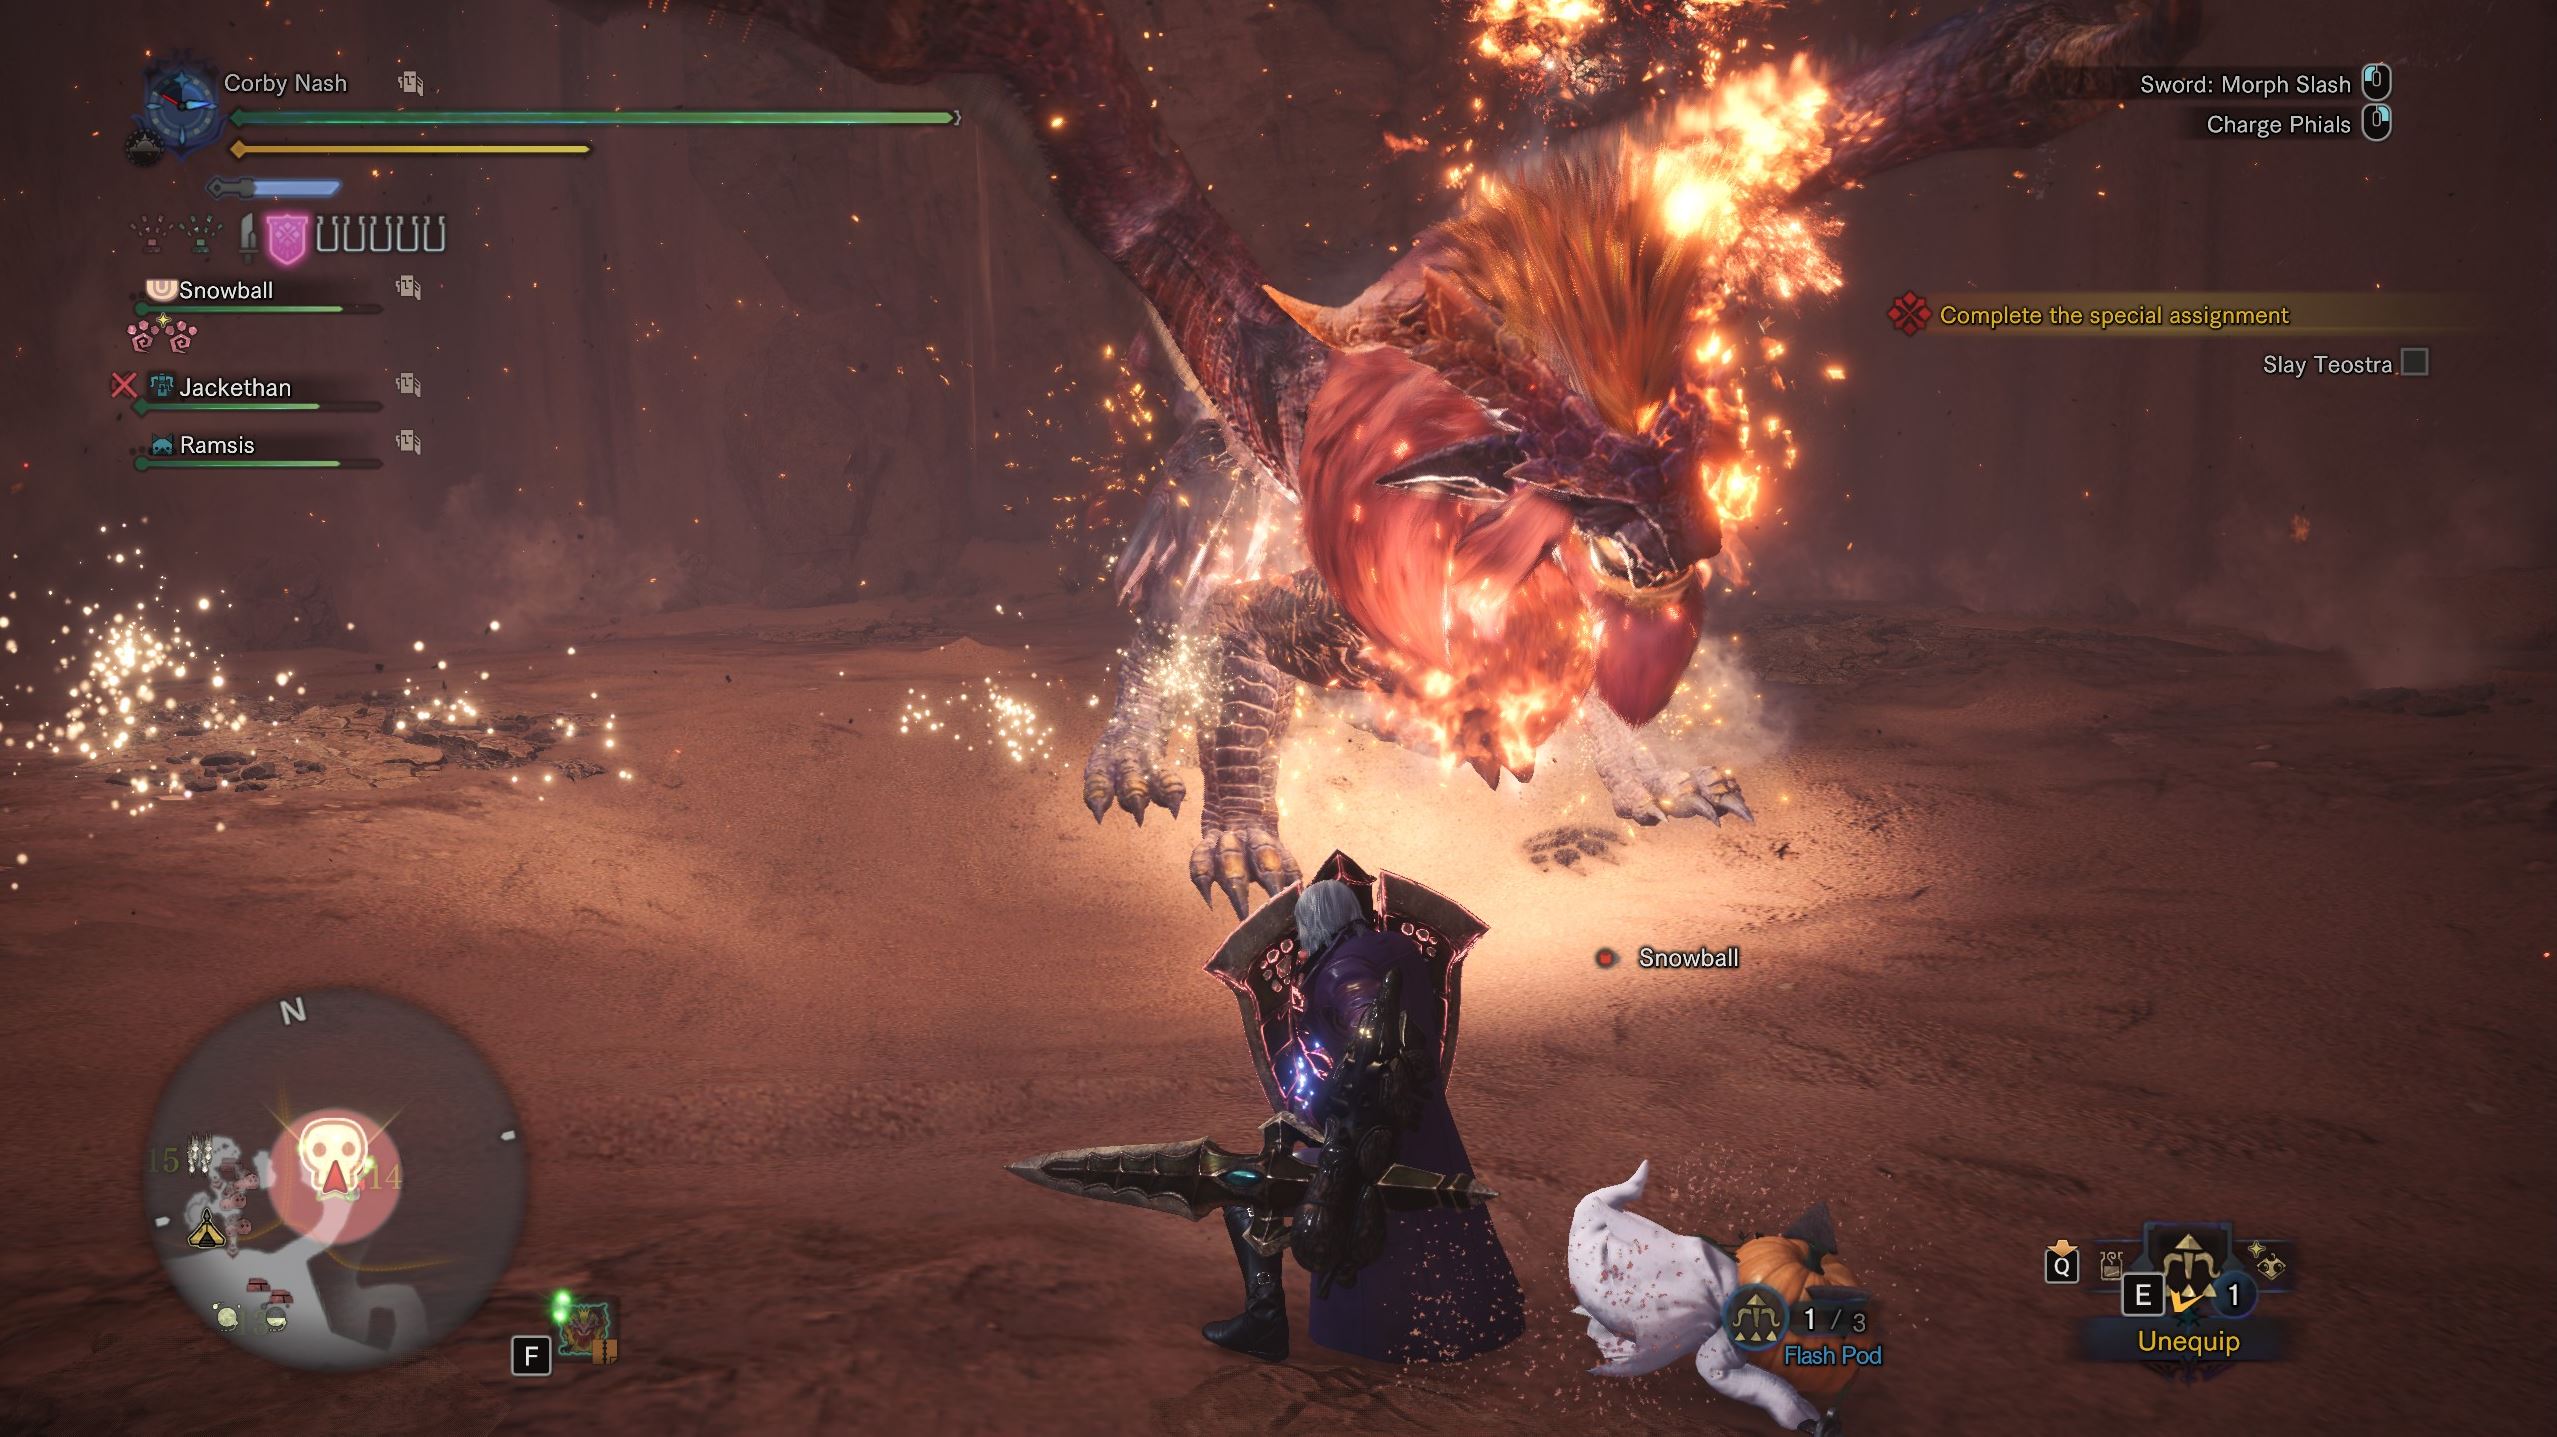
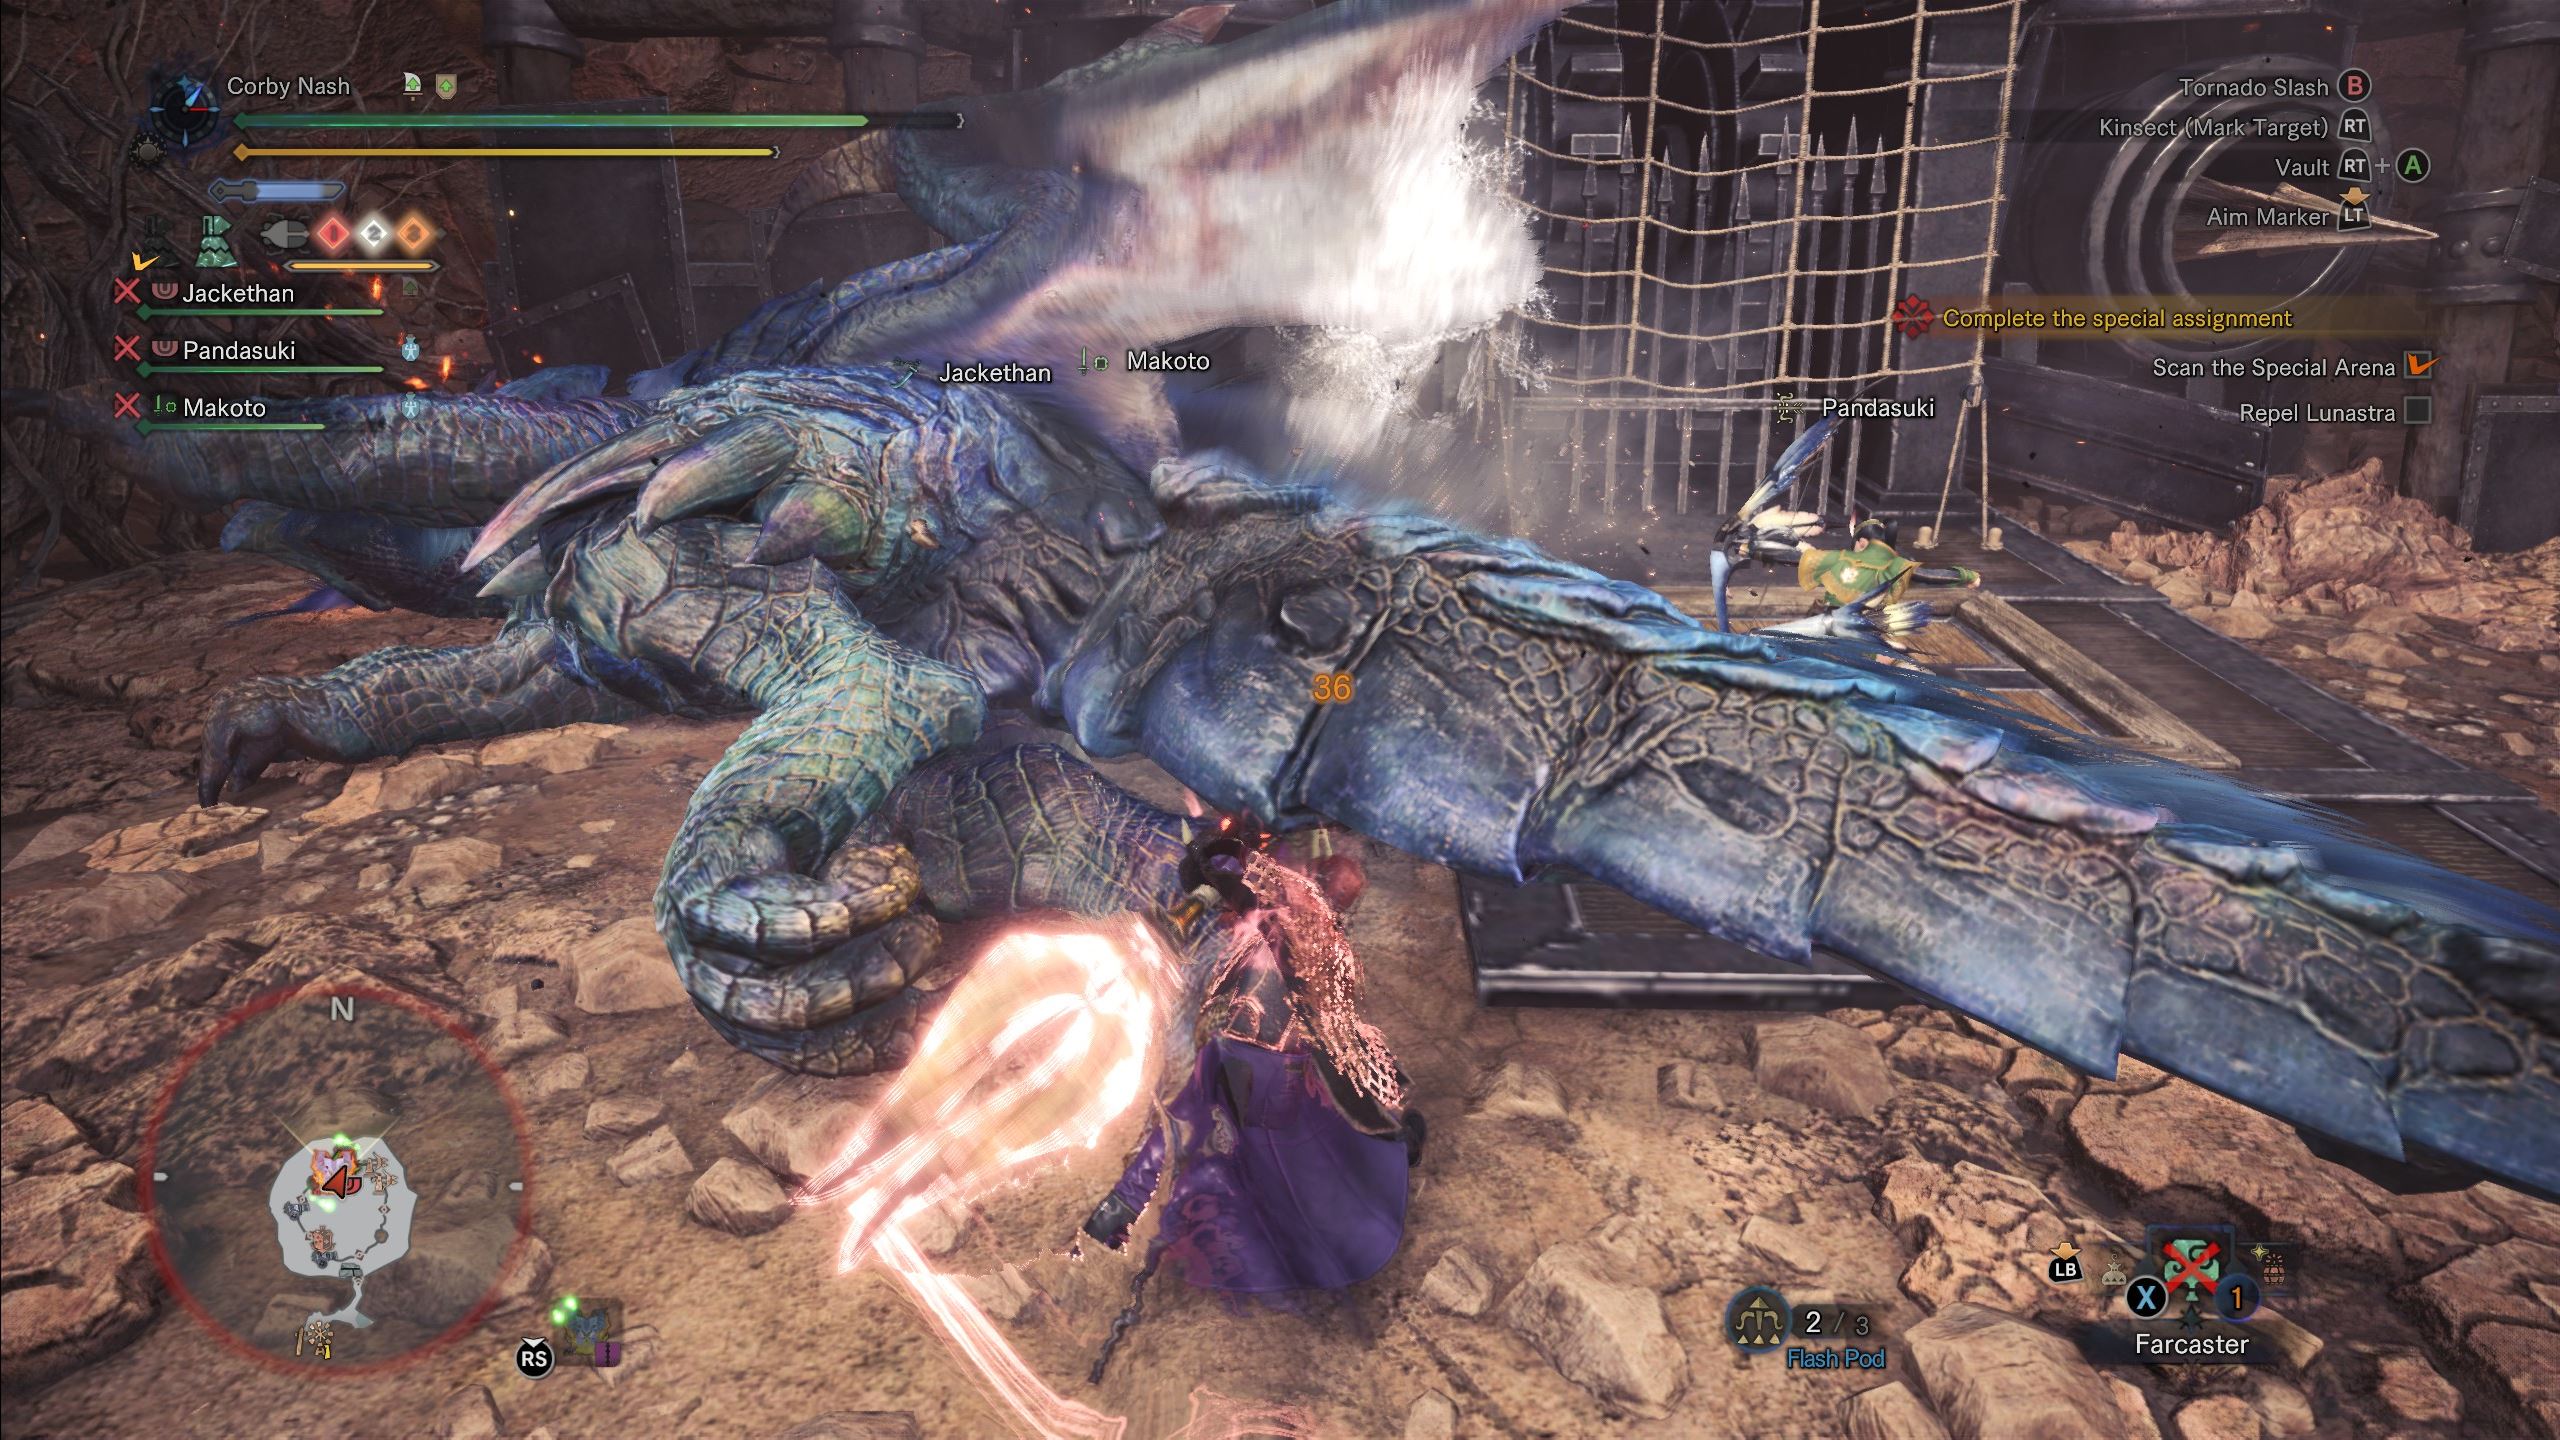
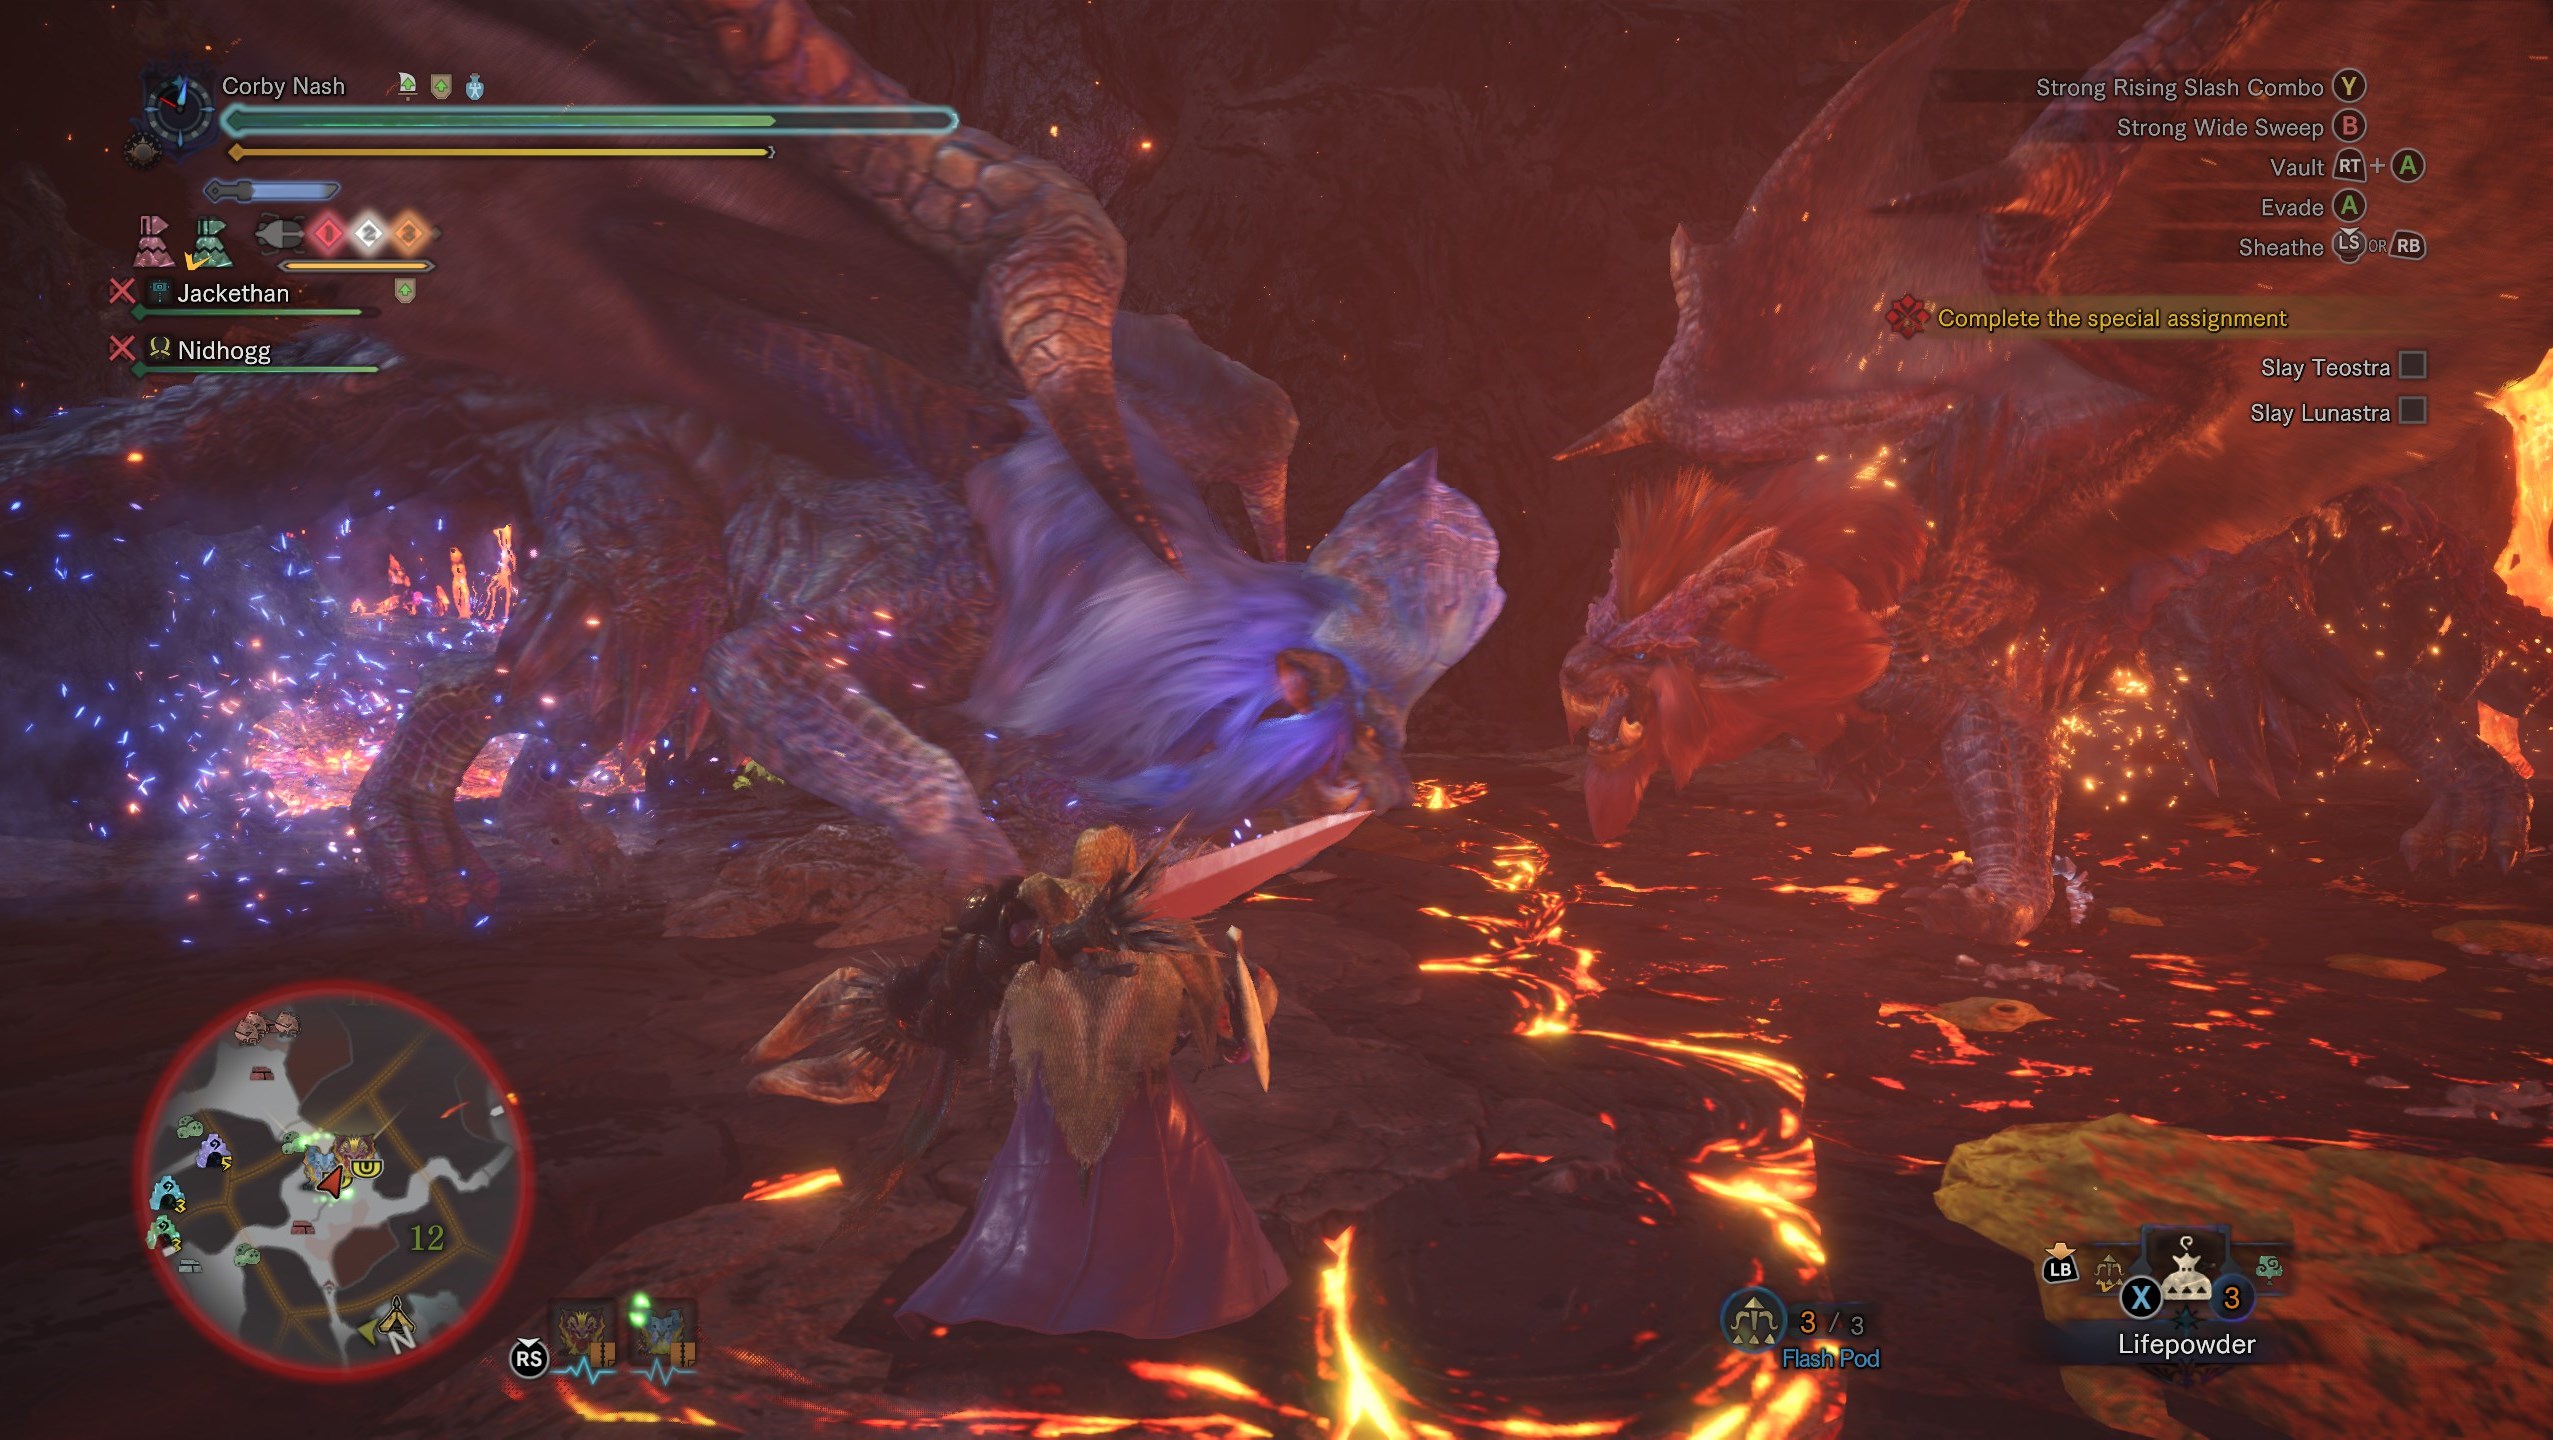
You’ll notice that she’s not alone, either—her hubby, Teostra, has shown up again, and the arena is in total free-for-all chaos. Your first priority is a simple one: don’t die.
If the two monsters are focused on each other, let them duke it out. Move in to land some hits (on Lunastra) when you can do so safely, but don’t be too conservative—you need to lay down some elderseal soon and keep it up throughout the fight.
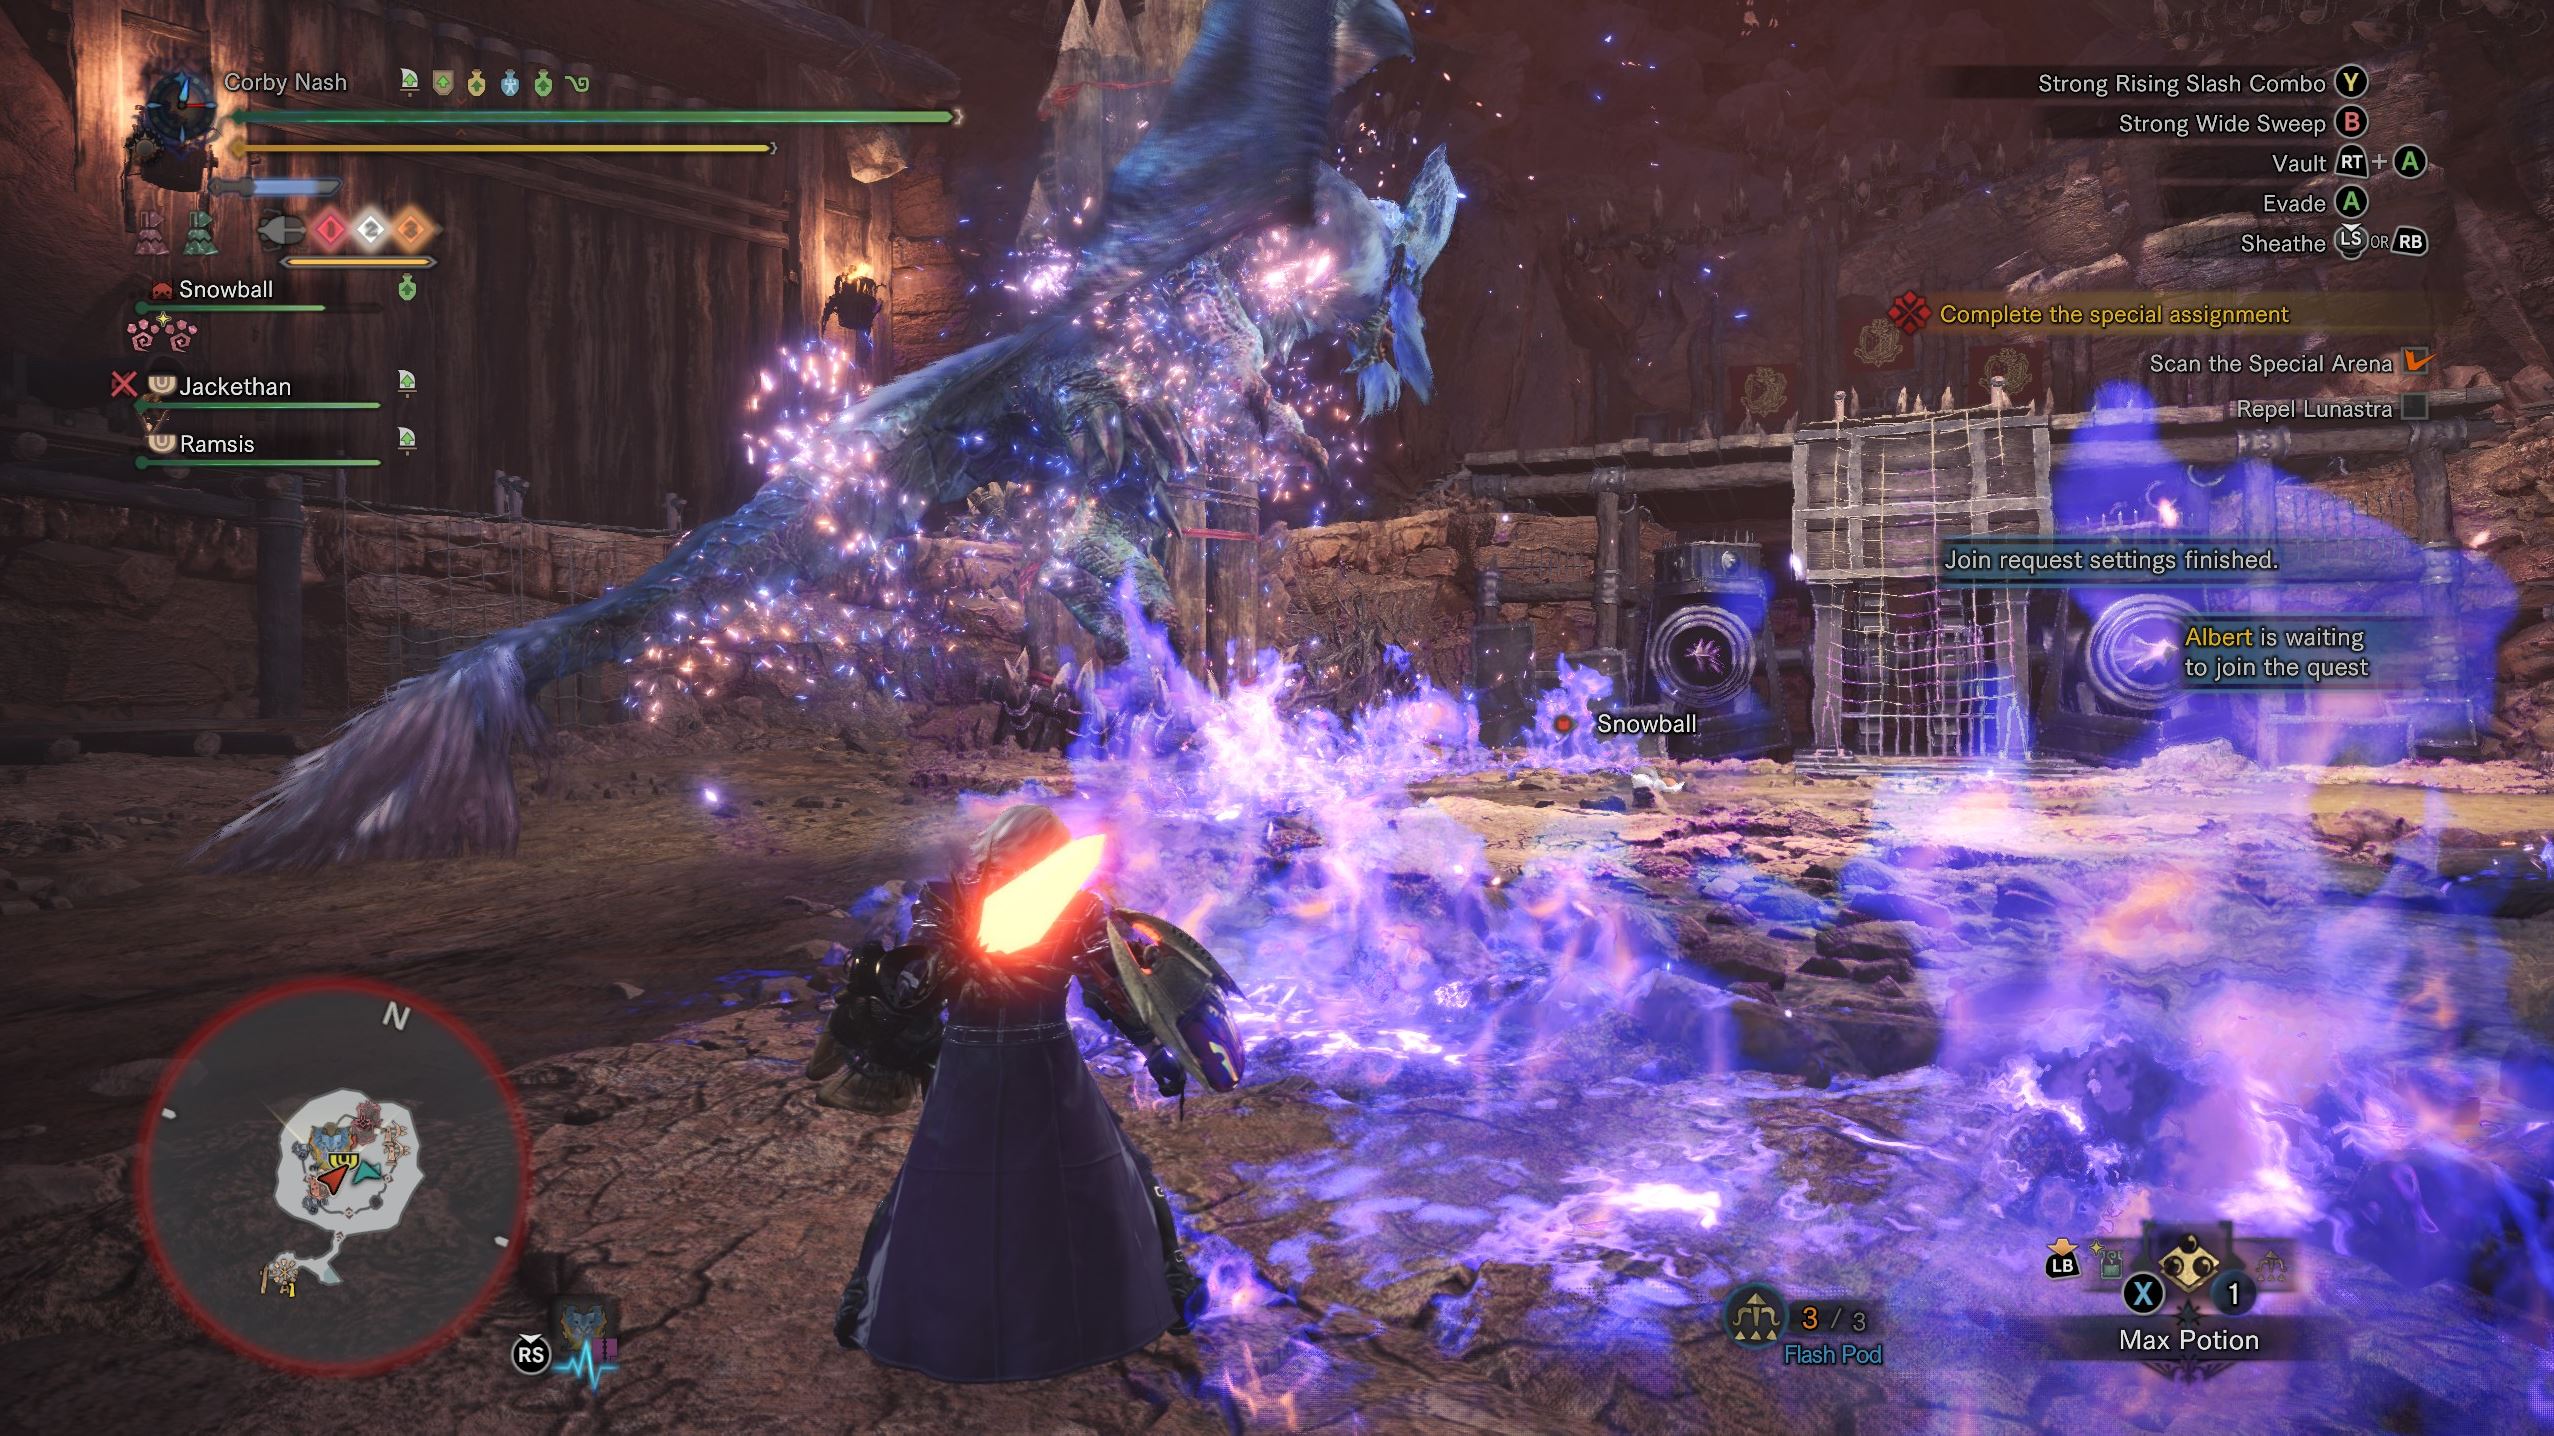
She’ll periodically lay down purple fire all over the floor of the arena. In and of itself, it won’t damage you, but explosions or fire will detonate it, and you don’t want to be caught in the aftermath. Avoid using either if possible. (Bug dust from insect glaives can also trip the trap if your bug is attuned to fire or blast.)
If you see her lower her stance and start an obvious charging animation, sheathe your weapon and run for the hills as fast as possible. The AoE fire blast she’s about to unleash deals insane damage over an enormous area, and it’s best to avoid it entirely if you can.
You can try blocking it if you have a heavy shield and lots of shield-related skills, but you’ll need to be a really beefy tank with abundant stamina to survive the hit.
As if the damage from the blast itself weren’t bad enough, if you survive it, you’ll find yourself on fire and losing health at an alarming rate. Use a nulberry and heal up as soon as possible. (Max potions and ancient potions are great for this eventuality since they can be used much faster than most other healing items.)
A few minutes into the fight, the Dragonator will become available for use, so lure her into range and set it off when you can. Don’t hesitate to drop the ceiling boulders on her head, either. Deal enough damage before time runs out, and Lunastra will flee.
You’ll need to track her down one more time to finish the hunt once and for all.
Fighting Lunastra — Round 2
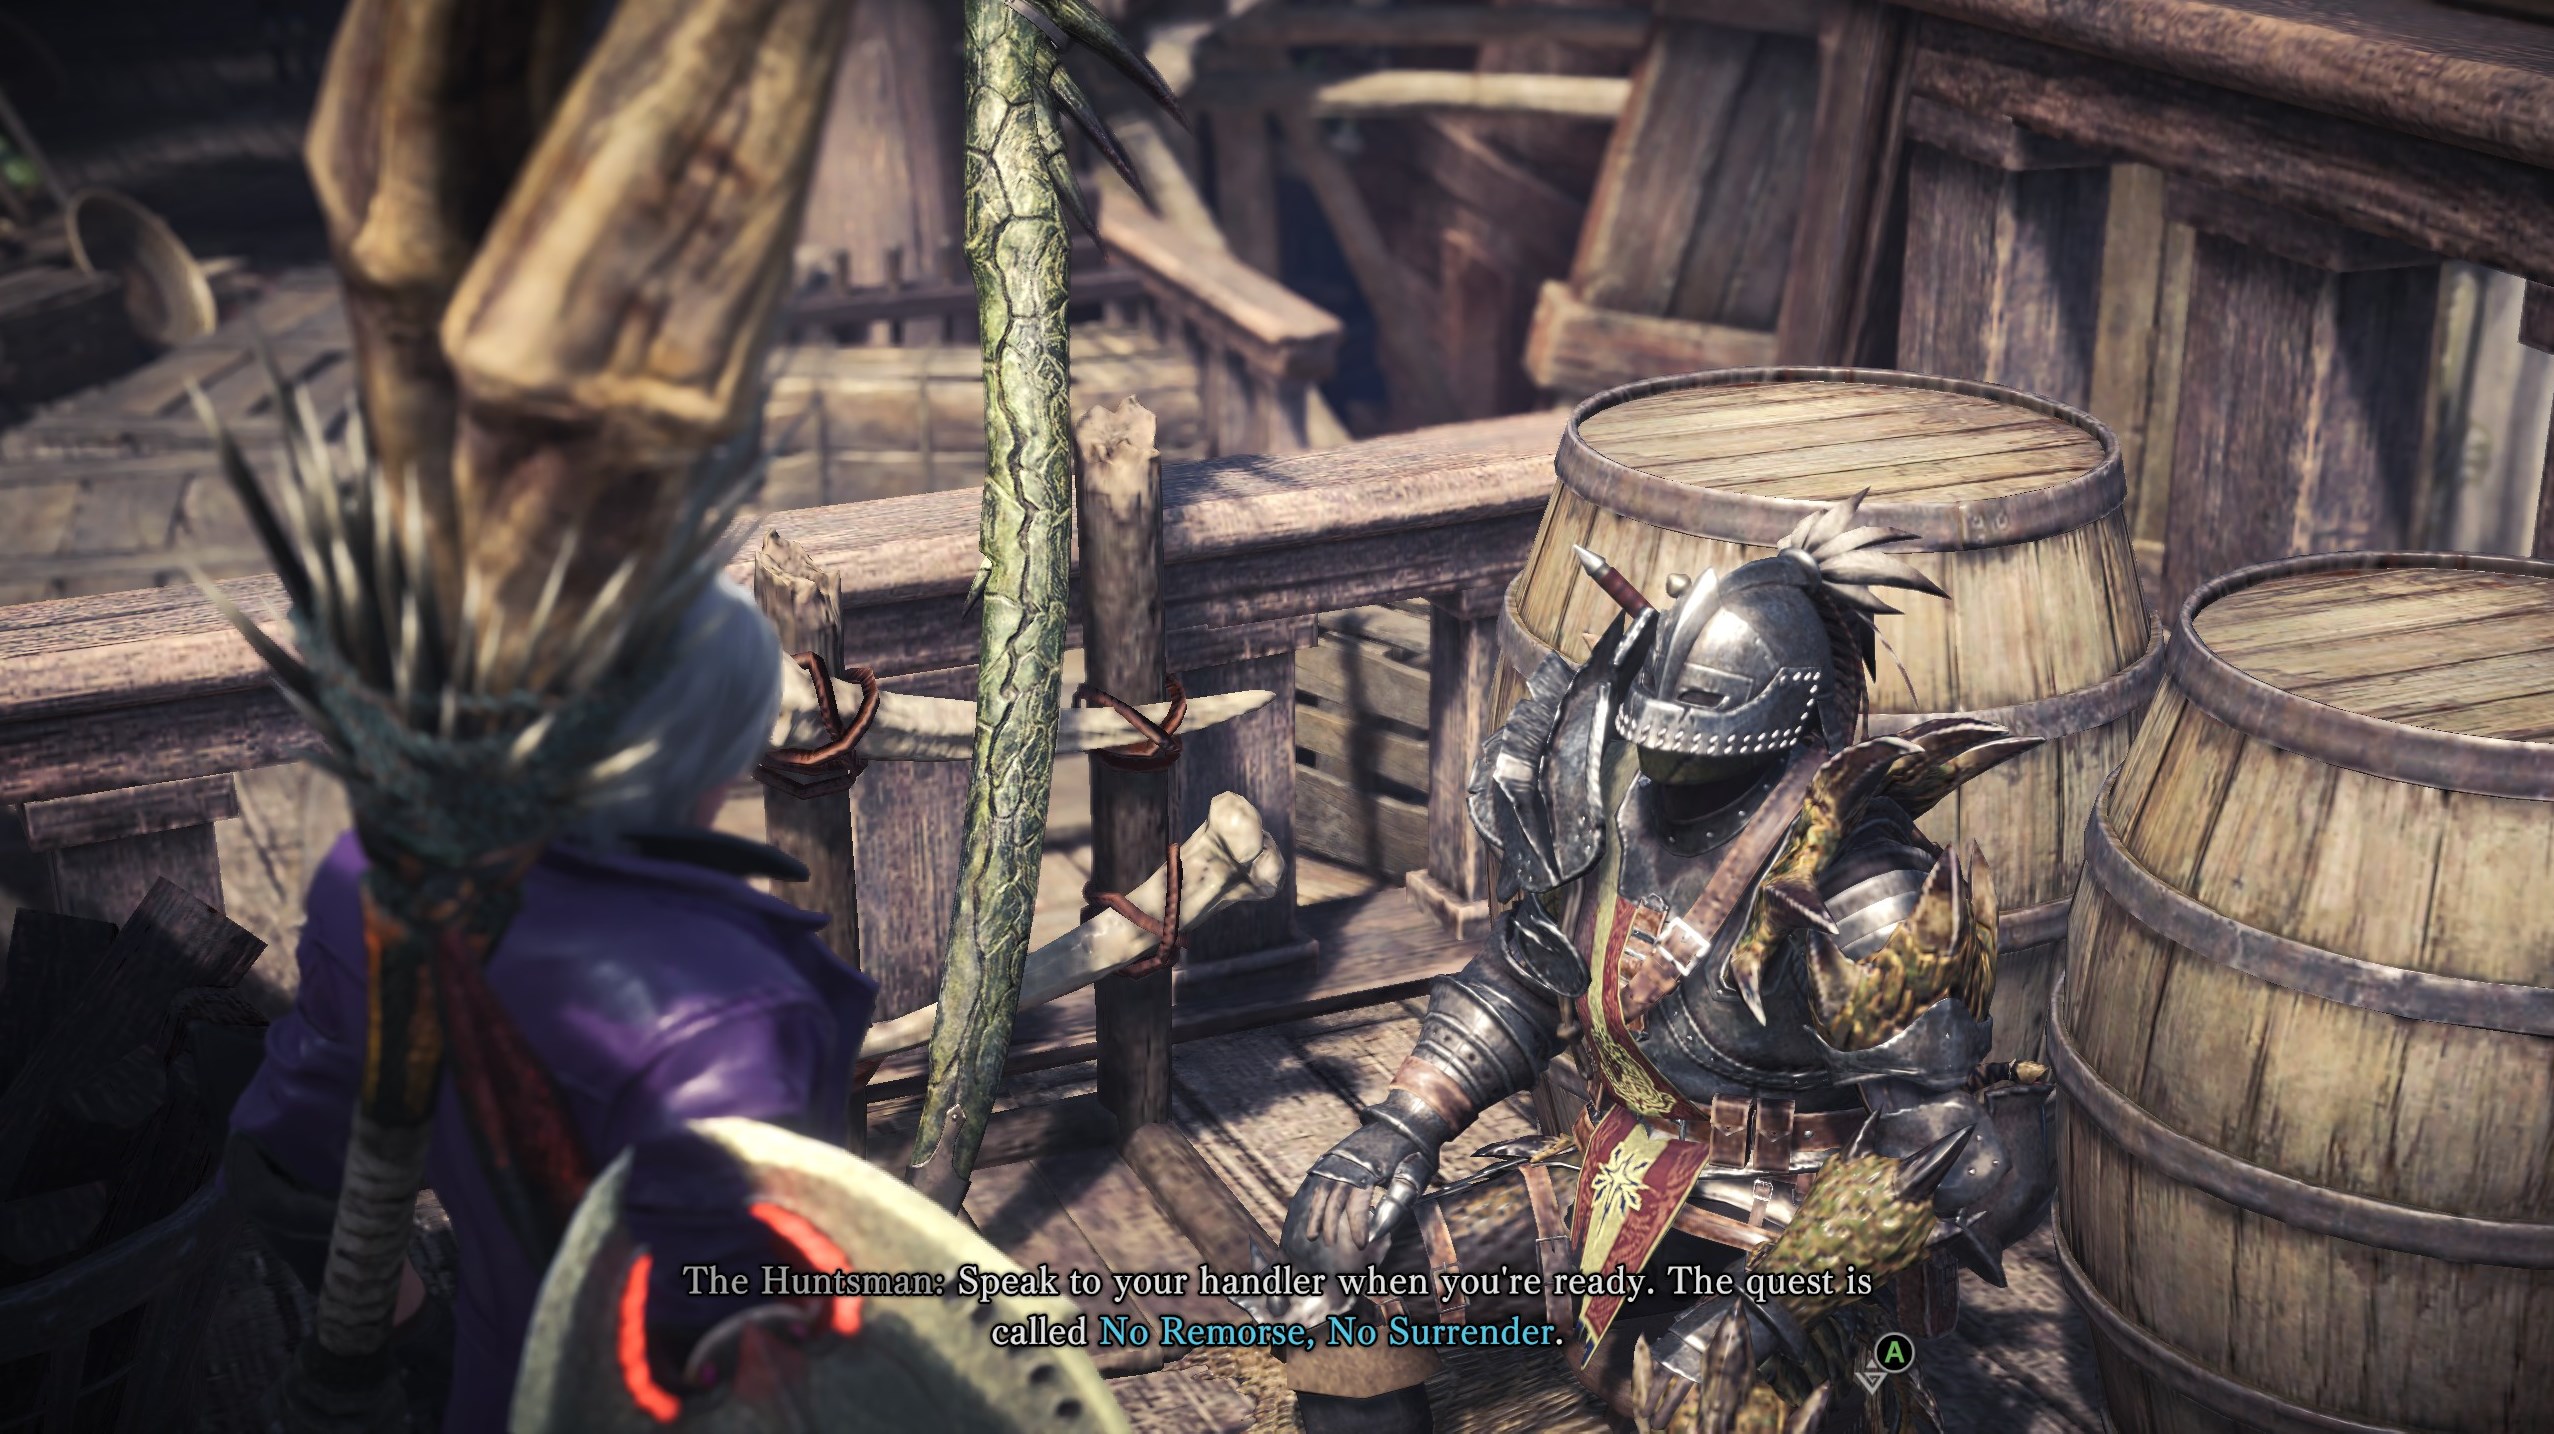
Once you’ve bested her in the arena, Lunastra will retreat to the Elder’s Recess to recover. Don’t give her the chance.
Report back to the Huntsman once more to receive the quest No Remorse, No Surrender.
The good news is that preparation-wise, nothing is different. Stock up on all the same supplies as before and eat a hearty large elemental resistance meal at the canteen.
Stupid dumb-dumb-face Teostra is still going to be around, so plan on having to take him down too. If anything, this final fight is easier than the first, because you’ll have a lot more room to maneuver (as well as a much more generous time limit).
Whether you divide and conquer or take on both targets at once, prioritize one over the other—you don’t want to flip-flop back and forth, giving one target time to limp away and heal while you’re being indecisive.
Keep up the pressure with elderseal, avoid Lunastra’s AoE at all costs, and you’ll eventually bring her down. The armor you can make out of her has excellent fire defense and boosts useful skills like Evade Extender, Peak Performance and Wide-Range.
—
There you have it! She wasn’t so tough, right? Keep an eye on our Monster Hunter: World hub page for more tips, tricks, and guides as Capcom continues to give us new beasts to hunt.


Published: Nov 30, 2018 02:05 pm