Death's Gambit is already hard, but that gets cranked up to 11 with heroic boss rematches, where each enemy you've already beaten into oblivion gets new attacks and extra health, coming back from the grave like an infernally crazed zombie. To have any chance at beating any of these heroic versions, you're going to need a little help.
But before you do anything, make sure to explore and grab the tomes for each boss. In many cases, having that extra damage bonus will be the difference between victory and defeat when facing these heroic beasts.
Several of these rematches are pure DPS races, so if you have major trouble, spend more time leveling up your primary damage stat and give it another go. Trading your feathers for damage can also be very helpful, although since you can't heal, it will mean dying several times while you memorize the attack patterns of each boss.
Ready to get started? In the slides ahead we cover specific strategies for each boss and what achievement(s) you unlock for defeating their heroic versions!
Owlking Heroic Boss Strategy
Achievement: Dethroned
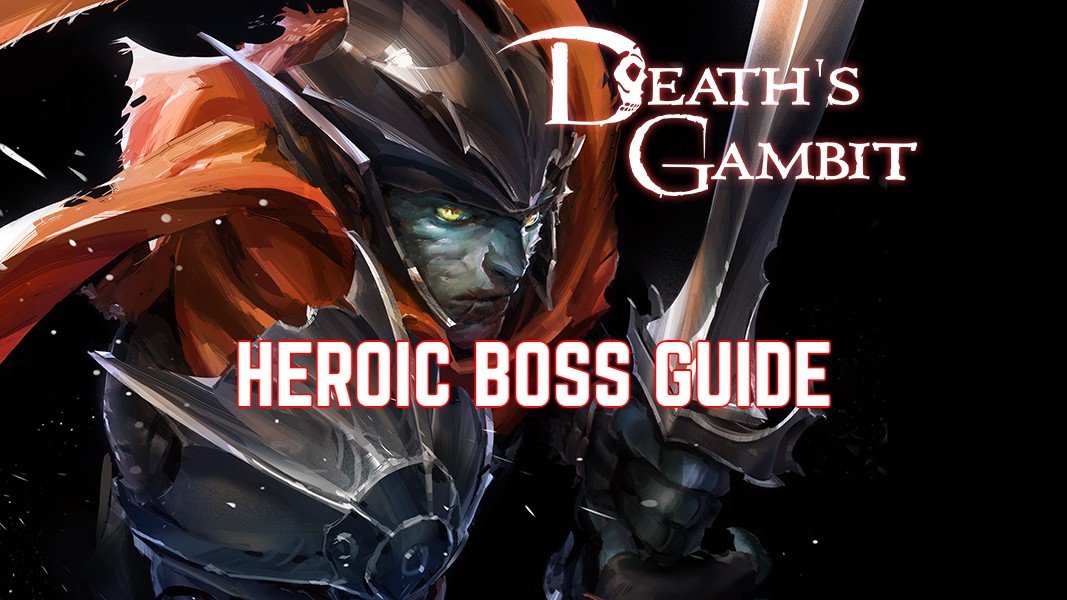
The first half of this fight is very similar to the original battle, except the Owlking sends out three waves of glowing orbs instead of just one. Rather than wasting the stamina dodging all three waves, just dodge roll behind the boss when he starts his vertical black portal.
The second half of this fight is where things gets truly challenging. The orbs that land on the ground from the horizontal portal now permanently remain on the screen. This means you are going to rapidly run out of room to dodge.
To minimize the loss of ground, try to stay in the same left or right corner instead of battling in the middle. By keeping to one spot, fewer parts of the room will get covered in orbs.
If you mess up and the middle of the area gets covered, don't try to dodge roll through the stationary orbs. Instead, jump and attack at the height of your trajectory to hover and increase your jump distance.
Save your arrows for this second half of the battle so you have a damage dealing option when stuck on the other side of the screen.
Inevitably, you are going to get stuck in a position where the Owlking is on one side of you and the wall is on the other. The hit boxes for damage are his arm/wings and feet however, not his main body. If you dodge roll left and right quickly, you can still avoid taking damage when he strikes.
Soul Of The Phoenix Heroic Boss Strategy
Achievement: To Ash And Dust
In the first phase of this battle, stay on the ground close to the boss so you can run forward and avoid the jump attack (you don't even need to dodge roll).
The key to this fight is to pay very close attention to the hit box on the long-range scythe attack. You can avoid it entirely without even dodging, and many of the attacks can be negated just by staying slightly to the left or right of the boss.
Although it seems counter-intuitive, it's better to stay close to the boss and use sword attacks that let you jump up and slam down for much of the first half of this fight.
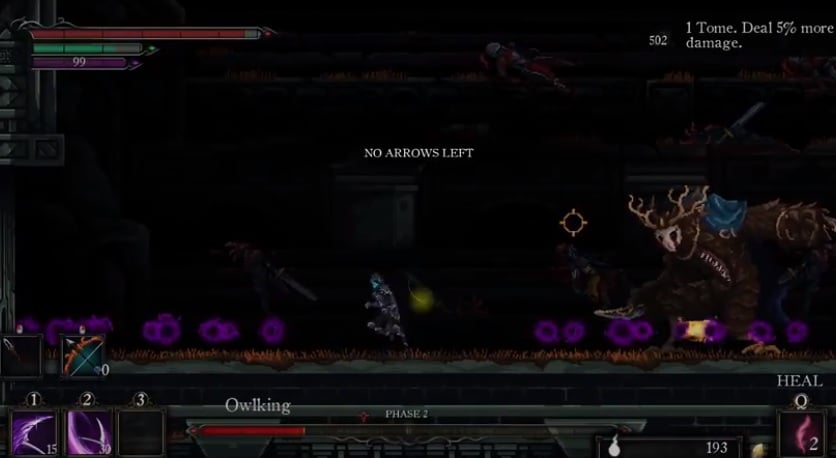
During the battle, listen for the sound of the Phoenix just a second before he swoops by and sets the area on fire. When this happens, run underneath a platform and get ready for the boss to start throwing fireballs, which can be blocked with your shield or jumped over.
The second half of the fight plays out much like the first, except the boss will occasionally split into two. During this segment, stay far away from the blue version that has a long range attack, and keep up your normal strikes on the ground against the red version.
Tundra Lord Kaern Heroic Boss Strategy
Achievement: Lord Of The Vale
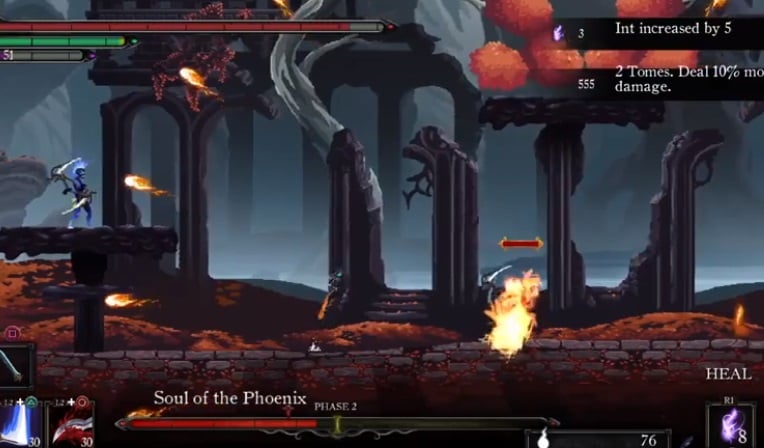
Quick knife attacks and fast firing of arrows can be a huge help in whittling down the enemy's health. As the platform starts tilting, run to the other side and jump up to avoid the ground attack, then immediately run back towards the boss.
When he leaps in the air, dodge roll forward. If you time it right, you should avoid his ground attack and be directly on the boss so you can get in a few swings. When he roars and starts his swing animation, dodge roll away or run to the other side of the platform to avoid his arms.
During the phase when the ice walls land, keep in mind that they don't actually form and cause damage until a split second after the falling animation. You can use this to your advantage to quickly get out of the way.
In the next phase, pay attention for randomly-appearing skulls so you can dodge the incoming icicle attacks. However, don't forget you can actually smash the icicles in the air before they fire at you. If you stay very close to the boss, you can jump up and hit both the icicle and the Tundra Lord at the same time.
In the final phase of the fight, The Tundra Lord floats in the air while icicles fall straight down from the sky. In this section, you'll need to master jumping either slightly to the left or slightly to the right of each icicle to avoid getting hit but also giving yourself a window to strike the boss.
It's actually easier to stay in a fairly tight area rather than trying to run around to avoid the falling debris.
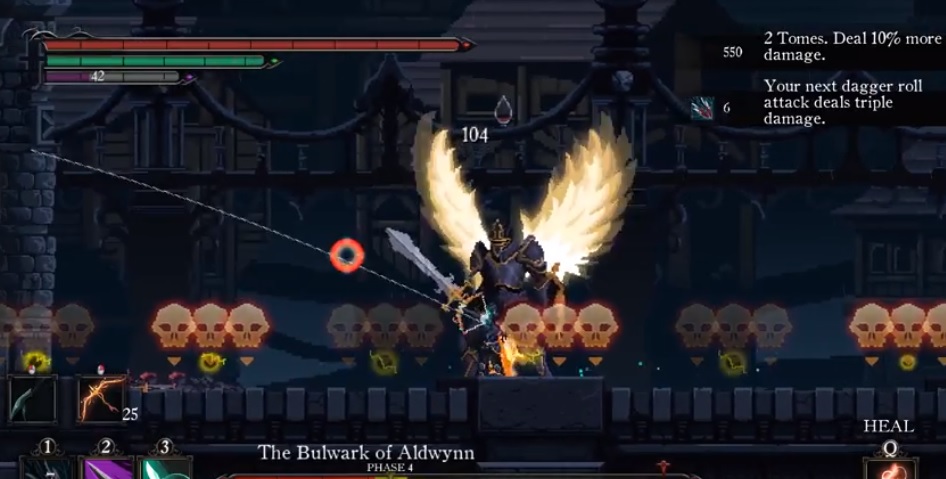
The Bulwark Of Aldwynn Heroic Boss Strategy
Achievement: A Worthy Challenge
The early part of this fight plays out like the normal version of this battle. Having upgraded bow abilities and damage can be very helpful in culling down the Bulwark's reinforcements before they get close to you.
Be sure to pull out your shield and walk forward to destroy the yellow and black orbs he summons, as they explode when they hit your shield.
As with most of the bosses in Death's Gambit, you have to memorize the Bulwark's wonky hit boxes and use them to your advantage. For example you can stand inside the Bulwark when he calls down more orbs and avoid taking damage, while still hitting him with your melee weapon or bow.
When the blue spirit comes out, get in as many strikes as you can, then run to the other side to avoid the attack that hits most of the screen. This takes practice to get right so you can quickly return and resume the attack.
Because of the tight margins for movement here, a weapon that doesn't push you forward is actually better. That makes this one of the few instances where the Acolyte Of Death's starting scythe isn't as helpful.

Forgotten Gaian Heroic Boss Strategy
Achievement: Gaian Slayer
To start this battle, get in a few swings at the Gaian's foot until it goes down to about a quarter health.
Run over to the far left and take out the first wave of reinforcements, then stay under the overhang and don't engage the Gaian. Remain there until the reinforcements timer hits 0 again. If you need to, just pull out your shield to avoid damage from the wave attacks.
Although it will be boring, just stand under the overhang and wait for the next wave of reinforcements to arrive -- they won't damage as you they come out of the overhang. Take them all out, then finish damaging the foot to get Ione to jump down and fight.
Parry Ione repeatedly, then dodge roll forward when necessary to take out the wave of reinforcements. Always wait to take out all the reinforcements before going back to hit the giant again. If you let the reinforcements start to the swarm the area, this battle becomes impossible, so its a waiting game without a quick victory.
If you don't like that strategy, there's a sort of "cheat" to employ here. You can actually jump onto the blade, wait for him to lift it up, then jump over to the arm and kill Ione up in the air! After destroying her, just jump down and hit the foot to end the battle.
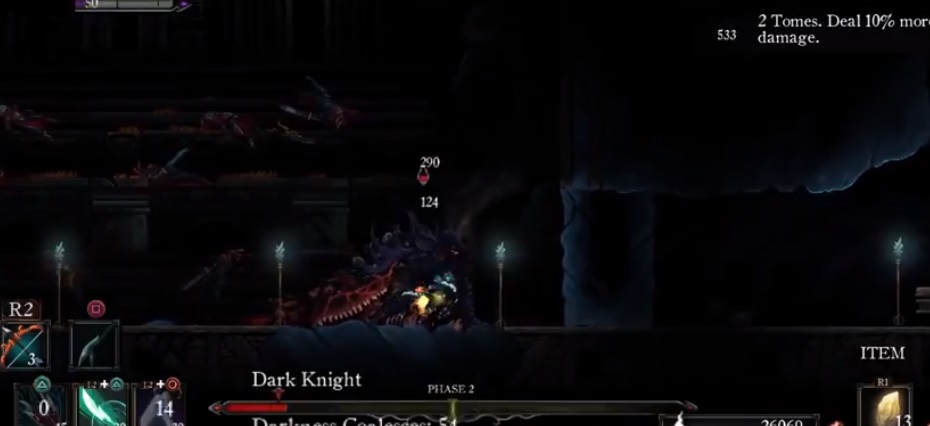
Dark Knight Heroic Boss Strategy
Achievement: Darkness Falls
This is a DPS race; augment your damage to full. The Dark Knight has a major Achilles heel that isn't immediately apparent and will be a huge help. His attacks don't hit directly in front of him.
Stay close -- like stupidly close -- and get off fast knife strikes. When he leaps away, dodge roll close to avoid his long-range attack and then stay in tight quarters to constantly attack.
Your goal is to kill him before the timer hits 0. However, if you let the timer run down and darkness overtakes the screen, you can use the Light Of The Phoenix ability to get a small area of visibility.
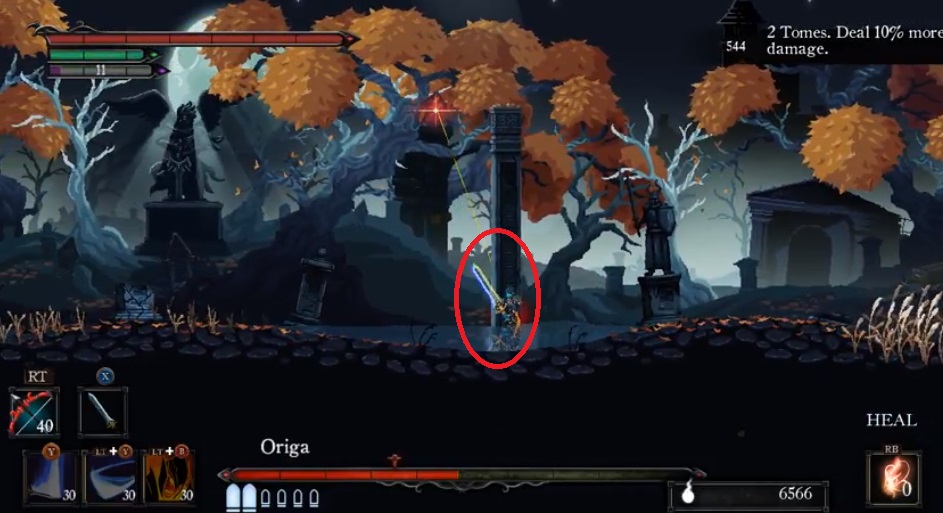
Origa Sniper Heroic Boss Strategy
Achievement: A Friendly Duel
I bet you didn't expect to be fighting a robot sniper in an otherwise fantasy-focused game? But here you are anyway ...
There are two different ways to make this battle much easier that aren't immediately apparent. First, you can block her rifle shots in the first phase by pulling out your shield, then drop your shield and get in an attack while she's recovering.
Second, when Origa jumps into the background and the red dot appears, stand directly in front of any of the tall, skinny pillars or the statues. Her shot will destroy the pillar and completely miss you! You don't have to waste stamina trying to dodge the sniper shots at all.
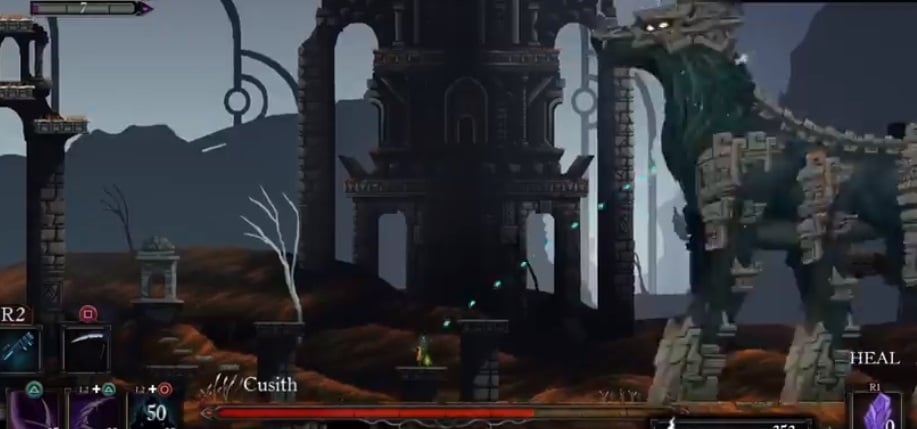
Cusith Heroic Boss Strategy
Achievement: Who Is The Real Monster?
This battle is stupidly hard in traditional melee, so it's easier to take advantage of some of the game's broken mechanics to win here.
The first strategy is to pick the Unlimited Energy talent, fully increase your damage with 10 feathers to 200%, and use the Energy Lance weapon. Jump on a platform and fire off an ungodly number of rounds directly at Cusith until he dies in less than 60 seconds.
If you are going with melee, you need to have an insane level of damage output to get anywhere. Jump up on the platform before Cusith spits out the electricity that covers the ground, then pull out your shield to avoid the bullet hell orbs.
Jump down and get in as much damage as you can before having to rinse and repeat -- and good luck!
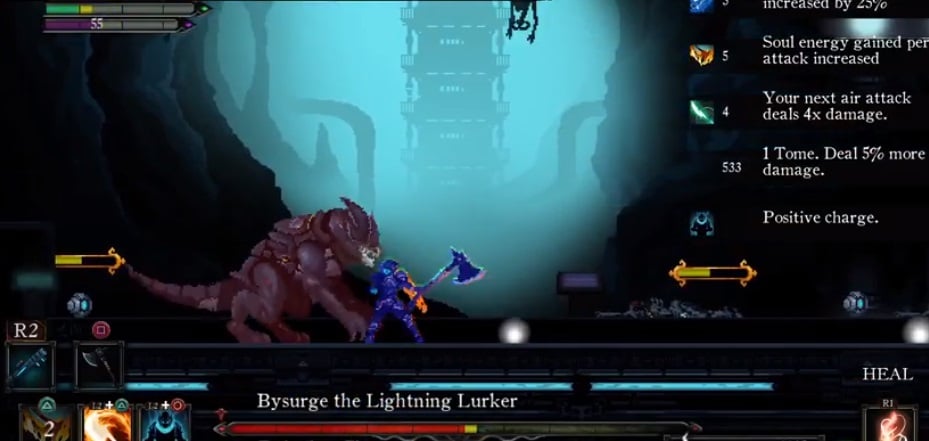
Bysurge Heroic Boss Strategy
Achievement: A Relic Of The Past
This is one instance where you probably want to keep your feathers for healing instead of augmenting for damage; Bysurge's health pool is so huge it doesn't even help.
It isn't immediately apparent, but his normal swipe attacks don't need to be dodged every time. In a lot of cases, you can jump over or run past his normal swipe attacks without wasting the stamina. You want to keep your stamina up for his massive attack, which comes after he yells, "I need more energy!"
The biggest thing to keep in mind here is to avoid the skeleton/robot grabs, as they are going to result in immediate death. If your choice is to take damage from Bysurge or get grabbed, take the damage instead.
This might get patched out, but there's a small, recessed area to the far left where you can be knocked bock while blocking an attack with your shield. Bysurge can't hit you while you stand there with his normal attacks. The skeletons also can't grab you there! Hit him with ranged and heal when necessary when he uses his electricity attack.
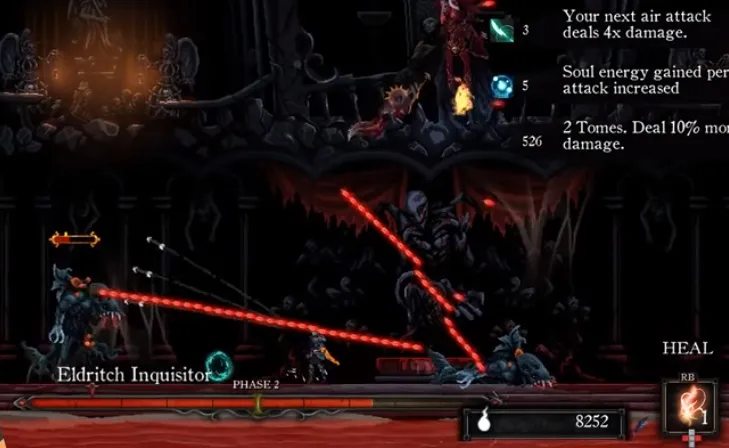
Eldritch Inquisitor Heroic Boss Strategy
Achievement: Judge, Jury, Executioner
Prepare to have a rage stroke on this one, because this is some absurd bullet hell nonsense.
No matter what, you can expect to do this heroic fight a couple of dozen times just to learn the patterns alone. Position yourself slightly away from the energy ghost that lands near you so you can avoid it when it splits in two. Meanwhile, hit the boss with arrows from the ground.
When the fishy, Cthulhu monster is summoned, learning his wonky hit box is critical so you can deal damage to him quickly without having to move far away. When he summons his magic shield, you can often stand directly inside him without taking damage if you move to the side.
The red arcane bullets filling the screen will make this battle incredibly tough, but there's a glitch here to take advantage of. They only seem to damage you if they hit your lower body. You can avoid damage entirely by walking at a measured pace and letting them pass through your head! Expect that to get patched at some point, however.
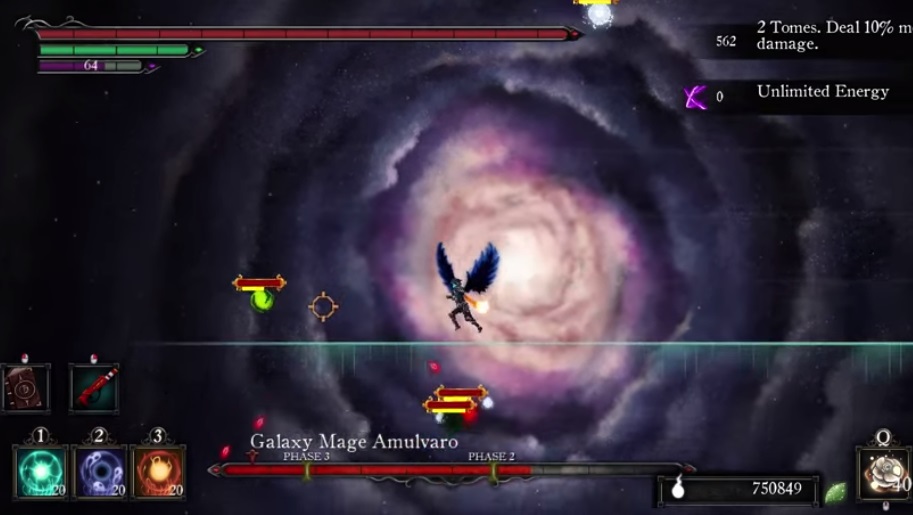
Galaxy Mage Amulvaro Heroic Boss Strategy
Achievement: When The Stars Align
Unfortunately the achievement for this heroic battle seems to be bugged, as no one on Steam has actually unlocked it yet despite them having defeated this boss on heroic.
During this fight, be sure to stay out of the paths where the stars intersect, because your damage is doubled in these areas.
You are going to probably want to use The Swarm as your weapon for the fastest damage output, and your focus should always be on taking out the green orbs quickly.
In the later phases, there will be too many orbs to take out on your own, so trail them through the flying comets that are summoned to destroy them (or the creatures that pop out of them).
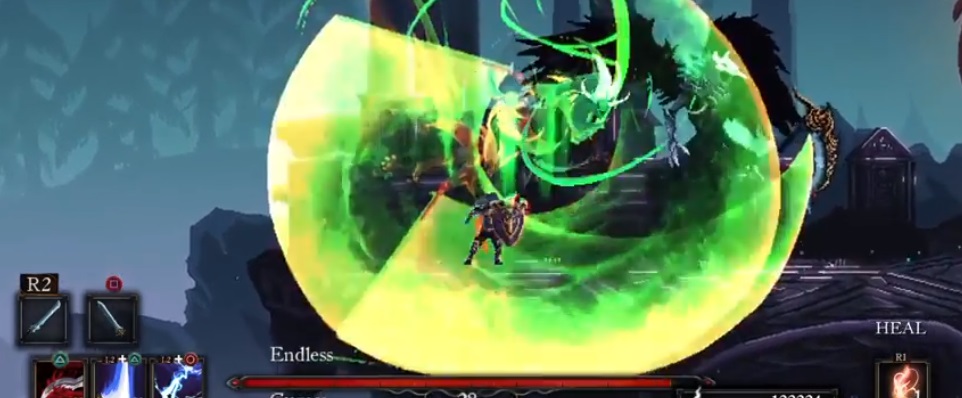
Endless Heroic Boss Strategy
Achievement: Everlasting Torment
For this fight, you may want to strike a balance between damage boost and keeping some feathers for healing, because it's a crazy battle.
You can block her long range green weapon attacks -- including the ones where she jumps in the air and swings around -- with your shield rather than wasting the stamina to dodge them.
The green arrows that go up above will just miss you, so don't try to jump or dodge there and save that for when they go lower, at your normal body height.
During the fireballs segment, stay close to Endless and block with your shield, then walk forward and dodge roll.
Multiple weapon types can work out here, but if you have trouble, try switching to a high intelligence build with Unlimited Energy and then spam orb attacks.

Have any other tips and strategies for these Death's Gambit heroic boss re-matches?
Let us know how you won each fight in the comments below! You can also check out our other Death's Gambit guides here:


Published: Aug 21, 2018 06:53 pm