
In the world of Ace Attorney, it never rains — but it sure does pour. After narrowly avoiding a murder conviction for lawyer and client alike, thanks to a corrupt foreign legal system, waiting and unable to help while his adopted daughter was being framed for murder, Phoenix Wright is looking forward to meeting an old friend for the first time in years. Nothing can go wrong, except for brutal murder, an escaped terrorist, a masked vigilante, and the game’s first multi-day trial and investigation. Oh, and his assistant is someone who has made no secret of wanting to see him dead.
Suggested Navigation: In Investigation Mode, use your browser’s find function to look for your current in-game location; in Trial Mode, search for the name of the current witness to find a guide to their testimony. In Investigation Mode, it is possible to progress in a slightly different order than listed below: if the options presented do not appear as described, double-check that all proceeding actions have been completed, and try again.
The Rite of Turnabout: Investigation
Investigation mode is largely unchanged from the previous cases: Examine areas to obtain new evidence, and Talk to persons of interest to build your case. Phoenix also has a unique ability during these sections, Psyche-Locks which allows him to detect when a person is lying, and gives him the chance to use evidence collected during the investigation to break down their mental barriers.
As before, there are a number of optional items to investigate, show to witnesses and discuss. While they provide no gameplay benefit, do not affect the story, and are not covered here, searching for them is highly recommended.
Investigation – Day 1

- Move to the Plaza of Devotion
- Talk to an old friend: the story will advance significantly. Talk to Ema Skye to discuss the crime, and begin the investigation.
- Move to the Inner Sanctum, and before you begin your search, Examine the girl standing in front of the altar.
- Talk to Rayfa Khur’ain.
- During this investigation, changing the camera angle several times is required. From the default position, Examine all the all the lanterns, the painting on the wall, and the text next to it. Examine the Warbaa’d Statue, and continue your investigation after walking towards it.
- While standing in front of the Altar, Examine the mask and cloak on the ground, the white outline, the bird statue itself, and the bloodstained paper.
- Go Back to your default position, and pressing right on the D-pad Rotate the camera to the left.
- From this new angle, Examine the statue again: when zoomed in, do the same to the eye socket. Go Back and Examine the surrounding scene, specifically the large rock, lantern and, once the camera moves closer to the lantern, the surrounding snow.
- Rotate the camera to the last angle, facing the entrance and side.
- Examine the torn looking flags, and the curtain walls of the Sanctum itself.
Walking and Talking
- No investigation necessary, simply Move to the Plaza of Devotion, and Talk to the man there.
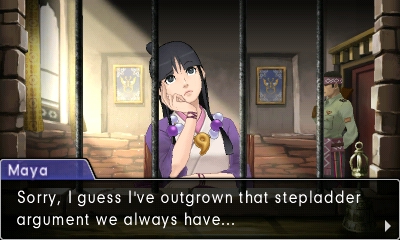
- Move to the Detention Center and Talk to Maya for a while.
- Move to the Bazaar and Talk to Ahlbi to get a few more crucial pieces of evidence.
- Move to the High Priest’s House
Investigation and Psyche-Locks

- First, Examine the woman standing at the shrine, and Talk to her.
- When she leaves, you’ll be given the chance to Examine the room, take it: the garbage can, shrine, spiked cushion, game board, orb, a wanted poster, a picture of mountains and bag are the items needed to progress.
- When the woman re-enters, Talk to her again: as the conversation progresses, you’ll enter a Psyche-Lock Section. To start, press the Magatama on the touch screen.
- Choose Option 2, then Present Lady Kee’ra’s Warning, Envelope (highlight any of the holes through it when asked,) and the Warbaa’d Arrow. Once you’ve broken through, make sure to talk to her about the topic you’ve just unlocked.
- You’ll be taken to several different locations, Talk to all the people you meet until the end of the Investigation Section.
The Rite of Turnabout: Trial

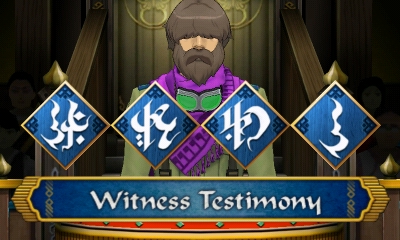
Trials in Khu’rain feature a heavy emphasis on Divination Seances. During these scenes, a short scene is played, showing the final moments of a victim’s life, with the various sensations they experienced shown as text. As opposed to the traditional court-arguments, you can neither Press statements, nor Present contradicting evidence.
Instead, the Priestess performing the Seance will provide an account of the victim’s final moments, as interpreted by the prosecution. Your job is to match specific parts of the visions to show errors in the accompanying ‘testimony.’ When referring to a numbered scene, this guide means that you should ensure that many magatamas are displayed on the bottom screen
Divination Seance – Witness/Victim: Tahrust Inmee

- Compare Scene 5 to Statement 3, Present the Sound, “Footsteps.”
- Select Option 2, and the 3rd Statement will be revised.
- Compare Scene 5 to the new Statement 3, Present the Sound, “Water.” It should appear in the same spot as “Footsteps” and “Bells,” as the scene ends.
- Compare Scene 4 to Statement 3, wait until the word “Wind” appears next to the Lantern, but only Present the Lantern. The sense ‘Sight’ should be displayed.
- Compare Scene 2 to Statement 3, Present the broken lantern. When pressed for an explanation, Select the option ending in “Positions.” On the diagram, present the space between the lower two lanterns.
- Select option 3, then when pressed for proof, present “Lady Kee’ra’s Warning.”
Witness: A’nohn Ihmus TBD
- Present the Ritual Curtain against Statement 4.
- Present the Rites Guide against Statement 2. Select Option 2 and then Option 3.
- New testimony will be given. Press Statement 3, and Select Option 3.
- On the new 4th Statement, Present Sanctum Prayer Flags.
- Press Statement 3, Present Newspaper, and Show the top of the mountain.
- Present the Wanted Poster, then the Bloodstained Letter.
- Select Option 3.
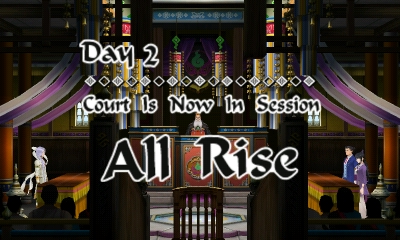
The Rite of Turnabout – Day 2
Investigation – Day 2

- Move to the Plaza of Devotion and Talk to Ema.
- Examine the white flower, prayer carpet, white outline, and purple prayer flag.
- Move to the High Priest’s House, and Talk to Beh’leeb again.
- Examine the left framed photo on the desk, and Present it to Beh’leeb.
- Move to the Detention Center and Talk to Maya.
- Move back to the Priest’s House, Examine the Steel Samurai bag, and Talk to Rayfa. The scene will move to the Bazaar automatically.
- Examine the Manhole, and when allowed, Present the Brand New Flag.
- Examine the room, specifically: the branded book, knife, photo-laden board, refrigerator, white flowers, old robes, table and gold item.
- Talk to Datz, and eventually, a new Psyche-Lock will appear. Break it by Presenting the Nahmanda Flower, Brand New Flag, Dhurke’s Law Book and Attorney’s Badge.
- Choose Option 2, and Talk to Datz again.
- Move back to the Inner Sanctum. Rotate the camera to the right, so that the empty eye of the statue is in view. Examine the Statue, and the Eye again, then Present the Golden Orb to unlock the final location for this case.
- Move to the Rebel Hideout, and Examine the bloodstains by the water. You’ll be given some luminol: Spray the area next to the door.
- Examine the following items in the room: the banner, the two moss-covered slabs, back wall, calendar, chain attached to the door, weapon-filled cart and suspicious looking slab.
Trial – Day 2: Identity and Seance
- Rather than starting with the Seance, first cross-examine Ema Skye. Press the 3rd Statement, and Select Options 2 and 1.
- At the new Statement 3, Present the Crime Photo, and Show the tattoo on the back of his neck.
- Another Divination Seance, and another Insight from Rayfa: Compare Scene 2 to Statement 2. Present Gingihi (smell), and Present Beh’leeb’s Statement when pressed.
- Compare Scene 2 to the new 2nd Statement, Present the green ‘floor’, and defend that claim by Presenting the May 9th Newspaper, and the Photo of the Rebel Hideout.
- Highlight the Right-Most Green Slab and Present the Inner Sanctum Photo. Choose Option 2 and Show the clock.
- Compare Scene 3 to Statement 1, and Present the word “Heavy.” Select Option 1.
- Present Inner Sanctum photo and Show the Warbaa’d Statue. Select Option 3, Present the profile of Tahrust Inmee, and Select the Option 2.
Spirit Channeling and the Final Witness

- Press every statement, then the newly added Statement 4. Select Options 1 and 3.
- Press Statement 1, and Statement 5, and have both added to the record. Press every remaining statement.
- At the 6th statement, Present the Rebel Hideout Photo, and Select Option 3. Present the profile of Beh’leeb Inmee.
- At the 2nd statement, Present the Tome of Secrets, and Show her masked face.
- Present the profile of Puhray Zeh’lot, the Lady Kee’ra’s Warning, and the Plumed Punisher Strap.
- Select the 3rd option, and Present the Family Photo, Showing Beh’leeb’s watch.
- Select the options in the following order: 2, 1, 2, 2, 3, 2, 3.
- Present the Warbaa’d Statue and Dhurke’s Law Book to end Episode 3.
There you have it!


Published: Sep 20, 2016 10:13 am