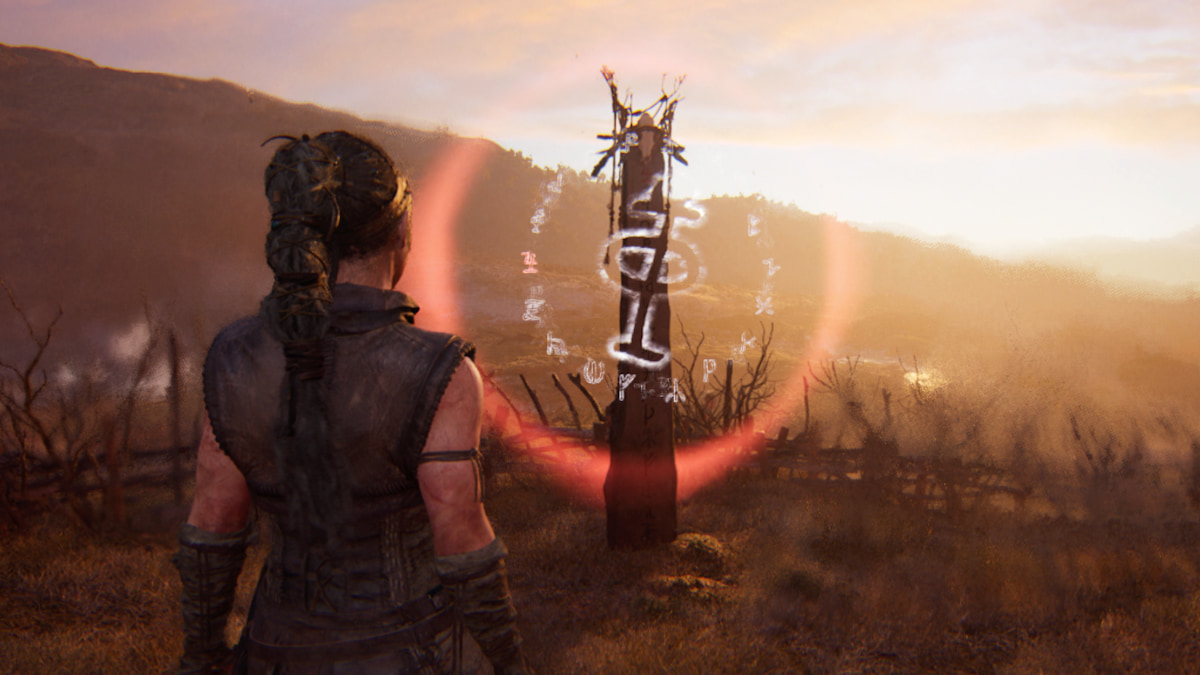
As you progress through the story in Senua’s Saga: Hellblade 2, you’ll come across some totems or Lorestangirs with runes etched into them, similar to the rune gates. We saw this concept in the first game with Lorestones, but now, they’re long pointy poles instead. Here’s where to find all of them.
Where to Find All Lorestangirs in Senua’s Saga: Hellblade 2
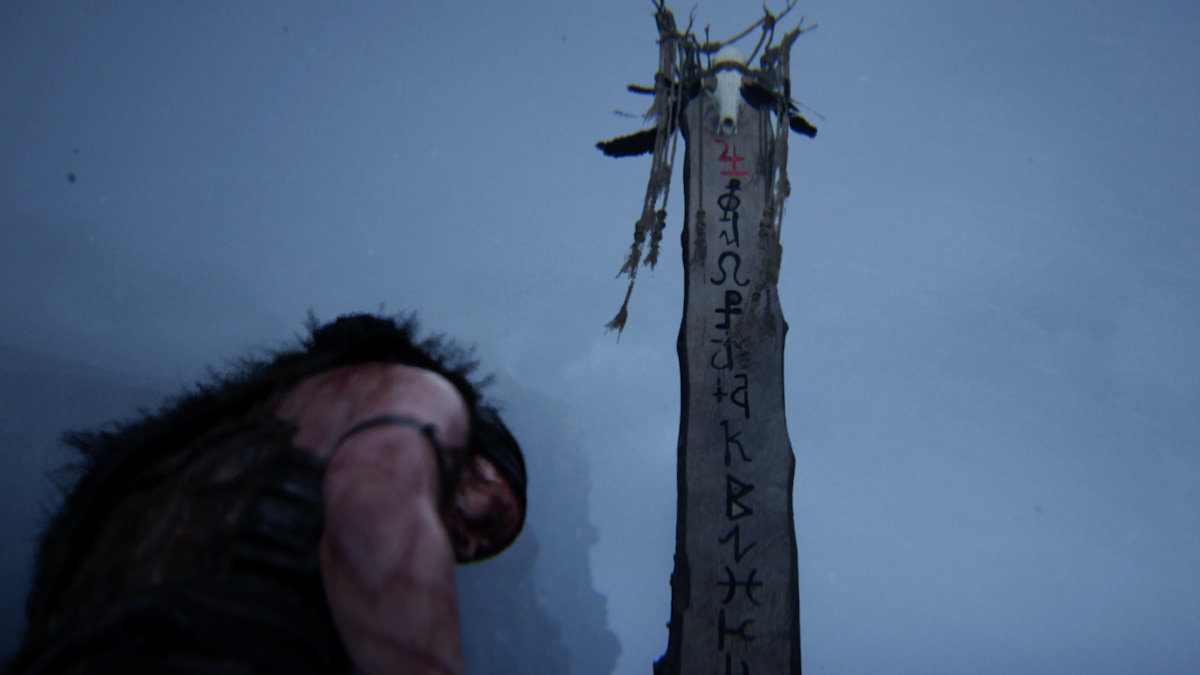
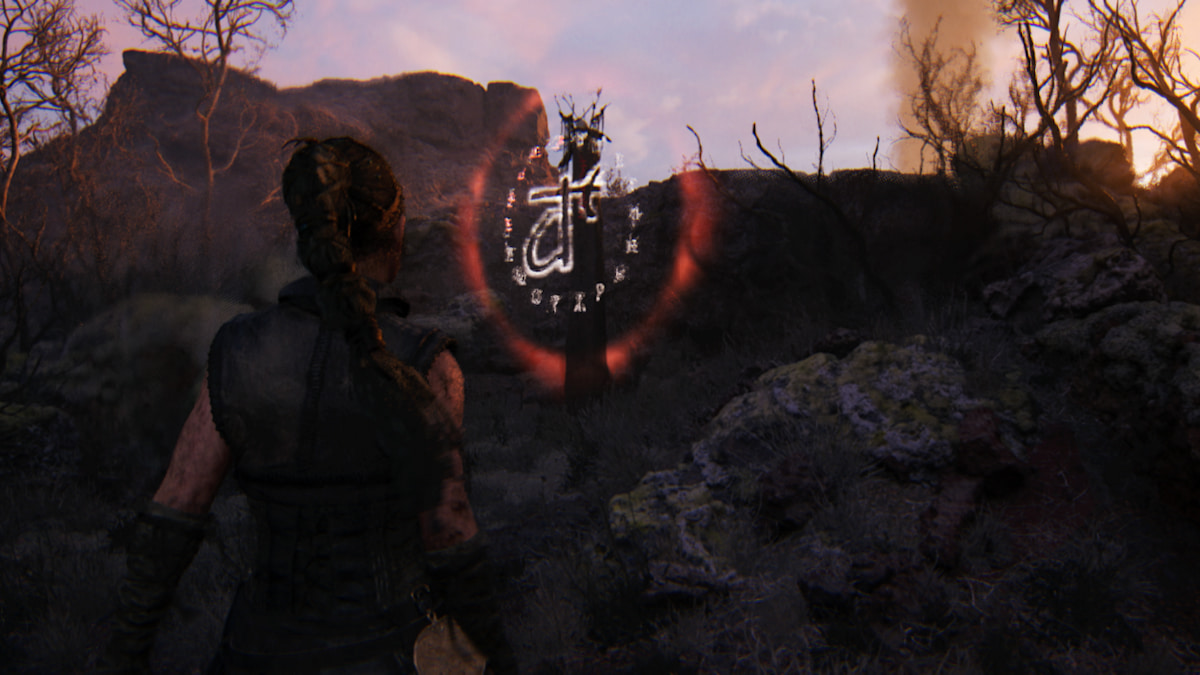
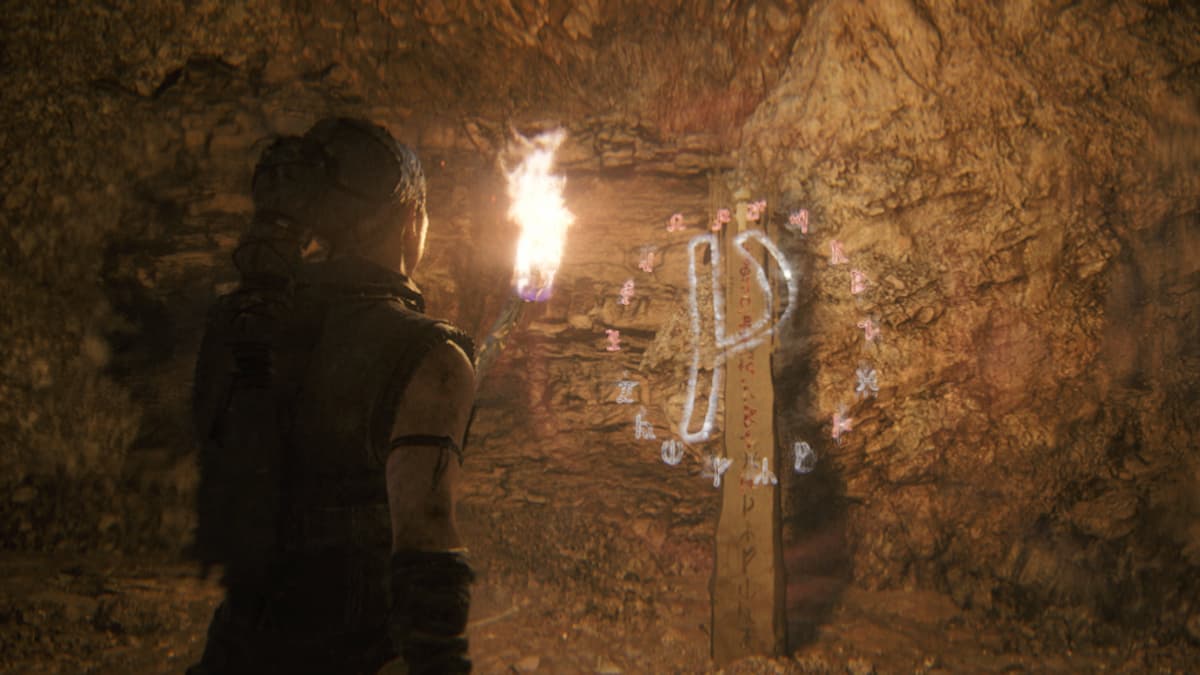
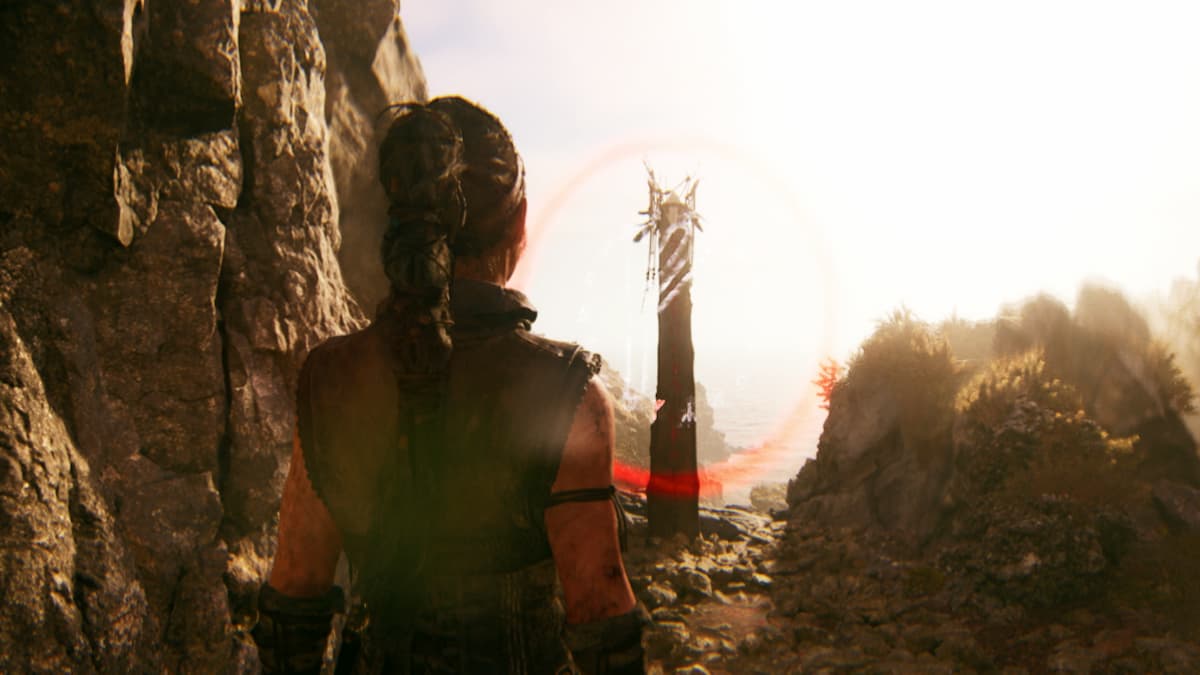
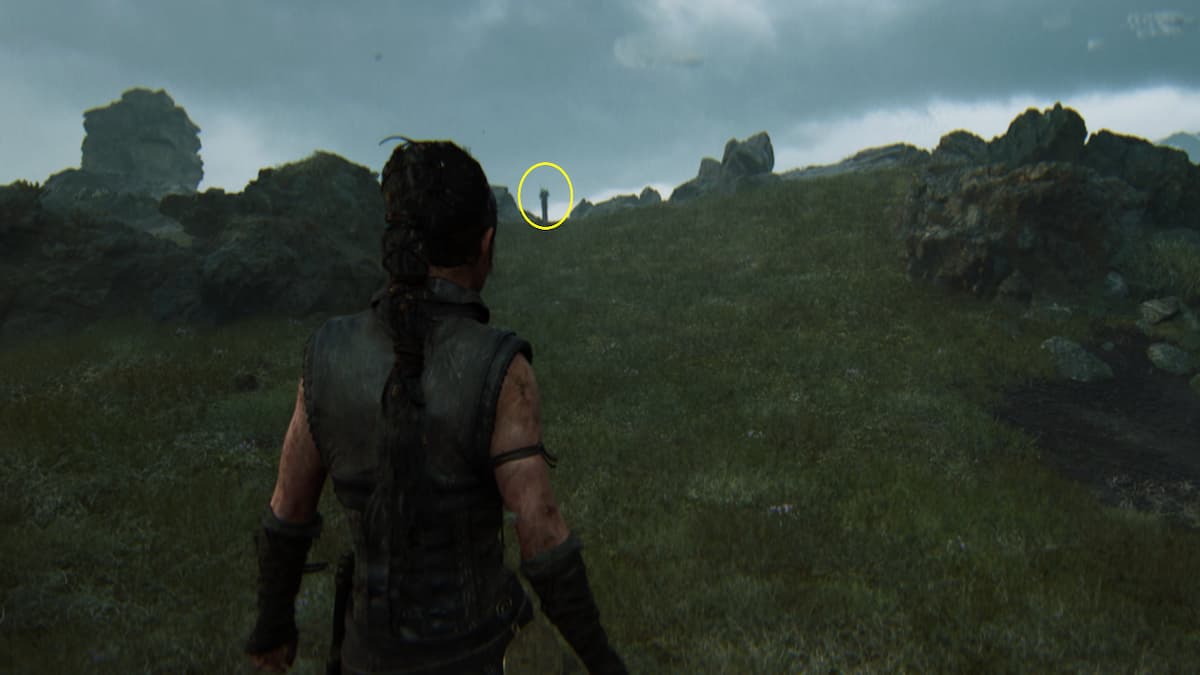
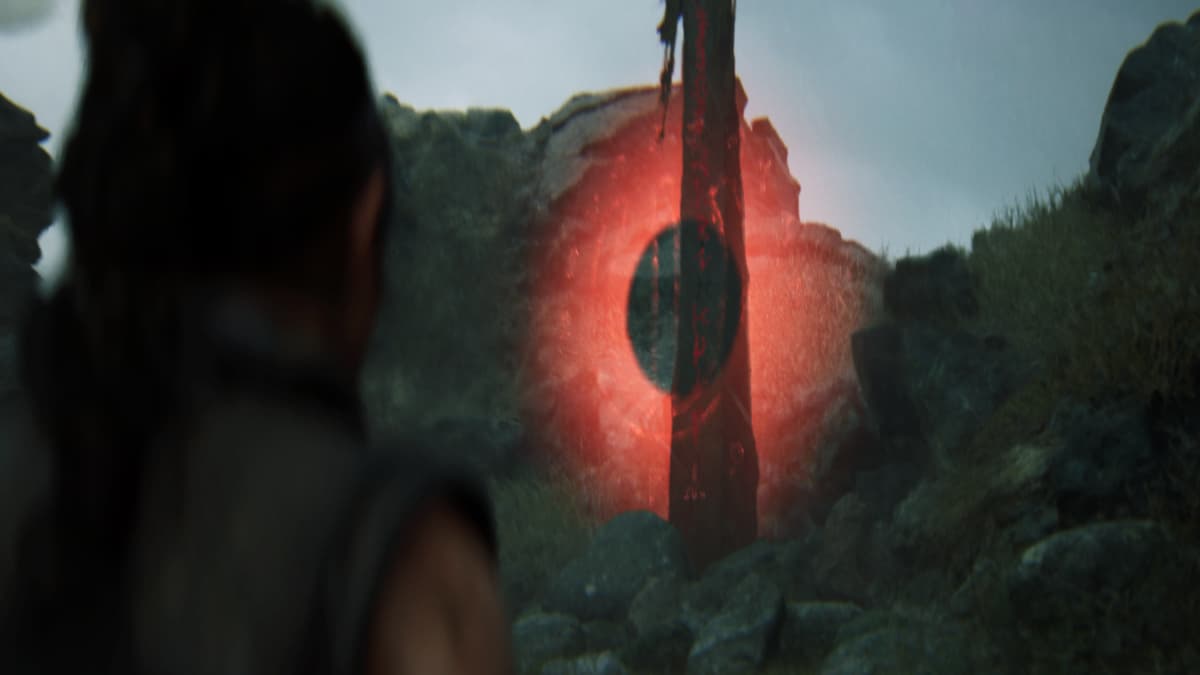
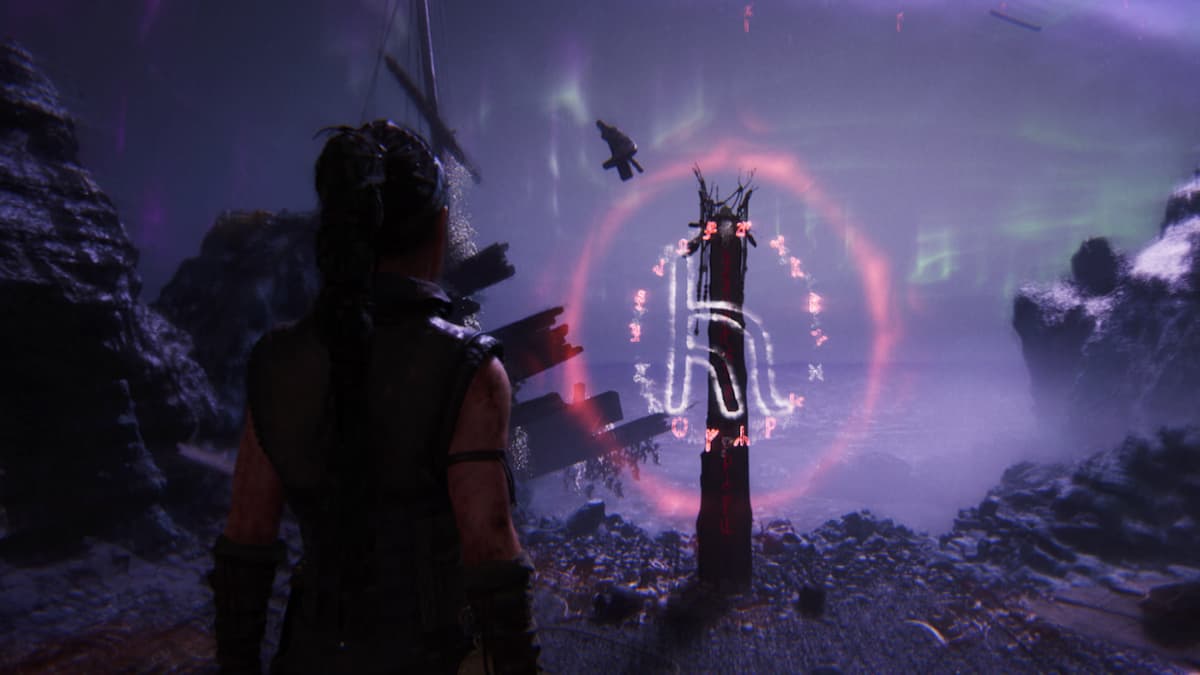
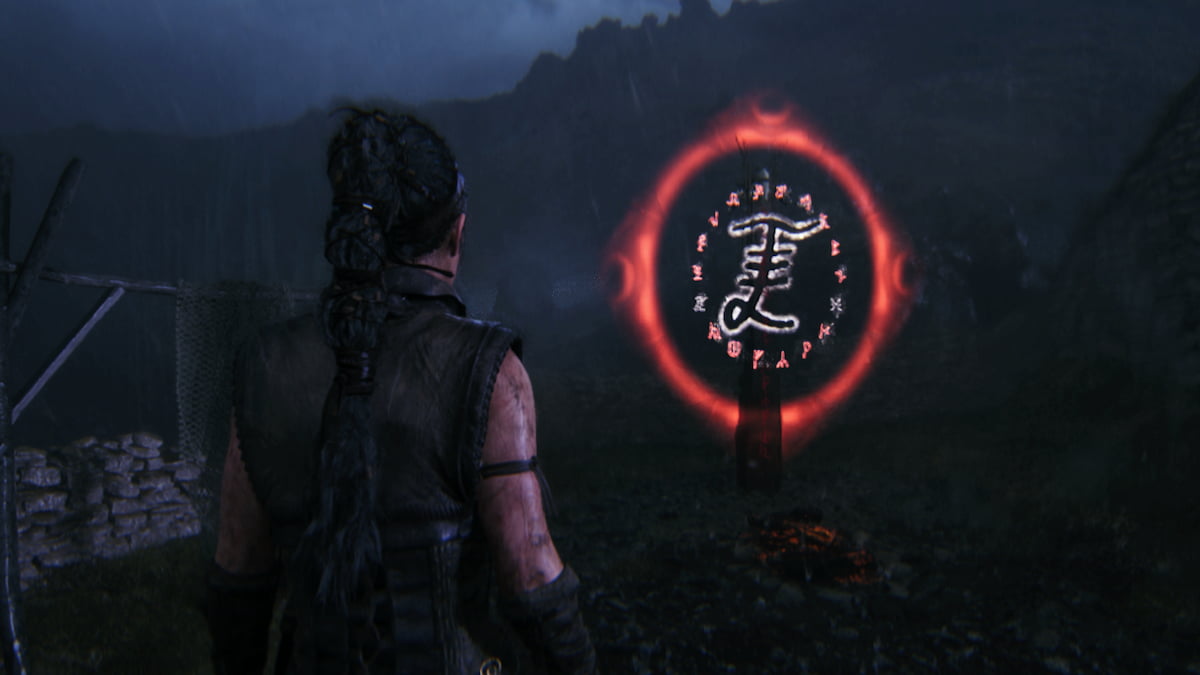
These Lorestangirs work like collectibles as you progress through the main story. Interacting with them using your Focus will trigger a brief voice line about the lore behind the story or location.
Each pole has a unique rune symbol and is ordered by chapter and location in the story. That way, if you miss one, you’ll know whether you need to backtrack or not. If you happen to miss one, you can go back at any time in the Chapter Selection via the main menu to collect them. Collecting all 18 of them will unlock new Extra content found on the main menu and give you the achievement of “Tales of Midgard.”
Here’s the complete list of locations:
Chapter 1
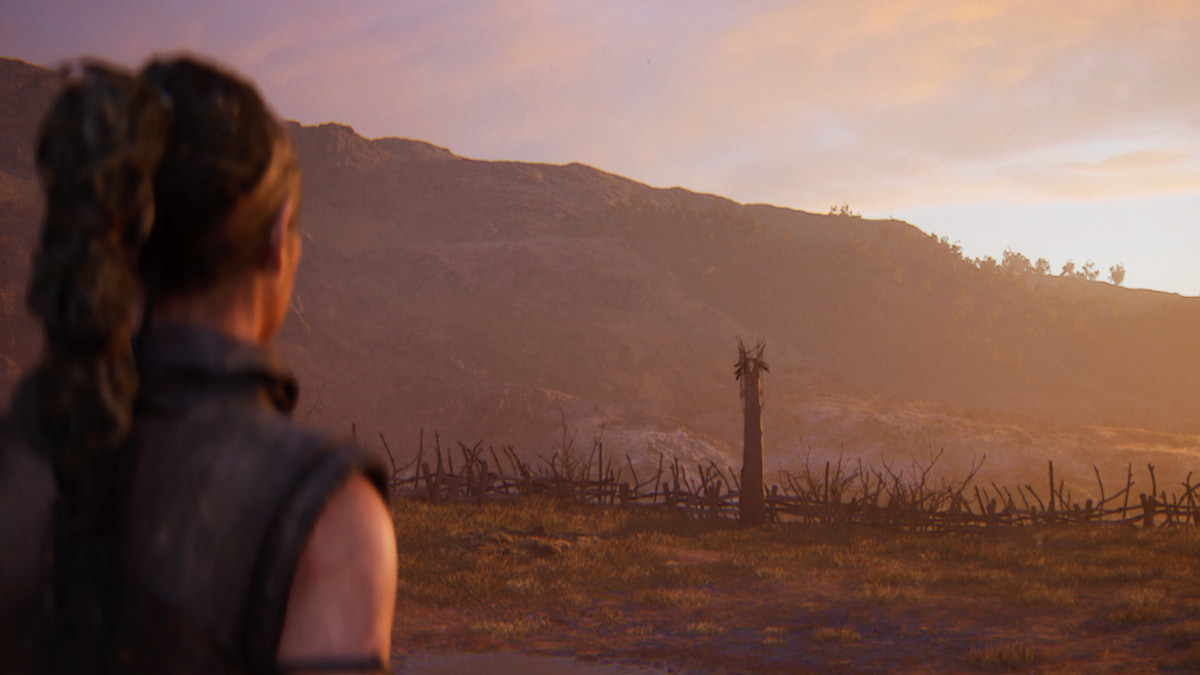
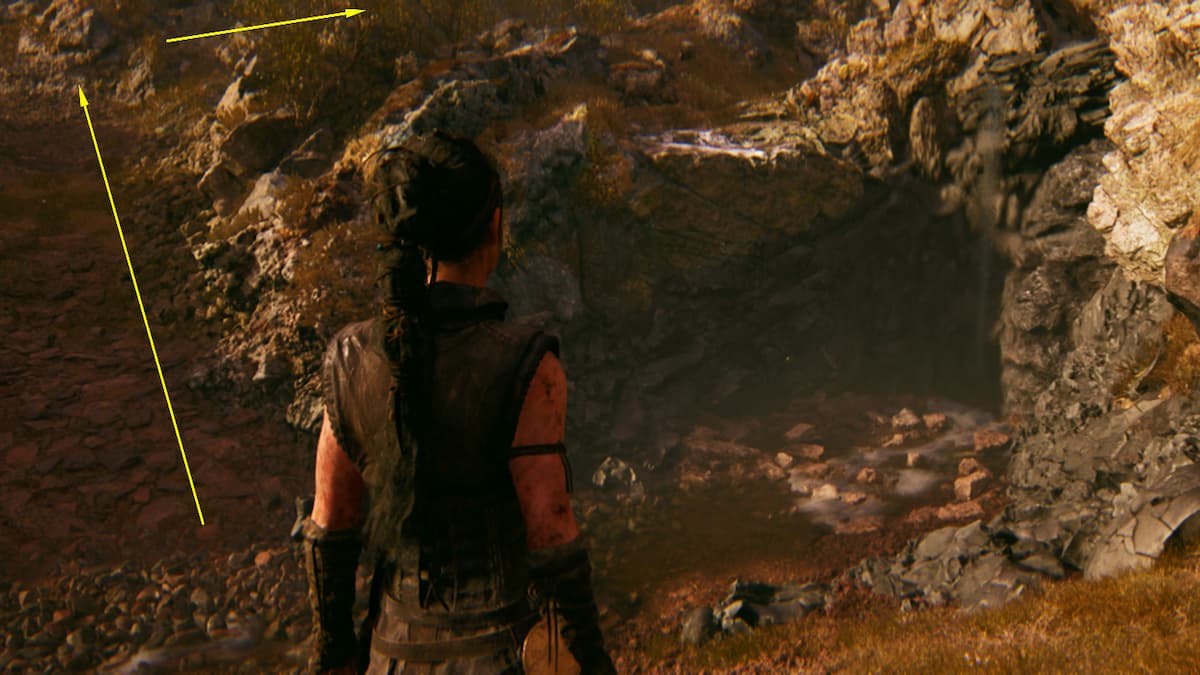
Lorestangir Totem #1 – Shipwreck Beach
The very first Lorestangir totem that you’ll come across is impossible to miss. You’ll find right after climbing up the cliffside from the beach and following the main path. A voice will prompt you to inspect the symbols, and you can use Focus to collect it. This is the only one you’ll find in the first chapter.
Chapter 2
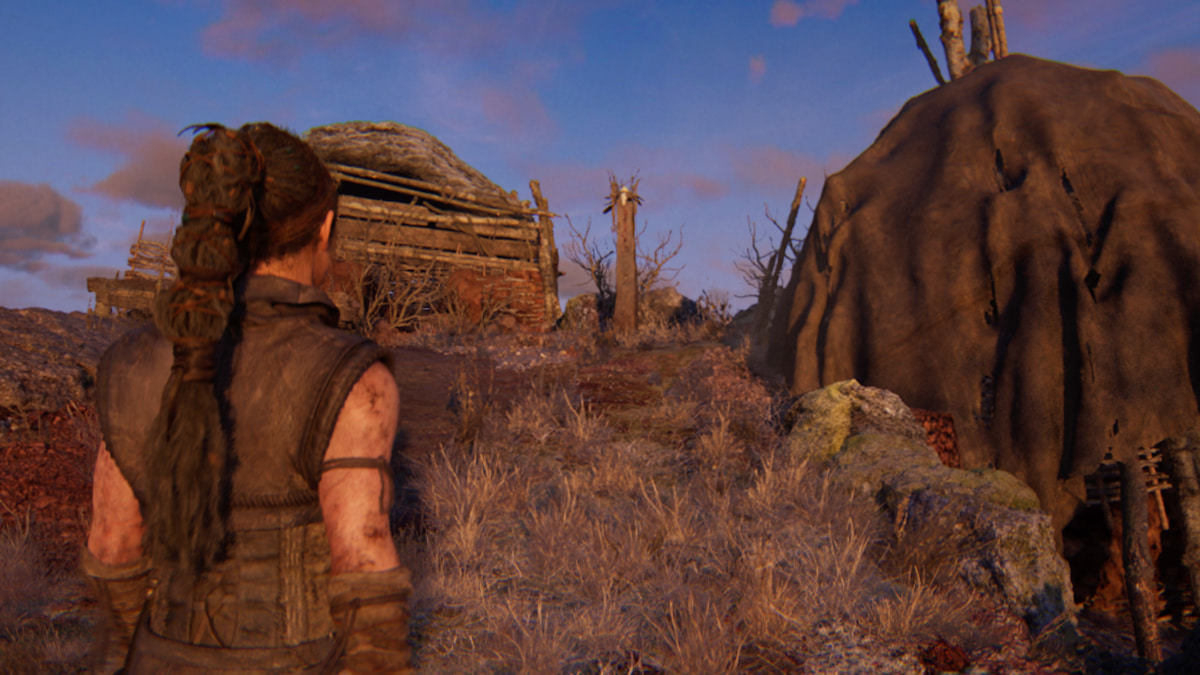
Lorestangir Totem #2 – Outside the Pillaged Village
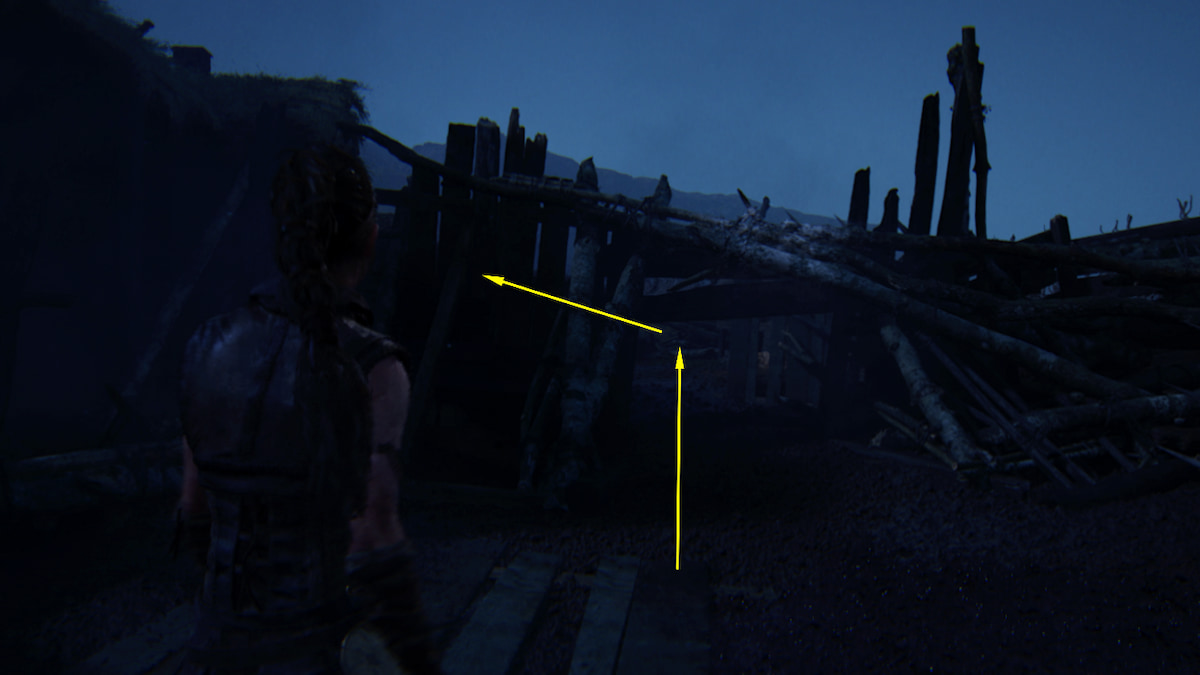
The second totem you’ll come across is after you fight the slavemaster and begin following him down a path toward the pillaged village. Before coming to the broken bridge, take a right into the area with two small houses with thatched hay roofs. Behind them, you’ll see the totem toward the back left corner.
Lorestangir Totem #3- Pillaged Village

The third totem is inside the pillage village, but first, you’ll need to collect the mirror and fight off the enemies using it in the burning village. After that, you’ll cross over the bridge into a different part of the village. Follow the path into a house where there’s a hanging man, and immediately after exiting that house, take a left. There will be some rumble falling over but a small gap where you can duck underneath. Within this yard, you’ll see the totem.
Lorestangir Totem #4 – Draugar Camp
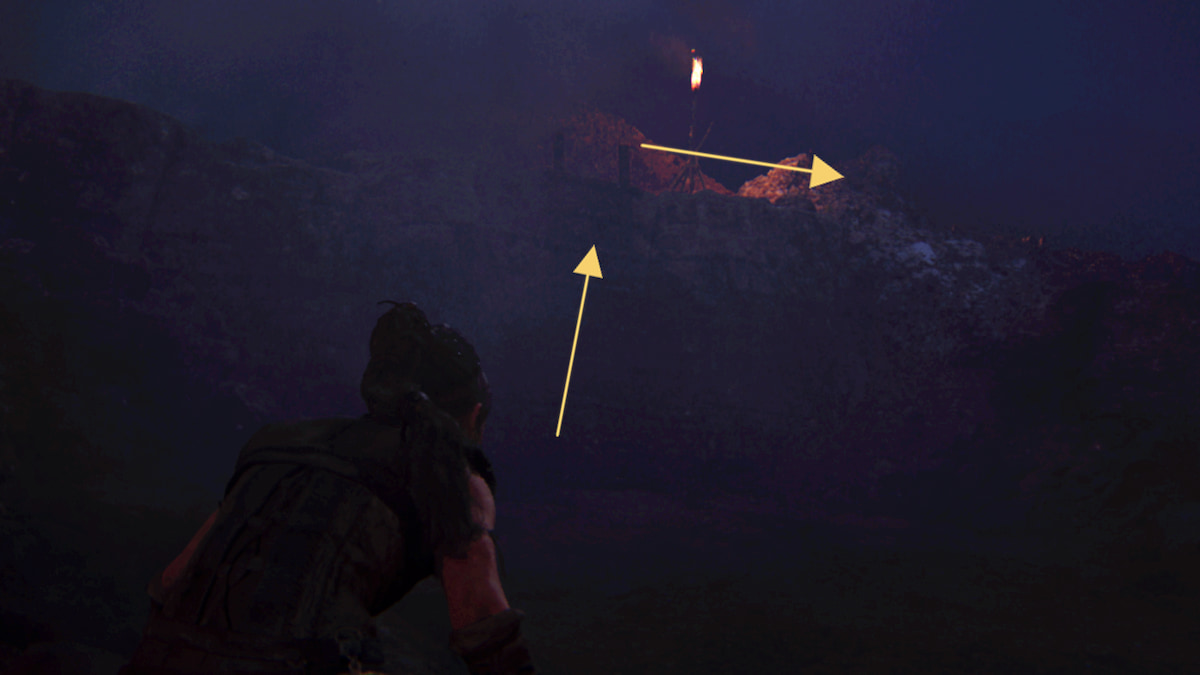

You can find the next totem after coming across the Draugar ceremony camp. Once Senua starts crouching, keep following the path until you drop down from the ledge. After you drop down, take a left, and you’ll see a wooden ladder to climb up. Climb up the ladder and follow the path, jumping over the rock wall to your right. The Lorestangir is at the very end of the path at the dead end.
Lorestangir Totem #5 – Overlooking the Pillaged Village


The last totem in Chapter 2 is after saving the mysterious man tied to the pole in the Draugar camp. Once you begin following him out of the camp, you’ll pass a broken bridge. From there, the path will split to the left and right. The man will continue to the right toward the river, but instead, take a left and follow the path all the way down to the totem on the overlook above the pillaged village.
Chapter 3
Lorestangir Totem #6 – Stranger’s Settlement
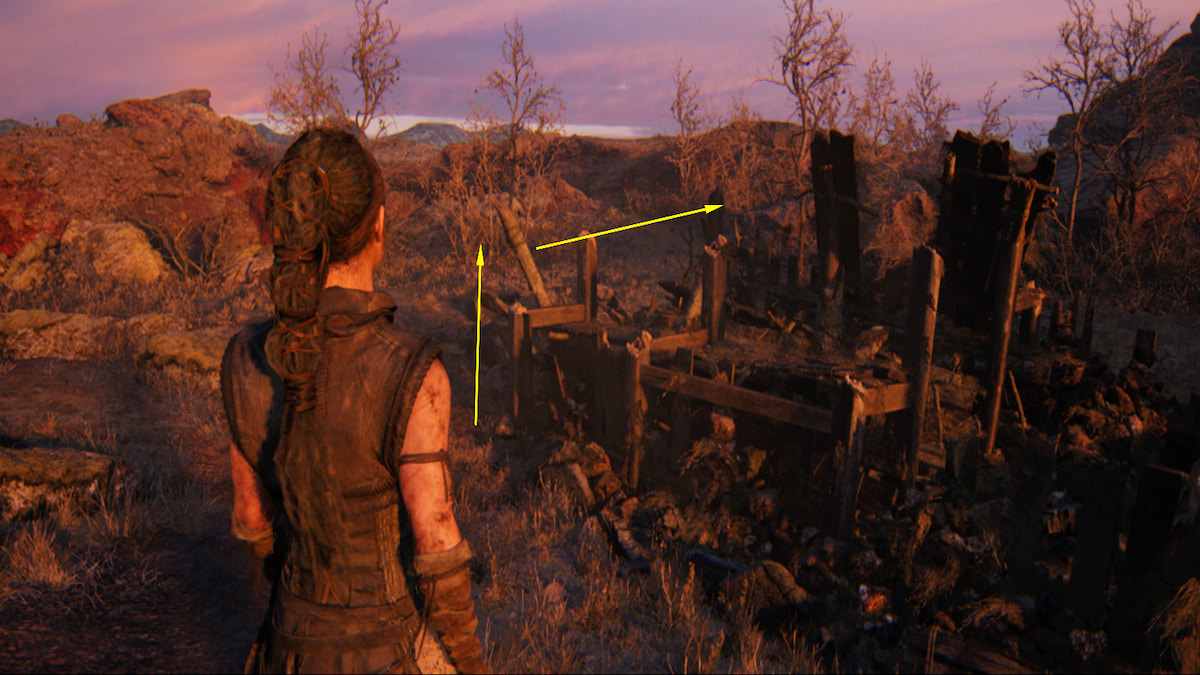
At the very start of Chapter 3, Senua will be following the stranger she saved from the Draugar camp and the Slavemaster. Walk down the hill with them and then take a left, where you’ll see the ruins of a house. Walk around the house and to the right, and you’ll find totem number six.
Lorestangir Totem #7 – Hilltop Camp
After escaping the shadow forest, Senua will be on a hilltop camp. Turn around after the cutscene and follow the hill up to the highest point, where there’s a building. Beside it, you’ll find the next totem.
Lorestangir Totem #8 – Hilltop Path
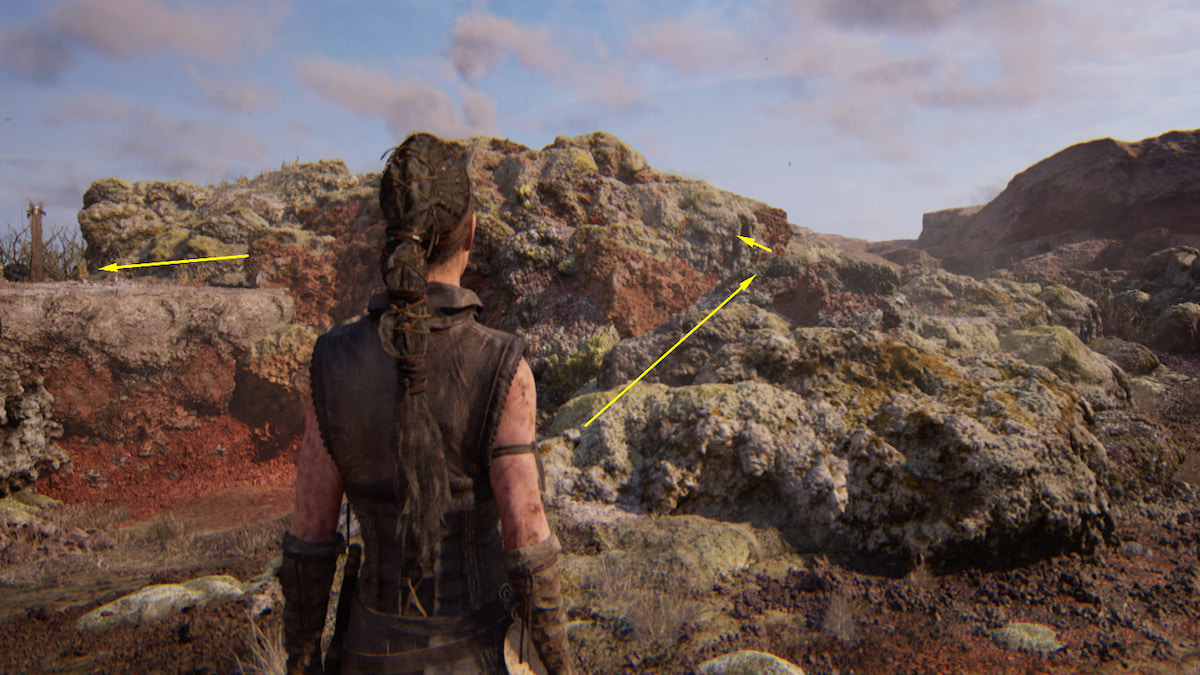

You can find totem eight after completing the first ball puzzle. Follow the now-open path, climbing upwards and keeping an eye on the left side. You’ll see a gap in some stones that you can squeeze through to reach this totem.
Lorestangir Totem #9 – Hilltop Gap
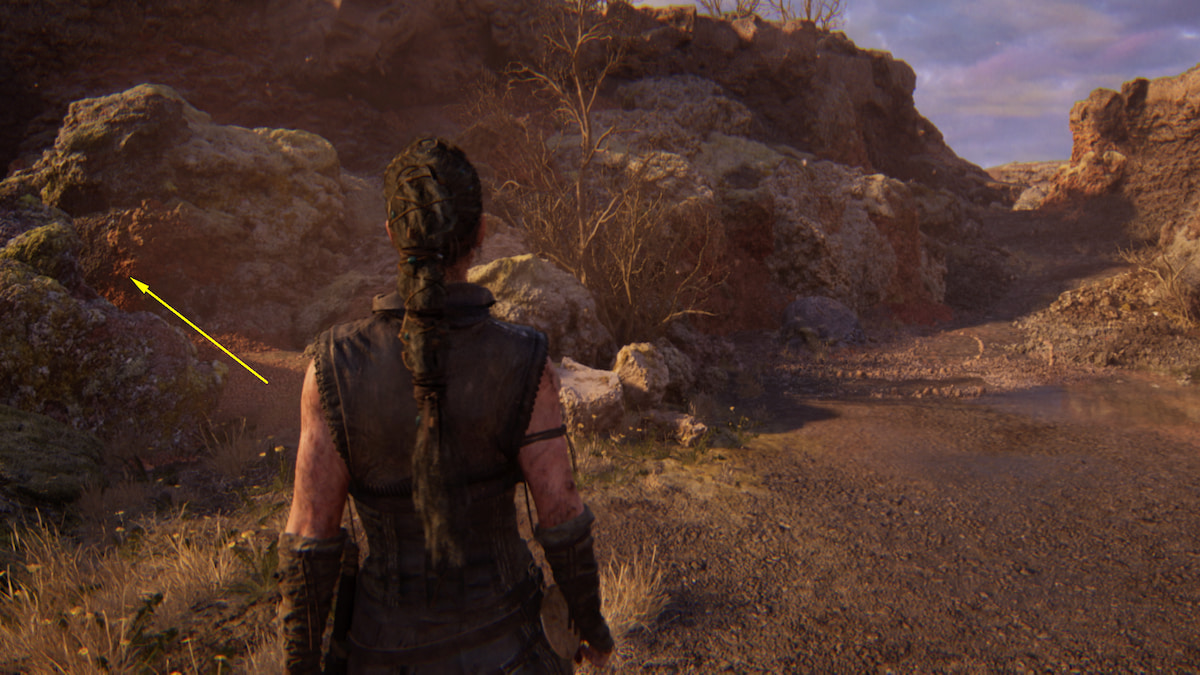

You can reach totem nine after completing the second ball puzzle. Follow the path, dropping down from two ledges, and then you’ll come to some branching paths past puddles of water. Turn left, and you’ll see a passageway through a slim gap. Head through it, and you’ll reach the totem.
Lorestangir Totem #10 – Hilltop Tunnel
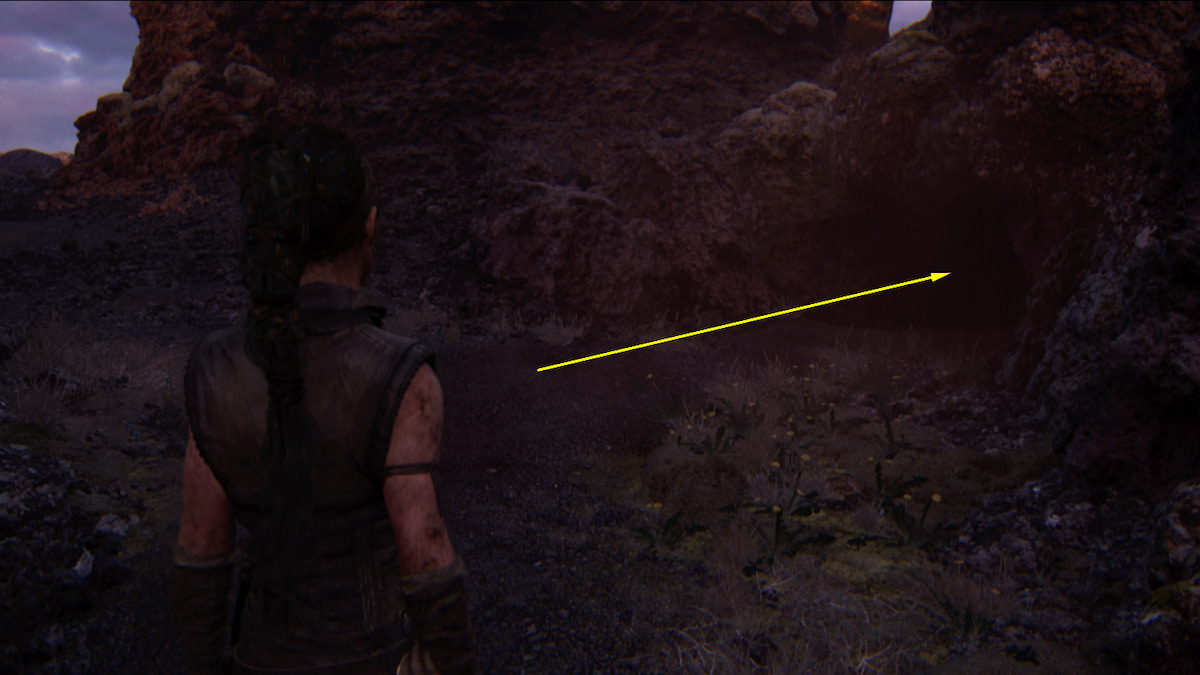

The next totem is very close to the last one. All you need to do is drop down back into the area with the puddles of water and continue forward on the path until you see a tunnel-like entrance on your right. Crawl through the tunnel, and you’ll find the totem at the end of the path.
Lorestangir Totem #11 – Third Ball Puzzle

The last of the lore totems in Chapter 3 is probably the easiest to miss. You’ll find it while completing the third ball puzzle. In the spot where you collect the last ball, turn around, and you’ll see the totem hanging upside down from the ceiling.
Chapter 4
Lorestangir Totem #12 – Cave Entrance
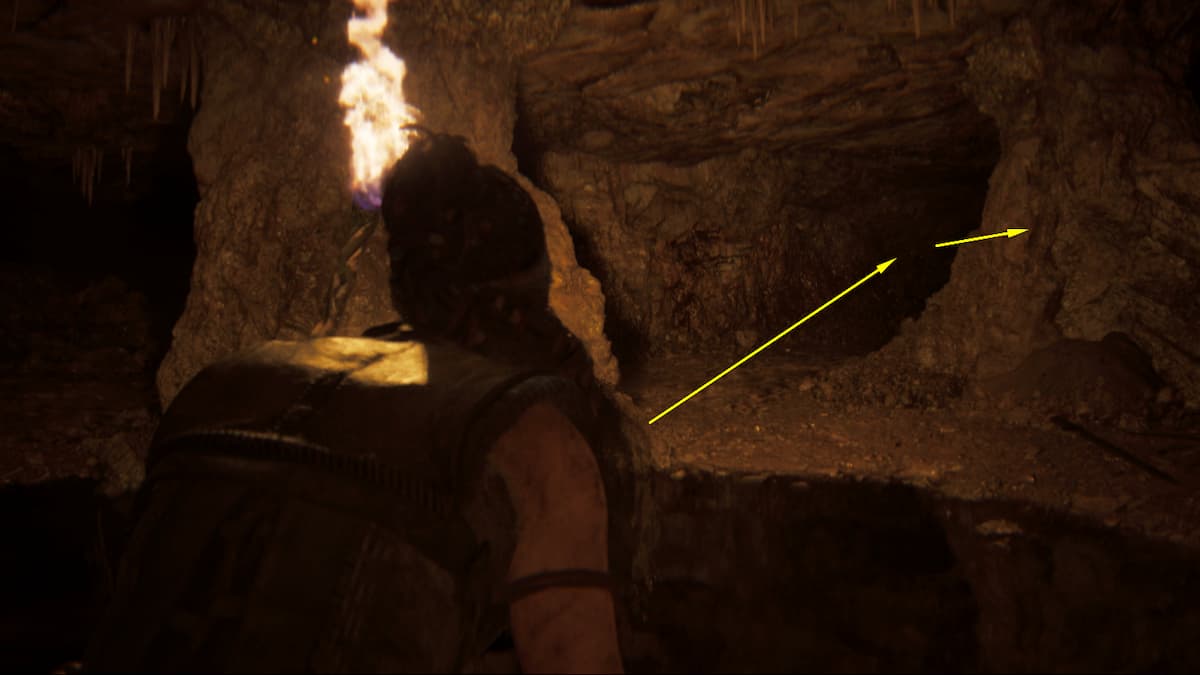

The first lore totem you’ll get in Chapter 4 is right as you descend into the cave. You’ll have to drop down from several ledges. After you drop from the fourth ledge into some water, turn right and follow the path to lore totem twelve.
Lorestangir Totem #13 – Cave Ledge
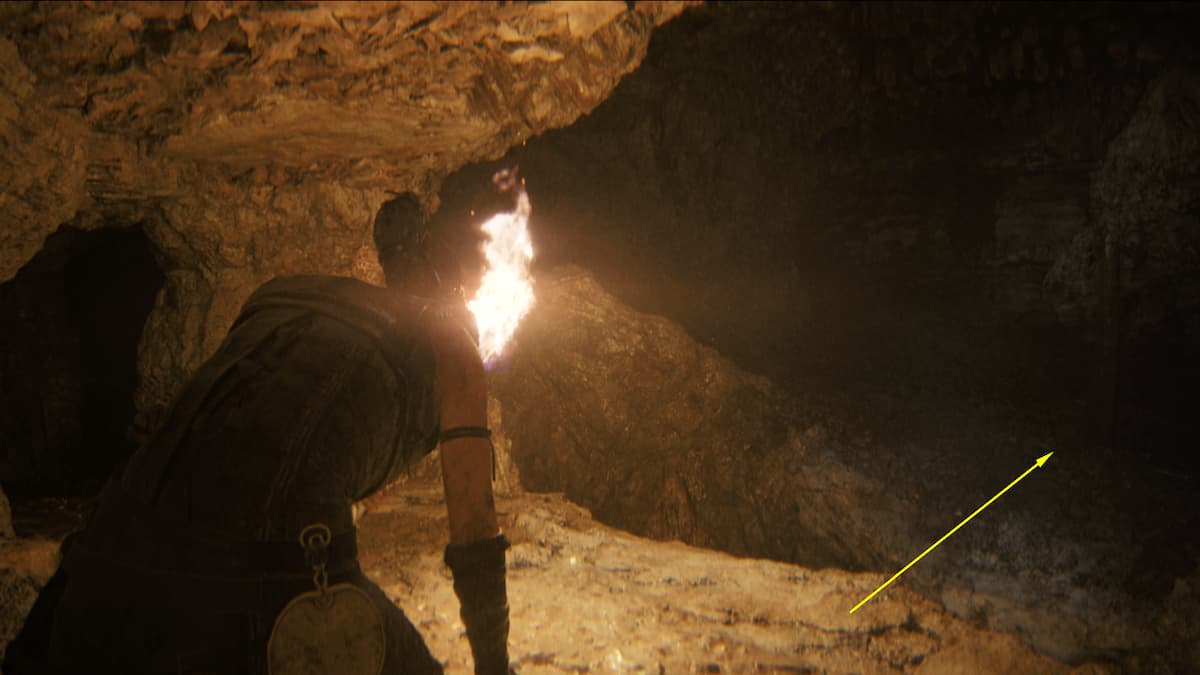
Once you reach the first area where you’re waist-deep in the water, you’ll have to light braziers to create a bridge across. After crossing the bridge, keep an eye on the right side. You’ll see the lore totem on a lower ledge, and there will be an outstretch of rock you can drop down on to reach it.
Lorestangir Totem #14 – Following the Light
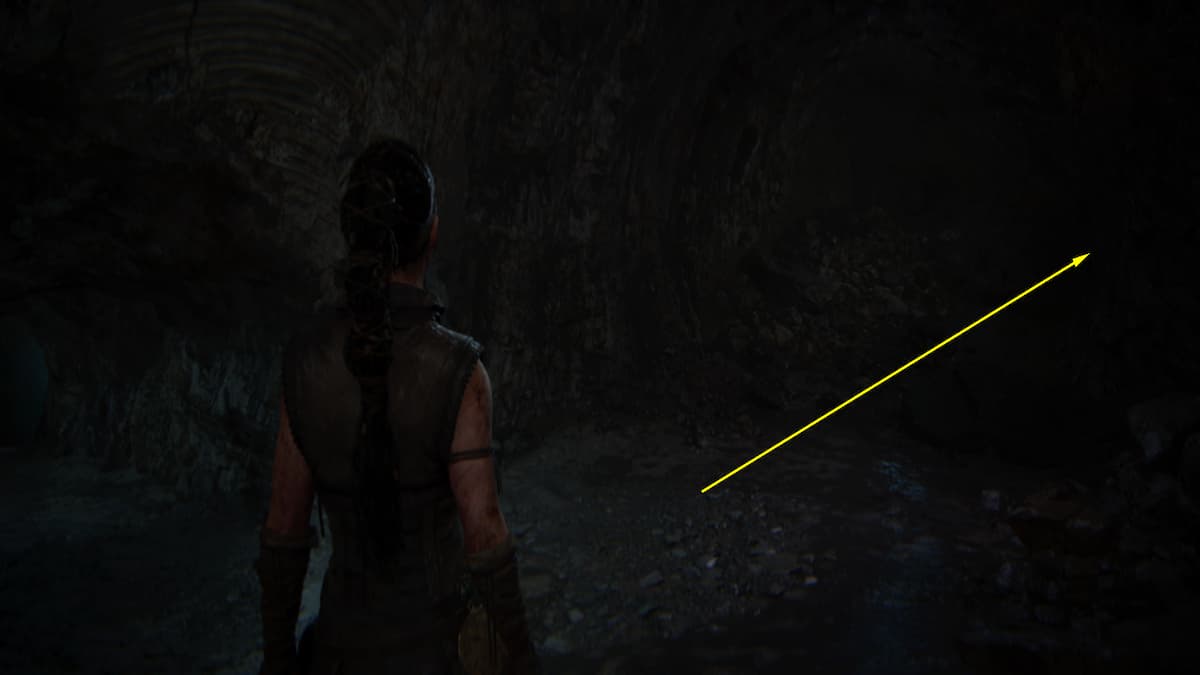

This lore totem you’ll find a little while later, after escaping the creatures and following the light to safety. You’ll enter an area with light shining through the top of the cave and some bizarre floating rocks. Drop down the next ledge, and you’ll see two branching paths. The path to the left with the greenish-blue light is the path for the story. Instead, take a right and follow it down to find the totem.
Chapter 5
Lorestangir Totem #15 – Waterfall

After making your way out of the cave, Senua will be following the slavemaster and stranger she rescued from the Draugar again. After they disappear, keep following the path until you see a waterfall on your right. Then, continue up the slope and make a sharp right turn to climb up to the mainstream of the waterfall. Follow the stream to the right, and you’ll find the totem.
Lorestangir Totem #16 – Following the Woman
Once you begin following the woman leader toward the beach, after battling the first giant, keep following her until you reach a large open field. You’ll have to drop down many ledges and climb a wall to get there. Then, in the field, turn right, and you’ll see the lore totem sticking up in the distance. Head toward it and follow the ledge of the rocks around toward the left and right. You’ll see an opening you can crawl through to reach the totem.
Lorestangir Totem #17 – Shipwreck Puzzle Area
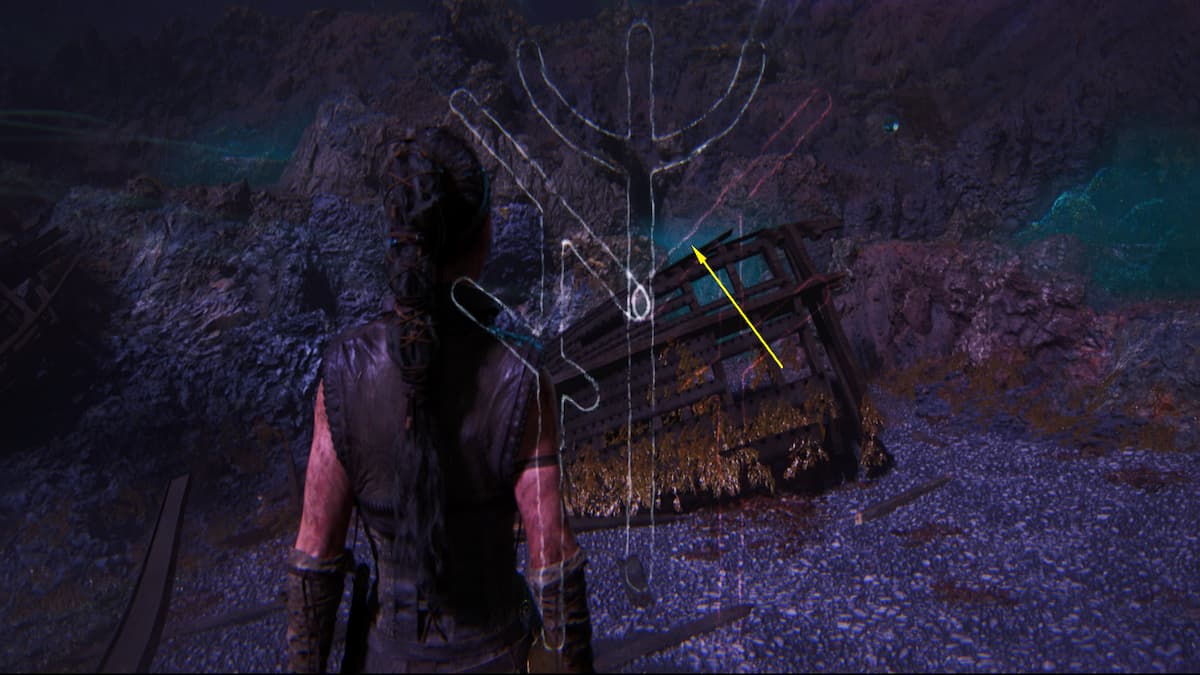
The next totem is found during the second glyph puzzle on the way down to the beach in the shipwreck area. To get to it, head to the right and up the slope (you may have to use the water drop to fill the gap if it isn’t already filled). Keep following the slope around to the right, using the water drops to create the path. Once you drop down to another beach area, look for a shipwreck with yellow plants growing on it and blue dust behind it. Head through the blue dust, and there will be a crack in the wall you can squeeze through. Then, you’ll find the totem on the edge of the water.
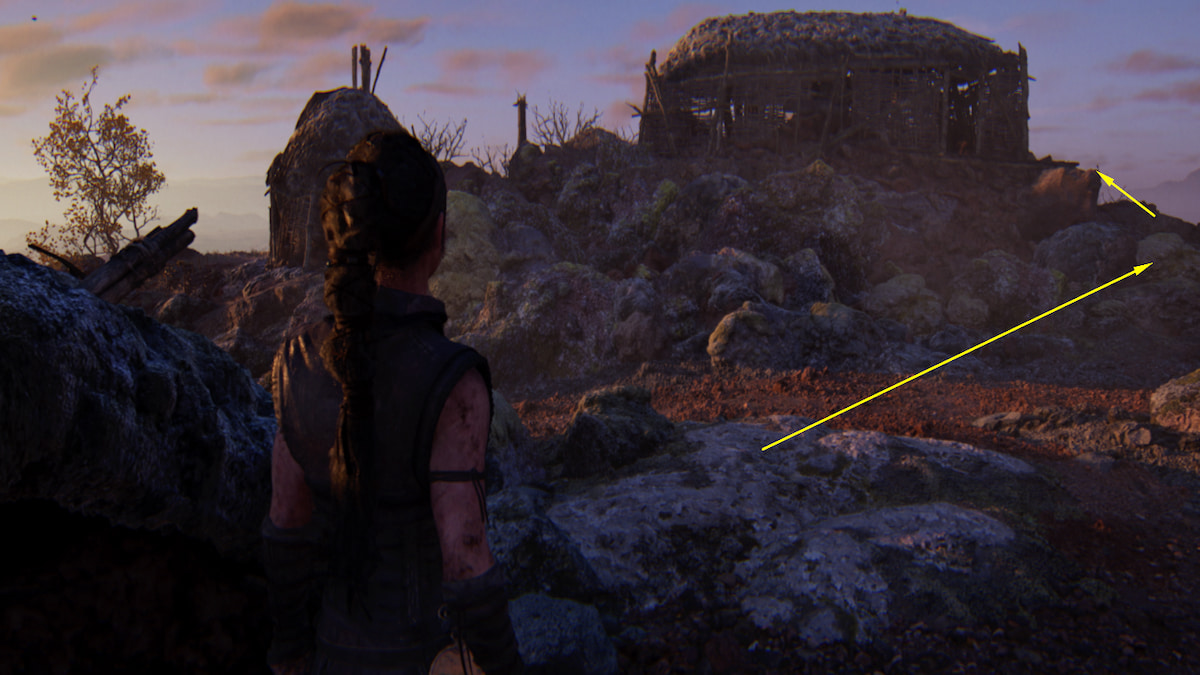
Lorestangir Totem #18 – Stormy Village
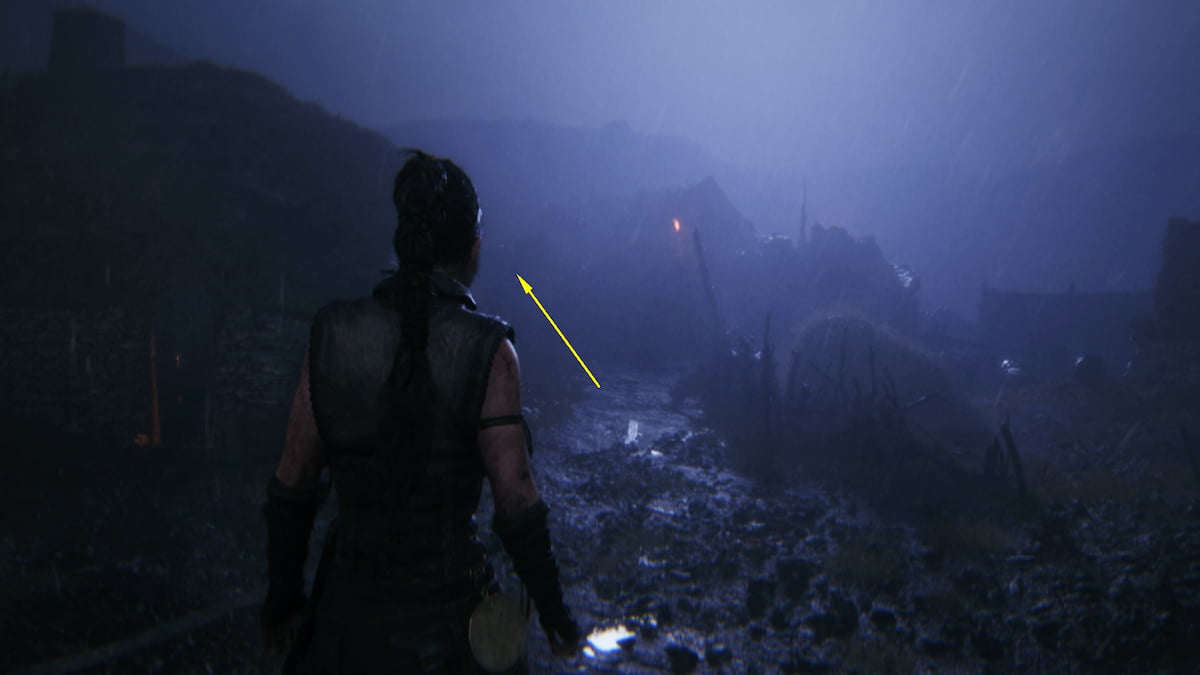
The very last of the lore totems is in the village where you are confronting the ocean giant. This is directly after witnessing the story of the giant underwater. Keep to the left side, following the pathways upward, past several houses. Whenever the path splits off, stay left and continue all the way up. You’ll find the lore totem in the yard behind a house on the slightly elevated hill.
That’s all 18 of the totems! There aren’t any in the last chapter. Once you collect them all, you’ll earn your achievement, and you can check out the Extras section of the main menu for new content. If you happen to miss any, you can use the Chapter Selection menu to go back and get them.
Want more tips like this? Check out GameSkinny’s Senua’s Saga: Hellblade 2 hub.


Published: May 23, 2024 09:05 am