It’s clear early in Cult of the Lamb that Tarot Cards are the game’s bread and butter. These items give you buffs as you traverse the extremely unforgiving and horrific dungeons that stand before you. Some are can be purchased from the vendors you unlock as you play through the main questline, while others are found through random encounters within certain dungeons.
In this Cult of the Lamb guide, we will discuss each of the 36 Tarot Cards we have come across so far, where to find them, and what each one does for you.
Tarot Cards Explained
Tarot Cards boost your character’s attributes and stats. They come with a preset buff that can change the outcome of a dungeon run or boss fight and are found randomly throughout dungeons from Clauneck, who will appear in random rooms throughout each dungeon. Tarot Cards also reset each time you die or leave a dungeon and return to your Cult.
As you play through the main questline, you can also find Fleece of the Fates, handy items that spawn +4 Tarot Cards at the beginning of every dungeon. Using them, however, means you will no longer encounter Clauneck and those four Cards are what you get for the entirety of the dungeon.
Storyline Tarot Cars
- The Lovers I: +1 Health Heart.
- Diseased Heart: Damages everything on screen when hit .
- Rabbits Foot: Increases chance to spawn better chests.
- Gift From Below: 10% chance of gaining health when killing an enemy.
- Shield of Faith: Take Refuge in your Devotion – When attacked, 10% chance of negating damage.
- Master of the Art: Weapon damage increased by 1.2x.
- True Sight: 10% chance to deal a critical hit.
- The Hearts I: Gain an extra half Heart of Health.
- Divine Curse: Curses consume 25% less Fervour.
- Divine Strength: Attack rate increased by 1.25x.
- Neptunes Curse: Enemies have a chance to drop a fish.
- Ambrosia +: Increase Cursed Attack damage by x1.5.
- Fervours Harvest +: Enemies will drop 3x more Fervour.
- Fortunes Blessing: Receive double the health when healing.
- Telescope: Reveal the Map.
- The Arachnid: Inflicts enemies struck with Poison, and does Poison Damage over time.
Cards Purchased from Vendors
- Blazing Trail: Rolling into an enemy will damage them.
- Cost: x35 Coin at Spore Grotto.
- The Path: Increase movement speed by 1.25x.
- Cost: x35 Coin at Spore Grotto.
- Weeping Moon: +30% more damage at night.
- Cost: x35 Coin at Spore Grotto.
- Natures Boon: Harvest bonus resources.
- Cost: x25 Coin at Pilgrim’s Passage.
- All Seeing Sun: +20% more damage during the day.
- Cost: x25 Coin at Pilgrim’s Passage.
- Hands of Rage: Fire a projectile when you swing your weapon; has a 10-second Cooldown.
- Cost: x25 Coin at Pilgrim’s Passage.
- The Bomb: Drop an explosive when you roll; has a 10-second cooldown.
- Cost: x40 Coin at Smugglers Sanctuary.
- Ichor Lingered: Drop black Ichor when you roll; has a 10-second cooldown.
- Cost: x40 Coin at Smugglers Sanctuary.
- Soul Snatcher: +10% chance of healing when killing an enemy.
- Cost: x40 Coin at Smugglers Sanctuary.
- Ichor Earned: Drops a glob of Black Ichor around you when struck by an enemy.
- Cost: x5 Gold Bar at Midas’s Cave.
- The Deal: Resurrect with +1 red heart when killed.
- Cost: x10 Gold Bar at Midas’s Cave.
- The Burning Dead: Dead enemy bodies will explode, damaging other enemies nearby.
- Cost: x5 Gold Bar at Midas’s Cave.
Cards Unlocked Through Encounters
- The Hearts II: Gain +1 Heart.
- Beat Ratau in a game of Knucklebones.
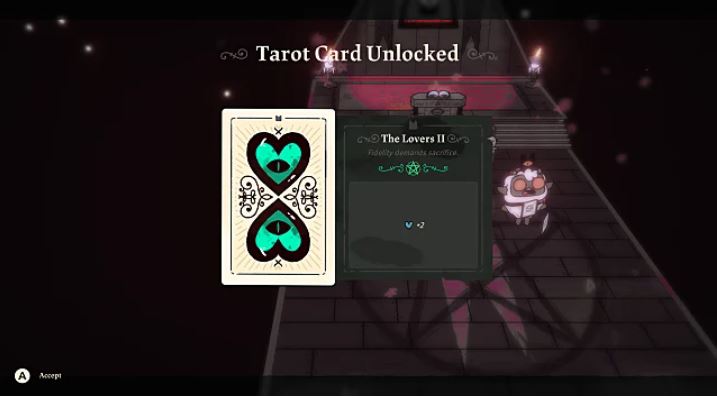
- The Lovers II: +2 Blue Hearts.
- Marry one of your followers.
- Ambrosia: Increased curse attack damage by 1.25x.
- Purchased from Forneus in one of the Dungeons (this appears to be random).
- The Hearts III: Gain +2 Hearts.
- Purchased from Ratoo in one of the Dungeons (this appears to be random).
- Mithridatism: Immune to any Poison.
- Beat Flinky in a game of Knucklebones.
- Strength from Without: Receive +5 Fervour when hit by an enemy.
- Beat Klunko and Bop in a game of Knucklebones.
- Strength from Within: Fervour will slowly replenish over time, and has a 2.5-second cooldown.
- Beat Shrumy in a game of Knucklebones.
- Fervour’s Host: Fervour will refill completely upon entering a new room in a dungeon.
- Purchase Followers from the Spider Helob (the number of followers needed to purchase is unknown and seems to be random).
Best Tarot Cards
The best Tarot Cards in Cult of the Lamb will vary depending on your personal playstyle, but these are the ones that we believe are vital when entering dungeons in Old Faith:
- The Lovers I: Having extra hearts is never a bad thing. Giving yourself an HP boost helps with survivability and longevity in the dungeons.
- Gift From Below: You will kill a lot of enemies in each dungeon, and some of them will slap you for a decent chunk of HP. So, why not steal 10% of it back when they die?
- The Arachnid: Poison Damage can turn the tide in any boss encounter. The Arachnid deals damage over time, meaning that if you need to step away from a Heretic to kill the 2,343 adds he spawned, the boss will still be taking damage. Plus, it makes killing the little guys throughout the dungeon much easier.
- The Hearts I, II, or II: Again, Health Points = Good. The more health, the better your chances.
- Hands of Rage: This has come in handy more times than we can count. Ranged enemies can be annoying in any fight, especially those in small spaces. Shooting projectiles in random directions can hit the enemies can and can’t see.
Again, the best Tarot Cards are ultimately the ones that best fit your playstyle, but we believe these, in particular, are super helpful and can make all the difference when defeating the bloodthirsty creatures that lurk in the Old Faith. For more tips, head over to our Cult of the Lamb guides hub, where we cover the Doctrines, Rituals, and Followers in detail. If you’re looking for the best weapons, we’ve got that covered, too.


Published: Aug 17, 2022 06:06 pm