
Genshin Impact has its fair share of quests that explore different locations in Teyvat. A prime example of that is the Perils in the Dark quest, which is part of a larger series that ventures into The Chasm: Underground Mines area in Liyue.
Although the series was added last year, it’s become relevant again thanks to the new story quest line for Nahida that was added in Version 3.6. This guide will act as a walkthrough of the Perils in the Dark quest and explain the relation to the second act of Nahida’s story quest, Sapientia Oromasdis Chapter.
How to Start Perils in the Dark in Genshin Impact
 Screenshot by GameSkinny
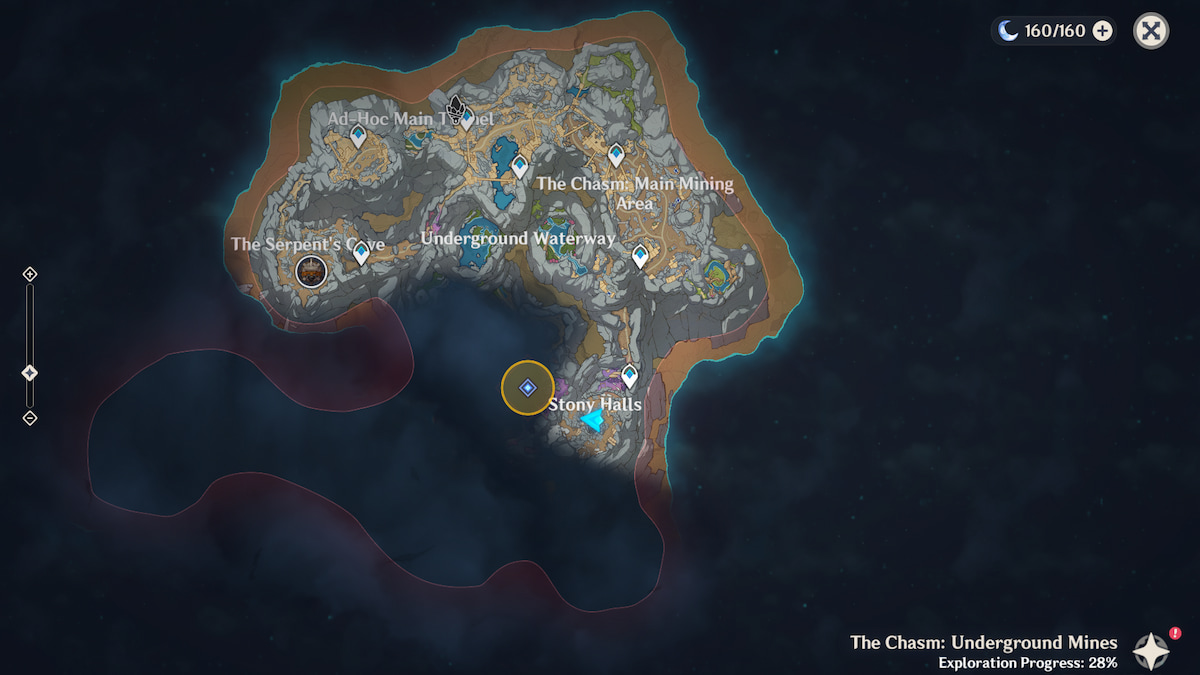
This quest can be found within the Stony Halls subarea, which will be the deepest point you’ve reached so far. A teleport waypoint just a little bit north of the area provides quick access. You’ll know you’re in the right place once you find a large hole in the ground.
The Nameless Ruins
 Screenshot by GameSkinny
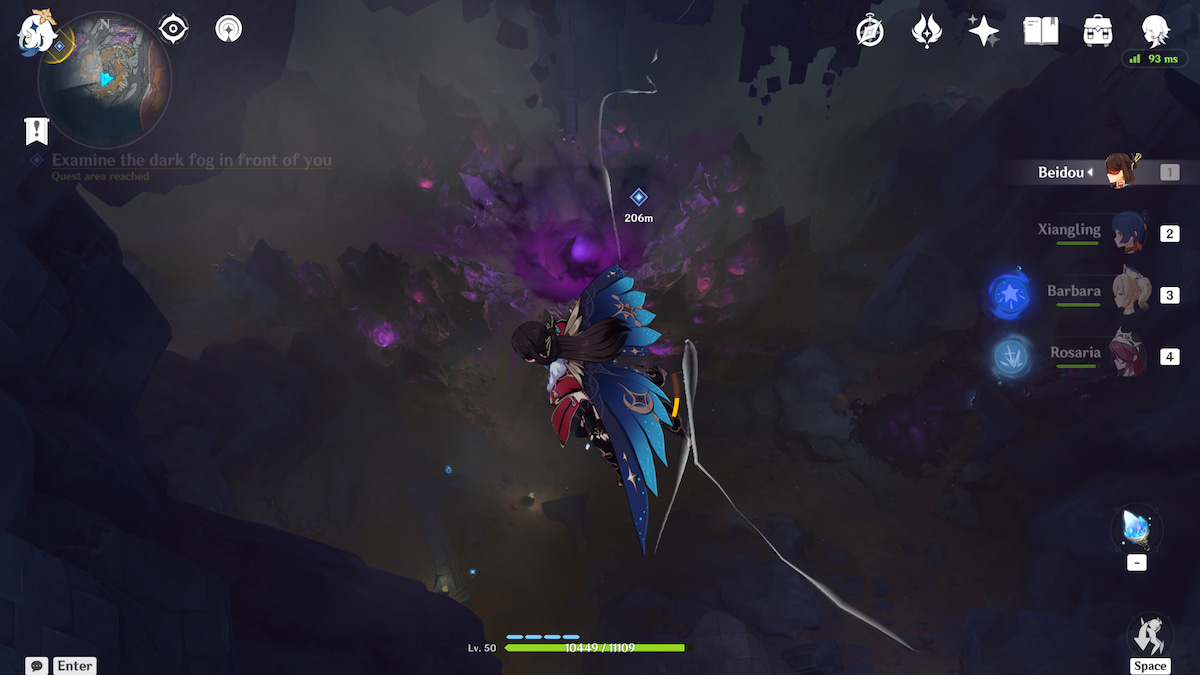
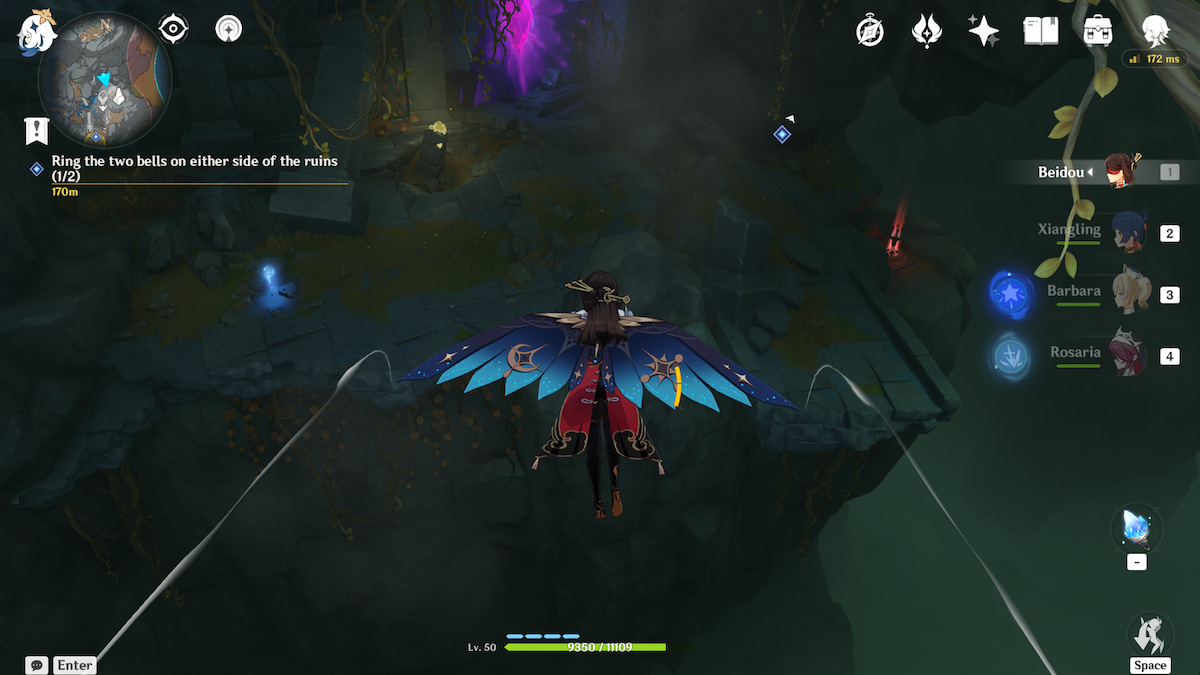
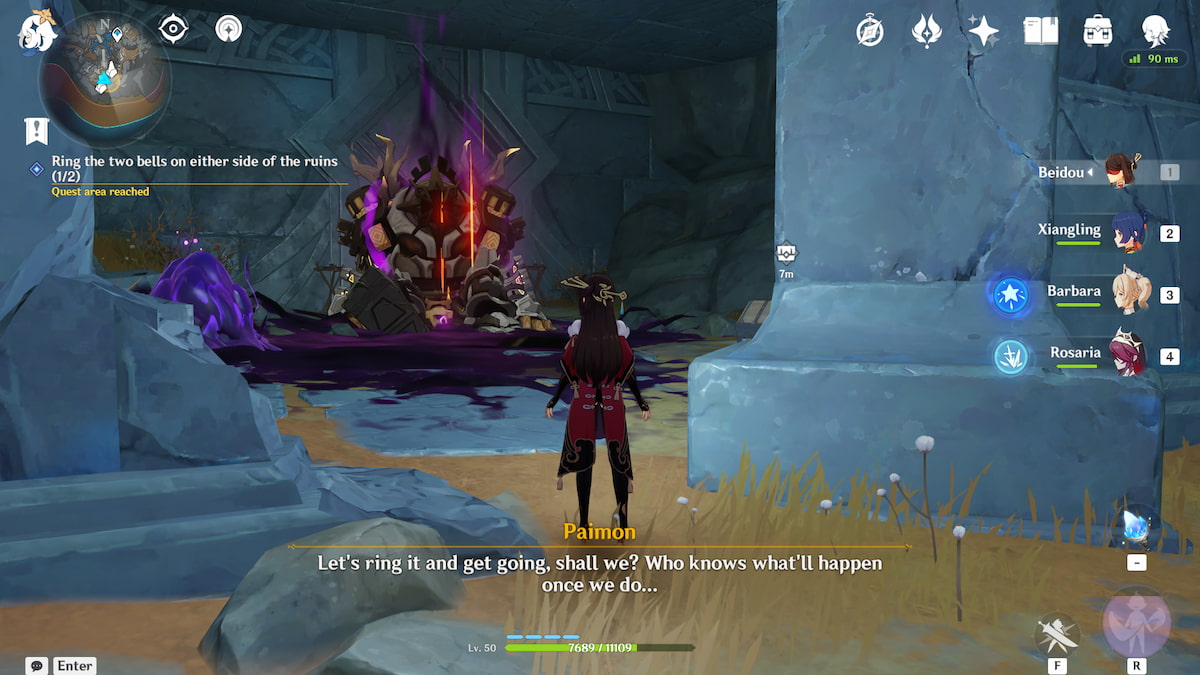
Your first objective is to go deeper into the chasm, so jump into the big hole and use your wing glider to avoid the walls. Keep on gliding and you’ll make it to the Nameless Ruins. There’s an ominous dark fog in the middle of this area, but make sure to go a bit further down and activate the teleport waypoint first.
The dark fog won’t let you pass for the moment, so walk around until you find an Oozing Concretion next to the quest marker. Use your Lumenstone Adjuvant to clear it and find the Fatuus’ Journal. Reading that will reveal the rest of Stony Halls and Nameless Ruins on your map as well as the locations for two bells you need to ring.
Ringing the Northern Bell
 Screenshot by GameSkinny
Just ahead of your location is a Seelie. Follow it to score a chest of loot and then continue north along the defined path. Along the way, you’ll find a Ruin Grader that you can run past or take on. Soon after a large door will come into view and a Shadowy Husk: Line Breaker will step out.
This enemy is also optional, although there’s a good chance this is your first time seeing one so it might be worth fighting them. It uses basic Hydro attacks and moves pretty slow, but it can also generate healing waves for itself and other Shadowy Husk enemies when attacking any player shields.
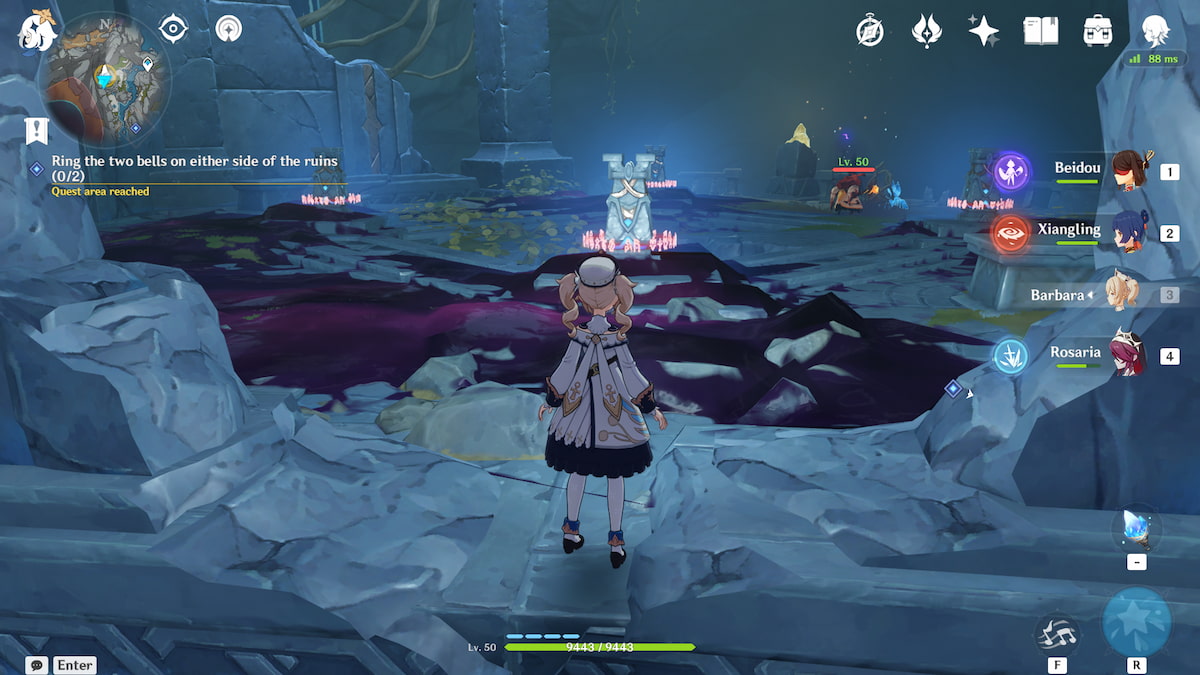
No matter how you handle the encounter, don’t miss the teleport waypoint just behind the door and to the left. The first bell is located at the top of the nearby tower, so glide over to it. From here you can either climb or activate the nearby lamps to create wind currents.
 Screenshot by GameSkinny
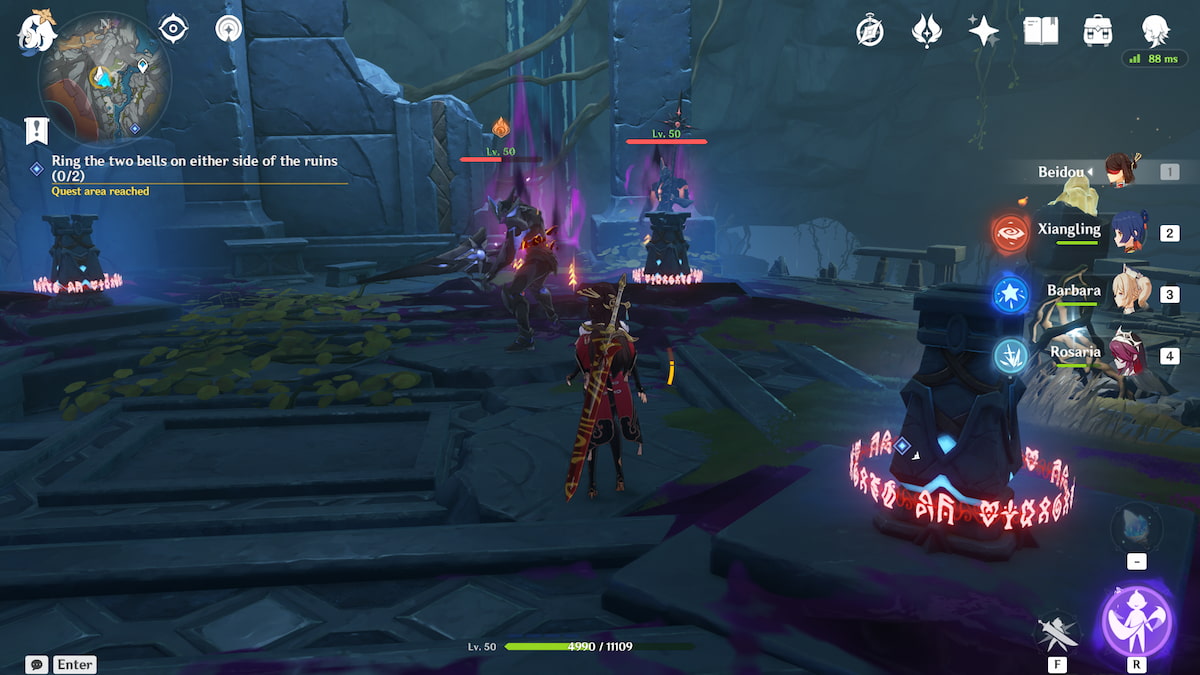
A Pyro Abyss Mage will be found at the top along with four monuments. Defeat the mage first and then recharge the vine-like object it was standing in front of.
You can then use your Lumenstone Adjuvant to clear the dark mud around each monument. An alternate method, and likely more time efficient, is to hit the recharged vine object to send out projectiles of light.
 Screenshot by GameSkinny
A Shadowy Husk: Line Breaker and a Shadowy Husk: Standard Bearer will spawn once you’ve cleared all four monuments. The latter uses Pyro attacks and also has an interaction with player shields, only that instead of healing they create Pyro shields around themselves and nearby Shadowy Husks. Their attacks are slow so try to take them out one at a time.
After they’ve both been slayed, you can go and whack the large bell. A short cutscene will play and you’ll be ready to head over to the other one. Teleport back to the first waypoint we discovered during this quest, in front of the fog.
Ringing the Southern Bell
 Screenshot by GameSkinny
Immediately turn left (technically in the Southern direction) and drop down to a small opening in the cave. Walk a little bit and you’ll see a large void with a new teleport waypoint in the distance.
Glide across, activate it, and then glide further toward the broken bridge or to the rocky path on the left. Any enemies you come across are optional.
 Screenshot by GameSkinny
Climb up some stairs to reach the base of another tower. The puzzle here is a bit tricky but manageable. There are four stone lamps that require a nearby light source to activate and two Seelies which will move in specific directions. Here’s how to light them all:
- The Southern lamp has a device next to it which can be recharged to emit light.
- The Western lamp is covered by an oozing concretion which needs to be cleared away. Chase a Seelie towards it after.
- The Eastern lamp needs the second Seelie next to it.
- With the other three accounted for, use your Lumenstone Adjuvant to light the Northern lamp.
Feel free to loot the Precious Chest that pops up and then take the wind current to the top of the tower. Chase a lonely Seelie to one lamp and then light the other with your Lumenstone Adjuvant. Interact with the nearby device that’s been unlocked and the roof door will open. Glide down and prepare to fight against the one mandatory Ruin Grader in this quest.
 Screenshot by GameSkinny
Three weak points can be seen on its head and feet. All of its attacks are slow and easy to dodge, although you should keep an eye out for its spin attack due to how small the room is.
Take it down and the bell will be free to hit. Watch a similar bell-ringing cutscene and then teleport back to where the fog is. Glide over to it and a cutscene will play, showing the fog dissipating and revealing two bosses within.
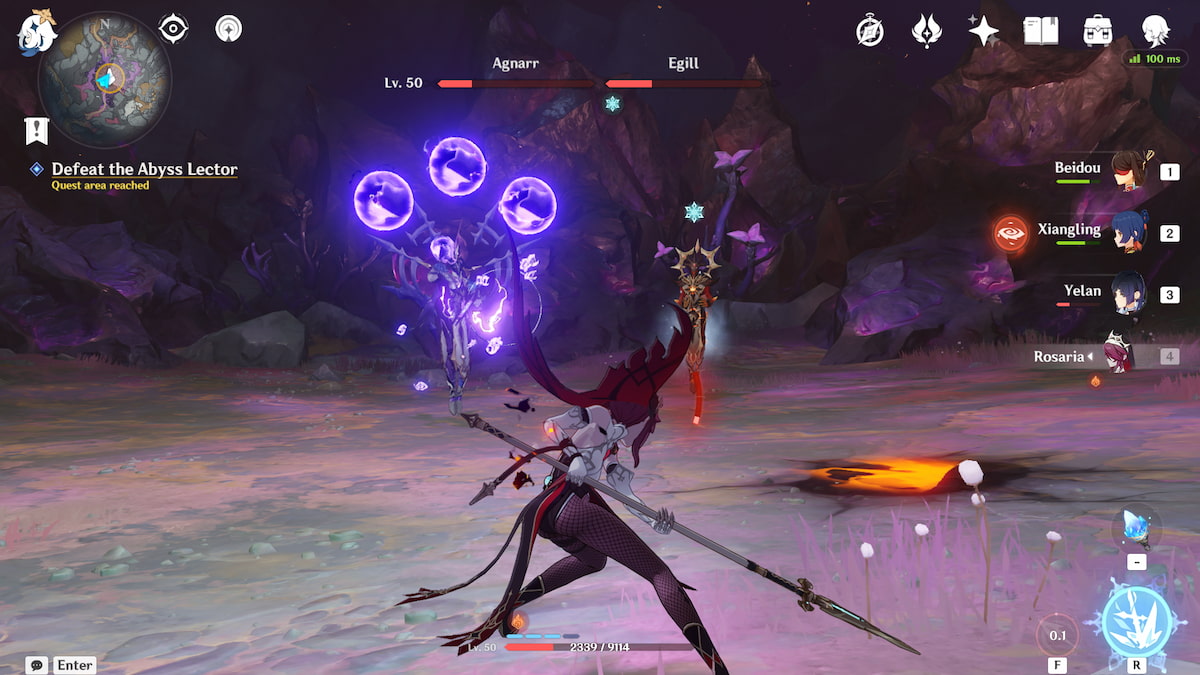
Defeating the Abyss Lector
 Screenshot by GameSkinny
Rounding out this quest is a boss fight against Abyss Lector: Violet Lightning and Abyss Lector: Fathomless Flames enemies, named Agnarr and Egill respectively. Together they attack with Electro and Pyro abilities.
Many of their attacks are projectiles, but they both have a powerful AoE attack for when you stay too close. Each will cast a shield around itself and gain new moves when at 20% health as well. They’re strong, but you can take advantage of their elemental weaknesses with the right team.
 Screenshot by GameSkinny
Hydro and Cryo characters are a must. The rest can be filled in with Dendro, Electro, or Pyro characters. They get tougher as they lose health, so keep an eye out for both of their attacks and try to focus on just one. After they’ve both been defeated, pick up the Curious Cube item they drop to finish the quest.
Perils in the Dark and Nahida’s Homecoming Story Quest
Partway through Nahida’s second story quest act, you’ll be tasked with heading to the deepest part of The Chasm: Underground Mines area. A pop-up message will also appear and advise you to complete the Perils in the Dark world quest if you’re unable to reach the destination.
The message has become a source of confusion for some players, especially those who completed it already. Thankfully, the message is just a helpful reminder and not an indication that you’ve been quest locked.
All you need to do is open your map and switch to The Chasm: Underground Mines tab to find the starting location for the quest. It’s within The Glowing Narrows subarea which isn’t covered during the Perils in the Dark but does require completion of it to be accessible. Fast travel over there and you’ll be all set to begin the quest called What Shape Does the Self Hold.
That covers all you need to know about the Perils in the Dark quest in Genshin Impact. If you’re currently working your way through Nahida’s story quest, our guide on how to beat the Guardian of Apep’s Oasis will come in handy. For everything else in the land of Teyvat, check out our collection of Genshin Impact guides.
Featured image by GameSkinny.


Published: Apr 25, 2023 03:23 pm