My Hero One’s Justice has finally hit the store shelves! Fans of the anime nationwide have been waiting patiently for the My Hero Academia fighting game, and now that it’s out, the next step is to enroll in My Hero Academia Academy.
That’s right — we’ve put in work with the game, and we’re happy to be your teacher, giving you the ins and outs of the characters in the game. Use this My Hero One’s Justice character guide to see who’s in the higher tiers, and find a character that works for you!
SHOTO TODOROKI
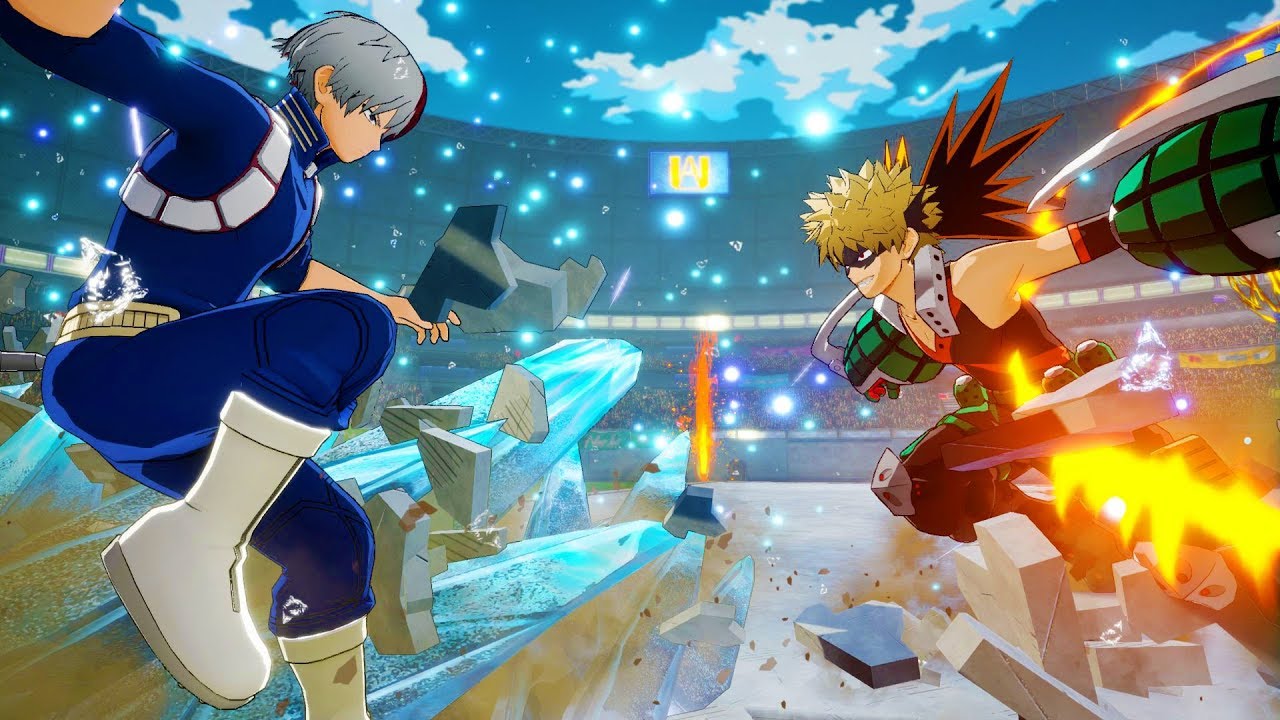
Tier: S
The current meta in My Hero One’s Justice favors heavy zoning with projectiles before getting way up close and personal, and that’s what Todoroki does best. Don’t be afraid to stay rooted to a spot and spam ice stalagmites and flame breath, forcing your opponent to come to you.
Then, once they do, show them how fearsome Todoroki can be up close. His ice moves make it super easy to string together insanely long combos. You can button mash your way into a 1/2 health combo. Imagine what you can do when you know what you’re doing!
DENKI KAMINARI
Tier: S
Kaminari’s combos don’t last super long, but they are incredibly powerful. He’s also a versatile character, comfortable at range with projectiles and up close in melee fights as well.
Zone your opponents, then move in for the kill with your target combo. Cancel that into your electro-dash, then use the electo-dome attack. If you’re feeling frisky, keep tapping in order to electrify yourself and boost your attack power for the next go-around. Just be aware that just like the show, if you overdo it, you’ll be helplessly giving your rival the double thumbs-up for a while.
ALL MIGHT
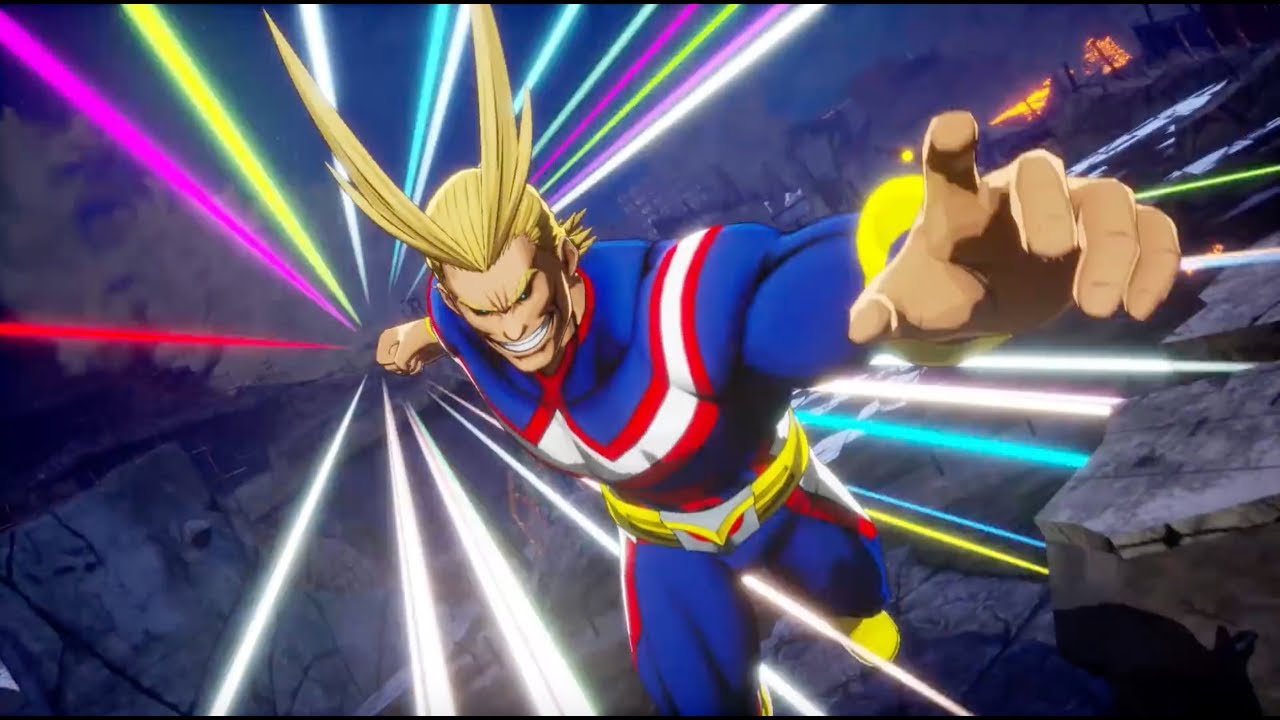
Tier: A
All Might plays similarly to Deku (appropriate, given that they share a quirk) which means that, like Deku, All Might is a great character for beginners. But while Midoriya is more of an all-around fighter, All Might excels up close.
He’s one of the few My Hero One’s Justice characters that doesn’t have a projectile attack in his arsenal, so you’ll really need to familiarize yourself with his counters and throws since your opponent will likely be spamming counters and throws at you in order to break through your flurries of blows. Keep the pressure on and watch your opponent, and you’ll be fine.
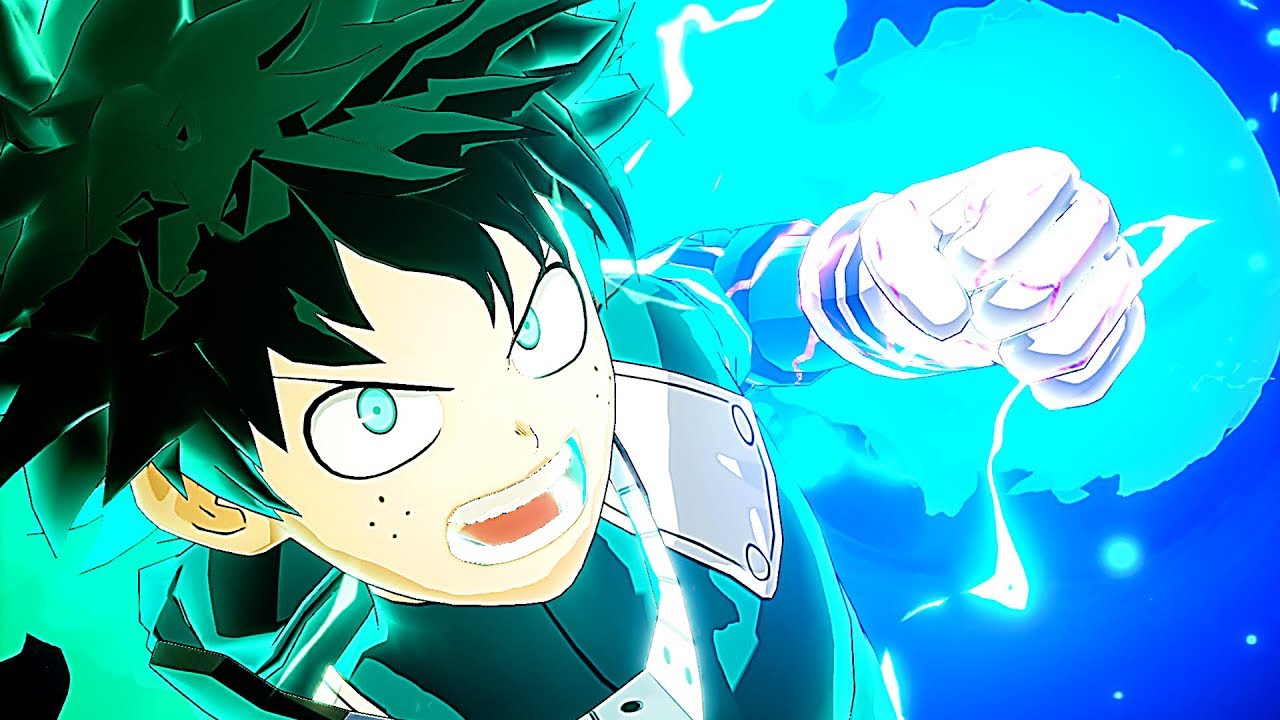
IZUKU MIDORIYA
 (Image via Youtube)
Tier: A
Midoriya is a pretty basic all-around character with no glaring weaknesses and no huge strengths. Though Midoriya has a few projectile attacks, he excels most in melee range as his target combo cancels seamlessly into each one of his quirk attacks.
This makes Deku (Midoriya) a great My Hero One’s Justice character for beginners — and it’s why you play as him in the tutorial. Getting good with Deku will make you good with every other character in the game, but don’t let that turn you off the character. If you guard smart and master the game’s countering techniques, he’s a monster to fight against.
MOMO YAOYOROZU
Tier: A
Momo can be finicky. She has probably the best mid-range projectile in the game in her flashbang grenades, and if you time it just right, you can combo it into the laser move.
Her combos do a lot of damage, especially with the spear out, and her shield move offers her a reliable combo starter that can negate oncoming attacks. She just struggles mightily against strong zoners, and once she’s interrupted by a sidekick move, it can be tough to get all your equipment back.
TOMURA SHIGARAKI
Tier: A
Tomura Shigaraki would be one of the most powerful characters in the game even if he didn’t have a move that, when repeated 4 times, results in an automatic K.O., or even if that move wasn’t easily linked to in combos.
So yeah, that’s what you’re going to want to be going for with Shigaraki. Target combo into Quirk 2 into Quirk 3. It’s a true combo, and if you can land Quirk 3 (AKA Death Penalty) 4 times, the round is yours. As long as you can close the distance, you’ll be okay.
KYOKA JIRO
Tier: A
Jiro’s moveset is one of the most versatile in the game. Her main quirk attack is one of My Hero One’s Justice‘s best projectiles.
The sound waves she shoots are ginormous and have sneaky hitboxes that are a bit bigger than it seems like they should be. They also stunlock your opponent, making the move an ideal combo starter as well as a viable pester option. Pair that with the fact that she can follow up her target combo with both of her other quirk attacks and Jiro becomes a true terror.
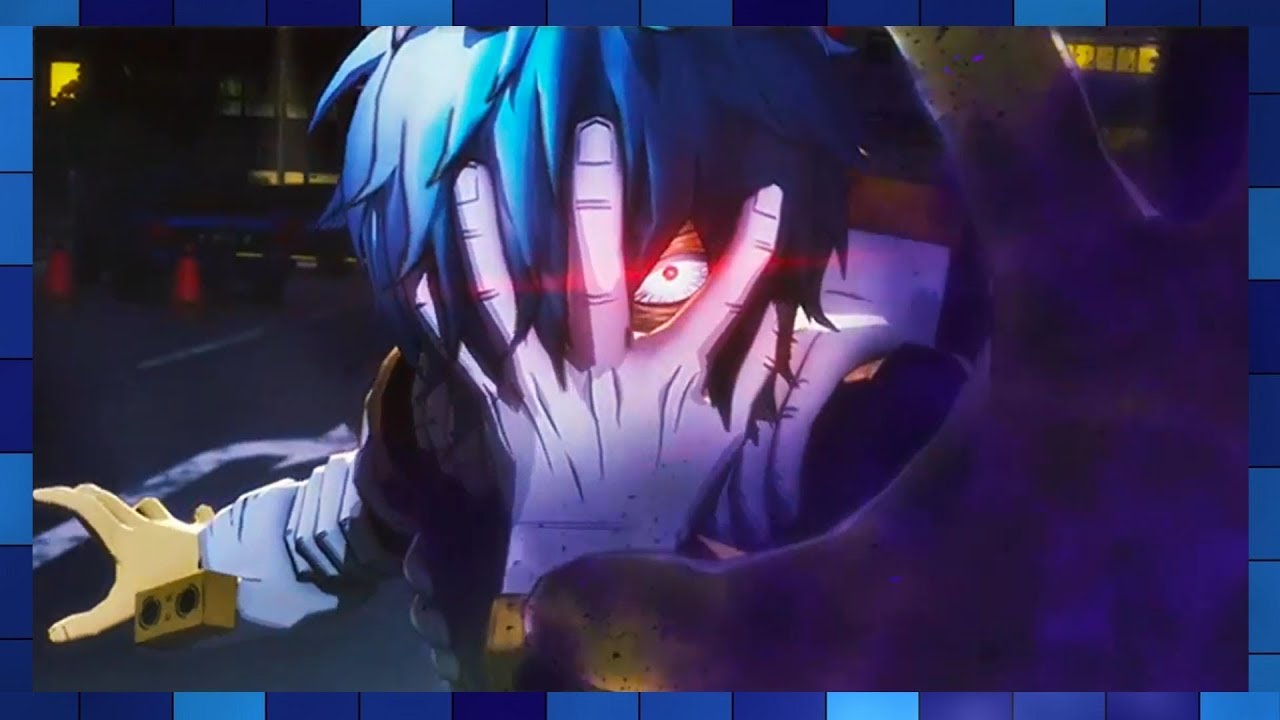
DABI
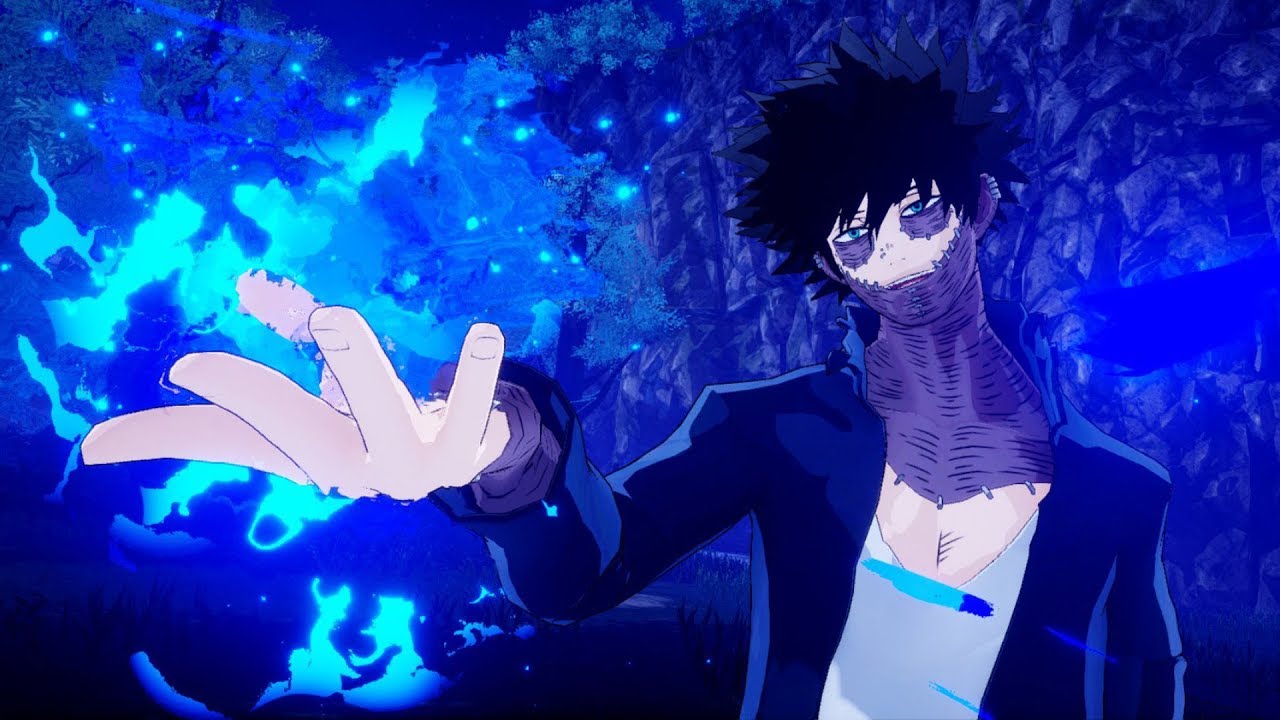 (Image via Youtube)
Tier: A
Speaking of zoning, if you’re the kind of fighting game player who likes to hang back and spam Hadoukens in Street Fighter, pick Dabi and never look back. He’s the game’s purest long-distance fighter, with an array of attacks from ground traps to lasers to fireballs.
You’ll be able to get a ton of mileage out of being that annoying player who hangs back and throws out ranged attacks. Dabi can be absolutely devastating in close range combat if you place your traps right, stringing together combos linked by traps or projectiles. Just don’t let your opponent close the distance before you’ve set your traps.
SHOTA AIZAWA
Tier: A
Eraserhead is one of the more annoying characters in the game to play against. His bread and butter is his erase grab, which is unblockable and prevents opponents from using any quirk attacks, making it almost impossible for them to string together literally any kind of powerful combo.
Troll your opponent and keep them quirkless for as long as you can by any means necessary, because if you’re able to do that, you’ll have the upper hand.
TSUYU ASUI
Tier: B
Everyone’s favorite froggy waifu is a pretty solid choice given the fact that Froppy has unblockable throw moves that can hit from a distance.
It really makes fights against folks like All Might and Iida a whole lot easier when you can intercept them as they’re trying to close the distance. That’s where Tsuyu excels, in interrupting attacks and turning the tables. So be patient and wait for your moment to lash out with that sticky frog tongue!
KATSUKI BAKUGO
Tier: B
It’s odd that in the story mode, you play as Bakugo in the earlier stages given that he’s a more complicated character to master.
Making Bakugo’s quirks work in his favor is really tough, as they’re all close-range attacks (unless you charge his Quirk 1 attack, which you should absolutely be doing at all times). If you’re having trouble learning how to cancel target combos into quirk attacks, give Bakugo a try in practice mode.
One of his quirk attacks is an insanely powerful launching attack that has a generous timing window after your target combo hits. That’ll be your bread and butter with Bakugo — a target combo into the launcher into an air combo (and hopefully a wall stun.) Having said that, what you’ll really be going for with Bakugo is cornering your opponent.
If you can position your opponent against the wall, all you have to do is tap that Quirk 1 attack and you’ll effortlessly be able to chew up at least 1/3 of your enemy’s health bar in one combo. Just watch out for grabs and ranged attackers — Bakugo doesn’t close distance well.
EIJIRO KIRISHIMA
Tier: B
The bet that you’re making when you pick Kirishima is that you’ll be able to super armor your way through your opponents’ combos and knock them out before they put you in the garbage can. Use your headbutt to activate your super armor and then just go at it for as long as you can, linking your target combo in with your dash attacks.
This wouldn’t be an issue if he could close distance with any consistency, but he’s really slow, and will be vulnerable to long range attacks along the way. Put on the pressure and never stop, or you’ll lose in the battle of attrition.
MUSCULAR
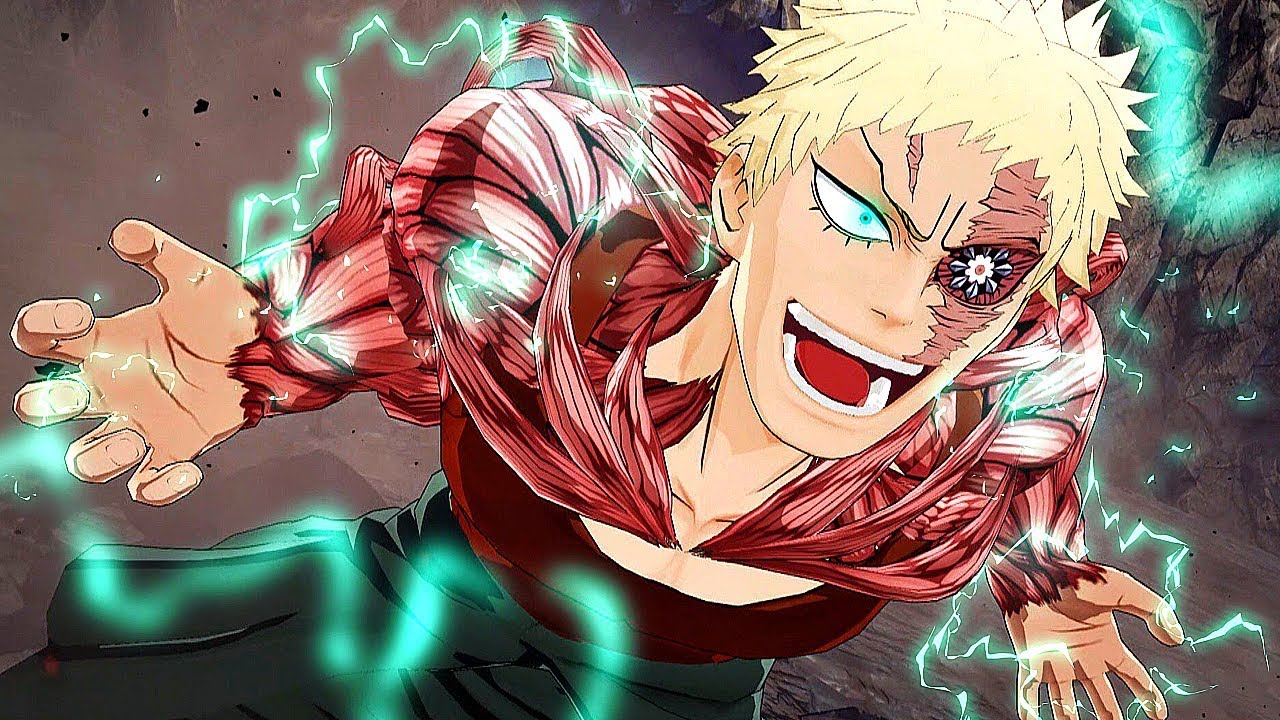
Image via Youtube
Tier: B
Muscular’s whole playstyle revolves around comboing into his charge move, and then afterwards, once it’s been fully charged, comboing into his super-powerful punch move. It’s simple and effective, but it’s also easily countered by, well, folks who know how to counter.
Use your throws and don’t be afraid to go for the mixup in order to get into your opponent’s head.
OCHACO URARAKA
Tier: B
How good you’ll be with Uraraka will depend on how many times your opponent has lost to Urarakas that use the spin move and nothing else. Uravity’s combos make heavy use of that move, so try not to rely on it too much or you’ll become predictable. Make sure you always have your boulders out and look for your opening, just be aware that folks will be expecting your combos so try and play some mind games with them.
FUMIKAGE TOKOYAMI
Tier: B
In theory, Tokoyami operates kind of like Rosalina and Luma do in Super Smash Bros. for the Wii U, but much less annoying.
Most of your fighting should be done in solo mode, since this allows you to cue Tokoyami and Dark Shadow’s attacks separately, allowing for even longer combos. That said, if you’ve backed your opponent into a corner, switch to team mode and have Dark Shadow just swipe away.
TENYA IIDA
Tier: B
Iida is another all-around melee attacker like All Might, but, understandably, with more of a focus on speed.
To be effective with Iida, you’re going to need to commit to rushdown tactics using his quirk attacks. Be on the offensive at all times, since your special attacks close the distance between you and your opponent very effectively, even against zoners.
Watch out for characters like Kaminari and Jiro who have area of effect attacks — they’ll be really tough matchups.
STAIN
Tier: B
I’m not really sure why they gave Stain a counter when every character already has counter attacks, even though it is a whole lot more powerful. Either way, Stain is another beginner-friendly character, with easy cancels into quirk moves.
It’s a bit tough to string together insanely long combos with Stain so you’ll need to rinse and repeat a bit, but just keep mashing that stab button and it’ll all work out. Unless you’re up against Dabi. Then you’re on your own.
GRAN TORINO
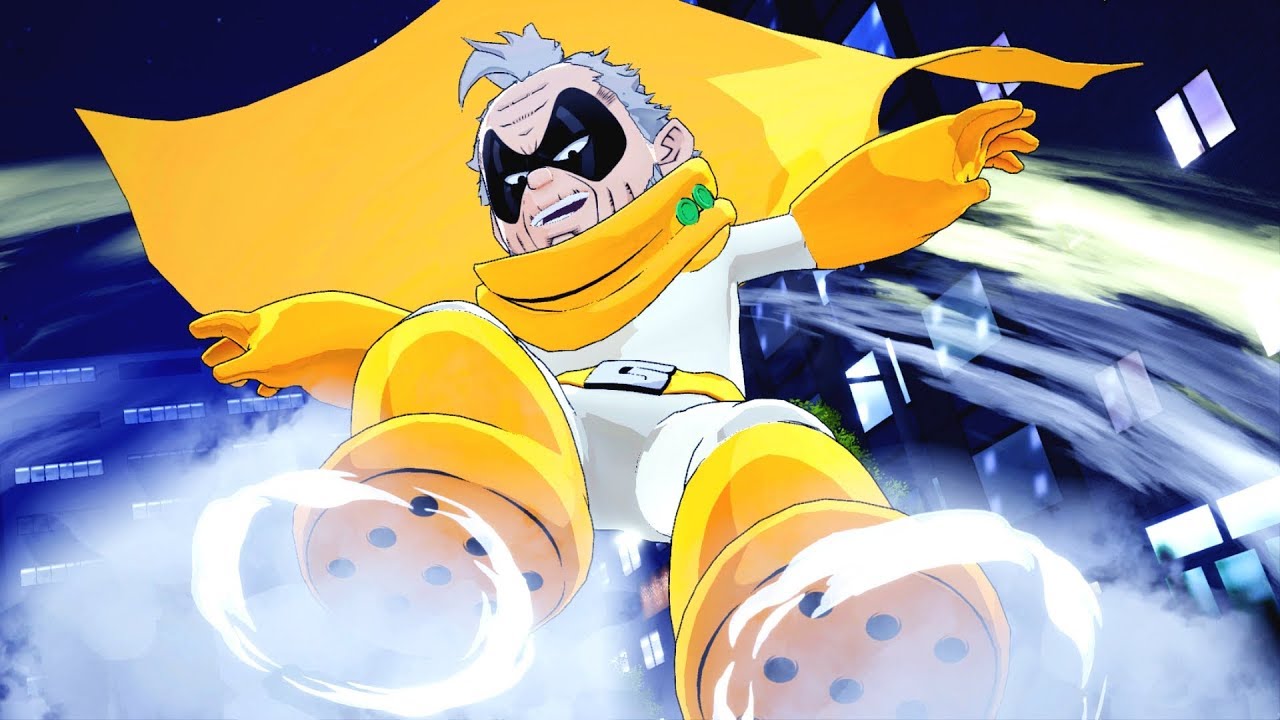
Image via Youtube
Tier: C
Gran Torino, as you might expect, is one of the speedier characters in the game. In most fighting games that would make him into a force to be reckoned with, but given the way My Hero One’s Justice’s engine works, it doesn’t really give Gran Torino that much of an advantage since nearly every other character in the game is better at zoning than Gran Torino is.
The saving grace here is that if your cancels and followups are on point, Gran Torino can string together some insanely long combos. It’s just kind of a shame, since almost every other character in the game can deal more damage with their combos with a whole lot less effort.
HIMIKO TOGA
Tier: C
In any other game, Himiko Toga would be an incredibly formidable character, given that she can both copy her opponent’s moves, but also steal her opponent’s sidekicks for a short period of time. It sounds interesting and powerful, but unfortunately, it’s more of a gimmick than anything else.
Copying your opponent essentially takes away all of your quirk moves, meaning that you can’t really string together the kinds of huge combos that every other character in the game will be relying on. It’s super disappointing, because Toga’s base quirk moves are pretty great — they cover a huge distance and stunlock opponents. It’s just that there’s no real reason to pick her over someone like Asui or Aizawa, unless you’re a fan of the character.
———
How have you been enjoying My Hero One’s Justice so far? Let us know in the comments below!


Published: Oct 26, 2018 03:03 am