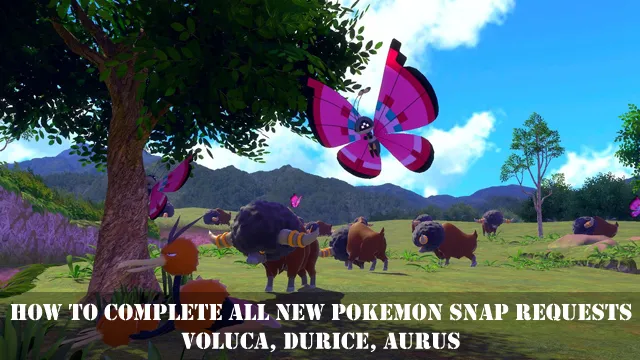
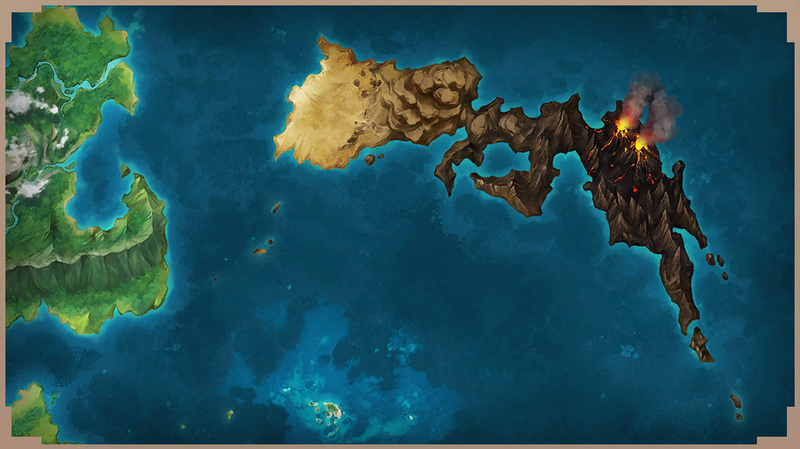
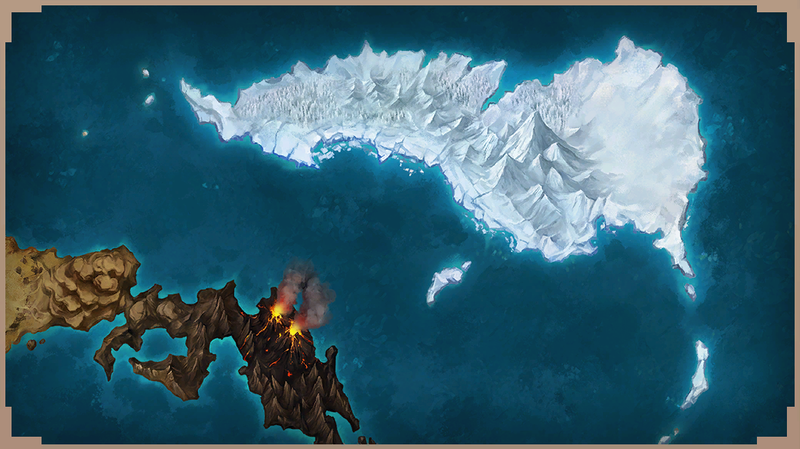
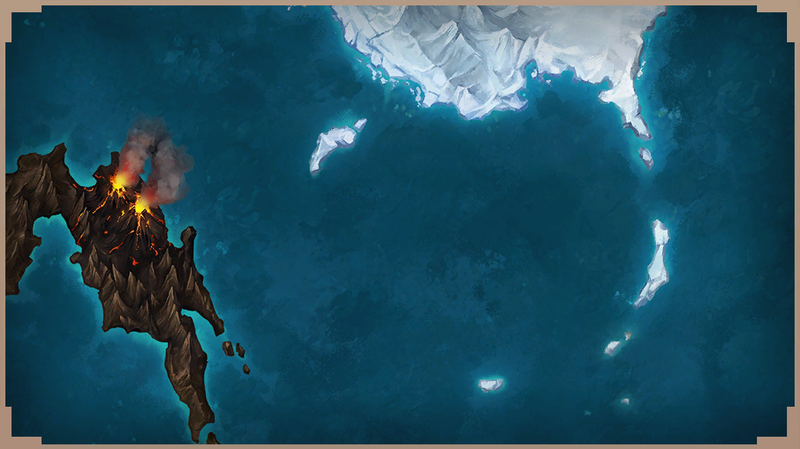
The six islands of New Pokemon Snap are the home to a huge number of Pokemon, and you’ve got to snap pictures of them for LenTalk. This two-part guide will provide you with easy step-by-step instructions on how to complete all New Pokemon Snap requests.
Recommended Videos
This part of the guide will cover all LenTalk requests on the three islands:
- Voluca
- Durice
- Aurus
If you’re looking for other three islands, then refer to our guide on Florio, Belusylva, Maricopia requests.
All New Pokemon Snap Requests: Voluca
Striking a Pose with Its Tail
- Throw several Illumina Orbs at the three Crystalblooms at the start
- This action will reveal the first Skorupi, while on Research Level 2, another Skorupi will fall from the sky
- When two Skorupi face each other, throw an orb at them and take a photo
The Flying Cacnea
- Find Cacnea next to a tornado to your left
- Once the tornado picks Cacnea up in the air, take a photo
Where Did the Fluffruit Go?
- Throw several orbs at the three Crystalblooms at the start
- Wait for the sand vortex to disappear and throw a Fluffruit on its place
- Once Flygone picks it up, follow the main path
- In the end you will see Flygone feeding the fruit to two Tripanch, take a photo of this
Munching Mandibuzz
- Toss a fruit at a Mandibuzz on an alternate route to your right
- Once it picks up the fruit, take a photo
A Finicky Flame
- Throw a few orbs at Torchic near the oasis
- Toss a fruit near him and once he starts burning it, take a photo
Sprinting in Surprise
- Toss some fruits into the pond at the oasis
- When Magikarp appears scaring away Helilisk, take a photo
Lycanroc’s Reply
- Scan the area to your right to reveal Lycanroc
- Once Lycanroc approaches the edge of the cliff, take a photo
Oasis Buddies
- Throw some orbs at Torchic and Hippowdon near the oasis
- Once Torchic jumps on the Hippowdon’s head, take a photo
Totally Cool Tyranitar
- Scan the alternate path to the right to reveal Tyranitar
- Lure Lycanroc with fruits to get closer to Tyranitar
- Throw an orb at Tyranitar and once it crashes the rock, take a photo
Onix’s Mighty Leap
- Toss a couple of fruits at two Mandibuzz past the oasis
- Toss another fruit at the third Mandibuzz to your left
- Once all three Mandibuzz fly up and Onix appears, take a photo
Roll and Stop
- Toss a fruit at Sandshrew at the beginning
- Once it stops spinning, take a photo
Hide-and-Seek in the Desert
- Use scanner to reveal Trapinch near the lake
- Once you find it, take a photo
Kangaskhan’s Parenting
- Use scanner to find Minior and throw an orb at it
- Take the alternate left path to oasis and find Minior join Kangaskhan
- Once they’re done playing, play a melody and toss a fruit
- When Kangaskhan gives a fruit to Minior, take a photo
Revenge of Silicobra
- Toss a fruit at Silicobra near two Skorupi at the beginning
- Toss another fruit at Silicobra’s snout appearing to your left
- Take the alternate left path to oasis and toss a third fruit at it
- Once it pops out of the ground and starts throwing sand at Lycanroc, take a photo
Rainbow Meteor Shower
- Use scanner to reveal the first three Miniors at the start and throw orbs at them
- The 4th and 5th Miniors are to your right, so keep throwing orbs
- The 6th and 7th are beside Cacnea
- The 8th one is near Skorupi
- The 9th is to your right near three Crystalblooms
- The 10th is right behind the hill
- Once all Minior fly over the oasis, take a photo
The Singing Dragon
- When you hear singing in the distance, play a melody
- Keep playing melody until the singing stops
- Once it stops, a group of Altaria will fly away, take a photo of this
Little Lost Shinx
- Lure Shinx closer to Luxray using fruits at the start
- Once they come together, take a photo
Luxray Vision
- Find Luxray in front of a large magma area
- Throw an orb at him and take a photo
A Skilled Hunter
- Toss a fruit at Talonflame on a rock in front of a cave
- Once he takes the fruit, take a photo
A Goofy Pose
- Throw an orb at Monferno that comes out of the cave and climbs on a rock
- Once he turns his back on you, take a photo
Rest Your Wings
- Toss a fruit at one of the Typhlosion on an alternate path
- When Aerodactyl appears, toss him a fruit and take a photo of him eating
A Quaking Volcano
- Throw an orb at one of the Monfernos on the rocks at the beginning
- Once they’re inside a cave, throw an orb at the one on the left
- When Tyrantrum wakes up and hits his head on the rocks, take a photo
When Graveler Shows Its Hand
- Toss some fruits at the two Gravelers to your right and one to the left
- When the Graveler appears from the lava, toss him another fruit and take a photo of him reaching for it
Archeops at Ease
- Toss a fruite at one of the Archeops in front of the cave (RL2)
- Once he starts eating it, take a photo
Climbing the Lavafall
- Throw orbs at three Slugma to make them fall into the lava in the lava room. They can be seen to your right, in the center, and at the end.
- Once the final Slugma starts climbing out of the lava, take a photo
So Excited!
- Throw an orb at the sleeping Torkoal in the magma room
- Once he wakes up, throw another orb at him and take a photo
Volcanic Hide-and-Seek
- Throw an orb at Crystalbloom at the end of the main path
- Toss fruits at the group of Charmanders
- Play a melody to make Charizard fly around
- When Charizard lands and Charmander starts jumping, take a photo
Red-Hot Energy
- Throw some orbs at two Charmanders on the bottom of a lava pit on the alternate path
- Toss a fruit at Graveler on the wall to make it fall down
- Once Charizard appears, take a photo
Typhlosion Explosion
- Toss a fruit at Typhlosion at the start
- Throw an orb at Typhlosion fighting Aerodactyl in the sky
- Once it starts exploding from within, take a photo
3,000-Degree Flames
- Throw an orb at Crystalbloom in the blue magma room on an alternate path to your right
- Toss fruits near Flareon and once he starts buring them, take a photo
A Slice of Rainbow
- Find Charmander to your right (RL3)
- Wait for Ho-Oh pass by and take a photo
Vocal Volcarona
- Toss a fruit at Volcarona to your left on an alternate path
- Throw more orbs and fruits at two Volcarona on the main path
- Wait for both Volcarona to fly over Crystalbloom and take a photo
All New Pokemon Snap Requests: Durice
Frolicking Furret
- Throw an orb at Crystalbloom to your right
- When Furret runs out into the hole, toss a fruit at the hole
- Once he shows up again, play a melody and take a photo of him dancing
Snowfield Hide-and-Seek
- Toss a fruit at a snowy hill at the beginning
- When Cubchoo appears, take a photo
Duel on the Snowfields
- Toss a fruit at Beartic outside of the ice cave
- Once he starts roaring, take a photo
Message from a Friend
- Lure Weavile to the marked tree at the end of the path using fruits
- Once he’s there, throw an orb at both him and a tree, then take a photo
Dig Here, Swinub!
- Lure Swinub to the Crystalbloom at the final area using fruits
- Throw an orb at the Crystalbloom
- Once a hot spring appears and lifts up Swinub, take a photo
The Wrath of Mamoswine
- Follow steps from Message from a Friend request
- Toss a fruit at Swinub at the top of the hill
- When two Weaviles start chasing Swinub, throw orbs at them
- Once Mamoswine appears, take a photo
Skarmory’s Flying Show
- Find a group of Mamoswines on the right side of the main path
- Once Skarmory flies above them in a spin, take a photo
Find that Perfect Timing
- Find Sandslash digging in the snow
- Toss a fruit at it and take a photo
In the Blizzard
- The first Snom can be seen to the left as soon as you walk on an alternate path
- The second one can be seen to the right near the tree
- The third one can be seen on a tree to your right
- Take all three photos of Snoms
It Jumped Out at Me!
- Scan the area to your left on the alternate path
- When Crabominable jumps out of the tree, take a photo
Fidgety Snorunt
- Toss a fruit at the middle icicle after entering the gave
- Once Snorunt starts jumping, take a photo
Icy Armor
- Find Glalie to your left when you reach the cave
- Toss a fruit at it and when it activates its armor, take a photo
Icy Playground
- Toss a fruit at Spheal outside an ice cave
- When he falls into the icy water, play a melody
- Once he pops out of the water, take a photo
Treasure-Hunting Troupe
- Throw an orb at the leftmost Pilpup outside an ice cave
- When he shows the seashell, take a photo
You Can Do It, Vanilluxe!
- Play melody to Glaile in the ice cave
- Throw an orb at Glaile and toss a fruit inside the hole at the ice wall
- Once Vanilluxe appears and starts eating the fruit, take a photo
Dining Dewgong
- Toss fruits at the floating ice outside the cave
- When Dewgong catches and eats the fruit, take a photo
Gazing Down on the Snowfields
- Find Glaceon standing on top of the hill in front of the cave
- Take a photo before he runs away
Howling at the Heavens
- Throw an orb at Furret in the beginning
- When Mightyena starts howling at the moon, take a photo
Proud Warrior
- Toss some fruits at the hole with a hidden Furret
- When Braviary comes eating the fruits instead, take a photo
Whiteout
- Find Sandslash on the left side of the alternate path
- Follow him through the snow and throw an orb at Crabominable
- When this disturbs Abomasnow, take a photo
A Safe Place to Sleep
- Find a sleeping Vulpix in the hole of the right wall in the cave
- Take a photo of him sleeping
Present for a Friend
- Toss some fruits at the two holes on the right wall of the cave
- Play a melody to an approaching Delibird
- When he shows you the fruit, take a photo
Like Powder Snow
- Toss a fruit at the Frosmoth on the wall before you climb the hill
- Toss two more fruits at the two Frosmoths on your way to the cave and inside of it
- When you see all of them flying outside the cave, hit them with an orb and take a photo
Beyond the Wall of Snow
- Follow the steps in the Whiteout request
- When Abomasnow wakes up, take a photo of Frosslass near the tree
With Their Powers Combined
- Toss a fruit at a sleeping Jynx in the cave of the alternate path
- Lure him to the Crystalbloom using more fruits
- When two Jynx appear, throw an orb at the Crystalbloom and take a photo
A Sheer Face
- Toss a fruit at Avalugg outside the cave
- When he lifts his foot, take a photo
Shades of Aurorus
- Follow the steps in the With Their Powers Combined request
- When both Jynx summon Aurorus, take a photo
Wish Upon a Shining Sky
- Follow the steps in the Beyond the Wall of Snow request
- Scan to find a new path and follow it
- Throw an orb at Jynx next to Avalugg
- When Suicune appears, throw an orb at it, too
- Once Suicune starts roaring, take a photo
Crobat Touches Down
- Toss a fruit at the flying Crobat at the very end of the cave
- Once it lands, toss him another fruit and take a photo
Joltik Adjoined
- Throw orbs at Carbink and Mawile on the alternate path
- When Diancie appears, throw an orb at it
- Lure Joltik to Jolteon on your left using fruits
- When Joltik jumps on top of Jolteon, take a photo
Take a Good, Hard Look
- Toss a fruit at Geodude on the left wall of the cave
- When he starts climbing up, take a photo
Gem Royalty
- Throw an orb at Crystalbloom in the final area
- Throw some orbs at the group of Carbinks and play a melody
- When Diancie appears, throw an orb at it, too
- Once Carbink and Diancie start smashing the pink gem, take a photo
Gengar the Prankster
- Throw an orb at Gengar’s portal to reveal Gengar
- Throw an orb at Croagunk nearby
- When Gengar comes stomping on Croagunk, take a photo
Noibat’s Refined Palate
- Toss some fruits at Noibat in the final area of the cave
- When Noibat approaches the fruit, take a photo
The Biggest Pumpkaboo of All
- Throw orbs at the four Pumpkaboos at the start, on the cliff, near waterfall, and next to huge crystals
- Once Super Size Pumpkaboo appears, take a photo
Croagunk Chorus
- Find a group of three Croagunks near the river
- Play a melody and throw fruit at the middle, top, and bottom one
- Once they hop into the air, take a photo
Drifloon Puffed Up
- Throw an orb at Crystalbloom near a pool of water at the end of the cave
- When Drifloon in the pool inflate, take a photo
Clefairy by Moonlight
- Thrown an orb at Crystalbloom next to a group of Clefairy
- Play a melody and once they start dancing, take a photo
Sound Asleep
- Find a sleeping Sableye on the right path
- Take a photo of him sleeping
Anger Outlet
- Lure Rampardos to the Gengar portal using fruits
- When Gengar pops out and scares Rampadros, take a photo
Hydreigon Berserk!
- Play a melody to Hydreigon floating in the air at the final area
- Once it floats above the water, toss him a fruit and take a photo
Having a Goodra Time
- Throw an orb at the Crystalbloom inside the smaller cavern in the cave
- Once Goodra appears, take a photo
Look My Way
- Follow the steps in the Joltik Adjoined request
- When another Mewile appears, toss it a fruit and take a photo
Fur Standing On End
- Follow the steps in the Joltik Adjoined request
- When Jolteon approaches Pumpkaboo, throw an orb at Jolteon and take a photo
Myth of the Cave
- Follow the steps in the Joltik Adjoined request
- When Diancie appears and holds hands in the air, take a photo
Steelix Takes a Breather
- Throw three orbs at the group of Noibats at the start
- Find a sleeping Steelix near the end and take a photo
All New Pokemon Snap Requests: Aurus
Houndoom’s Breather
- Find Houndoom to your left
- Once it starts stretching, take a photo
Blowing Seeds
- Toss a fruit on top of the ruins to reveal Natu
- When Eldegoss appears, toss another fruit at Natu
- Once Natu starts dropping seeds, take a photo
Just Perching Here
- Toss a fruit on top of the ruins to reveal Natu
- When he sits on top of the fruit, take a photo
A White Pokemon
- Toss a fruit to Houndoom on the left side
- Play a melody and Absol will jump off the cliff
- Toss Absol a fruit and take a photo of him eating
Salandit’s Battle Plan
- Toss a fruit on a marked ground to reveal Salandit
- When Noivern appears and Salandit attacks, take a photo
Gracefully Gliding
- Toss a fruit on a marked ground to reveal Salandit
- When Noivern glides in the air, take a photo
The Mysterious Heart
- Toss five fruits into the well in the first area
- When five Woodbats appear and get stuck on the wall, take a photo
A Break Between Patrols
- Find Sigilyph in the room with a huge statue
- Take a photo of him sleeping
Drowsing Beheeyem
- Find Beheeyem in the final room
- Take a photo of him sleeping
Two Golurk
- Toss a couple of fruits at Beheeyems in the final room
- Throw an orb at Crystalbloom to reveal Golurk
- Once the other Golurk appears flying, take a photo of both Golurks
Groovy Chandelure
- Throw an orb at Chandelure in the large area of the ruins
- Follow it until it stops and toss a fruit nearby
- When Chandelure finishes the fruit, play a melody and take a photo of him dancing
Fading into the Shadows
- Play melody to Noivern at the start
- Once he leaves, toss a fruit to reveal Salandit
- When Umbreon appears, take a photo
Myth of the Ruins
- Throw orbs at the six Crystalblooms inside the ruins
- Throw another orb at Jirachi near one of the statues
- When he appears at the altar, play a melody
- Once he starts moving, throw orbs and play melody until he stops
- When he puts his hands together and sparkles, take a photo
The Power of Xerneas
- Throw an orb at the Aura above the pool of water
- Throw another orb at Xerneas
- Lure Houndoom to come closer to Xerneas using fruits
- Toss a fruit at another Houndoom to the left
- When both Houndooms start charging at Xerneas, he will pull up his legs and you need to take a photo at that very moment
That’s all you need to know on how to complete all New Pokemon Snap requests on Voluca, Durice, Aurus islands. Also, be sure to read our official New Pokemon Snap review!
GameSkinny is supported by our audience. When you purchase through links on our site, we may earn a small affiliate commission. Learn more about our Affiliate Policy


Published: May 10, 2021 11:17 am