
There are six islands in New Pokemon Snap that are inhabited by a vast number of Pokemon, and you can take pictures of every single one. This two-part guide will provide you with easy step-by-step instructions on how to complete all New Pokemon Snap requests.
Recommended Videos
This part of the guide will cover all LenTalk requests on the first three islands:
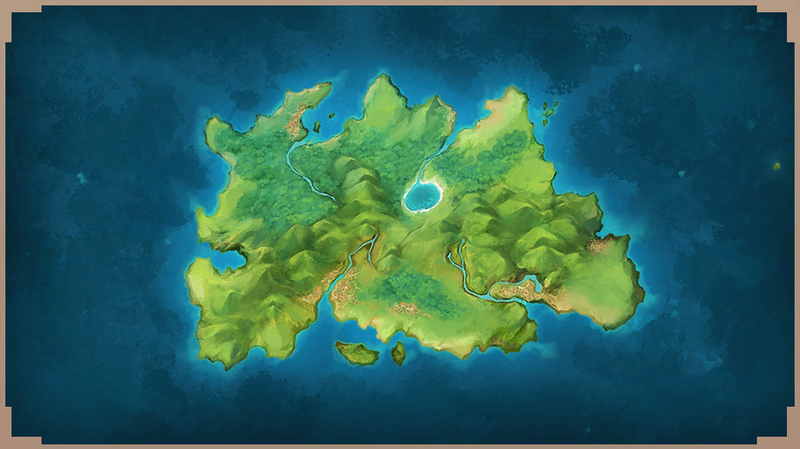
- Florio
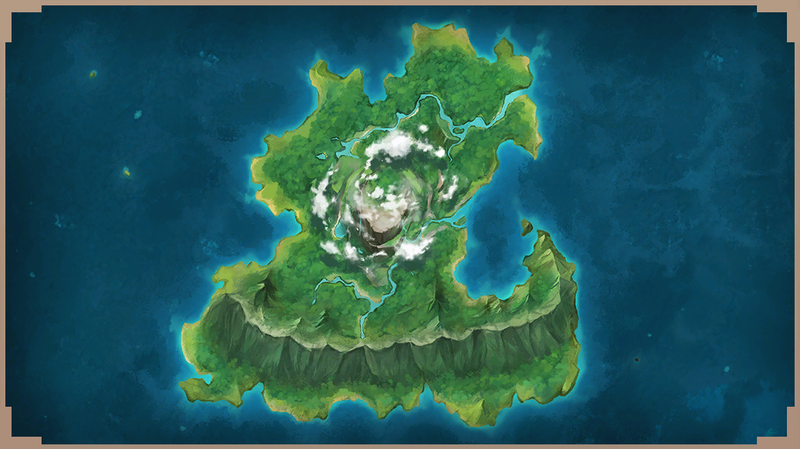
- Belusylva
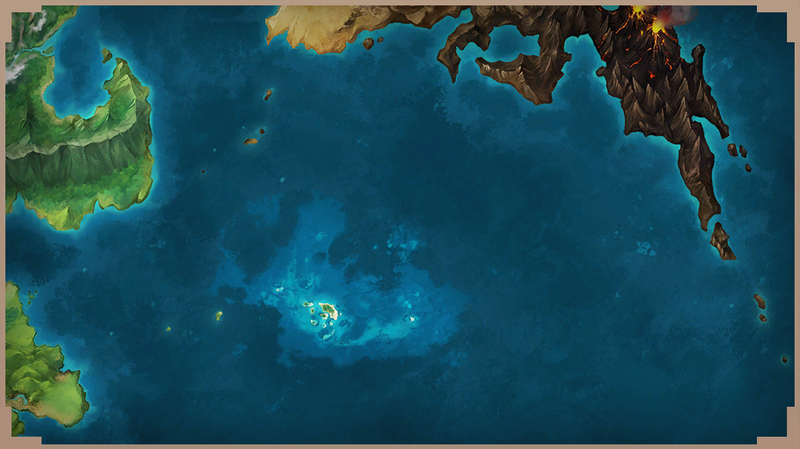
- Maricopia
If you’re looking for other three islands, then refer to our guide on Voluca, Durice, Aurus requests.
All New Pokemon Snap Requests: Florio
Hide-and-Seek in the Flowers
- Find hiding Pichu in the flowers by throwing an Illumina Orb
- Once Pichu pops out, take a photo
One-Hand Freeze
- Find sleeping Grookey by throwing a Fluffruit
- Once he makes a one-hand stand, take a photo
Three Friends Among Flowers
- Find Pichu, Scorbunny, and Grookey in the flowers
- Follow them and take a photo of Scorbunny at the Crystalbloom
Head-to-Head Competition
- Play a melody to the herd of Bouffalant
- Once they start fighting, take a photo
Shockingly Well-Done
- Lure in Emolga by placing Fluffruit on the pile of charred fruits
- Once Emolga snaps the fruit, take a photo
What’s Up with Wurmple?
- Take a photo of the Taillow
- Once Taillow and Wurmple start fighting, throw an Illumina Orb
- Take a photo of Wurmple spraying poison
Swanna-be
- Find Ducklett on the lake
- Once it flies, take a photo
Dam, Sweet Dam
- Lure Bidoof by throwing Fluffruit at the dam
- Once Bidoof pops out, take a photo
Off to a Flying Startle
- Find Taillow around the lake
- Once it flies, take a photo
Flopping by the Water
- Find Pigeot at the lake and throw Fluffruit
- Once it lands on the tree, throw Fluffruit at Magikarp
- Take a photo of Pigeot snapping Magikarp
Don’t Be Scared!
- Throw an Illumina Orb at Crystalbloom
- Once Comfey walks up to eat Crystalbloom, take a photo
Livening Up the Flowers
- Find Florges at the field
- Once it starts glowing green, take a photo
Myth of the Nature Park
- Wake up Shaymin by tossing an orb at Crystalbloom
- Toss the fruit at the pile of lowers to reveal Pichu
- Throw another orb at the Crystalbloom next to Shaymin
- Once it starts jumping, take a photo
Hard-Won Happiness
- Find Pigeot near the herd and feed him the fruit
- Find Pigeot near the lake and feed him another fruit
- Once you meet Pigeon on the field, take a photo as he greets you
Sudden Movement
- Find Tangrowth near bridge and throw orb at him
- Once he stretches his arms, take a photo
Munching Murkrow
- Find Murkrow near the lake
- Once it lands, throw a fruit at him
- Take a photo of him eating the fruit
Where’s That Pokemon?
- Find the group of Caterpie at the end of park
- Lure them with melody and take a photo
Where It Snacks and Snoozes
- Use orbs to lure Pinsir out of the dirt mound
- Throw another orb at Crystalbloom and a fruit next to Pinsir
- When Heracross appears, take a photo
Best Frenemies
- Find Sylveon across the dam
- Wake him up by throwing an orb
- Once Pinsir and Heracross start fighting, play the melody
- When Pinsir, Heracross, and Sylveon come together, take a photo
Who Needs Wings?
- Find Dodrio and throw an orb at him
- Once he jumps in the air, take a photo
Art in Flight
- Find Swanna on a lake and play melody
- Once Swanna take off, make a photo
A Terrific Yawn
- Find Torterra and throw fruit to wake it up
- Once it yawns, take a photo
Hoothoot’s Hidden Foot
- Find Hoothoot near lake and throw fruit at it
- Once it raises the foot, make a photo
Dancing with the Queen
- Toss an orb at the first Crystalbloom right of the field
- Once Vespiquen appears, throw another orb at Crystalbloom near her
- When Vespiquen starts dancing with Combee, take a photo
For Whose Sake?
- Toss an orb at the first Crystalbloom right of the field
- Once Vespiquen appears, take a photo
Asleep on a Calm Night
- Find Sylveon sleeping at the end of the lake
- Take a photo of it sleeping
Meganium’s Pal
- Follow Meganium, as he goes behind the tree in the final area
- Throw several fruits at a tree for Hoothoot to fall down off it
- Once Hoothoot lands next to Meganium, take a photo
An Eevee Party
- Start the level on the entrance side
- Find Audino and Dedenne inside the lab
- Throw some orbs at Stoutland and Eevee and scan them
- Throw some orbs at a TV-set and scan it
- Throw orbs at Eevee and Cutiefly
- Once Eevee settles down, take a photo
A Cheeky Pose
- Start the level on the lab side
- Throw some orbs at the patch of flowers near lab entrance
- Once Cutiefly puts hands on its cheeks, take a photo
Bunnelby Bursts Out
- Start the level on the lab side
- Find Bunnelby’s ears sticking from the ground
- Throw a fruit and an orb at the ears
- Once he jumps out of the ground, take a photo
A Pup at Heart
- Start the level on the lab side
- Find Stoutland and toss him some some fruits
- Throw some fruits at Tubbish and Eevee at the table
- Toss some more fruits to Eevee and Stoutland once they’re together
- Throw an orb at Stoutland
- Once Stoutland starts prancing, take a photo
Say Hello to Your Neighbors
- Start the level on the entrance side
- Throw some fruits to Starly near houses
- Once Starly eats a couple of fruits, take a photo of its wings
The Empty Room
- Start the level on the entrance side
- Find Audino and Dedenne inside the lab
- Throw some fruits inside the dark room in the lab
- Once Meowth appears, take a photo
Audino’s Favorite Pastime
- Start the level on the entrance side
- Give a couple of fruits to Cutiefly in front of the lab
- Once Audino starts dancing, take a photo
At Home in the Dark
- Start the level on the lab side
- Throw some fruits at Meowth in front of the lab
- Scan the area under the house
- Once Rattata shows up, take a photo
In the Middle of the Camp
- Start the level on the entrance side
- Throw an orb at the Crystalbloom near the houses next to Sudowoodo
- Play melody to attract Sudowoodo, Rattata, and Trubbish
- Take a photo of all three Pokemon in the middle of the camp
Borrowing Bravery
- Start the level on the entrance side
- Throw an orb at the Crystalbloom near the houses next to Sudowoodo
- Once he starts walking and lighting up, take a photo
Research Data Rescue
- Start the level on the lab side
- Find Audino and Dedenne inside the lab
- Throw a fruit near a computer
- Once Dadenne comes closer and gets electrocuted, take a photo
All New Pokemon Snap Requests: Belusylva
Cutting Moment
- Throw an orb at Crystalbloom
- Scan the footprints
- Throw an orb at Aipom
- Once Aipom cuts the grass with his tail, take a photo
Dangling Metapod
- Cross the bridge and find Metapod on the tree
- Throw an orb at him and take a photo
What’s Your Favorite Pollen
- Throw an orb at Venusaur near sleeping Beautifly
- Once Beautifly approaches Venusaur’s flower, take a photo
Hard at Work in the Jungle
- Scan Ancient Ruins to reveal an old tree
- Toss a fruit inside the hole in the tree
- Once Pikipek appears, take a photo
Staredown for Venusaur
- Toss a fruit at Arbok near Wooper
- Use more fruits to lure Arbok to a sleeping Venusaur
- Once they are close to each other, throw an orb at Venusaur
- Scan the area twice
- Once Arbok and Venusaur confront each other, take a photo
Jungle Buddies
- Play melody to Bounsweet near dirt mound
- Toss a fruit at Arbok near Wooper
- Once Bounsweet gets closer to Wooper, take a photo
Making a Splash
- Find Quagsire at Research Level 1
- Once it jumps into the waterfall, take a photo
In the Tall Grass
- Scan the area to reveal Sobble
- Toss a fruit beside him
- Once he shows up behind the flower, take a photo
Operation Be My Friend!
- Find Liepard on a large rock and throw a few orbs at him
- Scan the area of that large rock for an alternate path
- Toss a fruit at Leafeon behind the waterfall and take a photo
Myth of the Jungle
- Throw an orb at Mew at the start
- Throw another orb at Mew near Venusaur further on
- Thrown another one at Mew above the ruins
- And another one near waterfall
- Toss a fruit to him in the end and take a photo
Bounsweet’s Amazing Journey
- Play melody to two sleeping Bounsweets on the ledge
- Toss a fruit at sleeping Ariados on a spider web
- Once Ariados attacks the Bounsweets, take a photo
Arbok Falls, Asleep
- Toss a fruit at sleeping Arbok on a tree (RL1)
- Once he falls from the tree, take a photo
Resting Its Wings
- Find a sleeping Yanmega on a tree (RL2)
- Take a photo of it sleeping
Tree-Dwelling Pokemon
- Find a sleeping Toucannon on a tree
- Throw an orb at a Crystalbloom nearby
- Once Toucannon flies away, take a photo
Triple Threat
- Throw an orb at a Crystalbloom near swamp
- Scan the area to reveal footprints
- Play a melody to reveal Yanmega
- Play a melody once again in the swamp
- Once Ariados attacks Yanmega, take a photo
Tonight’s Dinner
- Take an alternate route behind the waterfall
- Toss a fruit at Morelull and take a photo
Where’s the Fruit?
- Throw an orb at a Crystalbloom near swamp
- Scan the area to reveal footprints
- Keep scanning to make Slacking move forward
- Once Slacking reaches a fruit in the tree hole, take a photo
A Figure of Beauty
- Toss a fruit at Arbok sleeping on a tree
- Throw an orb at Liepard behind the tall grass
- Further on play melody to another Liepard sleeping on a tree
- Once you reach a group of Liepards, toss an orb and take a photo
Why So Still?
- Throw an orb at a Crystalbloom near swamp
- Scan the area to reveal footprints
- Toss a fruit at Leafeon to make it go further
- Play melody once you reach a group of Ariados
- Throw an orb at Swampert in the swamp
- Once he starts throwing mud at Leafeon, take a photo
An Unusual Spot
- Throw an orb at a sleeping Liepard on the edge of the cliff
- Throw another orb at a Liepard on top of the tree
- Throw an orb at a Crystalbloom on the ground
- Toss a fruit at Ledian and take a photo
Sylvan Sentinel’s Secret Side
- Scan the top of the rocks to reveal Espurr (RL3)
- Toss some fruits to lure her to Trevenant on the alternate path
- Once they’re together, throw orb at them and take a photo
An Airborne Boulder
- Scan the alternate path to move Trevenant off the way
- Once you reach the group of Espurr, take a photo
Gust with Gusto
- Toss a fruit at Shiftry on a tree to your right
- Once he starts jumping, throw an orb at him
- Throw another orb at a Crystalbloom near him
- Once Shiftry blows a gust of wind, take a photo
Upside-Down Hide-and-Seek
- Scan trees to your right to reveal Kecleon
- Once he shows up, throw an orb at him and take a photo
Little Lost Deerling
- Throw an orb at a Crystalbloom and wait for Deerling to appear (RL3)
- Throw another orb at a farthest Crystalbloom to your right
- Go to a small clearing and throw another orb at the Crystalbloom there
- When a group of Pokemon gather around this Crystalbloom, take a photo
A Seasonal Gathering
- Come to the same clearing as before
- Scan area to your left to reveal Espeon
- Throw a few orbs at him
- When a group of Swasbuck gather around him, play a melody and take a photo
Egg Patrol
- Find Unfezant on the right side of the Summer route
- Throw a fruit at it
- Once it stands up revealing eggs, take a photo
Angry Drampa
- Find Drampa on the Summer route and throw an orb at it
- When Drampa and other Pokemon gather in the clearing, throw an orb at Pancham
- Once Drampa’s eyes start glowing red, take a photo
A Pair of Chums
- Find Drampa on the Summer route and throw an orb at it
- Wait for other two Pokemon gather in the clearing
- Once they start riding Drampa, take a photo
Weird Crossing
- Throw an orb at Lotad at the end of the course
- Throw an orb at Bulbasaur near the pond
- Once Bulbasaur jumps on top of Lotad, take a photo
A Moment’s Rest
- Throw an orb at the Serperior’s tail at the end of the course
- Toss a fruit to him and play a melody
- Once Serperior falls asleep, take a photo
Heart of a Dragon
- Toss a fruit to Deerling and lure it closer to Applin
- Toss anther fruit to Applin
- Once they come really close to each other, take a photo
Danger Warning
- Toss a fruit at Bewear at the end of the course
- Once it raises its arms, take a photo
Winter Wonders
- Throw a few orbs at Gardevoir
- Once he appears next to a tree, throw an orb at a nearby Crystalbloom
- When Gardevoir covers it with ice crystals, take a photo
Flickering Flames
- Throw a few orbs at Gardevoir
- Toss a couple of fruits to Deerling and Ninetales
- Throw an orb and another fruit at Ninetales
- Once it summons Will-o-wisp, take a photo
A Tad Happy
- Toss a fruit at Lotad to the right of the sunny path
- When Lotad jumps into the water and two more Lotad appear, play a melody
- Throw an orb at the top Lotad and take a photo
A Calming Air
- Scan the area to the left of the sunny path to reveal Espeon
- Toss him a fruit and take a photo of him eating it
Myth of the Forest
- Throw an orb at Celebi in the final area of the forest
- Toss some fruits near a tree to your right
- When Celebi appears again, throw an orb at it
- Once another Celebi appears, play a melody
- When both Celebi start listening, take a photo
Milotic’s Mighty Leap
- Throw some orbs and fruits at Milotic at the giant tree root
- Throw some more orbs and fruits at it to make it jump
- This will produce a twister, so throw another orb at it
- Once the second twister starts, take a photo
All New Pokemon Snap Requests: Maricopia
Near the Water’s Edge
- Toss a fruit to Pikachu at the beach of the final area
- Lure him to the sandy shore with Stunfisk
- Once Pikachu starts surfing on Stunfisk, take a photo
Wingull Loop-the-Loop
- Play a melody to the group of Wingulls in the air
- Once one of the Wingulls does loop-the-loop, take a photo
Three in a Row
- Find the first sleeping Exeggutor by scanning the first area
- Lure two more Exeggutors to the same spot with fruits
- Once you have all three Pokemon asleep, take a photo
Say Cheese!
- Play a melody to Bellossoms at the end of the first area
- Scan them and take a photo
Most Marvelous Muscles
- Throw an orb at Machamp on the main path
- Once he turns to you, take a photo
Hiding in the Sand
- Scan the area beneath the sand to reveal Stunfisk
- Toss a fruit at Stunfisk to make him electrocute Octillery
- Once he shocks Octillery twice, take a photo
Returning to the Sea
- Find Pelipper and throw fruit at it
- Throw an orb at Pelipper
- Once it picks up Pyukumuku in its mouth, take a photo
A Bite for the Bully of the Sea
- Toss a fruit at Sharpedo at the start of the course
- Once it jumps out of the water, take a photo
Bobbing for Fluffruit
- Toss a fruit to Pelipper
- Once it catches the fruit, take a photo
If You’re Happy and You Know It
- Throw some orbs at Wailord behind the rock on the alternate path
- Toss him some fruits
- Once he turns on his belly, take a photo
Adorable Water Spray
- Throw an orb at Wailmer at the end of the course
- Once it starts spraying water, take a photo
Favorite Hangout Spot
- Find two Luvdiscs sleeping on a Corsola in front of undersea cave
- Take a photo of them all sleeping
Swimming Clamperl
- Find Clamperl in front of underwater ruins (RL3)
- Toss a fruit at Luminenon nearby
- Once Clamperl swims away, take a photo
Lucky Four-Leaf Clover
- Throw orbs at two Crystalblooms at the end of the cave
- Wait for two Luvdiscs appear
- Throw two more orbs at the other two Crystalblooms
- Once you have all four Luvdiscs together, take a photo
A Ring of Bubbles
- Throw two orbs at Alomomola and Luvdisc at the beginning
- Once they come together surrounded by bubbles, take a photo
A New Way to Dance
- Throw an orb at Cradily in the seaweed and play a melody
- Once it starts dancing, take a photo
Stirring Up Starmie
- Toss a fruit at Luminenon in the underwater ruins
- Once Starmie reveals himself nearby, take a photo of both of them
See Ya Inf-later!
- Play a melody to Qwilfish in the undersea cave
- Toss a fruit at it and take a photo once it starts deflating
Ready, Aim, Fire!
- Throw an orb at Clawitzer inside the cave
- Once another Clawitzer starts a fight, take a photo
Undersea Ballroom Dancing
- Throw an orb at Clawitzer on an alternate path to underwater ruins
- Throw another orb at male Tentacruel (use scanning)
- Once Tentacruel and Frillish start dancing, take a photo
A Sunlit Cave
- Throw an orb at Clawitzer on an alternate path to underwater ruins
- Throw an orb at Chinchou inside the cave
- Follow it inside the sunlit cave
- Once a group of Chinchou come together, take a photo
A Light in the Depths
- Throw an orb at Lanturn on the alternate path (RL3)
- Once two Frillish start attacking Lanturn, throw another orb at him
- When he’s free and smiles at you, take a photo
A Seven-Colored Glow
- Use scanning to reveal Starmie under the sand (RL3)
- Throw orbs at Starmie to wake him up
- Throw orbs at Crystalbloom at the end of underwater ruins
- Once Starmie comes closer to Crystalbloom, throw another orb at it
- When Starmie lights up, take a photo
To the Bottom of the Sea
- Toss a fruit at Alomomola and follow it to the Frillish
- Toss another fruit at Alomomola
- Once both of them dive down, take a photo
Golisopod Training
- Find sleeping Golisopod on the alternate path (RL3)
- Throw an orb at attacking Glawitzer
- Once Golisopod wakes up and attacks another one, take a photo
Seafloor Roar
- Throw an orb at Lanturn on the first alternate path (RL3)
- When two Frillish attack it, throw another orb at Lanturn
- Take the second alternate path and throw orbs at two Crystalbloom
- Toss a couple of fruits at Lugia appearing nearby
- Once it starts roaring, take a photo
Swirling Energy
- Throw a few orbs at a group of Wishiwashi during the Illumina Spot course
- Once an Illumina Wishiwashi appears and creates a vortex, take a photo
An Easy Mistake to Make
- Lure Crabrawler to get closer to sleeping Exeggutor using fruits
- Once Exeggutor wakes up and chases Crabrawler, take a photo
Sitting and Waiting
- Scan the area and take the alternate path
- Throw an orb at the Crystalbloom next to Primarina
- Once Primarina starts singing, take a photo of Zangoose near on the shore
When Archenemies Meet
- Throw an orb at Primarina on the offshore rocks
- Toss a fruit at the bushes to reveal Seviper
- Once Zangoose and Seviper start fighting, take a photo
Inkay by Moonlight
- Toss fruits to Inkay in all five locations given at Maricopia
- Once they all come together, play a melody
- When they start jumping, take a photo
A Casual Gesture
- Go north and throw an orb at Crystalbloom near Octillery and Seviper
- Wait for Octillery to shoot ink
- Once Octillery scratches its head, take a photo
Fins Aflutter
- Toss a fruit at Sandygast hiding on the shore
- This will prompt Octillery run to the water
- Once Finneon jump into the air, take a photo
Bigger! Even Bigger!
- Use fruits to lure Crabrawler to Sandygast on the shore
- When Sandygast grows full size, take a photo
Drifting Drifblim
- Throw a couple of orbs at two Drifblim at the beginning
- Once one of them inflates his head, take a photo
The Dancing Songstress
- Throw an orb at the diving Primarina at the start
- Once it jumps out of the water, take a photo
Practice Makes Perfect
- Find Raichu near the whirlpool
- Once it starts spinning, take a photo
Round and Round
- Toss a fruit at Squirtle on an offshore rock
- Once Wingull pushes it into the water, take a photo of Squirtle in the whirlpool
Whirlpool Blast Off
- Throw orbs into whirlpool to reveal Blastoise
- Once it shoots its rockets, take a photo
Take One, Please
- Toss a fruit at the most distant Lapras on the alternate path
- Once it starts eating the fruit, take a photo
A Mighty Rolling Leap
- Scan the whirlpool to reveal two Mantine (RL2)
- Once Mantine starts jumping, take a photo
Mareanie’s a Meanie
- Toss some fruits at the rocky area to your left
- Once Mareanie attacks Clamperl, take a photo
Voracious Vaporeon
- Throw an orb and a fruit at Vaporeon
- Once it starts eating the fruit, take a photo
Myth of the Sea
- Throw a couple of orbs at two Lapras on the alternate path
- Play a melody to reveal Manaphy
- Once they swim together, take a photo
That is everything you need to know on how to complete all New Pokemon Snap requests on Florio, Belusylva, Maricopia islands. Also, be sure to read our official New Pokemon Snap review!
GameSkinny is supported by our audience. When you purchase through links on our site, we may earn a small affiliate commission. Learn more about our Affiliate Policy


Published: May 10, 2021 11:16 am