Shifting away from the forests of the Dyrwood to the island chain of the Deadfire Archipelago, Pillars Of Eternity 2 includes a mechanic entirely new to the series: ship-to-ship combat!
While there are tutorial screens for the major concepts, some of the finer points of the system are glossed over, and that’s where we come in with this full guide to all things nautical in Pillars 2.
Maintaining the Ship and Crew Morale
To start your pirate adventures, open up the ship menu by clicking the boat icon at the bottom of the screen (this is available even while on land when you aren’t on the open sea).
Keep an eye on the numbers at the top of the screen, and always maintain a full supply of repair tools, medical supplies, and cannon ammunition by stocking up at any port. These items are also frequently found by searching wrecks at sea or checking containers in land maps. Don’t ever run low on these supplies, as frequent events on the water will result in injured crew and damaged hulls.
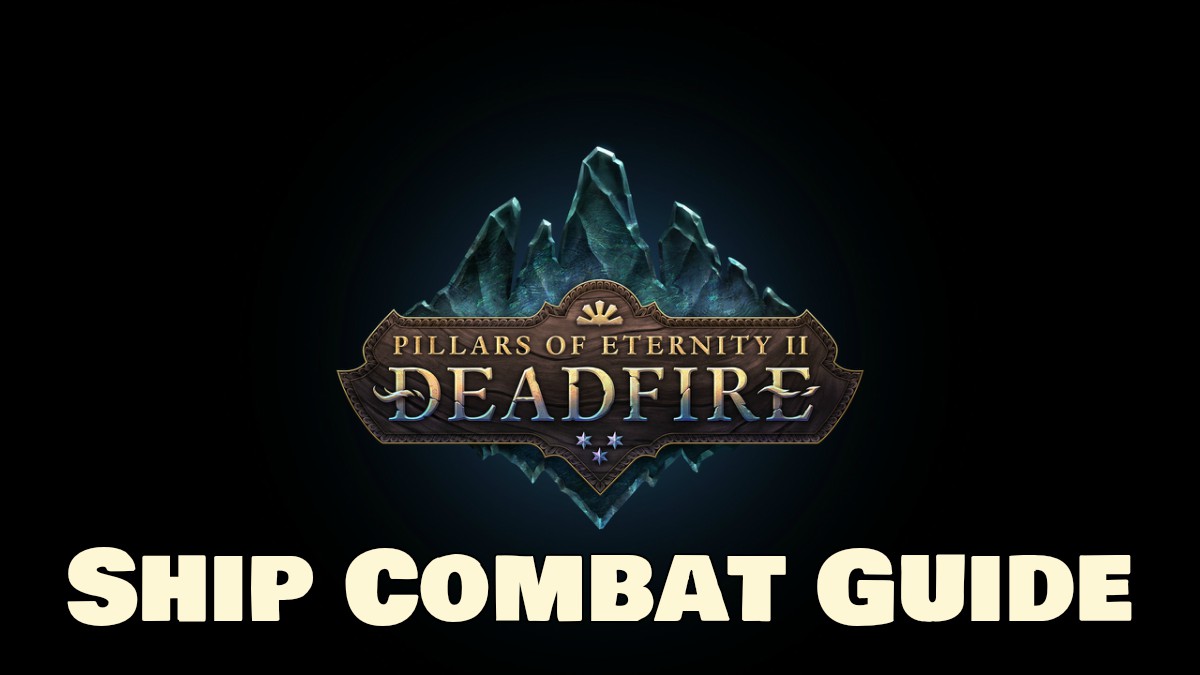
After any encounter where crew members are injured (marked by a red icon), be sure to move the injured crew to the three reserve slots on the lower-right side of the ship menu. Leaving them at their posts while injured results in large morale losses every day.
While you can pay to recruit new crew at a port, always talk to any NPCs you come across. Many of the quest NPCs, like Oswald, Vektor, Mother-Sharp-Rock, and Birta the cook, can be recruited directly to your crew through dialog.
 Repositioning injured crew
Managing Food and Water
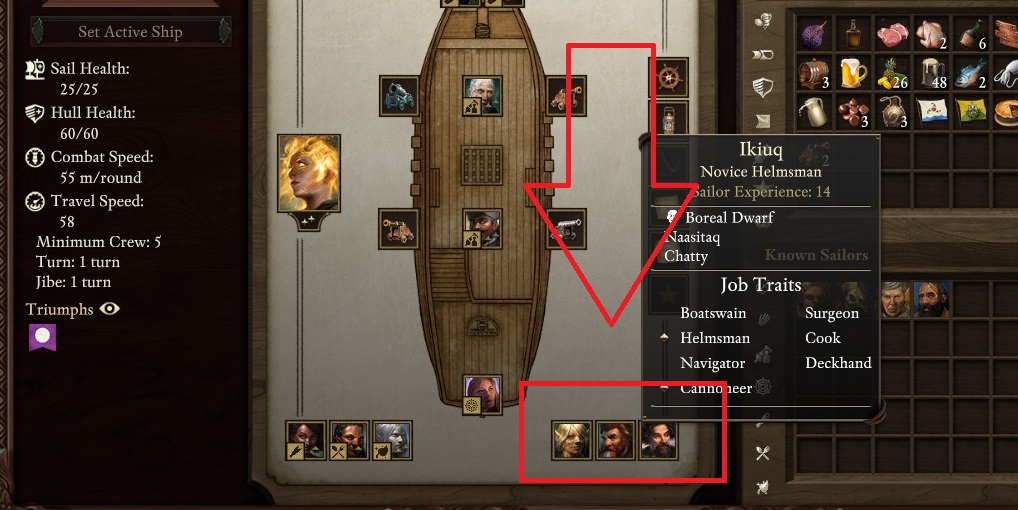
This isn’t clear at first, but you have to move food and water out of the party stash to the appropriate slots in the boat management screen to keep your crew fed — just having it in your inventory doesn’t make it available to the crew.
Place the higher-morale food and drink options to the left, and the lower-morale options (like water and hardtack) to the right if you want to keep morale up.
Search every container you come across and make use of crafting regularly, and you won’t often run out of the higher-morale food and drink. With higher morale comes bonus experience and no chance of mutiny.
 Moving food and drink from your inventory to the ship’s stores
Ship Upgrades and Avoiding Damage
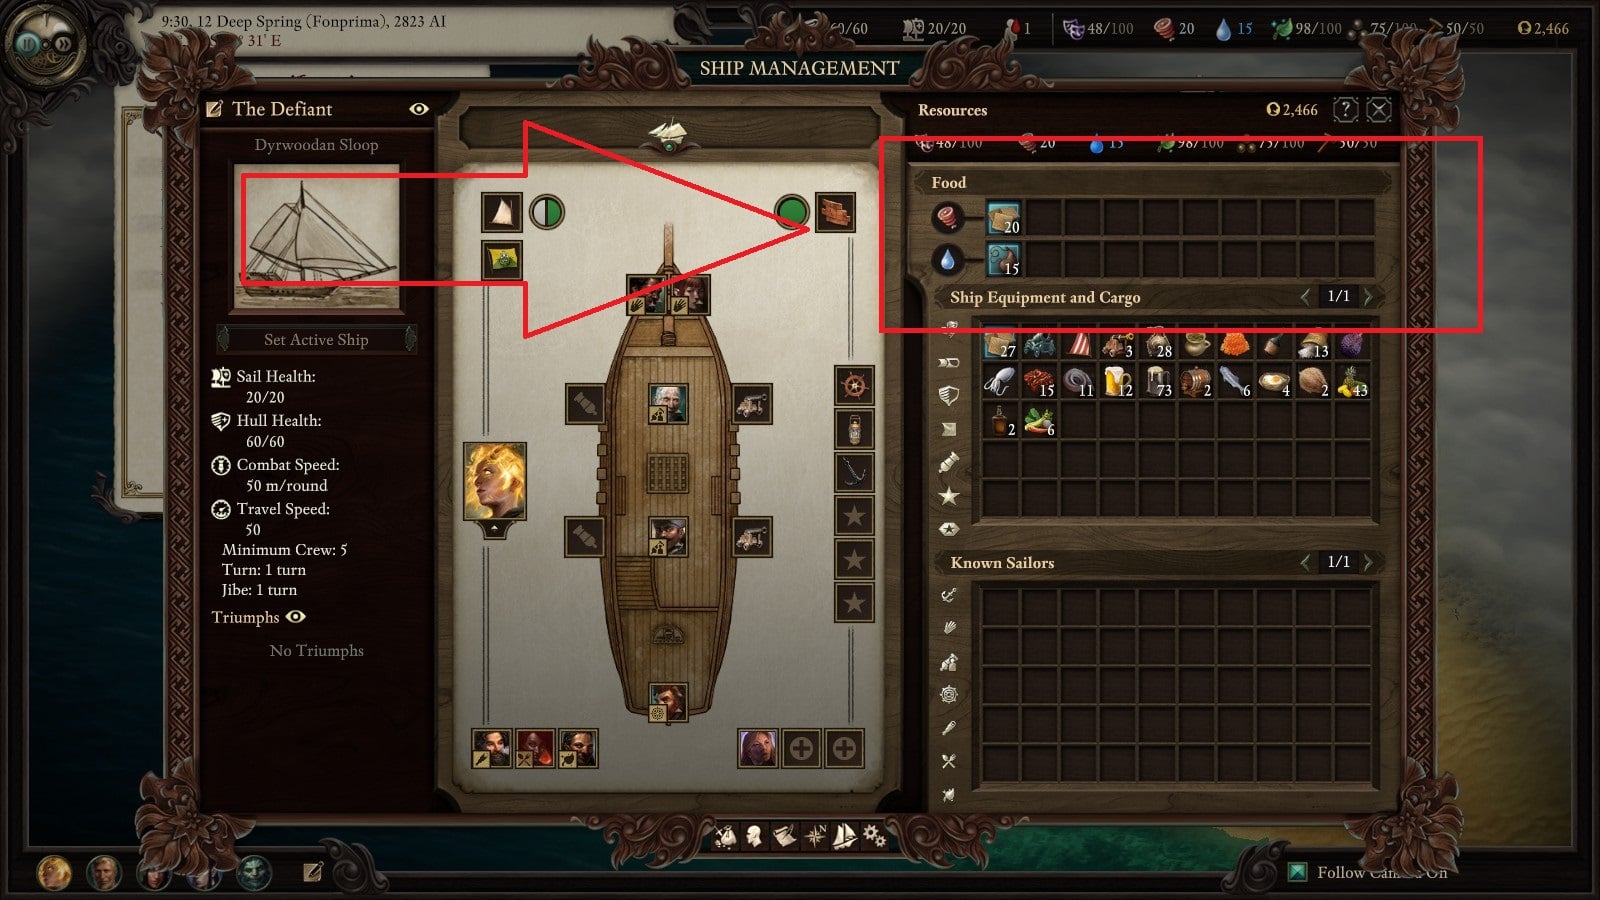
Although it’s quite expensive for an early-game item at a cost of 5,000 coins, buying the spyglass at Sanza’s Map Emporium in Neketaka will give you an edge in ship encounters. Many of the events on the sea have an option to scout first with the spyglass for bonuses or to avoid hazards altogether.
If the Defiant isn’t big and bad enough for your crew, you can buy whole new ships at the Neketaka port, or pay for expensive upgrades to your existing hull and sails to get an edge in combat.
Don’t drop too much money right at the start, however. A set of upgraded Valera Sails is available for free by completing a quest for Martino Valera in the Queen’s Berth section of Neketaka.
Finally, while out at sea, avoid the large, grey storm clouds that randomly generate across the Archipelago. These clouds initiate a storm event that usually isn’t worth the trouble. You can end up with some extra loot or interesting dialog, but they usually just cause expensive problems since you will take ship damage and get injured (or even killed) crew members during the event. If you want to level up your crew, however, they can be valuable sources of shipmate experience.
 Buying the spyglass
Winning Ship Battles
At the start of combat, your first decision is whether to ram the opposite ship and board them for a straight fight or to shift into the new ship combat screen. When dealing with a much stronger ship, boarding may be your best option.
While the Defiant is guaranteed to take damage and most likely suffer multiple crew injuries, boarding can be a better choice when you are outgunned and the enemy ship has a stronger hull and sails.
During ship combat, your goal is to get into optimal range for your cannons and to fire while staying out of your enemy’s optimal range, repositioning away from enemy cannon fire by turning to starboard and port.
Performing Ship Manuevers
The big question mark for anyone not intimately familiar with nautical terms will be the “prepare to jibe” option. The jibe maneuver swings you around to the opposite position you are currently in. This is incredibly useful in combat to quickly fire off multiple volleys.
For instance, if you spent a few rounds turning to starboard or port repeatedly while your cannons are reloaded on one side, you can fire those cannons, then on the next turn, perform a jibe to get to the other side of the enemy ship instantly and fire off your secondary cannons on the next turn (rather than waiting a full three turns to repeatedly turn to starboard or port and get your other cannons in line for the shot).
By repeating this process, you will get more shots off more frequently while waiting for the cannons on the starboard and port sides to be reloaded. If you know the enemy cannons are going to fire this round, it can be better to perform the Brace For Impact action than to try to turn away or jibe, as you will get fewer crew injuries.
If your goal is to sink the ship, plunder its loot, and steal its flag, then aim for the hull. That’s not the only possible outcome, however. Sails obviously have less health than the hull, so if you just want to escape the encounter, repeatedly fire on their sails from a distance, then turn away from the ship and sail at full speed to leave.
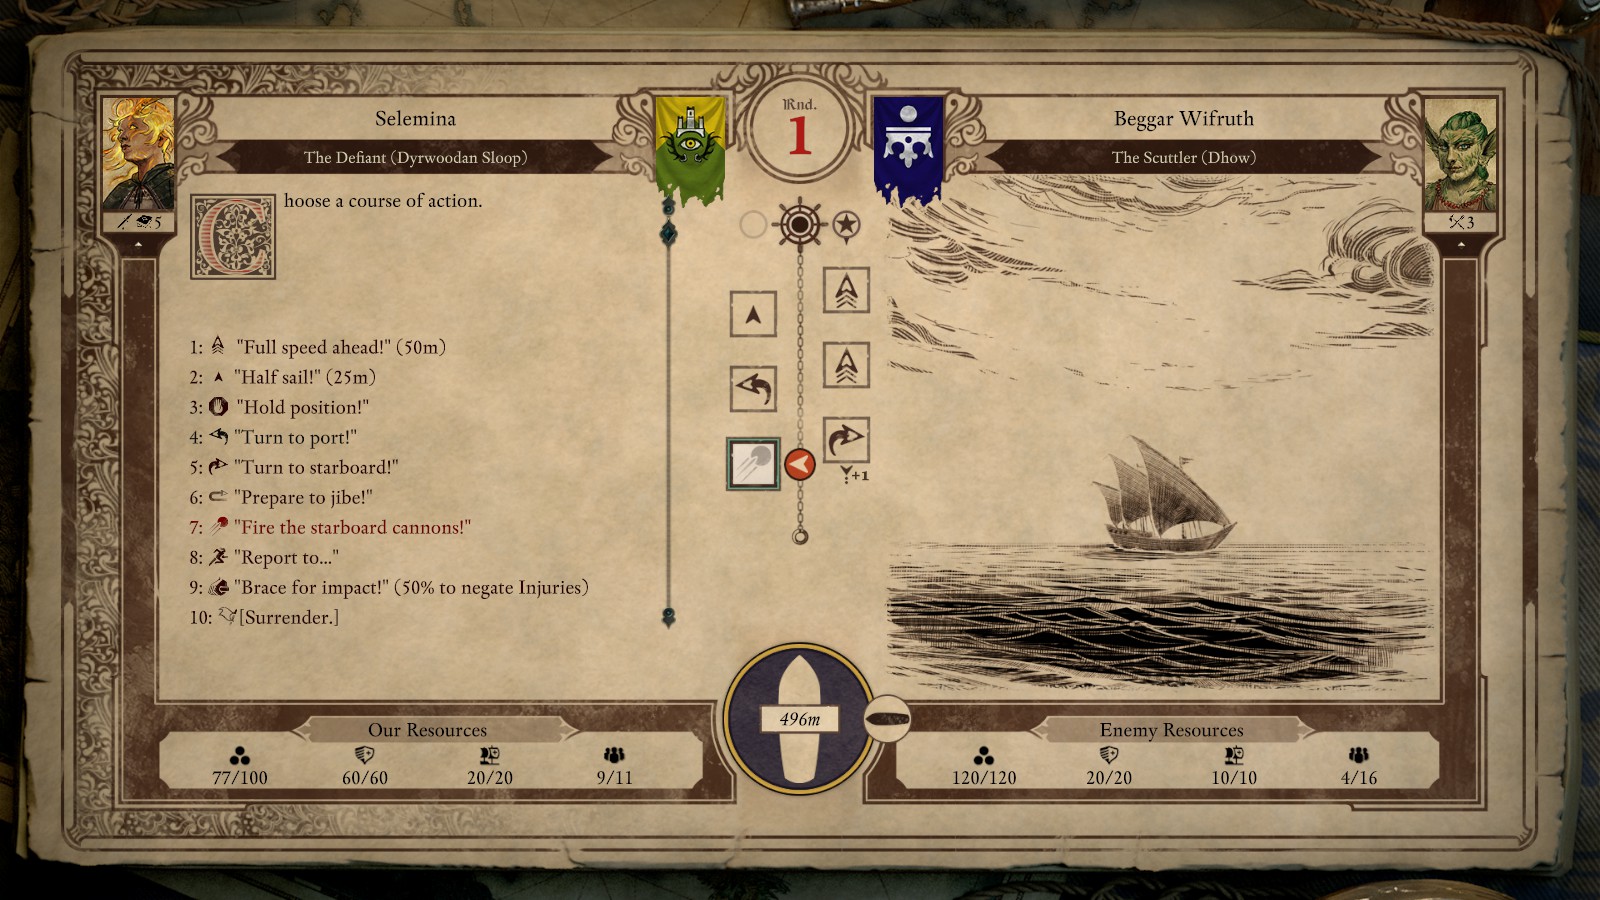 Engaging in ship-to-ship combat
That’s all you need to know to get started sailing the high seas and fighting pirate captains! Have any other Pillars 2 ship combat tips we should try out? Let us know in the comments section.
For help on finding pets, balancing party relationships, and completing quests, check out the rest of our Pillars of Eternity 2 guides here.


Published: May 4, 2018 01:54 pm