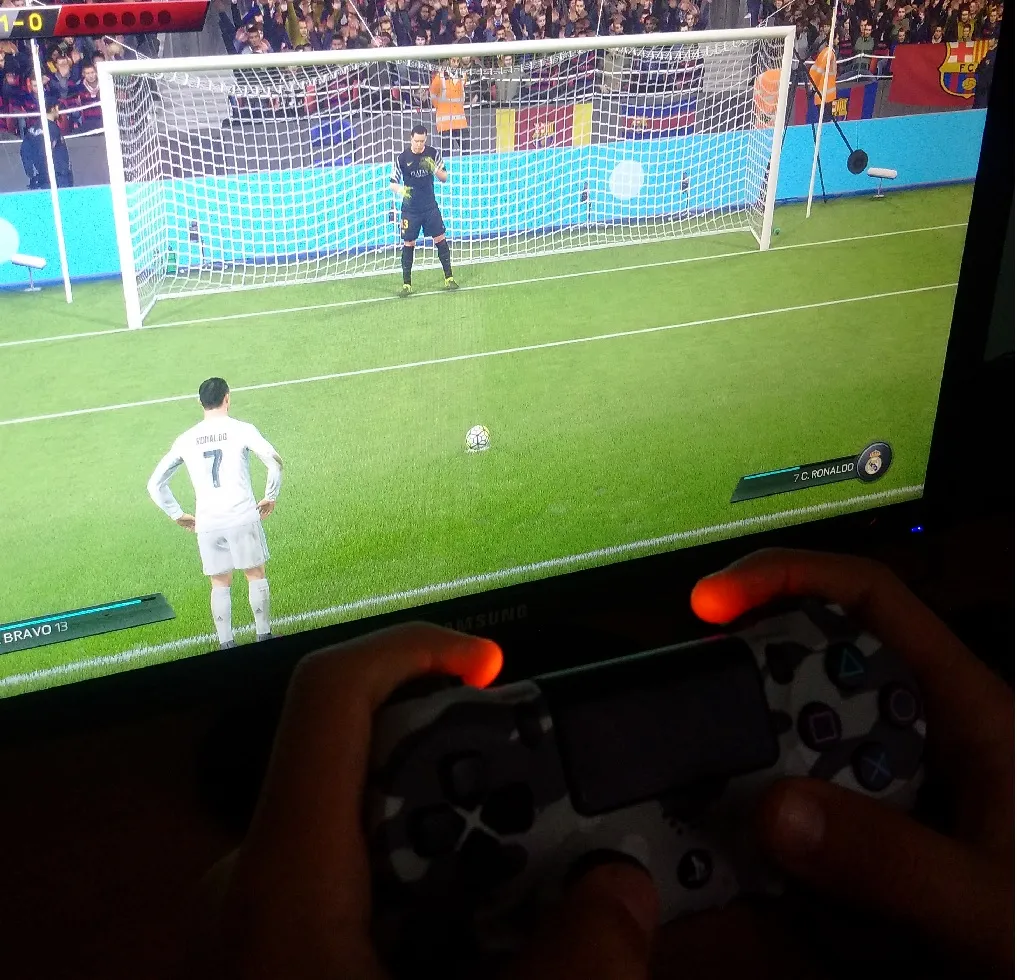
With the addition of FIFA 16 to the Origin Vault today, there’s no better time to hook up your PS4 remote to use on your PC! Our easy step-by-step guide takes you through the preliminary setup, and all you’ll need to do after your first use is press your PS4 remote’s power button, and you’re good to go!
The remote should work with any game that supports controller support, whether on Origin, Steam, UPlay, or even on your browser!
Here’s what you’ll need to get started:
- A PlayStation 4 remote (This setup also works for a PS3 remote, as well as off-brand remotes)
- A Bluetooth connection on your PC (If you don’t have a Bluetooth Adapter installed, you can buy a simple Bluetooth USB Dongle for less than $10)
- InputMapper (we’ll tell you where to find this in just a second)
1. Bluetooth Setup and Settings
First up, if you’ve bought a new USB Dongle, you’ll want to set this up yourself and continue with the next paragraph. These often either have a plug-and-play feature, or require a software download to install.
With your Bluetooth hardware set up, go to your Bluetooth Settings on your PC. If you’re not sure where this is located, you can just press the Start button and search for Bluetooth, and you’ll find Bluetooth Settings easily.
2. Connecting your remote
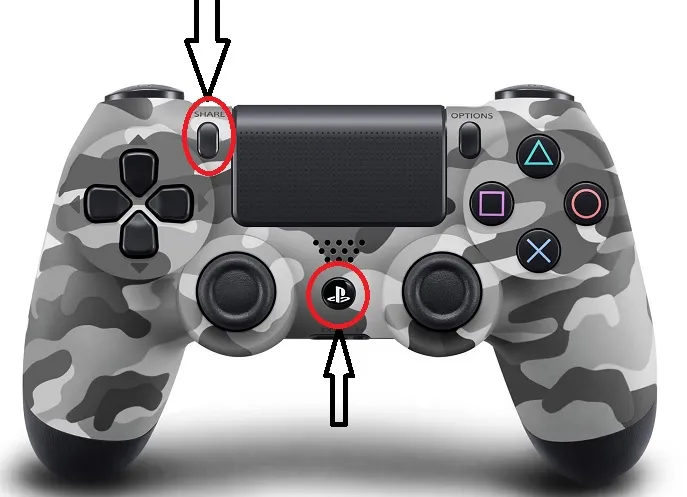
When you open your Bluetooth Settings, your device should start scanning for Bluetooth devices immediately. So to pair your PS4 remote, you’ll first need to set it up for sharing mode. To do this, simply hold the Share button and the PS buttons simultaneously!
This will cause the remote’s front lights to pulsate very quickly for roughly 20 seconds. This is much quicker than the normal on-and-off pulsing lights, so make sure you hold the buttons simultaneously to get your remote in sharing mode.
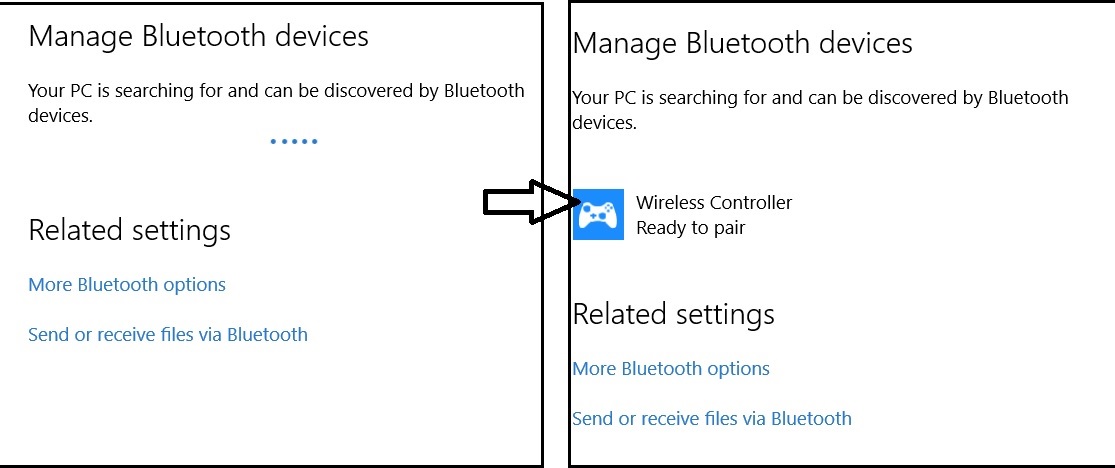
You should now be able to find your PS4 remote with your Bluetooth Settings.
You can now click on the Wireless Controller option on your PC, and then click pair. This should stop your Remote’s light from flickering, and set it to a static blue light. Depending on your PC, it could take a few seconds to a minute for the device to get paired, at which point the Bluetooth Settings status will show up as Connected.
3. Driver Download (InputMapper)
Next up, you need to head to InputMapper’s download page here, and download the latest version of the software. You’ll probably want to stay away from the Alpha, so just download the main version of the driver, which looks like this:
When that’s taken care of, go through the simple installation, and make sure you have a Shortcut to the app on your Desktop. (This app is completely safe; we’ve used it in over a dozen devices without any issues whatsoever)
4. Connecting your device to InputMapper
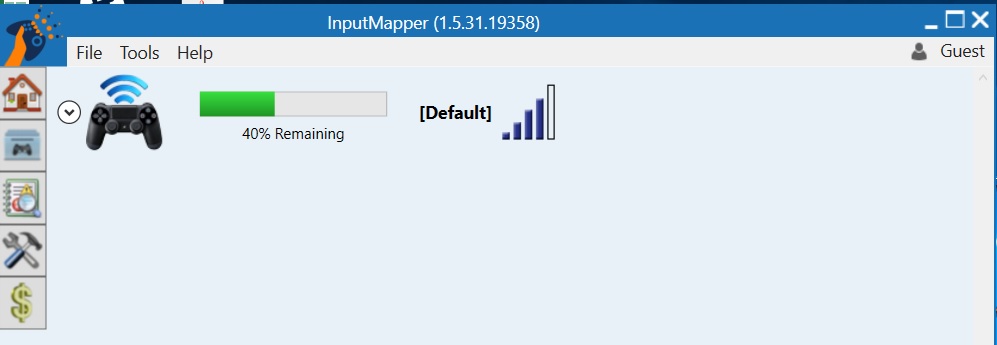
If InputMapper didn’t open on its own, open it from your Desktop. The software should instantly recognize your device, and show you a screen like the following;
If your remote isn’t shown in the software, ensure it is turned on by pressing the PS button. If the Remote is on, but not connecting, try closing InputMapper completely, and opening it again.
And that’s all!
If your PS4 Remote is showing up on InputMapper, you’re good to go, and can access your games as normal.
To turn your PS4 Remote off, you can simply go to InputMapper, click on your Remote and click on Disconnect Bluetooth.
To start it up again, you simply need to open InputMapper, and then turn your Remote back on.
(Note: Do not disconnect or unpair your Remote from the PC, as this would mean you’d need to run through the setup again.)
You can charge the Remote normally, by connecting it to a USB socket on your PC, or to the wall. Keep in mind that if you connect it back to a PlayStation, you’ll need to run through the Bluetooth Pairing again, as the device can only pair to one console at a time.
You can also use these settings to connect multiple Remotes to your PC. If your Bluetooth Adapter doesn’t support multiple connections however, you might have to buy additional Dongles to connect the different devices.
If you have any questions, or ran into any problems, please let us know in the comments section below, and we’ll try our best to get back to you with a solution. If you liked this guide, please do share it with your friends.






Published: Apr 20, 2016 05:45 am