Starlink: Battle for Atlas is a game built around customization, and there are 15 weapons to tinker with and take into battle.
However, if you have decided to pursue the game’s physical release, you are going to be paying a premium to add new ones to your collection.
In this guide, we will cover powerful combinations and combat approaches that we hope will help inform those purchases.
Further, if you are a digital player, hopefully this information will assist as you select your loadouts.
Weapon Functionality
Every weapon in Starlink is fired in one of three ways:
1. Hold down the trigger to deal continuous damage.
These are low damage, low energy cost, high fire rate weapons, and include:
Shredder
Shredder Mk. 2.
Volcano
2. Press the trigger once to fire a single shot.
Typically, these are low fire rate, high energy cost, middling damage weapons, and include:
Crusher
Flamethrower
Frost Barrage
Hailstorm
Iron Fist
Levitator
Nullifier
Shockwave
3. Hold down the trigger to charge a single shot, and then release to fire.
These are low fire rate, high energy cost, high damage weapons, and include:
Freeze Ray Mk. 2
Gauss Gun Mk. 2
Meteor Mk. 2
Imploder
Selecting Weapons Based on Functionality
I believe that the interplay of firing methods is the most important factor to consider when selecting weapon combinations; remember, while the base stats of a weapon can be adjusted with mods, the way a weapon fires cannot.
I recommend always keeping one weapon from the first category equipped.
With one weapon doing consistent, maintenance-free damage, your attention is free to focus on precision with a charge or single-shot weapon on your second trigger.
While there may be more raw power in combining two weapons from categories two and three, I find that needing to actively monitor both triggers decreases overall DPS and reduces survivability in the harder difficulty settings.
Elemental Weapons Vs. Kinetic
Simply, Elemental weapons provide powerful status effects and damage boosting combinations, and Kinetic weapons do not.
Additionally, some mods grant valuable perks for executing Elemental Combos (increased energy, damage, etc.).
While some of the Kinetic weapons offer slight base stat increases over their elemental counterparts, the loss of status effects and Elemental Combos is simply too significant.
That said, I still believe that adhering to a weapon setup that consists of one weapon from category one and the other weapon from category two or three is more important than both weapons dealing Elemental damage.
This primarily comes into play when selecting your category one weapon, as there are only three, and just one does Elemental damage.

Recommended Weapon Combinations
To summarize, I recommend prioritizing weapon configurations that provide the outlined firing setup (one category one weapon, and one weapon from category two or three), and then giving preference to Elemental weapons over Kinetic.
Here are the weapon combinations that I find allow for the most consistent damage and maximized survivability:
- Levitator & Volcano
This is far-and-away the combination I use most frequently.
As mentioned, the Volcano is a continuous fire Elemental weapon, and I always want it equipped.
The Levitator’s Status Overload effect (which incapacitates enemies by levitating them) is extremely powerful on its own, and these two weapons combined are the most dominate, catch-all combo I have found.
- Frost Barrage & Shredder Mk. 2
This is the combination I use if I am facing off against fire enemies that are immune to the Volcano.
The Frost Barrage is a solid category two weapon that targets their weakness, and the Shredder Mk. 2 is essentially a non-elemental Volcano with an additional Amplifier slot.
- Gauss Gun Mk. 2 & Shredder Mk. 2
As the game reaches its conclusion, you will increasingly encounter groups of enemies with multiple elemental immunities.
In these instances, a Kinetic weapon configuration is preferable, and the Gauss Gun Mk. 2 is my go-to compliment for the Shredder Mk. 2 (though the Iron Fist is another appealing option).
With end-game mods equipped to the Gauss Gun, you will hardly miss status effects and Elemental Combos at all.

Final Thought
If you have Starlink: Battle for Atlas Digital Edition, you have all of these weapons, and I would recommend giving these combinations a try.
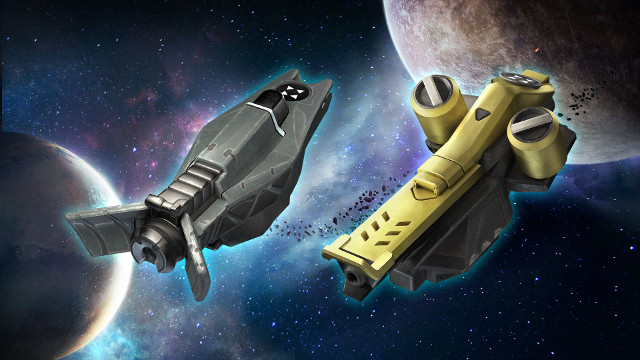
If you are the owner of a Starter Pack, picking up the following items will give you access to them, and I can say with confidence that they will be great assets on your way through the game:
Starlink: Battle for Atlas Starship Pack – Pulse ($25)
Starlink: Battle for Atlas Starship Pack – Neptune ($25)
Starlink: Battle for Atlas Weapon Pack – Shockwave ($10)
Starlink: Battle for Atlas Weapon Pack – Crusher ($10)
Weapon List
For those that would like to see full stats on all 15 weapons, here is a complete weapon list:
Heat Weapons
Flamethrower
Damage: 18
Range: 33
Fire Rate: 16
Energy Cost: 74
Status Effect: Fire
Amplifier Slots: 3
Description: The Flamethrower is a fuel-injected weapon that spits fire in a wide arc, continuously dealing damage that overheats targets and weakens their defenses.
Volcano
Damage: 10
Range: 74
Fire Rate: 100
Energy Cost: 10
Status Effect: Overheat
Amplifier Slots: 3
Description: The Volcano is a tri-barrel Gatling gun that fires heat-activated molecules. The gun gets deadlier as it gets hotter, so hold down the trigger and start melting your enemies’ defenses.
Meteor Mk. 2
Damage: 100
Range: 33
Fire Rate: 10
Energy Cost: 11
Status Effect: Overheat
Amplifier Slots: 4
Description: The supercharged Meteor Mk.2 projects an intense field of heat around its user, turning them into a flaming ball of fiery death for anyone unlucky enough to get in their way.
Cold Weapons
Freeze Ray Mk. 2
Damage: 24
Range: 100
Fire Rate: 14
Energy Cost: 52
Status Effect: Freeze
Amplifier Slots: 4
Description: This advanced weapon is souped-up with extra mod capacity. Charge up and release a high-intensity cryolaser that encases targets in ice.
Frost Barrage
Damage: 19
Range: 100
Fire Rate: 16
Energy Cost: 41
Status Effect: Frost
Amplifier Slots: 3
Description: When it’s time to chill your enemies out, there’s the Frost Barrage. Its volley of guided missiles spreads frost over a target, helping to slow down the fast or evasive ones.
Hailstorm
Damage: 21
Range: 100
Fire Rate: 23
Energy Cost: 56
Status Effect: Frost
Amplifier Slots: 3
Description: Hailstorm adapts the four barrels of the Shredder to deliver cryo-enhanced projectiles, firing in short, accurate bursts that Frost the target with deadly precision.
Kinetic Weapons
Shockwave
Damage: 18
Range: 15
Fire Rate: 15
Energy Cost: 47
Status Effect: Kinetic
Amplifier Slots: 3
Description: Initially designed as a non-lethal crowd dispersal device, the intensity of Shockwave’s concussive blast wave became much too dangerous for use against anyone except those the user would like to see shattered into a million pieces.
Shredder
Damage: 10
Range: 74
Fire Rate: 83
Energy Cost: 13
Status Effect: Kinetic
Amplifier Slots: 3
Description: Based on human military designs, the Shredder is an all-purpose rotary gun that shoots kinetic projectiles. It’s precise and shoots continuously, so aim it at weak points and rack up the damage.
Shredder Mk. 2
Damage: 10
Range: 74
Fire Rate: 83
Energy Cost: 13
Status Effect: Kinetic
Amplifier Slots: 4
Description: This upgraded version of the Shredder funnels projectiles into the tri-barrel assembly more quickly, resulting in a lot more pain per second than the standard variant.
Iron Fist
Damage: 54
Range: 10
Fire Rate: 13
Energy Cost: 32
Status Effect: Kinetic
Amplifier Slots: 3
Description: Named for the famous Outlaw warlord who invented it, Iron Fist is a brutal close-range shrapnel launcher that smashes through even the most durable of defenses. Its short range was intentionally designed so that its creator could look her foes in the eye when they met their end.
Gauss Gun Mk. 2
Damage: 31
Range: 100
Fire Rate: 14
Energy Cost: 52
Status Effect: Kinetic
Amplifier Slots: 4
Description: Outfitted with additional racks of electromagnetic coils, which are then enhanced with modified Kinetic stabilizers, the Mk.2 is a significant improvement on the standard Gauss Gun in every way. It even looks cooler!
Gravity Weapons
Crusher
Damage: 21
Range: 100
Fire Rate: 23
Energy Cost: 56
Status Effect: Gravity Well
Amplifier Slots: 3
Description: A wing-mounted singularity engine gives Crusher the power to create miniature Gravity Wells around its target. Any projectile caught in the Well will be drawn inward for damage!
Imploder
Damage: 27
Range: 100
Fire Rate: 13
Energy Cost: 43
Status Effect: Vortex
Amplifier Slots: 3
Description: The Imploder is a cannon that literally fires black holes. As if that weren’t devastating enough, when you pair it with Elements, you can create even more incredible vortex combos.
Nullifier
Damage: 23
Range: 100
Fire Rate: 18
Energy Cost: 87
Status Effect: Vortex
Amplifier Slots: 3
Description: The Nullifier is the result of outlaw weapons experimentation. When fired, its volley of guided missiles creates an incredible vortex of gravity that will crush your enemies in their place.
Stasis Weapons
Levitator
Damage: 21
Range: 100
Fire Rate: 13
Energy Cost: 100
Status Effect: Stasis Overload
Amplifier Slots: 3
Description: Anti-gravity technology helps to make the Levitator a terrifying weapon. Its self-guided missiles suspend your enemies and remove their ability to fight back.
It’s up to you to come up with a weapon combination that suits your playstyle. Hopefully having this information on-hand will help you find your weapon preferences. If you found this guide useful or are specifically mulling over mods, take a gander at my Starlink mods guide for some extra help.


Published: Oct 25, 2018 12:29 am