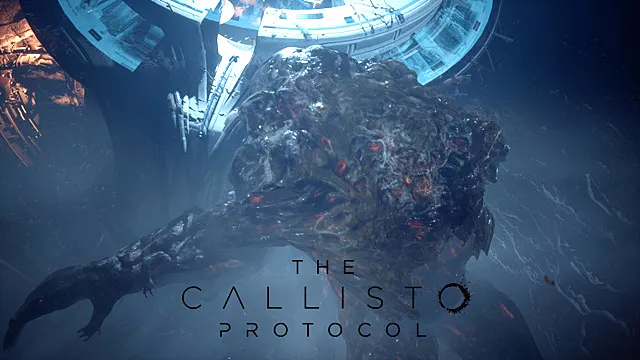
Captain Leon Ferris makes two appearances as a boss in The Callisto Protocol, including the last in the last chapter, Tower. Considering he is the final boss of the game, he can be extremely hard to beat unless you have an assured strategy going into the fight.
Prepare for the Final Boss Battle
Before you initiate the final boss fight in The Callisto Protocol, it is advisable to make some preparations. You will know you are at the final encounter area when you reach a circular area within the Tower.
You can enter the battle arena without triggering the boss fight, and it is important to collect all the Health Injectors and ammo in the outer circle that you can. There is a Reforger nearby if you need to upgrade any weapons or buy ammo and health stims.
Phase 1 Tips and Tricks
During the first phase of the fight, Captain Ferris appears as a large, infected Biophage, but his attack patterns and behaviors are very similar to the preliminary boss fight with Captain Ferris in his human form during Chapter 7. You can use the same tips for both Chapter 7 and Chapter 8: Phase 1.
Another important thing to note is that the Riot Gun is your friend in this fight, because it is perfect for dealing high damage at close range. There are three patterns in this phase of the boss fight:
- Aggressive melee attacks: From the get-go, Ferris will furiously attack you with multiple melee strikes. Focus on creating space and dodging those attacks if he gets too close.
- Attack him as soon as he backs away: After a series of such assaults, Ferris will step back for a moment, and that’s your window to shoot him with a Riot Gun as well as heal and reload.
- Wait for the grab attack: Ferris can grab you and hold you on the ground if you remain too close for too long, so be sure to dodge and weave to avoid this attack.
The first phase is rather simple and requires you to simply dodge his attacks and shoot him whenever he opens up. Do this until he stomps you to the ground and transforms into Subject Alpha, which triggers the second phase of the fight.
Phase 2 Tips and Tricks
Once Capatin Ferris turns into Subject Alpha, be prepared to quickly swap between Riot Gun and Assault Rifle, as Ferris will grow into a hulking Biophage, gain ranged attacks, and summon Exploders, which you need to eliminate at distance.
This phase also includes three patterns:
- Shoot at his head: Ferris’ weakest spot is his head, which is protected by an organic shield, so shoot the shield first and then hit his head for maximum damage once it lowers.
- Deal with the Exploders: Once you destroy his face shield, he will summon Exploders that will crawl out from the edges of the arena, so swap to an Assault Rifle and shoot the Exploders before continuing on with the boss.
- Create space and utilize the arena: Always keep your distance from Subject Alpha, as his attacks are heavy. Constantly move around the outer portion of the arena, using the walls of the inner circle as a buffer or shield to gain more distance and kite him through the middle.
- Mind his ranged attacks: If you’re a decent distance away from Subject Alpha, the biophage will throw his arm across his body, shooting out 5 arcing projectiles. At greater distances, these are easy to sidestep but very hard to dodge at close range.
Keep repeating these three patterns while healing yourself and swapping weapons. If you’re out of Health Injectors, then pick up Health Gel that is dropped by the dead Exploders. If you’re out of ammo, then use your GRP to pick up explosive tanks, which you can find around the arena, sending them at Ferris.
A war of attrition, Ferris will eventually receive enough damage and will fall down to his knees, triggering the final cutscene of the game.
That’s all you need to know on how to defeat the final boss in The Callisto Protocol. For more The Callisto Protocol tips and tricks articles, be sure to visit our dedicated hub page.


Published: Dec 10, 2022 08:49 am