
To open the Temple of Time door, you’ll need to know how to complete the Gutanbac Shrine. The third puzzle shrine in The Legend of Zelda: Tears of the Kingdom, it’s also the easiest. The primary hurdle you’ll face is actually getting to the area on the snow mountain in the first place. But once you do and solve the Gutanbac Shrine puzzles, you’re three-fourths of the way through the TotK tutorial area.
Tears of the Kingdom Gutanbac Shrine Walkthrough
The easiest way to reach the Gutanbac Shrine is by coming from the TotK‘s second Shrine location, In-Isa. Simply follow the critical path from that Shrine all the way east. You’ll pass over a river and through several caves before popping out underneath the Shrine at coordinates (0709,-1381,1584) in the tutorial area. Use the roots by the cave entrance to climb up to the snow Shrine.
How to Solve the Gutanbac Shrine Puzzles
Once inside the Gutenbac Shrine, you’ll meet Rauru again, and he’ll give you the Ascend ability, which lets you ascend through the bottom of almost any object. It’s key to solving the puzzles here and getting your third Light of Blessing. Don’t worry: I found their solutions to be quick and easy, and you will, too.
Gutanbac Shrine Puzzle 1 Solution: Ascension Overhang
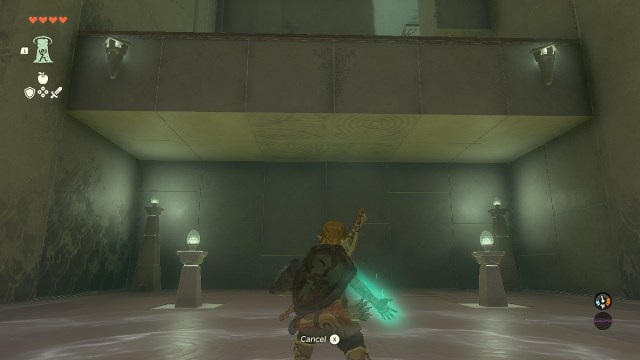
Once you have the Ascend ability, go down the stairs and stand underneath the overhang ahead. Open your ability wheel and select Ascend, then look up. You’ll see a green grid on the ceiling above. Use the ability to rise through the bottom to the top.
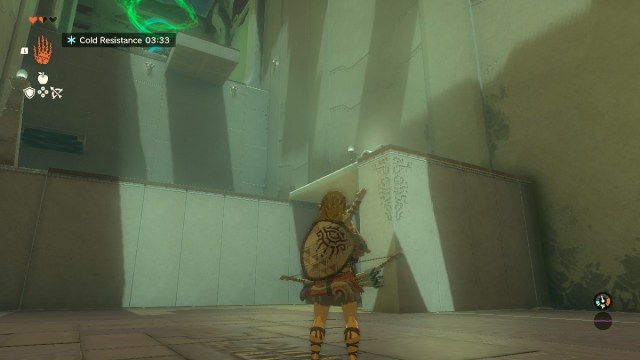
Gutanbac Shrine Puzzle 2 Solution: Wall Blocks
Next, head forward and to the right. You’ll see two blocks on the wall. Go under the shorter block to the left to get a chest, then hop down and go underneath the taller block. Ascend through that.
Gutanbac Shrine Puzzle 3 Solution: Tethered Ramp
In the next area of the Gutanbac Shrine, you’ll see a ramp tethered by two cables ahead. Turn right, and push the crates out of the way. Ascend to the platform to get another chest.
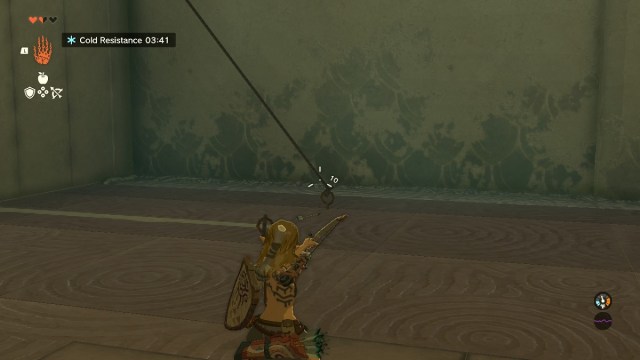
Now, shoot the cables holding the ramp with your bow and arrow to drop it. It’s easiest to shoot the ringlets instead of the ropes themselves. Now go under the ramp and use Ascend again.
Gutanbac Puzzle 4 Solution: Moving Platform
In this next area, you’ll see a platform moving from left to right. Ascend to it, then time your ascension to through the block above when the platform moves under it. Go to the altar ahead and get your next Light of Blessing.
And that’s how to complete the Gutanbac Shrine in Tears of the Kingdom. Luckily, its puzzles are easy since getting to the snow Shrine can be both brutal and long. Now it’s back to the Temple of Time to open the door, solve more puzzles, and find one last Shrine (surprise!). For more help on your adventures through Hyrule, head over to our TotK guides page.


Published: May 18, 2023 02:05 pm