
Red Star Rings were originally called Special Rings and were first introduced in Sonic Colors back in 2010. Originally, the rings enabled you to unlock special bonuses for the game; however, for Sonic Forces, the Red Star Rings have become hidden collectibles. There are five rings in each stage of the game, and we’ll show you how to find them all.
Recommended Videos
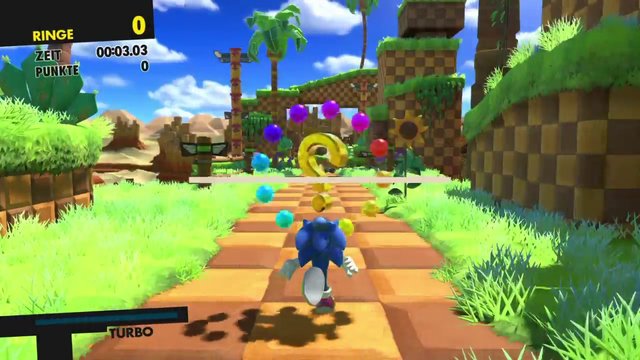
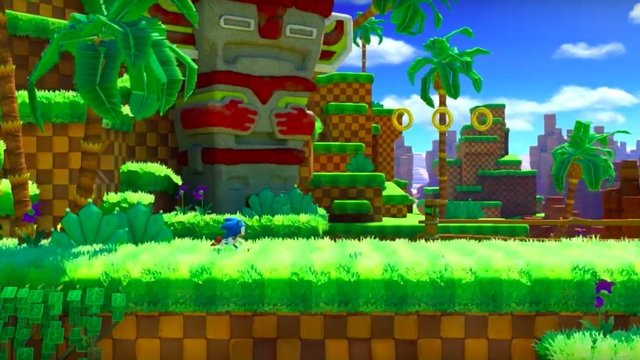
Stage One: Green Hill Lost Valley
- Ring One: The first ring is located near a totem pole that you will get to as you move through the level. When you get to this spot, use your homing attack while hitting jump repeatedly. This should defeat all enemies in the area, and you’ll be able to grab the ring floating in the air.
- Ring Two: The next Red Star Ring is located below a platform with spikes on it, near where the floor breaks. This is a simple ring to collect, and the third one is close by.
- Ring Three: The third ring is on a swinging platform located right next to the previous ring. You will be able to grab the platform by holding the right bumper and moving to the left. Once you are on the platform, you will be able to grab the ring, and the platform will take you back up to the top level.
- Ring Four: Once you’re back on the top level, if you move to the right, you’ll find a ramp that you can jump off into a red air booster. Following this, you should be able to collect the fourth ring.
- Ring Five: The final Red Star Ring is located on the right-hand path after the Wisp Capsule. You should be able to run alongside a sand waterfall to collect the final ring.
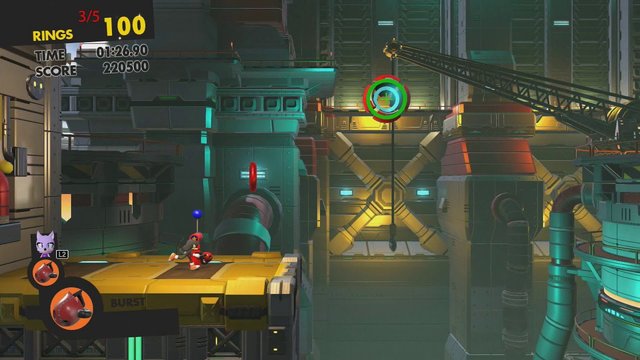
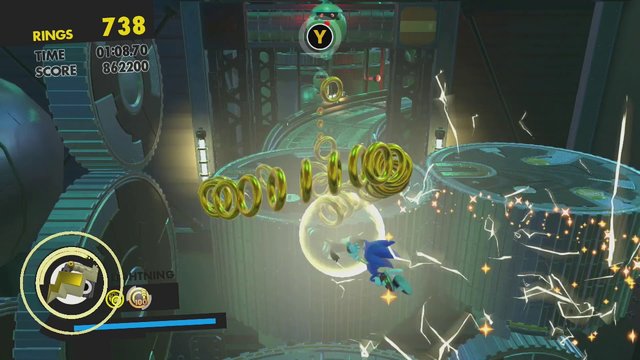
Stage Two: The Chemical Plant Spaceport
- Ring One: As you progress through the level, you’ll find the first Red Star Ring near a group of enemies once you bounce off a bumper. After the enemies are defeated, you can bounce off a bumper to the right, then use your Wire Attack while pushing upwards to gain more upward momentum, and you’ll be able to grab the ring in the air.
- Ring Two: The next ring will be located as you’re grinding across a rail collecting other ordinary rings. You will then land on a platform where you will find a capsule. Using your Burst ability, you can cause an explosion that will push you forwards. Keep using this ability until you’re all the way up, and you’ll be able to find the second ring on the upper level.
- Ring Three: Once you’re able to get to the next area, you should see a checkpoint and a Red Star Ring next to a Wire Attack Point. This point will swing you across the gap, and you’ll be able to collect the third Red Star Ring.
- Ring Four: One you’re up high on another platform, you can move to the right and either jump up or down. Going down will enable you to collect the fourth ring on a falling platform. Using your Burst ability, you’ll be able to jump back up before the platform falls and you lose a life.
- Ring Five: Towards the end of the level, there will be a rainbow ring that can boost you into the air, enabling you to collect the final ring for that stage.
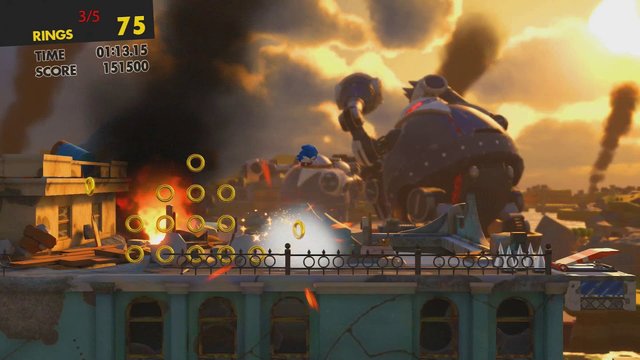
Stage Three: City Ghost Town
- Ring One: This level will feel incredibly nostalgic, as you play as a more vintage Sonic throughout the level. Following the natural path of the level, you will be flung up onto the higher platforms. Right next to you should be a massive wall of rings. Continue going right and you will find the first ring on the archway.
- Ring Two: This ring is found once you hit a checkpoint; you will pass through two loops and then be launched into the air, where you’ll easily be able to grab this Red Star Ring.
- Ring Three: At this point, you should have collected a large group of rings on a high platform. After this, you need to move to the right and use the bumper to jump across a gap. This is where you will be able to find the third Red Star Ring of this area.
- Ring Four: If you jump down cautiously from the left edge of the platform where you got the last ring and continue to the right, you will eventually find multiple platforms with gaps in them. The one holding the fourth Red Star Ring is too high to reach. You have to drop down onto a spring that will enable you to collect it.
- Ring Five: After this, you’ll want to go past the column of rings and then jump down to the next gap. Keep going down until you get to the bottom, and when you reach a podium with a box and rings on it, make your way back up onto the level above the one you were previously on. You’ll then want to boost, which should be enough to send you flying and get the final Red Star Ring.
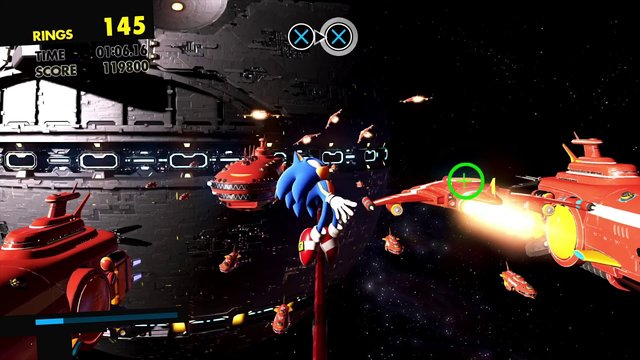
Stage Four: Death Egg Prison Hall
- Ring One: You’ll find this ring just slightly off a ramp from the path that you will natural drift towards through the level. You can launch off this ramp, which will then take you to a higher level where you can grab the first ring.
- Ring Two: Past the next ramp there should be another Red Star Ring next to a set of bumpers.
- Ring Three: Soon you should come to a wall where you will be accosted by a group of enemies. Once you defeat the enemies, you will have a lift drop. You need to grab it and launch upwards to be able to collect this ring, which should be located at the top.
- Ring Four: This ring is in the next area of the game as you move across lifts. If you move to the right on one of the lifts and then jump onto a bumper, you should then be launched into the air. You then need to move to the right to jump off another bumper, where you will land on a new platform and find the fourth Red Star Ring.
- Ring Five: The last ring is located towards the end of this stage and your final goal. You need to stay on the top path while dodging enemies who try to shoot you if you keep hitting boosters on the top platform. The Red Star Ring is on the center track, but you can only move to get it if you have been able to stay on the top level.
Stage Five: VS Zavok.
This is your first boss fight, and consequently, there are no Red Star Rings to collect in this area.
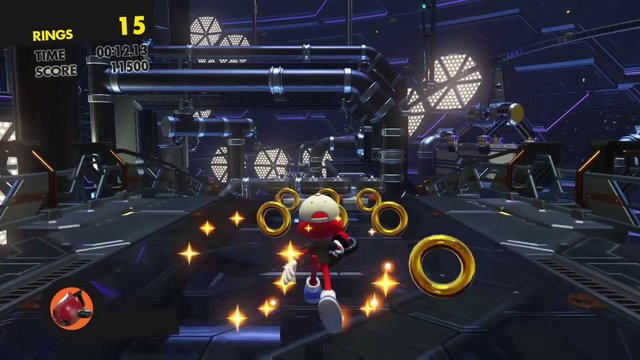
Stage Six: Death Egg Egg Gate
- Ring One: You should instantly pick up the first Red Star Ring from following the path.
- Ring Two: After coming out of the station in this level, you can take the middle path towards a rail. Further along you should see a bumper that should boost you up to another platform. There will be some enemies on this platform, and once defeated, you can grab the first ring for this stage.
- Ring Three: After grabbing the first ring, you can move upward onto a floating platform. As you do this, there will be more enemies to defeat and another ring that you can grab.
- Ring Four: At this point you should be dodging enemies that will be shooting lasers at Sonic across three different rails that you can jump between. If you’re looking to collect the Red Star Rings, it is better to stick to the left rail, as that will be where the ring is. The Red Star Ring is toward the end of the rails, so you’ll have some time to make your way over to the left rail.
- Ring Five: After you have gotten through the rising boxes section, you’ll need to avoid a turret. Then as you progress through, you’ll be able to bounce off a spring to attack the enemies. If you are using your Homing Attack on the enemies, you can use this to jump and bounce off a metal rod, which will send you soaring to another platform. There should be three boxes on this platform; by using your Stomp Ability, you can break them and grab the last ring.
Stage Seven: Green Hill Arsenal Pyramid
- Ring One: After a wide platform with many rings to collect, you will be launched onto another platform below. You will want to stop and walk backwards across this platform; this is where you will find the first Red Star Ring.
- Ring Two: You will then be traveling along a path that will ultimately launch you into the air and through the top of the pyramid. As you are travelling downwards through the tunnel, the second Red Star Ring will be up for grabs in the middle.
- Ring Three: Once you have finished free-falling, you will need to continue forward until you hit a bumper. If you go to the right, some enemies will span, travel back to your previous platform, and use the bumper to go to the left. The third Red Star Ring will be on the middle of the platform.
- Ring Four: Continuing through this path, you’ll want to go forward, where you will end up on multiple rotating platforms. You will come across rails to grind and other platforms to jump across. When you reach a path with multiple enemies blocking different sections, the Red Star Ring will be towards the end and in the middle of the path.
- Ring Five: Before launching across to the other platform, drop down onto the lower level and to the left of the bumper; the last Red Star Ring will be there.
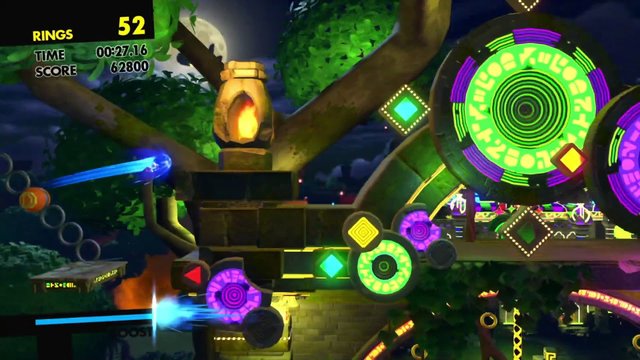
Stage Eight: Mystic Jungle Luminous Forest
- Ring One: When you see some flying enemies in this level, you can use your Homing Attack on them. You will then be able to jump on them one after the other and grab the Red Star Ring in the air.
- Ring Two: At some point in the level, you will be able to jump over to a gap with multiple rails that you can grind on. If you stick to the middle ring, you will be able to run into a red ring booster that will allow you to grab this ring.
Stage Nine: Mystic Jungle VS Infinite.
This is the second boss battle of the game, and there are no Red Star Rings to be collected.
Stage Ten: Green Hill Green Hill
- Ring One: You should hit a spring with a totem pole in the background; instead of landing on the top platform, drop down instead. Go to the left, where you will need to jump over some spikes, and the first Red Star Ring is hidden there.
- Ring Two: You should hit a spring that will launch you into the air and place you on the top path of this section. You should come across a Speed Sneaker box, which you can then break. This will be followed by a Shield box over a gap, and you will find the Red Star Ring afterwards.
- Ring Three: Continue left and you will eventually hit another checkpoint. After this, you will want to keep using springs to get yourself onto the top level. You will come across a bridge, and on the other side is a capsule that will launch you into the air, where you can grab the third ring.
- Ring Four: Move forward, but let a falling platform drop you down to the middle level. Continue this path and you should hit a slope with enemies lined up on it. You can Boost through them while running and collect the fourth Red Star Ring at the end.
- Ring Five: Then go to the right and make your way down to the lower platforms. Use the springs to get yourself back up to a falling platform; it is beneath some spikes. You’ll need to use your Boost ability very quickly and launch to the left. This way you’ll be able to collect the last ring.
~
Was this helpful for you? Are you able to find more Red Star Rings now? Let us know in the comments.
GameSkinny is supported by our audience. When you purchase through links on our site, we may earn a small affiliate commission. Learn more about our Affiliate Policy


Published: Nov 21, 2017 01:36 pm