There are an absurd number of elements at play in Total War: Warhammer 2‘s campaign, from diplomacy to taxes to properly lining up your units for battlefield advantage and even onto game-changing magic rites.
Simply playing the game, let alone getting close to winning, can be a daunting task for a newbie — which is why we’ve put together this Total War: Warhammer 2 Lizardmen faction guide.
Below we cover everything you need to know to exterminate those treacherous warm bloods who just can’t ever leave well enough alone and stop mucking about with the forces of Chaos.
The Best Lizardmen Lord for Your Total War: Warhammer 2 Campaign
You have two legendary Lord options right off the bat: Mazdamundi, the spell-casting Slaan, or Kroq-Gar, a saurus oldblood general who is focused on direct melee combat and bonuses to nearby units.
Which Lord is best for your Lizardmen army? It depends on what you want out of your campaign. Kroq-Gar begins at a different point of the map and has a slightly harder starting difficulty in the campaign. On the other hand, Mazdamundi has many advantages for the new player because he allows access to an additional Slaan Mage-Priest and offers reduced Rite costs — but he’s also terrible at diplomacy. His many long range spells more than make up for that, however.
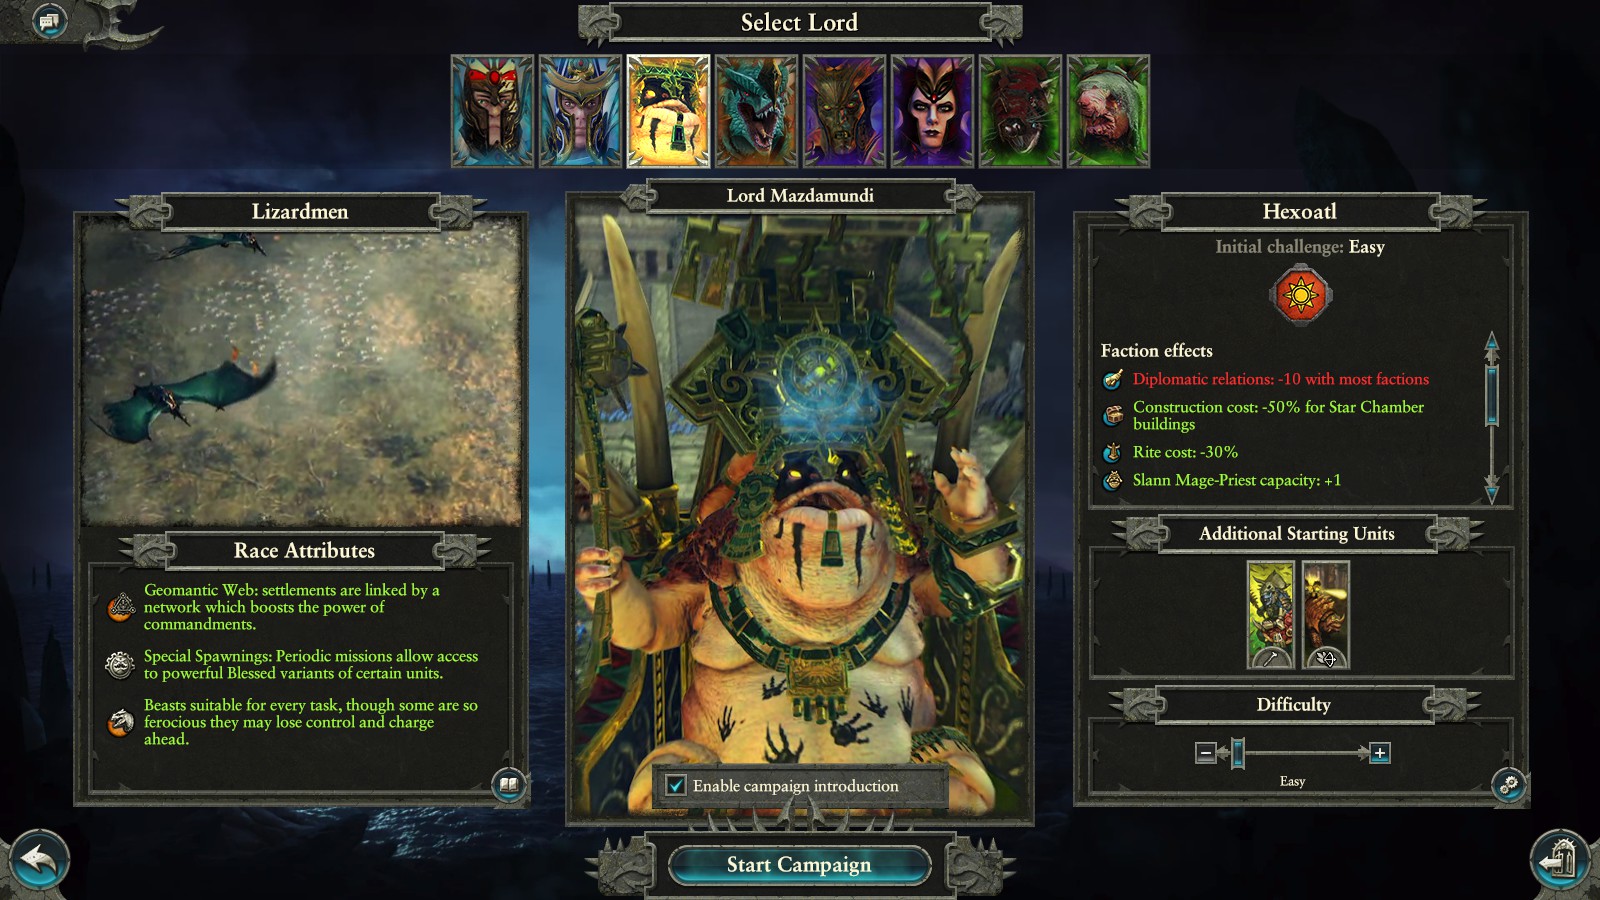 Picking Lord Mazdamundi
The Geomantic Web
No matter which Lord you choose, the big advantage to the Lizardmen is the Geomantic Web that connects cities in your provinces by magical forces. The Web is incredibly useful — so you should always conquer an area with a Web node whenever you can, and upgrade it like crazy.
The various Alignments on the Web give you drastic bonuses if you pump them up to tier five. To improve the Web to its highest strength, you need to keep nodes connected to cities of equal Geomantic strength and keep up your relationship with neighboring settlements. Don’t forget to build Geomantic Markers and Lodestones on cities that aren’t connected to the Web as well.
Always make sure there’s space in capitals for Geomantic structures and upgrades. If you are regularly adding to and upgrading the Web, you will frequently be flush with gold and bonuses that will keep you one step ahead of the other factions.
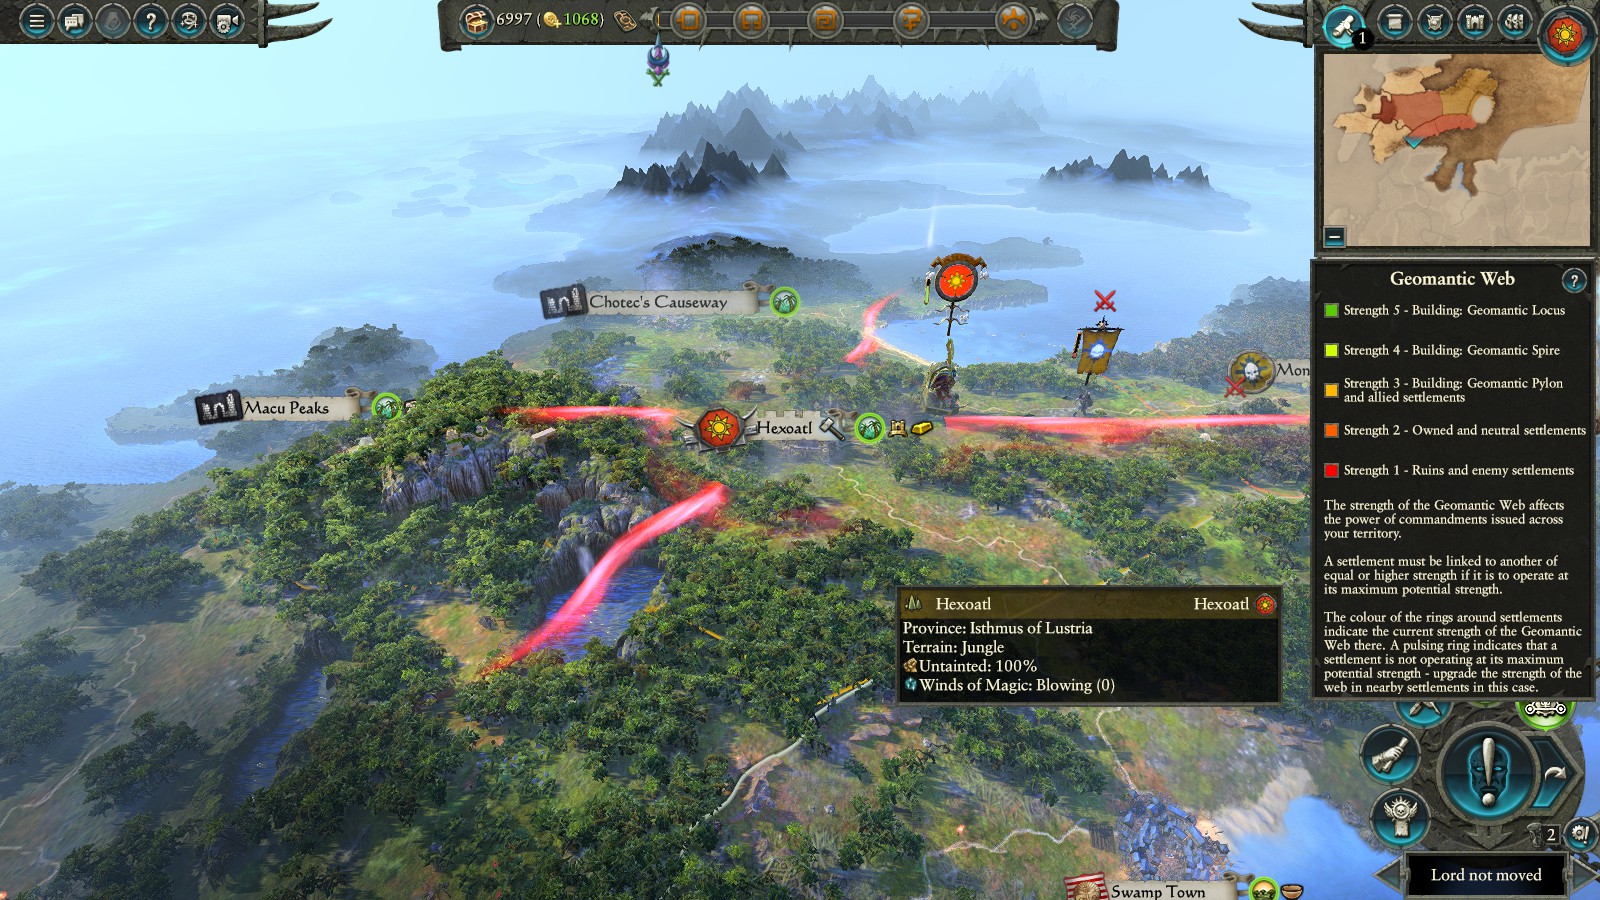 Starting the Geomantic Web
Warhammer II Lizardmen Campaign Strategy
It’s worthwhile to be fairly aggressive early on during the campaign, taking on the Skaven and Skeggi but ignoring or getting diplomatic with the Empire to the south.
After taking the Monolith of Fallen Gods, its probably time to get a new Lord and start building up a secondary set of armies so you can tackle problems on different areas of the map at the same time.
Either of the Lizardmen legendary lords have access to four powerful rites that are costly but offer big bonuses. The Rite Of Ferocity is the least expensive, and often is also the most helpful because it gives you bonus experience, gold, and recruitment — so your armies can pump up faster.
On the defense front, the Rite Of Sotek can be incredibly useful, hampering enemies within your province and making ambushes more deadly.
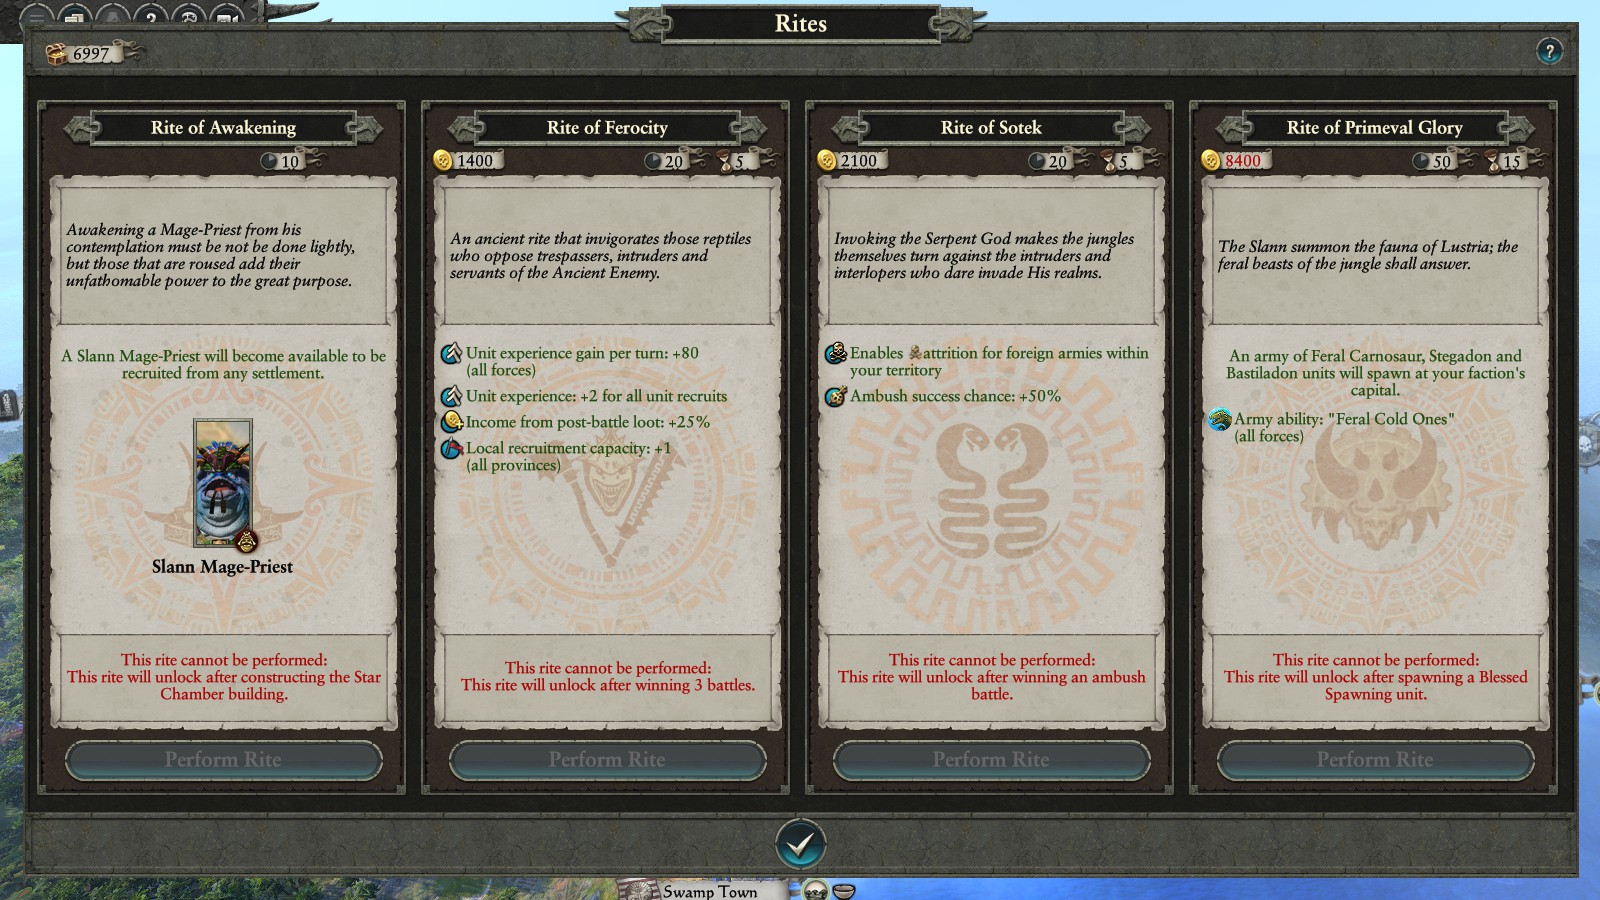 Lizardmen Rites
Be sure to go through the quests in the early game to earn gold and Ancient Plaques, since you’ll need those for the rituals. In particular, be sure to rush to the Mirror, Mirror quest so you can build a trove at the quest location and generate a steady stream of Plaques.
Whenever a ritual is being enacted, random forces of Chaos will pop up behind your province lines near cities enacting rituals (or near cities that are undefended). The other factions will also be able to see where you rituals are being enacted and will show up to ruin your day. In other words, don’t try to expand while you are doing a ritual, because you need armies to protect your cities during those times.
On the expansion front, you can mostly ignore the frozen regions as places to hole up, since (as you’d expect from a cold blooded people) the Lizardmen will see public order plummet in cold regions. The best spots to conquer and fortify are jungles and deserts, although anything that isn’t frozen and snowing can work in your favor.
While adding to your Lizardmen empire, don’t forget to take into account the level of upkeep and expense going on with your expensive lizard armies, so build economic buildings and do anything you can to keep the gold flowing in.
On the tech tree, feel free to go where you like, focusing on whichever unit or building type you use most. I’ve found upgrading the solid mid-level saurus warriors to be an effective strategy, but it is also worthwhile to grab a few upgrades on the tree that help increase public order in your provinces, since corrupting influences will frequently appear.
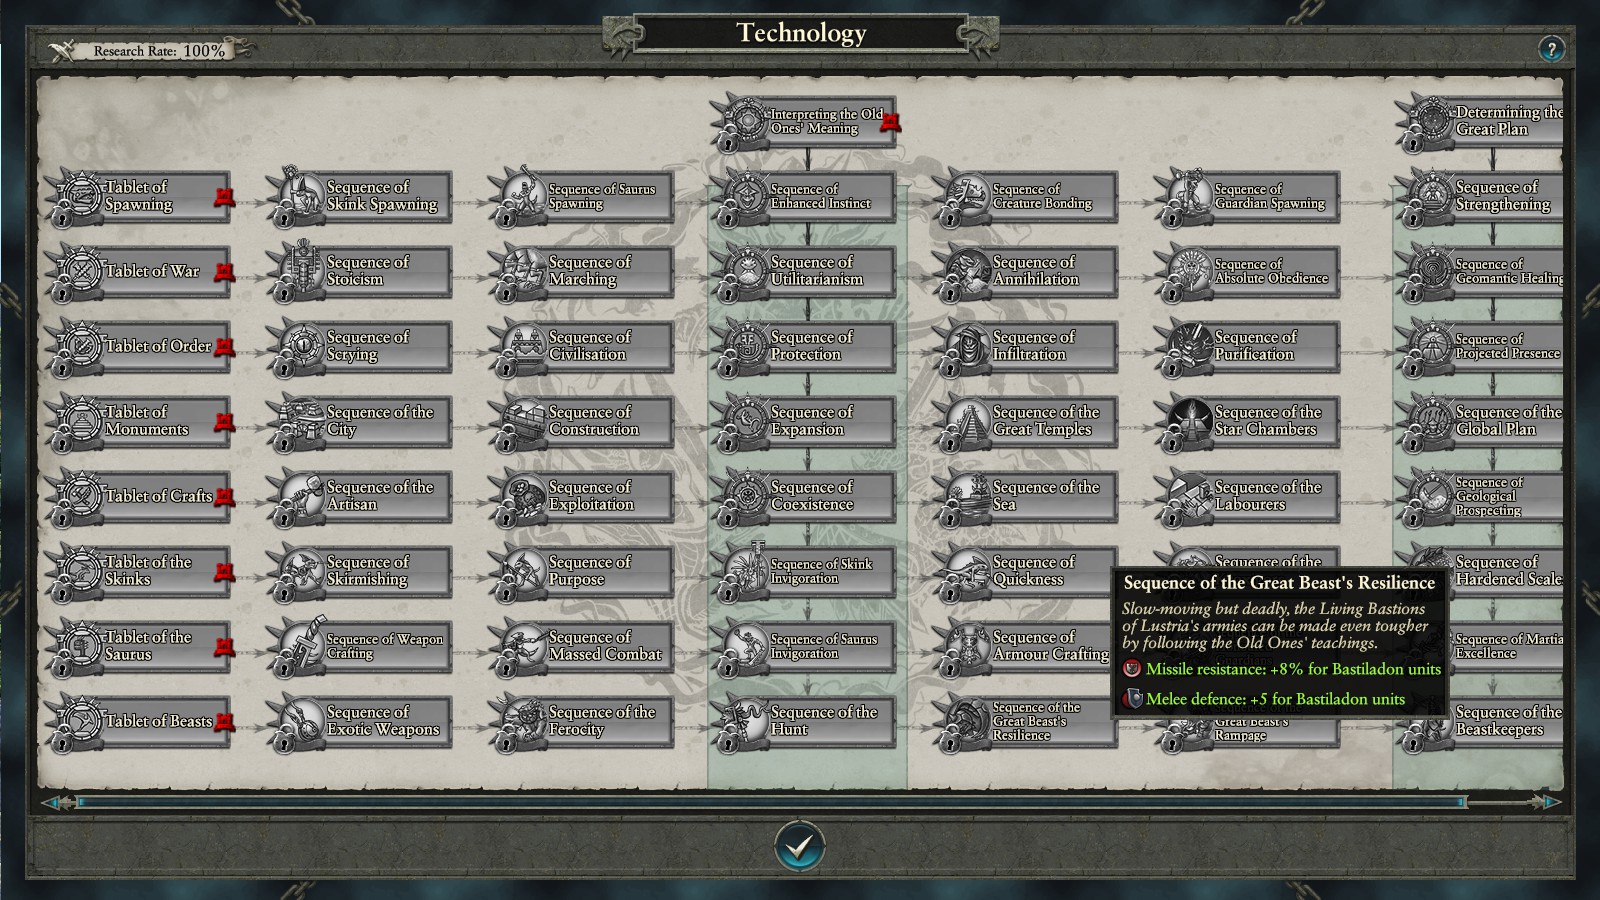 Lizardmen Tech Tree
Warhammer II Lizardmen Combat Strategy
Before battle while you are still moving around the world map, don’t forget that the Lizardmen get the Astromancy stance for armies. While this reduces your mobility, it improves your visibility and lets you ambush easier, in addition to providing vanguard placement in battles.
Besides your powerful Lords, there are essentially two types of Lizardmen to deploy in combat: your slower and harder hitting beasts and saurus warriors, or your cheaper, faster skinks. (Check out our full list of Warhammer: Total War II unit rosters for the full rundown of all the units at your disposal.)
The skinks are good for maneuverability, since they move faster and can redeploy to flank enemies from the side or behind, although in many case you’ll want to save your swift mounted units for that strategy. Skinks also break morale and flee regularly, which isn’t always a negative, since it lures big melee units away from the main fight.
 Choosing the Astromancy stance
If you’ve got a hidden unit waiting nearby in the trees or just have some ranged units ready to reposition, fleeing skinks can actually turn the tide of battle. When you work up the tech tree, chameleon skinks can be your sneaky, hit and run units to always vex the enemy and take out unprotected units.
Unlike some of the other factions, sending your saurus units past enemy lines can actually work to your advantage, because they go berserk so easily. Berserk units get big bonuses to combat, but they also don’t respond to your commands.
If a squad of saurus warriors goes berserk on the edge of a battle and wastes their time chasing a faster unit of ranged archers, then they are essentially out of the battle. Saurus hilariously trying to chase mounted archers is a sad way to lose a battle. If they are in the thick of combat near a whole bunch of vulnerable melee units, however…
On the opposite side of that, don’t be afraid to have your big bruisers flee before they go berserk if things are going badly, so you don’t lose highly experienced troops and have to start over with fresh recruits.
Where the Lizardmen trail behind the other factions is in powerful archers, but their later game artillery pieces also happen to be dinosaurs that can more than hold their own in melee, so don’t be afraid to put them in harm’s way!
After battle, eating the enemies of course is a great way to replenish your forces, but unless you are heavily beaten down and expect another battle soon, you should probably choose the option to sacrifice the survivors instead for all that extra experience.
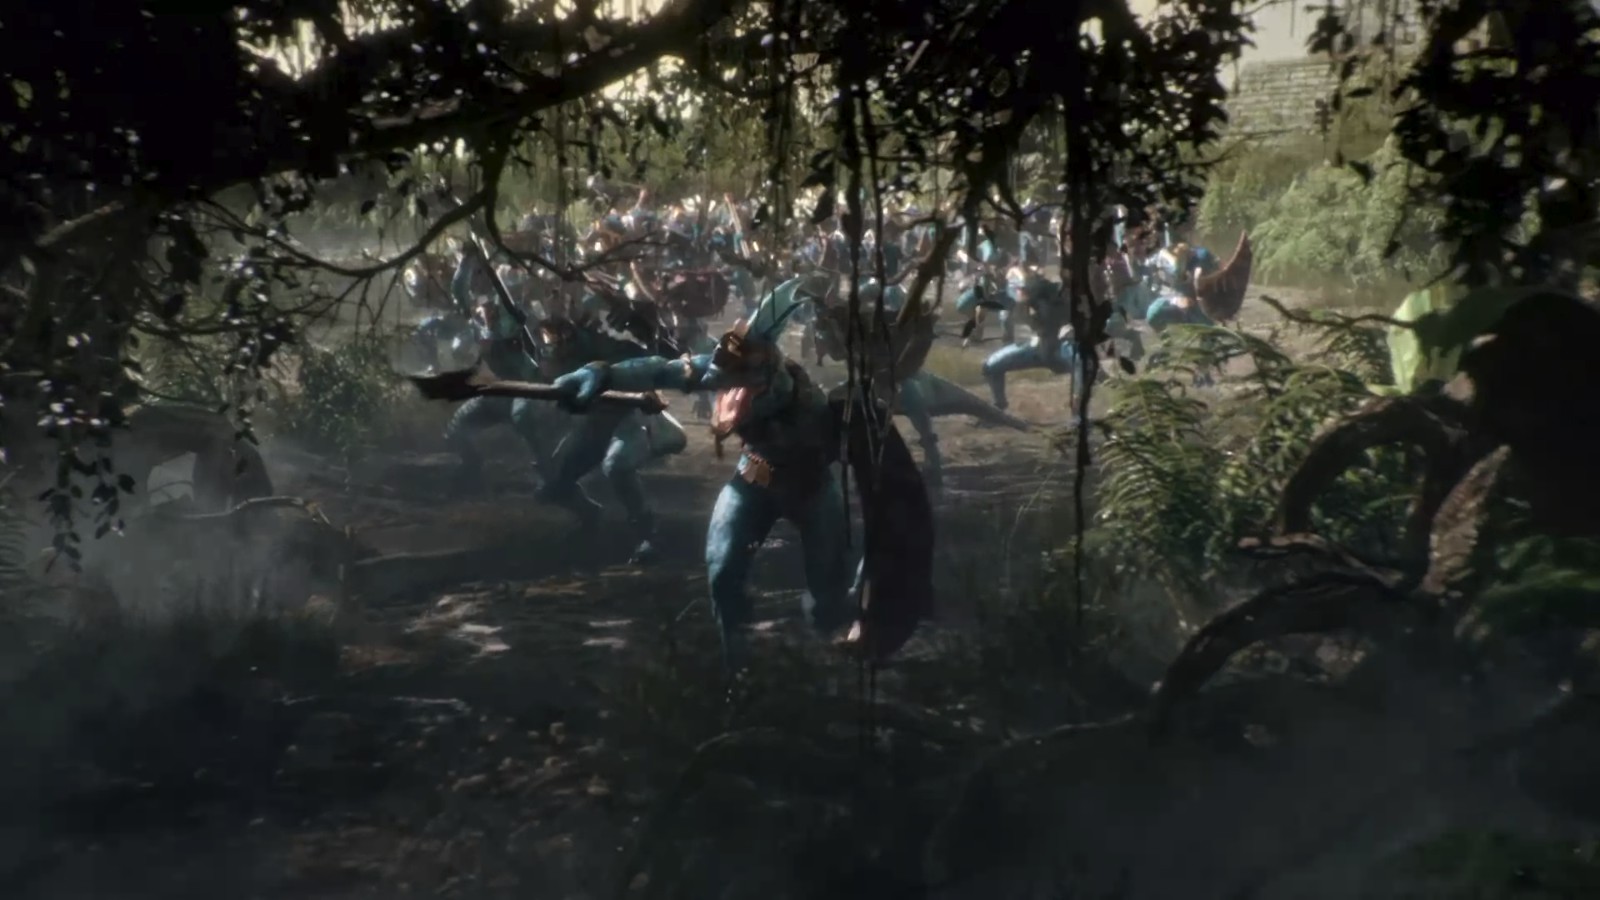 A horde of skinks popping out of the tree line can spell doom for your enemy
Those are all the basics you need to know to dominate the Total War: Warhammer II Vortex campaign map! Do you have any other effective Lizardmen strategies we didn’t list here? Let us know your best Lizardmen tactics in the comments below! And stay tuned for more Total War: Warhammer 2 guides here on GameSkinny.


Published: Sep 28, 2017 07:07 pm