Darkest Dungeon 2 is a roguelite. It’s also hard. Red Hook Studios changed the very foundation of how the game’s played and upped the difficulty. With those two things in mind, you may be looking for some beginner’s tips to get you through this Cthulu-inspired world — even if you aren‘t exactly a beginner.
With new battle mechanics and a new way to explore the world, setting out can be jarring, if not downright difficult. These are the best beginner’s tips for heading out on your first expeditions in Darkest Dungeon 2.
Beginner’s Tips and Tricks for Darkest Dungeon 2
Face Your Confession: Confessions Explained
Instead of having separate areas to explore as in the first game, Darkest Dungeon 2 is split into five chapters known as Confessions. These are further separated into various regions:
- The Valley
- The Sprawl
- The Foetor
- The Sluice
- The Shroud
- The Tangle
- The Mountain
When first starting, you’ll have four characters in your party and access to the Denial Confession. Each Confession afterward brings new lore to light and becomes more difficult. You’ll see increasingly strong and bizarre enemies in later Confessions, forcing you to change team comps and strategies. The bosses here are also not to be trifled with.
You select Confessions and pick your team once you’ve unlocked more characters. You then go through the regions by choosing paths, all of which are randomly generated from a pool and contain various rewards, traps, debuffs, and more. Things always end at the Mountain.
Loot the Academic’s Cache

When you first set off on your expedition, you’ll play the Prologue tutorial through the Valley. During your initial expedition through the Valley, you’ll have an Assistance Encounter where you can help fellow travelers. You’ll also get a chance to loot the Academic’s Cache, providing you with helpful items for your journey.
This is the only time these two stops will appear in the Valley, and you’ll want these items for your first several expeditions.
Take Advantage of Inns
At the end of the Valley is the first Inn, and there will be more at the end of each region. Inns are great for restoring HP, reducing stress, buying items, and buffing your party. Perhaps not surprisingly, these are the only places you can use Inn items like Books and Concoctions.
Inns are also where you’ll equip upgrades to your Stagecoach, Trinkets for your party members, and combat items. Though you can perform the latter two actions as you travel, it’s always good to double-check your party’s equipment before venturing out.
Ideally, spend as much of your money as possible at Inns, as you’ll rarely use it on the road, and it only takes up space in your inventory.
Collect Candles of Hope
While traveling, choose paths that fulfill the goal of a particular region, such as eluding the Hoarder, winning three road battles, and other random challenges that appear. Along with those goals, pick a route that has as many Candles of Hope as possible.
These act as your upgrade currency. You’ll use them at the Altar of Hope (below) to unlock new items, Pets, and memories — or to upgrade your characters. Focus on getting as many Candles of Hope as possible in your first few expeditions so you have as many resources at your disposal later in the game.
Use the Altar of Hope

Once you make it through the Prologue, you’ll have a chance to use the Altar of Hope. Depending on how many Candles of Hope you’ve collected on your journey, focus on upgrading your current party characters and unlocking items. It’s great to unlock new characters, Stagecoach customization options, or Pets, but focusing on that only puts your party at a disadvantage. Do so sparingly.
Use Combat Items and Skills Liberally
When it comes to battles, there are a few new mechanics at play. Combat is still turn-based, with four positions on the left and right, with corpses when things die, you included. You can use a Combat Item at the start of your character’s turn and a skill following that. Make sure to take advantage of these opportunities.
For example, this is great for the Leper, who may have a Milk-Soaked Linen equipped, capable of curing his blindness before he attacks.
If you’ve made it to a few Hero Shrines, make sure you’ve equipped the skills you want before you head into battle. Nothing is more frustrating than going to use a skill and realizing you forgot to equip it.
Pay Attention to Skill Cooldowns
Some skills now have cooldown periods, as well as requirements that must be met before use. The Jester’s Inspiring Tune, the Plague Doctor’s Battlefield Medicine, and more fall into this category. Once these skills are used, they can have a one- to three-turn cooldown period before they can be used again. In addition, some skills can only be used a certain number of times. You’ll need to pay attention to these in more difficult fights.
Don’t Run From Battles

Don’t avoid or run from all battles. Your party will miss out on Mastery, potential items, and money. It will also reduce Loathing levels. Instead, take on as many battles as possible while maintaining some resources for the final encounter, Oblivion’s Rampart. You can run from battle encounters, but you can’t run from Road Battles that happen between stops, the Oblivion Rampart, and the first battle of the Lair.
Be Wary the Loathing Whispers
Loathing is another new mechanic in Darkest Dungeon 2. As you travel through the various regions, some paths will be marked with a blue symbol and black fire, signifying Oblivion’s Tear. Each time you travel through one of these — or to a location that has one — your Loathing value increases by one.
As Loathing increases, your Flame drains faster, and enemies have more advantages in battle. When Loathing maxes out, your Flame drains by 10 points. Unfortunately, the Confession Boss will gain +10% Max HP and other bonuses for your future battle at the Mountain. This can stack each time you max out Loathing, creating a buffed-up boss too hard to beat.
While Loathing can go from a whisper to a howl, it can be reduced as well. Fighting at Oblivion’s Ingress, Creature Dens, and Resistance Encounters can lower your current Loathing level until it finally abates. Plan your route carefully to maximize Candles while completing the region goal and keep Loathing low.
Grow Affinity and Build Relationships
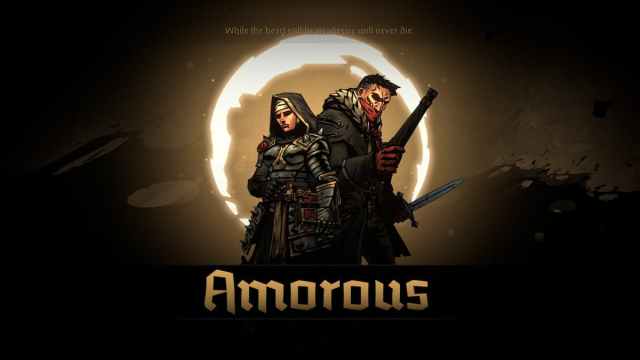
Imagine being stuck in a cramped Stagecoach, forced to battle hideous creatures as you fight to survive the apocalypse, and just not getting along. That’s what it can be like for your party.
Heroes have Affinities toward one another and the potential to develop Positive or Negative relationships. Your Graverobber may form an amorous relationship with the Highwayman but grow envious of your Man-at-Arms. These Affinities and relationships can be seen in the actions you take at locations.
- Heroes that agree with an action being taken will glow gold and receive an Affinity increase.
- Heroes that disagree with an action will glow blue and have their affinity decrease.
The lower Affinity goes, the more likely a negative relationship will occur, just as the higher Affinity goes, the higher the chance of a positive relationship.
Relationships come with Skills. When Positive, using the associated skill gives a boost to the other character, such as a small heal or -1 Stress. This can be a boon for fights where you lose a member or run out of available Combat Items.
The tricky part, however, is when you have a negative relationship. While skills enhanced by a positive relationship can be interchanged, negative relationships can lock any skill, whether it’s equipped or not. This could increase stress or inflict Vulnerable on another party member, but it could also lock a skill you use regularly.
Deal with Stress

The basics of Stress are essentially the same here as they were in Darkest Dungeon. Your party comes across scary stuff, they get stressed, they have a mental breakdown, and they lose some health. The biggest difference comes when they max out their Stress. Now there’s only Resolute or Meltdown.
- Resolute heals the hero, reduces stress, and often increases affinity with other party members.
- Meltdown reduces health to just above Death’s Door, reduces stress, and reduces party Affinity by a drastic amount.
There are trinkets, combat items, and Inn items you can use to keep your stress low throughout the expedition. Stay on the lookout for those.
And that’s it for our Darkest Dungeon 2 beginner’s guide. Hopefully, these tips and tricks helped you on your initial journey. Check out the rest of our coverage over on our Darkest Dungeon 2 guides page.


Published: May 10, 2023 05:30 pm