
Rocket Launchers are usually powerful in any game that features them. After all, there are few things more formidable than a massive explosion going off in your face. Rockets in Destiny 2 are no exception. Here’s how to get the Deathbringer exotic rocket launcher.
How to Get the Deathbringer Rocket Launcher in Destiny 2
To get the Deathbringer exotic rocket launcher, you’ll need to start the Symphony of Death quyest. First, you must own the Shadowkeep expansion. Second, you must have completed Eris Morn’s post-campaign Luna’s Calling quest up to the Memory of Sai Mota.
How to Complete Symphony of Death
Step One: Investigate the Circle of Bones Beneath the Moon
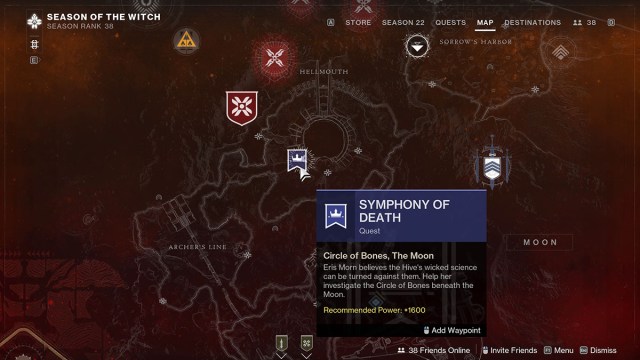
Start by heading to the northern portion of the Hellmouth on the Moon and taking the path underground. The quest marker will guide you to where you need to go, but the path is like this:
- Go to the overhang in the northern Hellmouth.
- Take the door at the back right of the room.
- Go through or past the enemies and take a right at the end of the cave.
- Take a left at the end of the hall, then the first right you see when you enter an orange-lit room.
- Follow the caves down, and keep left until you reach a circular, red-lit room.
- After some more cave exploration, you’ll eventually enter a large chamber with a yawning chasm to your right. The quest marker will be on a raised platform on your left, across from the chasm.
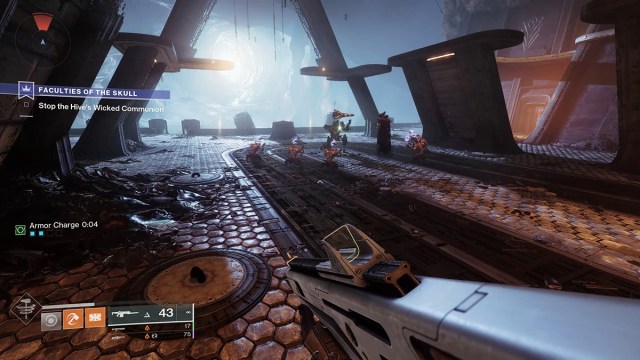
Once in the quest, turn left when facing the chasm and follow the path until you meet with Toland (a white, floating ball of energy). He’ll pontificate momentarily, then ask you to prove your worth, opening the door. Clear out all the enemies, starting with the boss-level Wizard, the Devote of Ir Yut.
Killing the Wizard will make the Knight boss, the Nightmare Servant of Ir Yut, vulnerable, and you can kill it as well. More enemies will continue to spawn for a few moments, and once you defeat all of them, Toland will reappear. Interact with him to Pick Up the Silent Skull.
Step Two: Speak with Eris Morn
Head back to the Moon and speak with Eris, who will give you the next step of the quest, as well as some quest dialog.
Step Three: Gather Materials
Next, you need to collect three materials.
- Festering Bone: Complete a Public Event in the Hellmouth. I don’t believe it needs to be Heroic to count for the quest, but make it Heroic anyway.
- Ritualistic Bone: Complete the K1 Revelation Lost Sector in Sorrow’s Harbor. Simply open the loot chest at the end.
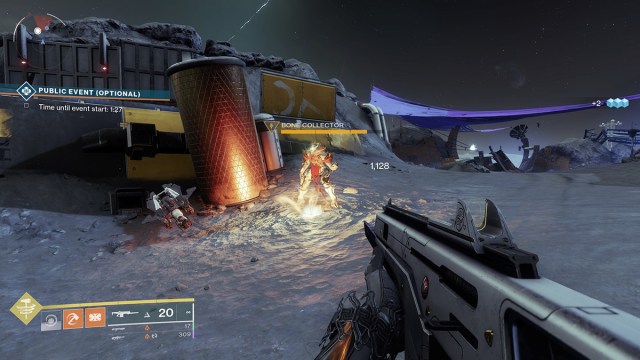
- Bone Collector’s Marrow: Kill the Bone Collector, a boss-level Acolyte that appears fairly regularly in the Anchor of Light area of the Moon. In my testing, he spawns every five minutes or so, whether there’s a public event going on or not. If you just missed him, you’ll need to wait.
Once you’ve collected all three items, the quest will automatically update.
Step Four: Defeat Sulmakta
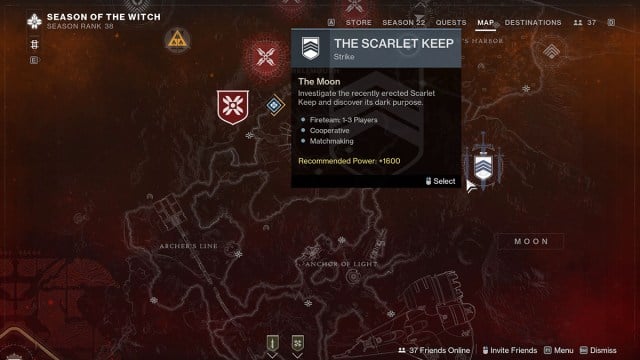
The next step requires defeating Sulmakta in the Scarlet Keep Strike, which you can launch from the Moon Destination. Then, proceed until you reach the elevator section. Sulmakta will be an additional enemy at the second stopping point. Sadly, I don’t have a picture of her, as my team melted her too fast, and the quest progressed before I could get even a bad shot of her.
Step Five: Record Your Enemies’ Screams
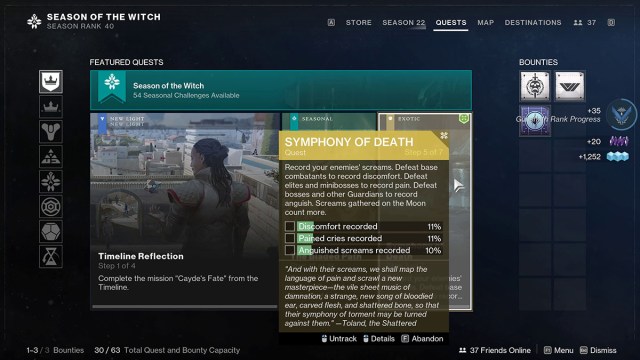
If you were waiting for the grind, it’s here. For this step in Symphony of Death, defeat base combatants, Elites, and Bosses. Defeating them on the Moon grants additional progress.
- For rank-and-file enemies (discomfort) and bosses (anguished screams), I recommend going to the Altars of Sorrow activity in Sorrow’s Harbor. The boss-level Nightmares count, and you’ll only need ten of them. The rank and file also spawn infinitely.
- For Elite enemies, I went into Dares of Eternity, did a single run, and easily got enough Elite kills to progress the quest.
Step Six: Defeat Ir Airam, Deathsinger
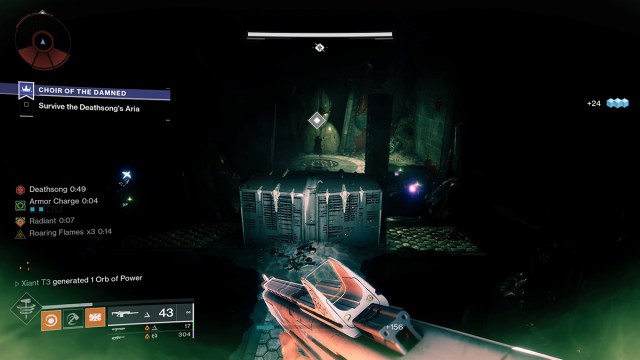
We’re almost at the end and one step closer to the Deathbringer. For this step, go back to the Circle of Bones. Take the same path as before, though the quest marker will be near the chasm this time.
Once in the mission, speak to Toland near the chasm’s edge. When you enter the Catacombs, you’ll be tasked to Hunt the Deathsinger. On top of being respawn restricted, you’ll have the Deathsong debuff on the left side of your screen. To avoid wiping, you must defeat a boss-level Wizard.
You have one minute to do so, and you need to do it two times until you reach the underground chamber where the Lunar Pyramid takes up the sky where the last Wizard awaits.
After you defeat them all, speak to Toland, and the bridge will build itself. Now you can kill the Deathsinger herself.
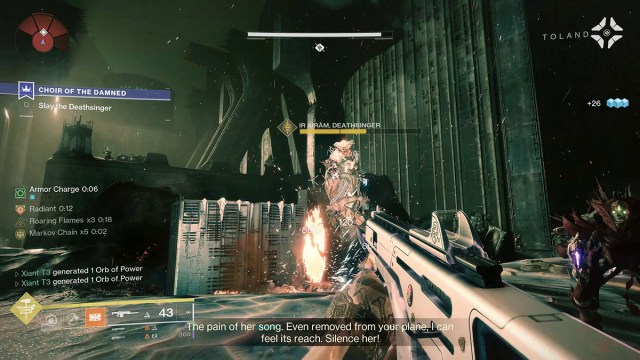
She starts to run away as you do damage, so keep on her and deal damage as you can. This mission is only Power level 1600, and we’re much stronger than we used to be. Almost any build you can think of can one or two-shot the Deathsinger. When it’s dead, listen to Toland again, then proceed to the final step.
Step Seven: Speak to Eris Again
Your final task, as with most Exotic missions, is to speak to the quest-giver. Eris will have some ominous words for you and the Deathbringer Exotic Rocket Launcher.
That’s how to get the Deathbringer Exotic Rocket Launcher in Destiny 2. It’s one of the most unique Power weapons in the game. It might not have as universal a use as, say, Gjallarhorn or even Two-Tailed Fox, but it can do some serious damage if used correctly. For more content, check out our guides on the Conditional Finality, Unfinished Business, and more in our D2 guides hub.


Published: Nov 10, 2023 06:49 pm