
Just as in the original game, every act in Hello Neighbor 2 is chock full of puzzles to solve and an antagonist to escape. And Act 2 of the first-person horror sequel is no different. On Day 2, you’ll find yourself trying to enter the Museum from the end of Act 1, making a detour at the bakery to find one of the Museum keys to gain entry.
Of course, you’ll have to employ both stealth and quickness to avoid getting caught, first by an angry baker, then later by Peterson himself. With that in mind, this walkthrough guide is here to help in furthering your investigation, providing all of the solutions and answers to the puzzles you’ll face in Act 2.
Hello Neighbor 2 Act 2 Walkthrough
Following the cutscene bridging Act 1 and Act 2, you’ll awaken back in the television station. Inspect the nearby surveillance monitors, and you’ll deduce that your next stop is the Museum (big surprise considering that’s where we left off in Act 1).
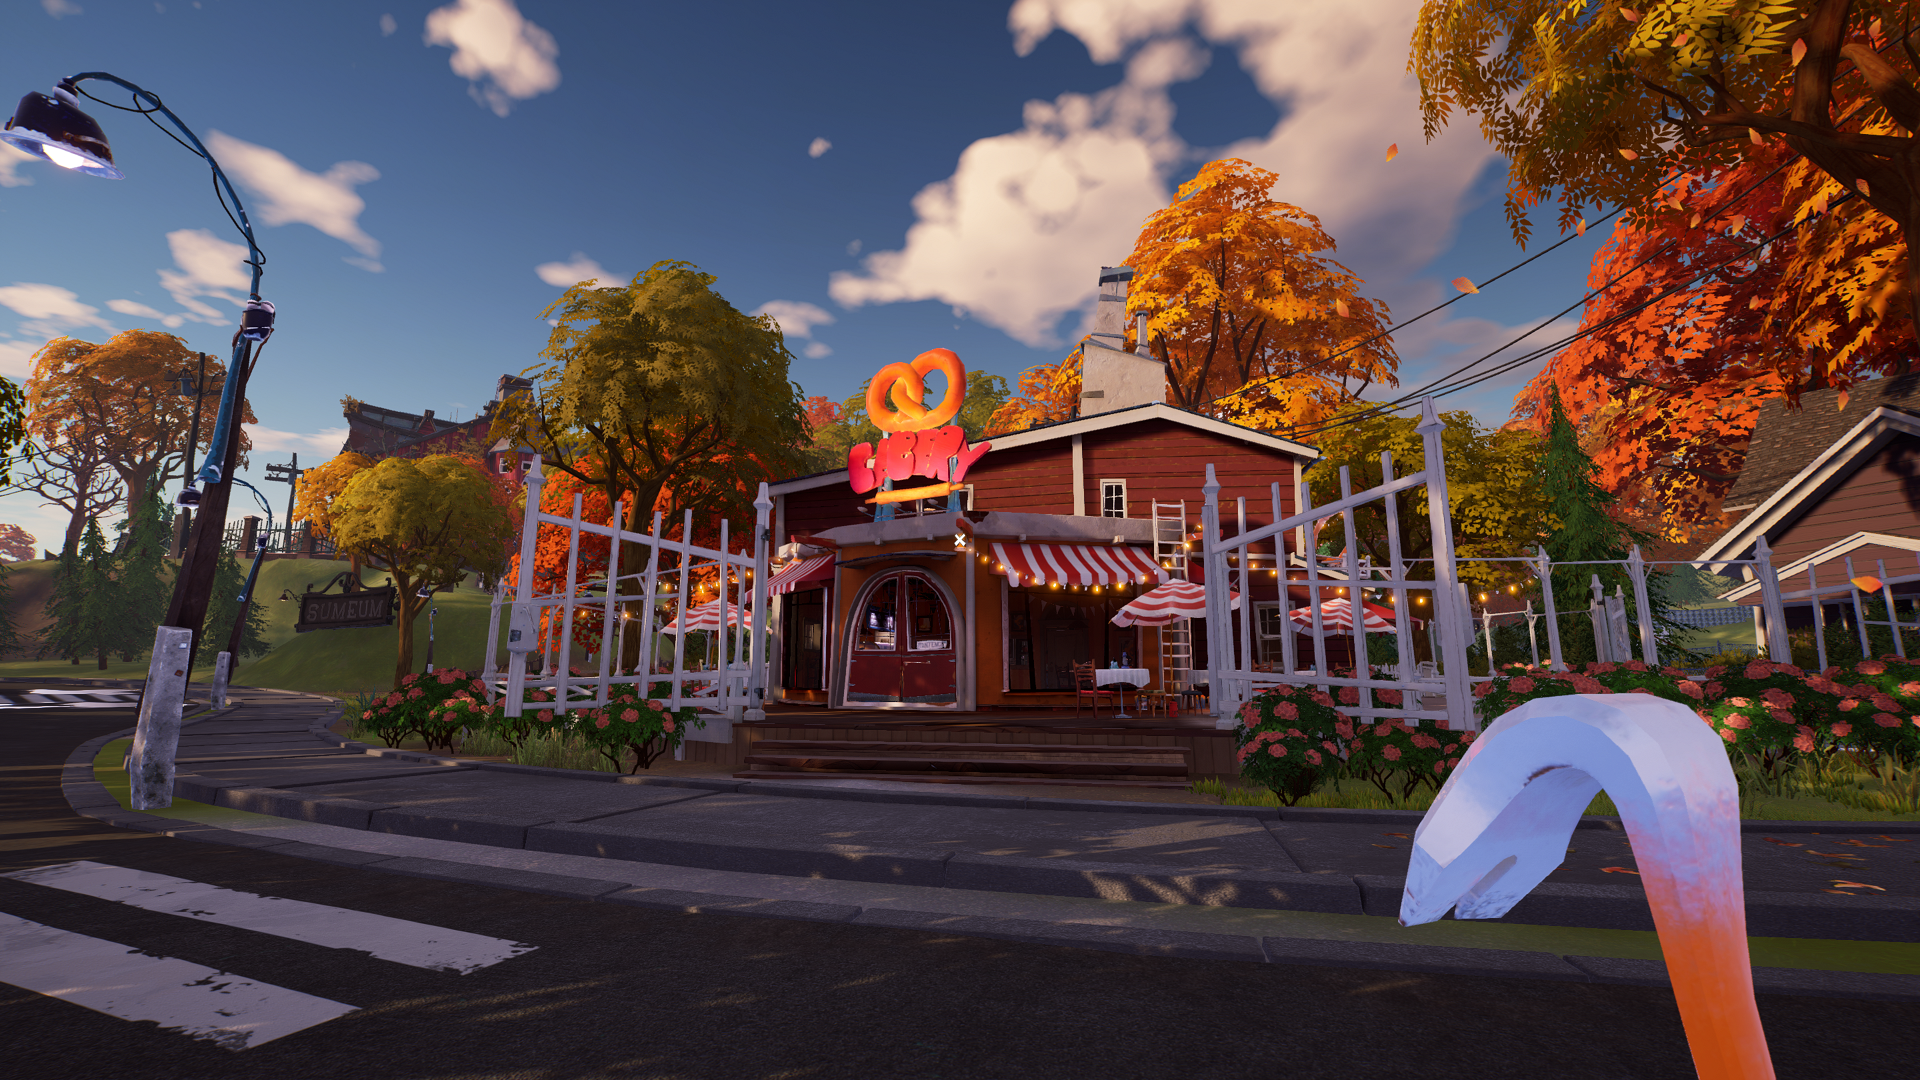
Leave the TV station, and head in that direction. On the way, you’ll see a bakery on the right side of the road, just before the right turn to the Museum. Since the museum doors are (spoiler) currently locked, stop at the bakery to solve a set of Act 2 puzzles. Here, you’ll be avoiding an angry baker throughout this entire section.
Where to Find All the Cash Register Buttons
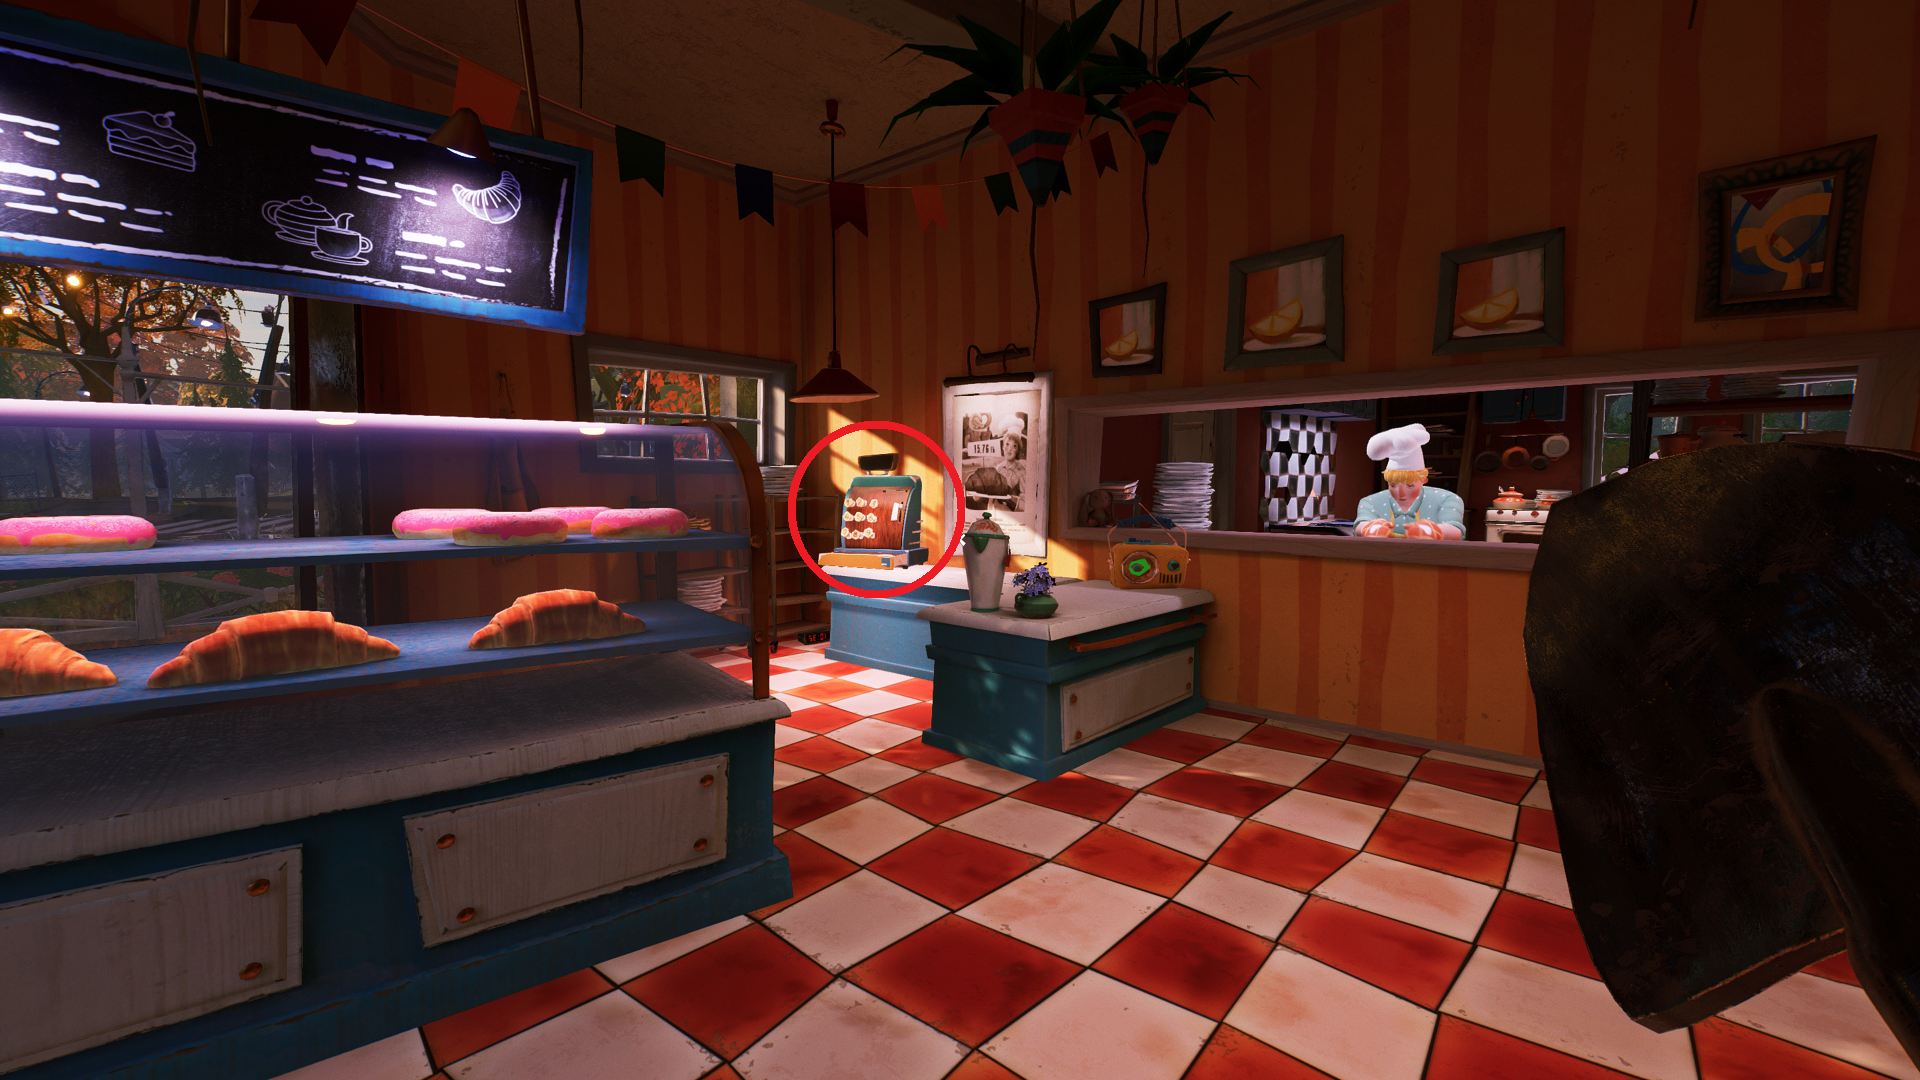
The main goal in the bakery is to find the key that unlocks the front door of the Museum. To do so, you’ll need to solve four puzzles to get four buttons for the cash register on the left side of the bakery’s front end. We’ll go through each in the most efficient order below.
How to Solve the Cat Puzzle and Get the Bakery Heart Key
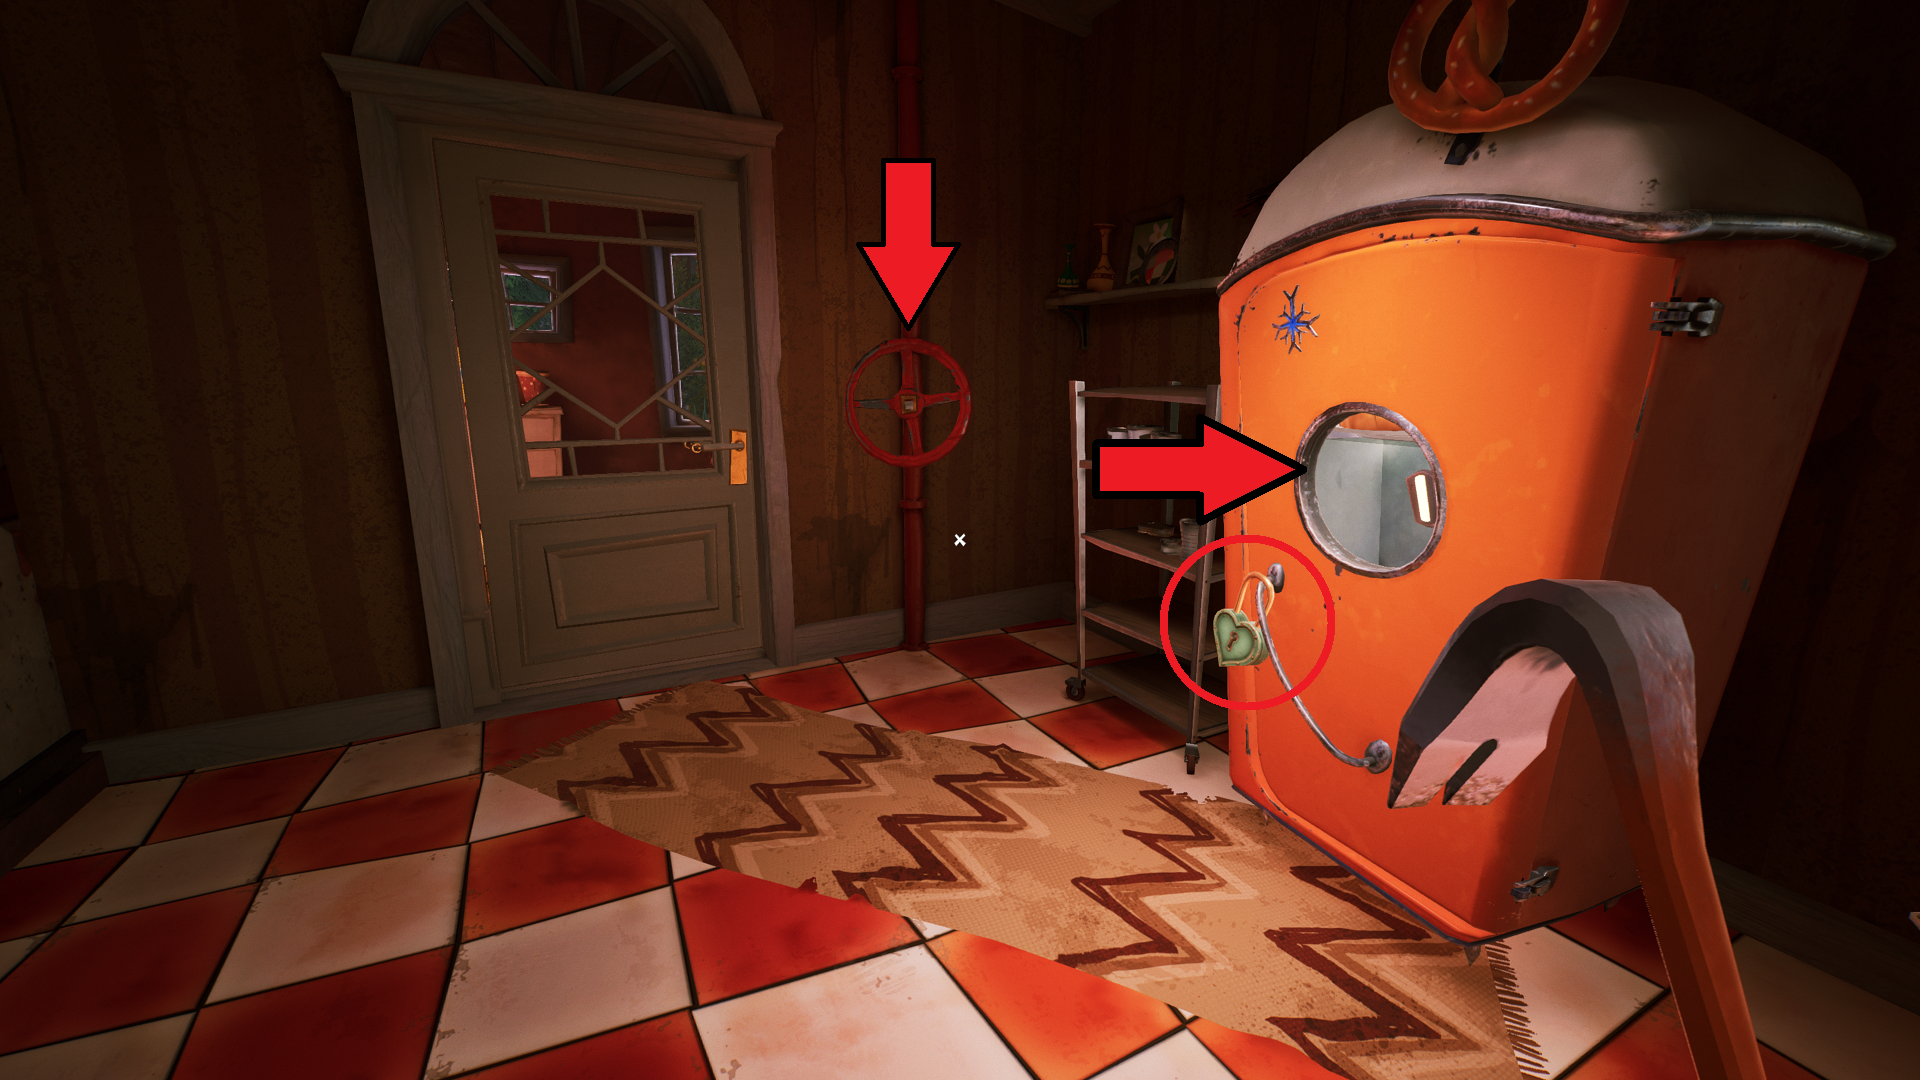
Enter the bakery through the window on the front right side, to the right of the ladder leading up near the entrance. Once through the window, you’ll notice a locked refrigerator on the right side that needs a Heart Key. Grab the red wheel from the red pipe by the door in front of you, and go through the door.
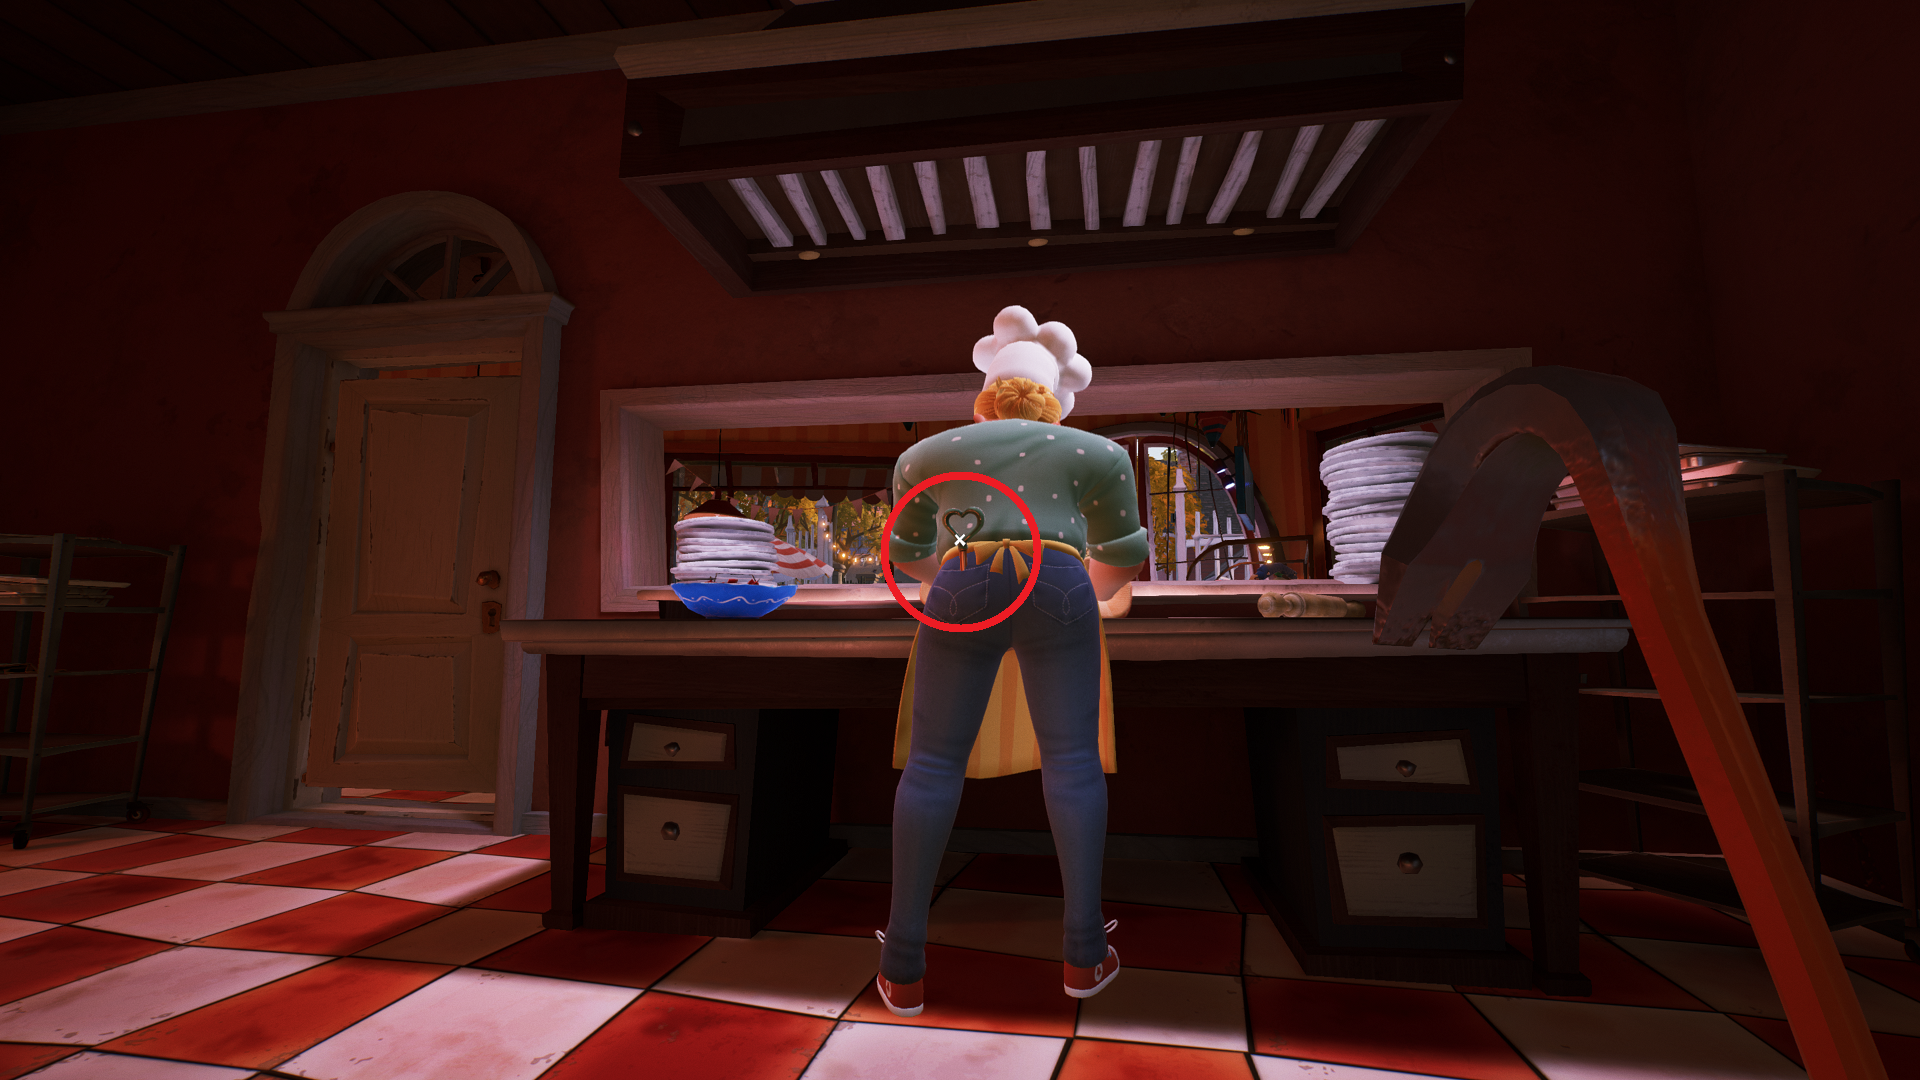
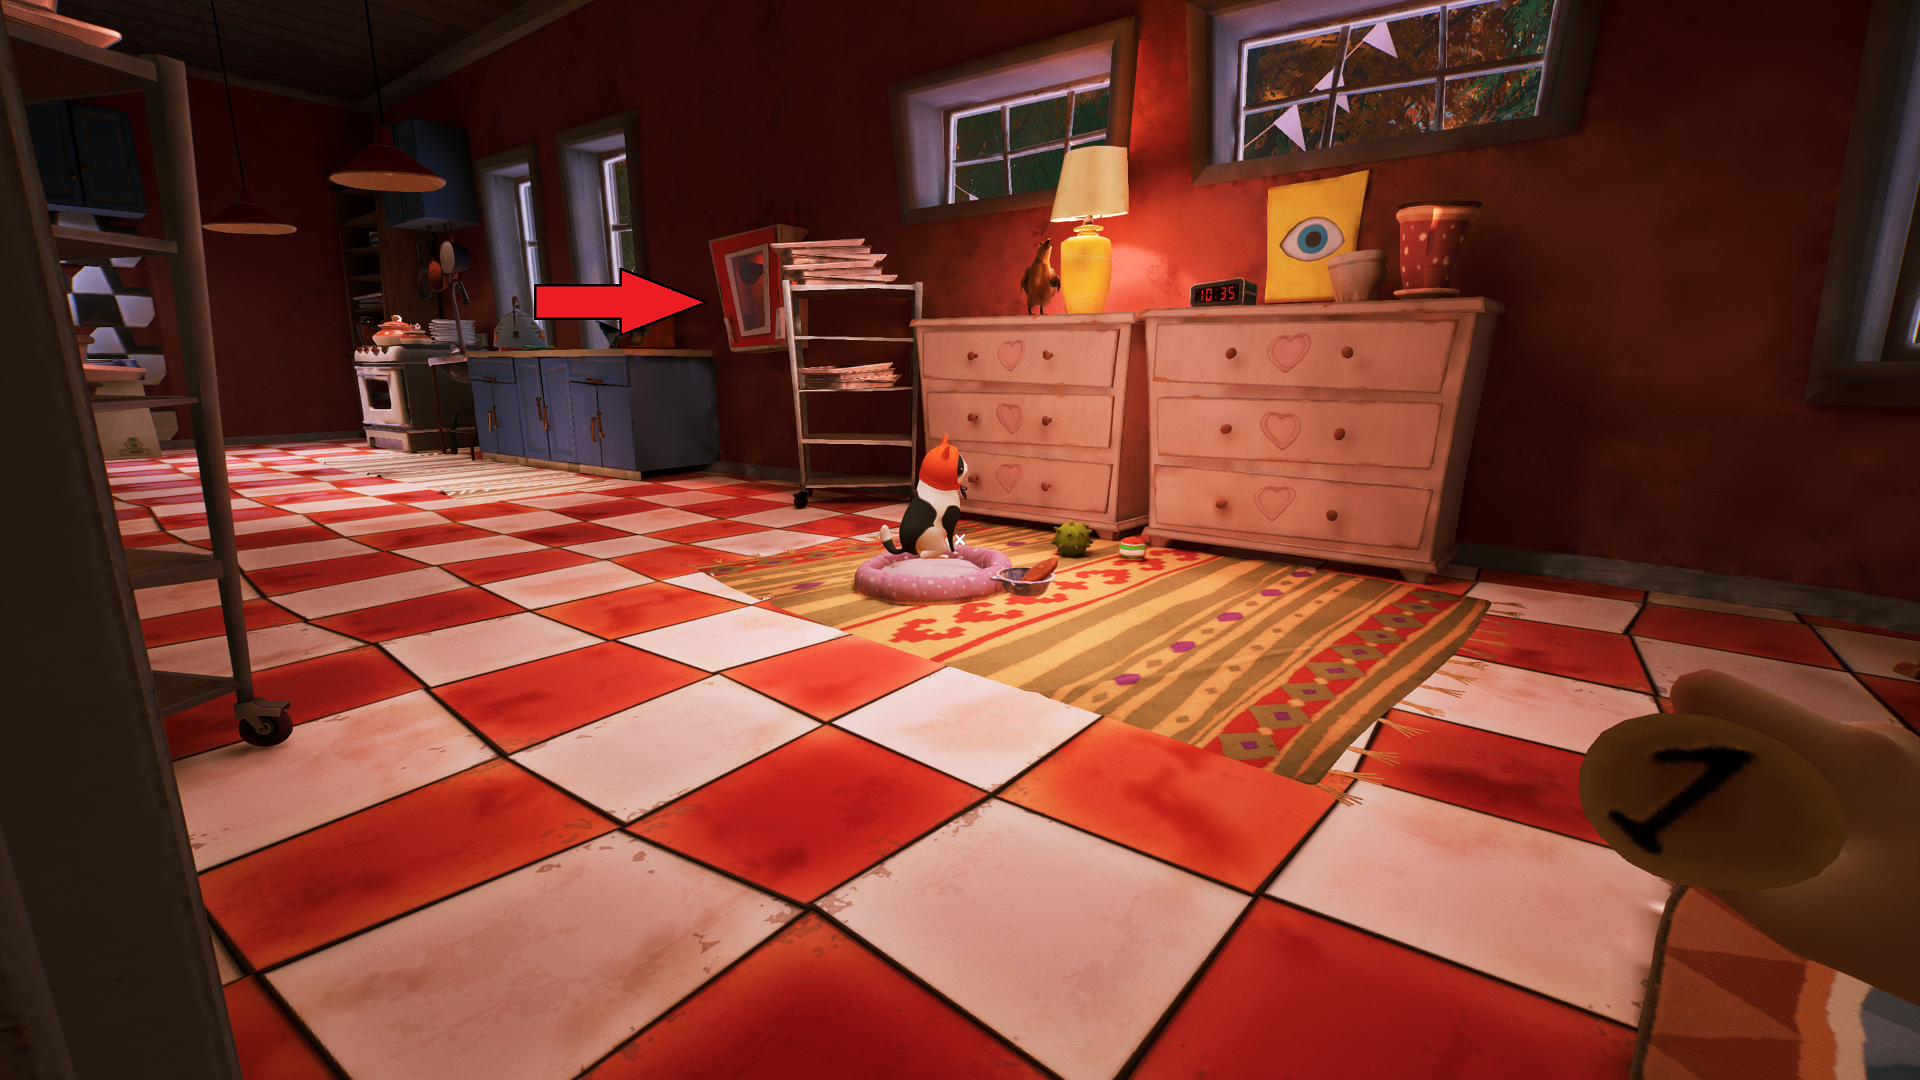
You’ll see a Imbir the cat playing on its bed on the other side. Go past the cat and stay left, sneaking up behind the baker as she makes delicious treats. The Heart Key is in her back left pocket; snatch it out and return to the refrigerator.
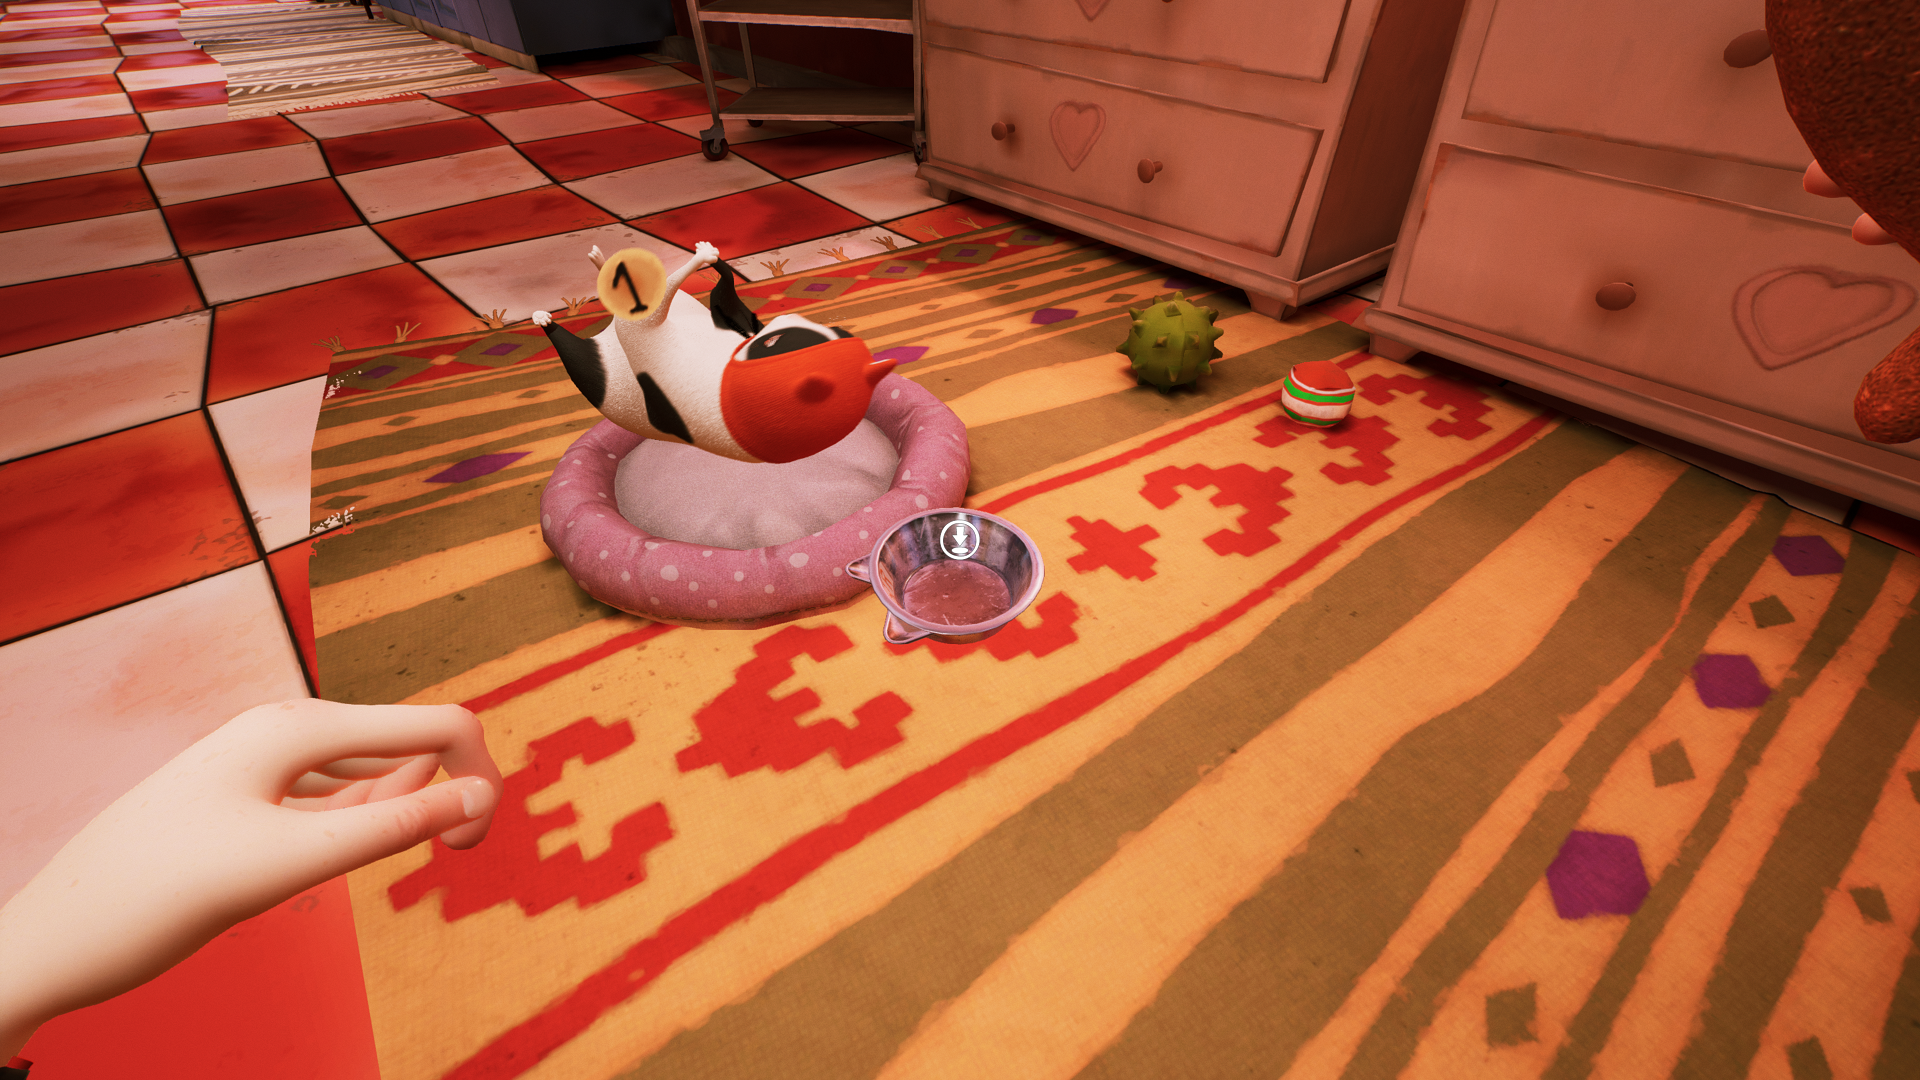
Unlock the refrigerator, and grab the fish treat inside. Put the fish treat in the cat’s bowl so the cat will stand up, revealing the 1 button for the cash register in the front of the bakery. Note: it’s OK if Imbir finishes eating the fish treat and sits back on the bed before you grab the button; you’ll still be able to pick the button up once you’ve placed the treat.
How to Open the Locked Book on the Bakery’s Second Floor
The next three puzzles are on the bakery’s second floor. However, before we go up, there are two things to do in the bakery’s kitchen to open the locked book on the second floor.
Still in the kitchen, open the white door to the right of the baker’s prep table (the door on the far wall if looking at the baker from the cat). This will change the baker’s patrol path, allowing them to go upstairs.
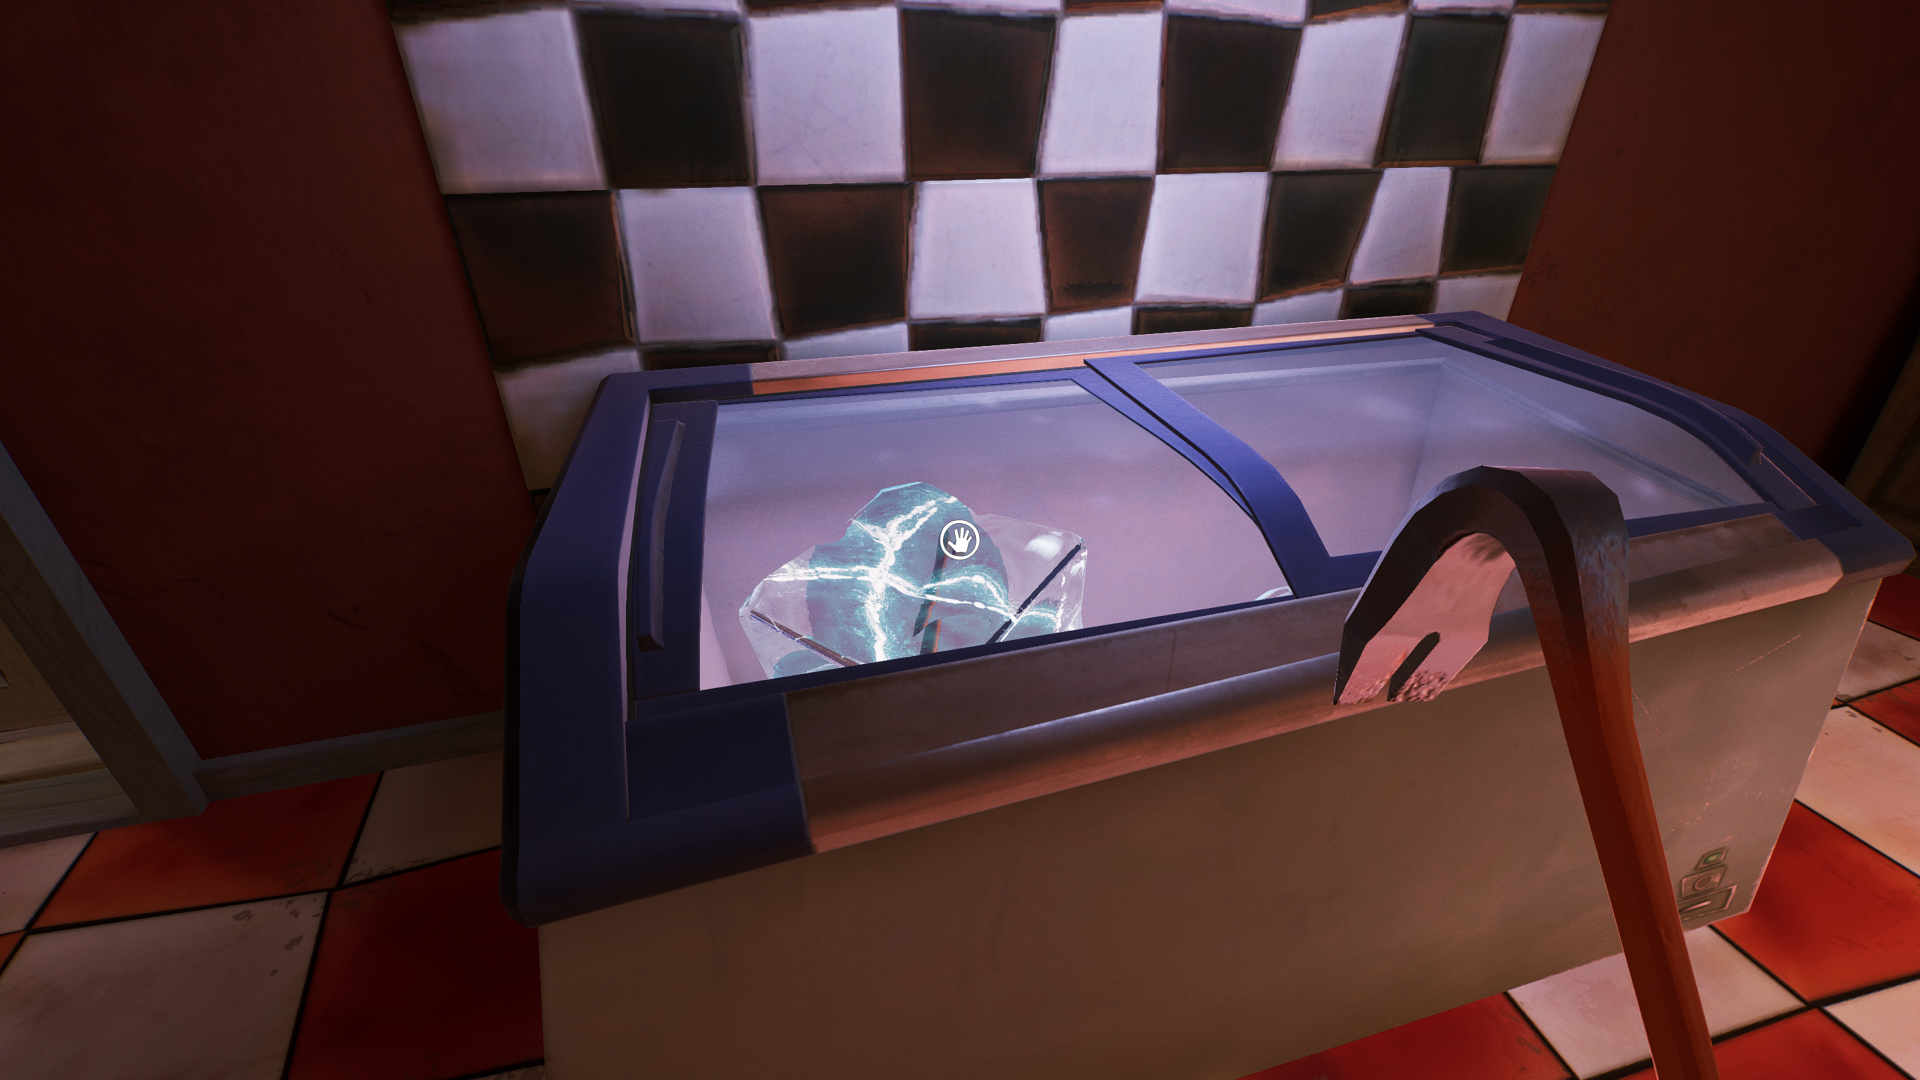
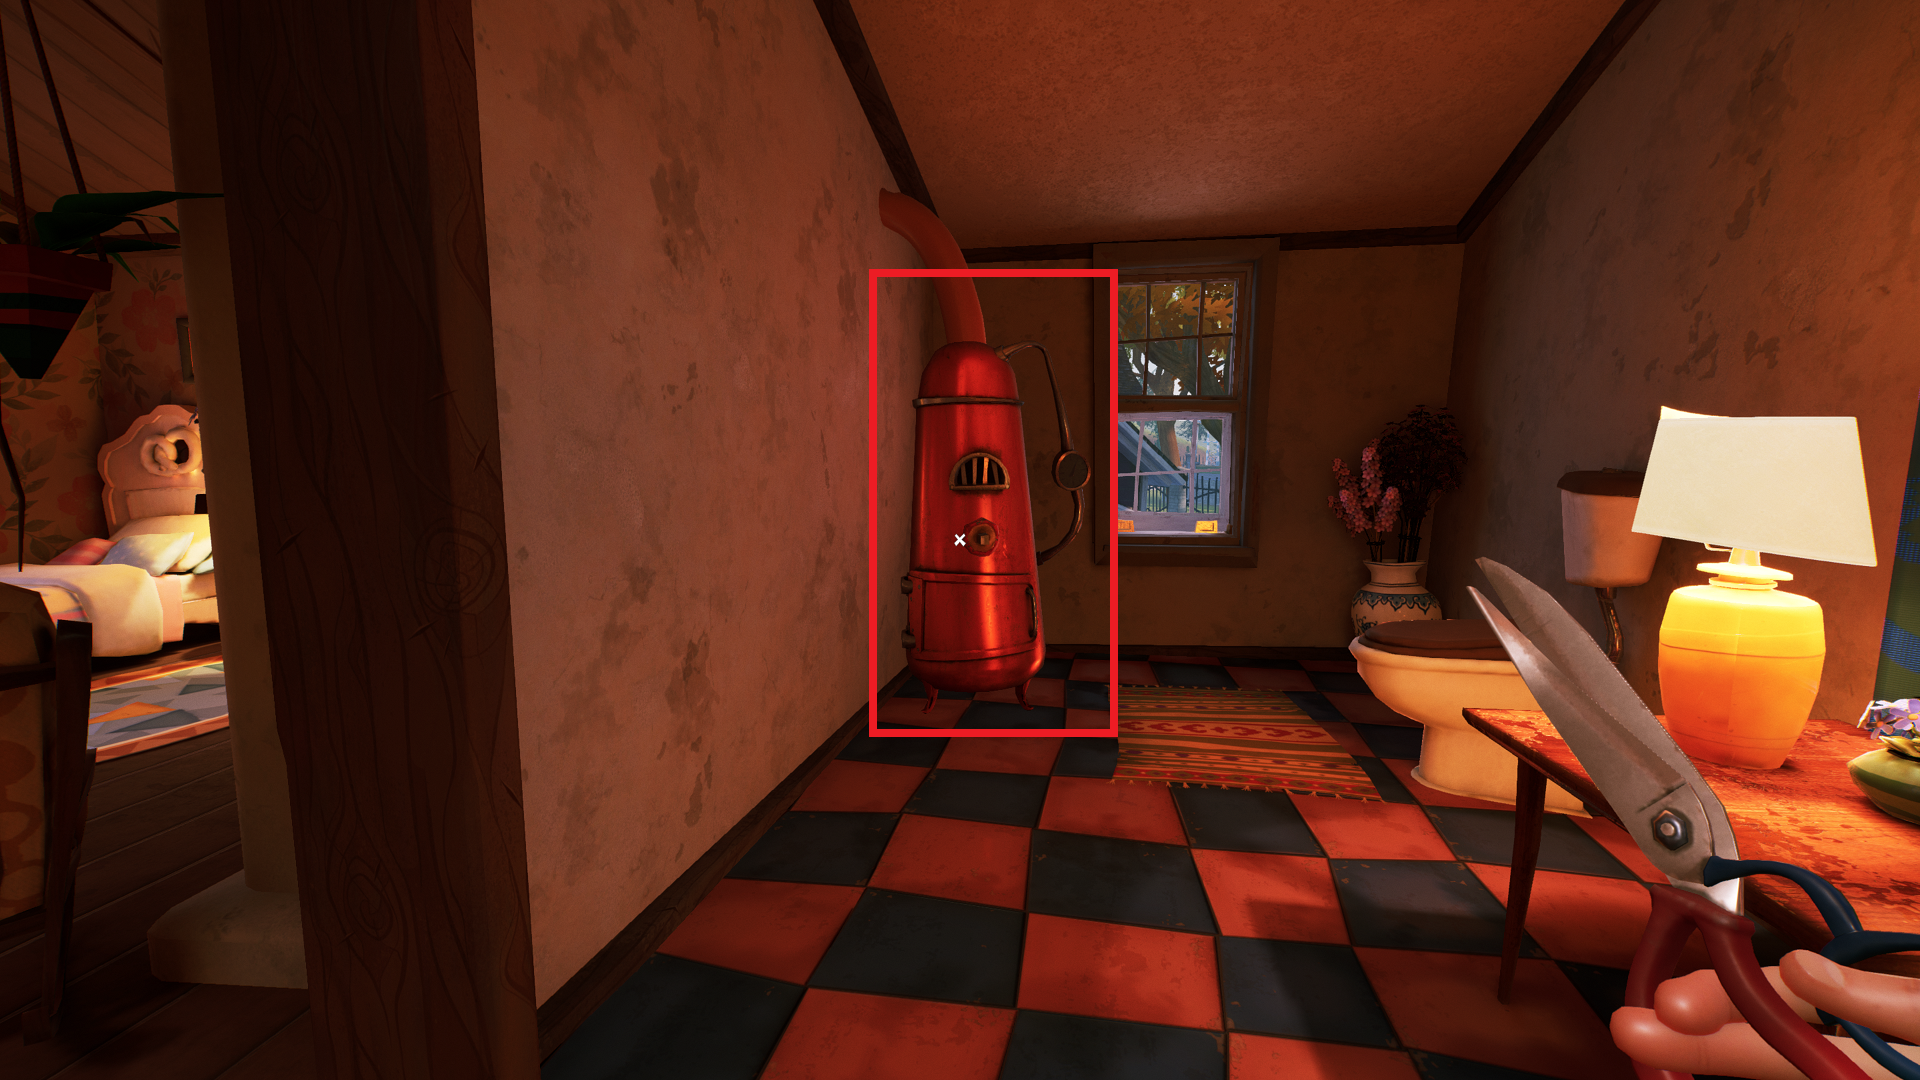
When they’ve gone upstairs (preferably) or to the front end of the bakery, interact with the freezer to the right of the white door you opened, the one leading to the stairway that goes upstairs. Grab the block of ice out of the freezer, then throw it into the oven/fire on the opposite wall.
The ice will melt in the fire, revealing the key inside. Now turn left toward the cat. There is a fire extinguisher in a red case on the wall, between the blue cabinets and the white chest of drawers by the cat. Grab the fire extinguisher, and put out the fire to get the key.
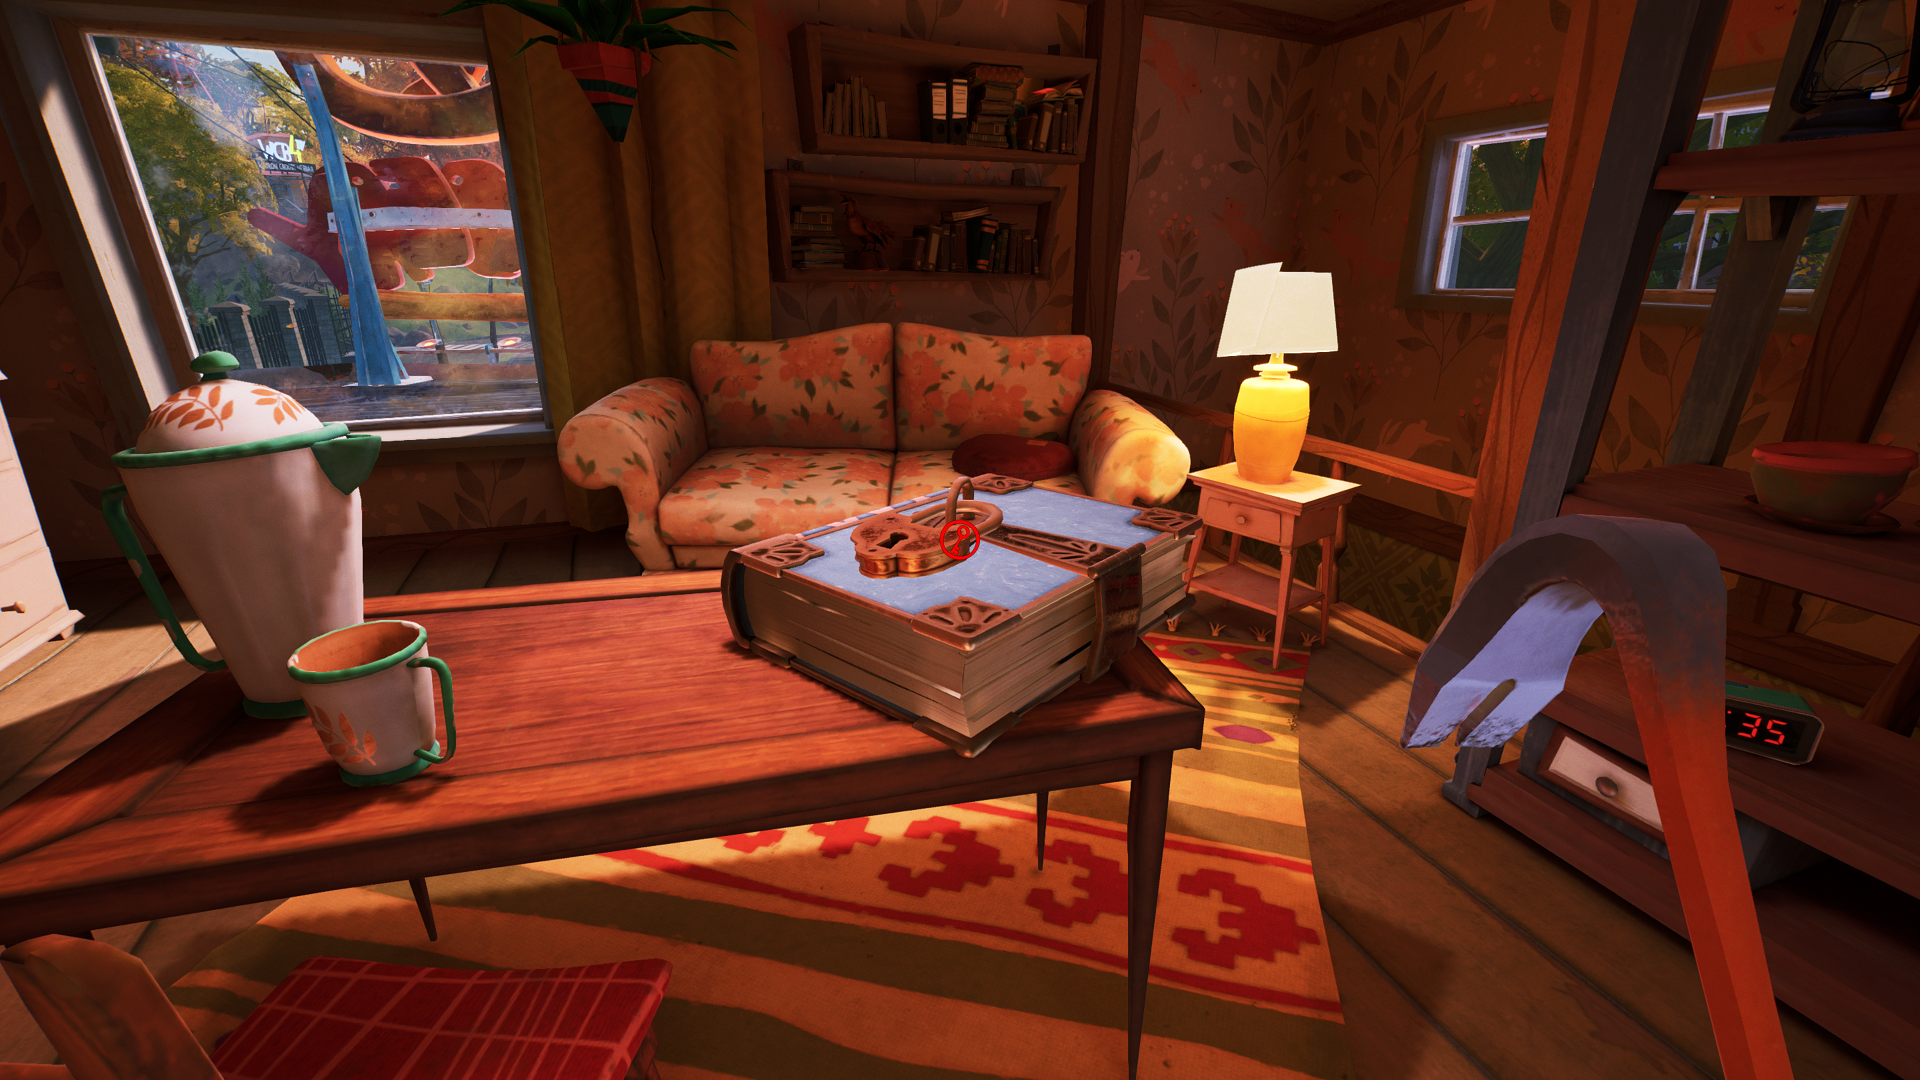
Take the key upstairs. You’ll notice a large locked book on a table in a small living area with a couch, chair, and some lamps. Use the key to unlock the book on the table and get the 6 button for the cash register downstairs.
How to Solve the Bush Puzzle
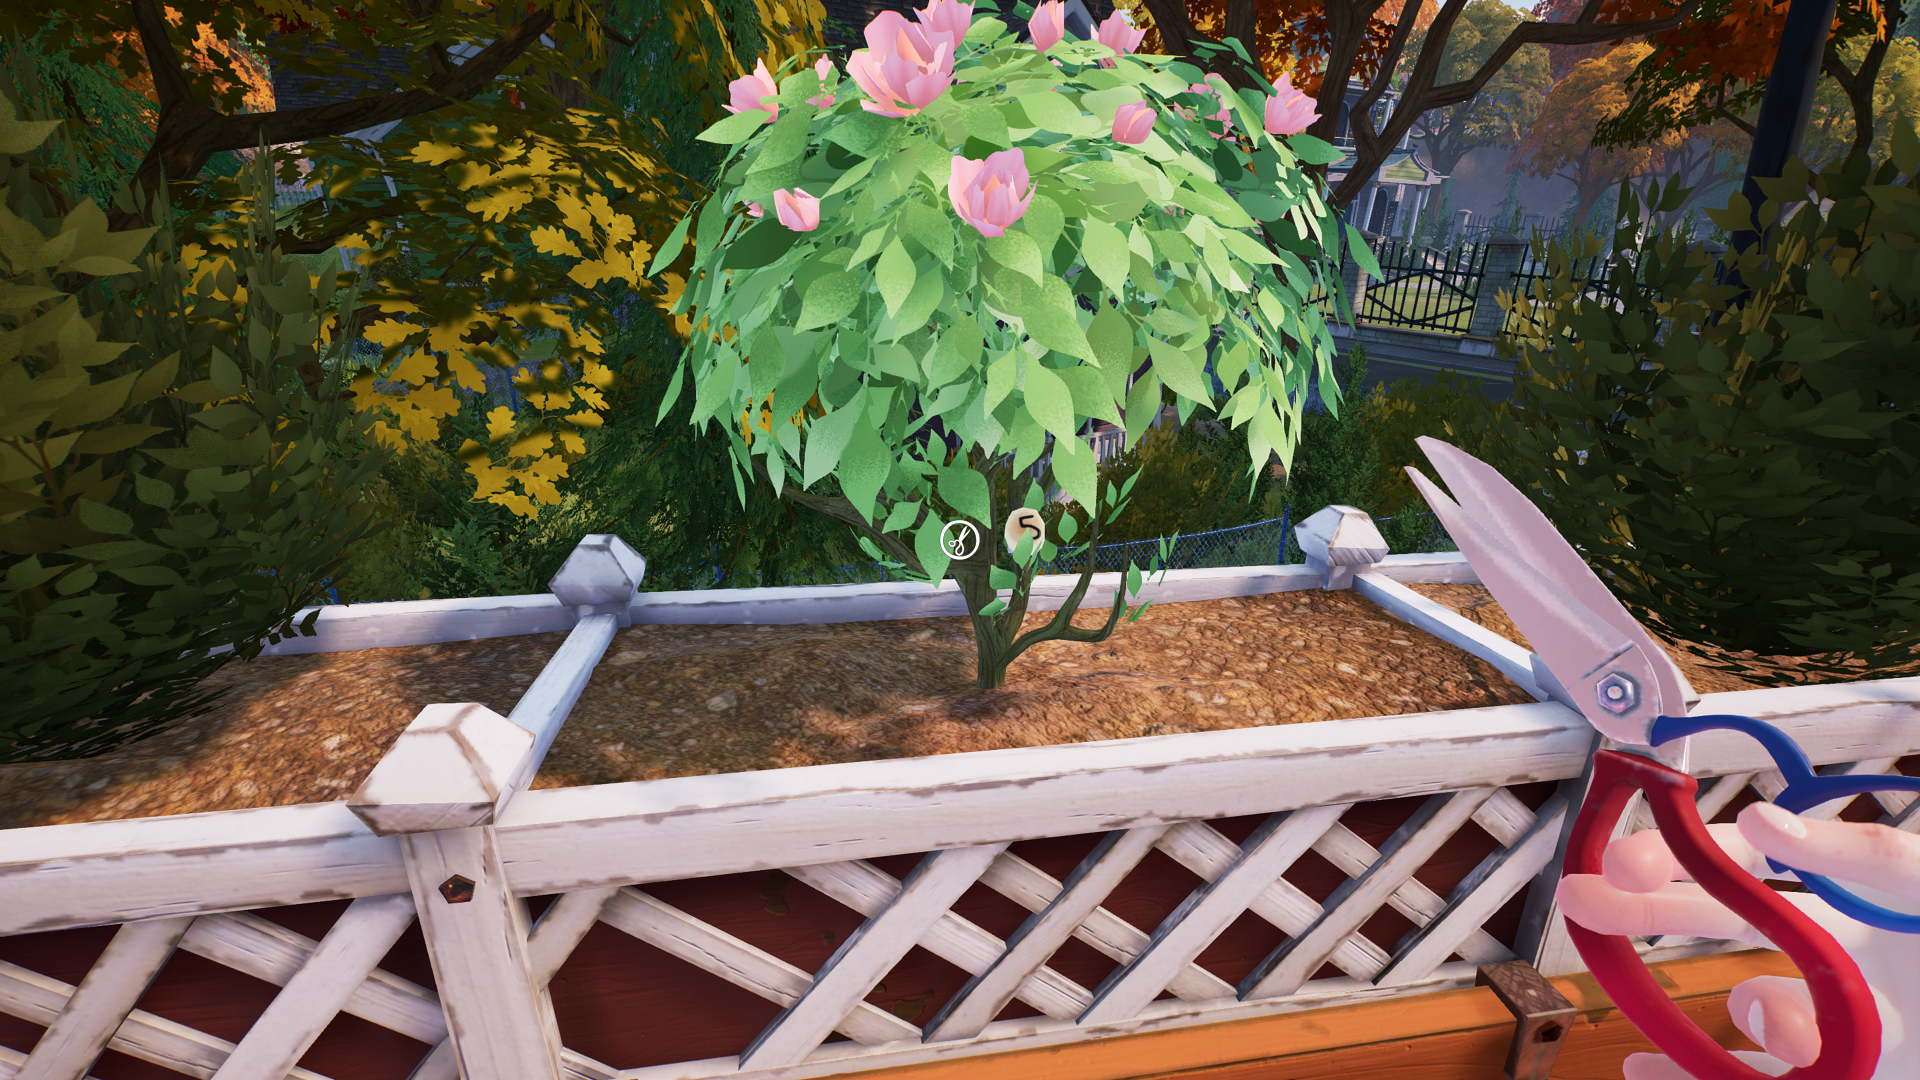
From the book, go through thee nearby door into the adjoining bedroom. You’ll see a white door that leads to a balcony and a bush directly ahead of you; while you need to cut the bush for the next cash register button, go right into the bathroom first.
Turn left once in the bathroom to see a red water heater. Place the red wheel on the water heater, and turn the wheel. Now go outside to the balcony through the door near the bed. The bush outside will be yellowed and withered (instead of vibrant green as it was before). Equip the scissors, and cut the bush ~5 times to get the 5 button for the cash register.
How to Solve the Clock Puzzle
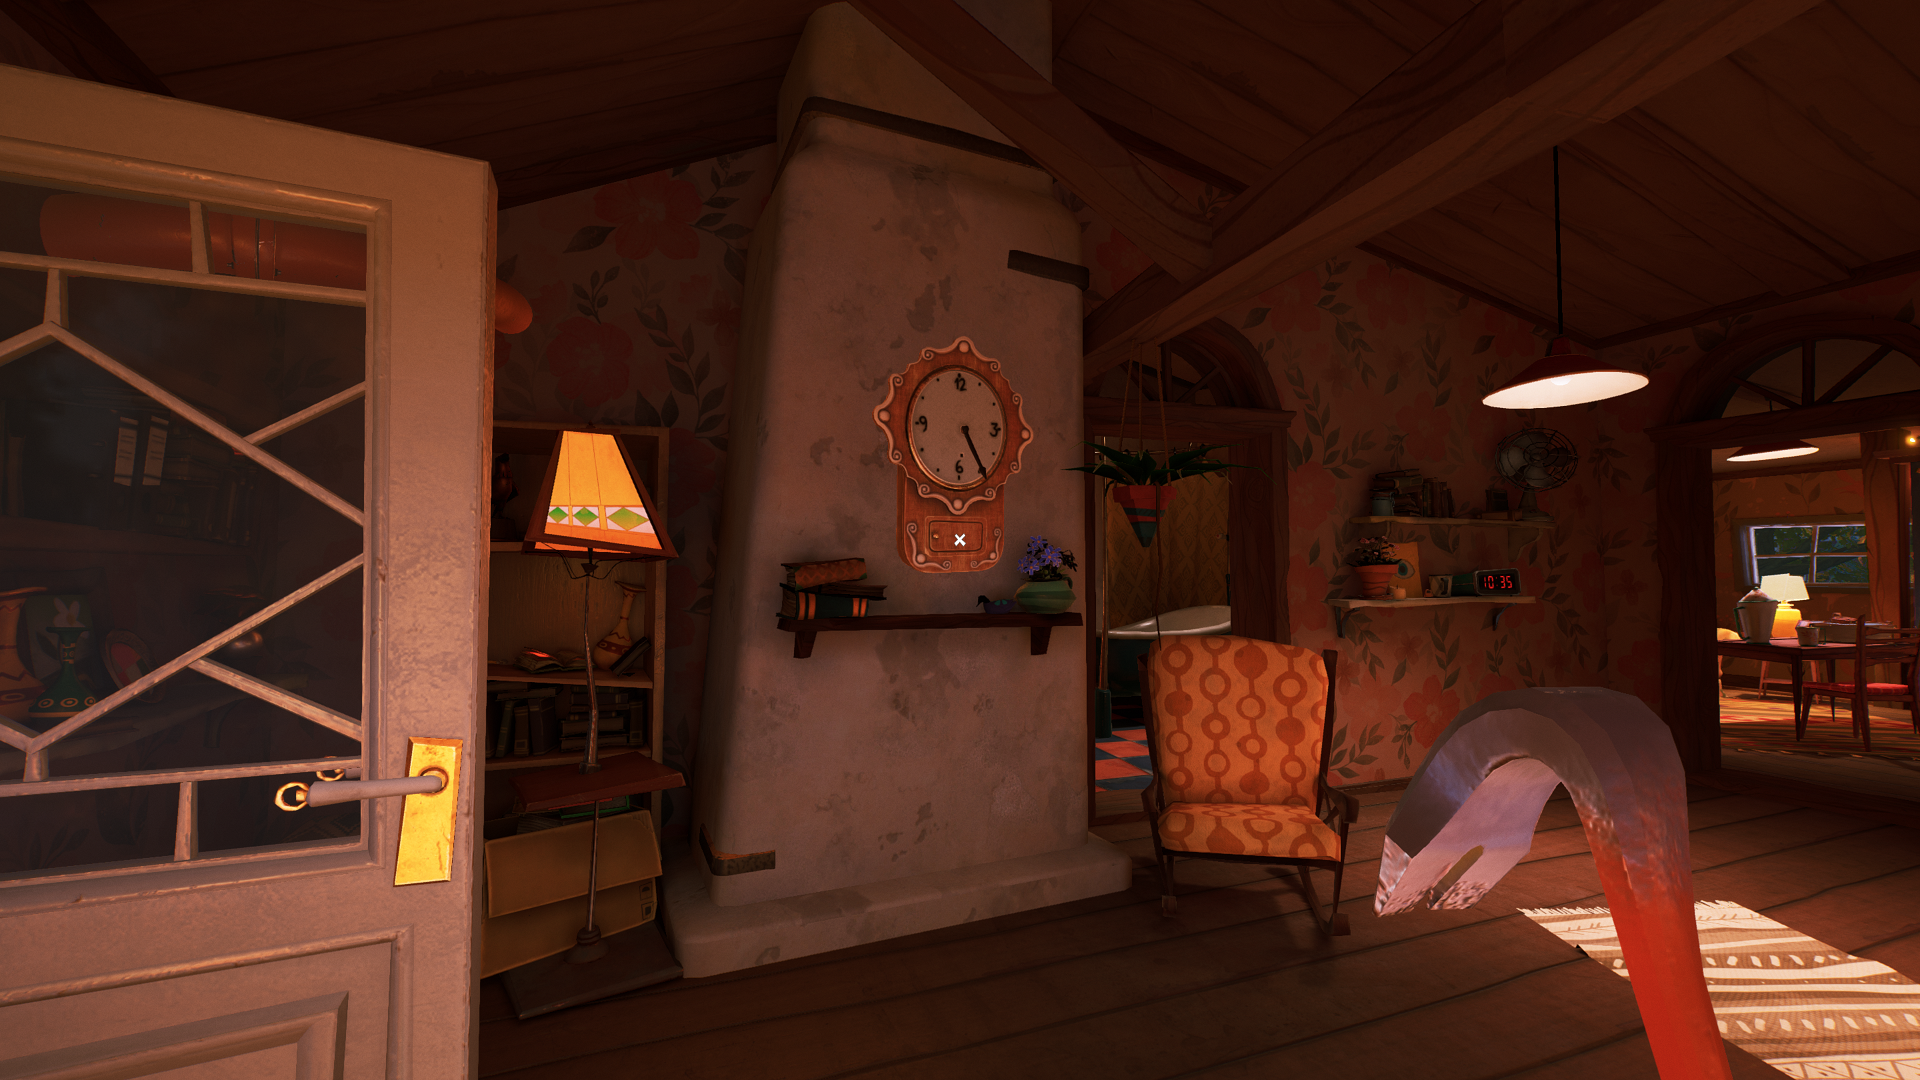
Return to the bedroom, and look left to see an old-fashioned clock hanging on the wall between a lamp and chair, opposite the bed. The goal here is to set the hands in a specific time. But what is the answer?
beyond the old-fashioned clock, look on the left wall by the bathroom door to see a digital clock on a shelf. The clock reads 10:35, which is the answer to the clock puzzle. So, you’ll need to set the antique clock to this time. However, the clock is missing a hand!
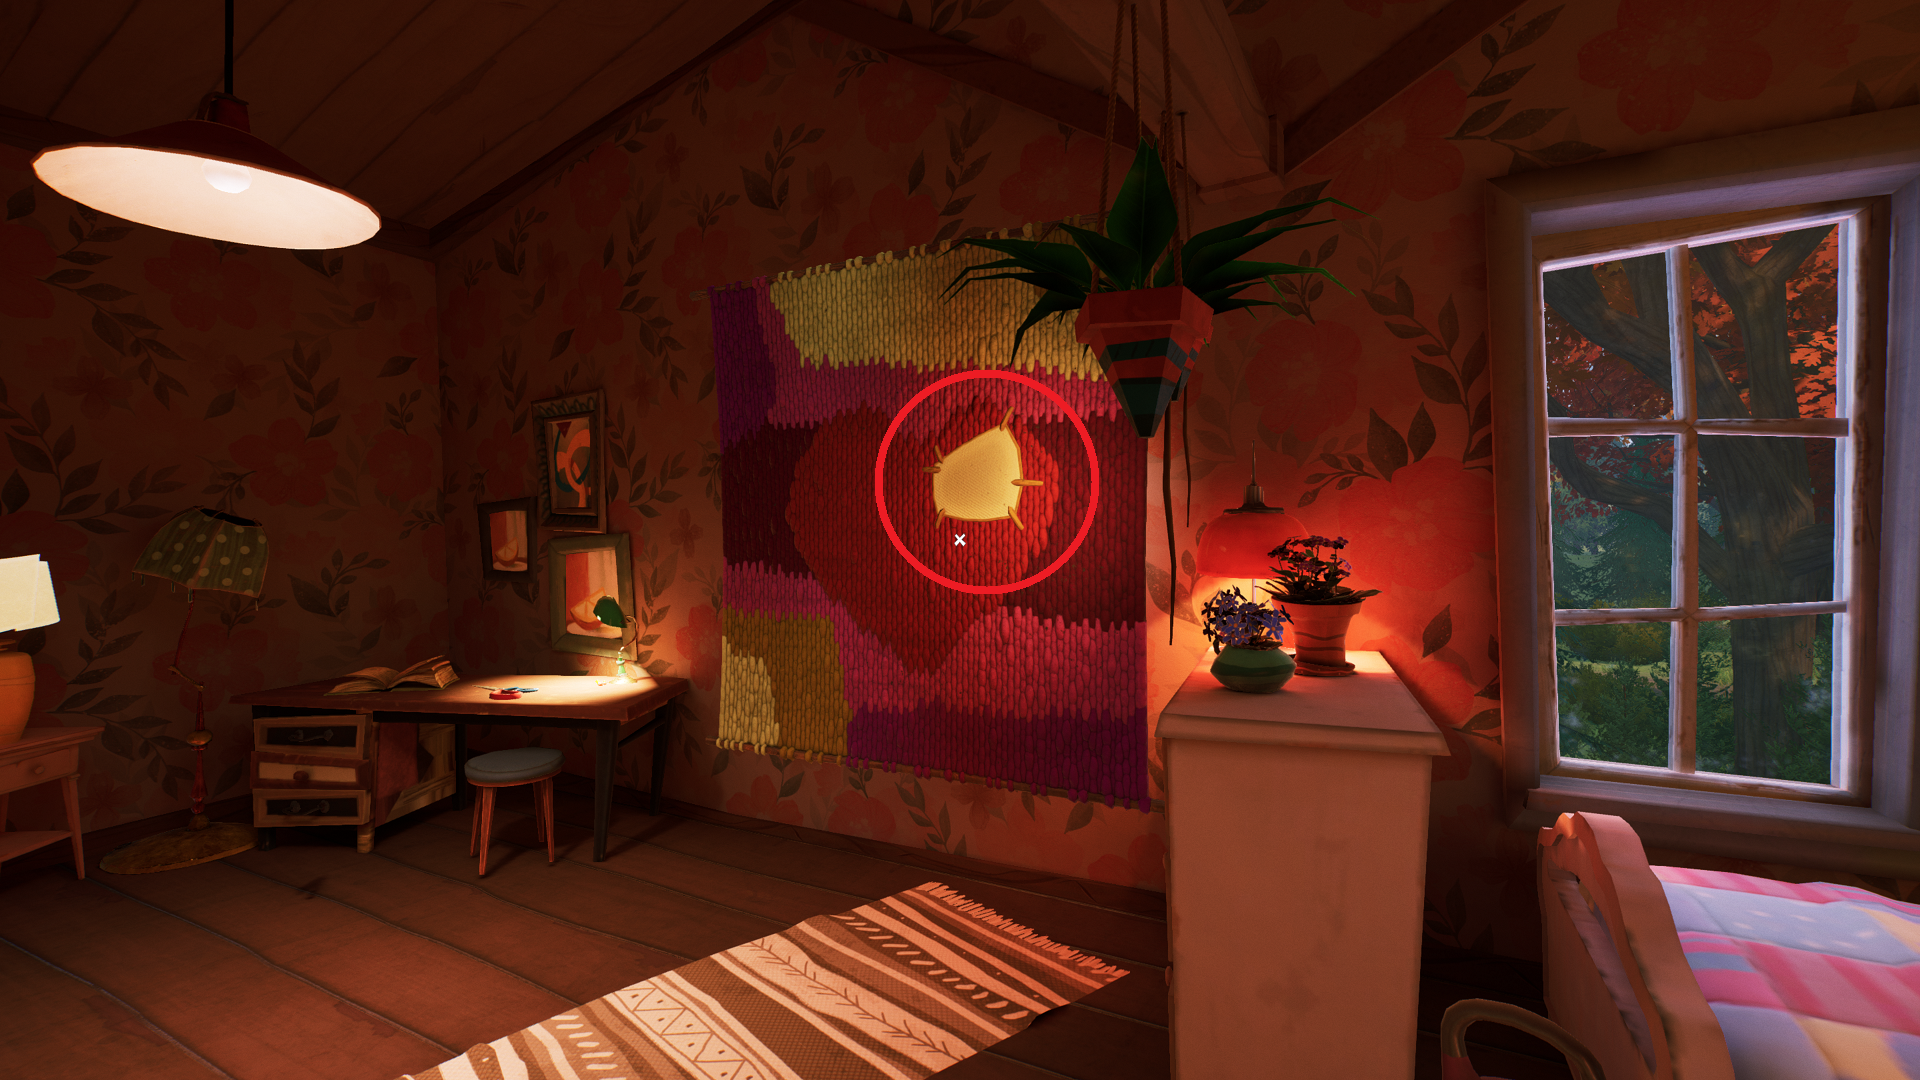
Equip the scissors and turn to the bed. You’ll see a crocheted tapestry with a heart embroidered on it on the wall between the bed and the desk. There is a patch on the heart; cut that patch with the scissors to reveal the clock’s hour hand. Take it, and place it on the clock.
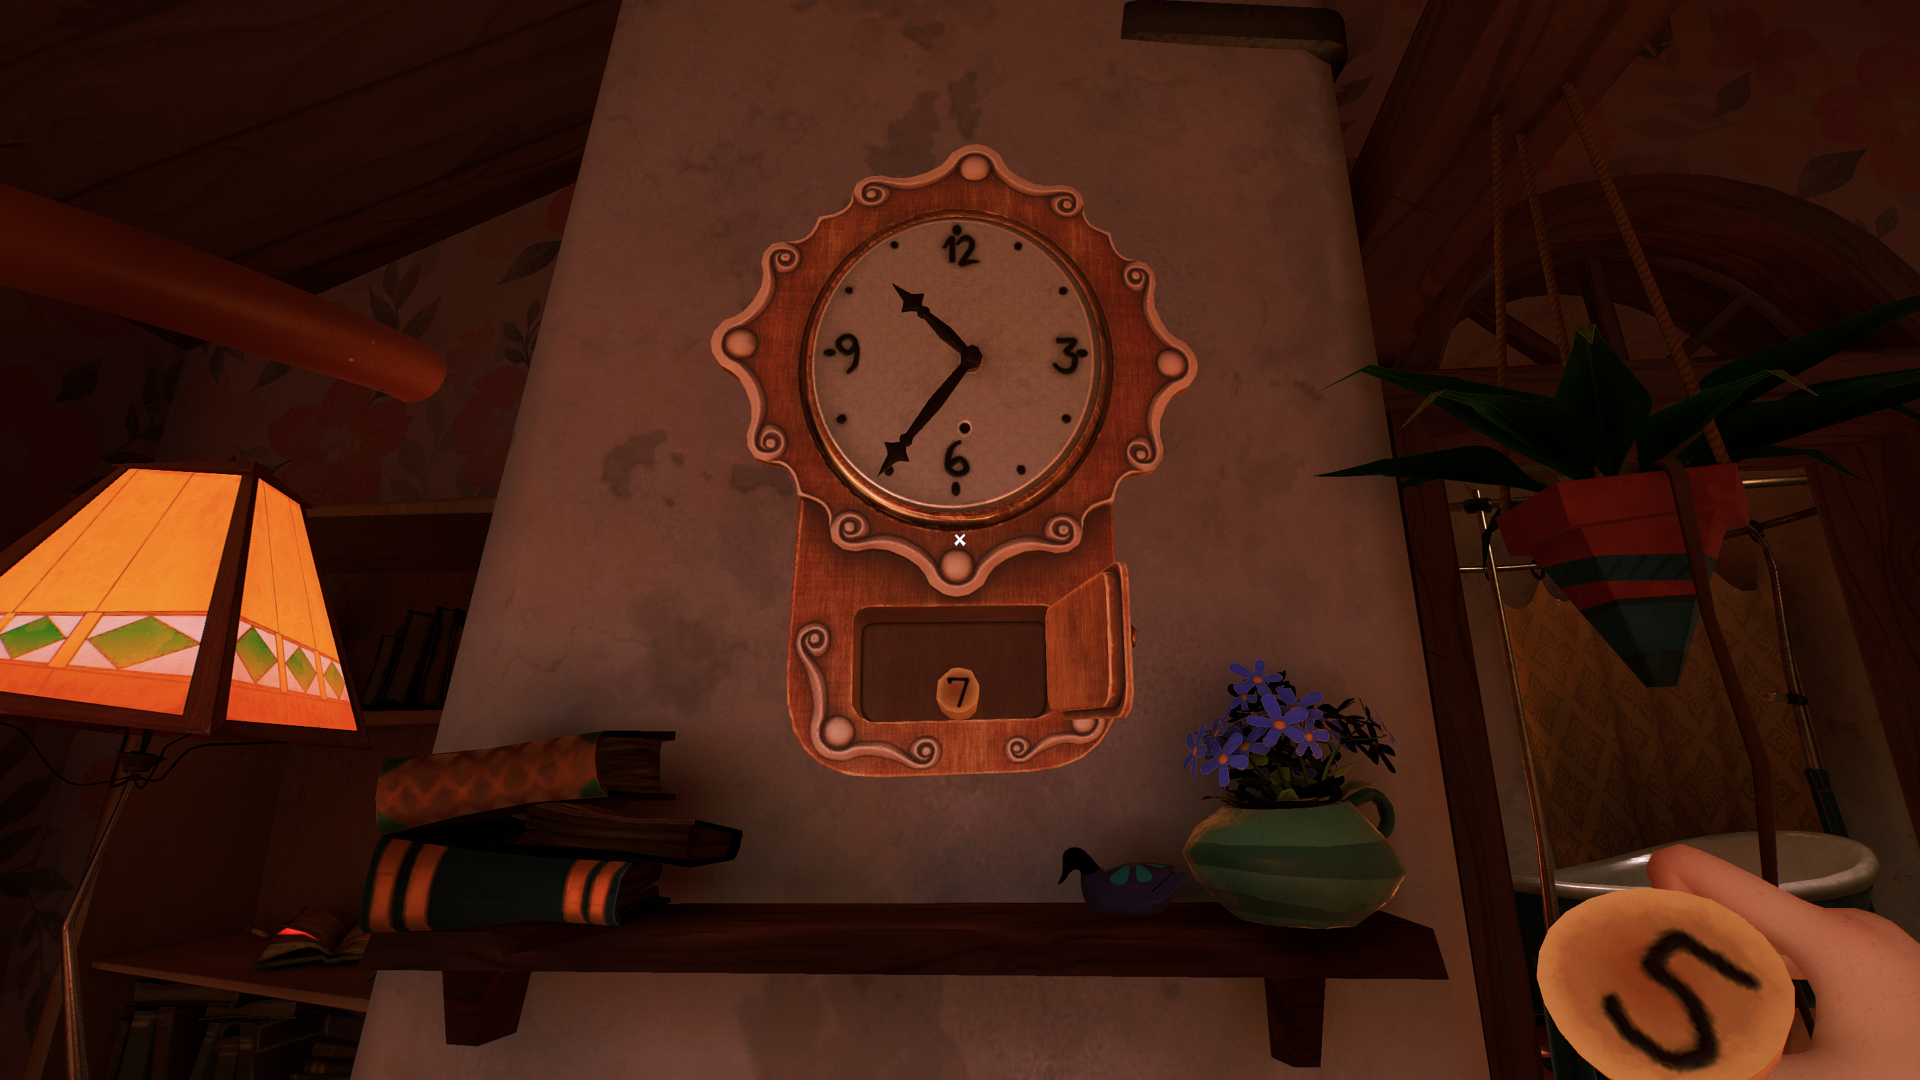
Remember: the time should be 10:35. Move the hour hand (short hand) one position past the nine. Move the minute hand (long hand) one position past the six. With the hands in the correct positions, a small door will open at the bottom of the clock, revealing the 7 button for the cash register downstairs.
Bakery Cash Register Code Answer
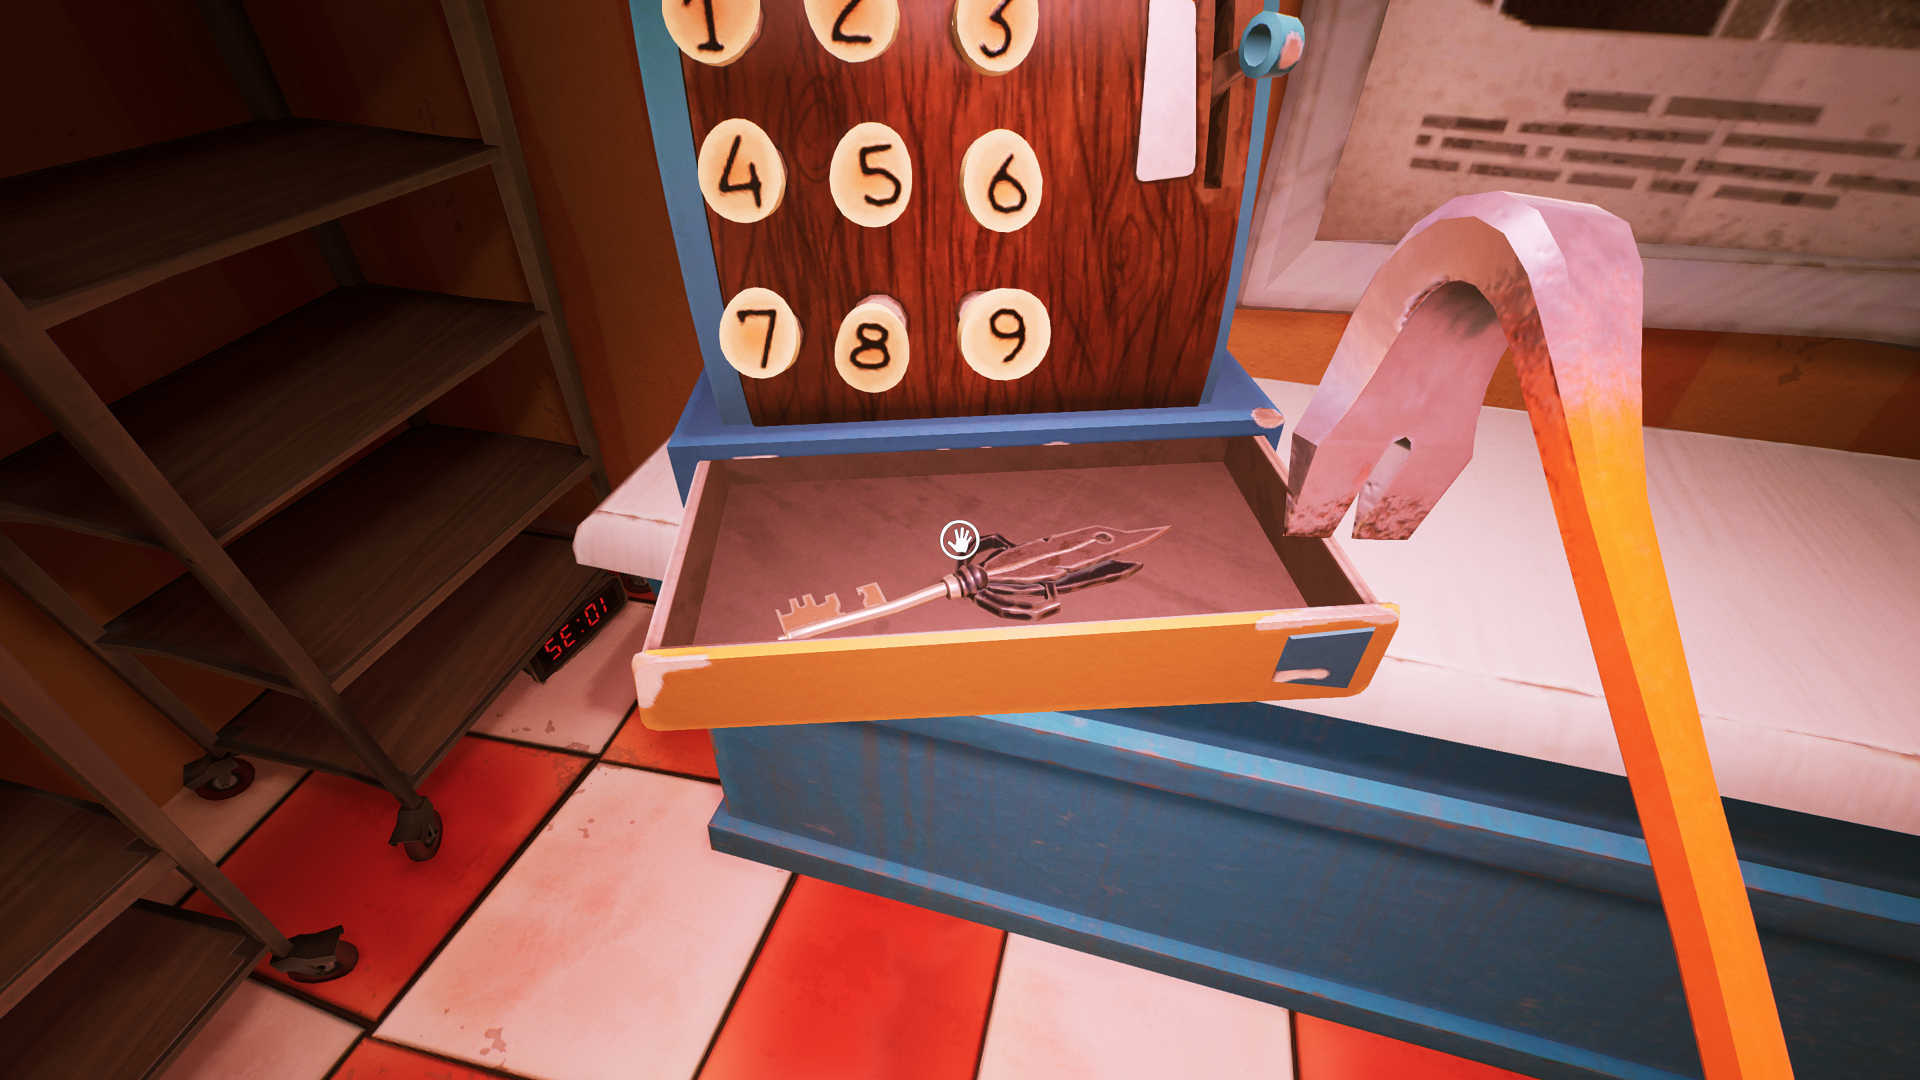
With all of the cash register buttons in your possession, put them in the correct positions on the register. Enter 1576 to open the drawer and get the first Museum key inside.
A loading screen will appear, advancing time. Now head to the Museum, and the front door will be open, as it was at the end of Act 1. Use the Museum key to open the door by the shovel. Peterson will be patrolling inside.
Model House Puzzle Solution
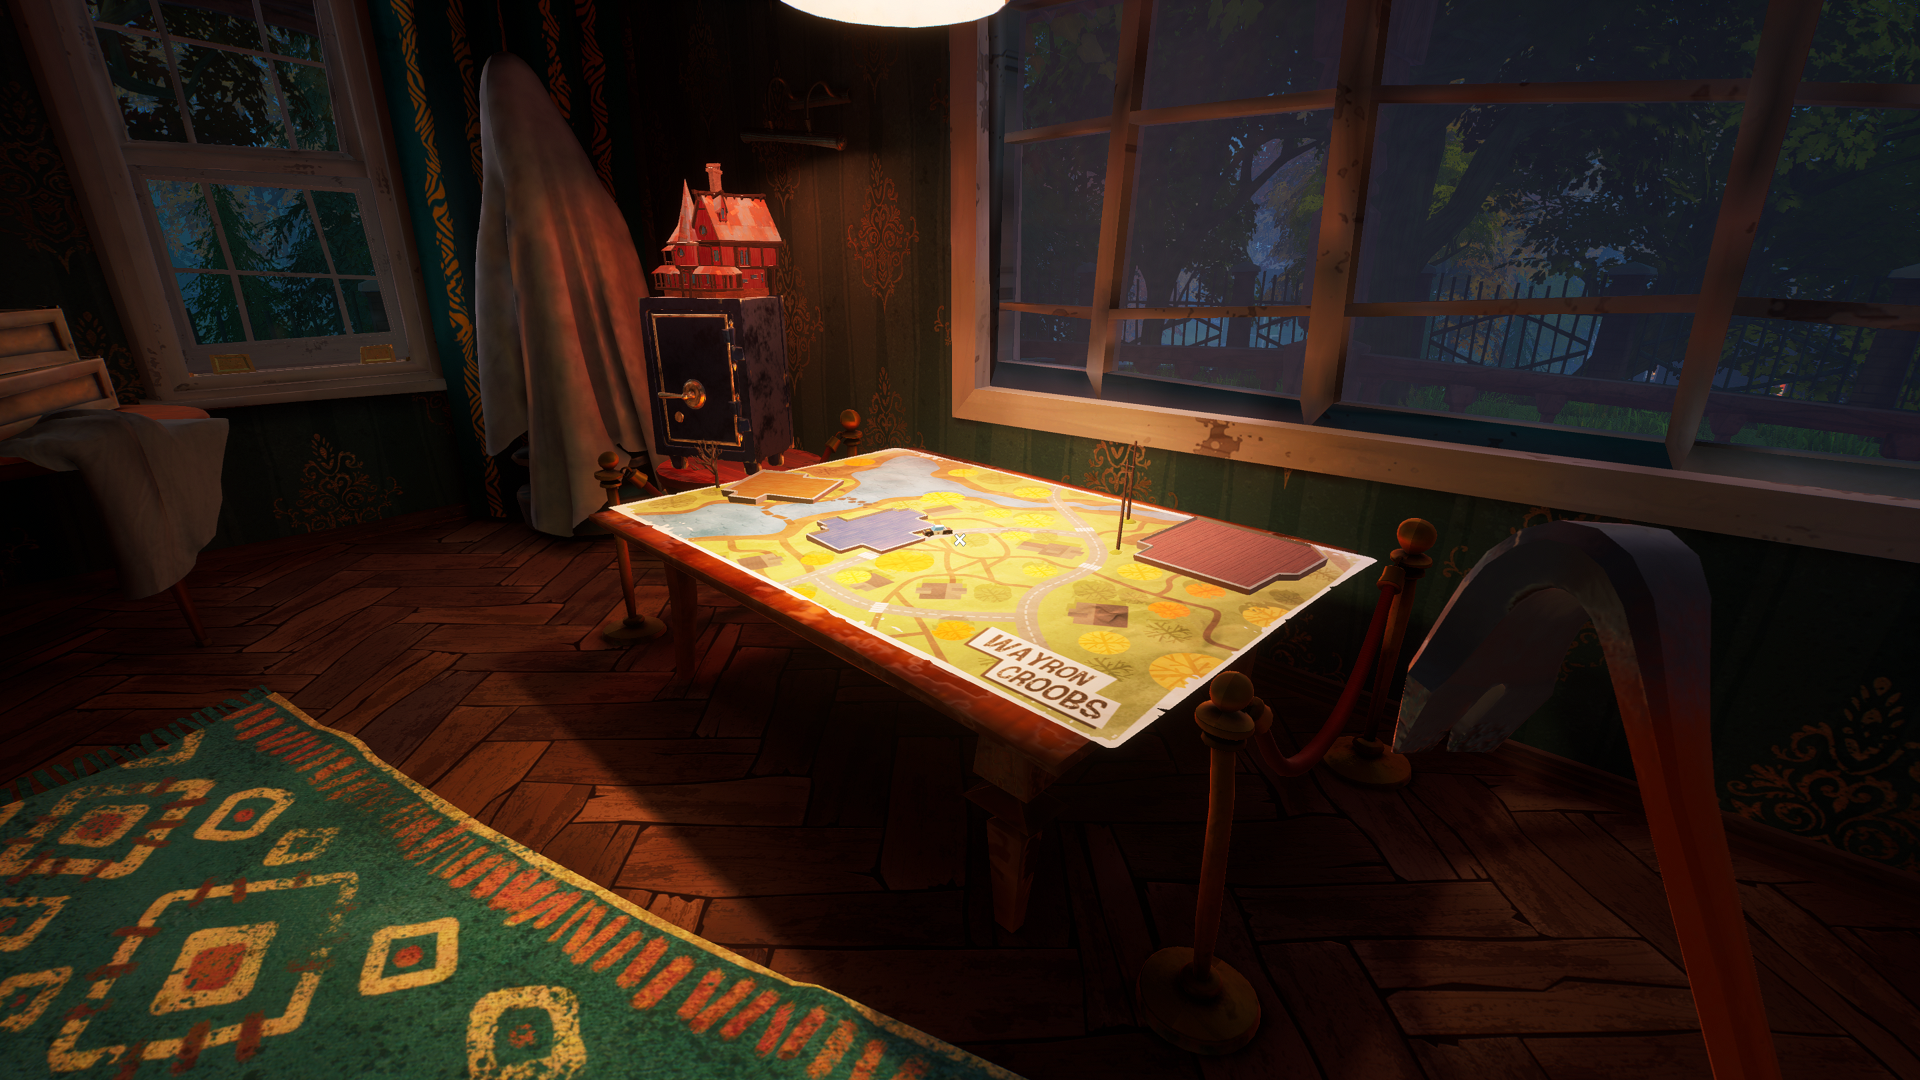
Go into the room to the right of the door you just opened (and to the right of the shovel by the desk), and you’ll see a table with a map of the town on it by a safe. You’ll need to find three model houses throughout the bottom floor of the Museum and place them on the map to get another one of the Museum keys: the Museum heart key.
Museum Model House Locations
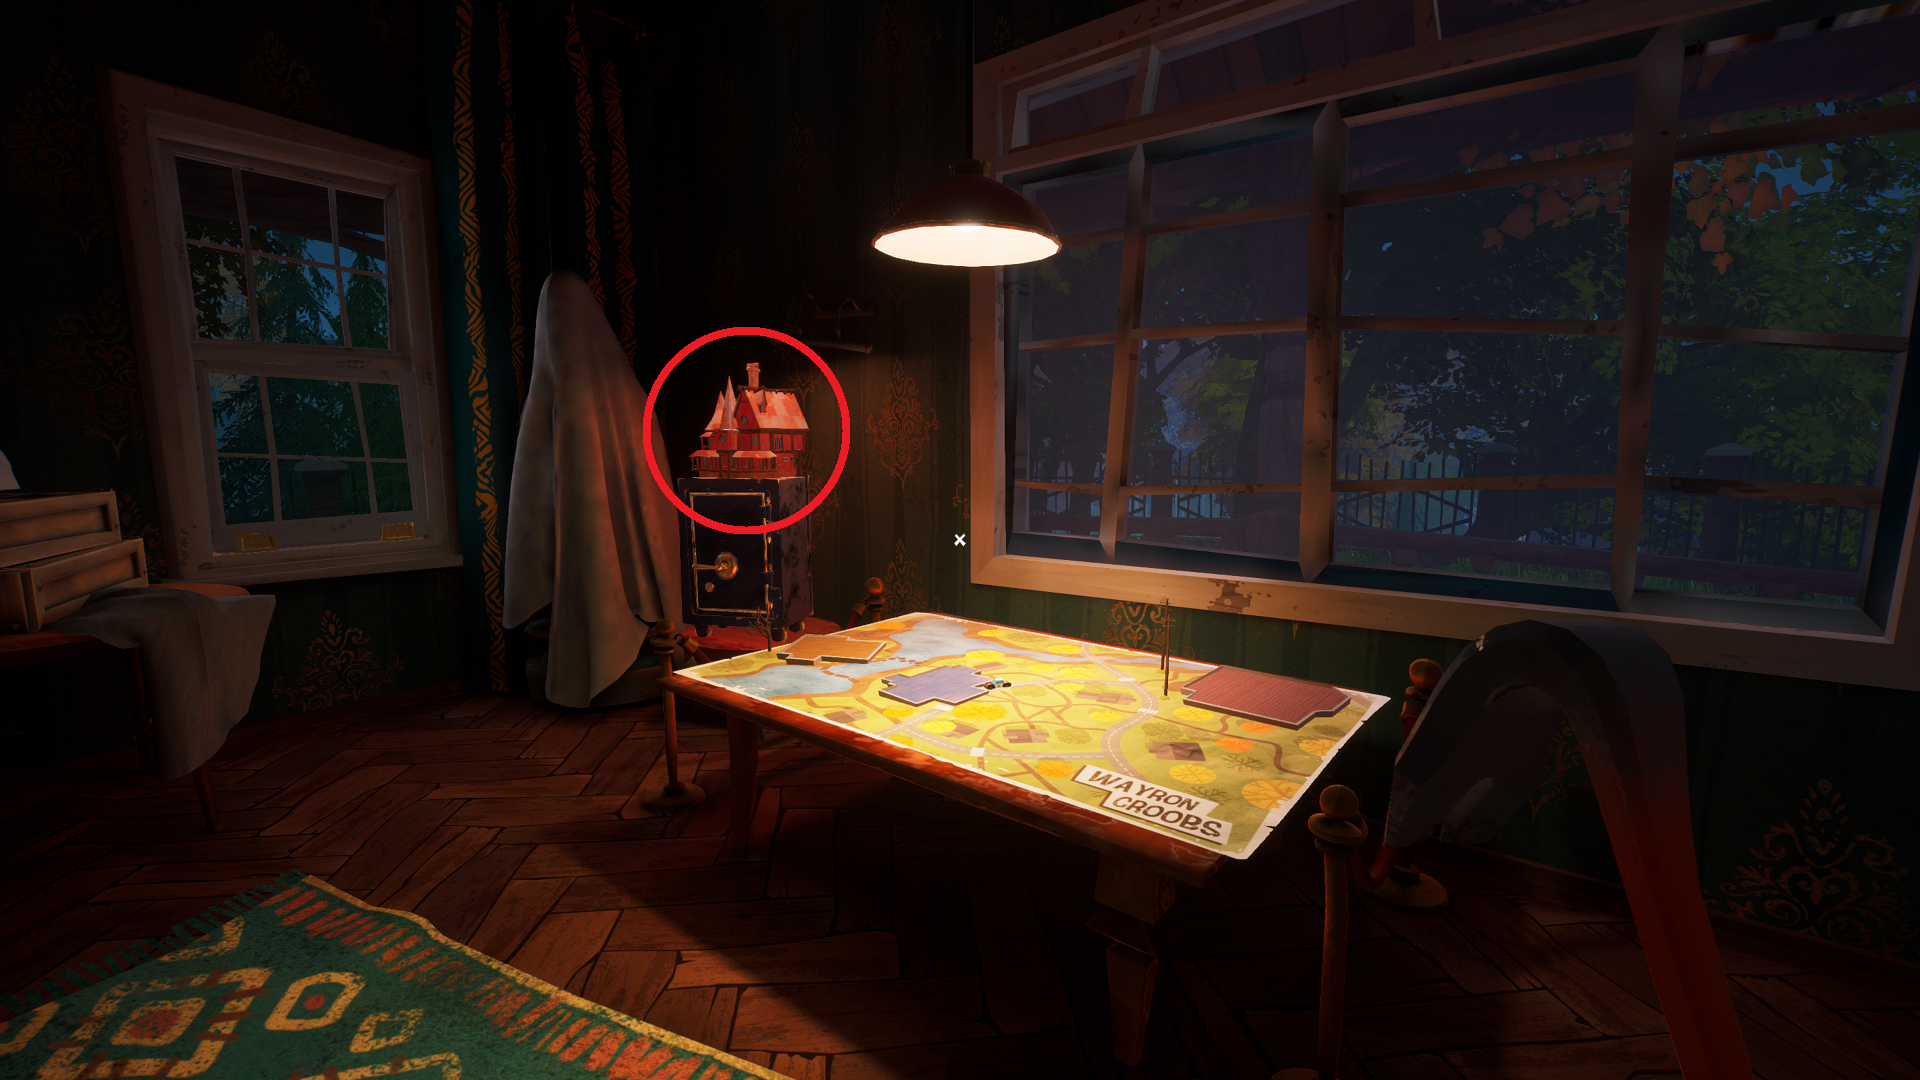
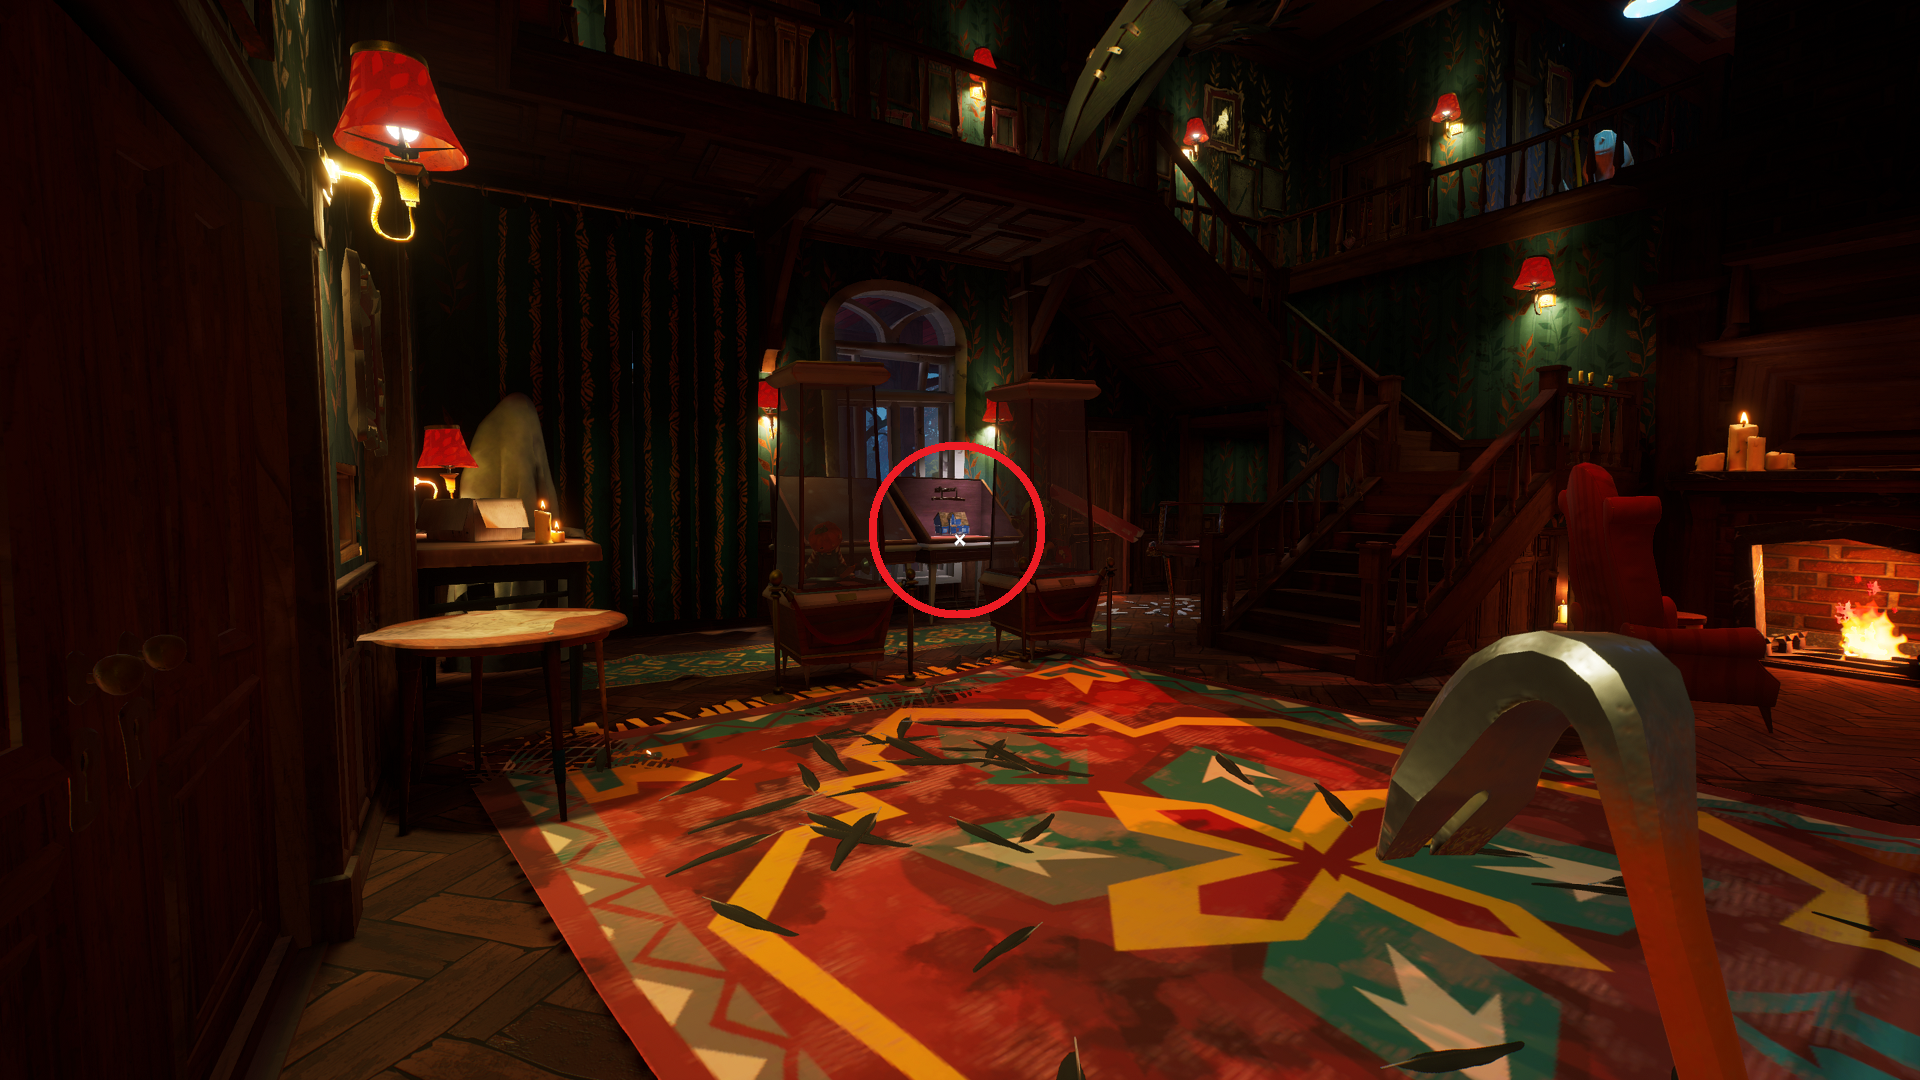
The first model is a red/pink house with two spires and a wraparound porch that represents the Museum. It can be found on top of the safe next to the table. Place it in the upper right corner of the map.
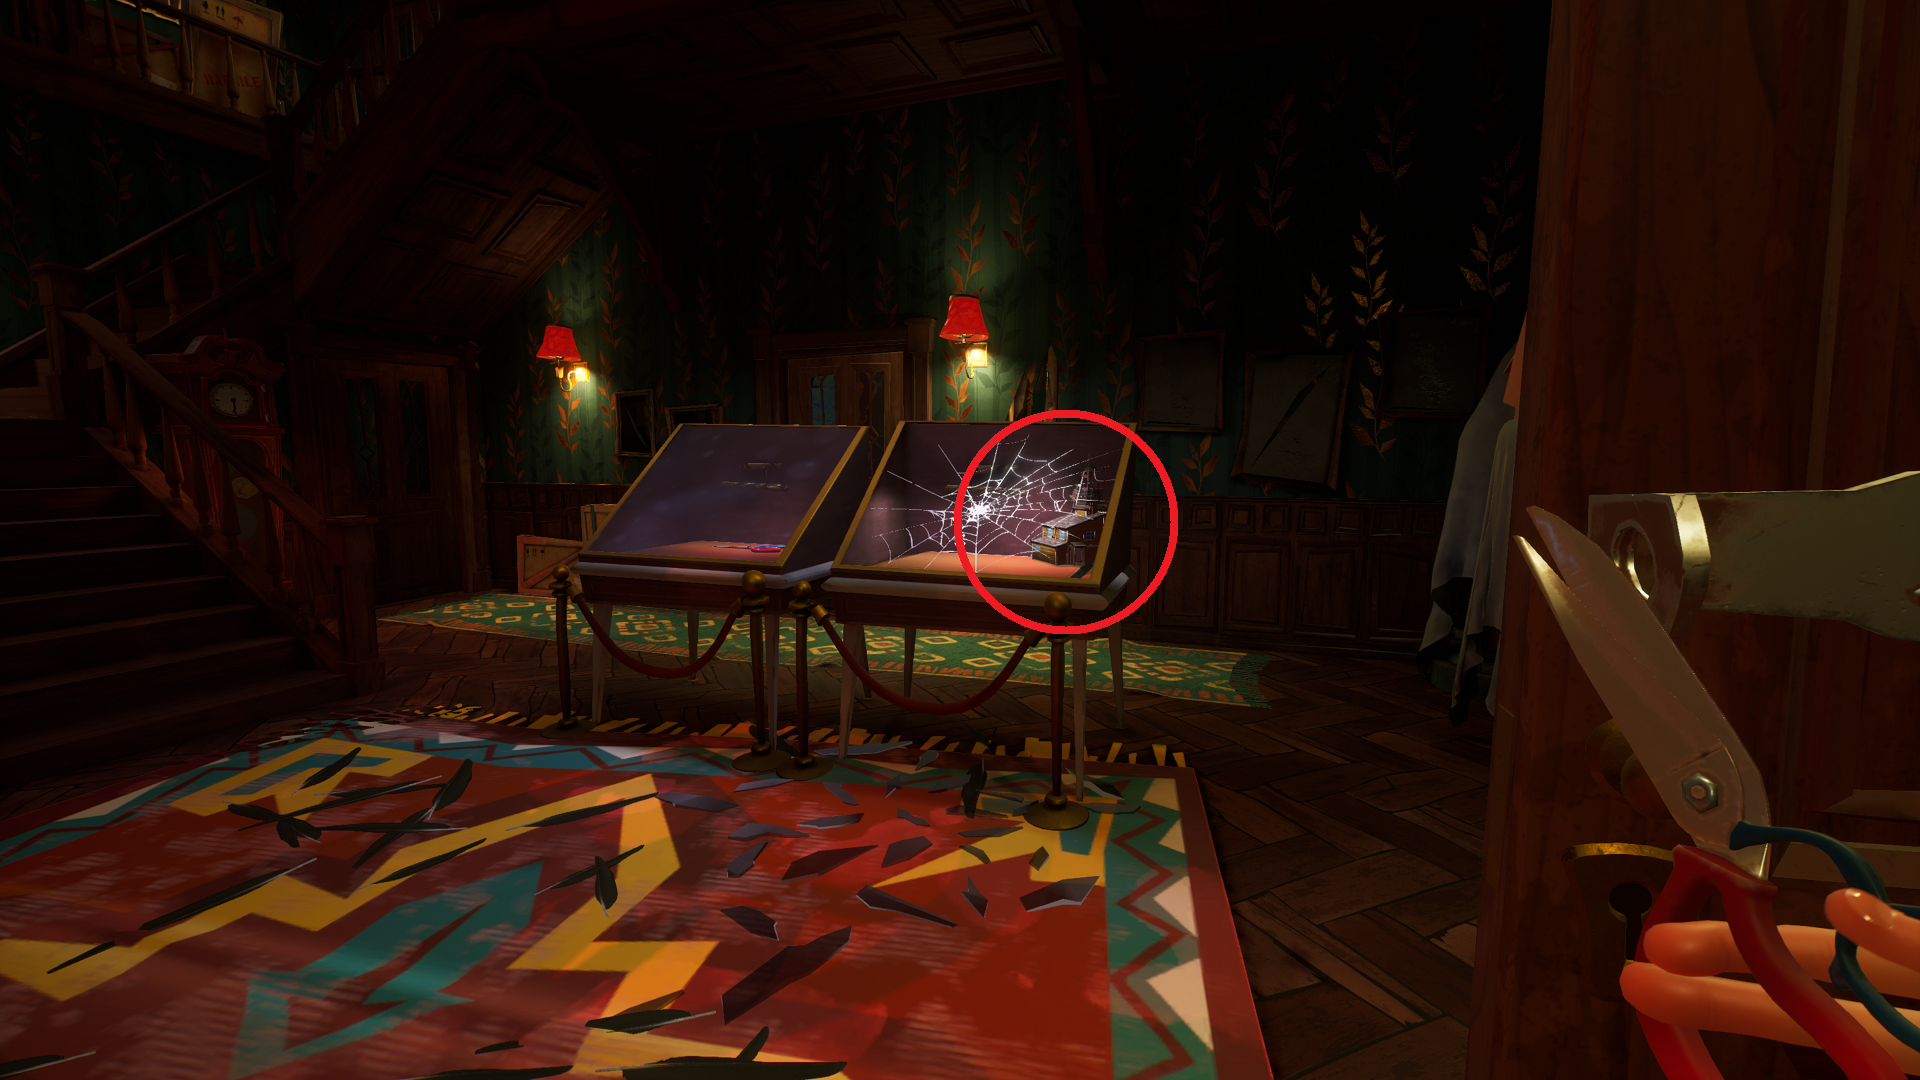
The second model can be found inside the main doors of the Museum, which you just opened and where Peterson is patrolling. Go through the doors, and turn right immediately to see a display case with a spiderweb on it. Cut through the web to grab the brown model. Place it on the far left side of the map.
The third model house, a blue house seemingly representing Peterson’s dungeon dwelling, can be found on the left side of the Museum’s main floor where Peterson is patrolling. It’s in a display case on the far wall opposite the second model house, behind two vertical display cases holding dolls.
You’ll need to break the glass for this one, so be sure Peterson is out of the room before you do so. Go back to the map, and place this model in the middle.
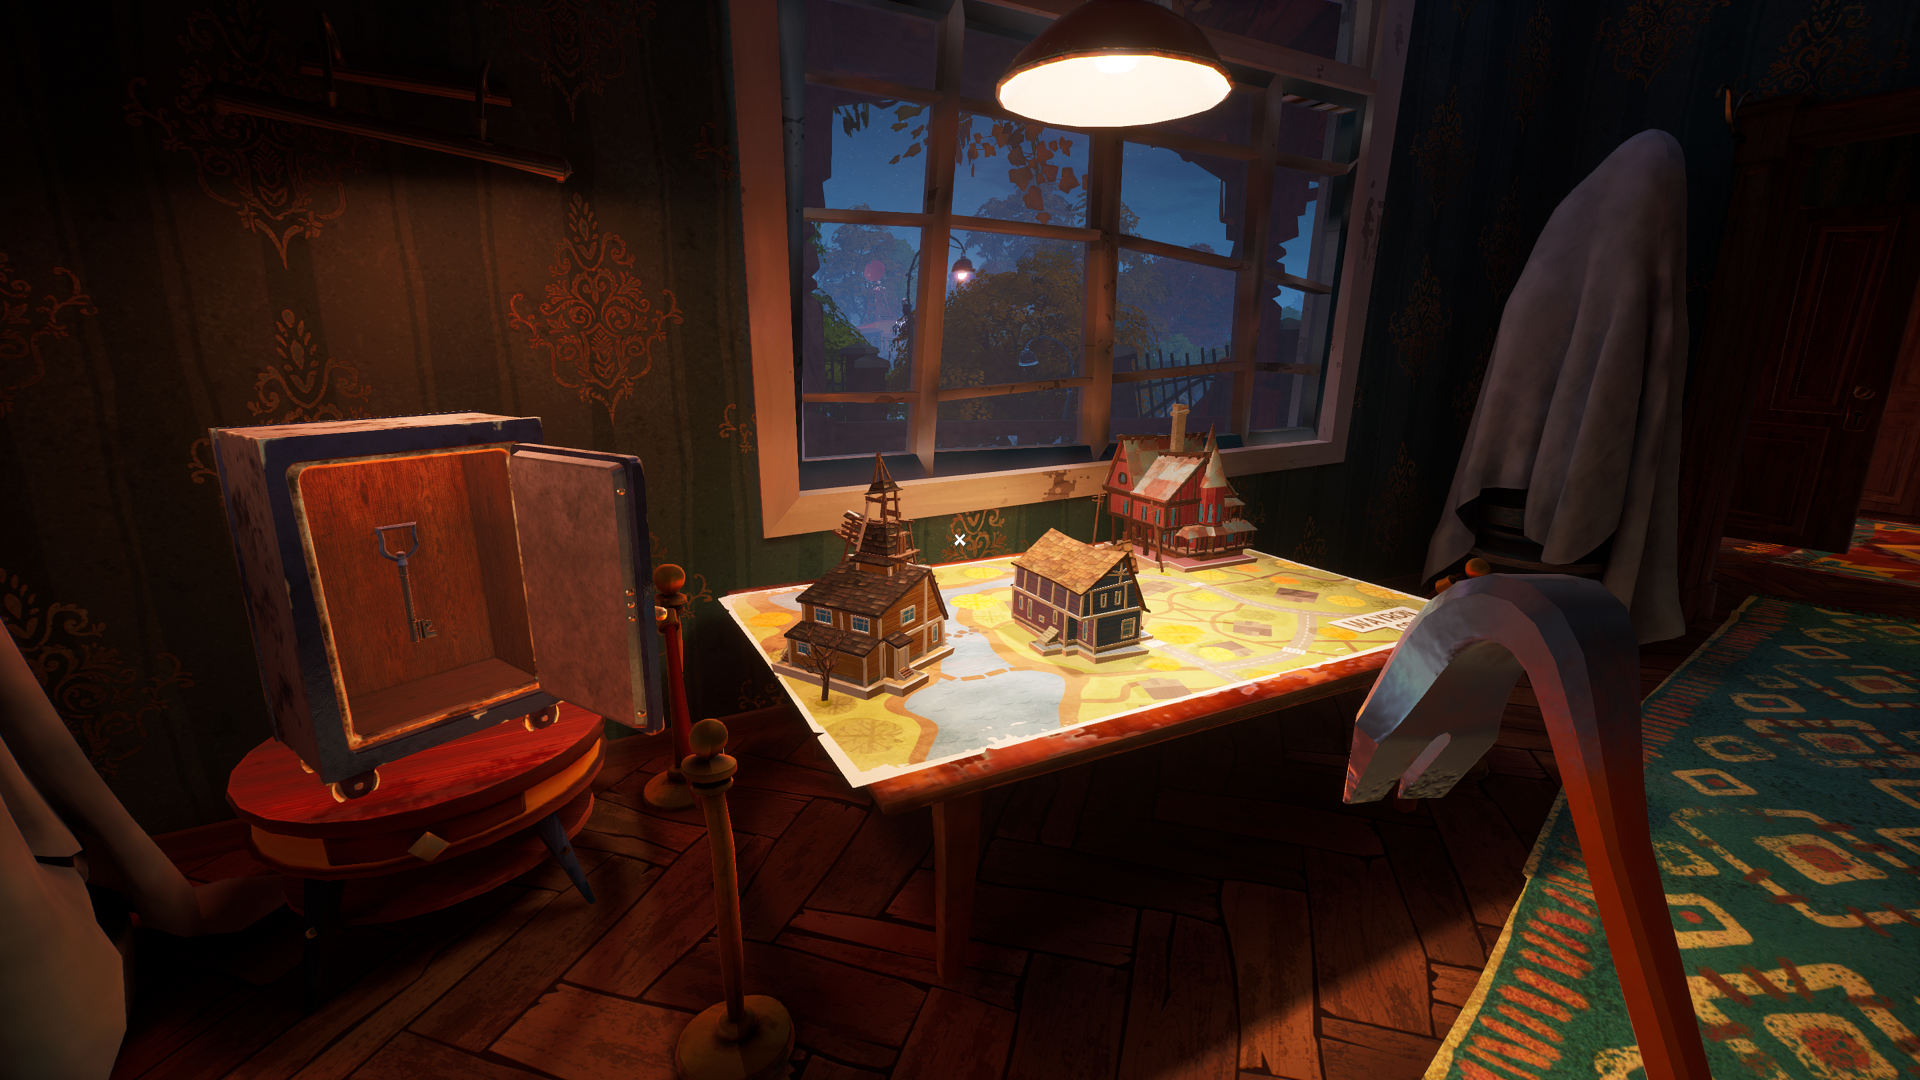
Now place the model houses in the correct locations on the map:
- Red/pink model: upper right corner.
- Brown model: far left side.
- Blue model: middle.
With the model houses in their proper locations, the safe will open and reward you with a key, which opens the door behind you. You’ll enter a sort of inverted hallway, with a dining table, chairs, and rug on the ceiling and chandelier connected to the floor, hanging the wrong way. Use the scissors to cut the cobwebs in the green shelf immediately to your left, and grab the blue lamp sconce.
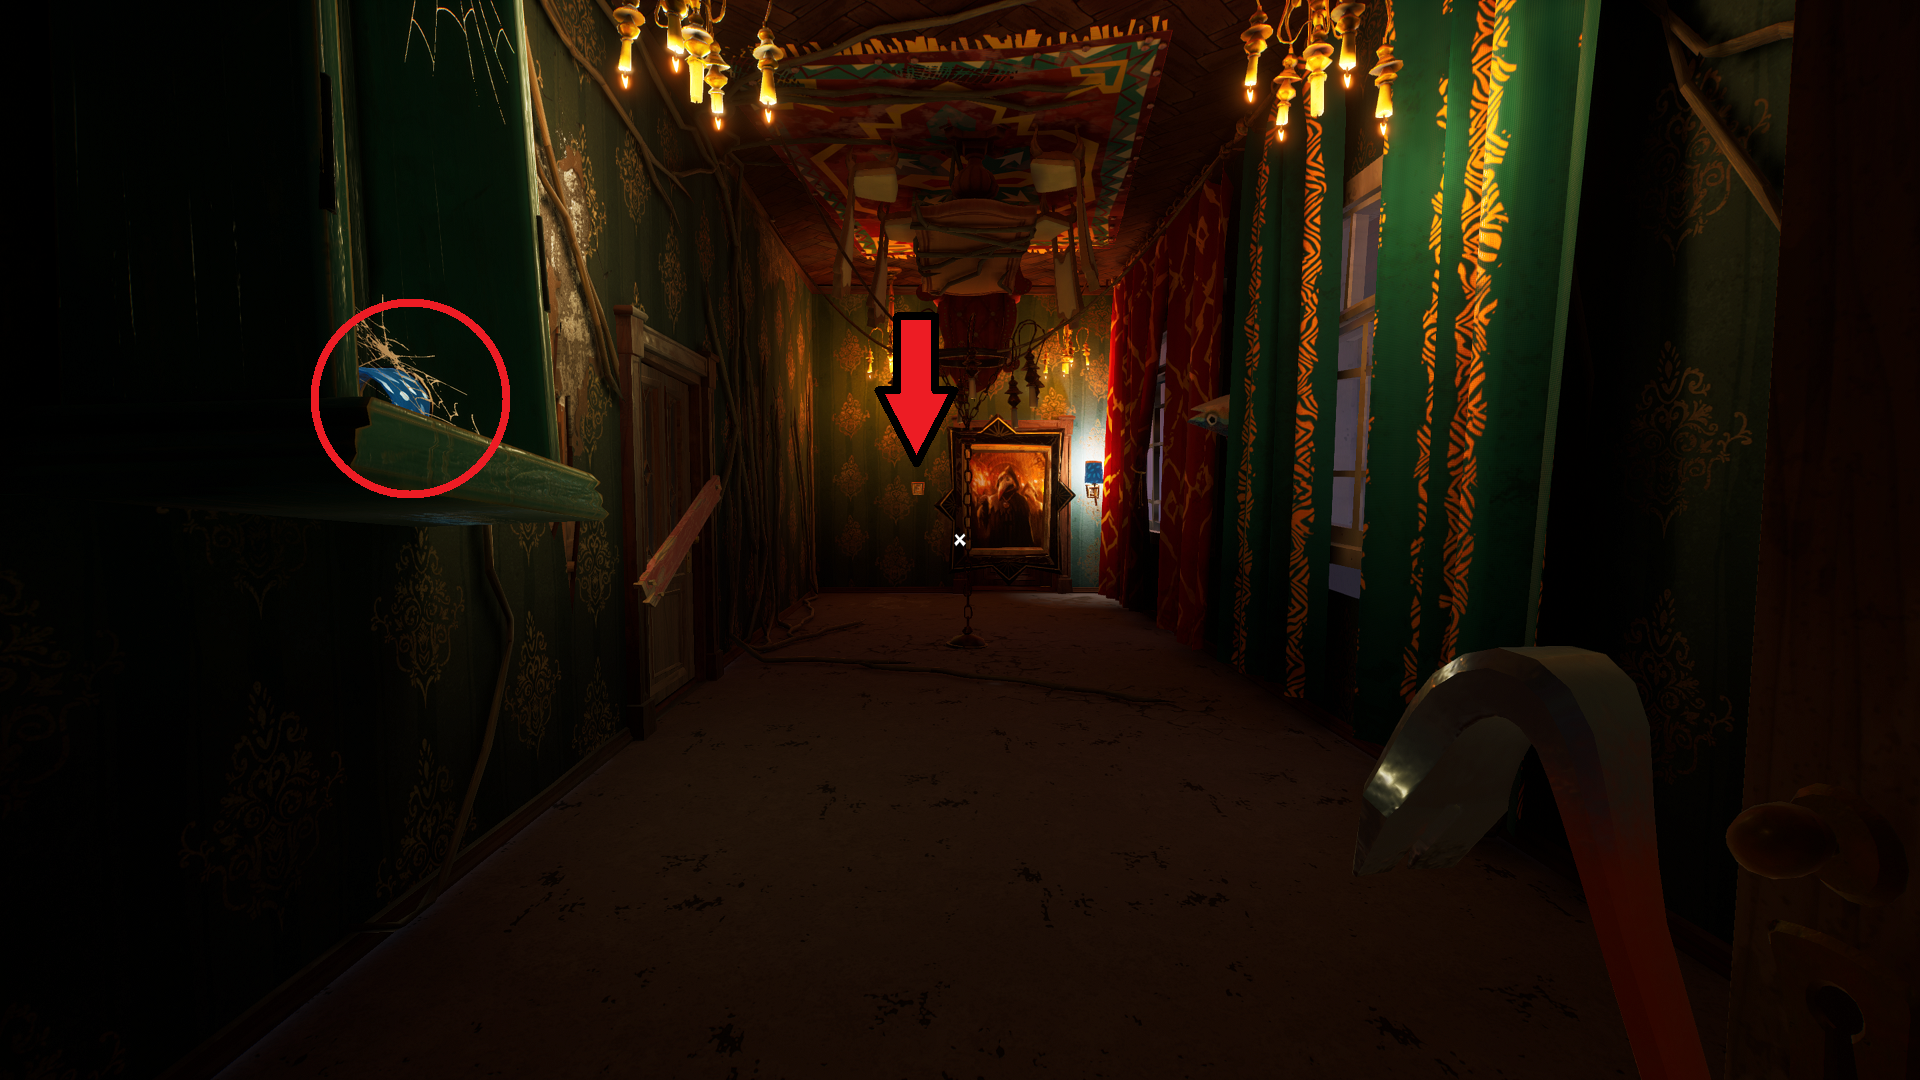
Take the blue lamp sconce to the end of the room, and place it in the receptacle to the left of the plague doctor painting. Pull both of the sconces on either side of the painting to reveal a door covered in another cobweb. Cut the web with the scissors, and go through the door.
There is a scaffolding taking up much of the room on the other side. Directly in front of you, at the base of the scaffolding, is a table surrounded by lit candles. Take the key off of the table on the left side.
With the heart key in hand, the door you’re looking for is in the back left corner on the second floor. Sneak upstairs, go through the door, and interact with the display case on the left side. Grab the picture frame to trigger a cutscene and end Day 2 (note: you don’t have to break the glass to pick up the picture frame in the current version).
And that’s the end of our walkthrough for Hello Neighbor 2 Act 2. On to Act 3 and Mr. Otto’s house!


Published: Dec 13, 2022 02:36 pm