
Hello Neighbor 2 Act 3 once again begins in the TV station following a cutscene that sees you waking up in bed. As with each previous day, look at the monitors in the room to see where you need to go. This time, it appears to be a brown house on the town’s lake, located behind Peterson’s house. Of course, plenty of puzzles await.
During Day 3, you’ll need to escape Mr. Otto, the taxidermist, who roams around the lakeside house with a shotgun (and definitely shoots without asking any questions). The puzzles for this act are a bit more spread out than in previous acts, but this walkthrough guide is here to help get your through it.
The ultimate goal in Hello Neighbor 2 Act 3 is to find four map pieces spread throughout Mr. Otto’s house, then place them in the correct positions on a corkboard found on the second floor of the house. This will lead you to a buried safe and a Museum key — which will lead you to another safe with a camera inside.
Hello Neighbor 2 Act 3 Walkthrough

Mr. Otto’s house is the brown house with a tower by the lake. It can be found behind Peterson’s house, across a small creek.
How to Solve the Basement Chest Puzzle

Once you reach Mr. Otto’s house, enter either of the first-floor windows (on the left or right side). You’ll be in the basement, with a taxidermied bear in the middle. Inspect the bear to take the switch for the bear puzzle later, then use the crowbar to pull the boards down blocking the chest on the left side.
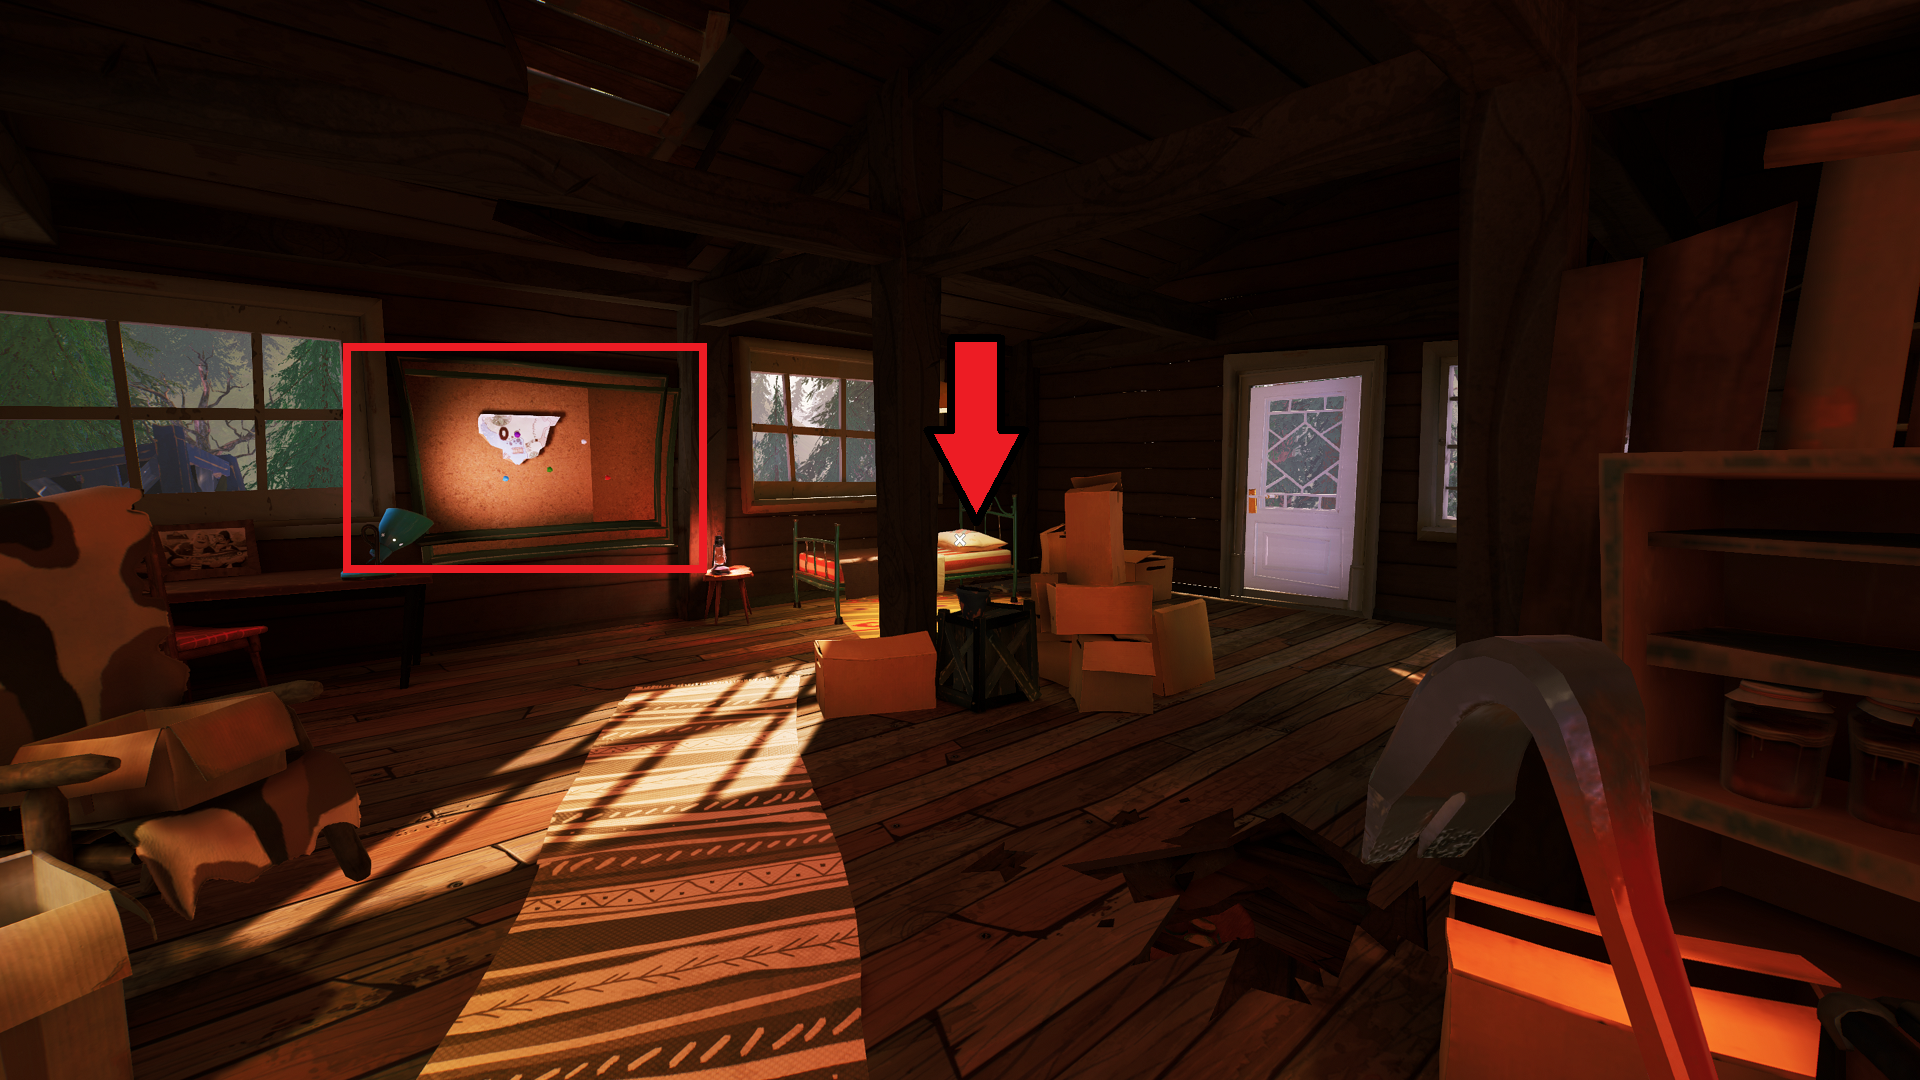
Go up the stairs from the basement, through the white door, then immediately left on the first floor to take another stairwell up to the second floor. There is a bed in the back left corner of the room. You’ll also notice a corkboard by the bed with a single map piece tacked to it; this is where you’ll put the other four map pieces you find.
Equip the scissors, and cut open the pillow on the bed to get a key. Go back down to the basement to open the chest and get your first map fragment. This fragment goes in the lower left corner of the corkboard.
How to Solve the Taxidermied Bear Puzzle
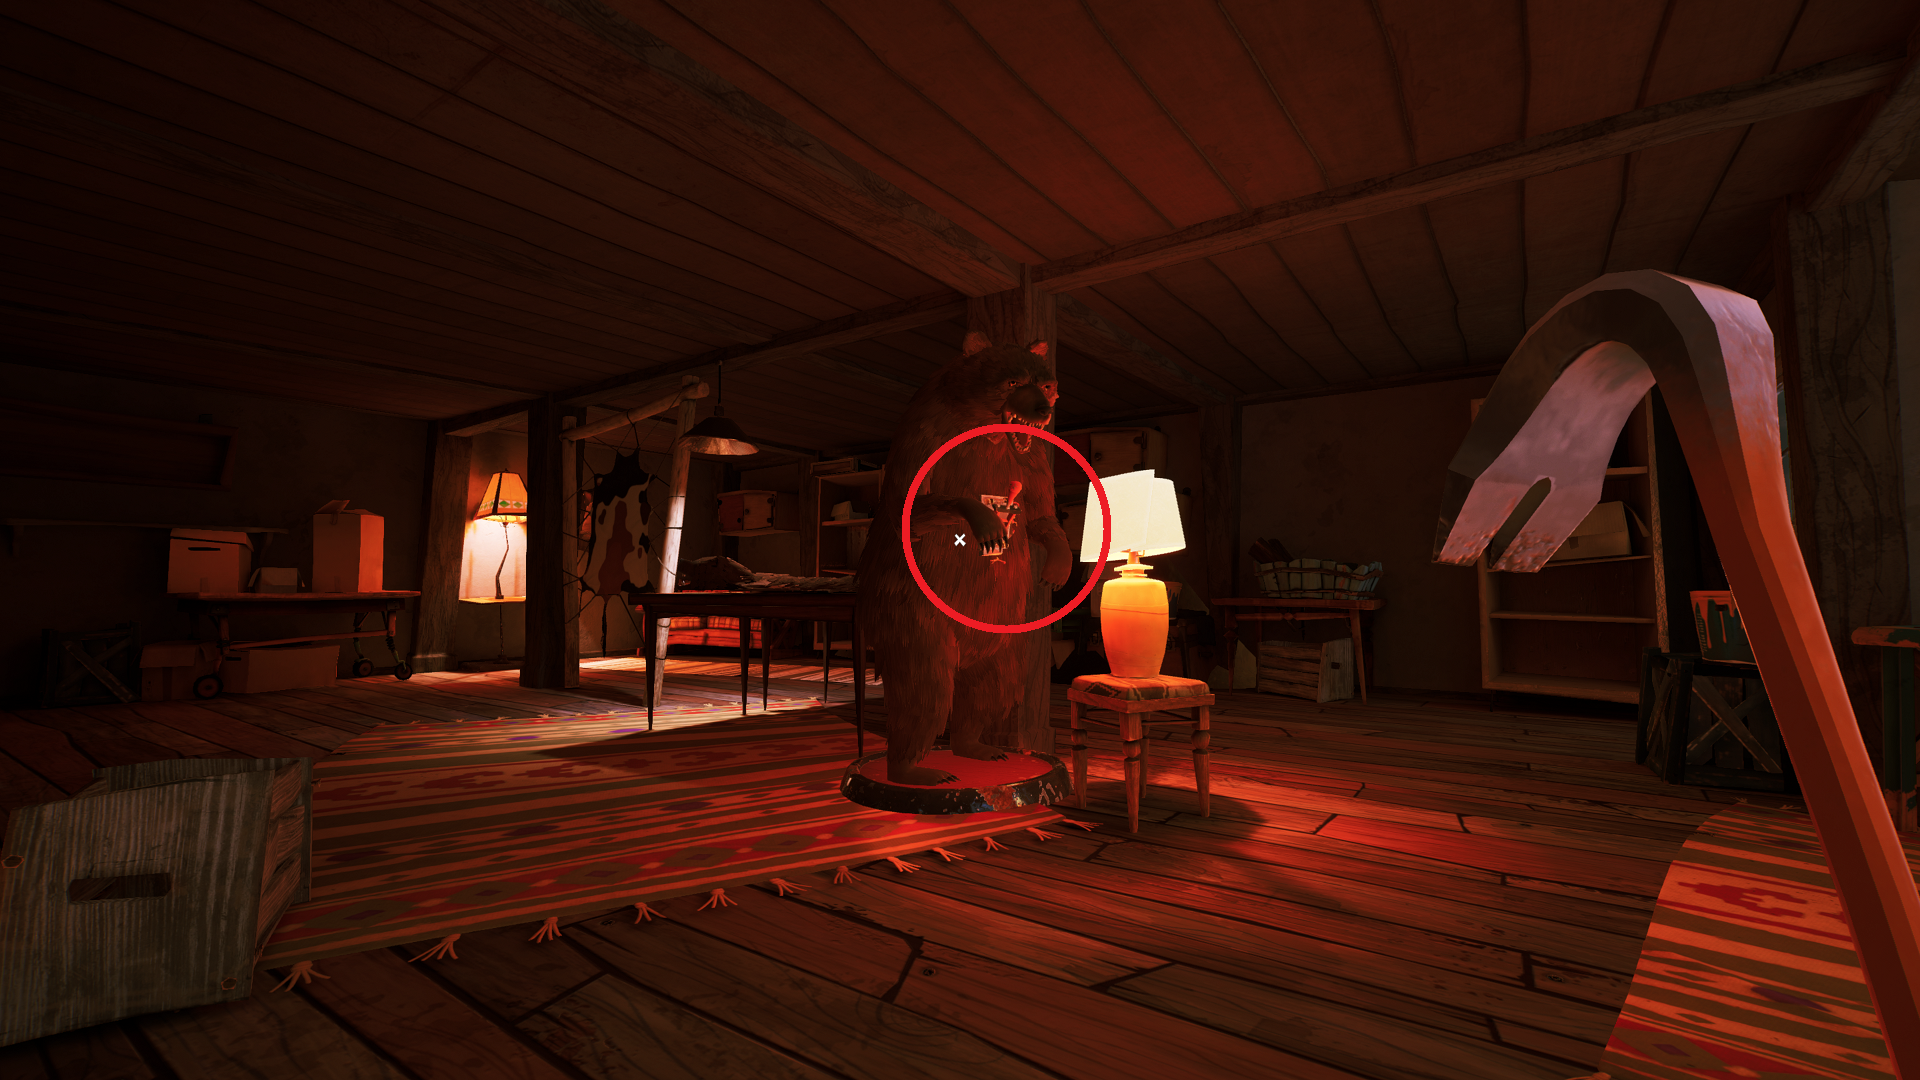
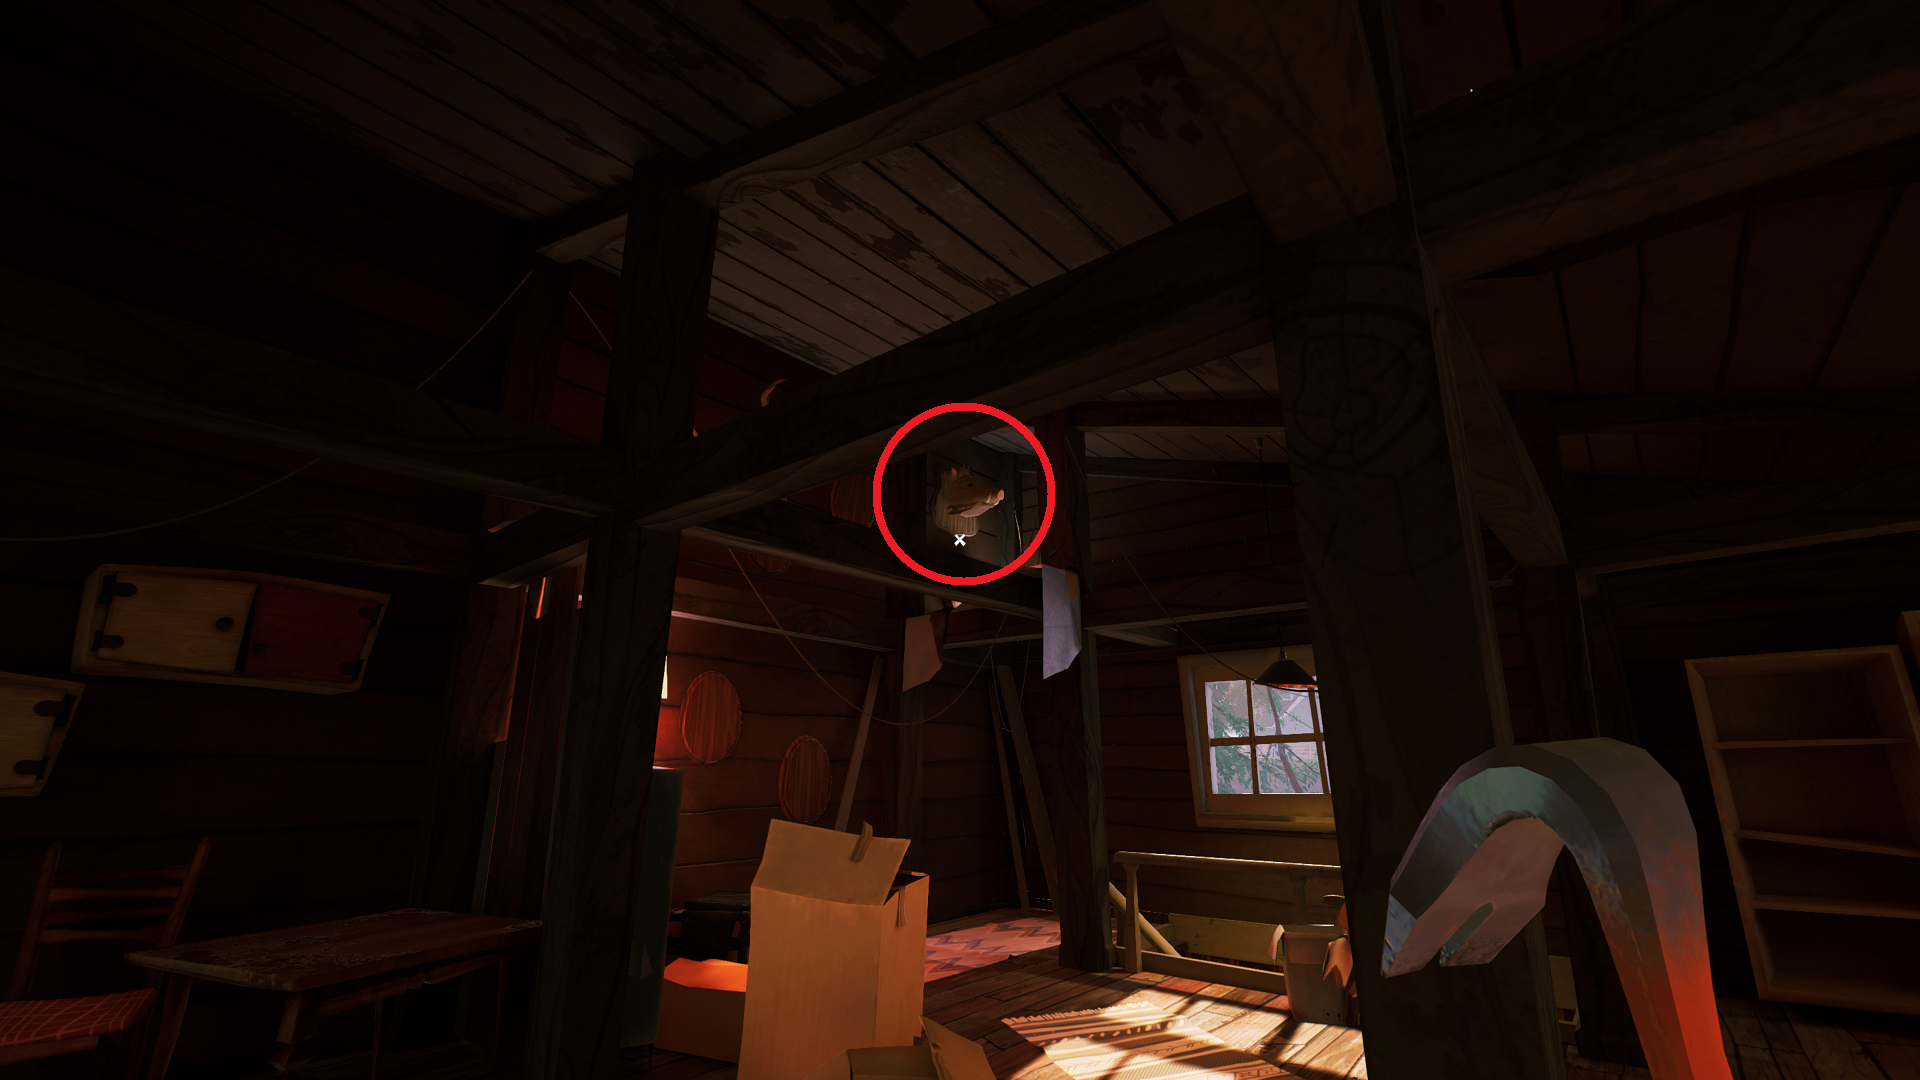
With the switch from the basement taxidermied bear in hand, go back upstairs to the first floor, and go through the white door on the right side, opposite the kitchen, along the wall with the holes and the camouflage chair.
Turn right through the door, and you’ll see another taxidermied bear in the far back corner; this one has a map fragment in its mouth. Place the switch handle you found on the bear in the basement on this bear, and interact with it. The map piece will lower so you can grab it. This fragment goes in the upper right corner of the corkboard.
How to Solve the Refrigerator Puzzle for the Antlers
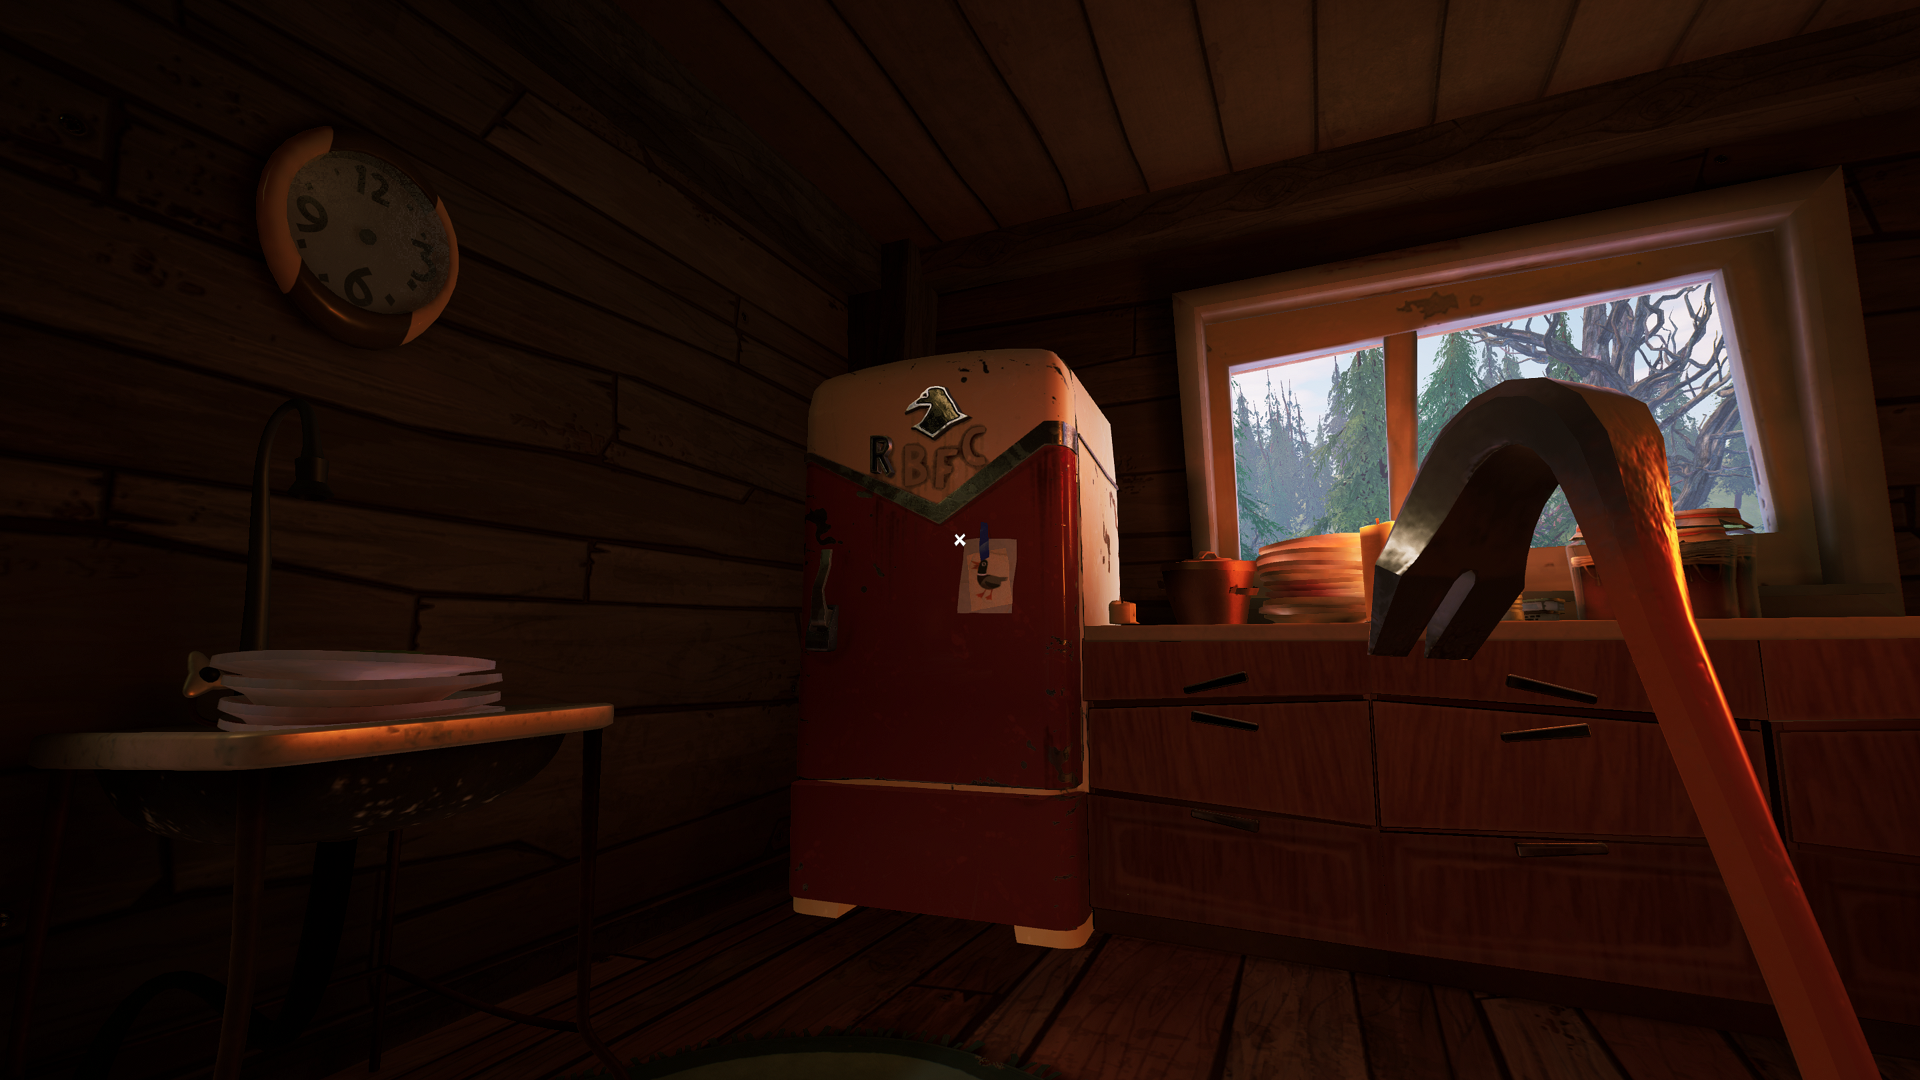
This puzzle is one of the most involved of Act 3. If you look at the refrigerator in the kitchen, you’ll notice that it’s missing three letters: “F”, “B”, and “C”. Opening it requires finding the three letters spread throughout Mr. Otto’s house and placing them on the refrigerator.
Refrigerator Letter Locations
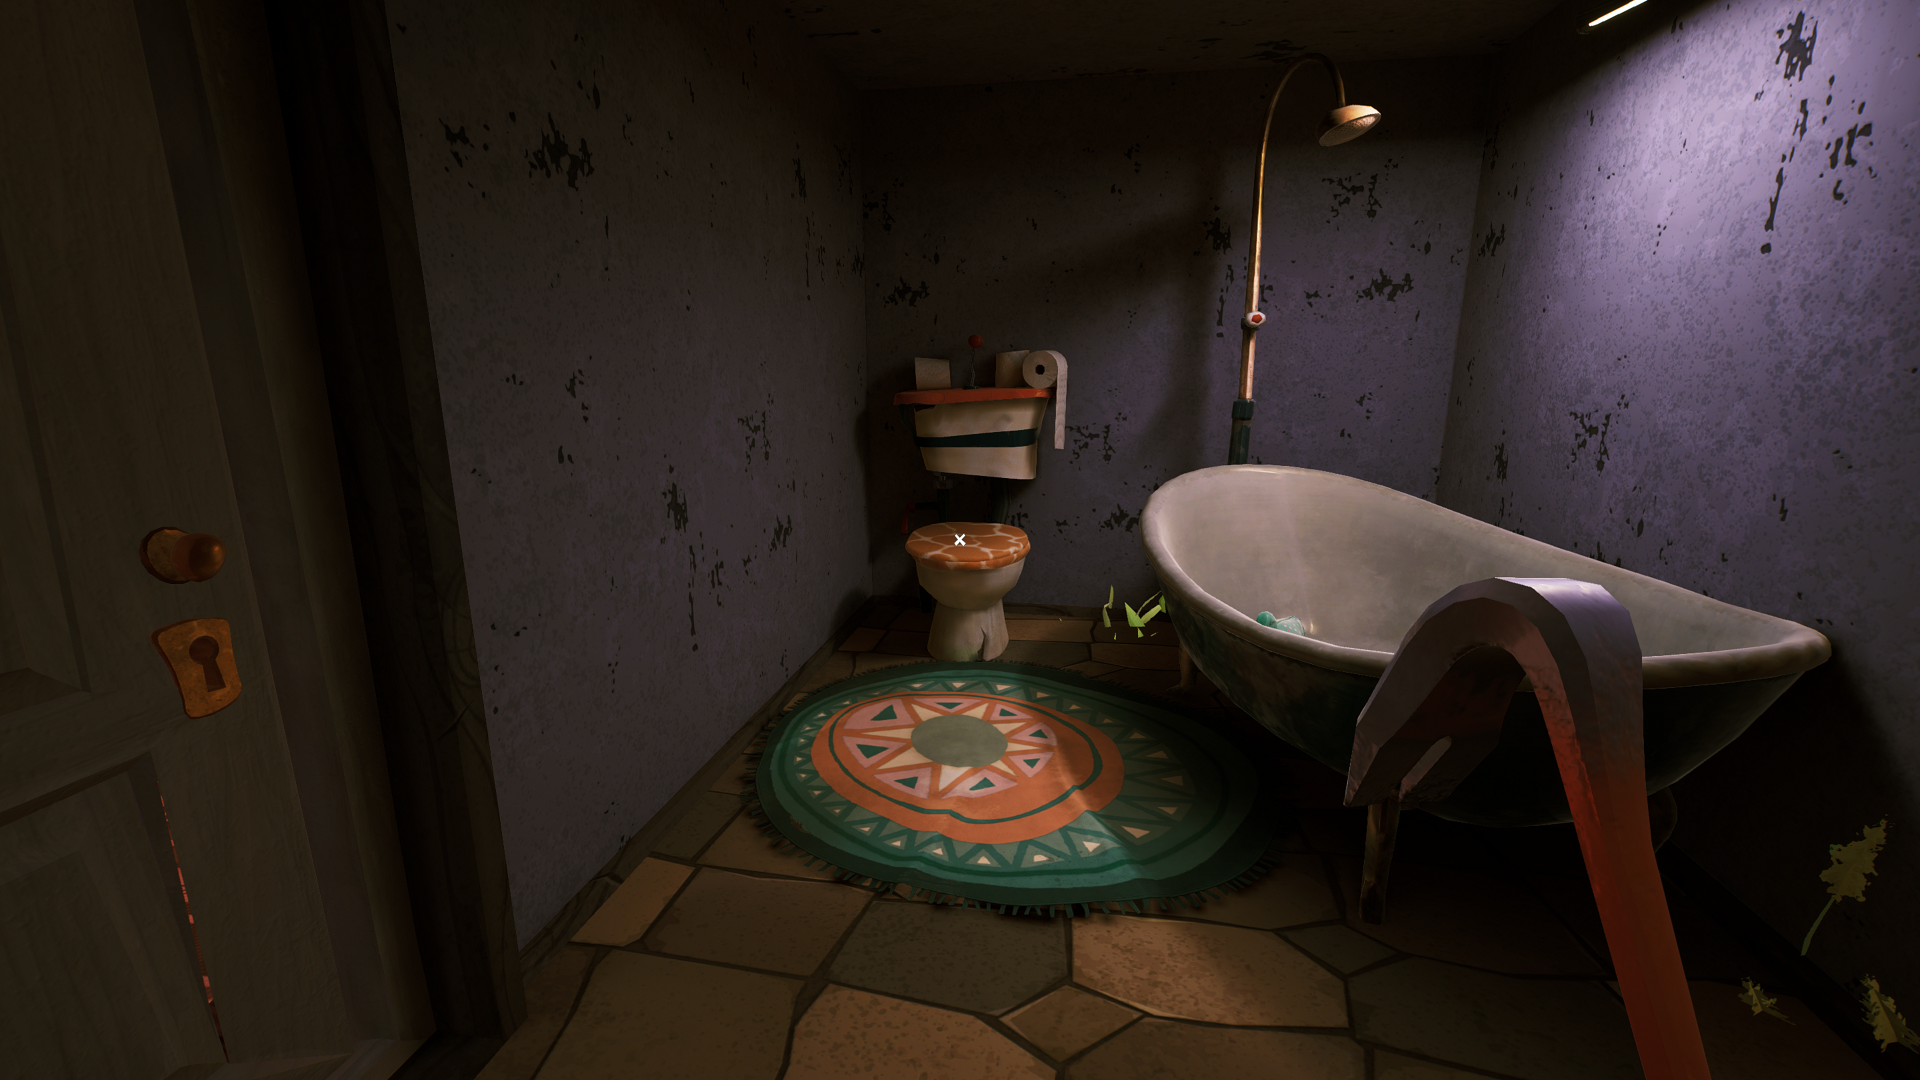
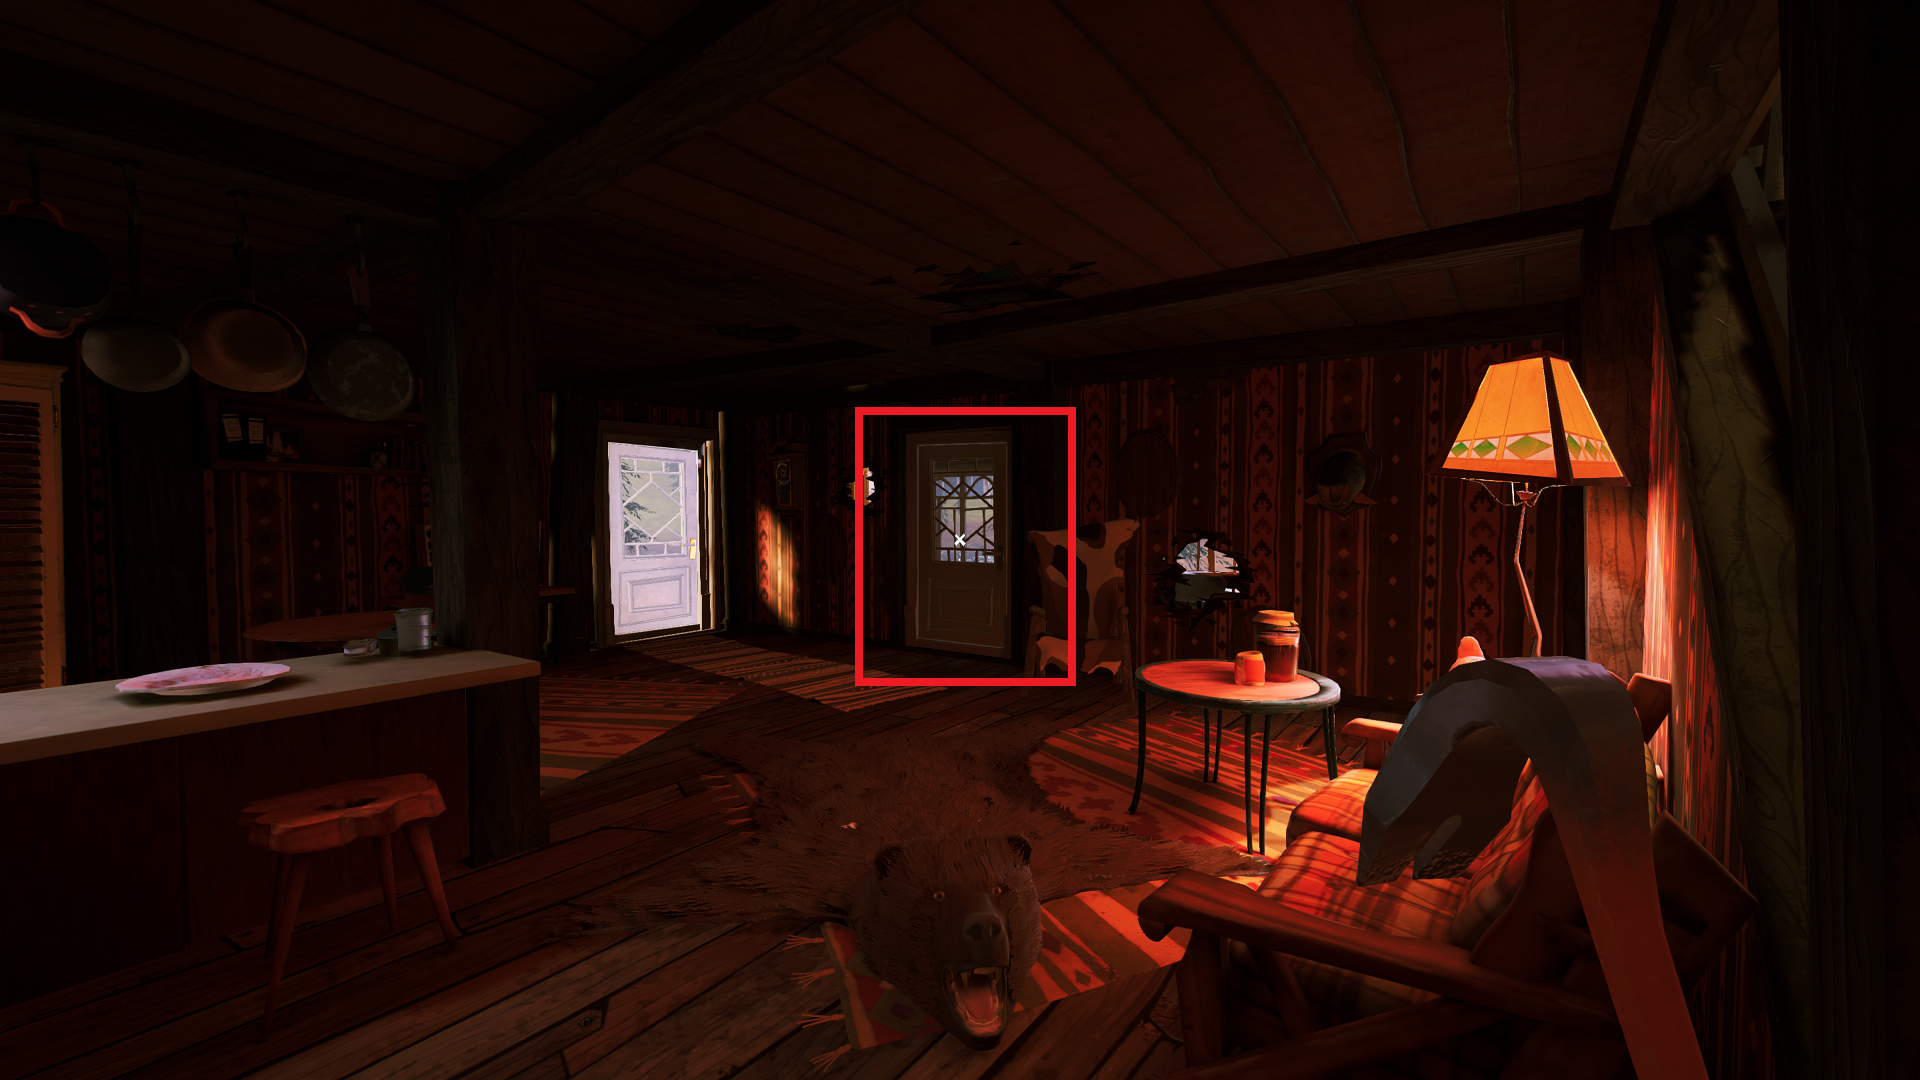
Letter F can be found underneath the toilet seat in the bathroom, which is located next to the kitchen. Use the door opposite the stairs leading to the second floor, to the left of the boar’s head on the wall by the microwave. Lift the seat to find it.
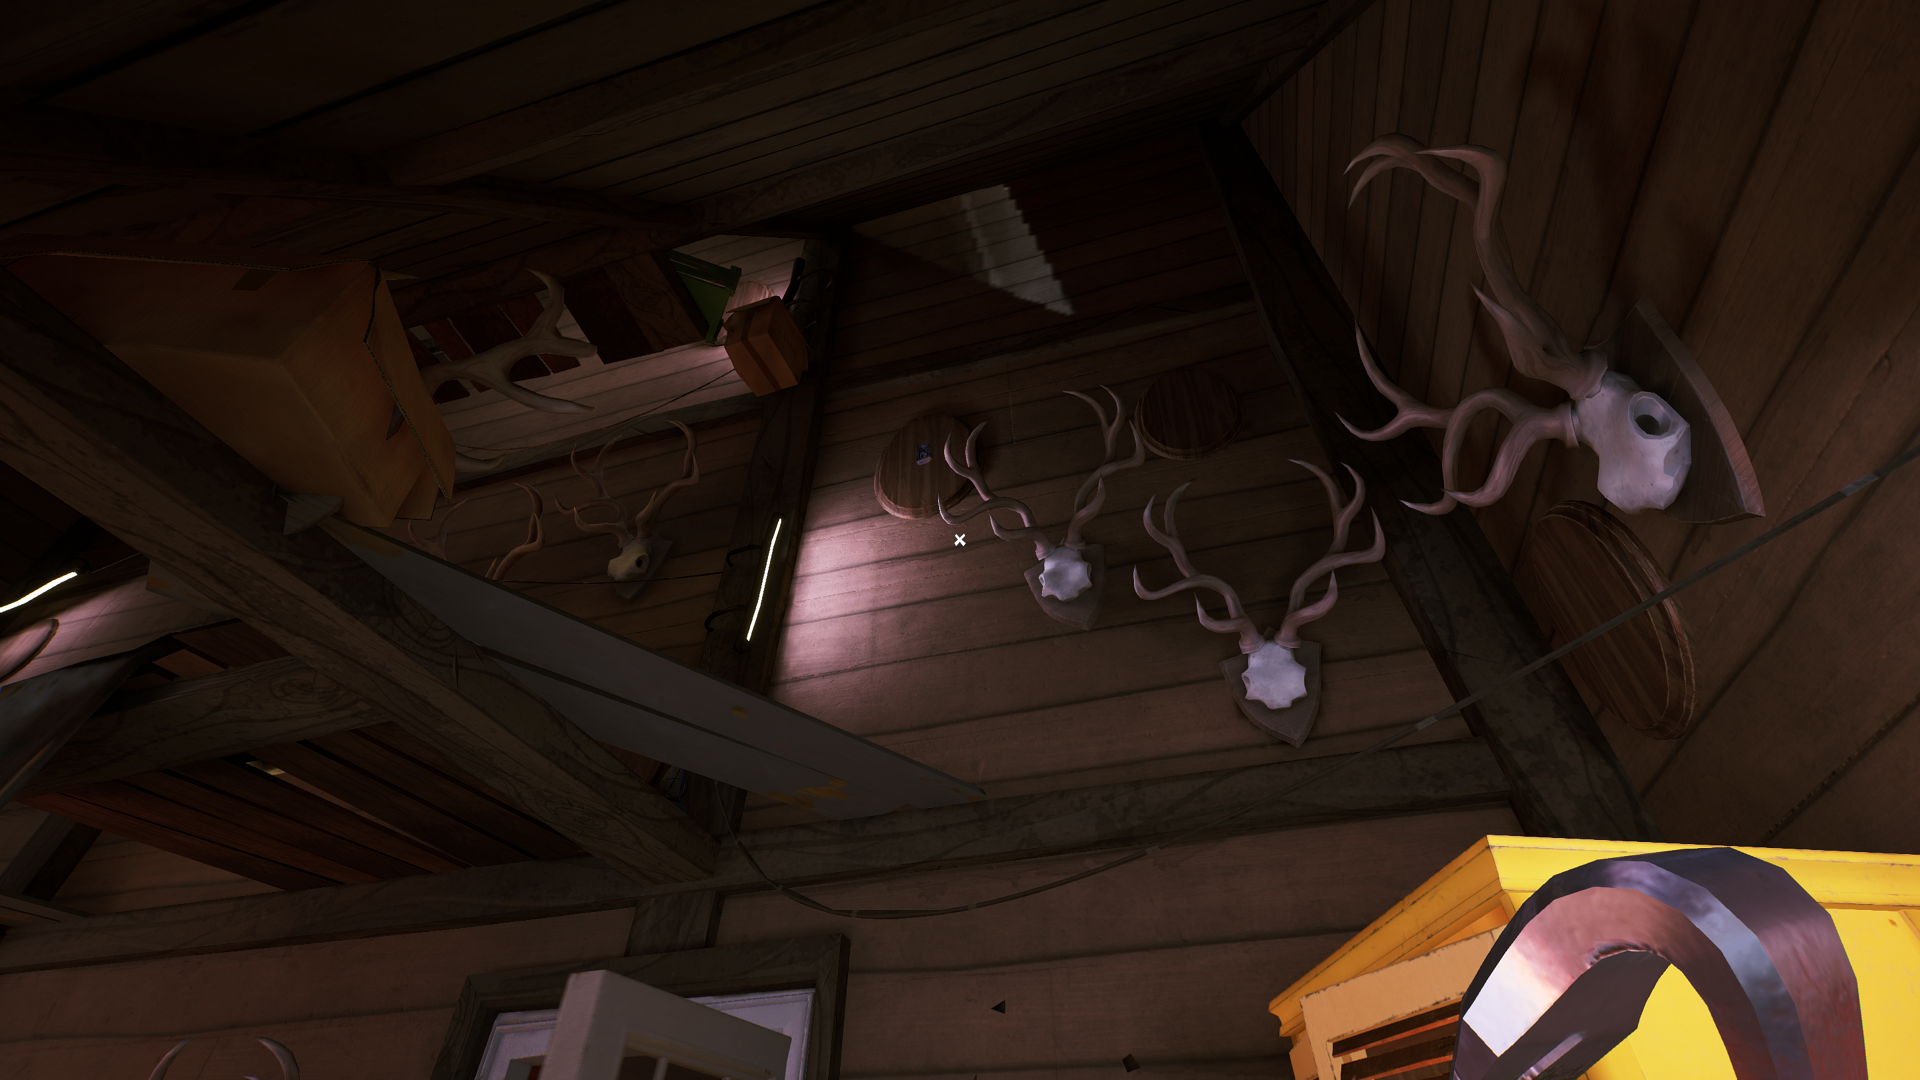
Letter B can be found in the same room as the taxidermied bear on the first floor, through the door on the wall with the holes, by the camouflage chair. Once through the door, turn left and climb up the hiding cabinet. There are numerous antlers mounted to the wall, but high up, you’ll notice one mount without any antlers. Instead, the Letter B is on it. Climb up the platforms to get it.
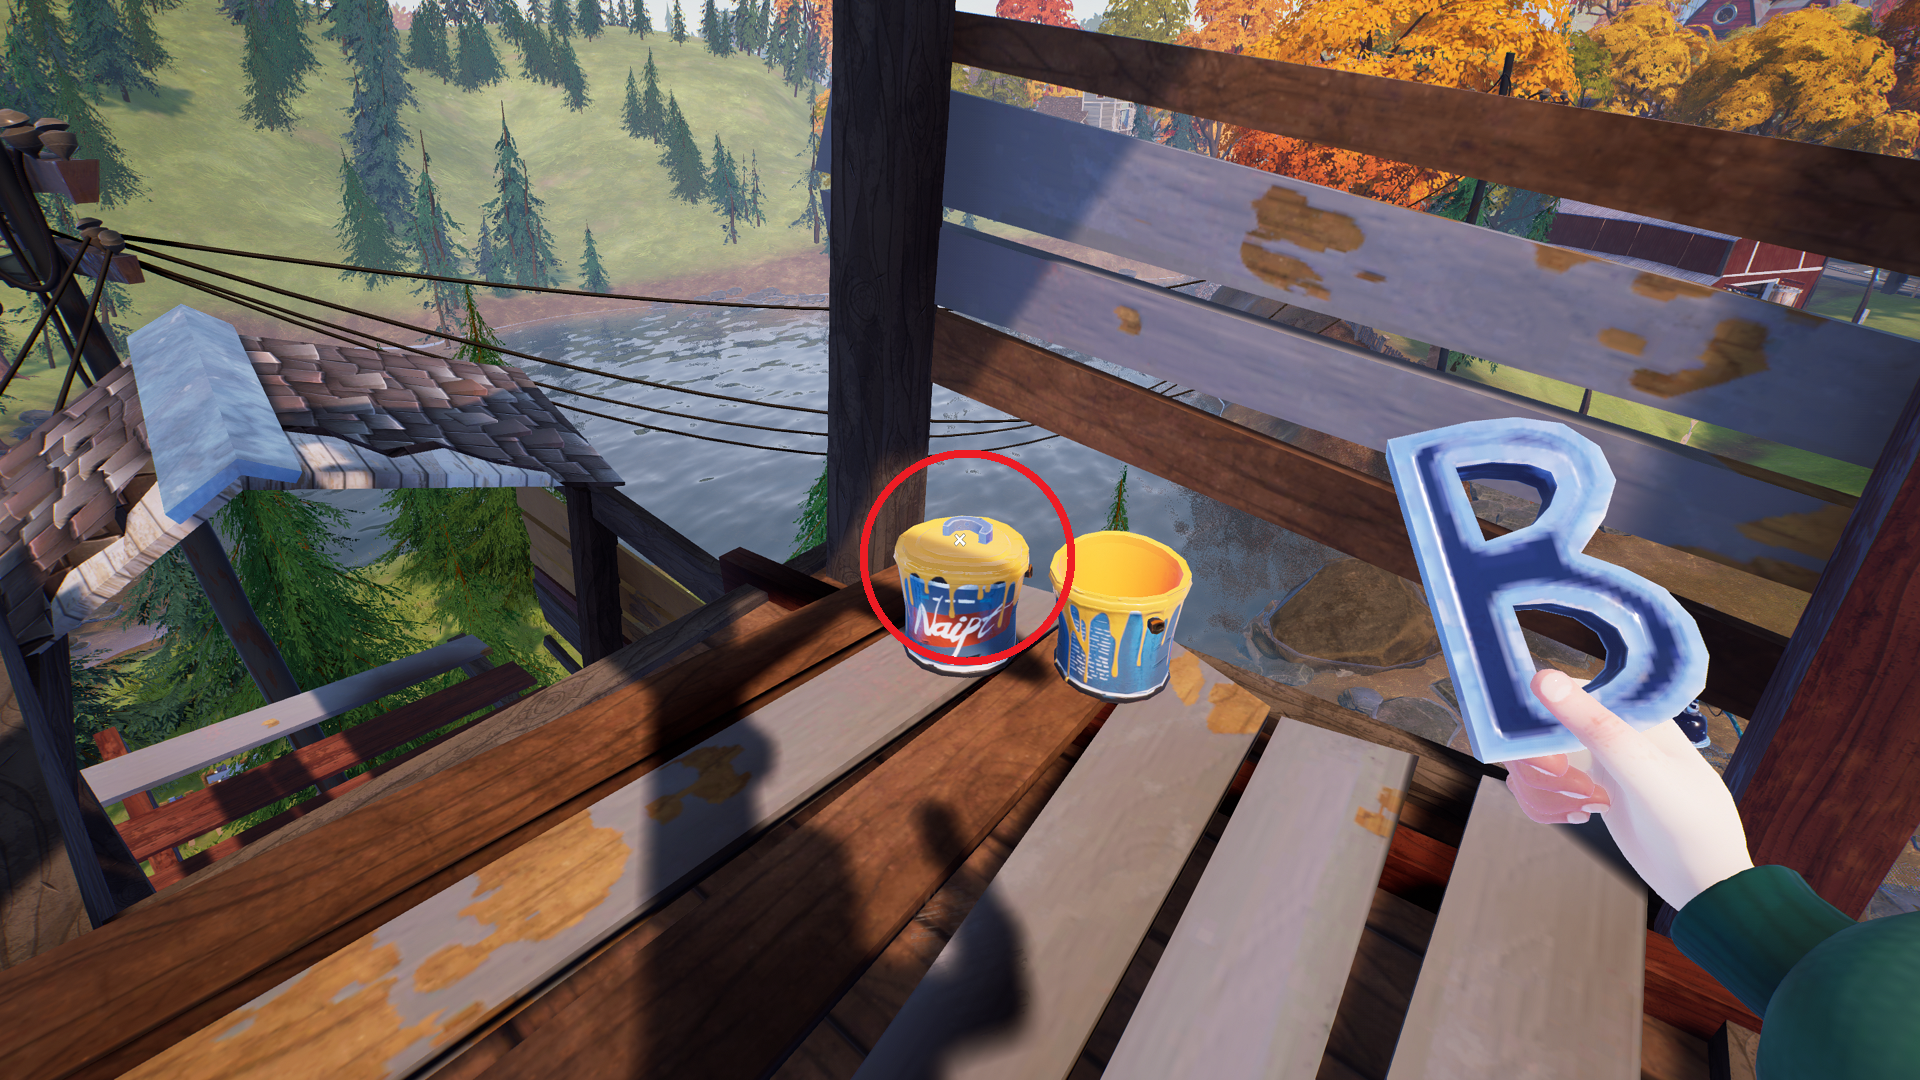
Letter C can be found high up on the roof of the house. From the last letter, climb the boards until you reach a window on the right side. Go through the window, and follow the boards up to the peak of the roof, then higher up the tower. You’ll reach a platform with two yellow paint cans on the right side. The Letter C is on one of the paint cans. Be sure to drop down just beyond the Letter to find the shovel for later in the area if you don’t have a shovel already.
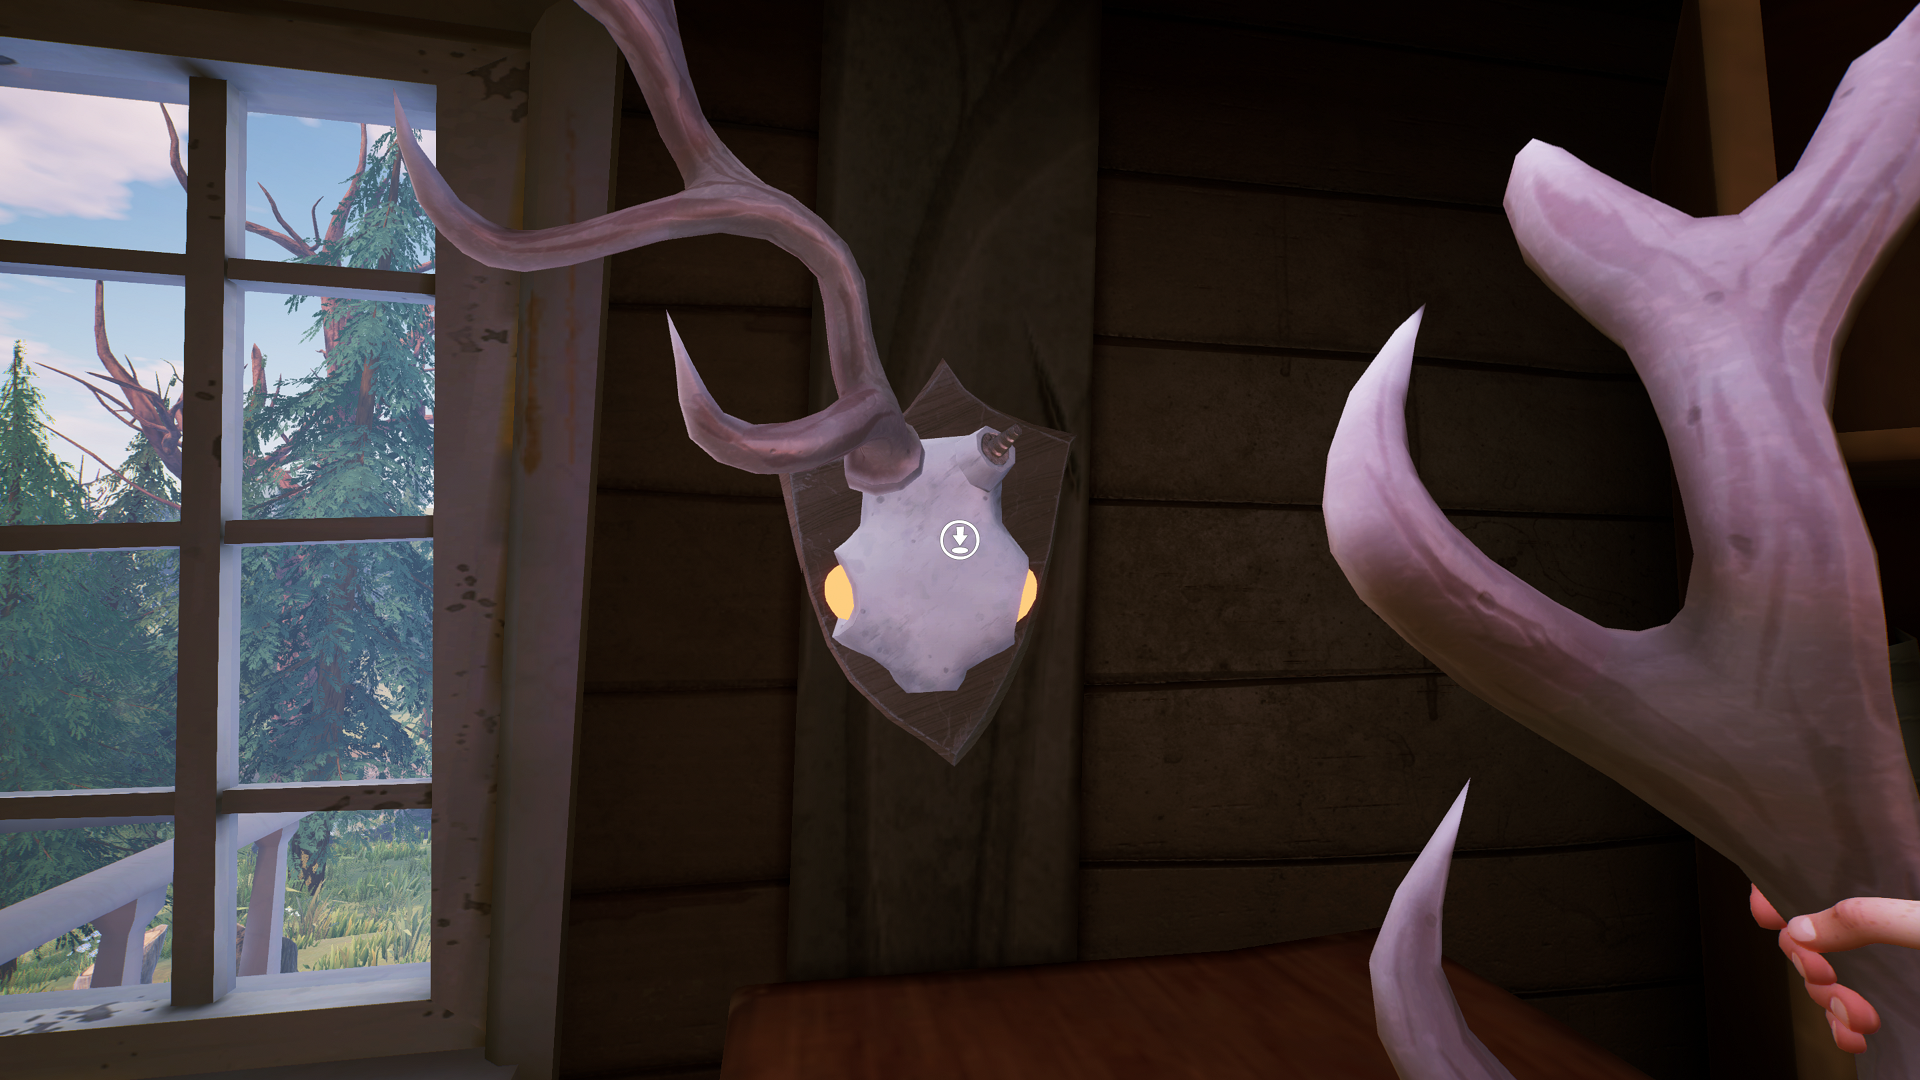
Return to the kitchen, and place the letters on the refrigerator to open it and get the antlers inside. Now take the antlers up to the second floor bedroom, and place them on the mount on the wall in the back right corner. This opens a secret compartment in the bookcase to your right, just as completing the photo frame puzzle in Act 1 did. Take the third map piece, which goes in the middle of the corkboard map.
How to Solve the Microwave Puzzle
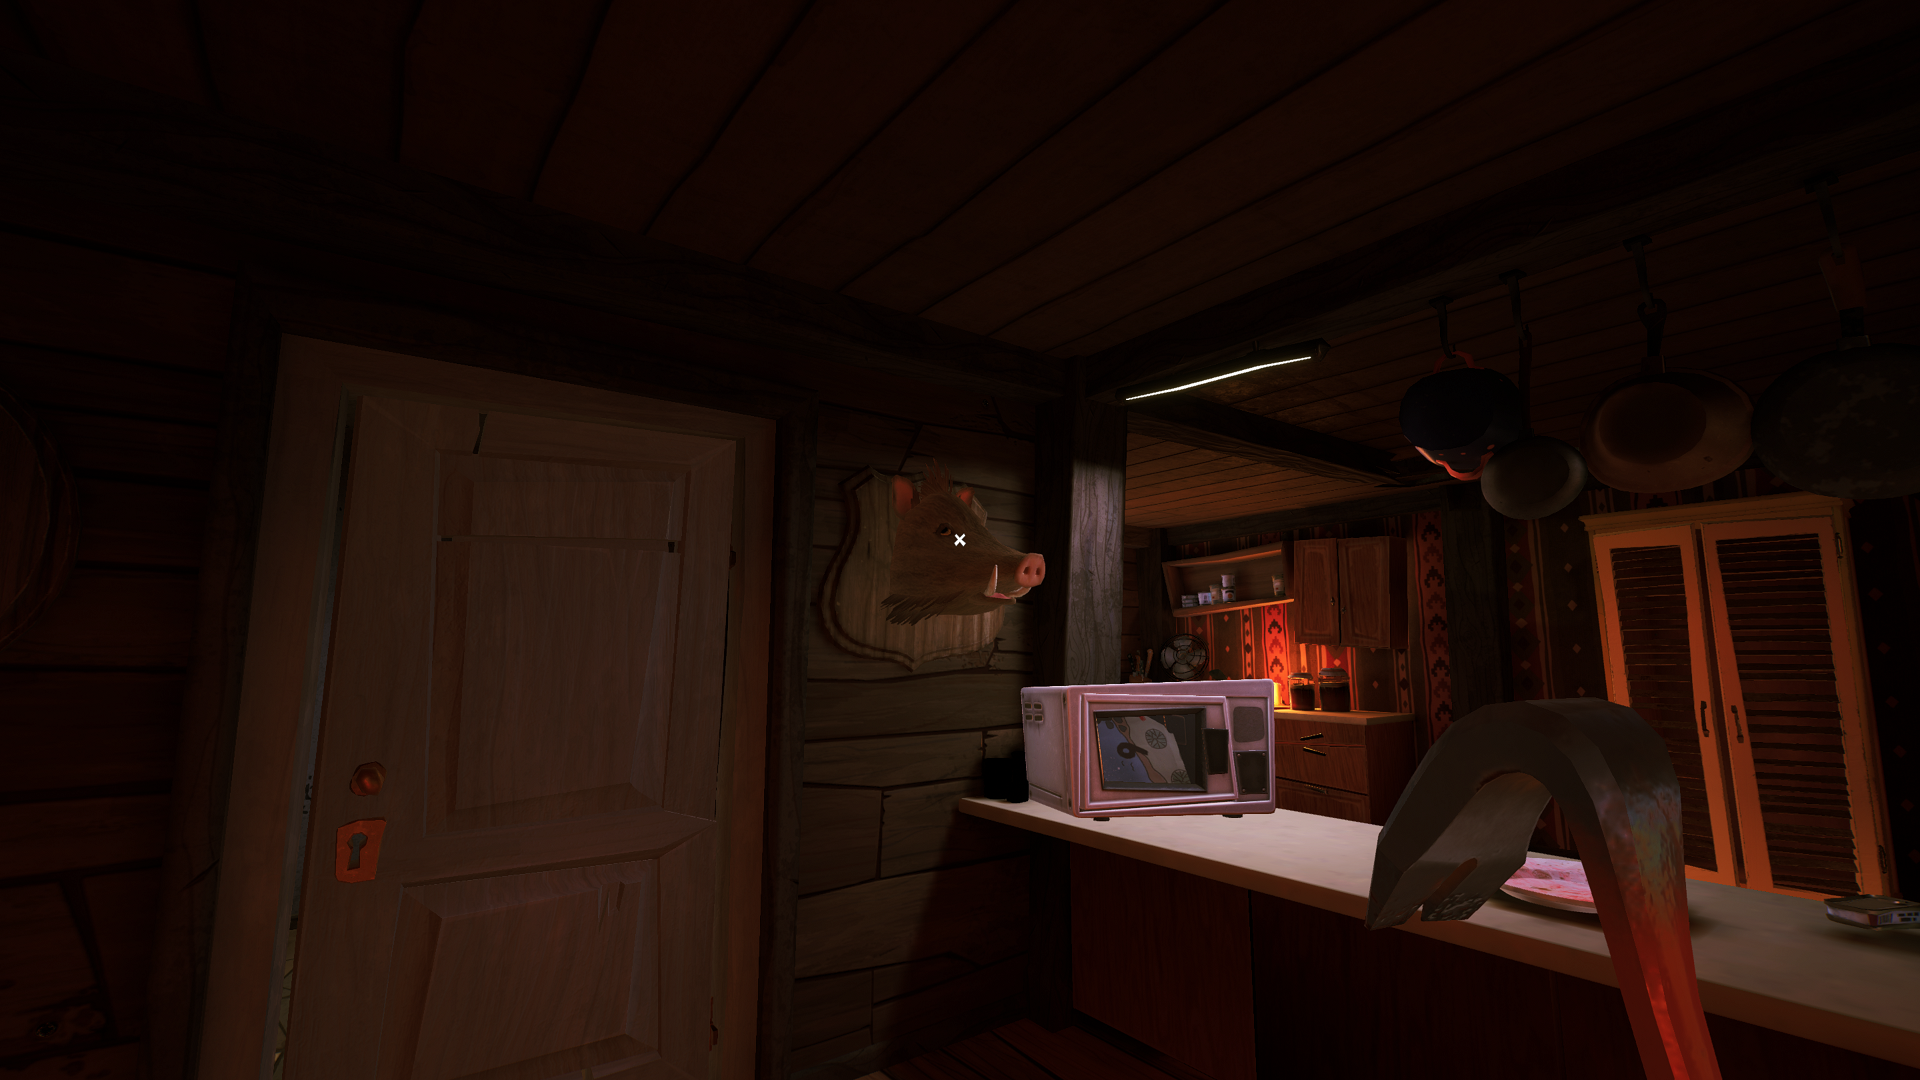
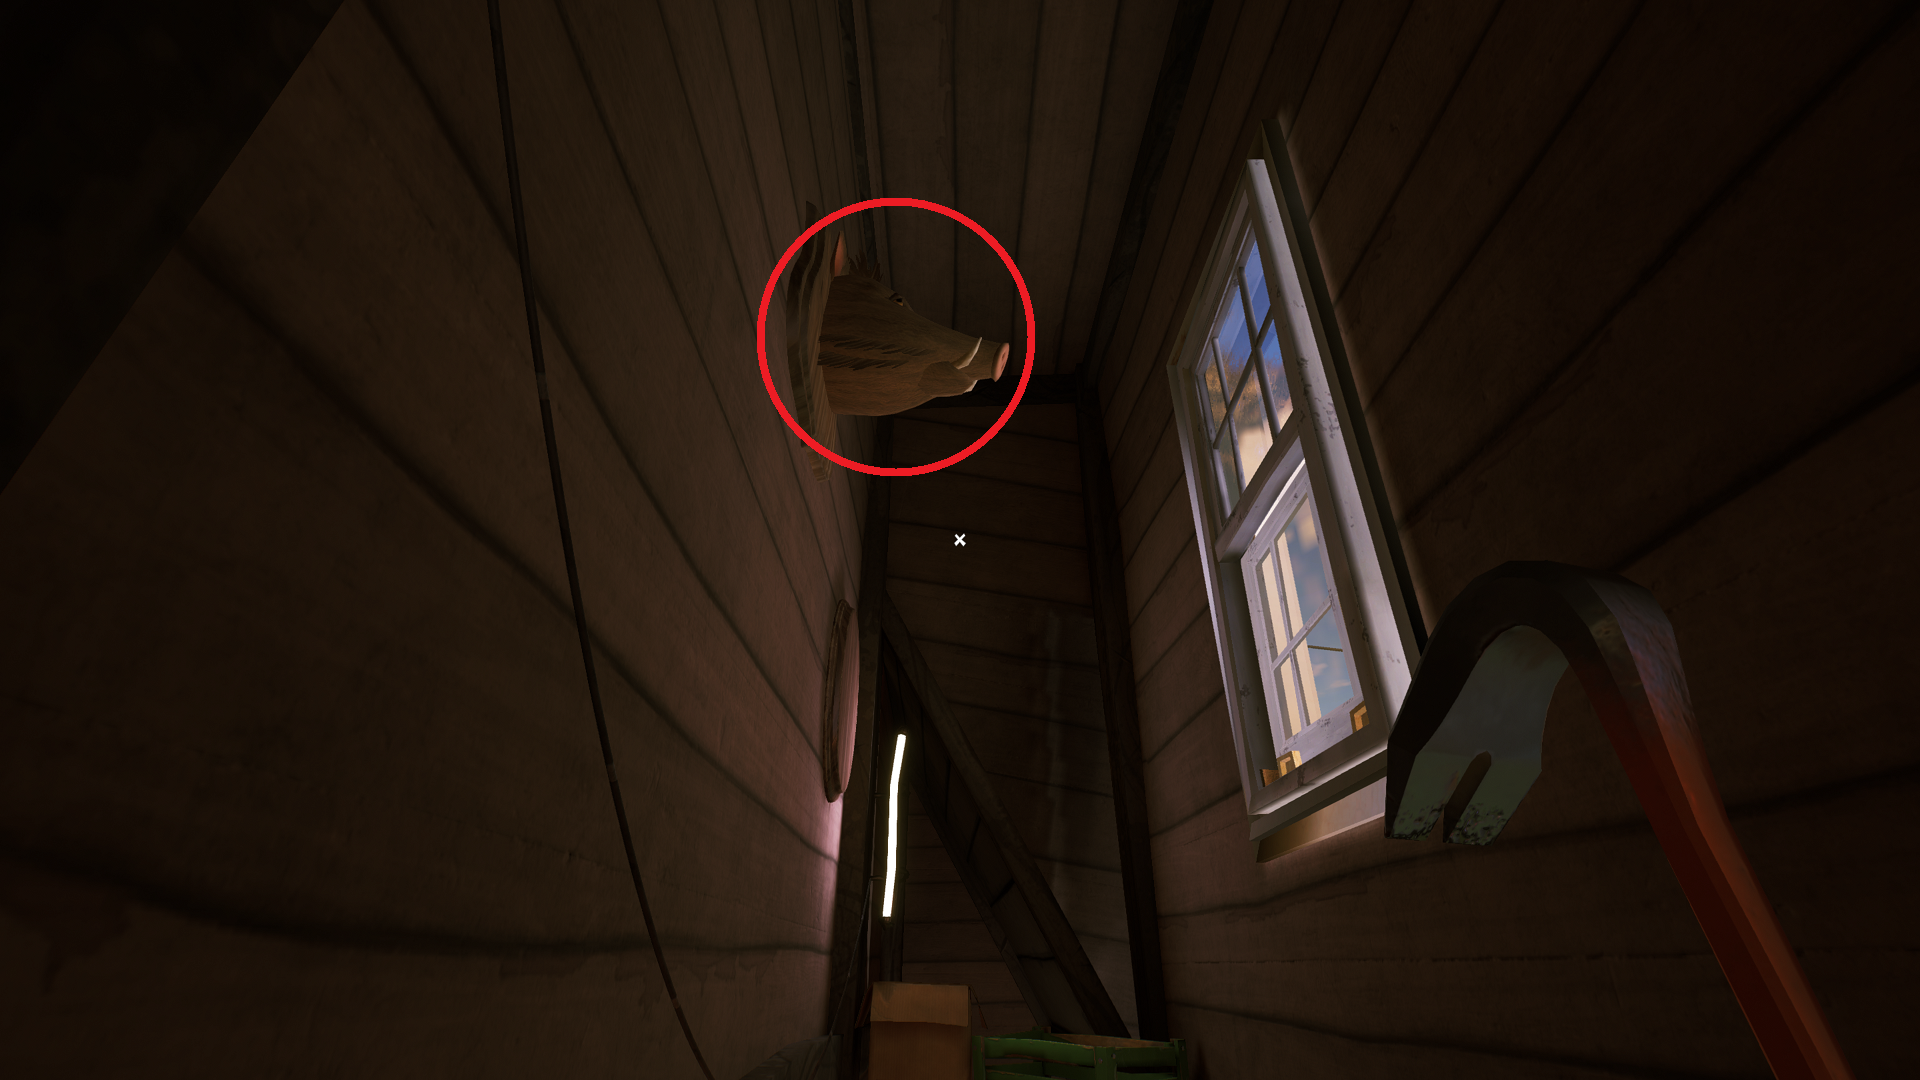
Solving this next puzzle requires you to interact with four boar’s heads throughout the house, and it’s the most difficult of the bunch. Each head will tilt downward and its eyes will glow when you’ve activated it. The catch is that the heads must be activated quickly; they will reset after a relatively short time. It’s best to familiarize yourself with their locations before attempting to activate them.
Where to Find the Boar Heads in Act 3
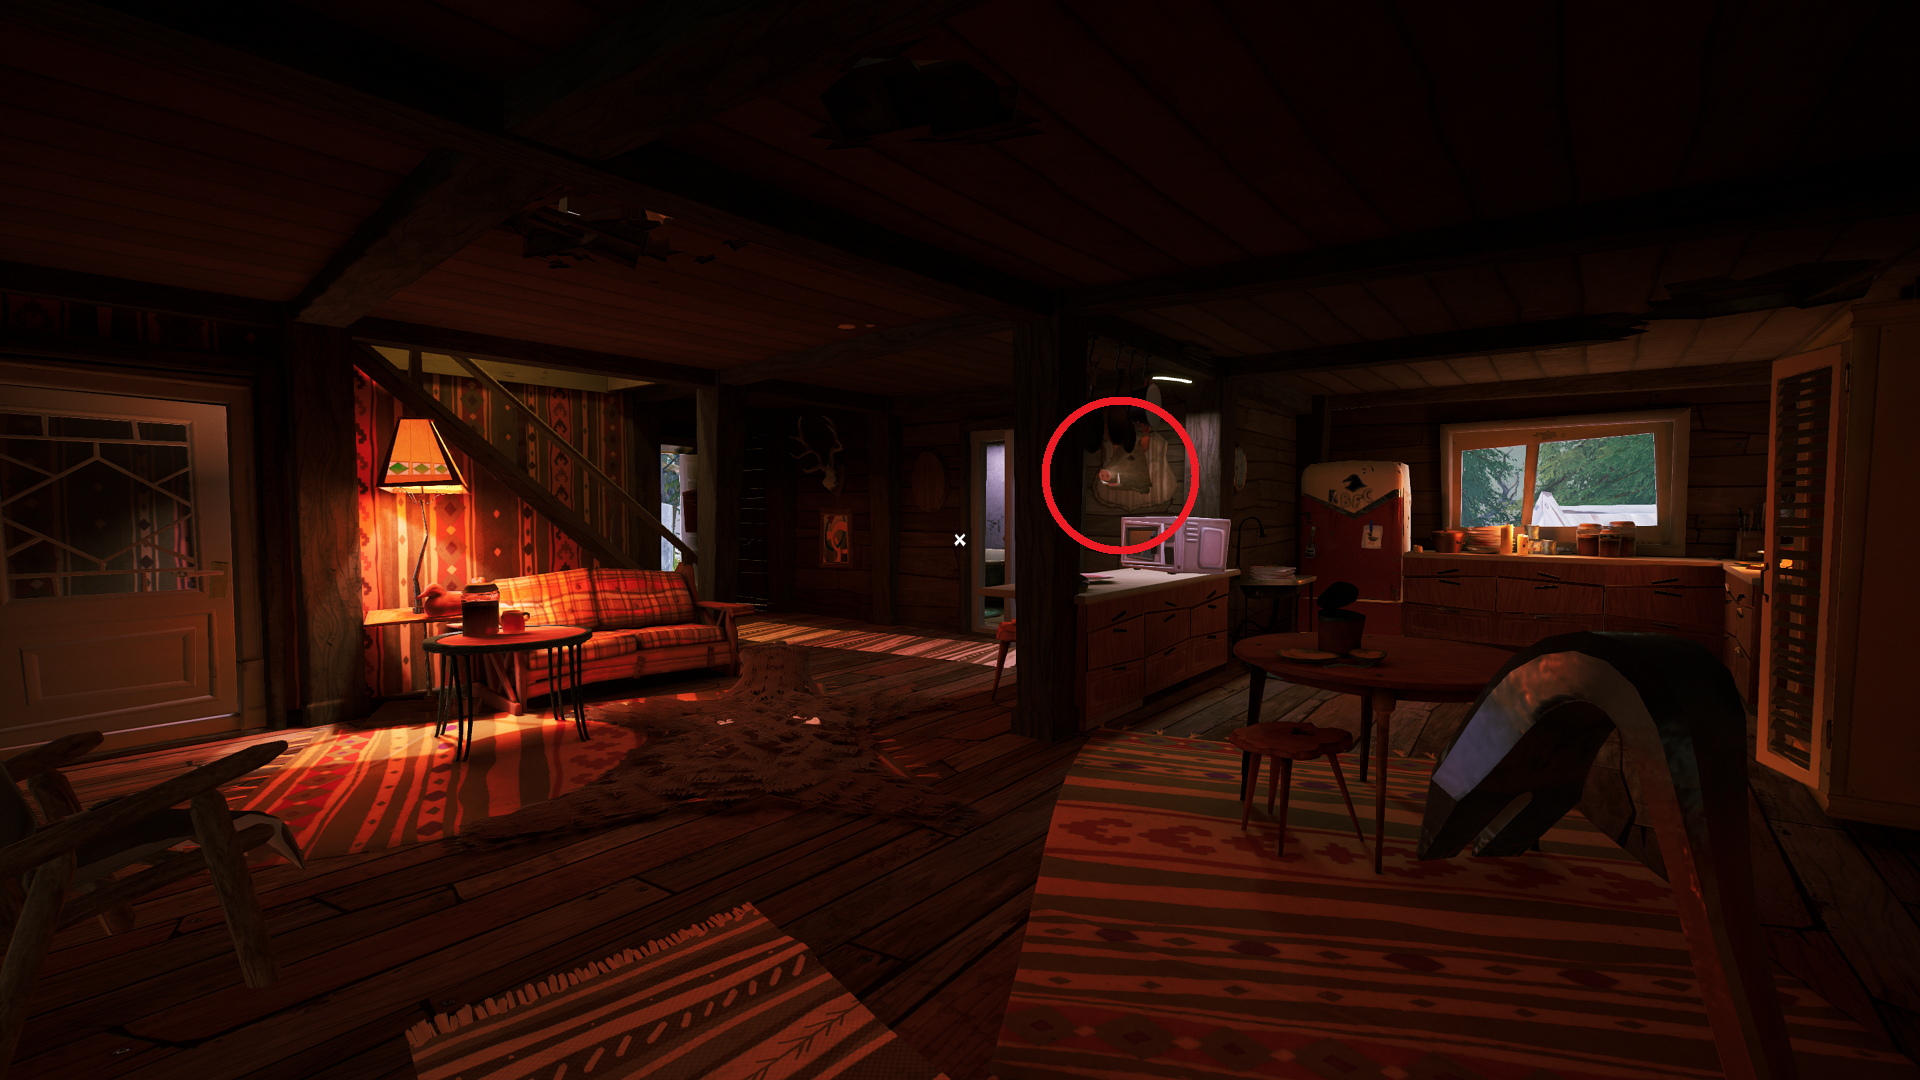
- One head is directly next to the microwave.
- Another boar’s head is in the first-floor room with the taxidermied bear, and can be activated when looking for the refrigerator letters. It’s on the left wall at the window you use to reach the roof.
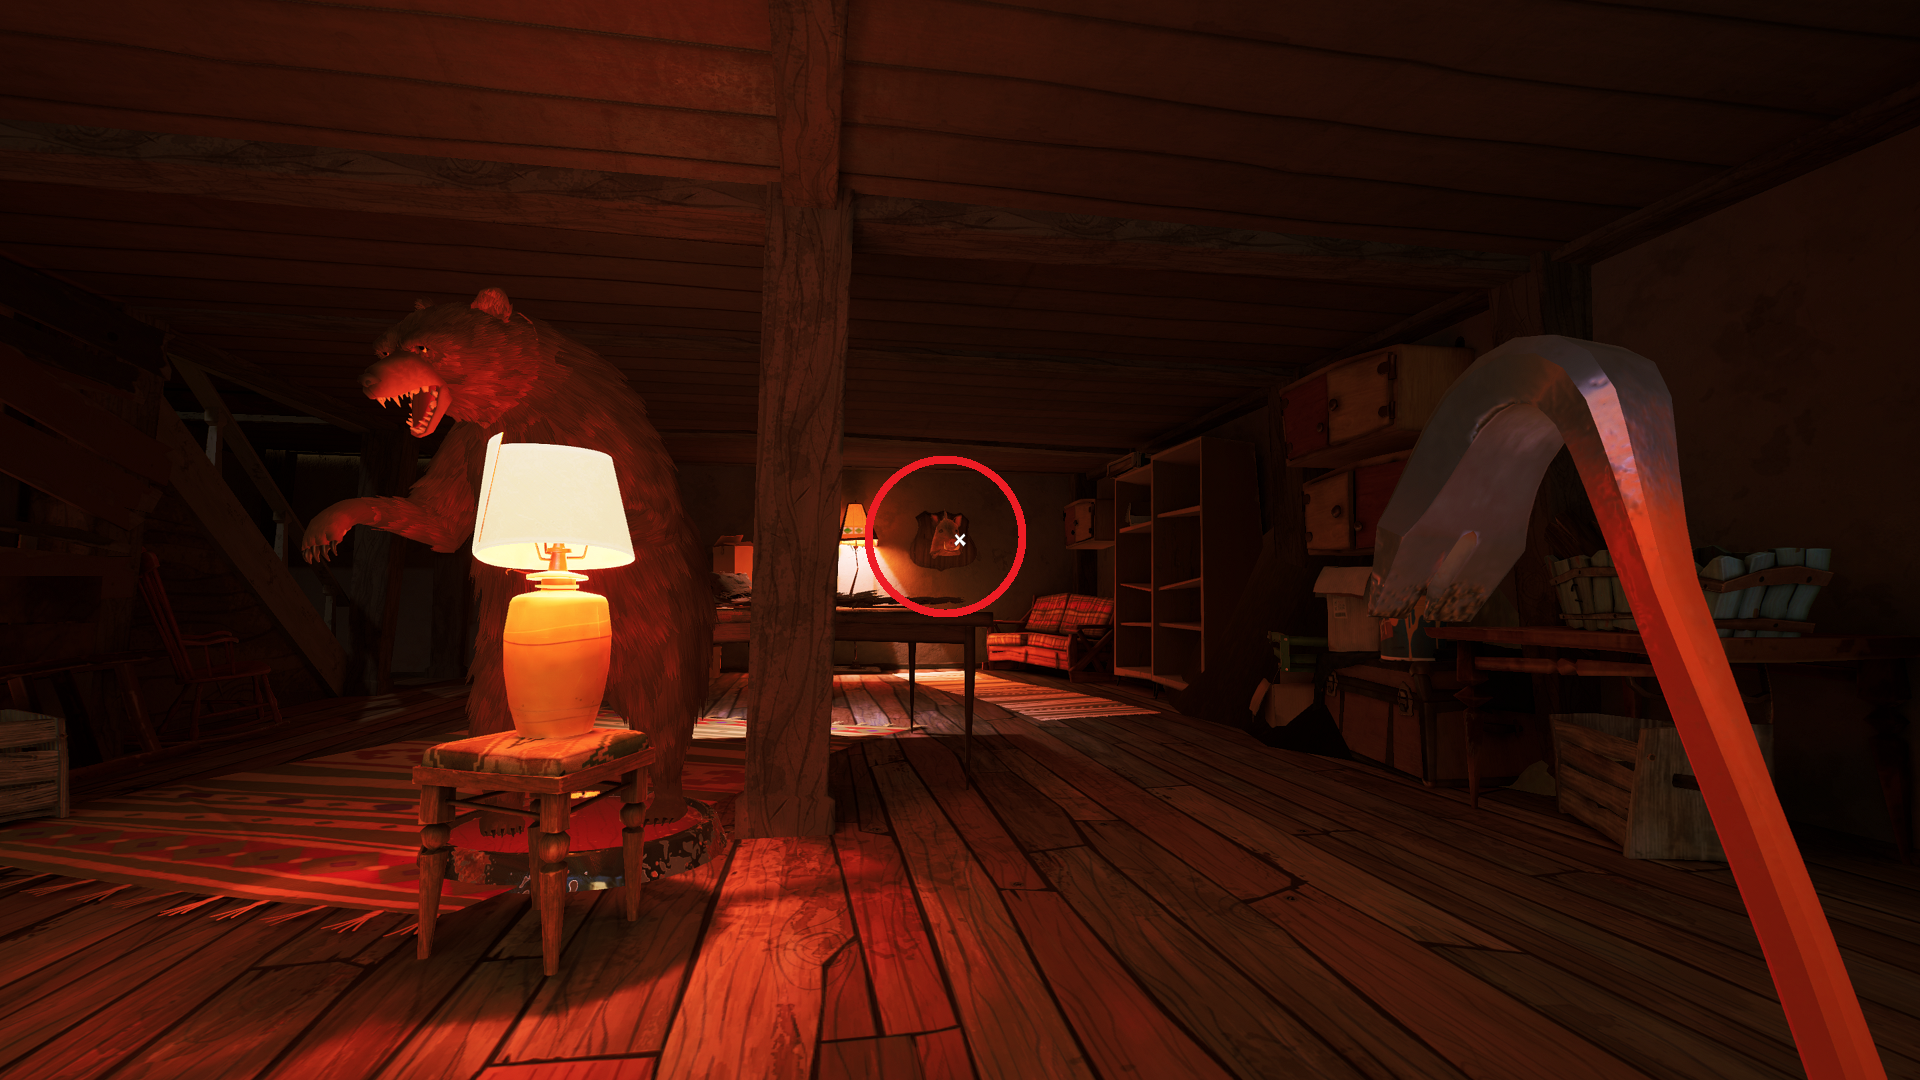
- Another head can be found in the basement with the taxidermied bear. It’s on the back right wall behind the bear, between a sofa and a lamp on a table.
- Another boar’s head can be found at the top of the stairs leading up to the second story, high up on the wall. Climb up onto the boards/rafters using the ledge next to the red chair by the antlers and bookshelf opposite (to the right of) the bed in this room.
One of the better routes to take is to begin with the head on the second floor because vaulting up to the rafters can be slightly tricky. With that one activated, try to hit the one at the microwave, then the one in the first-story taxidermy room. Use the nearby window to exit onto the roof and drop down to the front of the house. Then use either of the basement windows to enter the house again and activate the boar’s head in the basement.
With all of the heads activated – and if you’ve done it fast enough – you’ll hear a ding from the microwave. Return to the microwave to get another map piece, which goes in the bottom right corner of the map upstairs.
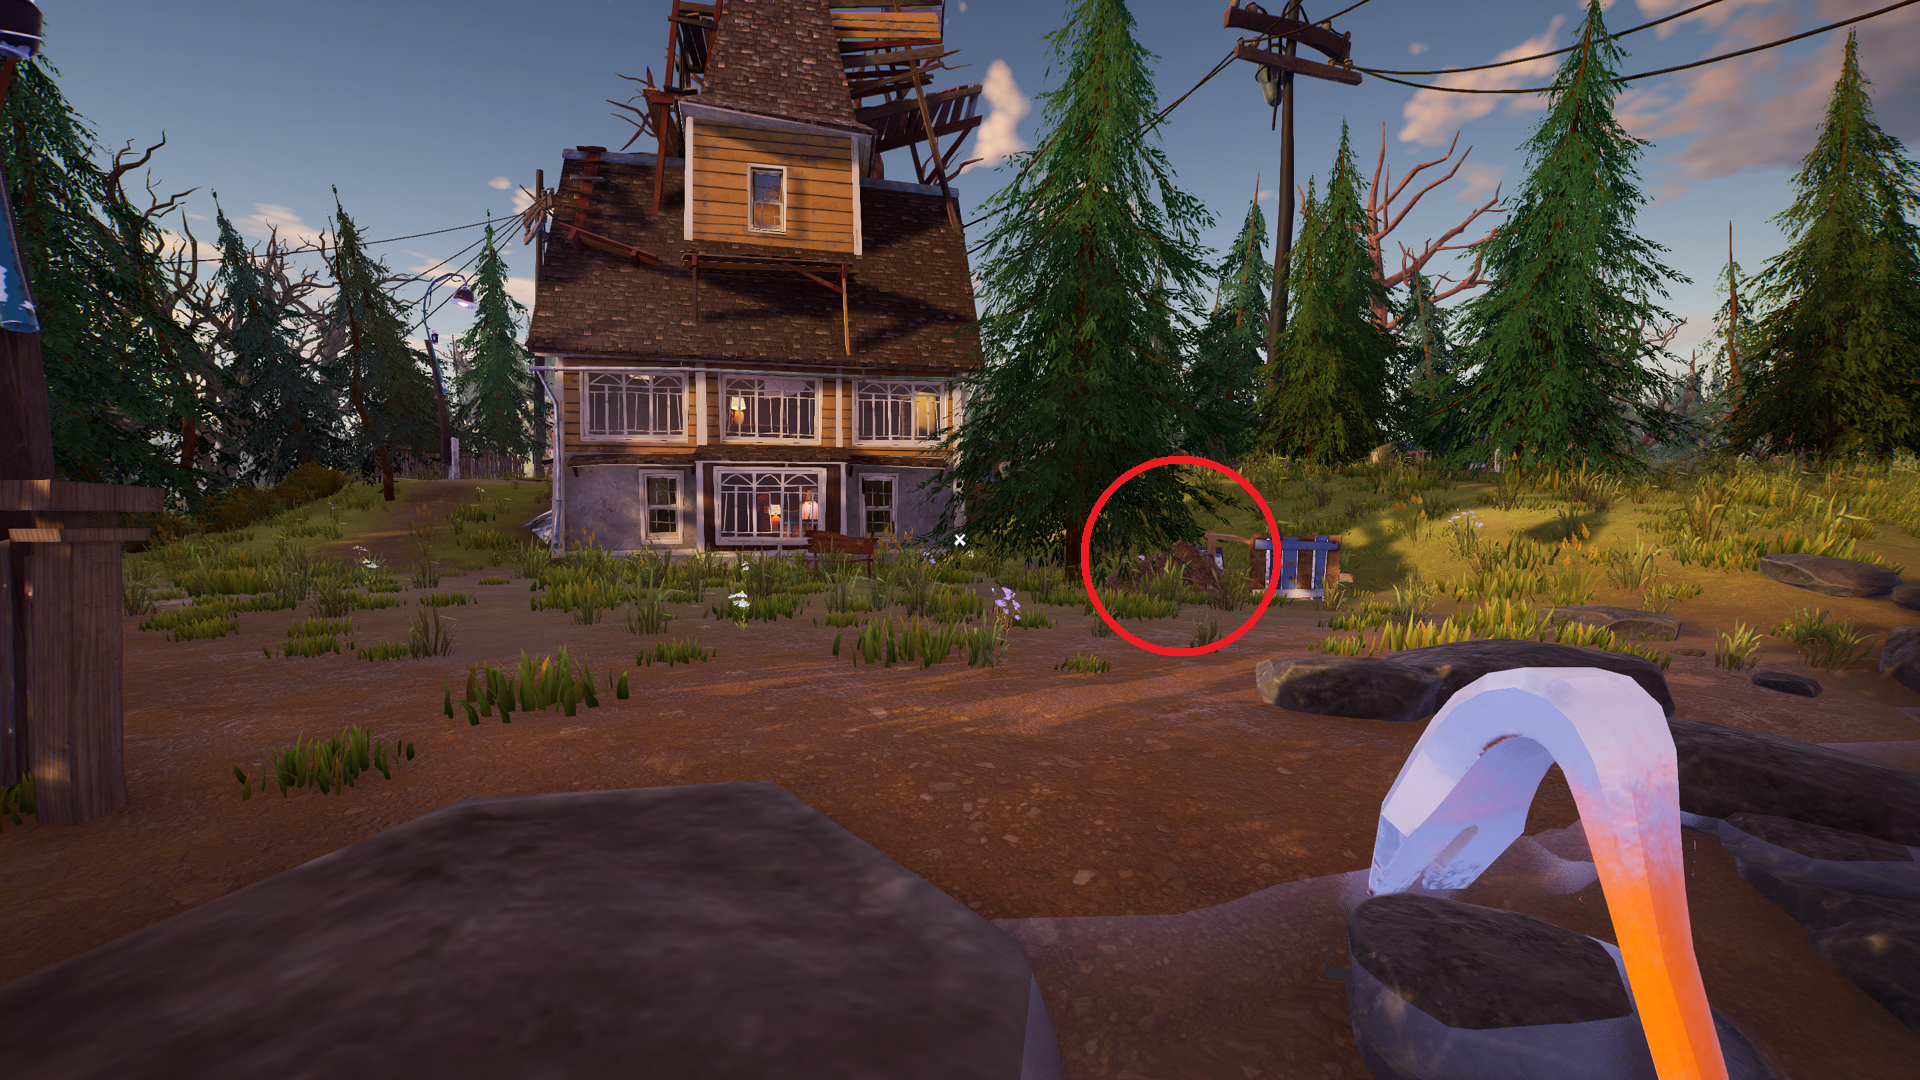
With the map intact, look for the red X that marks the location of a safe in front of the house. It’s the pile of dirt and rubbish to the right of the bench and the pine tree. Dig there to find a safe with a combination lock of five different colored discs.
Hello Neighbor Act 3 Safe Combinations

Each colored disc on the combination lock corresponds to a number and a colored pin on the map pieces from the cork-board map you just completed. The combination is: 80164. When the safe opens, pick up the key inside to trigger a loading screen.
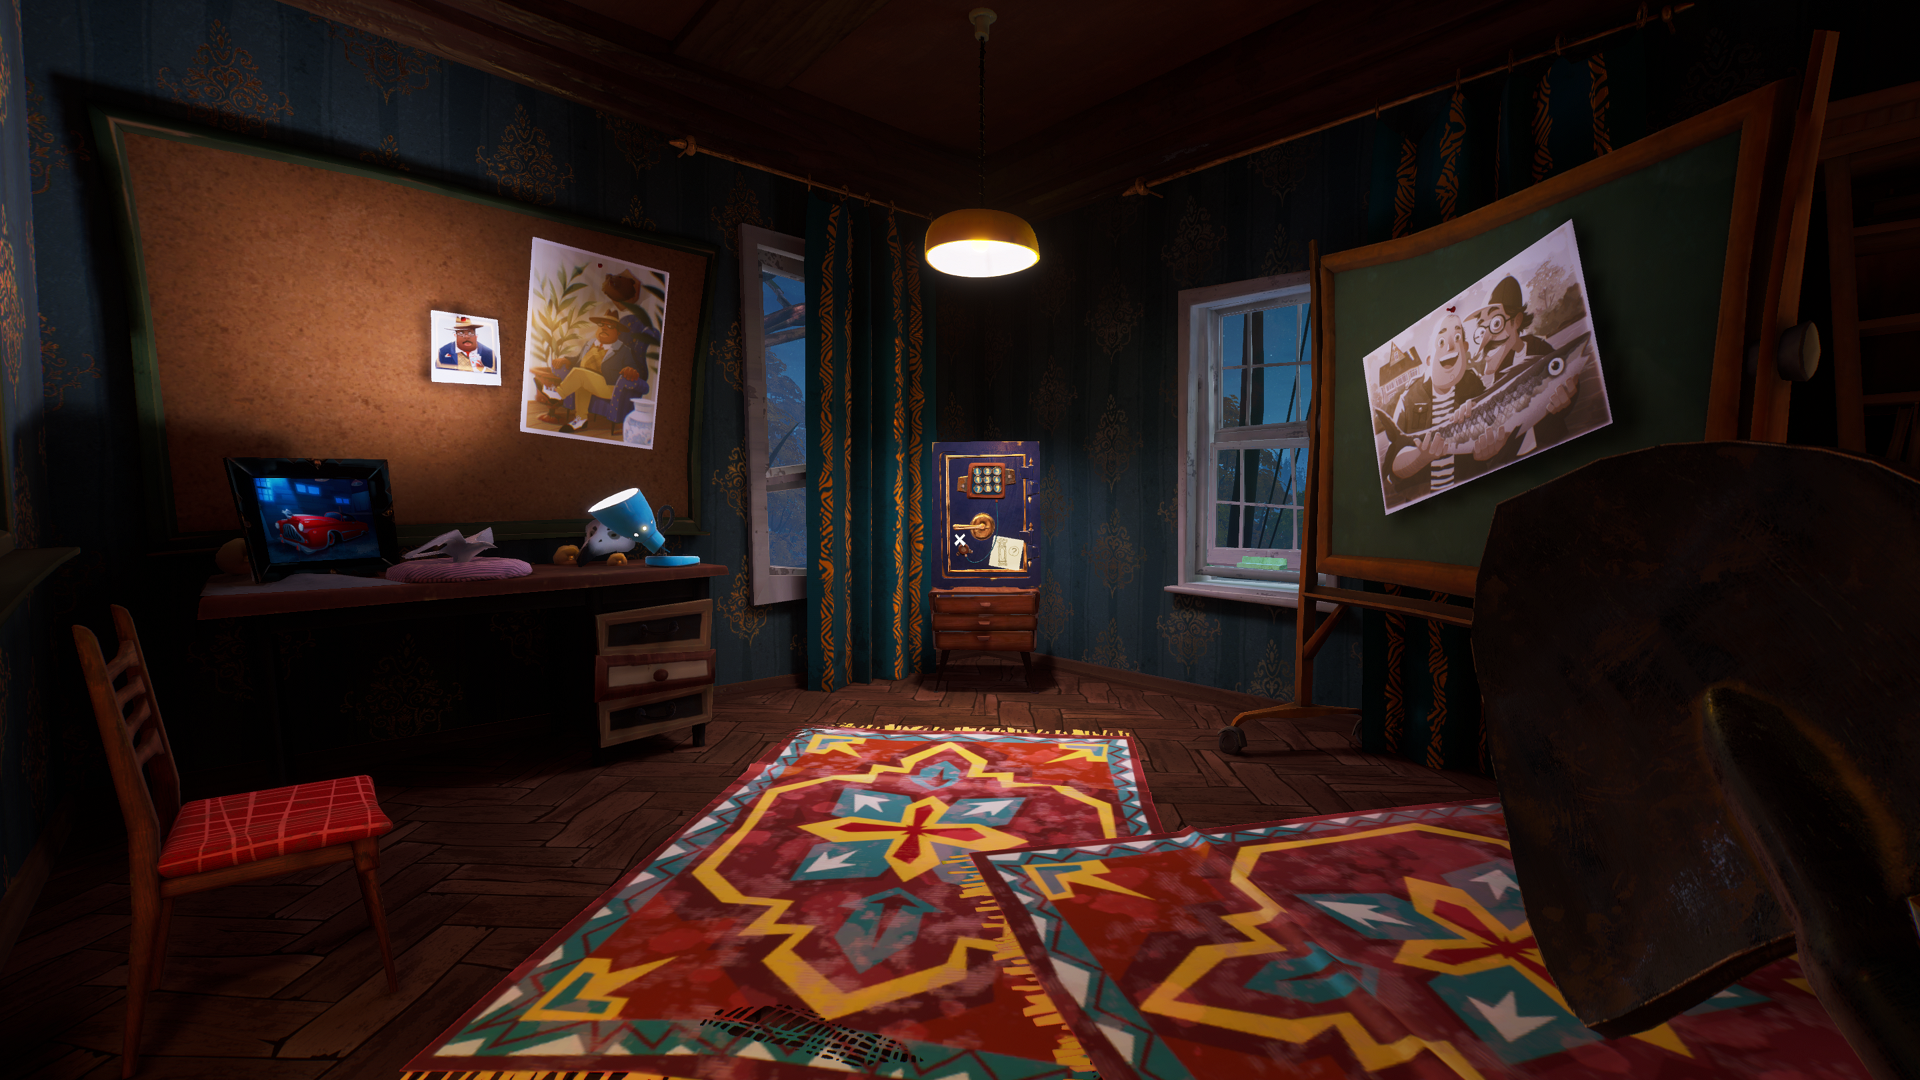
Return to the Museum, and go up the stairs on the left. Turn left at the top, and use the key on the door on the right. It’s just down from the room where you interacted with the photo frame to end Act 2. Inside, you’ll find another safe in the corner to your left. But you’ll need to solve yet another puzzle for this safe combination.
How to Solve the Grandfather Clock Puzzle
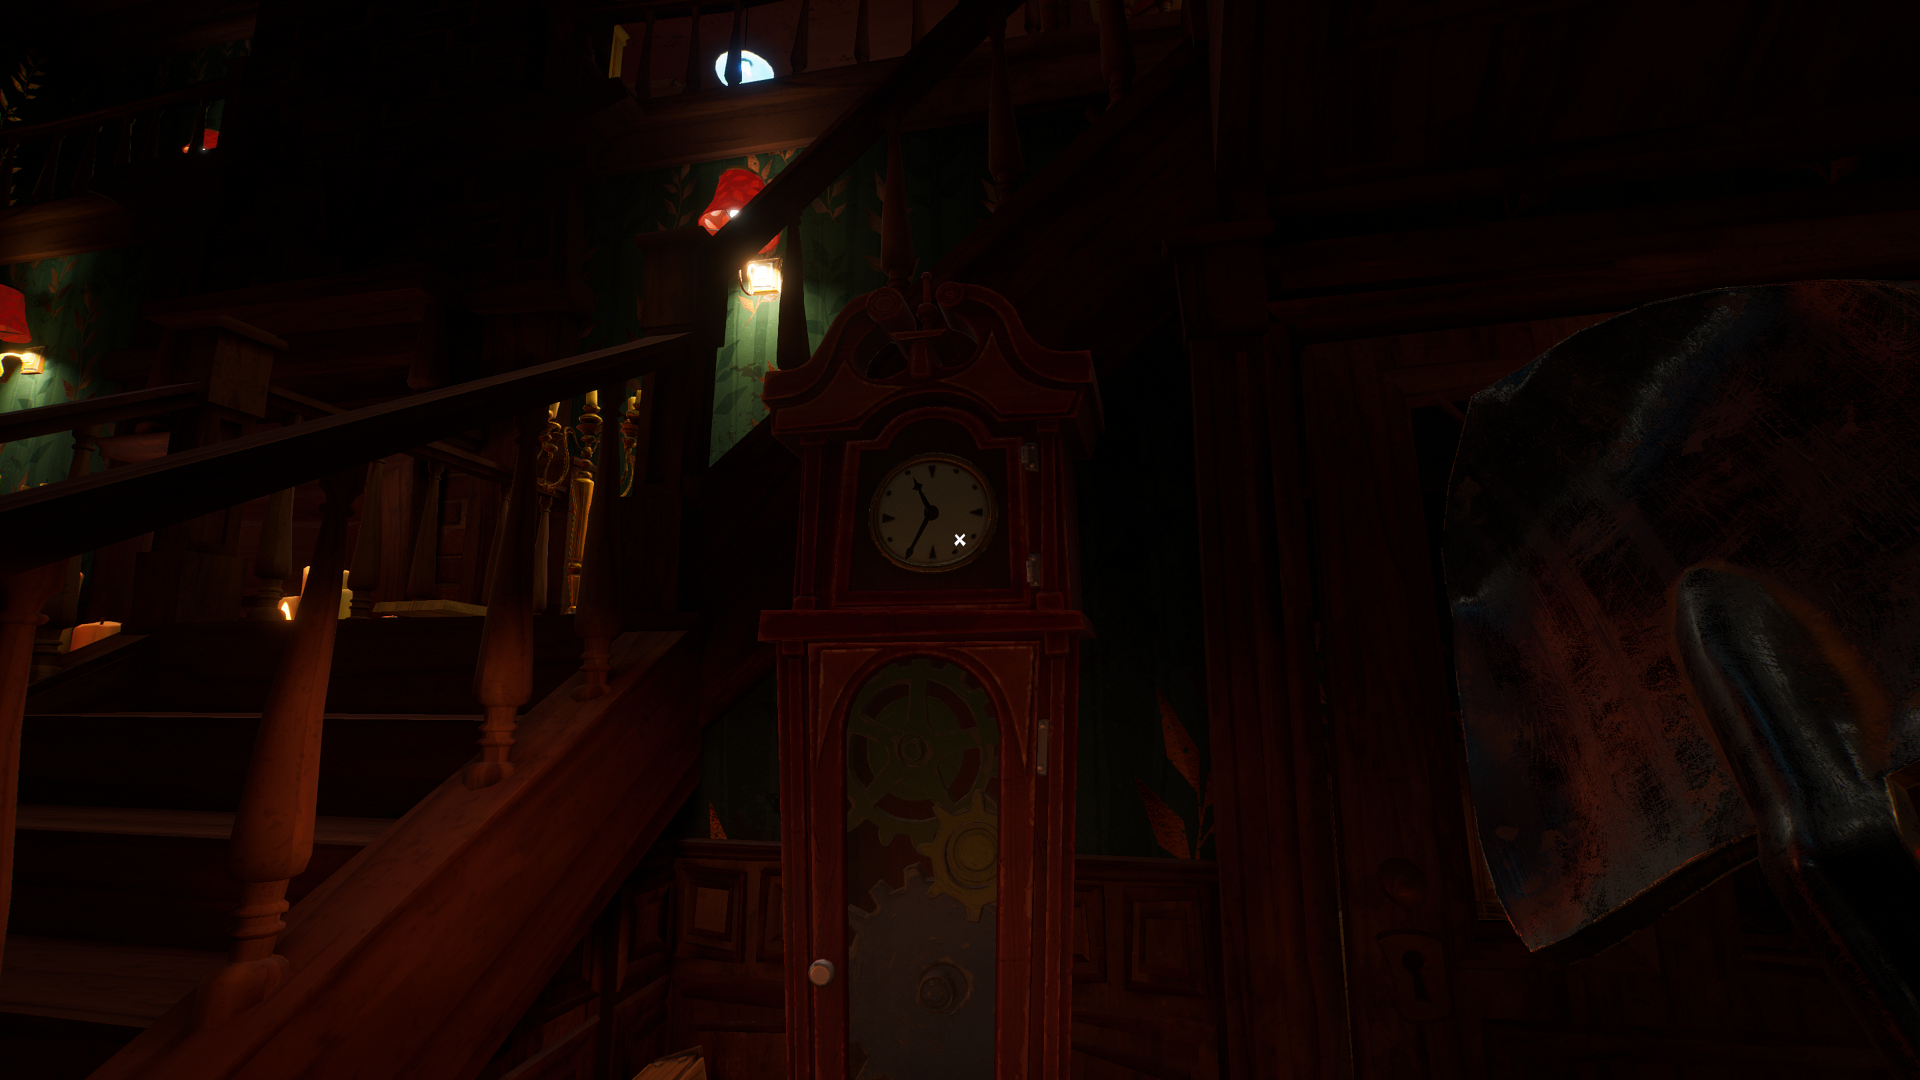
The drawing of the grandfather clock attached to the safe is a clue (though not necessarily a very good one) of what to do for this Museum safe combination. Ultimately, you’ll need to find three gears and place them in the clock to reset the proper time and reveal the code.
The Grandfather Clock is located to the right of the right stairwell in the lower Museum area, to the right of the fireplace.

Facing the safe, look to your left and grab the bird hood ornament off of the desk with the blue lamp. You’ll need this for a gear later.
Grandfather Clock Puzzle Gear Locations
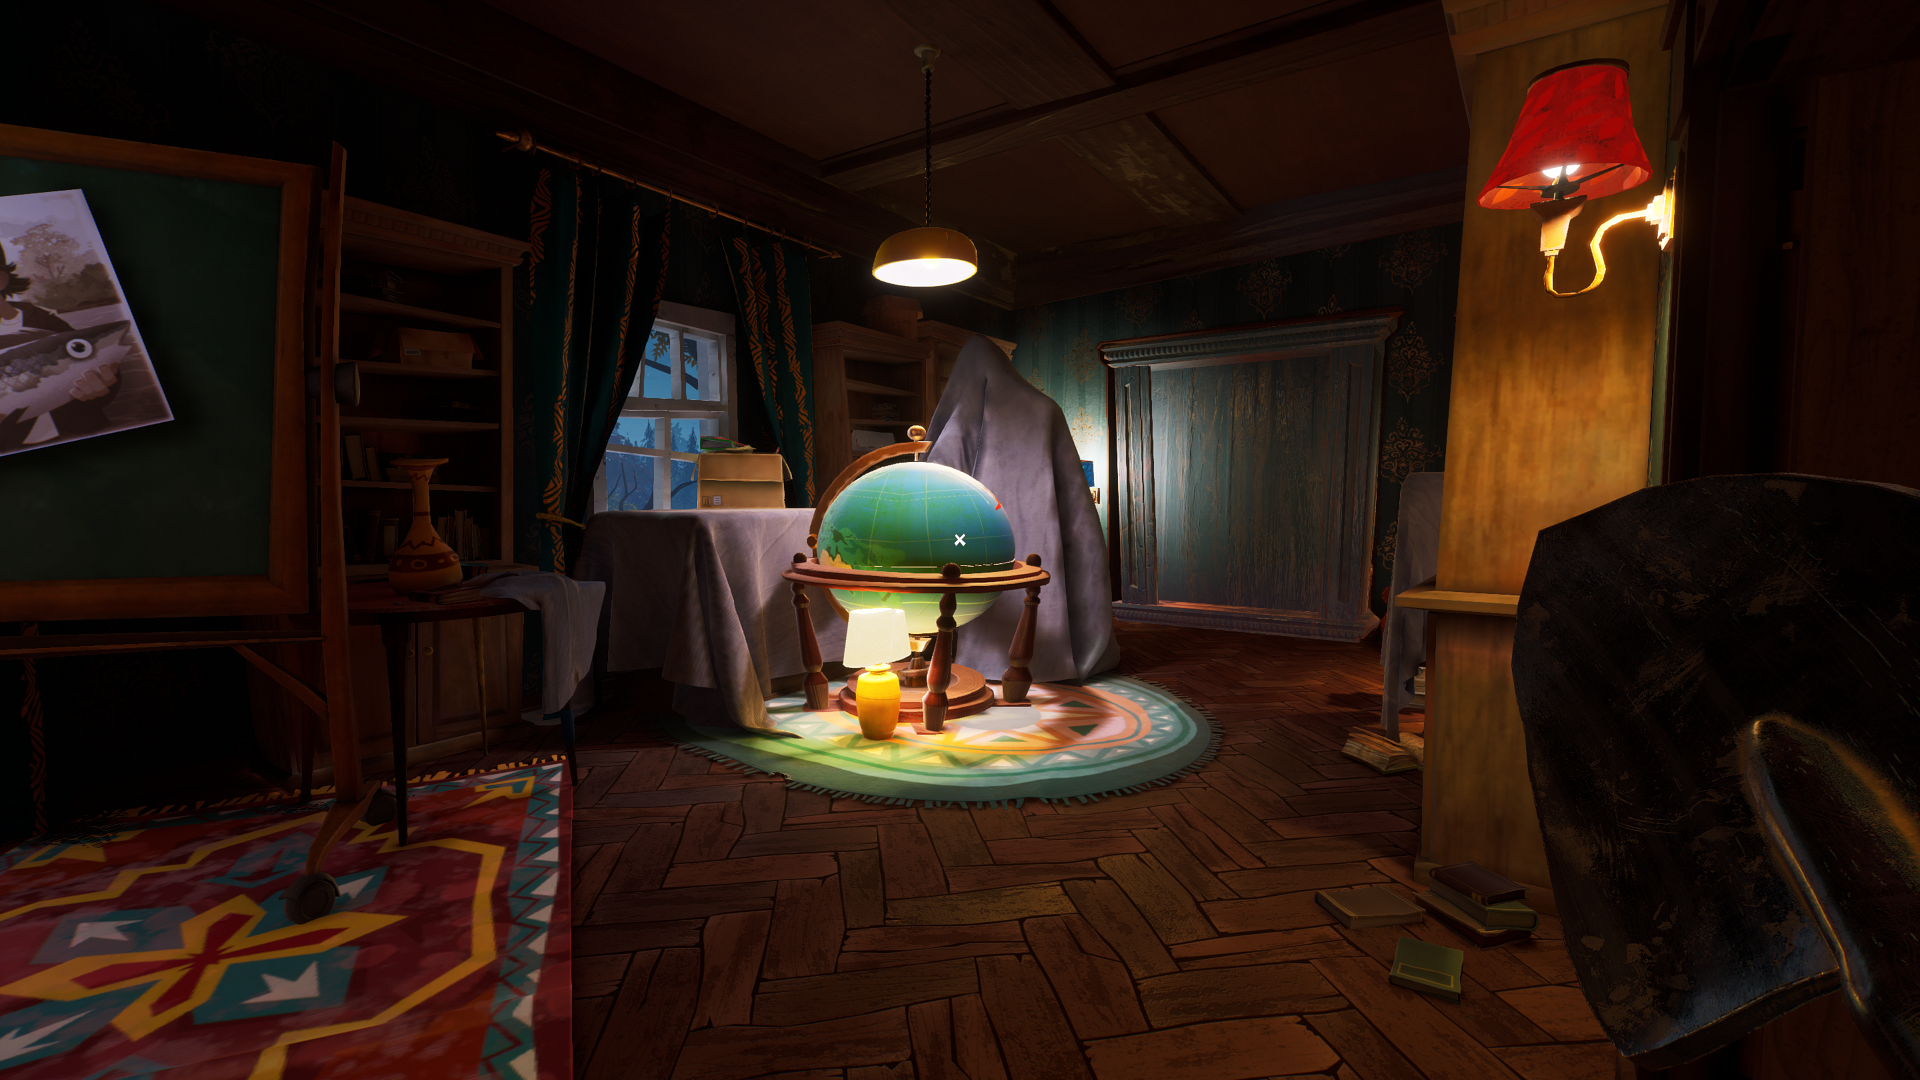
Green gear location: Interact with the globe in the same room as the safe. It will spin until you stop it – and you must stop it in the correct position to open it and reveal the green gear. The best thing to do is move it and stop it in small increments until the globe opens.
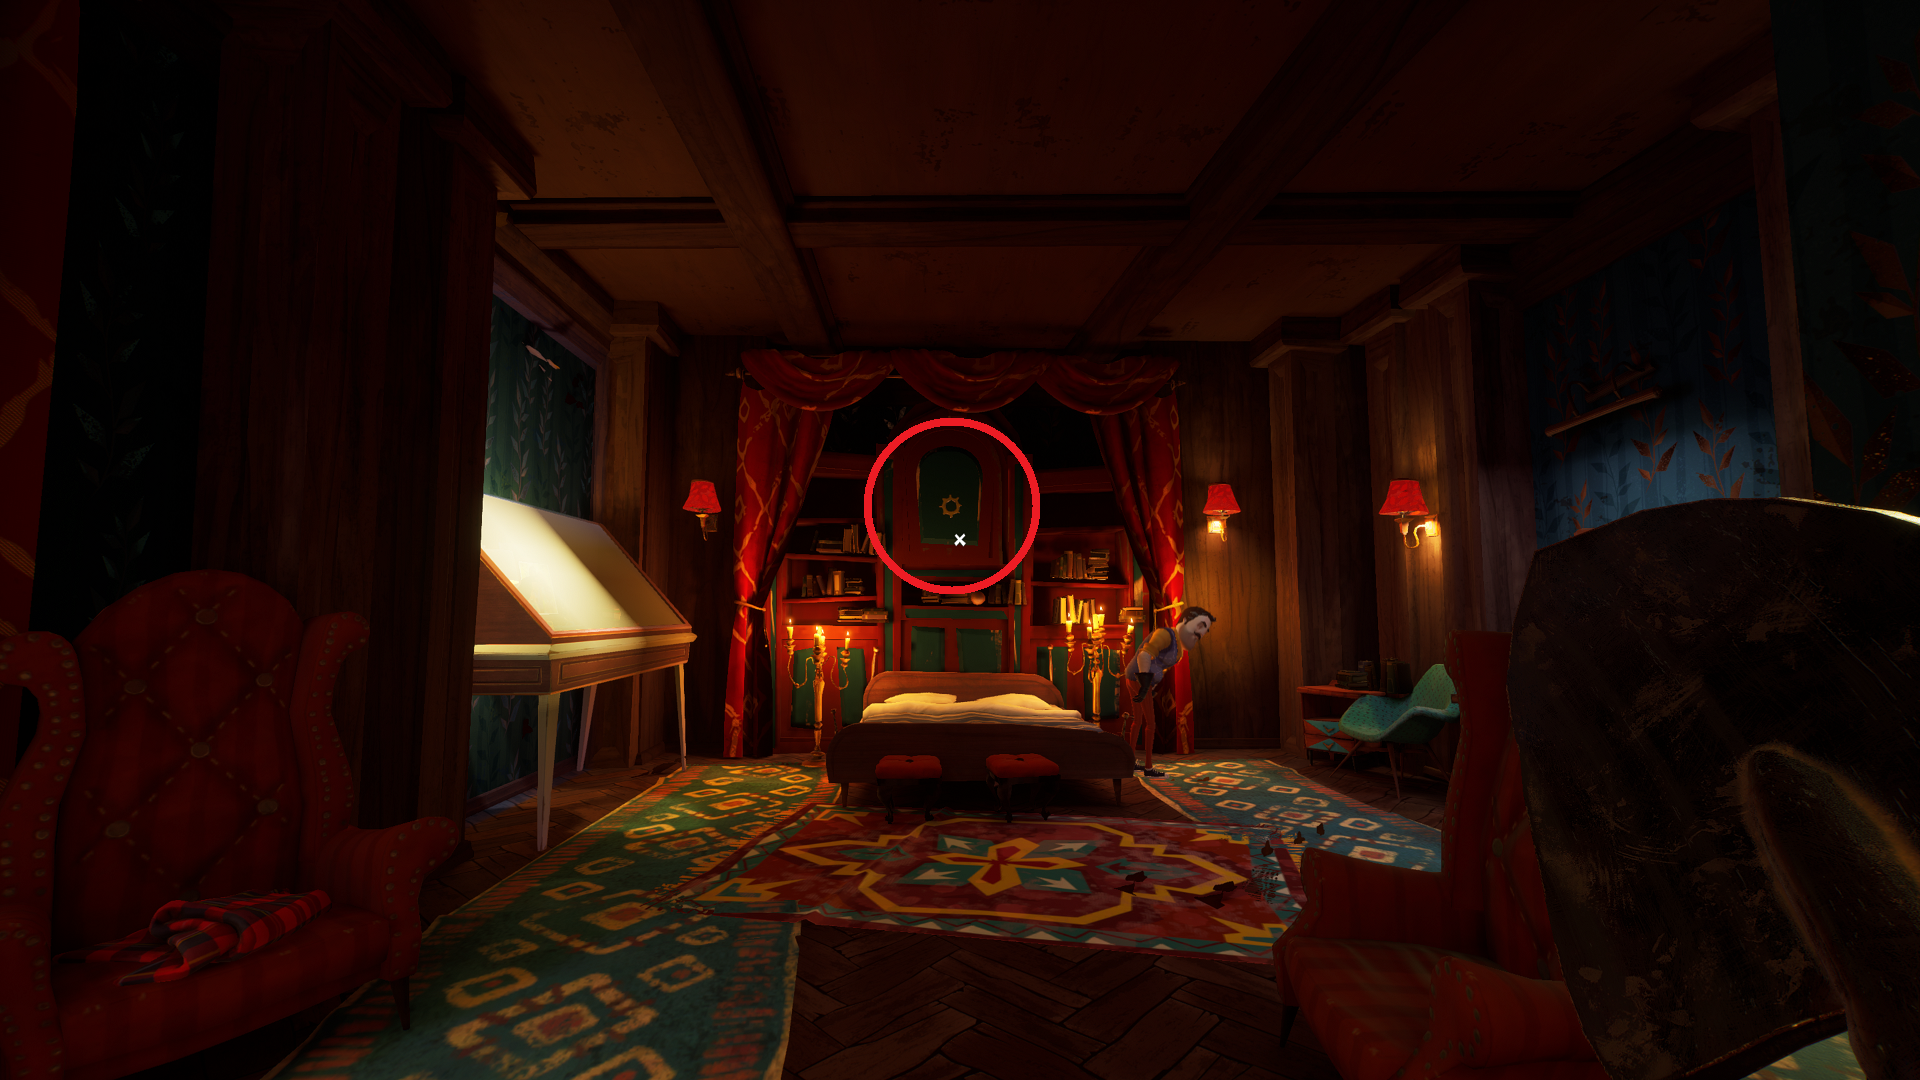
Yellow gear location: There is a blue wall with what looks like a door jam cut into it to the right of the globe (far right side of the safe room). Face it, and interact with the blue light sconce on the wall to the left of it to open a pathway between this room and the one where you interacted with the photo frame to end Act 2. However, before you go through, look to the right, and get the weight out of the cardboard box.
Go through the new doorway, and drop the weight on the pressure plate on the right just inside. This will turn a secret compartment above the bed, revealing the yellow gear.
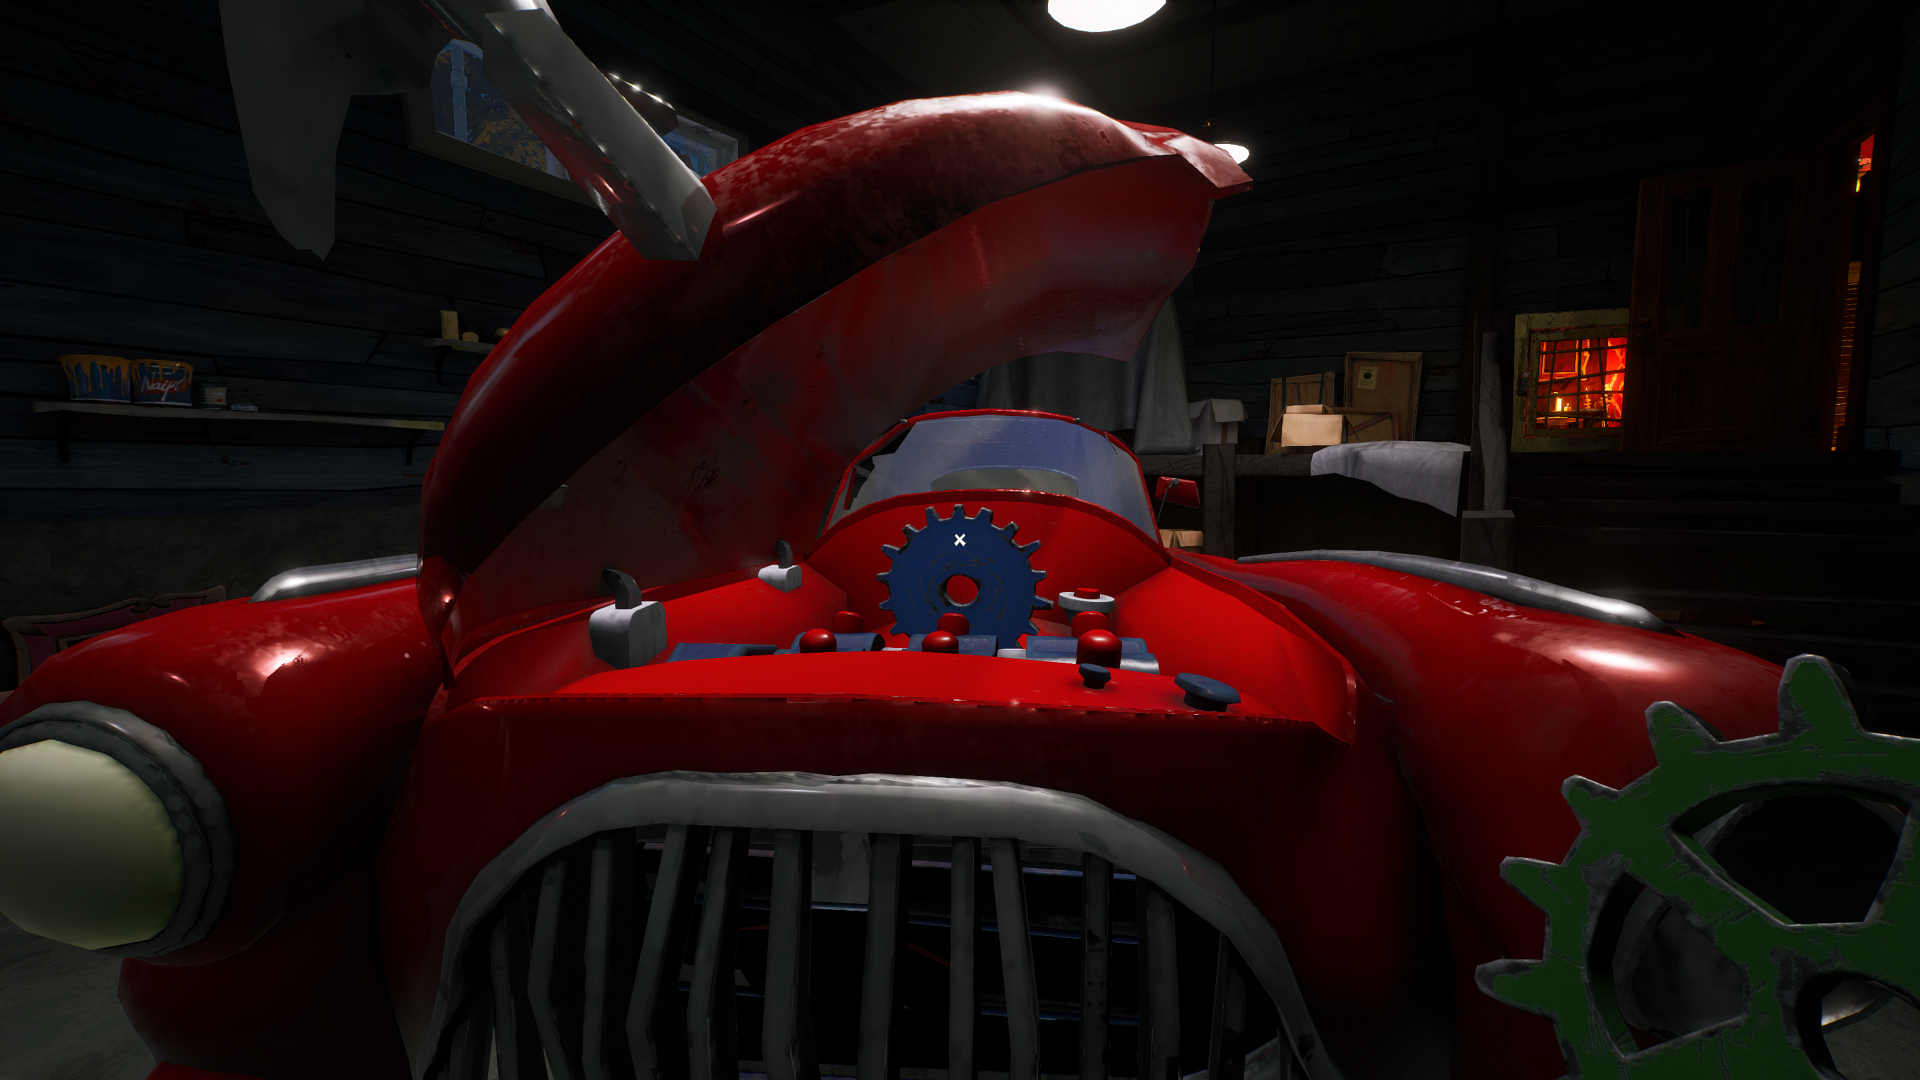
Blue gear location: Go to the Grandfather Clock, and go through the door to the right of it. Turn left, then through the first door on the right. You’ll be in the garage. Place the bird hood ornament on the front of the car to open the hood, revealing the final gear.
Once you insert the gears into the proper spots, the clock will reset and ding, stopping at 11:35. Return to the safe, and input 1135 to open it, get the camera.
And that’s the end of our Hello Neighbor 2 Act 3 walkthrough. There’s one more act to go. On to our Day 4 walkthrough!


Published: Dec 13, 2022 03:48 pm