
You may not realize it on your first playthrough of Little Nightmares 2, but Glitching Remains are key to understanding the game’s minimalistic story. Not only are they often hidden away in locations that reveal important details, but finding all of them on your playthrough will actually unlock a secret ending that changes an awful lot about the way you interpret the story.
Some of the collectibles are out in the open and easy to find, but others are squirreled away and easy to miss. They look like shadows or little ghostly children, and touching them will cause Mono to clutch his head and twitch around about.
If you want to see everything Little Nightmares 2 has to offer, here is where you can find them for each section of the game. Beware: spoilers follow.
The Wilderness

Glitching Remains #1
The first is found when you come across a broken bridge. Drop down like you normally would, but don’t climb up the other side. There’s a small tunnel on the right. Approach the screen, crouch, and move right to find it by a shovel.
#2
This one is found before the section with the bear traps covered in leaves, right after you slide down the hollow log. Duck back under the log after sliding through, and you’ll find another tunnel with the remains at the end.
#3
The third is found in the outhouse. After you leave the first building with Six but before you enter the hunter’s shed, you’ll see a little outhouse in the background. Approach this and Six will offer to boost you up to the handle. The Glitching Remains is inside.

#4
This one is at the very end of the Wilderness section. After you ride across the water and get to the beach, run up the beach towards the boxes in the background and you’ll spot it.
The School
#5
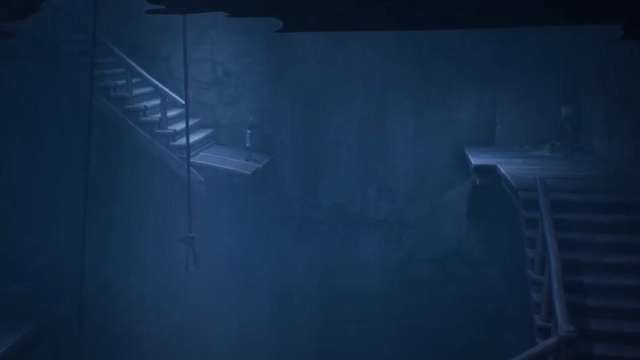
This collectible is technically in the School region, but you find it before you reach the school. In the first section, you’ll push a television off a ledge and Six will ride up a rope to a level above you. You’ll need her help to jump across a gap. After leaping across, climb the stairs and go through the door on the left. You’ll find number 5 there.
#6
Number 6 is found on the playground, just before you climb the rope into the school. The school building is a big “L” shape; head to the juncture (past the stairs) towards a dumpster, and you’ll find the remains.
#7
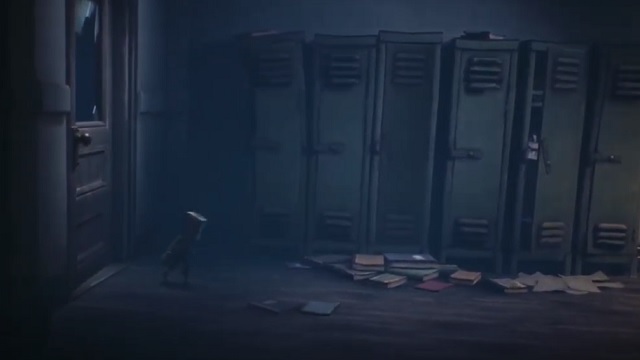
This one is in the section right after Six is kidnapped by the bully enemies. After you move through the room with broken desks stacked in the center, you’ll climb through a broken window on a door. You’ll see a row of lockers when you drop on the other side.
Pull open the third locker — the only one without a latch — to find the remains.
#8
This trinket is found on the stairwell just outside the chess puzzle. After climbing the stairs, go to the left and look for the remains next to a noose and two bottles.
#9
You can grab this one after completing the chess puzzle and unlocking the door with the key you find. Roll the dish cart from the left side of the hall to the right, but don’t go through the vent yet. Push open the door that the cart was pushed up against before you moved it, and you’ll find the remains on top of the ice chest.
#10
Number 10 is found after you escape the school. You and Six are back out in the rain, and you have to move a dumpster to jump onto a high ledge. After that, you’ll see a small alley at the top of the screen with a paper boat in it. Approach and you’ll find the last remains in this section.
The Hospital
#11
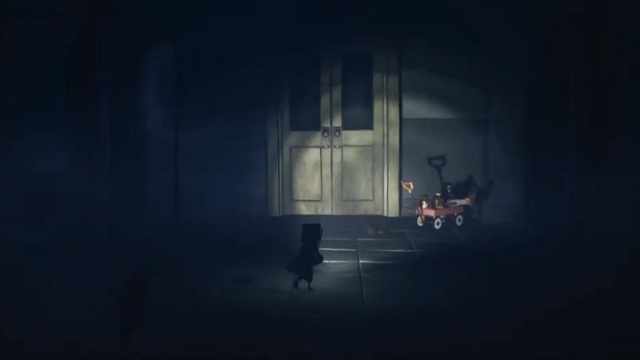
Look in the room just to the right of where you find the flashlight. It’s a “T” shaped room with a long hallway running away from the screen. Run up this hallway towards the wagon to find the remains.
#12
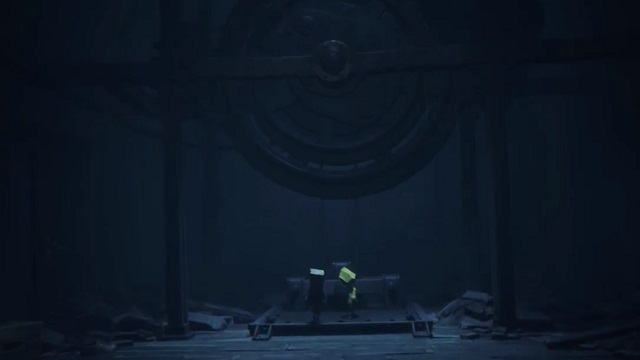
This one is found after you solve the X-Ray machine puzzle. Once you’ve burned the toy and found the key, move upstairs and unlock the door. Run through the operating room and you’ll find yourself in a large hallway lined with mannequin parts. Run up this hallway to find the remains.
#13
After finding the first fuse, you can find Glitching Remains 13. In the memorable hallway where all the arms reach towards you from the sides, run up towards the metal bars instead of down through the arms. There’s a small hole you can go through in the bars, partially hidden by the door. Go through this gap and enter the room on your left to find it.
#14
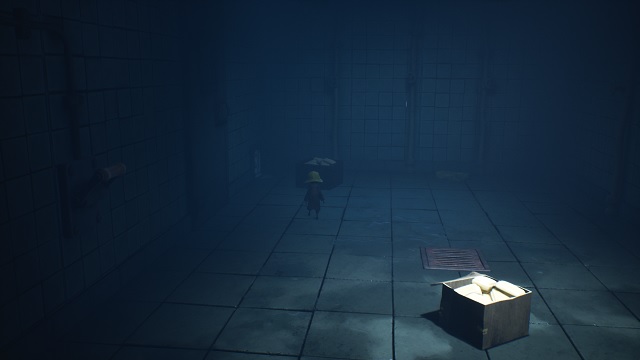
You’ll find 14 in the shower. Once you drop in, head to the top left corner and pull the box away from the wall. This will reveal a small vent, leading to a room with the remains inside.
Pale City
#15
Look immediately after you escape the hospital. Once you drop out the window onto the street, run up the alley towards the manhole. Climb down the ladder into the sewers to find it.
#16
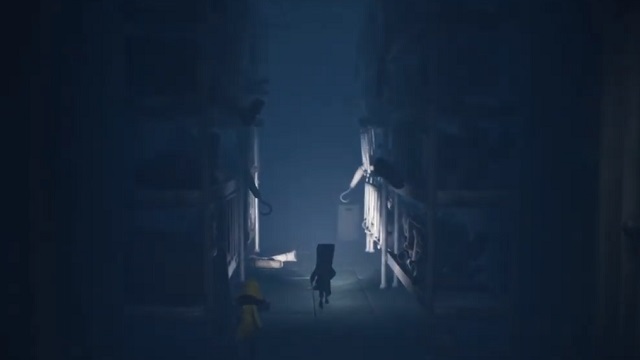
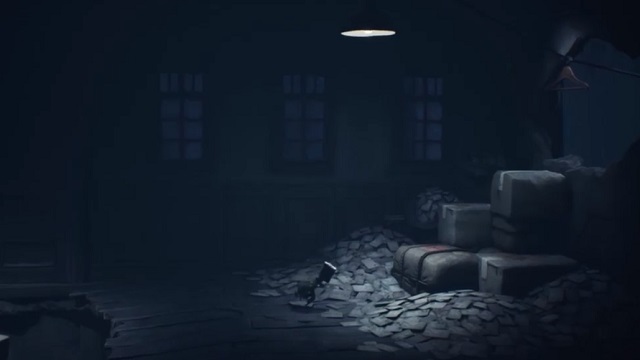
After using the elevators to reach the top floor, you’ll find this collectible. Look for a room that looks like the one in the image below. Inside, head to the lower left and pull the box away from the wall. This will reveal a little opening you can squeeze through. Find the remains inside.
#17
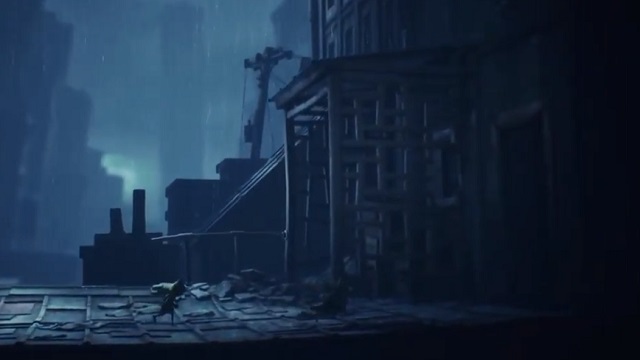
The 17th collectible is found almost immediately after number 16. After you jump across a few rooftops and see the signal tower in the distance, you’ll come across a wooden fence you climb to progress. Instead of climbing it, head behind it and work your way up the boxes and through the window. Find the remains inside.
#18
You’ll locate this one, the last you’ll find in Little Nightmares 2, after leaving the mailroom. After you use the clothes-hanger zipline, jump back out the window you came through onto the roof. Head up through the other open window to find the last remains.
The Secret Ending and Other Rewards
If you manage to find all 18 hidden items, you’ll unlock an extra scene in the game’s ending. It doesn’t directly explain things, but it does a lot to change the way we perceive this, should we say. sequel.
In addition to this little bonus scene, you’ll also get several trophies/achievements for finding the trinkets. There’s one tied to each region, so finding all of them in the Wilderness will unlock Wild Kids; all in the School will unlock School Kids; all in the Hospital will unlock Sick Kids; and all in the Pale City will unlock Pale Kids. In addition, the No More Remains trophy/achievement pops after you find all 18.
And that’s where you find all of the Glitching Remains in Little Nightmares 2, as well as how you unlock the secret ending and a handful of trophies/achievements. Not bad for a couple of kids up against their worst nightmares! Check out our game page for more on this creepy little platformer, where we have a walkthrough on the school area, as well as where to find all of the game’s headgear.


Published: Feb 17, 2021 01:50 pm