School is a rough time for almost everyone, and Little Nightmares 2 knows exactly how to play into those childhood fears. Nasty bullies, losing track of your friends, teachers who are out to get you. It’s all there. This walkthrough will get you through it.
The school is the second main area you encounter in the game, after the opening section in the wilderness. There are some tricky areas here, so here’s how you get through this section of Little Nightmares 2.
Beware: spoilers follow.
Little Nightmares 2 School Walkthrough
Getting Inside
After you leave the wilderness, you’ll start prowling through a ruined city. Take in the sights as you go, and you’ll eventually walk through the cafe, just before encountering the school. This is where you’ll find the first main puzzle section.
After you walk through the cafe, you’ll find a pile of smashed televisions. Move to the wall on the right, and Six will get in place to boost you through a hole in the wall. In the next area, climb on top of the TV missing its screen and jump to grab the rope. Swing back and forth until you kick the other TV down the hole, pulling you up to a new area.
Jump onto the ledge and move to the left. Push the TV off the ledge, and Six will ride up to the floor above you.
Go back to the right and move up the stairs. Six will approach the other side of the large gap and catch you when you leap across. Go through the door on the left and approach the TV near the top of the ledge to find a Glitching Remains.
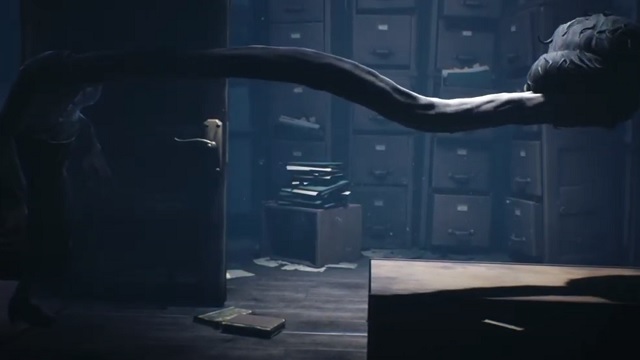
Cross the narrow beam, and you’ll enter a room with a suit hanging from a noose. Squeeze through the next door, and you’ll enter a room with a television putting out a strange signal. Walk towards it. Mono will place his hands on the screen.
Use the left stick to adjust the screen until it lines up straight, then do it a second time, and you’ll be transported to a corridor. Run towards the door, and you’ll eventually collapse back outside the screen.
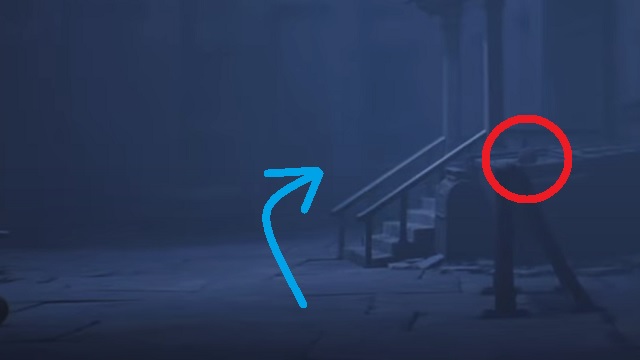
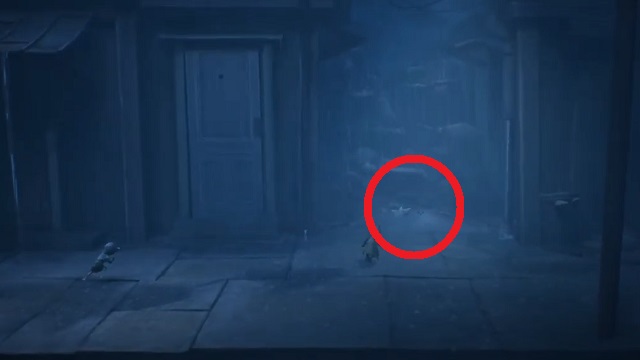
Jump through the window to help Six pull the dumpster away from the fence to enter the playground. The building is in an “L” shape, so head to the juncture up past the main staircase. There’s a Glitching Remains by a dumpster (the blue arrow in the screen below).
If you climb the stairs towards the front door, then move down to the top of yet another dumpster, you’ll find the Soccer Ball Hat as well (the red circle). Finally, head to the lower right and climb the bedsheet rope to enter the school.
Getting to Class
Move to the right until you find a lever. Jump and grab it, and you’ll notice something odd about the painting. Run up the hall in the middle of the corridor, then go through the door. There several objects here you can pick up.
Grab one and run back to the painting. When Mono changes the way he’s holding the item, throw it at the painting to knock it off the wall, revealing a new path.
In the next room, jump onto the weak floorboard. Six will start jumping on it as well. Time your jump with hers a few times, and you’ll open a trapdoor to the next section. As you move through the next few corridors, watch for loose floorboards that trigger swinging traps.
Eventually, you’ll encounter a door on your right that leads to a janitor’s closet and a hallway leading up towards a window and a toy sitting there. Approach closely, as a locker will fall on you if you run too quickly towards it.
Once the locker falls, jump on top of it, then over the ledge to the right. In the next room, crouch and trigger the trap that sends a light fixture swinging. It will swing over you if you’re ducking. Jump on top of it and over the next obstacle.
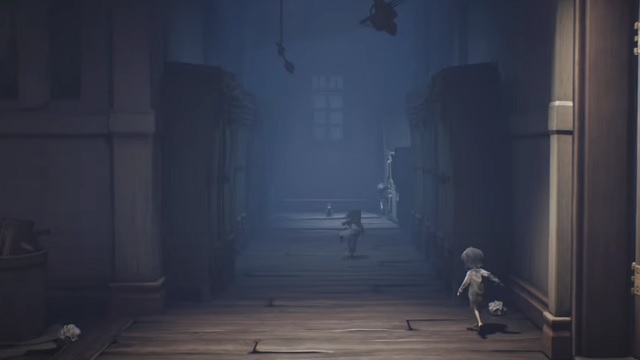
In the next room, you’ll be attacked by a group of Bullies. They’ll trap you in a locker and capture Six. Once you free yourself, move right, grab the hammer, and smash the bully that’s looking the other direction.
The next room has a pile of broken desks and another bully. Trigger the trap, and stay close to the screen to send a bucket swinging to smash the enemy. Jump on the chair and through the window of the door on the right.
Right after you land, approach the third locker (the only one without a latch) and pull it open to find a Glitching Remains. Keep moving right, past the elevator with the padlock, and you’ll enter the classroom.
The School Classroom
Creep behind the desks whenever the teacher has her back turned, pausing if she looks out at the class. Keep moving right until you enter a small room full of cabinets. Start climbing the bookshelf to grab the key, but be ready: it will tip over once you get high enough.
After it does, quickly grab the key, and hide in the open box on the floor until the teacher shuts the door. This will open a small vent that leads back to the classroom.
Keep an eye on her pattern as she moves between the desks. Your goal should be to get back behind the desks, moving towards the elevator you saw on the way in. As you approach the door, the teacher will probably spot you. Just start sprinting, and you should be fine to open the lock and ride the elevator up.
Keep moving, and you’ll encounter a bully drawing with chalk on the floor. Get it to notice you, but stay out of the reach of its tether: it will run at you and stun itself. Grab the pipe on the floor by the chalkboard and smash this foe, then break open the door to your right by hitting it with the pipe.
Climb up the desk and move through the vent until you fall out, knocking bottles to the floor below. Quickly move over the beam to the open box in the top left and crouch inside, as the teacher will come looking for you.
Once she stops looking, move over the other beams. You can grab the jar to avoid knocking it over, or you can move past it and hide in the other open box if the teacher investigates again. Jump to the bedsheet rope and climb up, moving over the beams until you come to a wooden plank standing upright. Push it over and walk across quickly, hopping into the vent and moving to the library.
Shh!
A shadow moves past as the teacher enters the library. Drop to the floor, and you’ll see a rolling ladder; move it over one shelf and climb up to find the Tin Can Hat.

Roll the ladder all the way to the right to get on the top of some shelves. When the books fall, start running. The teacher will burst through and snap at you.
Move quickly to reach the gap to evade her, and you’ll come to a few towers of books. Jump to the first, then climb sideways to the other side to jump to the next. This will alert the teacher once again. Circle around the tower to avoid her spotting you until she gives up, then jump to the next area and hide behind the pile of books until she walks through the door.
Grab the box with the handle in the top left corner of the room, and drag it to the door the teacher walked through. Jump up to grab the handle, and move to the next area.
Climb up the staircase and head to the left. Near a few bottles, you’ll spot a Glitching Remains. Move past the clock to the other side of the landing, and pick up the flat circle on the floor. Set it on top of the chess piece, climb on top, then jump to the door handle to encounter the chess puzzle.
The Queen’s Gambit
In the room, you’ll see a bully (deactivated) attached to a piece in the center of a chessboard. Move to the right and grab the drawing of the eye. It will flip up, revealing a drawing of the puzzle solution.
Jump on the table to take the top off the queen piece. Take it to the board, but just leave it on the floor for now.
Return to the hall and take the top off the piece you used to enter the room. Bring it inside, and place it on the piece on the left of the board so you can jump on the table and grab the king top. Put the king top on the piece just below the bully.
Take the flat rook top, and place it on the piece to the right of the black king, then put the queen top on the piece on the left, so the board matches the drawing. This will trigger the light on the right of that room. Use the top of the rook to jump onto this table, then jump and grab the light to open a secret door in the back.

Grab the key in this secret compartment, then exit the room and go back down the stairs. Head to the locked room on the right, and open it with the key you just obtained.
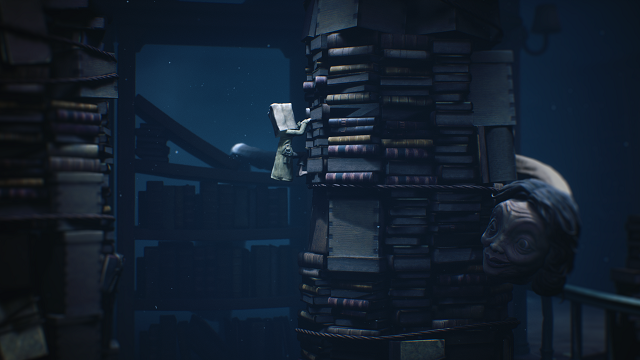
In the next hallway, move the rolling shelves from the left side to the right. You’ll move them away from a door. Push through this door to find a Glitching Remains. Then climb the rolling shelves, and go through the vent to enter the kitchen. Grab the ladle off the floor, and you’ll have to beat up a group of bullies.
The timing here is tricky, but take them all out, and one’s head will pop off instead of shattering. Approach this head, and you’ll put it on. Then move to the vent on the right to enter the cafeteria.
Move past all the chaos, avoiding falling objects or getting too close to any of the bullies. Keep moving until you reach a small closet and the bully’s head falls off your own and breaks.
For Science!
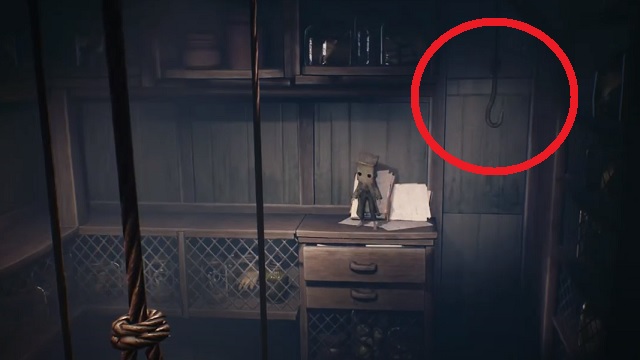
In this small room, climb the shelves in the top right to start moving upwards. Keep moving higher, walking over the wooden board on the lights, climbing another set of shelves, jumping to the rope and swinging across. Grab the brain in the jar, and throw it to the floor, then jump on the hook to follow it to the ground.
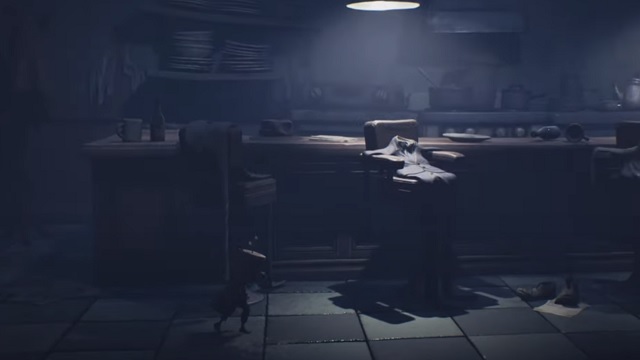
Pick up the brain, and throw it at the button on the wall to open the door. Move into the next room and through the vent, hiding under the desk until the teacher moves. When she’s on the right side of the room, move to the middle section and hide. She will eventually take a knife out of the drawer and move to the next room. Push through the door to follow her inside.
Once inside, climb up the desk drawers so you’re on the same counter the teacher is working at. Stay behind the jars, and she’ll eventually turn her back. Pause at each section of jars, staying crouched until she turns her back each time. You’ll hop over onto another table, then eventually through another vent. Climb the bookcase in this next room to go through another vent and encounter more bullies.
Pick up the hammer, and work your way through this (incredibly irritating) section of traps and bullies. You’ll probably die here a few times as you work out the timing.
Eventually, you’ll enter a bathroom where you’ll find Six suspended in the air by a rope. Smash the bullies in this room, and use the hammer to hit the wooden boards to release your old friend. Exit through the window, cross the boards, and you’ll be in a room with a piano.
Sweet Music
Use the lever in the back to lift the piano off the ground, then drop it on the floor. Climb on top of it, and time your jumps with Six to finish the hole and fall to the lower level. Approach the top left corner of this new room, and Six will boost you through the hole in the wall.

Sneak around the back of this room as Six jumps on the piano keys, distracting the bully. Grab the pipe and smash her, then pick up the key in the center of the room. Grab the screen, and Six will help you lift it open so you can reenter the piano room. Use the key to open the door on the right.
There’s a bully in the next room, but keep sneaking to the right, and Six will take care of it. Pull out the drawer and use it as a step to climb over the dresser, then run up the stairs. Approach the flat surface of the cabinet near the door. Six will boost you up. Climb to the top of the file cabinet, then push the box off. This will allow Six to climb up and help you open the vent cover.
You’ll find the teacher playing the piano. Only move when she’s playing: if you make any noise when she stops to write, she’ll catch you.
You’ll need to get to the lever on the right side of the room, use it to lower the scaffolding, pull the wheeled box to the left side of the room, use that to climb back up, then cross the scaffold with Six.
She will hear you when you pry open the vent cover and chase you. Just keep moving, and you’ll eventually escape to the street, exiting the school for good. Continue moving to the right, crossing a wooden plank over a chasm and wheeling a dumpster to access a high ledge, and you’ll see a small alley with a paper boat in it. Approach it to get the last Glitching Remains in this section and pop an achievement.
Phew! That’s it for our Little Nightmares 2 school walkthrough guide. Now you’re on to the hospital. For more on Little Nightmares 2, consider checking out our other guides on hat locations and how to find all of the game’s glitching remains.


Published: Feb 16, 2021 01:36 pm