The NFL is a passing league, and Madden 23 reflects that. Despite the superstar running backs on this year’s roster and in MUT, you’ll likely find yourself throwing the ball dozens of times a game. Knowing how to toss high and low bullet, lob, and touch passes is essential to moving the sticks and scoring touchdowns. And the advanced Field Sense mechanics add some interesting wrinkles to the mix.
This Madden 23 passing guide will tell you how to throw each type of pass and explain how FieldSense works.
Madden 23 Passing Controls and Types
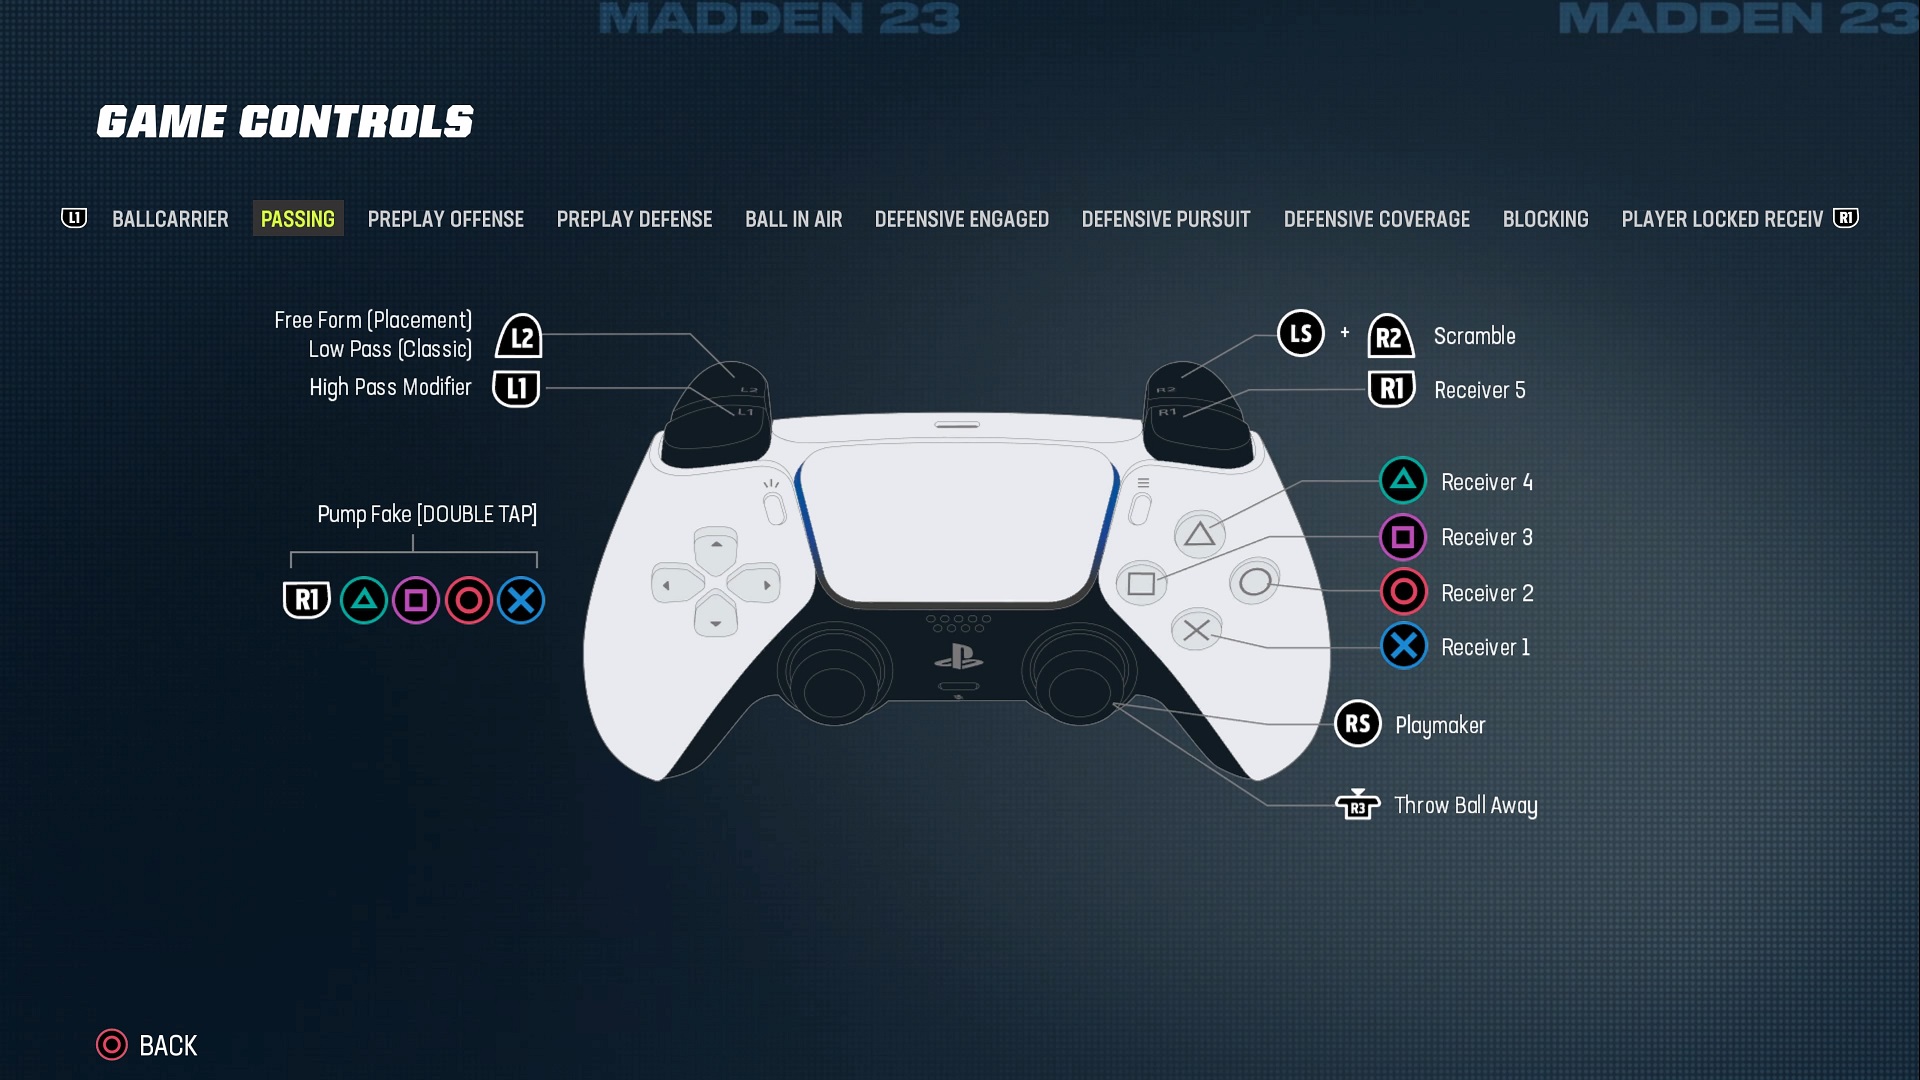
Just as in Madden 22, there are three overall pass types for QBs this year, with each having high and low versions available. To complete a pass, press the button/icon associated with the receiver, tight end, or back that’s found above their head before the snap (use L2/LT to show Playart).
How you press the button determines the type of pass you throw. You can also pump fake to bait defenders and throw the ball away to avoid a sack.
- Bullet Pass: Hold the receiver button.
- Lob Pass: Tap the receiver button.
- Touch Pass: Press and immediately release the receiver button.
- High Pass: Hold L1/LB and press the receiver button.
- Low Pass: Hold L2/LT and press the receiver button.
- Pump Fake: Quickly double-tap the receiver button.
- Throw the Ball Away: Press down on the right stick while outside the tackle box.
Both high and low passes can also be bullet, lob, or touch passes, depending on how you press the receiver button when throwing. You cannot throw a low pass while using Free-Form passing. Instead, you will need to throw on the backside of the target area to achieve a similar throw.
Veterans know how to use these pass types in situational football, but here’s a quick breakdown of when they’re most effective if you need a refresher or if this is your first time on the field.
It’s important to note that timing is key for all of these pass types, something that will come with practice and vary relative to the situation, route type, and defensive playbook and scheme. There’s quite a bit of nuance to passing, where high passes can work similarly to lob passes, for example, but these are some general tips.
- Bullet passes are useful for getting the ball to receivers, tight ends, and backs quickly, especially against defensive plays in man coverage like Cover 1. Bullet passes are also useful on out-routes to the sideline, slants, in-routes, when receivers break into an open part of a zone, or when they gain space from a defensive player with quick closing speed. If timed right, they can reach receivers on deep curl routes just as they turn around.
- Lob passes are good for putting air under the football and getting the pigskin behind defenders on deep routes up the sideline, double-move routes, or routes up and across the field, like posts. Use lob passes to help receivers gain separation on longer routes, lead them into open zones, and give them a higher possibility of getting YAC by hitting them in stride.
- Touch passes are good for mid routes across the center of the field; they can be used to drop the ball over linebackers and in front of deep defenders like safeties, specifically if the defense is playing a deep zone.
- High passes give your receivers the opportunity to go up and get the ball. You likely won’t get much YAC with these passes since they slow receivers down, and there’s a likelihood these throws can turn into jump balls or are in high-traffic areas where defenders can make hits quickly.
- Low passes can be beneficial for short routes like curls, where receivers turn and stop on routes to face the quarterback and have minimal separation from defenders. Throwing low passes on a short field, such as when you’re deep in the Red Zone against the goal line, gives your receivers leverage against a tightly-packed defense.
All of these pass types can be affected by defensive pressure, throwing off the accuracy and timing of each throw. Some players have Superstar abilities that keep them cool in the pocket, but many QBs don’t.
FieldSense Passing Explained: Skill-Based Accuracy and Power
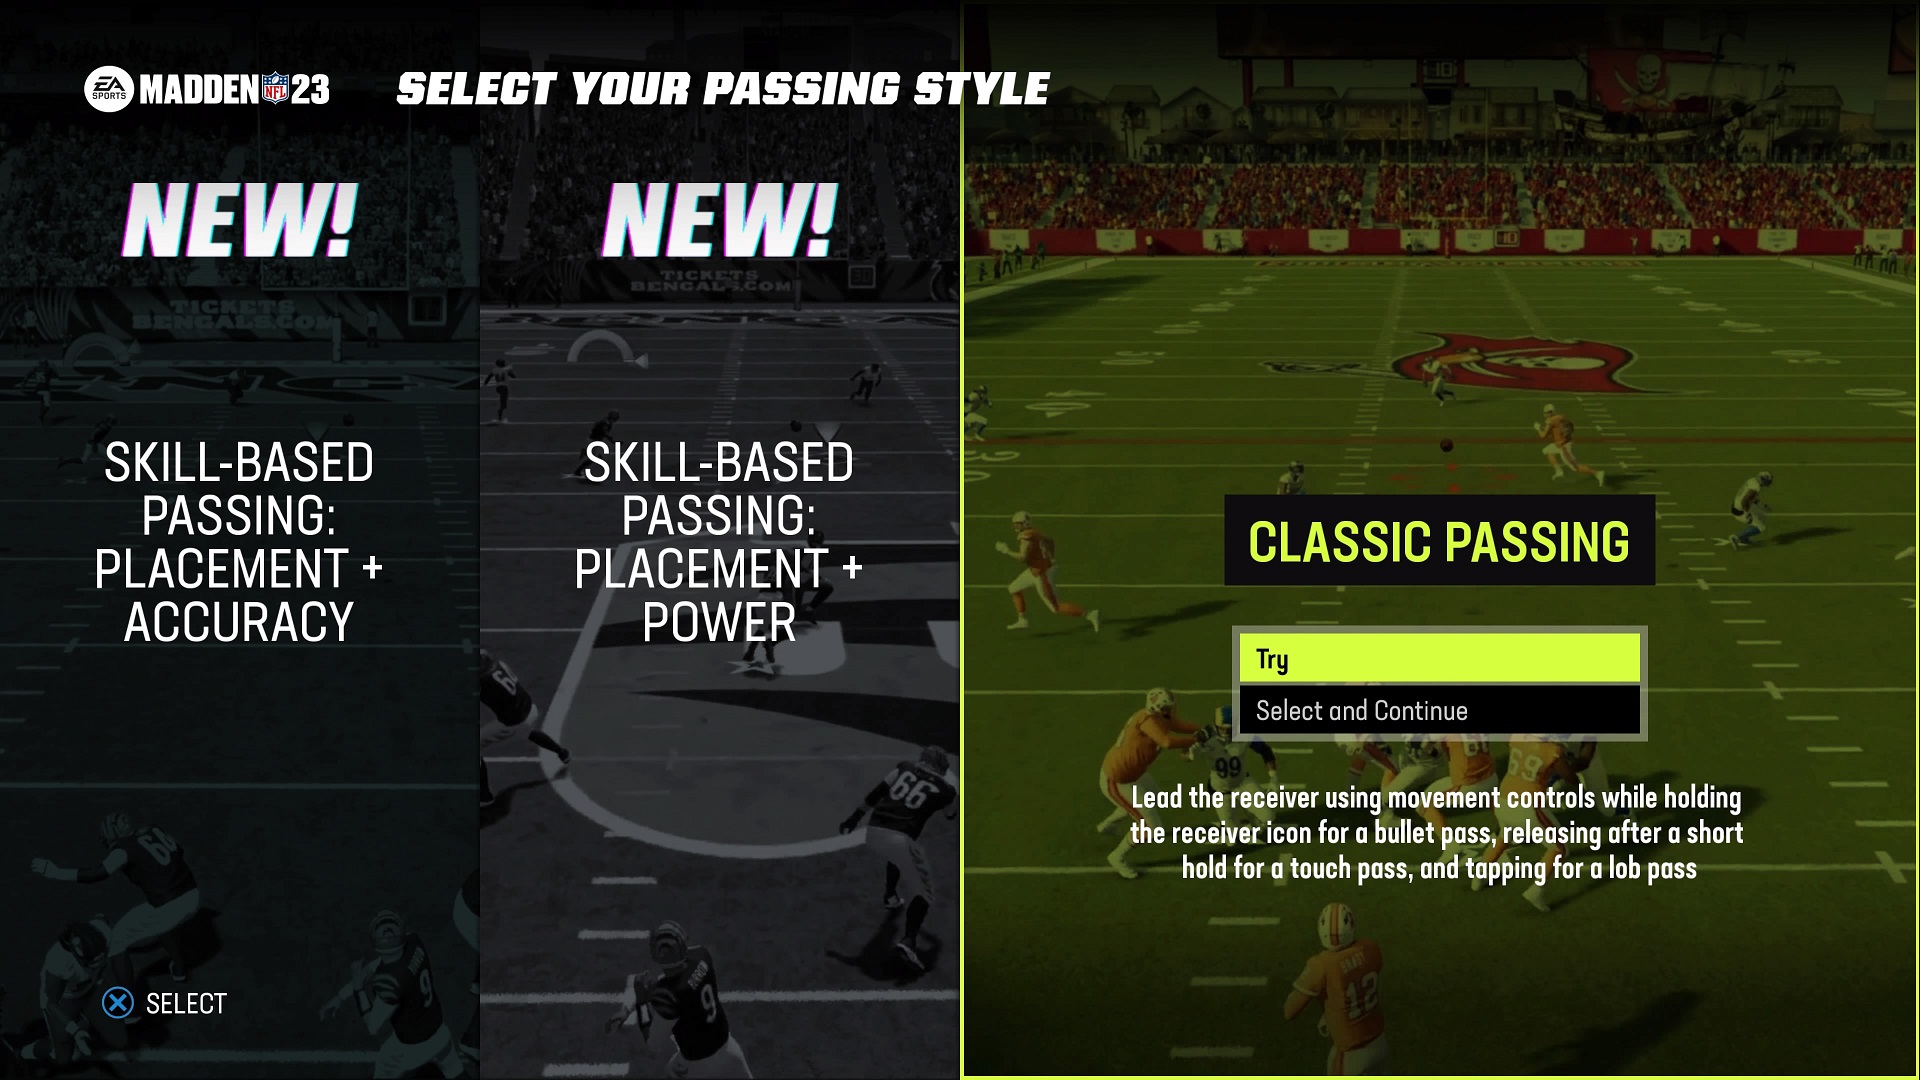
Alongside the traditional franchise passing system, Madden 23 introduces skill-based passing mechanics under the umbrella of Field Sense: Placement + Power and Placement + Accuracy. Both have unique controls that provide more granular command over your throws, and there is a further mechanic tide to each called Free-Form Passing.
You’ll be introduced to these via two tutorials when you first start Madden 23, with passing slowdown (only available in single-player) at its maximum value, an option that allows you to learn the ins and outs of the system. You can change from one system to the other or back to traditional passing at any time by going to Settings >Game Options > Skill-Based Passing. This is where you can also tweak the various settings for these mechanics, such as passing slowdown, Free-Form max distance, reticle visibility, and more.
Accuracy and Power are determined by a semi-circular meter above each receiver’s head. Accuracy is influenced by timing, and Power is influenced by how long you hold the receiver button. You’ll notice that bullet passes have the most power, followed by touch passes and lob passes.
Throws in the blue sections on the far-right side meter are more accurate and better timed, but they are not guaranteed completions or incompletions based on that criterion alone. Power is indicated by the orange sections of the meter. Think of this as a counterpart to the meter used for kickoffs and punts.
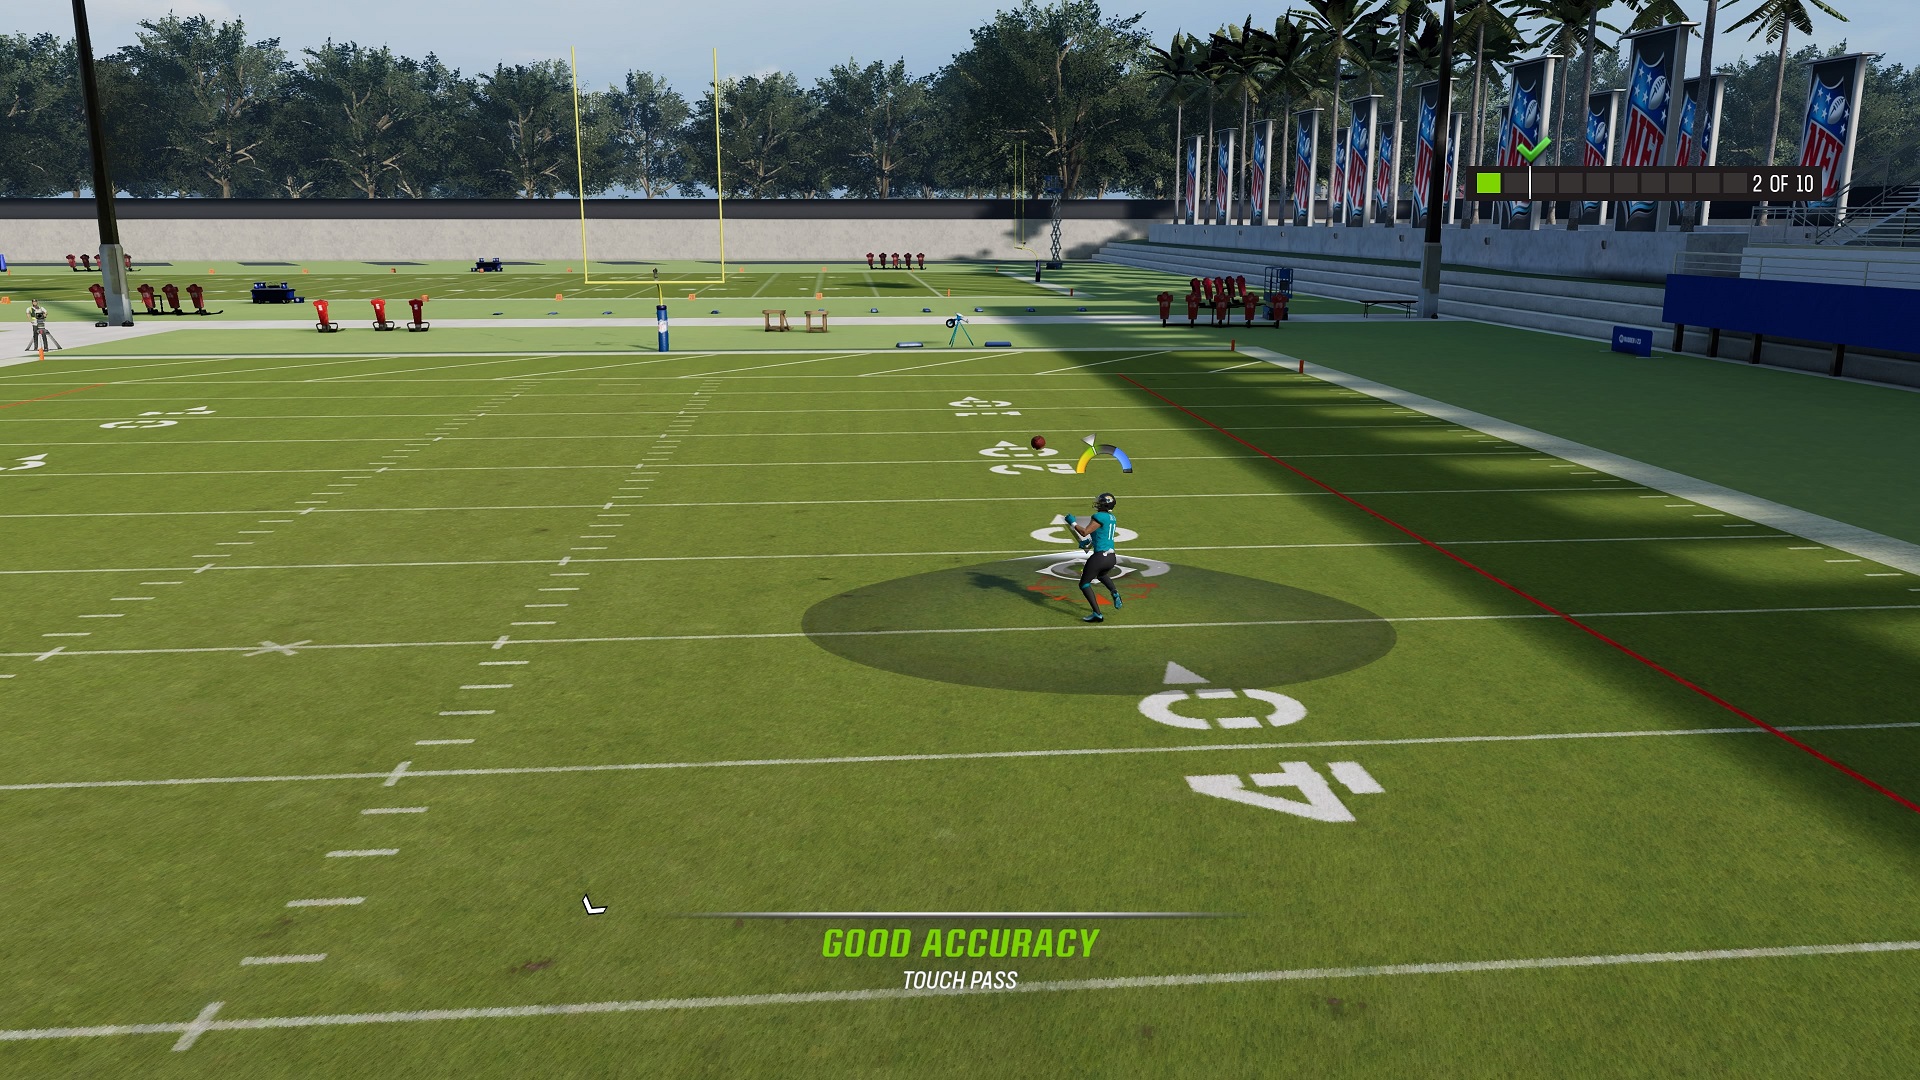
And just as you aim a kick, you can aim your passes to help receivers get open or to throw away from specific defenders. Both Placement + Power and Placement + Accuracy put target areas on the field to show the area in which passes will land; you can move the left stick to then place the ball in a specific spot with the help of a reticle.
Reticles can only be moved within the target area when not using Free-Form passing. While using Free-Form passing, which is activated by holding L2/LT, you can move the reticle outside of the target area to lead receivers to the sideline or back toward you, for example, actively tweaking their routes as needed.
If a defender is above and to the left of your receiver on a go route, hold L2/LT and press the left stick up and right when throwing to lead them toward the center of the field.
You can still pump fake or pull the ball down after pressing and holding the receiver button initially as the meter fills up by releasing and pressing the same button again quickly, though it works much better the more slowdown you have and is a bit touchy overall.
As is the case with most things Madden, it’s important to take the time and learn these passing systems before cranking up the difficulty or heading into an online matchup. Use the provided tutorials in the Learn to Play tab in the main menu to get up to speed on how to throw each pass type and take advantage of the Skill-Based passing mechanics. For more Madden 23 tips, hit the film room right here.


Published: Aug 19, 2022 03:18 pm