Creating a self-sustaining farm in Minecraft is incredibly satisfying. These aren’t always easy to make, and the open-ended nature of the game means it can be hard to pinpoint what works best. Below, I’ll be detailing an efficient plan for how to build the best Kelp farm in Minecraft.
Tips for Constructing the Best Kelp Farm in Minecraft
How to Find Kelp
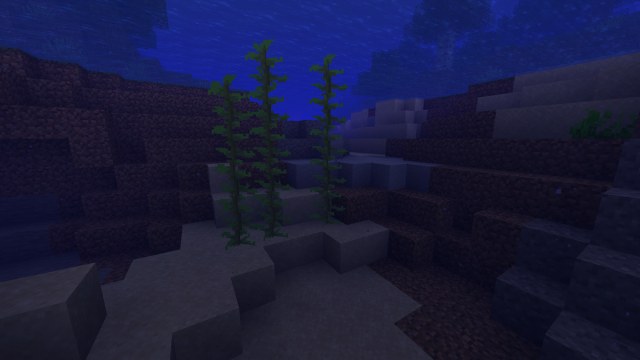
The first step to building the best Kelp farm is to, well, find Kelp, which is available in Ocean biomes. That means you’ll need to dive a little bit for this one. It only takes one hit from your fists or a tool to break a Kelp block and all above it, which is why I recommend breaking the bottom block.
If you’re not anywhere near an Ocean biome, you can also buy them from Wandering Traders for 3 Emeralds. No Villagers with jobs offer these, so the traders might be your best bet, depending on your location. You can also try some seeds that have an Ocean biome, but that may mean starting all over, so we don’t necessarily want to do that.
What is Kelp Good For? Why Farm It?
Kelp can be cooked to create the edible Dried Kelp and can also be used in a Composter. A bigger reason to farm them is to craft Dried Kelp Blocks, which can be used as fuel for smelting.
How a Kelp Farm Works
The idea behind a Kelp farm is to give it a suitable place to grow and then repeatedly harvest it. There’s a 14% chance of it growing every random tick that passes. Similar to Sugar Cane, this means there is a bit of RNG at play. You can potentially speed things up if you adjust the tick speed though.
A basic farm simply requires you to plant Kelp in a nearby pool of water and allow it to grow. It doesn’t need any light or sky access, but it does need to be underwater. Check up on it once in a while and harvest when needed. All of the broken Kelp will float to the surface of the water. These can take a while and do require a bit of manual work. The plans I detail below can be placed anywhere and are automated, making for a much more optimal method.
How to Build an Automated Kelp Farm
There are many different methods to build an automated Kelp Farm, each with varying degrees of complexity and plenty of ways to add your own touch. All of these require redstone and more complicated plans involve flying machines or precise timing with bone meal. When it comes to accessibility and general efficiency, I’ve found it’s best to keep it simple.
The Best Layout
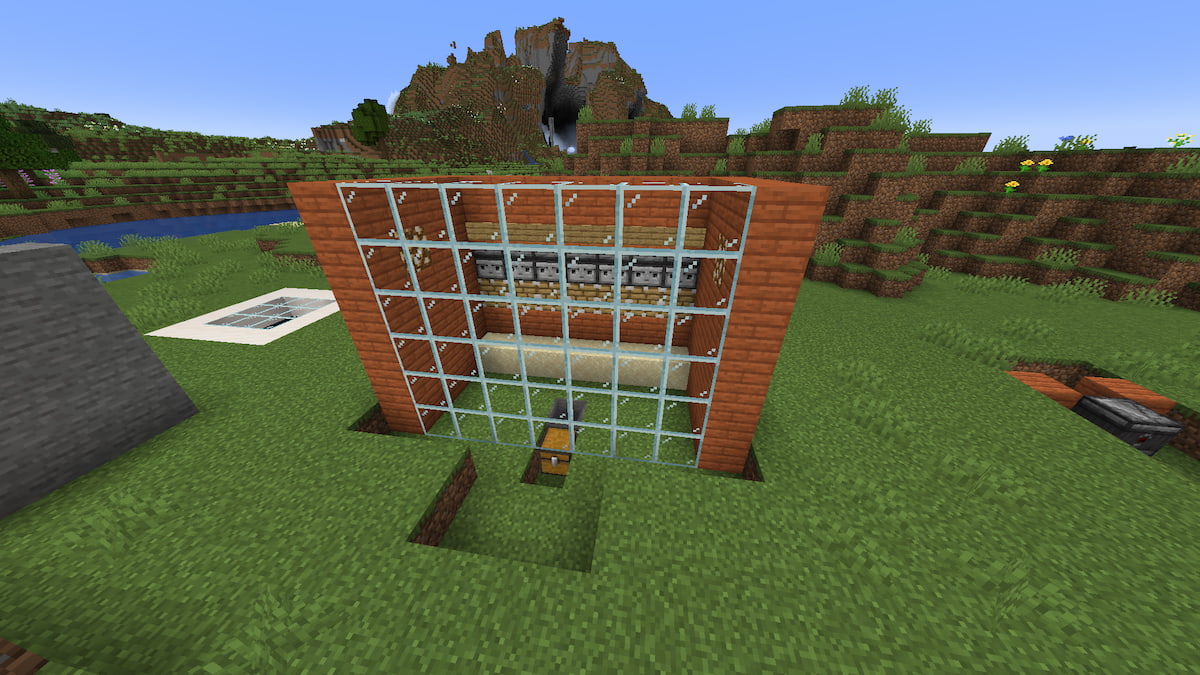
The first step is to build the container that’s going to house the automated Kelp farm. This is admittedly a medium-sized contraption, but it can easily be built into any building or underground base you have. It should also be easy to understand how to scale it up if you want something bigger.
- In this example, the farm portion will be a single layer five blocks wide with two empty layers in front of it. If you want it on display somewhere, I recommend using glass in front.
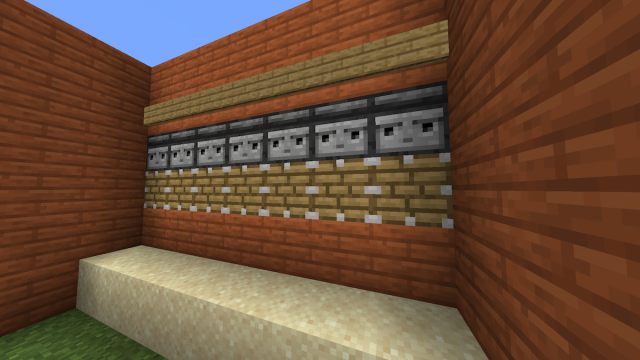
Kelp can grow on pretty much any solid block as long as it’s underwater, so feel free to be creative. I like to keep things natural, so I used Sand for the Kelp. You can use whichever block you’d like next to the bottom-most Kelp block (I kept the aesthetic with Acacia Planks), but make sure to put in a row of Pistons above it.
- The key to keeping this efficient is that we’ll be using pistons to destroy the second-to-the-bottom block. This ensures we can harvest Kelp as soon as possible while also allowing it to keep growing.
Directly above this row of Pistons will need to be a row of Observers. The purpose of these will be to notice any changes in the block in front of it (i.e. a Kelp growing) and then trigger the piston beneath it.
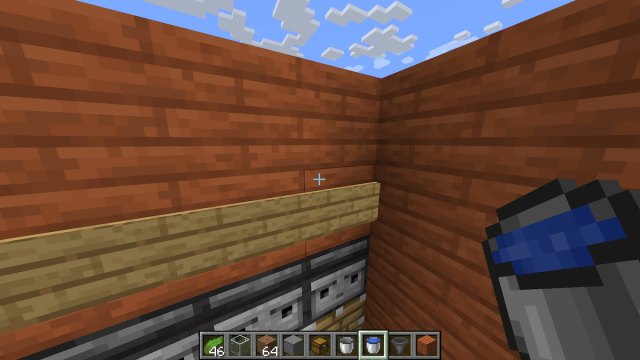
Lastly, you’ll need to add a row of signs above the Observers. Kelp has the interesting property of turning any water block into a source block. We want the surface of our water to be flowing, but if we allow it to touch the surface, it will turn it into a still source block. The addition of signs will make it a water-logged block, ensuring the Kelp doesn’t grow into it.
Using a Hopper

Our goal with this is to flow broken Kelp forward and center it. The moving water will funnel them toward the middle and drop it all down, where we’ll use a Hopper to collect it.
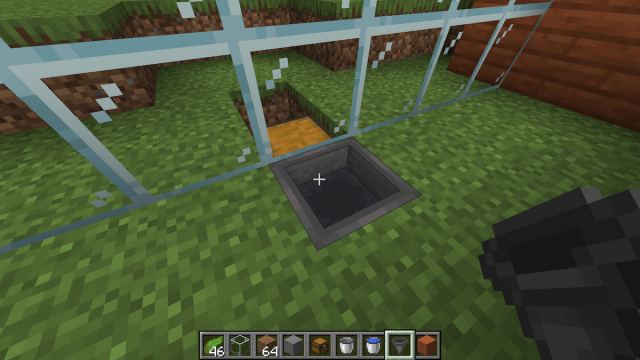
Dig a hole or provide some space underneath the glass. Place a chest in the middle, which can be reached from either side. From within our contraption, make sure to crouch while looking at the chest and then place a Hopper. All of the Kelp that reach the Hopper will now be sorted into the chest.
Adding Redstone
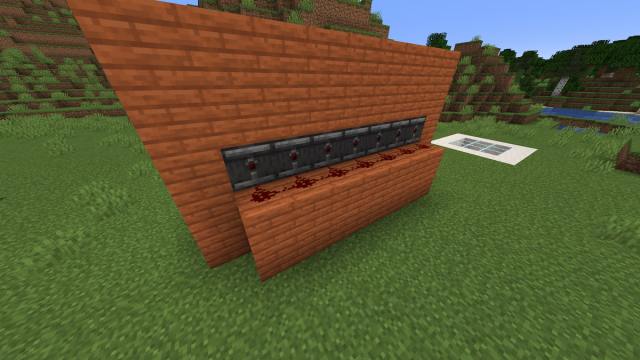
This is the most intimidating part of a Kelp Farm build, but I’ve provided a simplified layout. The first step is to add a row of blocks behind the Pistons. From there, just add Redstone Dust along these blocks. With this easy layout, the entire row of Pistons will activate as soon as any of the Observers are triggered.
Adding Water and Kelp
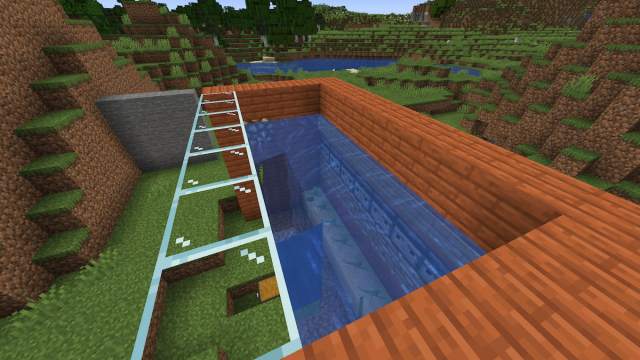
The final steps are to add water and Kelp. I placed the water on the same blocks that have the signs. If you add it above these, it will flow one layer over before dropping. This method ensures the Kelp only grows to the Observer Row and allows the surface level to remain flowing.
To create more of a funnel effect, I also added two more water blocks leading from the sides. I used Glowstone blocks in the image above to emphasize where you want the water to be flowing from.
Finally, plant some Kelp. If you have a higher tickrate you can see this automation work soon. It might take a bit of time otherwise. Make sure to check back on the chest now and then to reap your rewards.
If you followed all of these steps, you should now know how to build the best Kelp farm in Minecraft. If you’re looking for other things to harvest, check out our list of the 10 best crops to farm. Whether it’s challenging seeds or other helpful tips, we’ve got you covered with our Minecraft guides.


Published: Dec 7, 2023 10:51 pm