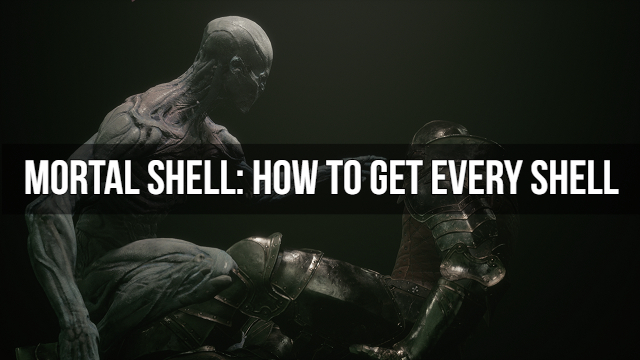
Unlike some other games in the genre, Mortal Shell doesn’t let you choose a class when you start. Instead, you have to know how to find the four shells scattered across Fallgrim. Each has its own unique abilities and stats geared to specific playstyles, and each is completely missable. You can play the entire game without a shell at all if you want to increase the difficulty.
The game shows you exactly where to find each shell through visions called instincts. To see where a shell is located, go to the crypt in Fallgrim Tower. Interact with each of the glowing graves across from Sester Genessa and choose “sense instinct.”
A series of disjointed visions will show you that path of each fallen warrior, culminating with the area in which you can find them. Figuring out where the visions are leading you in Fallgrim is half the fun of finding the shells, but if you’d rather skip all of that and get the shells now, we’ll tell where they are below.
We also include all of the abilities and stats for each shell, so you have access to everything in one convenient place. All shells have three common abilities at the bottom of their ability wheel:
- Recollection of Strength: 1,000 tar, 6 glimpses
- Put your enemies off balance with a powerful kick
- Recollection of Knowledge: 2,500 tar, 15 glimpses
- Harden in the air to create a devastating area of impact upon landing. Foes killed by the blast may drop an additional glimpse
- Recollection of Death: 4,000 tar, 25 glimpses
- Regain last chance upon defeating tough foes
It’s also worth noting that the abilities for all shells are named the same thing. However, their effects and costs are much different.
To gain access to abilities, you first have to find the name of the shell, which you can do by speaking with Sester Genessa at Fallgrim Tower and paying a certain amount of tar. You can also change shells at will by visiting Fallgrim Tower or using effigies.
Harros, the Vassal

Harros, the Vassal is the first shell you will get in Mortal Shell. After fighting Hadern for the first time and getting swallowed by the catfish, you’ll find yourself in Fallgrim. You’ll then crawl through a long tunnel and emerge on a small cliff with kneeling statues.
Jump down from the cliff and continue a short distance to the fork. Turn left, and you’ll see Harros’ shell leaning against a rock.

Attributes
- Durability: 5/10
- Stamina: 5/10
- Resolve: 5/10
Abilities
- Accretion of Inheritance: 1,100 tar, 8 glimpses
- Hardening lasts for twice as long upon being broken
- Accretion of Ascent: 5,00 tar, 2 glimpses
- Killing two enemies in quick succession resets your harden cooldown
- Accretion of Endurance: 3,000 tar, 20 glimpses
- Hardening causes Harros’ stamina to rapidly refill
- Accretion of Resolve: 2,500 tar, 15 glimpses
- Harden cooldown is reduced by 25%
- Accretion of Dominance: 1,000 tar, 6 glimpses
- For a short time after hardening, enemies killed have a chance to drop an additional glimpse
- Accretion of Foresight: 500 tar, 2 glimpses
- Gaining a glimpse has the chance to restore some health
- Accretion of Yearning: 1,100 tar, 8 glimpses
- Adds a chance for enemies to drop an additional glimpse on death
Solomon, the Scholar

Solomon, the Scholar will most likely be the next shell you pick up because he is so close to Fallgrim Tower.
Exit Fallgrim Tower and go straight ahead, past the tree on your left. Go through the pool of water and towards the cave entrance on the other side, but beware the six beartraps right after the pool of water.

Once inside the cave, you’ll be met with the game’s first minor boss: Grisha. You can take him on later. For now, run straight past him toward the back of the cave. Follow the path down to the right.
At the end of the path, you’ll see a pile of logs and brush. Strike the pile to reveal a tunnel, and crawl through it. On the other side, you’ll see Solomon’s shell leaning against the far wall behind a crouching Nocteserper.
Defeat the Nocteserper and interact with the shell to claim it.

Attributes
- Durability: 7/10
- Stamina: 5/10
- Resolve: 10/10
Abilities
- Accretion of Inheritance: 1,100 tar, 8 glimpses
- Solomon gains a small amount of resolve when being struck while hardened
- Accretion of Ascent: 3,000 tar, 20 glimpses
- Killing an enemy with an empowered riposte has chance to restore all resolve
- Accretion of Endurance: 500 tar, 2 glimpses
- Solomon has a chance to heal on using a weapon ability to slay an enemy
- Accretion of Resolve: 2,500 tar, 15 glimpses
- When holding a scared gland, Solomon gains 25 maximum health, when not holding a gland, Solomon gains one maximum resolve segment
- Accretion of Dominance: 1,000 tar, 6 glimpses
- The duration of time enemies remain hardened when you are separated from Solomon is increased
- Accretion of Foresight: 1,100 tar, 8 glimpses
- Solomon becomes familiar with items more quickly and gains a glimpse on reading lore for the first time
- Accretion of Yearning: 500 tar, 2 glimpses
- When talking to an NPC, Solomon gains a segment of resolve
Eredrim, the Venerable

From Solomon’s shell, exit through the tunnel back into Grisha’s cave. Follow the path back up and go to the left side of the cave. You will find another tunnel. Go through it.
When you emerge, you will see a small encampment in front of you. Beware of the bear traps leading up to it, as well as the enemy laying against the tree on the left side. There are a handful of enemies in the camp, including a Sturdyman, so bait them out one or two at a time.
Once you’ve beaten them, continue down the long path. There are three Brigand Rangers on the right side, as well as a Sturdyman patrolling in the middle. At the end of the path, you will find a Brigand and two Sturydmen. Defeat them and go left, toward the tower in the distance.

Follow the path right and up, defeating the enemies at the next camp. Now follow the path left onto the giant stone slab and then down the cliff to the left. At the bottom, you’ll see large, gravelike stones on either side of you and a set of stairs leading to the tower in front of you.
Look to the left of the stairs to find Eredrim’s shell leaning against a stone.

Attributes
- Durability: 10/10
- Stamina: 3/10
- Resolve: 3/10
Abilities
- Accretion of Inheritance: 2,500 tar, 15 glimpses
- Eredrim deals extra damage against enemies who are alone
- Accretion of Ascent: 1,100 tar, 8 glimpses
- Eredrim’s attacks deal additional poise damage, causing enemies to stagger more frequently
- Accretion of Endurance: 1,000 tar, 6 glimpses
- Eredrim’s max HP is increased by 15%
- Accretion of Resolve: 1,100 tar, 8 glimpses
- Eredrim gains an execution stack upon killing an enemy, each stack increases base attack damage. Stacks are lost when separating from Eredrim
- Accretion of Dominance: 3,000 tar, 20 glimpses
- Upon reclaiming Eredrim, your next attack will deal massive damage, sometimes exploding your enemies into a bloody mist
- Accretion of Foresight: 500 tar, 2 glimpses
- On kill, Eredrim gains a buff which reduces damage taken by 5% for 10 seconds
- Accretion of Yearning: 500 tar, 2 glimpses
- Eredrim is occasionally able to resist being knocked down
Tiel, the Acolyte

Note: Ven Noctivagu guards Tiel’s shell. This is the same boss from the beta, and he’s tougher than the Nocteserper you fought at Solomon’s shell. You must defeat him to get Tiel’s shell. Make sure that you at least upgrade your Hollowed Sword to +1 with Quenching Acid to deal more damage and make this fight easier.
With the main entrance to Fallgrim Tower to your back, go right. Pass the lute player, and enter the watery part of the swamp. Take an immediate right. Stay left when the path forks at the crumbling tower column.

You’ll see a glowing lore stone ahead and tree that’s fallen over the path. Take a left at the lore stone. There will be a Sturdyman and Brigand sitting in the path, with a Brigand hiding to the right.
Defeat them and go towards the large tree covered in hanging bats. Take a left at the tree and pass the encampment and lore stone. Go through the opening in the cliffs ahead, and you’ll emerge into a grove with a small pond and a small camp.
Go to the right of the camp to find a tunnel covered in limbs and brush. Destroy the pile and crawl through the tunnel. Fight Vin Noctivagu and find Tiel leaning against the wall in the back left corner.

Attributes
- Durability: 3/10
- Stamina: 10/10
- Resolve: 2/10
Abilities
- Accretion of Inheritance: 2,500 tar, 15 glimpses
- Striking a poisoned enemy increases the chances Tiel’s other passives will trigger
- Accretion of Ascent: 1,100 tar, 8 glimpses
- Tiel gains a 20% chance to lose stamina instead of health on taking damage
- Accretion of Endurance: 500 tar, 2 glimpses
- Gain a damage bonus when low on stamina
- Accretion of Resolve: 3,000 tar, 20 glimpses
- Sprinting doesn’t consume Tiel’s stamina
- Accretion of Dominance: 1,100 tar, 8 glimpses
- On killing an enemy, Tiel gains a buff that poisons enemies on hit. Lost this buff when you are hit
- Accretion of Foresight: 500 tar, 2 glimpses
- On Empowered Riposte, Tiel will sometimes release a poisonous cloud
- Accretion of Yearning: 1,000 tar, 6 glimpses
- Taking poison damage heals Tiel for a portion of the damage which would have been dealt
And that’s how you find every shell in Mortal Shell. Now that you have access to all of the game’s classes, you can find the one that best fits your playstyle. For more tips on this new Souls-like from Cold Symmetry, be sure to check out our Mortal Shell guides page, which includes everything you need to know about parrying and so much more.


Published: Aug 21, 2020 12:37 am